- What does authentication mean for Next.js?
- What is the difference between authentication and authorization?
- Common Next.js authentication patterns
- What is NextAuth, and what does it do for us?
- Tutorial: Authenticating a Next.js app with NextAuth
- Questions about Next.js authentication
- Closing thoughts

GSD
A Complete Guide to Next js Authentication
Posted by Nefe Emadamerho on April 30, 2024
An important aspect of app development is ensuring that apps are secure and protected against data breaches and other cybercrimes. One way you can secure your applications is by carrying out authentication. Authentication is critical, as developers must ensure that their apps are secure and can only be accessed by verified users.
Nextjs is a React framework for developing web applications with ease. It has many incredible features like file-based routing, server-side rendering, image optimization, prefetching, dynamic components, static exports, dynamic components, and built-in CSS and Sass support.
In this article, you will learn about Next js authentication, the different authentication patterns for Next js authentication considerations, and how to authenticate Next.js applications with NextAuth.
Please note that NextAuth.js is actively rebranding to Auth.js as it expands to become an authentication solution to not just Nextjs but other JavaScript frameworks as well. The name NextAuth.js now refers only to its Next.js integration while Auth.js refers to its entire ecosystem. You can check out the Auth.js history for more details on this.
For this tutorial, we will be working with NextAuth v4. However, the Auth.js team is currently working on a newer version—NextAuth v5. It is currently in beta and introduces a few breaking changes. You can keep an eye on it in the docs.
Table of contents
What is Next js authentication?
Authentication is the process of verifying a user's identity. This requires users to provide their credentials, typically a username and password or any other valid credential that can be used to prove their identity. Authentication can also be done through a third-party service like Google.
While the concept of authentication and its strategies are the same for all JavaScript frameworks, including Nextjs, what sets Nextjs and other frameworks like it apart are the patterns available for preventing unauthenticated users from accessing protected routes, commonly referred to as authentication patterns. We will talk more about this later in this article.
To understand what authentication means for Nextjs, you must first understand how Nextjs renders things.
With Nextjs, three types of rendering are available: client-side rendering, server-side rendering, and static site generation.
In client-side rendering (CSR), a minimal HTML file and the entire bundled JavaScript code are sent to the browser. The JavaScript is then executed in the browser to render the page.
In server-side rendering (SSR) the full HTML for the page content is rendered on the server upon a user’s request and then sent to the browser.
In static site generations (SSG) the HTML for each page is generated at build time and sent to the browsers at the user’s request.
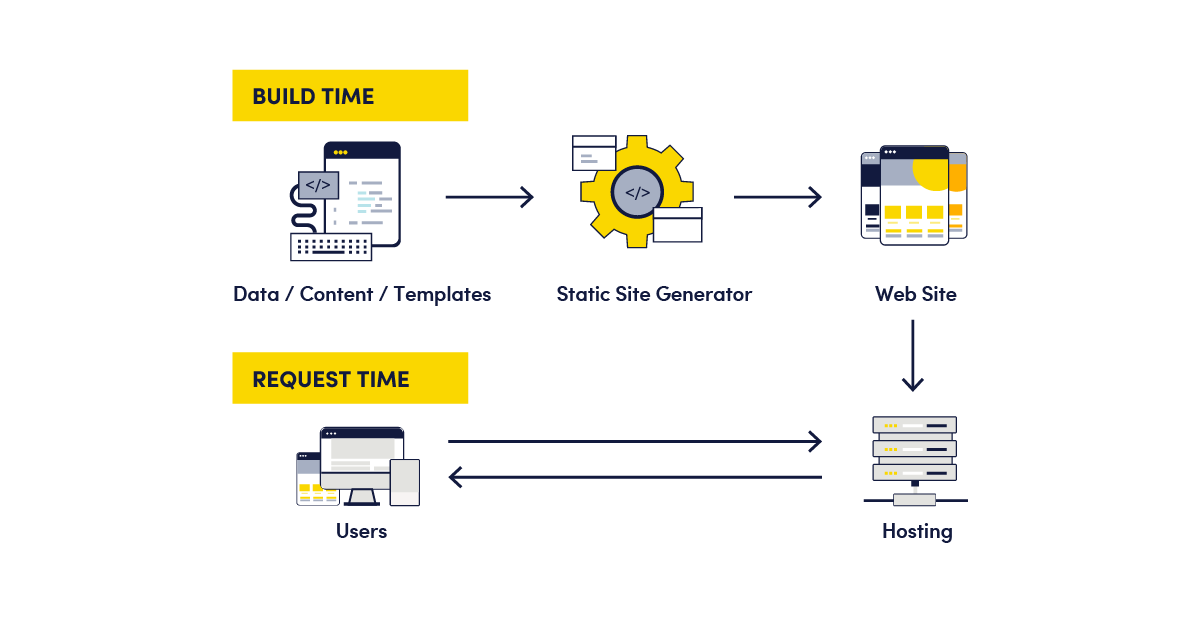
Source: Netlify
Authentication in Nextjs involves verifying a user’s identity and leveraging rendering patterns to prevent unauthenticated users from accessing certain pages.
What is the difference between authentication and authorization?
Authentication is the process of verifying that a user is who they claim to be, which usually occurs at login. An example is when a user submits a login form. The credentials are sent to the server and then verified against the stored data, making sure that they’re valid before the user is granted access.
Authorization, on the other hand, is the process of verifying what a user can access. It typically comes after authentication and ensures that only users with the correct permissions can access specific resources. For example, it allows only users with admin privileges to access the admin dashboard.
Authentication and authorization work together to secure and manage access in a web application.
Common Next js authentication patterns
An authentication pattern is a term commonly used to describe approaches to preventing unauthenticated users from accessing protected routes in Nextjs. These patterns include static generation and server-side authentication. It is important to choose the patterns that best suit your use case and application requirements.
Static generation pattern
In Next.js, when a page doesn’t contain blocking functions such as getStaticProps and getInitialProps, it is automatically prerendered to static HTML. Based on this, for the static generation pattern, when a page is requested, a loading state that has been statically generated is first served, followed by an attempt to fetch a user’s data in the client.
If successful, the requested page is displayed. Otherwise, the user is redirected to the login page and will see errors explaining why the check failed.
This pattern has the disadvantage of displaying secure content to an unauthenticated user.
Here’s some sample code of how the static generation authentication pattern works:
export default function UserProfile() {
  // Fetch the user on the client-side
  const { user } = useUser({ redirectTo: "/login" });

  // Server-render loading skeleton
  if (!user) {
    return <LoadingSkeleton />;
  }
  // Once the user request finishes, show the user's name
  return <p>{user.name}</p>;
}
Server-side pattern
In this pattern, when the browser requests a server-side rendered page, a request is sent to the backend API to get a user session. If successful, the server pre-renders the requested page on the server and sends it to the browser; otherwise, the user is redirected to the login page.
Unlike the static generation pattern, with this pattern, there will be no flash of unauthenticated content (FOUC) or a need to use a loading indicator.
One disadvantage is that the rendering will be blocked until the backend API responds. This is because getServerSideProps is blocking until the request resolves.
Here’s some sample code of how the server-side authentication pattern works:
export default function UserProfile({ user }) {
  return <p>{user.name}</p>;
}

export async function getServerSideProps({ req, res }) {
  const session = await getUserSession(req);
  if (!session) {
    //If no user, redirect to login page
    res.writeHead(307, { Location: "/login" });
    res.end();
    return { props: {} };
  }

  //If there is a session, return the current session
  return {
    props: { session },
  };
}
Try ButterCMS completely free for 14 days
Get started nowWhat is NextAuth, and what does it do for us?
Authentication is complex. There are several things to consider, like the right authentication methods to use—whether it’s magic links, OTPs, phone calls, email and password, or social sign-ins such as Google, Facebook, or GitHub buttons. We will also have to set up a database where we will store authenticated users. Managing all these ourselves will be expensive and time-consuming; it’s a full-time job in itself.
An easier and more effective option is to leave the responsibility of authentication to third-party libraries and solutions, often called ‘authentication providers’ or ‘identity providers’.
One such library is NextAuth, a full-stack and easy-to-implement open-source authentication library for Next js. It can be used with or without a database and has default support for popular databases such as MySQL, MongoDB, PostgreSQL, and MariaDB. NextAuth comes with support for over 50 authentication providers, including GitHub, Google, Facebook, Coinbase, and many more. Currently, it’s rebranding to Auth.js as it expands to become an authentication solution to not just Nextjs but other JavaScript frameworks as well. You can check out its history to learn more about this.
Additional technologies used for Next js authentication
Here are additional authentication libraries and solutions that are compatible with Next js.
-
Auth0: Auth0 is an identity platform for adding authentication and authorization to an application. It provides a wide range of features and tools and can be used for complex authentication workflows. Its free tier caters to applications with basic authentication requirements, but for more features and customization, like using a custom database, you will need to upgrade to a paid plan.
-
Lucia: Lucia is an open-source authentication library written in TypeScript, which simplifies session management. It requires you to specify your own database, which will be used to store users and sessions.
-
Kinde: Kinde is an authentication platform for modern applications. It offers several authentication methods and can be seamlessly integrated using its SDKs, which are available for more than 20 different language frameworks.
Tutorial: Authenticating a Nextjs app with NextAuth
For this tutorial, you will learn how to authenticate a Nextjs app that uses the Page Router with NextAuth, using GitHub’s social sign-in as our OAuth provider. The code for this tutorial can be found in this repo.
Prerequisites
The following are required to follow along with this tutorial:
- Knowledge of JavaScript, React, and Nextjs
- ClientID and Client Secret credentials from your GitHub account. You can acquire ClientID by registering a new OAuth application in Developer Settings. Then, you can generate your Client Secret credentials.
Getting started
Create a Nextjs project by running the command below in our terminal.
npx create-next-app butter-next-auth
Next, navigate into the project directory.
cd butter-next-authThen, run the command below to start the application.
npm run dev
We will use NextAuth later in the article, so install that also.
npm i next-authInitializing NextAuth
NextAuth can be initialized using the NextAuth method import from next-auth like the following:
import NextAuth from "next-auth"

export default NextAuth({
  ...
})
The NextAuth method receives an object as an argument containing the options used to configure NextAuth for your application needs. These options include:
-
Providers: An array of authentication providers to be used for signing in users on platforms such as Google, GitHub, Facebook, etc.
-
Pages: To override the built-in authentication pages and modify the page to which new users who sign in for the first time are redirected.
-
Callbacks: To add custom logic or data when specific actions are performed.
-
Session: An object with properties to specify the session strategy (JWT or database sessions), its expiry and extension time, etc.
To initialize NextAuth with GitHub, sign in and create a file called [...nextauth].js in the pages/api/auth directory, and paste the following code:
import NextAuth from "next-auth"
import GithubProvider from "next-auth/providers/github"

export const authOptions = {
  providers: [
    GithubProvider({
      clientId: process.env.GITHUB_ID,
      clientSecret: process.env.GITHUB_SECRET,
    }),
  ],
}

export default NextAuth(authOptions)
Here, we did the following:
-
Added the dynamic route required by NextAuth. By adding this route, all requests to
/api/auth/signIn,/api/auth/signOut,/api/auth/callback, etc., will automatically be handled by NextAuth. -
Configured GitHub as our OAuth provider using the GithubProvider by passing in our GitHub clientId and clientSecret. NextAuth supports several other built-in providers, but we used GitHub for this article’s demo.
Integrating NextAuth into the application
To integrate NextAuth into the application, navigate to the pages/_app.js file and update it with the code below:
import { SessionProvider } from "next-auth/react"

export default function App({
  Component,
  pageProps: { session, ...pageProps },
}) {
  return (
    <SessionProvider session={session}>
      <Component {...pageProps} />
    </SessionProvider>
  )
}
Here, you imported SessionProvider from the next-auth client module and used it to wrap the root of our application. This way, you can use NextAuth throughout the application. NextAuth uses React’s Context API to share the logged-in user session across all components. This improves performance, reduces network calls, and avoids page flickers when rendering.
Creating the signup page
Navigate to the pages/index.js file and update it with the code below.
import Head from "next/head";
import { signIn, signOut, useSession } from "next-auth/react";
export default function Home() {
const {data: session} = useSession();
return (
<div>
<Head>
<title>NextAuth Example</title>
<link rel="icon" href="/favicon.ico" />
</Head>
<main>
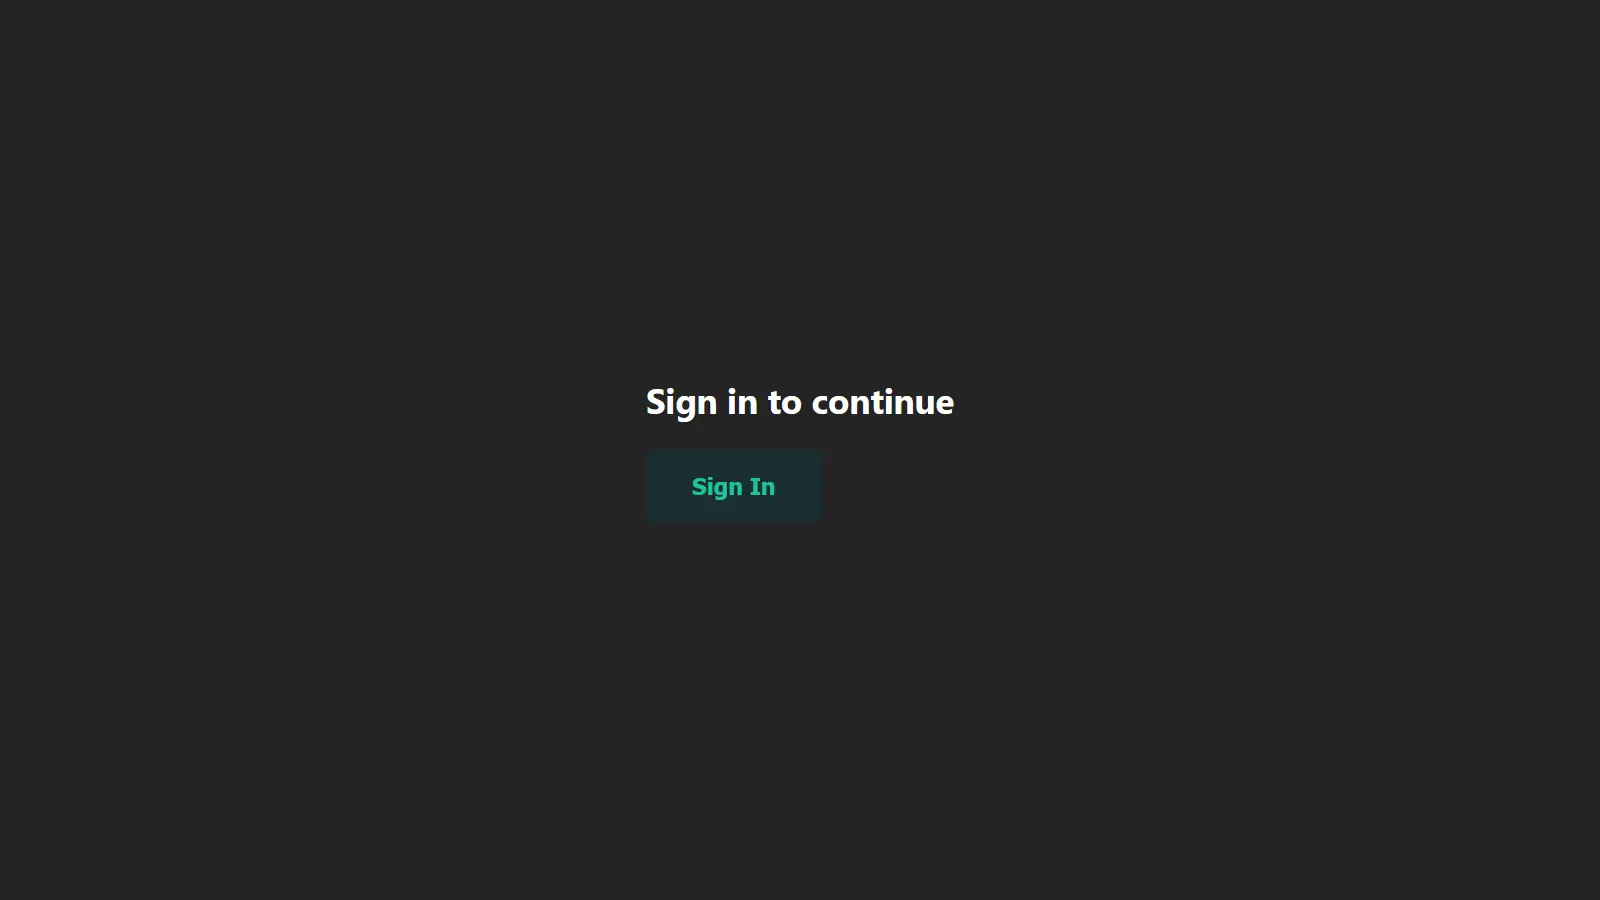
{!session && (
<>
<h1> Sign in to continue</h1>
<button onClick={signIn}>Sign In</button>
</>
)}
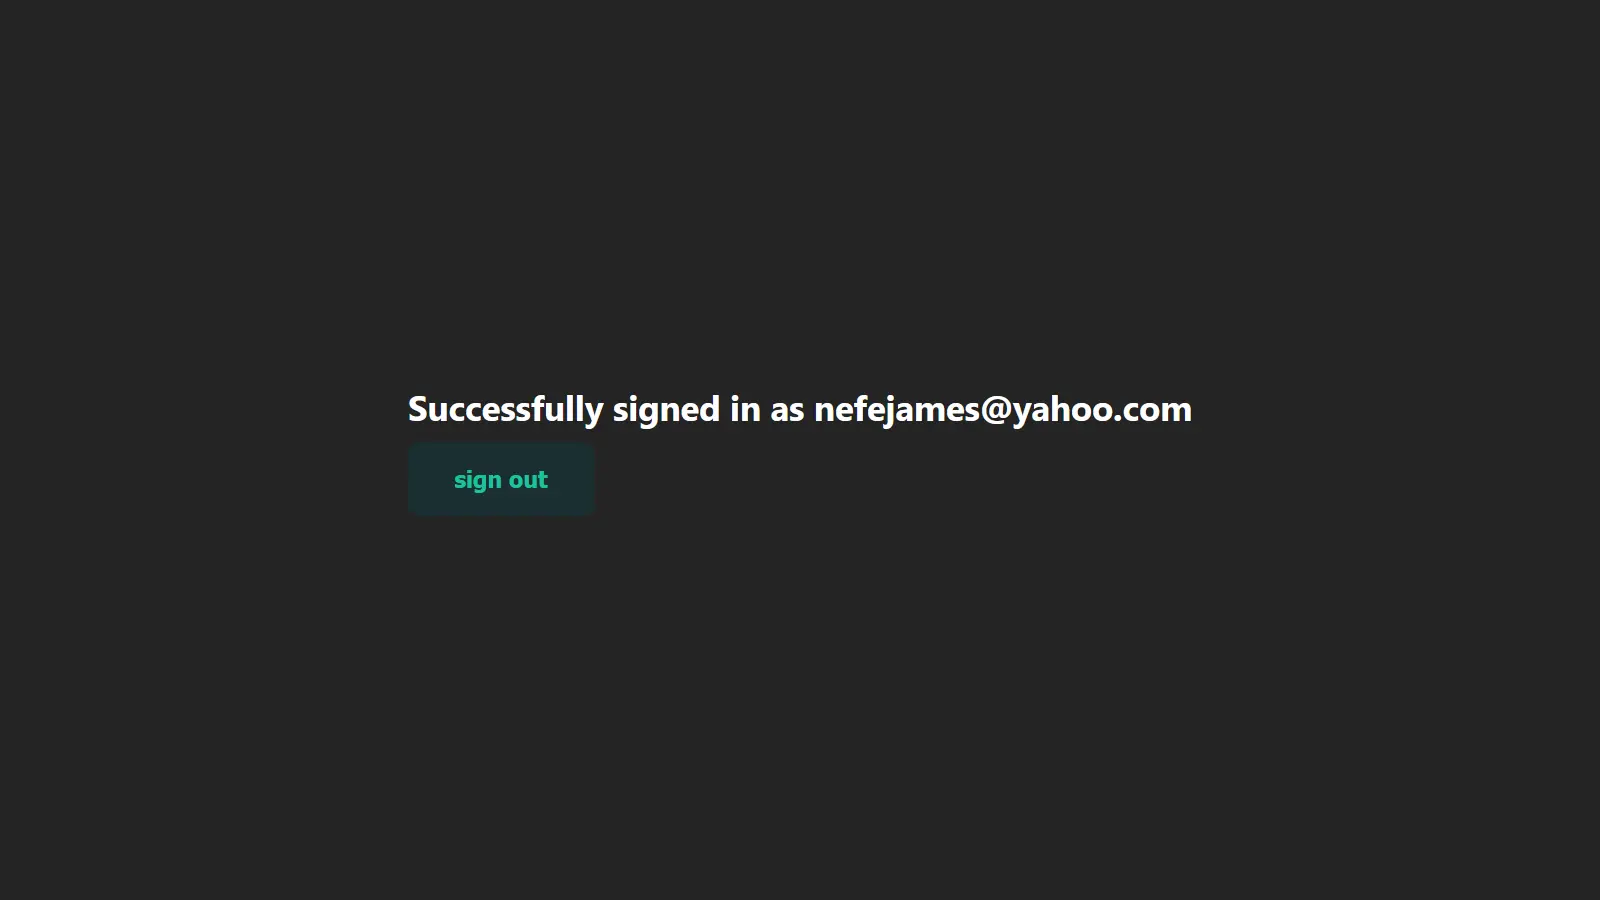
{session && (
<>
<h1>Successfully signed in as {session.user.email}</h1>
<button onClick={signOut}>sign out</button>
</>
)}
</main>
</div>
);
}
Here, you did the following:
-
Imported
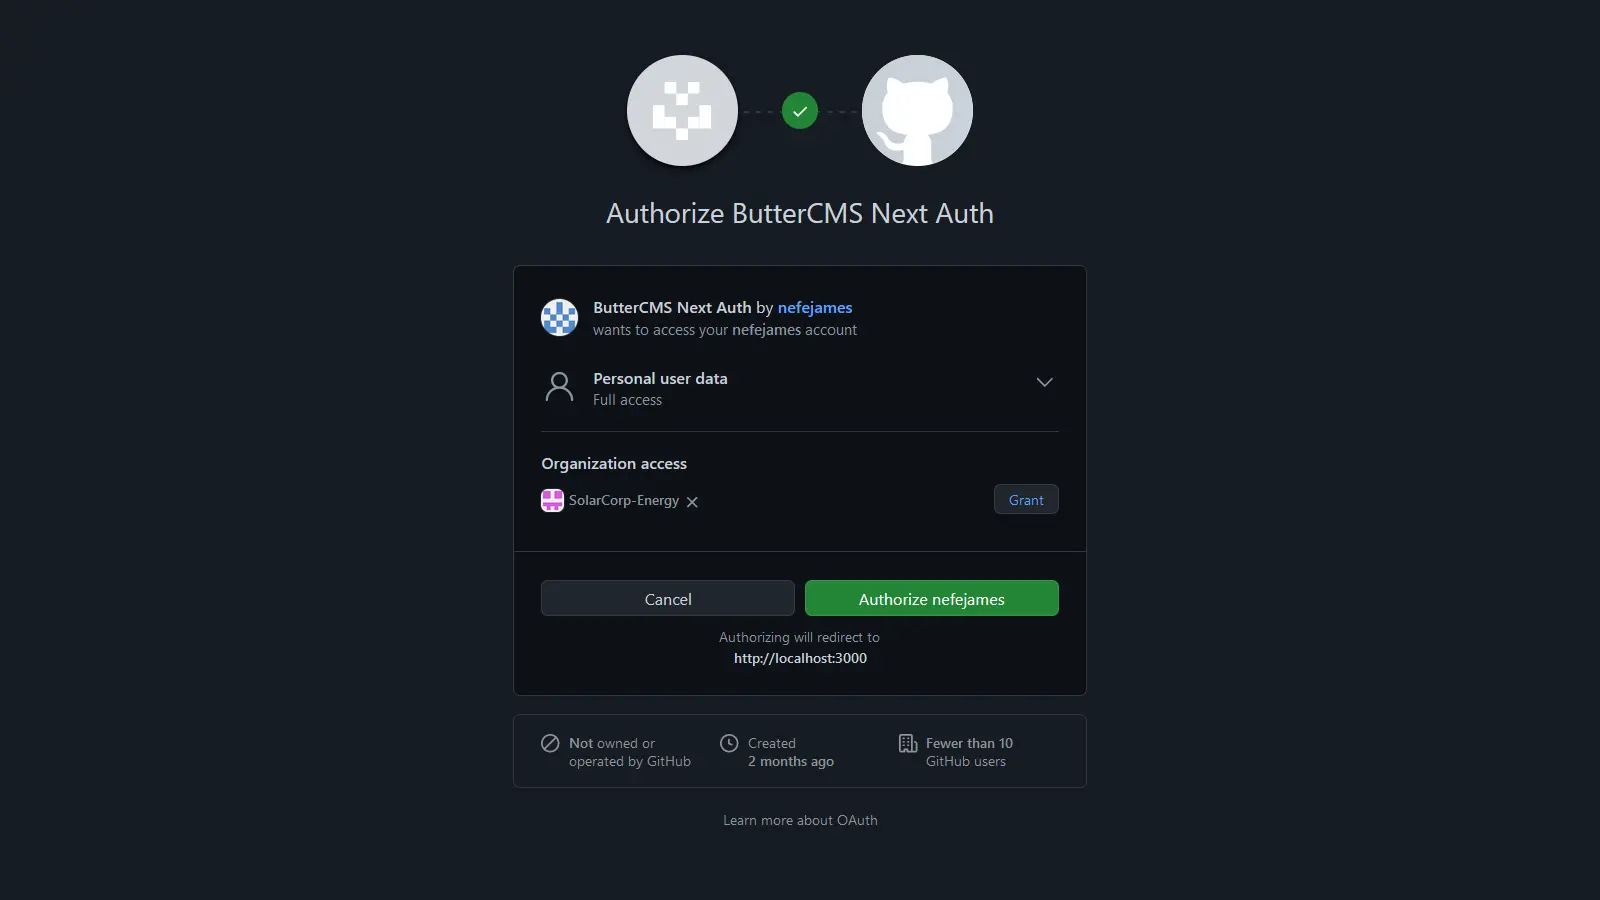
signIn,signOut, anduseSessionfrom the next-auth client module. The signIn method is used to sign a user into the application, and thesignOutmethod signs them out. By default, when the signIn method is called with no argument, you will be redirected to the NextAuth sign-in page. To redirect to the provider page directly, you have to specify the provider’s ID. For GitHub. This function will be modified tosignIn('github'). -
The
useSessionhook is the easiest way to check if someone is signed in. It provides adataproperty, which is an object containing the data of the signed-in user or undefined/null. -
In the HTML
<main>tag, you performed two conditional renderings. First, if there is no session (i.e., no signed-in user), render a CTA and a button for the user to sign in. Secondly, if there is a session (i.e., a signed-in user exists), access the user email from the session object and provide a button so they can sign out.
With that, you have successfully authenticated a Nextjs application with NextAuth and GitHub, and the images below show the authentication flow.

Creating a Protected Route
You can take the authentication one step further by creating a protected route or page that can only be accessed by a logged-in user. Create a file called pages/protected-route.js and update it with the code below.
import { authOptions } from '../pages/api/auth/[...nextauth]'
import { getServerSession } from "next-auth/next"
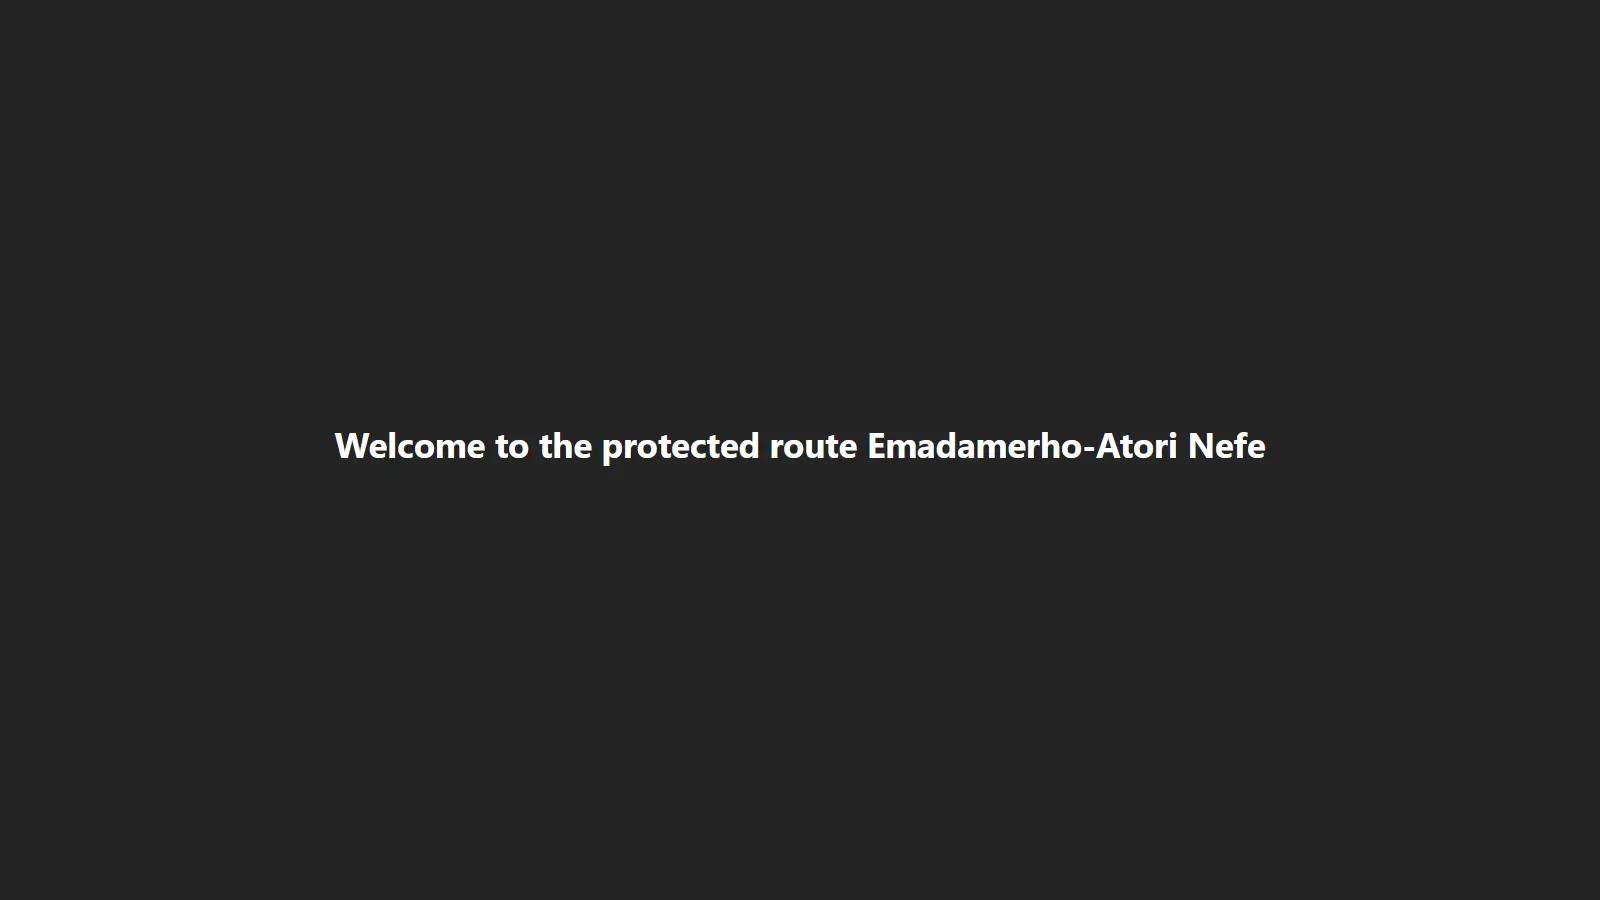
export default function ProtectedRoute({user}) {
return (
<div>
<h1>Welcome to the protected route {user?.name}</h1>
</div>
);
}
export async function getServerSideProps(context) {
const session = await getServerSession(context.req, context.res, authOptions)
if (!session) {
return {
redirect: {
destination: '/',
permanent: false,
},
}
}
const {user} = session
return {
props: {
user,
},
}
}
Here, you did the following:
-
Imported
getServerSessionandauthOptions, which are the NextAuth configurations. -
In the
getServerSideProps, we used thegetServerSessionmethod to check if a session exists (i.e. if there is a logged-in user). If there is no session, the user will be redirected to the login page. However, if there is a session, you return the user’s data.
With that, you have set up a protected route that can only be accessed by logged-in users.
If non-authenticated users navigate to that route, they are redirected to the login page. However, if an authenticated user navigates to that route, they will see the image below.
Protecting routes with Middleware
Middleware lets us write code that will be executed before a request is complete. It is a great choice for protecting routes as it can significantly improve the performance and user experience of your application. For protecting routes with Middleware, NextAuth provides a withAuth function that can be imported from next-auth/middleware either as a default or a named import.
Create a middleware.js file in the root directory of your project and add the following line of code:
export { default } from "next-auth/middleware"This protects the entire site, allowing only authenticated users to access it. To protect a specific page, you can use Matchers, which allows you to indicate the specific paths the Middleware should run.
For example, to protect the pages/protected-route.js file created above without using getServerSideProps, you will do the following:
export { default } from "next-auth/middleware"

export const config = { matcher: ["/protected-route"] }
For a more granular control, which will be helpful if we are also matching routes that don’t require authentication, we can make use of the authorized callback like the following:
import { withAuth } from "next-auth/middleware"

export default withAuth(
  {
    callbacks: {
      authorized: ({ req, token }) => {
        if (token && req.nextUrl.pathname.startsWith('/protected-route)) {
          return true
        }
      },
    },
  }
)

export const config = {
  matcher: [
    '/((?!api|_next/static|_next/image|favicon.ico).*)',
  ],
}
Protecting API routes
Authenticating Nextjs API routes with NextAuth is straightforward. Let’s see how it works. Create a pages/api/secure-api.js file and paste the code below.
import { authOptions } from './auth/[...nextauth]'
import { getServerSession } from "next-auth/next"

export default async (req, res) => {
  const session = await getServerSession(req, res, authOptions)

  if (session) {
    res.status(200).json({
     	name: "John Doe",
	message: "Welcome authenticated user",
    });
  } else {
    res.status(403).json({
      error: "You must sign-in to view the content on this page.",
    });
  }
};
Here, you did the following:
-
Imported
getServerSessionandauthOptions. -
Assigned the returned value of the
getServerSession()session variable. -
Checked whether a session exists. If it exists, you returned a dummy JSON response containing a success message and a name. However, in real-world applications, you would provide meaningful data. If a session doesn’t exist, you return an error.
Creating a custom NextAuth sign-in page
By default, NextAuth.js comes baked with a generic and minimal user interface that shows sign-in options based on the authentication providers we supplied during configuration.
However, there are circumstances where you would prefer to create a custom login page that matches the identity and representation of your brand, and NextAuth allows you to do that.
To create a custom page, you need to make some updates to the [...nextauth].js file in the pages/api/auth directory.
import NextAuth from "next-auth"
import GithubProvider from "next-auth/providers/github"

export const authOptions = {
  providers: [
    GithubProvider({
      clientId: process.env.GITHUB_ID,
      clientSecret: process.env.GITHUB_SECRET,
    }),
  ],
  pages: {
   signIn: "/sign-in"
  }
}

export default NextAuth(authOptions)
The page you defined, signIn: "/sign-in" means that you must have a sign-in page in the app, so let’s set that up.
Create a pages/sign-in.js file and paste the code below.
import { signIn } from "next-auth/react";
export default function CustomSignInPage() {
return (
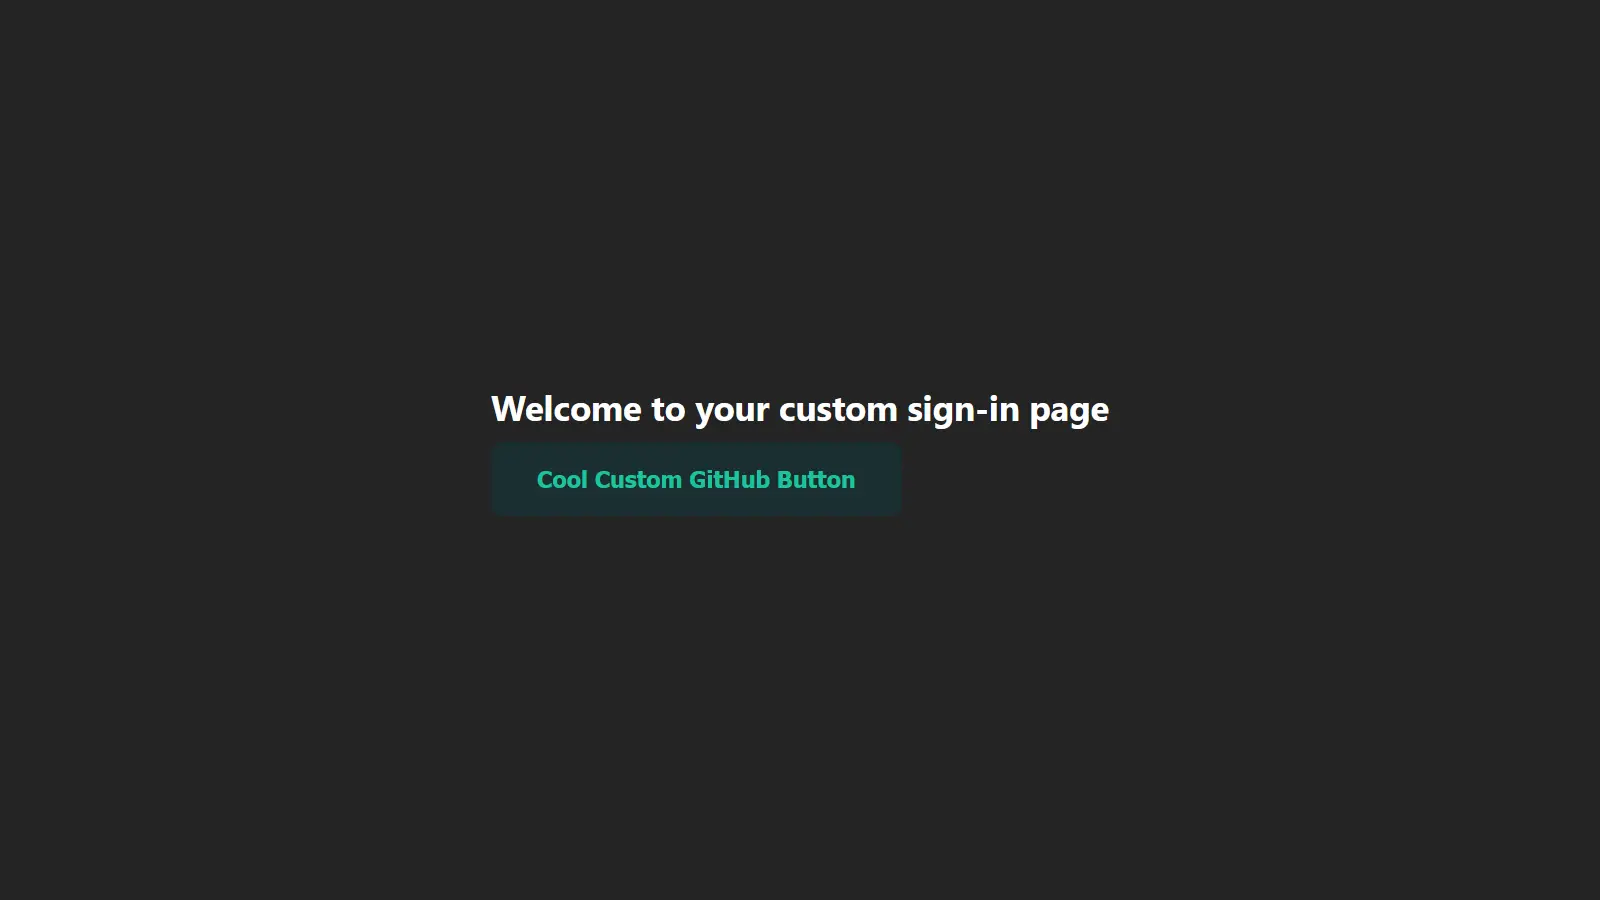
<div>
<h1>Welcome to your custom sign-in page</h1>
<button onClick={() => signIn('github', {callbackUrl: 'http://localhost:3000'})}>Cool Custom GitHub Button</button>
</div>
);
}
Here, you imported the signIn method from NextAuth and called it in the button’s onClick event handler, passing the GitHub provider ID and the URL to be redirected to after signing in its options object.
With that, you get a cool branded sign-in page instead of the generic one. Beyond creating custom sign-in pages, you can also create pages for signing out, displaying errors, verifying users, and new user authentications.
Storing signed-In user data
While NextAuth is a great library that makes authenticating Next.js applications a breeze, it is not a full-fledged solution. One thing it does not handle is the storing of signed-in user data. You may not need to store user data for internal tools, but it is important for customer-facing applications where you need to persist user info (e.g., for billing, to contact customers, etc.).
You have to set up a database yourself and store the user info. NextAuth supports databases like MySQL, Postgres, MongoDB, SQLite, and compatible databases (e.g., MariaDB, Amazon Aurora, Amazon DocumentDB). It also provides an Adapter API that allows you to connect it to any database of your choice. You can get more info on the list of official adapters.
Try ButterCMS completely free for 14 days
Get started nowSession management
Session management involves securely maintaining and managing user interactions with an application ensuring that the user’s authentication state is preserved and protected against session-related vulnerabilities.
NextAuth does all the heavy lifting concerned with session management and provides methods and hooks that can be used to easily interact with the session. It provides a session option that can be used to customize a few aspects of the session. In most cases, there is no need to specify this option since the default works fine. Here are all the properties that can be passed to the session option.
session: {
  //Let us choose how the user session will be saved.
  // This can either be "jwt" or "database".
  // The default is "jwt" where an encrypted JWT is stored in the session cookie.
  // However, if a database adapter is configured, the default is set to "database".
  // For the "database" strategy a sessionToken is stored in the cookie that is used to find the session in the database.
  strategy: "database",

  // The time before an idle session expires and is no longer valid.
  // In seconds
  maxAge: 30 * 86400, // 30 days

  // Control how frequently the database is updated to extend the user session.
  // In seconds. If set to 0 the database will always be updated
  // Note: It's not applicable when using the JWT strategy.
  updateAge: 86400, // 24 hours

  // To define a custom session token string.
  generateSessionToken: () => {
    return randomUUID?.() ?? randomBytes(32).toString("hex")
  }
}
Nextjs authentication best practices
Here are some best practices for handling and managing authentication.
Avoid using password-based authentication
It is generally recommended to avoid using password-based authentication because of the security risks associated with it and additional solutions to be implemented around it. Password-based authentication is prone to several attacks, including:
-
Phishing attacks: This is when an attacker uses the look-alike of an original site to try to make users reveal their passwords.
-
Brute force attacks: This is when an attacker continuously attempts several character combinations to guess a user's password.
Additionally, when using password-based authentication, you will need to implement several other solutions, such as password strength checker, password reset, and forget password functionality, etc.
Some alternatives to password-based authentication included: social login (E.g. Google, Facebook, GitHub, etc), magic link, and one-time password (OTP). Each of these has its pros and cons, so make sure to pick the one that best suits your needs.
Use an authentication solution
Most authentication solutions have been battle-tested and are implemented with best practices. Additionally, they try to stay updated with the latest secure authentication requirements. Utilizing these authentication solutions will not only save you a lot of time and effort but also reduce the risk of data breaches.
Add two-factor authentication (2FA)
Two-factor authentication involves creating a two-step verification process a user must go through before gaining access to the application. This adds an extra layer of security, making it more difficult for unauthorized users to access the protected resources.
Properly configure authentication cookies
Authentication cookies verify that a user is logged in, so they must be properly configured to prevent unauthorized access. To mitigate the risk of these cookies being prone to common attacks like man-in-the-middle attacks, cross-site scripting (XSS), and cross-site-request-forgery (CSRF), it is important to set the Secure, HttpOnly, and SamSite cookie attributes.
Questions about Next js authentication
Should you build your own authentication system?
Building a functional and robust authentication system is hard. Here are some things to consider when deciding if we should build an in-house authentication system or use a third-party service.
- Business priorities and goals: While you could create a custom solution, it is not advisable to do so if it does not meet the bottom line of your business. For example, a ride-hailing business could spin up a custom authentication solution, but in doing so, they have diverted their energy to develop projects that don’t meet their needs as a business or drive productivity in the right direction.
- Technical expertise and resources: Building great products takes time, and the same holds true for security software. You may need to invest a large amount of time to build a secure and hacker-proof authentication system. Not only that, but authentication solutions require heavy technical expertise, which is expensive to get. Also, the continual management and upgrading will drive costs up. Depending on the number of users the solution will authenticate, a team of specialists may be required, which implies higher operational costs.
- Scale and complexity: Applications often start simple and grow complex over time. The authentication solution may start with email and password login, but over time more options may be added, like adding passwordless logins through social sign-ins or magic links to accommodate more users. Not only do these new features increase costs, but they also add to the complexity of the project. The cost of maintaining your own identity management may be much higher than you’re expecting.
- Regulatory compliance: The identity industry is heavily regulated because it involves the processing and storage of confidential user data. Building with compliance in mind is one more consideration that will increase the complexity of the building process, and these regulations are always evolving.
I recommend that you do not build your own system unless you are going into the identity management system and building an Authentication-as-a-Service (AaaS) business like Auth0, Okta, or Ory. Where possible, build on top of existing solutions and ship faster with industry-trusted experts.
What is the right pattern to authenticate Next js applications?
When it comes to programming, there is no one-size-fits-all response, so the best answer to questions like this is usually ‘it depends’. Neither pattern is wrong, so there is no ‘right pattern’. Your focus should be on making sure that your applications are fully secure.
Which third-party authentication provider should I use?
Some great third-party solutions businesses love, and you can choose, are Okta, Ory, Auth0, NextAuth, and LoginRadius.
You should consider the following when deciding what third-party service to use:
- Available sign-in methods: The right solution should give your users the freedom to choose which identity provider they use to sign in to your application. Some basic sign-in methods are email and password, social login, and magic links.
- Database availability: Some solutions like Auth0 come with a database where you can store the data of your authenticated users. Others like NextAuth do not provide any database, meaning you would have to handle that yourself.
- Features: When choosing, you should look out for features like multi-factor authentication (MFA), single sign-on (SSO), analytics and reports system, and user management. Generally, the more features a provider supports, the better, particularly if you intend on sticking with them for a long time.
- Pricing: No matter how great a provider is, they must fall within your budget. Pricing is an important factor, particularly considering the scale of your application and the number of users you plan to authenticate.
- Technical support: What kind of support do they offer? This is important because services can fail at any time of the day. What is their response time, and how long does it take to resolve a problem or fix a bug? What communication lines do they provide (e.g., email, video calls, etc.), and are you satisfied with those channels?
- Documentation and learning curve: No matter the provider you choose, one thing they will all have in common is that developers are the ones who will handle the integration. The documentation must be easy to navigate and clear. A great product that is difficult to operate is of no use.
- Integration points: APIs are the most popular way of integrating third-party services. However, SDKs and libraries that support different languages also significantly improve the developer experience because they enable speedy integration. The faster you can integrate, the better, particularly for fast-paced businesses.
- Tech stack: Any service that limits your developers is not the right one for your product. The provider you pick should complement and integrate smoothly with your tech stack and enable you to do your best work, not fight against it.
Closing Thoughts
In this article, you learned about Next js rendering methods, authentication patterns, and how to set up authentication with NextAuth. A great thing about Nextjs is that you are free to choose the authentication pattern that fits your requirements. By pairing it with NextAuth, you'll get a seamless and hassle-free authentication for your applications.
The process of integrating third-party identity vendors like GitHub, Facebook, etc., is straightforward, empowering users to choose their preferred provider and removing every restriction. And as you've seen in the tutorial above, Next.js and NextAuth are two excellent and well-thought-out technologies to work with.
To dive deeper into these concepts please refer to the following resources:
Post updated April 2024 by Taminoturoko Briggs.
Get the latest Butter product updates and tutorials delivered directly to your inbox.
ButterCMS is the #1 rated Headless CMS


Related articles
Don’t miss a single post
Get our latest articles, stay updated!
Nefe is a developer and technical writer who enjoys learning new things and sharing his knowledge with others.