> ## Documentation Index
> Fetch the complete documentation index at: https://buttercms.com/docs/llms.txt
> Use this file to discover all available pages before exploring further.
# Dynamic landing pages
> Compose flexible page layouts and easily reorder them with ButterCMS Components and the Component Picker
Dynamic page layouts in ButterCMS are built using three key concepts:
| Concept | Description |
| -------------------- | ---------------------------------------------------------------------------------- |
| **Components** | Reusable content blocks with their own schema (Hero, Services, Testimonials, etc.) |
| **Component Picker** | A special field that lets editors add, remove, and reorder Components on a page |
| **Page Types** | Templates that define which Components are available for a particular type of page |
This architecture allows:
* **Developers** and **Designers** to ensure consistency through predefined component styles and templates
* **Marketers** to build unique pages without developer intervention
## What you'll build
A dynamic landing page system that includes:
* Reusable Components (Hero, Features, Testimonials, CTA, etc.)
* Drag-and-drop page building
* Component Library management
* Dynamic frontend rendering
## Setting up a landing page with Components in the ButterCMS dashboard
Let's create a landing page with these six sections:
* Navigation
* Hero
* Services
* Main Service
* Testimonials
* Footer
You can set up your landing page as a Single Page, if you only want to make one Page of this type, or
a Page Type, if you want to be able to reuse your Page schema multiple times.
Click on **Component Picker** in the left menu when configuring your Page and
give it a name.
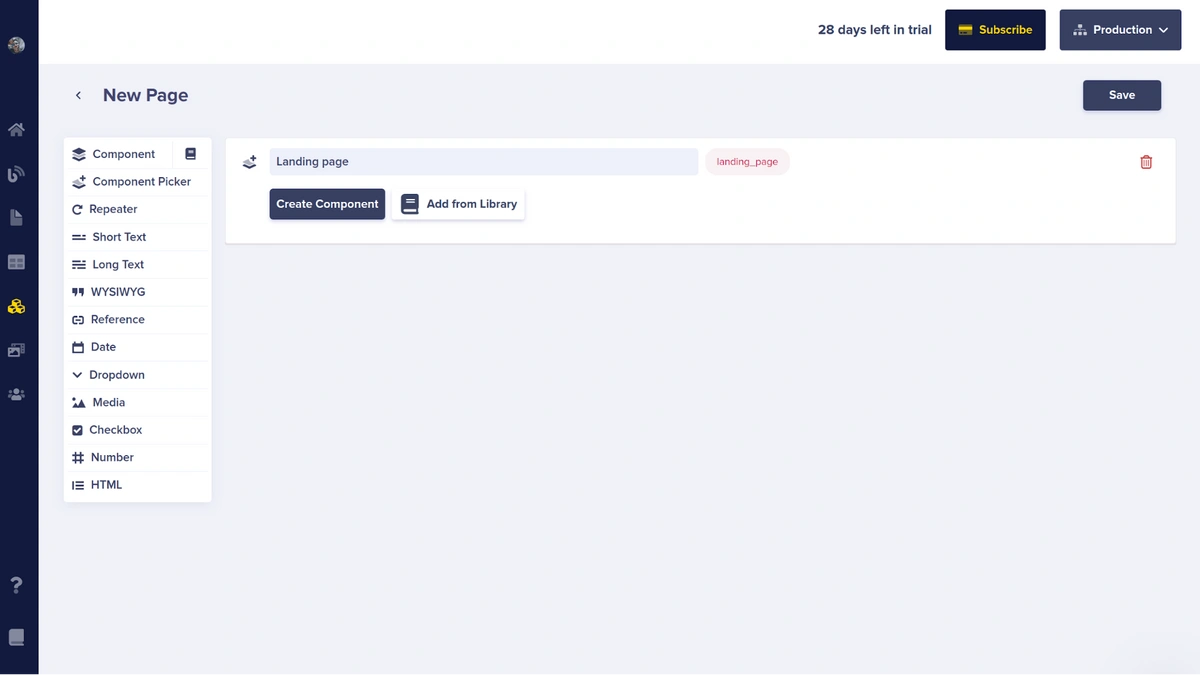
For each of the following components below, click the ***Create Component*** button, give the new
Component its own name, and then add the vraious field types you need in the Component.
When you are finished adding fields to the Component, click ***Done***.
When you've added all of the fields to your Page, click ***Save***.
Components created this way (inside of a Page schema), are called ***Local Components***: they only exist on
this Page schema.
If you want to reuse this Component in other Pages, roll over the newly created Component (after
clicking the ***Done*** button), and you'll see the ***Add to Library*** button.
You can select any Component that's been added to your Library any time you're creating/updating a Page schema.
### Components to add
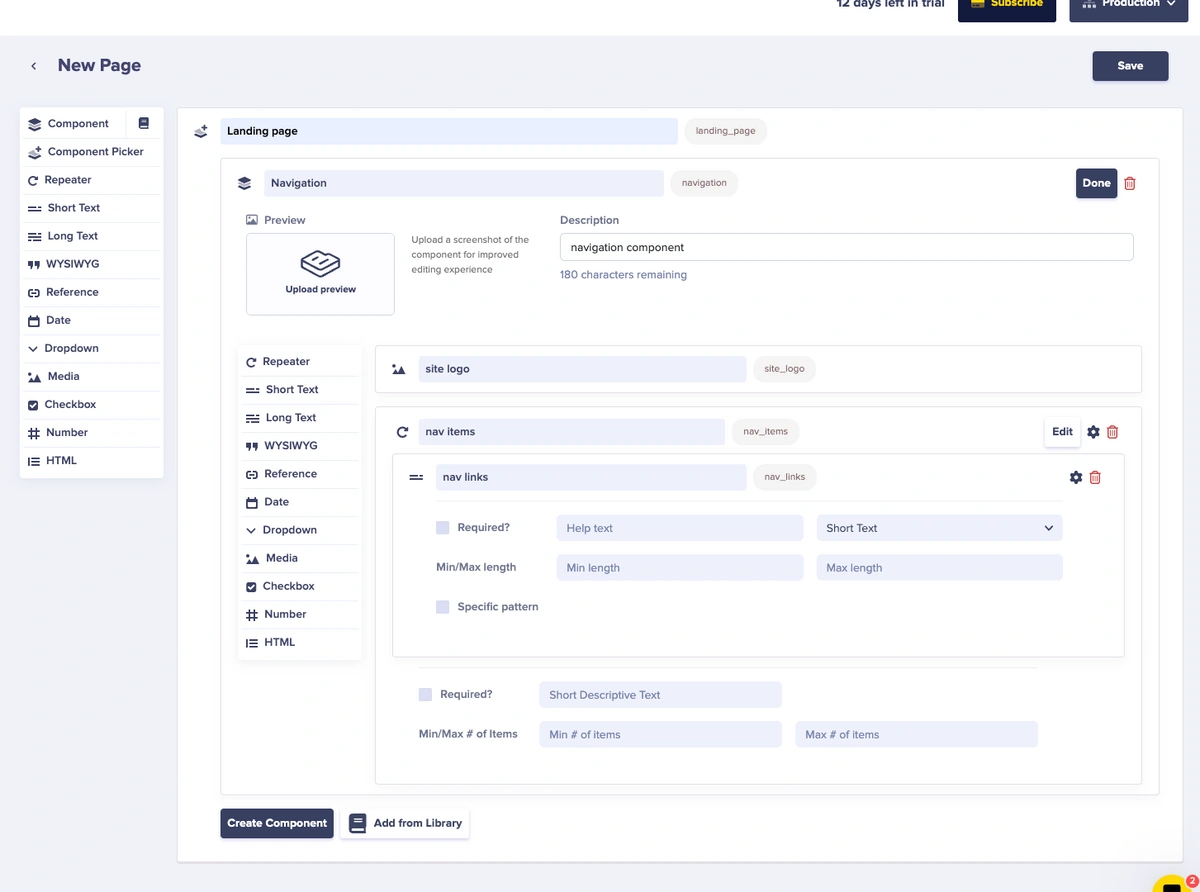
| Field Type | Field Name |
| ------------ | ---------- |
| Media | site logo |
| Repeater | nav items |
| → Short text | nav link |
This is a simple, single-level menu in which data would have to be manually added
with each instance of the Page. In real-life applications, you'd likely use a
[Reference field to a Menu collection](./navigation-menus-collections)
somewhere outside of the Component Picker.
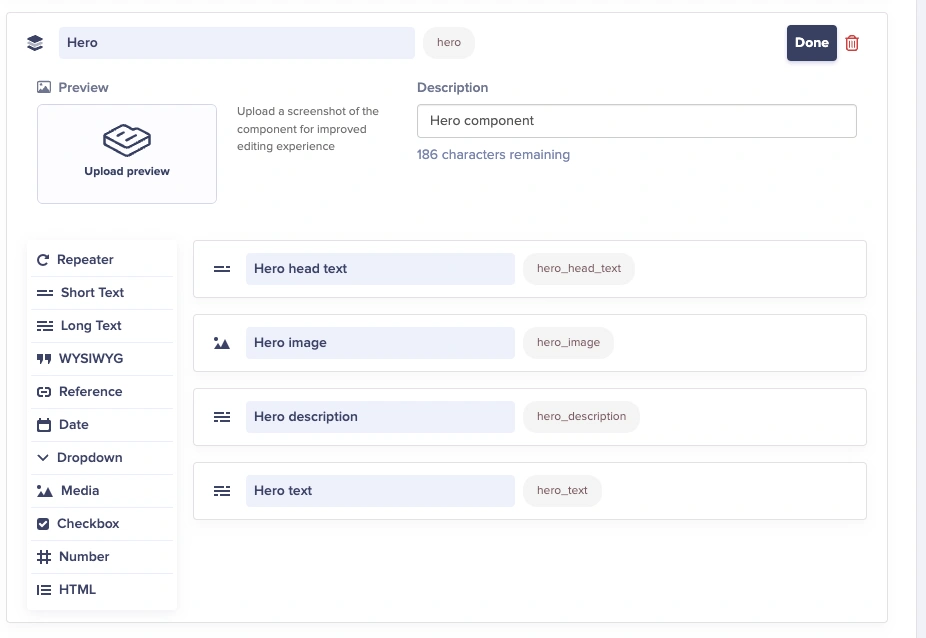
| Field Type | Field Name |
| ---------- | ---------------- |
| Short text | Hero headline |
| Media | Hero image |
| Long text | Hero description |
| Long text | Hero body text |
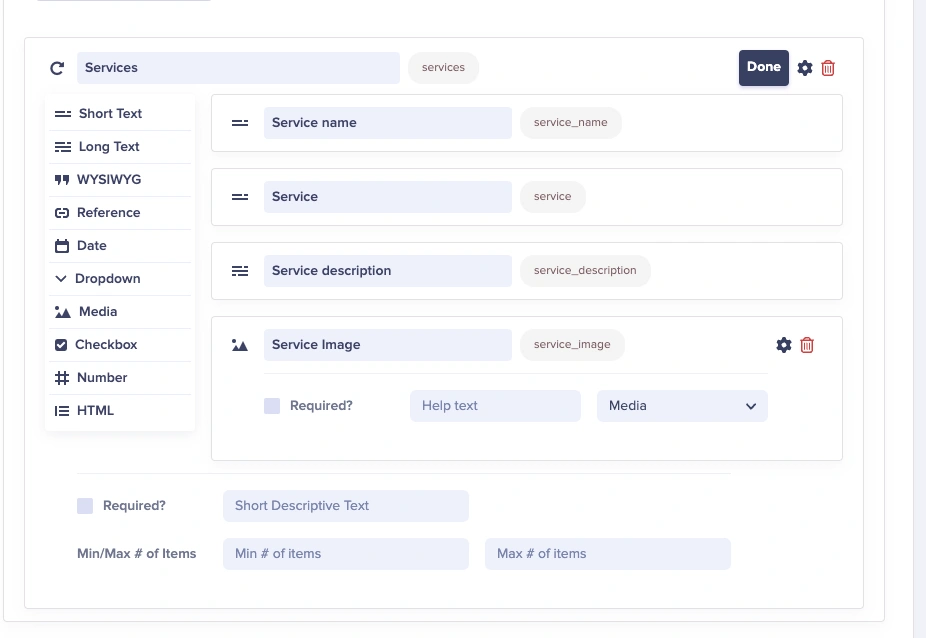
| Field Type | Field Name |
| ------------ | ------------------- |
| Repeater | Services |
| → Short text | Service name |
| → Long text | Service description |
| → Media | Service image |
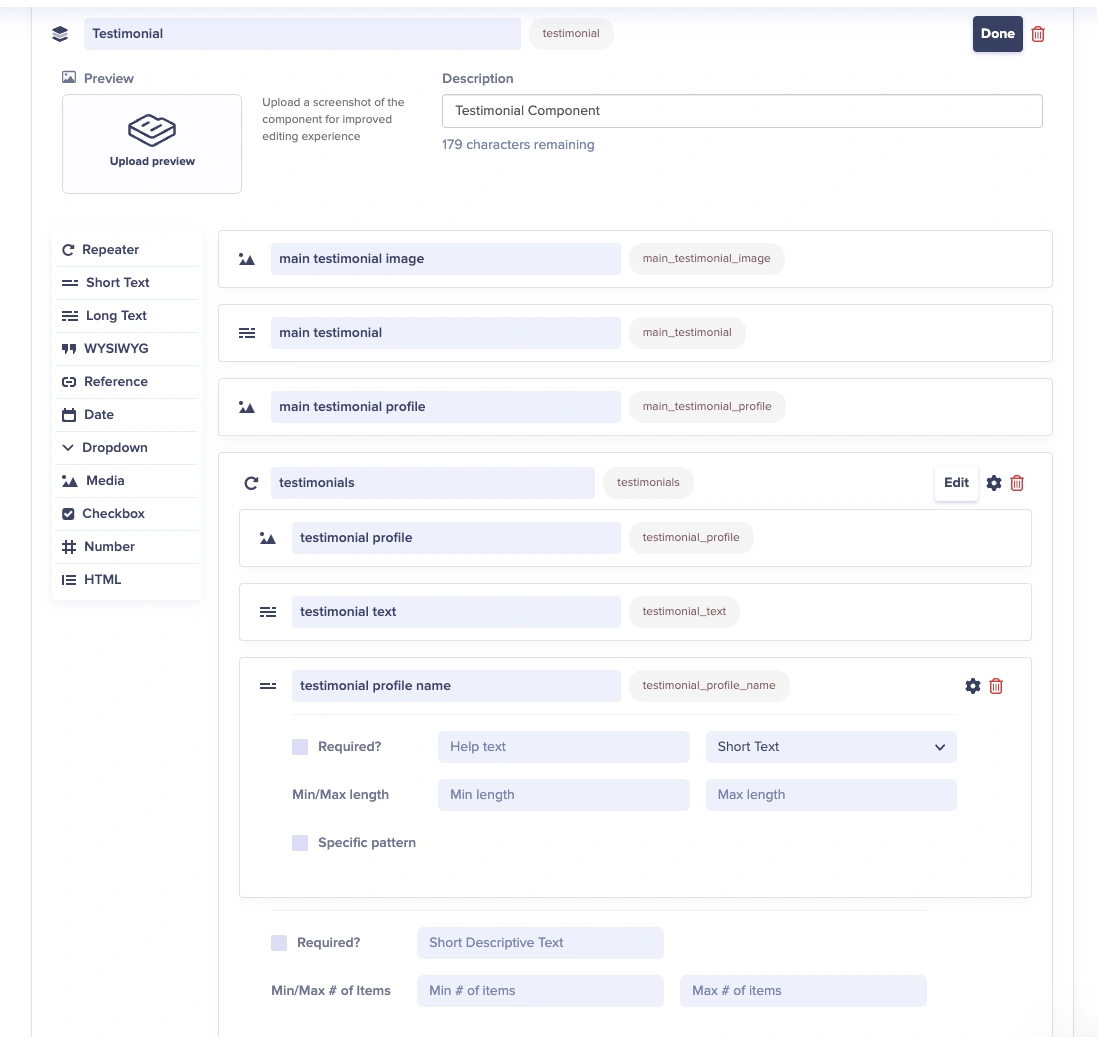
| Field Type | Field Name |
| ------------ | ------------------------ |
| Media | Main testimonial image |
| Long text | Main testimonial text |
| Media | Main testimonial profile |
| Repeater | Testimonials |
| → Media | Profile image |
| → Long text | Testimonial text |
| → Short text | Profile name |
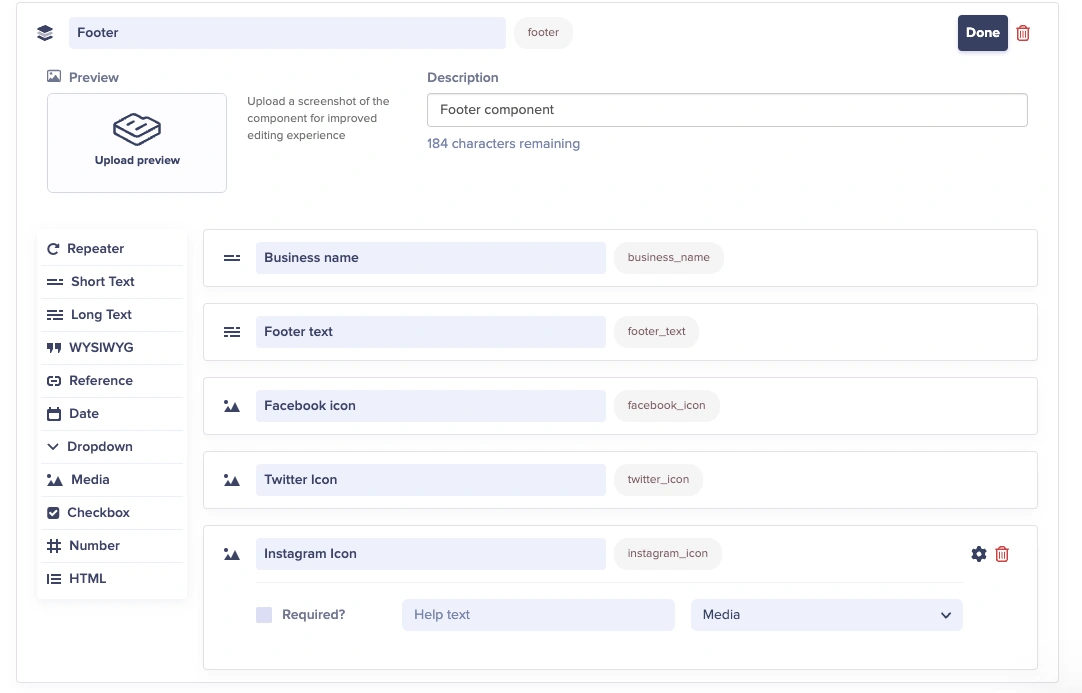
| Field Type | Field Name |
| ---------- | ---------------------------------------------------------------- |
| Short text | Business name |
| Long text | Footer text |
| Media | Social media icons (Facebook icon, Twitter icon, Instagram icon) |
After saving your schema, create a new instance of your Page (if it's a Page Type)
or just edit your Page (for a Single Page).
Now, click the **Component Picker** button under to the Landing Page component.
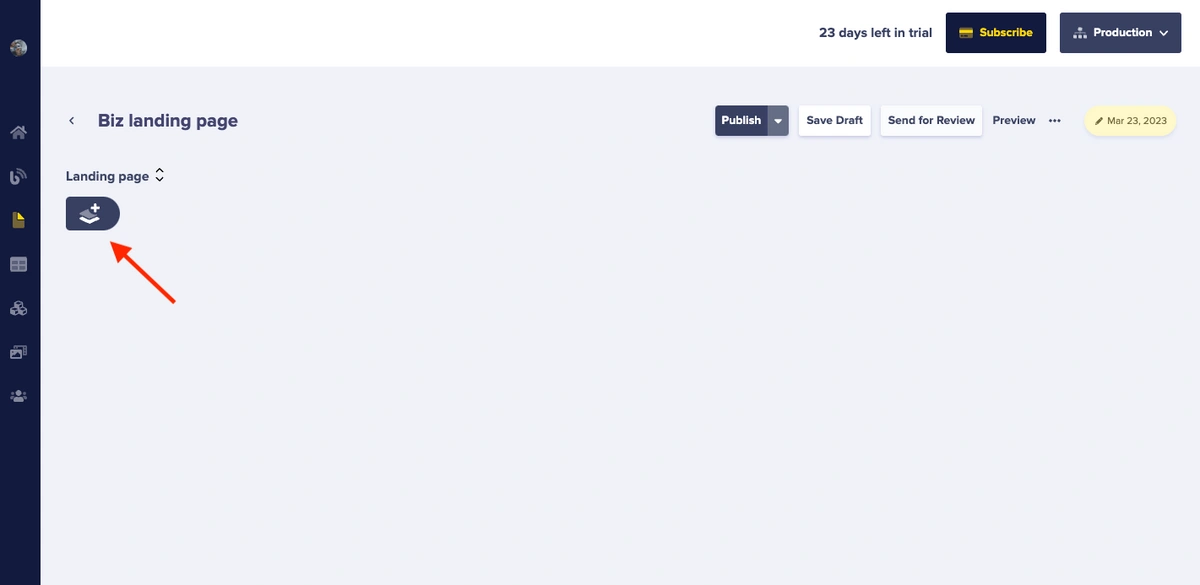
Select the components you want to add and fill in the content for each component.
You can add Component instances to a Picker in any order you choose.
You can also add multiple instances of each Component type.
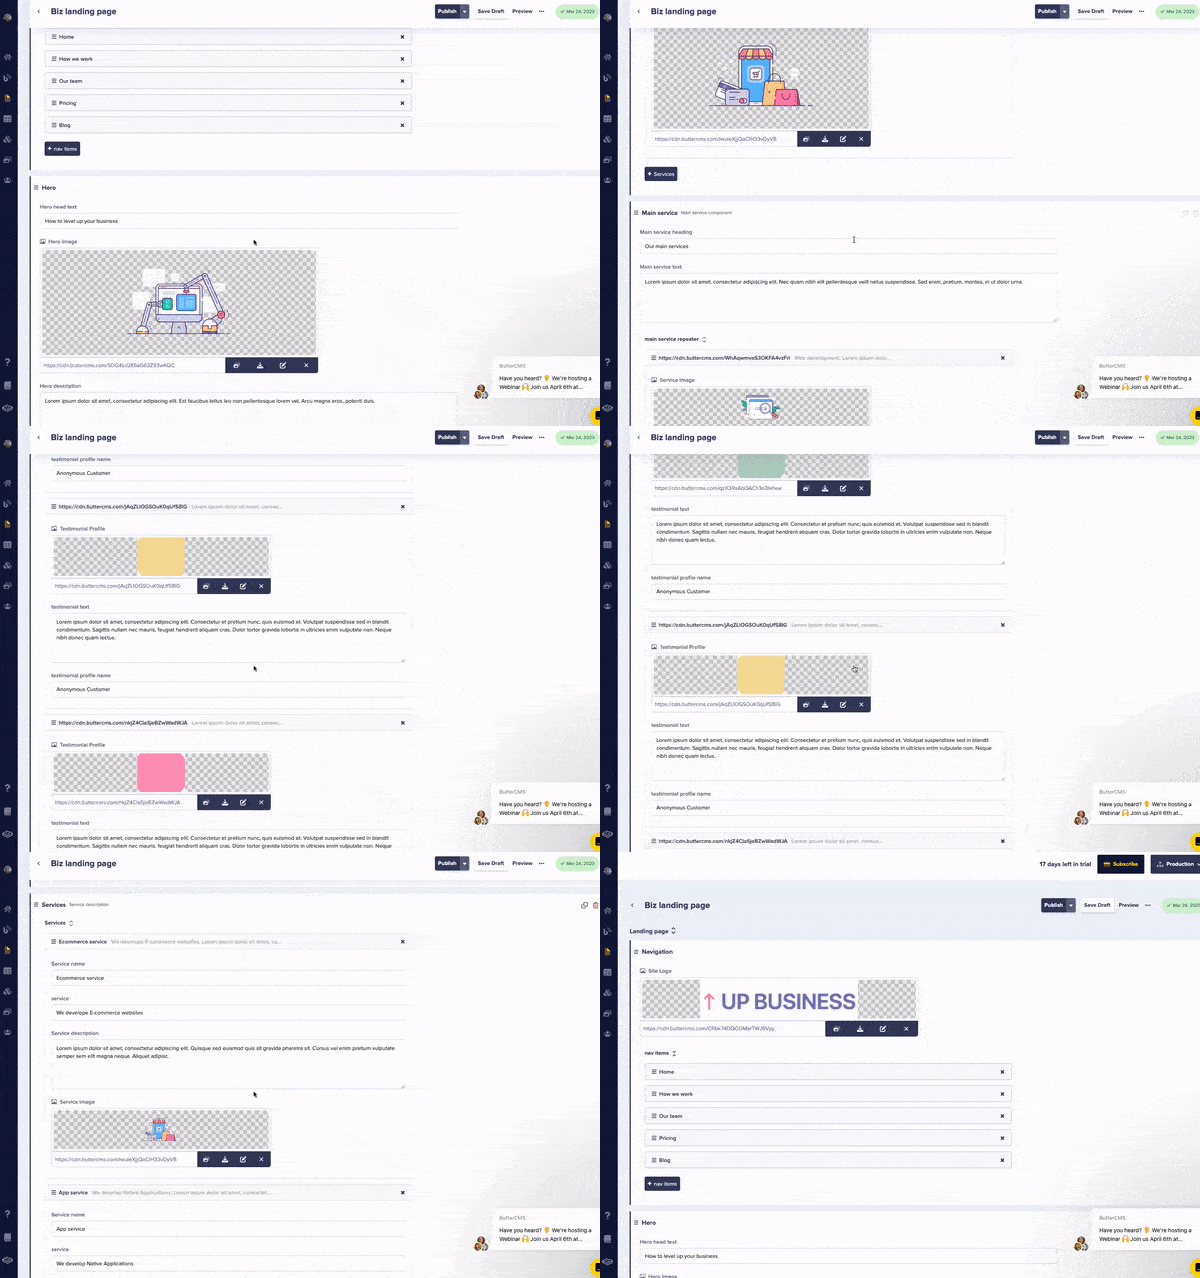
### Working with the Component Picker
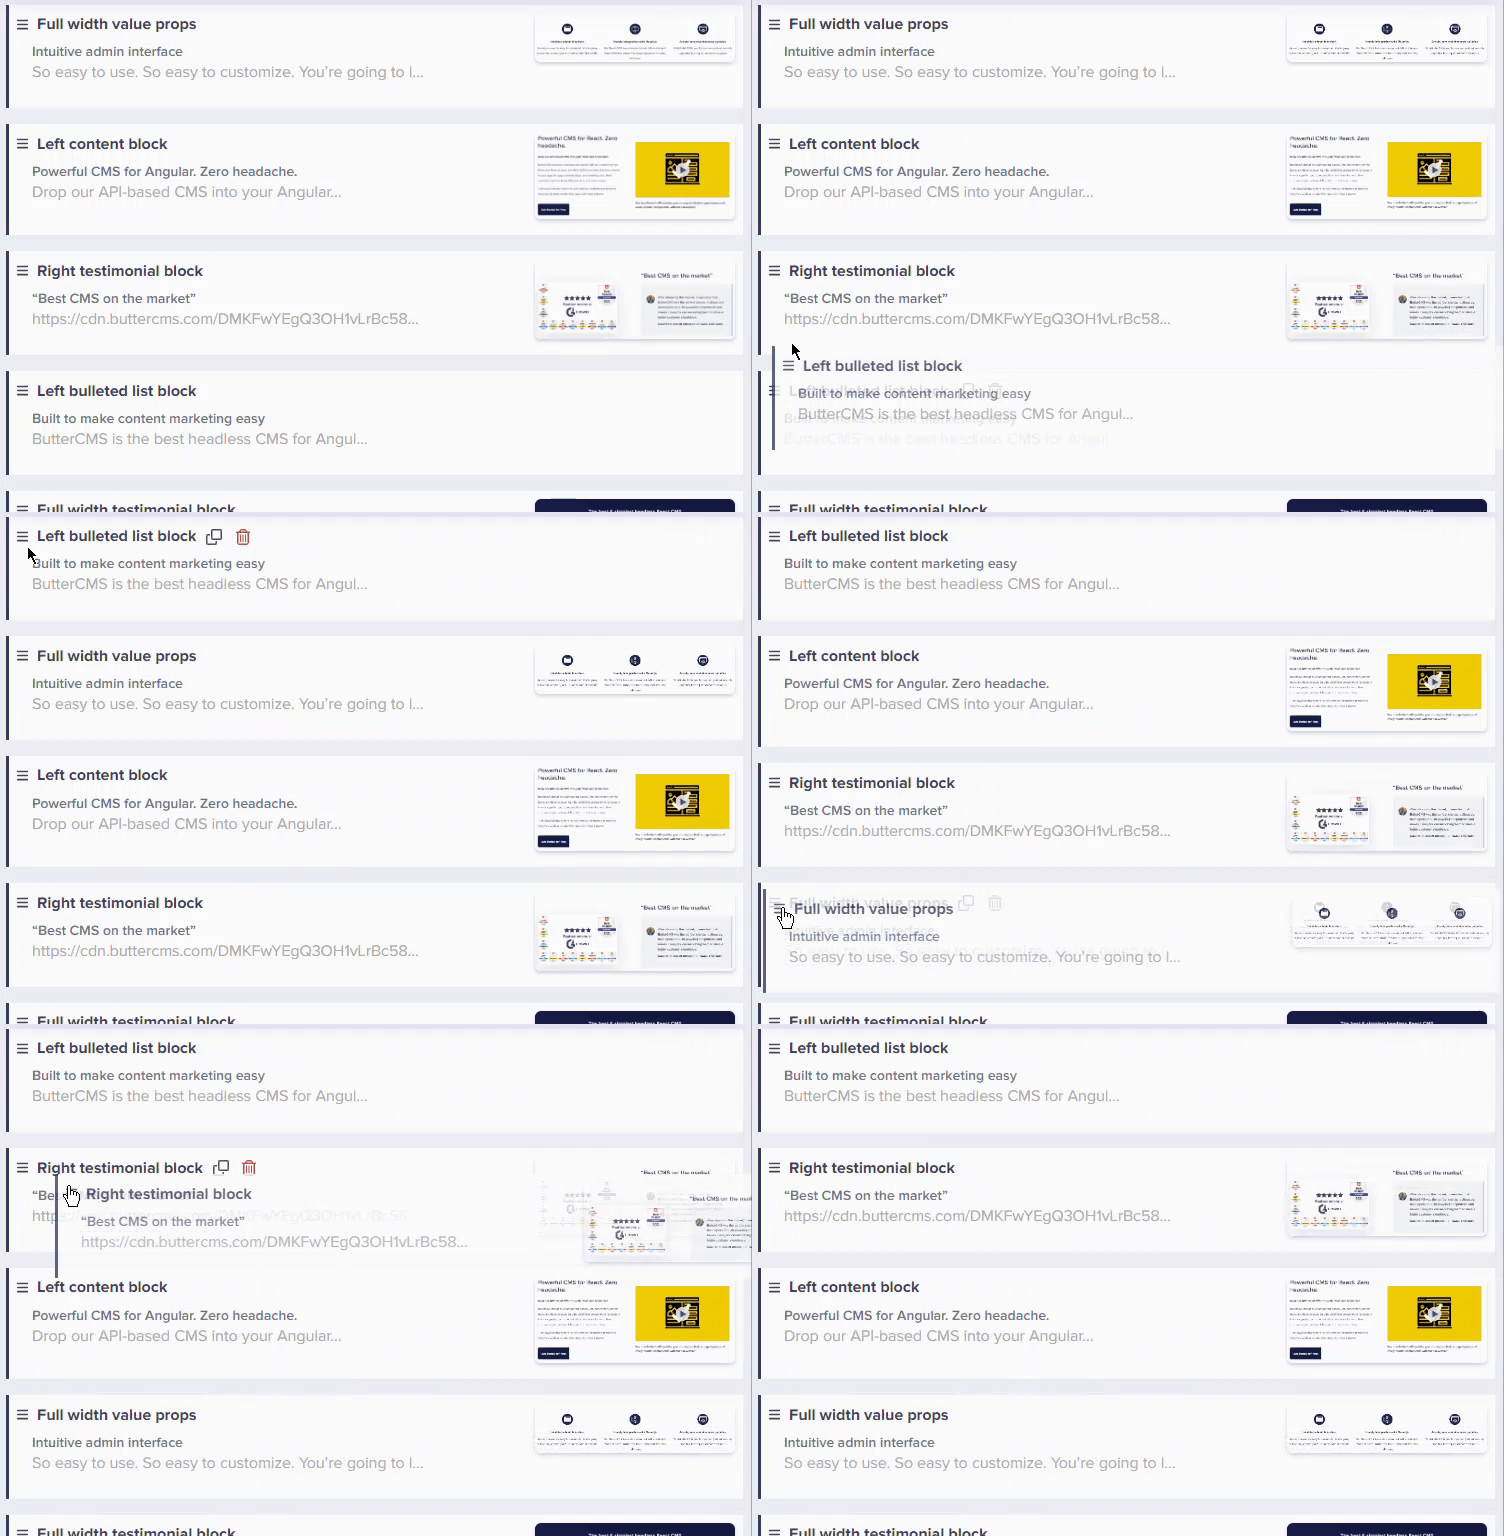
In order to better see your content, you can ***expand or collapse the entire picker*** by clicking on the
Collapse/Expand toggle, which looks like , or you can ***expand or
collapse a single component*** by clicking on the Component name.
To ***re-order Components***, simply drag & drop.
## Component Picker API response structure
The API returns Components in the order they appear on the page. Note the `type` key, which indicates the kind of
Component in the Picker.
```json theme={null}
{
"data": {
"slug": "product-launch",
"fields": {
"landing_page_sections": [
{
"type": "navigation",
"fields": {
"logo": "https://cdn.buttercms.com/...",
"nav_items": [
{ "label": "Features", "url": "#features" },
{ "label": "Pricing", "url": "#pricing" },
{ "label": "Contact", "url": "#contact" }
]
}
},
{
"type": "hero",
"fields": {
"headline": "Build Better Products",
"subheadline": "Our platform helps teams ship faster",
"background_image": "https://cdn.buttercms.com/...",
"cta_button_text": "Get Started",
"cta_button_url": "/signup"
}
},
{
"type": "services",
"fields": {
"services": [
{
"title": "Fast Development",
"description": "Ship features 10x faster",
"icon": "https://cdn.buttercms.com/..."
},
{
"title": "Easy Integration",
"description": "Works with your stack",
"icon": "https://cdn.buttercms.com/..."
}
]
}
},
{
"type": "testimonials",
"fields": {
"testimonials": [
{
"quote": "This tool changed everything for us",
"name": "Jane Smith",
"title": "CTO at TechCorp",
"profile_image": "https://cdn.buttercms.com/..."
}
]
}
}
]
}
}
}
```
## Render your page (React/Next.js example)
First, create a ***component renderer*** that maps ButterCMS components to React components:
```jsx theme={null}
// components/ComponentRenderer.jsx
import Hero from './Hero';
import Services from './Services';
import Testimonials from './Testimonials';
import Footer from './Footer';
import Navigation from './Navigation';
const componentMap = {
'navigation': Navigation,
'hero': Hero,
'services': Services,
'testimonials': Testimonials,
'footer': Footer,
};
const ComponentRenderer = ({ components }) => {
return (
<>
{components.map((component, index) => {
const Component = componentMap[component.type];
if (!Component) {
console.warn(`Unknown component type: ${component.type}`);
return null;
}
return (
);
})}
);
};
export default ComponentRenderer;
```
In production, wrap `ComponentRenderer` with an error boundary and add loading states for better user experience.
Render your main landing page with its own React component:
```jsx theme={null}
// pages/[slug].jsx
import Butter from 'buttercms';
import ComponentRenderer from '../components/ComponentRenderer';
const butter = Butter('your-api-token');
const DynamicPage = ({ page }) => {
return (
);
};
export async function getStaticProps({ params }) {
const response = await butter.page.retrieve('landing_page', params.slug);
return {
props: {
page: response.data.data
},
revalidate: 60 // Revalidate cached page every 60 seconds
};
}
export async function getStaticPaths() {
const response = await butter.page.list('landing_page', { page_size: 100 });
const pages = response.data.data;
return {
paths: pages.map(page => ({ params: { slug: page.slug } })),
fallback: 'blocking'
};
}
export default DynamicPage;
```
Render each of the individual components. Map the React template to the ButterCMS API data as
described with the mapping function, above.
```jsx theme={null}
// Hero Component
function HeroComponent({ headline, subheadline, background_image, cta_button_text, cta_button_url }) {
return (
);
}
```
## Final result
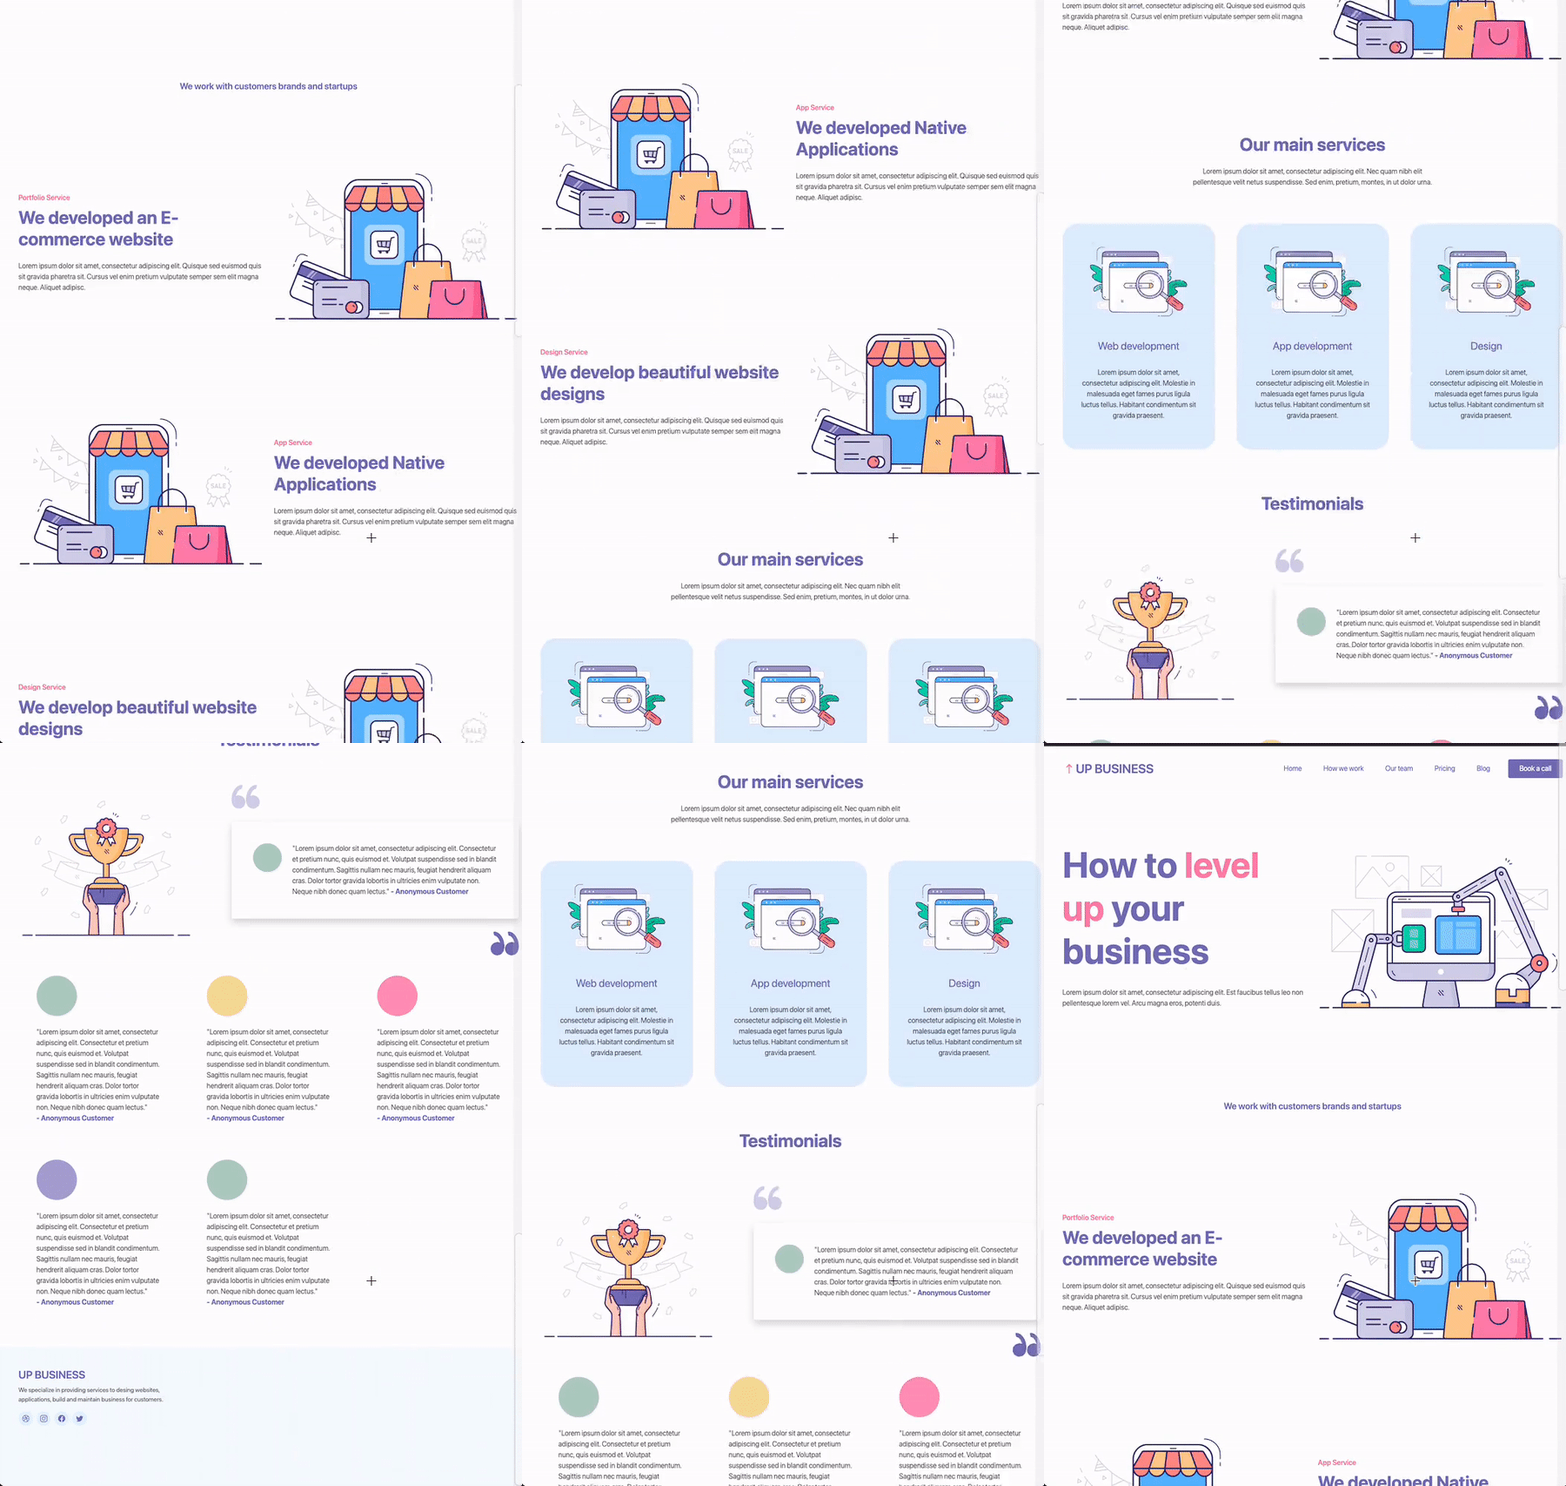
You now have a beautiful, fully dynamic, rendered landing page:
## Best practices
### Adding default values to fields
Set predefined default values for fields to maintain consistency:
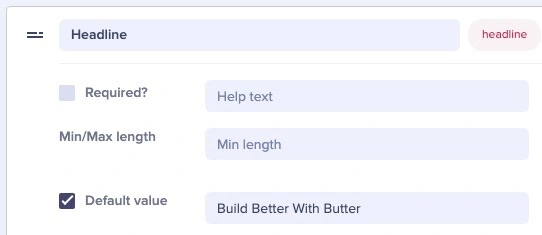
Benefits of default values:
* **Streamline Content Creation**: Fields are pre-populated with commonly used values
* **Consistency**: Ensure uniformity across your landing pages
* **Efficiency**: Save time by reducing manual data entry
* **Error Reduction**: Minimize typos and mistakes
You can also use help-text and pattern matching with individual fields to better guide your marketing team.
### Content design principles
* **Keep components focused:** Avoid Components that try to do multiple unrelated things; each Component should do one thing well.
* **Use sensible defaults:** Pre-fill common values to speed up content creation
* **Limit required fields:** Only require what's absolutely necessary
* **Document field purposes:** Add descriptions for content editors via help text
* **Document your components:** Create a style guide for editors
* **Limit choices:** Too many Components can be overwhelming
* **Use clear naming:** Component names should be self-explanatory
### Developer tips
* **Handle missing Components:** Always check if Component type exists
* **Add error boundaries:** Prevent one bad Component from breaking the page
* **Test on all devices:** Ensure responsive design works
### Performance tips
* **Lazy load components:** Load below-the-fold components on scroll
* **Optimize images:** Use ButterCMS CDN transformations
* **Cache API responses:** Reduce API calls with caching