> ## Documentation Index
> Fetch the complete documentation index at: https://buttercms.com/docs/llms.txt
> Use this file to discover all available pages before exploring further.
# Add table of contents to Blog Engine post
> Add a table of contents to ButterCMS Blog Engine posts using anchor links, helping readers navigate long-form content with quick links to each section.
## Overview
Creating a table of contents in ButterCMS involves three main steps:
1. **Create a list of sections** at the top of your post
2. **Add anchor IDs to headings** using the Source Code view
3. **Link your list items** to those anchor IDs
This creates clickable links that jump readers directly to each section of your post.
## Step-by-step guide
### Step 1: Create your table of contents list
First, create a list of all the sections of your blog post that you would like to include as your table of contents.
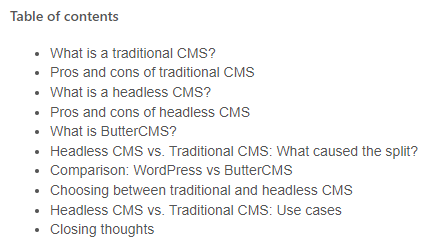
Place your table of contents near the top of your post, typically right after the introduction paragraph.
### Step 2: Open source code view
Open the Source Code view for your blog post to access the HTML.

Click the **Source Code** button (`< >`) in the WYSIWYG toolbar to switch to the HTML view.
### Step 3: Add IDs to your headings
Look for the headlines of your post that correspond to each section of your table of contents. You can do this with a simple **Ctrl+F** (Find), and then add an `id` attribute to each heading.
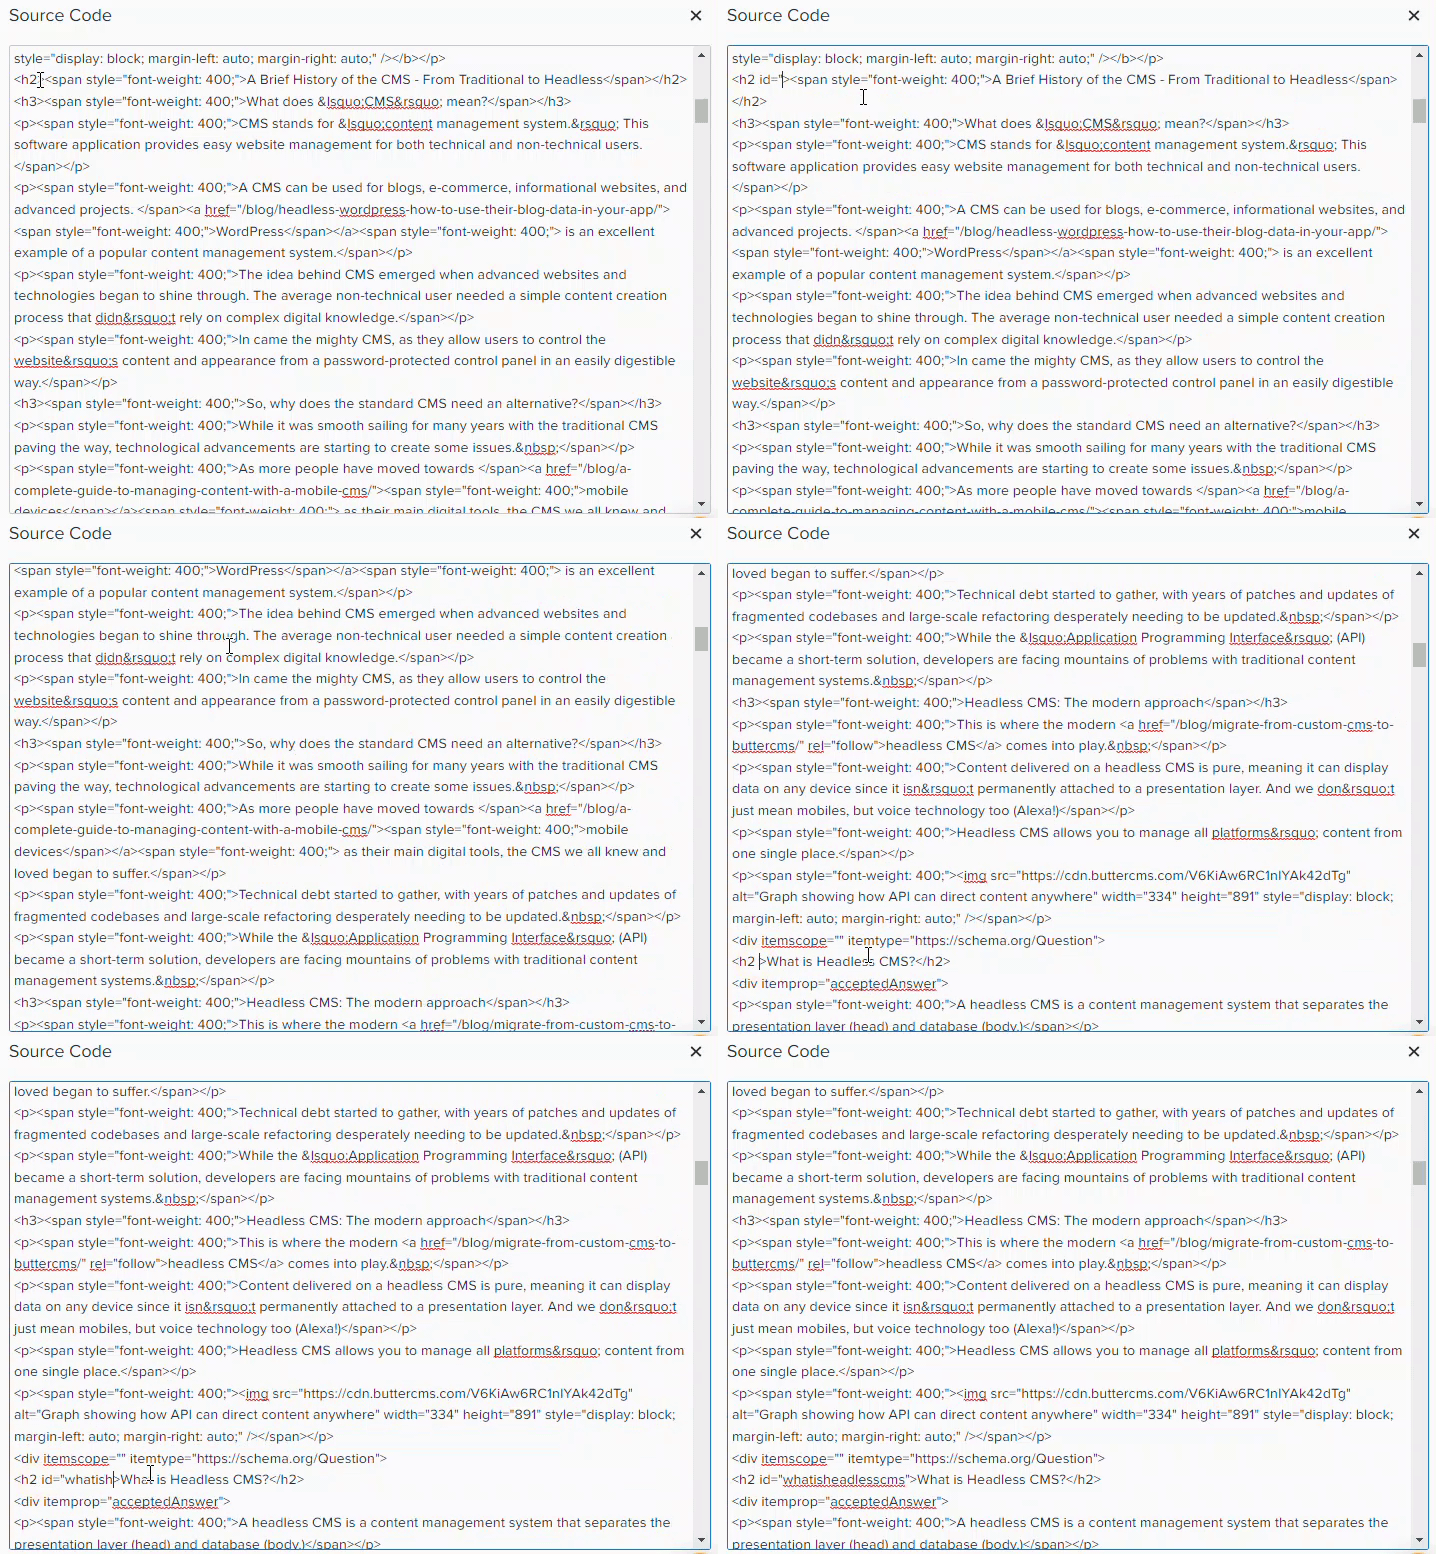
For example, change:
```html theme={null}
Getting Started
```
To:
```html theme={null}
Getting Started
```
**ID naming tips:**
* Use lowercase letters
* Replace spaces with hyphens
* Keep IDs short but descriptive
* Each ID must be unique within the page
### Step 4: Link table of contents to IDs
Now link the items on your table of contents to the IDs you just created by adding anchor links.
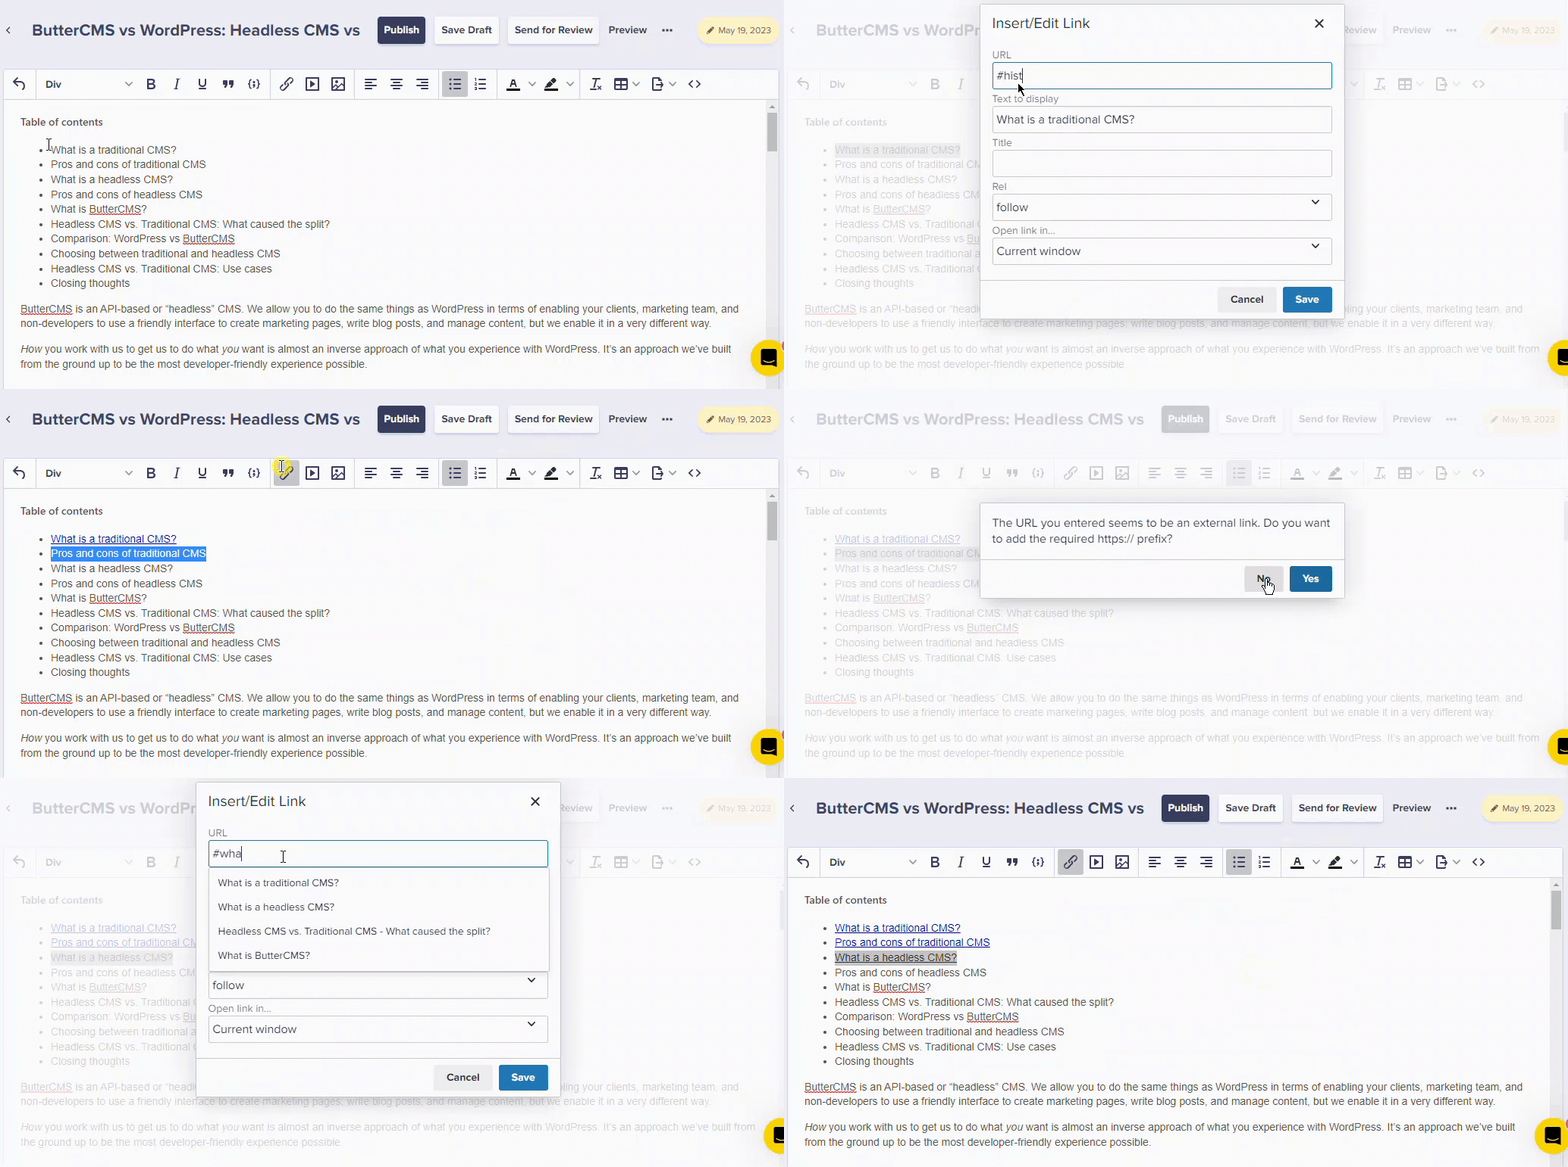
Change your list items from:
```html theme={null}
Getting Started
```
To:
```html theme={null}
Getting Started
```
The `#` symbol followed by the ID creates an anchor link that jumps to that section.
### Step 5: Verify and save
Go back to the Source Code view to check and make sure everything is linked correctly. Then save your post or publish it.
## Complete example
Here's a complete example of a blog post with a table of contents:
```html theme={null}
Welcome to our comprehensive guide. Use the table of contents below to jump to any section.
Table of Contents
Introduction
Your introduction content here...
Getting Started
Your getting started content here...
Advanced Tips
Your advanced tips content here...
Conclusion
Your conclusion content here...
```
## Best practices
### When to use a table of contents
* Long-form articles (1500+ words)
* Tutorials with multiple steps
* How-to guides
* Documentation
* Comparison posts
* Short blog posts
* News updates
* Announcements
* Single-topic posts
### Naming your anchors
| Good Practice | Example |
| ---------------------- | ---------------------------------------------------------- |
| Use descriptive names | `#how-to-install` |
| Keep it short | `#installation` not `#installation-instructions-for-users` |
| Use hyphens for spaces | `#getting-started` not `#getting_started` |
| Be consistent | All lowercase, same format |
### Structuring your content
For the best table of contents experience:
1. **Use clear headings** - Readers should understand the section from the heading alone
2. **Keep consistent depth** - Don't mix H2 and H4 without H3 in between
3. **Limit to major sections** - 5-10 items is usually ideal
4. **Update when editing** - If you change a heading, update the TOC link too
## Troubleshooting
* Check that the `id` attribute exactly matches the `href` value (minus the `#`)
* Ensure there are no spaces or special characters in the ID
* Verify the ID is unique - duplicate IDs will cause issues
* Make sure each heading has a unique ID
* Check for duplicate IDs in your Source Code
* Verify the href points to the correct ID
* The visual styling depends on your website's CSS
* Contact your developer to add styling for TOC lists
* Consider using a specific class for TOC lists
* Look for the `< >` button in the WYSIWYG toolbar
* It may be in a dropdown menu depending on your configuration
## Alternative: Using the link tool
If you prefer not to use the Source Code view, you can create anchor links using the Link tool:
1. **Add IDs via Source Code** (one-time setup for each heading)
2. **Select your TOC text** in the normal editor view
3. **Click the Link button** in the toolbar
4. **Enter the anchor link** as `#your-heading-id`
5. **Save the link**
This method still requires accessing Source Code to add the `id` attributes to headings, but the linking step can be done in the visual editor.