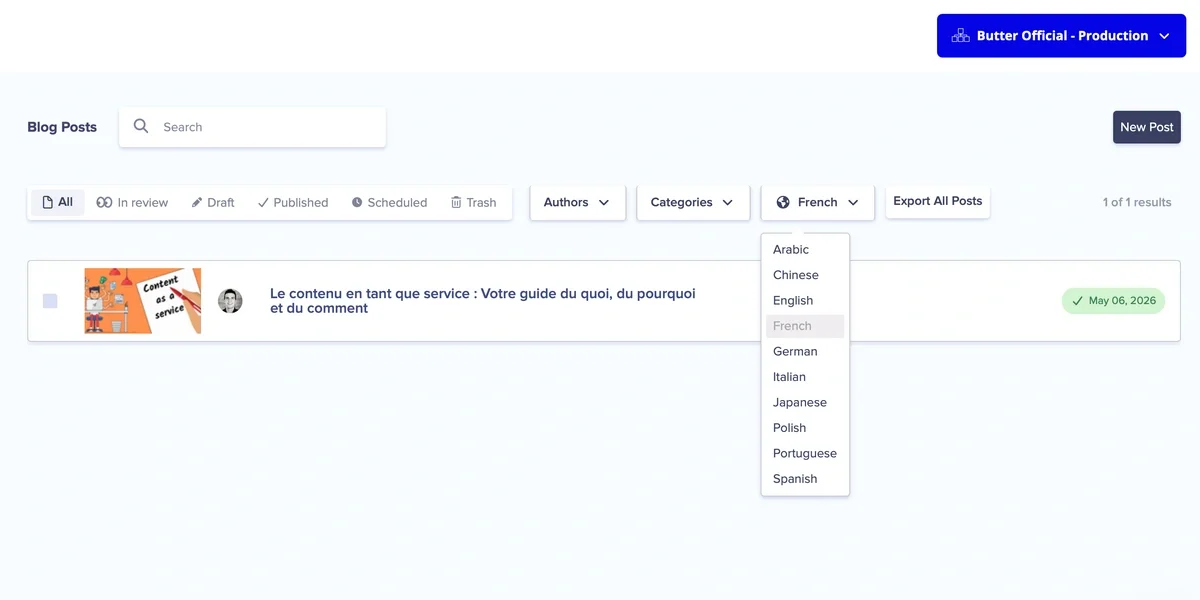
Learn how to use Blog Engine's built-in localization to create and manage translated versions of your blog posts
ButterCMS Blog Engine now includes native localization, giving teams a single place to create, manage, and publish blog content in multiple languages. Marketers can switch between languages, translate posts with AI assistance, and publish each version independently - without waiting on a developer or maintaining content in separate systems.
This article walks through how localization works in Blog Engine and how to set up and manage translations for your posts.
Localization needs to be enabled on your account before you can start adding translations. If you don't see a language selector in Blog Engine, check with your account admin or reach out to our support team to confirm it's switched on for your plan.
Once enabled, you can add any number of languages to your account from Settings → Localization. Each language you add there will become available across Blog Engine for all posts.
When localization is active, Blog Engine lets you view and manage content by language. From the Blog Engine homepage, you can use the language switcher to filter posts by a specific language - making it easy to see what's been translated, what's still in draft, and what hasn't been started yet.
Each post can have a separate version for every language your account supports. These versions are independent from one another, so translating or updating one language doesn't affect any other. You can publish each version on its own schedule.
Here's what each translated version of a post can have independently:
The post author, tags, and categories are excluded from automatic translations. They can be updated manually, if that needs to change based on language.
Open any existing post in Blog Engine. On the top you'll see a Dropdown with available locales. Click on it and select the language you want to translate into.
Integrations with DeepL and Lokalise are available to help speed up translation. These integrations let you send content for translation and bring it back into Butter without leaving the platform. If you're not sure whether these are enabled on your account, check with your admin
The editing experience is the same as any other post in Blog Engine. Update the title, body, and summary for the language you're working in. Make sure to also fill in the SEO title and meta description fields - these are what search engines in that language will pick up, so they're worth taking a few minutes to get right.
If the post uses a featured image, you can swap it for a more locally relevant one - or keep the same image across all languages. Either works.
When the translation is ready, click Publish. This only publishes the version you're currently editing - all other language versions stay in whatever state they're in. You can also save as a draft if you need another round of review first.
Back on the Blog Engine homepage, the post will now show the newly published language alongside any others. Unpublished or in-progress translations are shown as drafts so nothing goes live before it's ready.
Once your translated posts are published, the right version is automatically served to readers based on the language setting - no extra steps needed on the publishing side. If you're managing a large volume of content across many languages, the language filter on the Blog Engine homepage is a helpful way to keep track of which posts still need attention in each market.
We'd love to hear how the localization workflow is working for your team. Share feedback or suggestions through the Ideas Portal - it shapes what we build next.