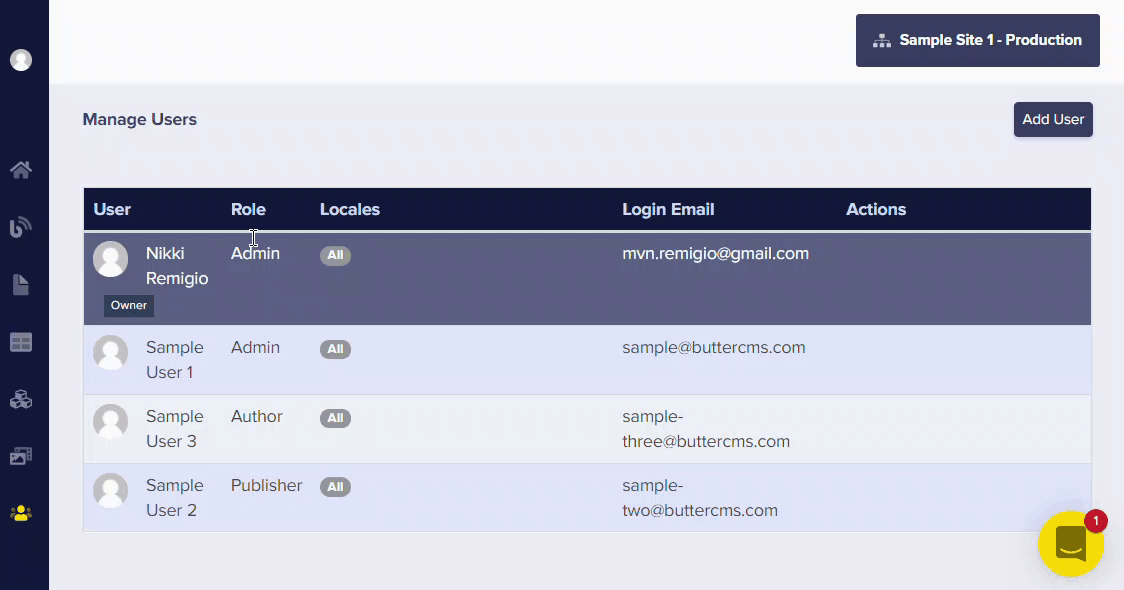
Accessing the users’ dashboard
To manage users, you must have Admin permissions, either via the default role created when you first set up ButterCMS or via a custom role defined in your organization.
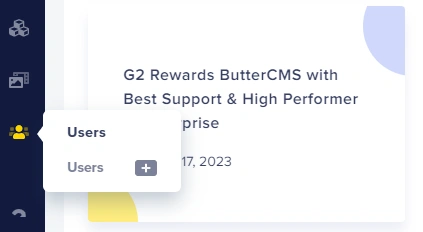
- Log in to your ButterCMS account
- Click on the Users tab in the main navigation menu
- View all team members associated with your account
 The Users dashboard allows you to access:
| Column | Description |
|---|---|
| Name | User’s display name |
| Email address used for login | |
| Role | Assigned permission role |
| Status | Active or pending invitation |
| Last Activity | When the user last logged in |
| Actions | Edit or delete options |
Adding team members
The invitation process
When you follow the steps below to add a user to your organization, they’ll be added in pending status. They’ll also receive an invitation email that includes a link to accept to their invitation, which will expire after a set period (typically 7 days). There are two ways to add a user: through the standard invitation process, or through the bulk invitation flow, which lets you add multiple users at once.Adding a single user: Standard flow
The standard flow allows you to add your user to your organization, choose their role, update their profile (optional), and set any configuration needed for access to sites or locales.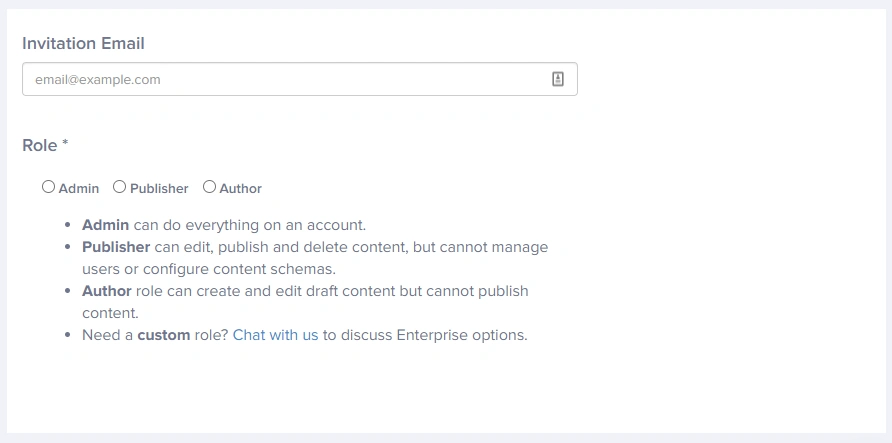
Optional: Select options for enterprise accounts.
ButterCMS does not have environment-level permission restrictions for users at this time; only site-level permissions apply, meaning a user’s access to a specific site affects all environments within that site.
- A checkbox granting the user the multisite admin role permissions.
- Checkboxes for the sites you want this new user to have access to
 3. Checkboxes for the locales you want the user to have access to.
Locales are set on a per-environment level. This means, for example, you could have a Production environment
with locales A and B, and a Staging environment with locales B and C.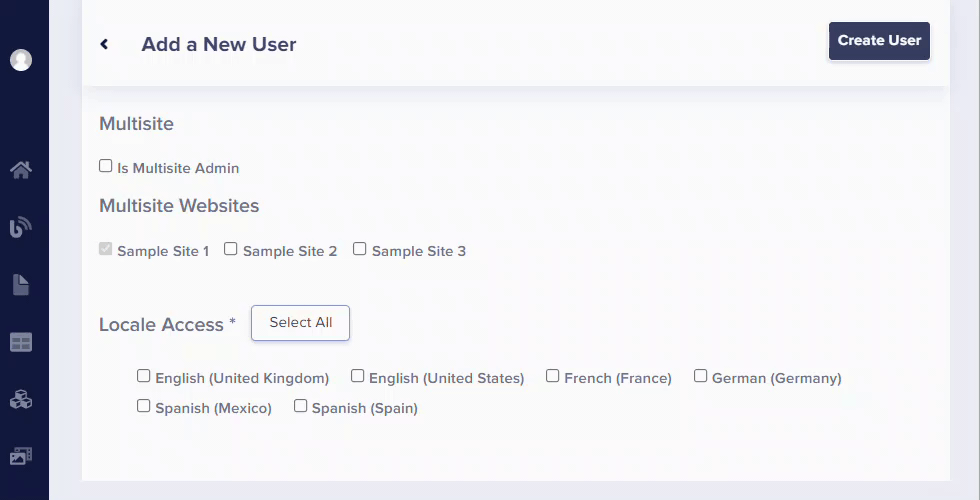 The locales you see reflected in the Users dashboard, and the access granted by checking them, only apply to the environment you are currently logged into. So, for the above example, an admin logged into the Production environment would only see locale checkboxes “A” and “B”.To update the user’s locale access in the Staging environment, the admin would need to switch environments to Staging first, then see the locale checkboxes for “B” and “C”.
The locales you see reflected in the Users dashboard, and the access granted by checking them, only apply to the environment you are currently logged into. So, for the above example, an admin logged into the Production environment would only see locale checkboxes “A” and “B”.To update the user’s locale access in the Staging environment, the admin would need to switch environments to Staging first, then see the locale checkboxes for “B” and “C”.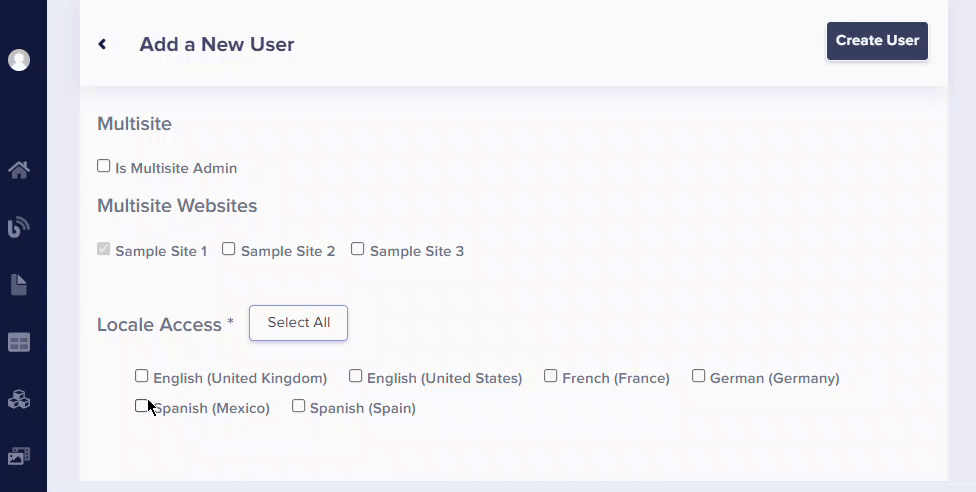
Bulk invitation flow
Multiple users can be added at once via the bulk invitation flow.
Re-sending invitations
You can resend the invitation email for users in a pending status from your User dashboard. Just click the Resend Invitation button.Troubleshooting invitations
User didn't receive invitation
User didn't receive invitation
Possible causes:
- Email went to spam/junk folder
- Email address was mistyped
- Corporate email filter blocked it
- Ask user to check spam folder
- Verify the email address in the Users list
- Resend the invitation
- Have IT whitelist buttercms.com emails
User can't accept invitation
User can't accept invitation
Possible causes:
- Invitation link expired
- User already has a ButterCMS account
- SSO misconfiguration
- Resend a fresh invitation
- Check if user needs their other account deleted
- Contact ButterCMS support for SSO issues
User has wrong permissions after joining
User has wrong permissions after joining
Solution:
- Go to the Users tab
- Click on the user’s profile
- Change their role or permissions
- Click Update User
Editing team members
You must have admin permissions to modify users. Click on any user in your user dashboard to access their profile. You can then update the user, including any biographical information, social profiles, roles, email address, site access, or locale access.Removing team members
There are two different methods to delete team members, depending on whether your organization is a single-site or multi-site organization.Single-site organizations
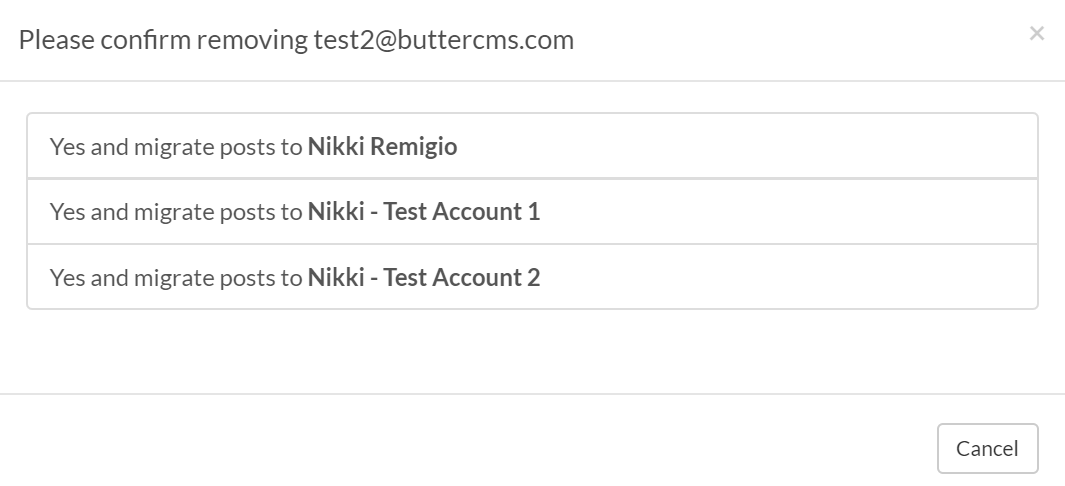
An admin can delete a user from a single-site organization by clicking on the Delete User button in the Users dashboard.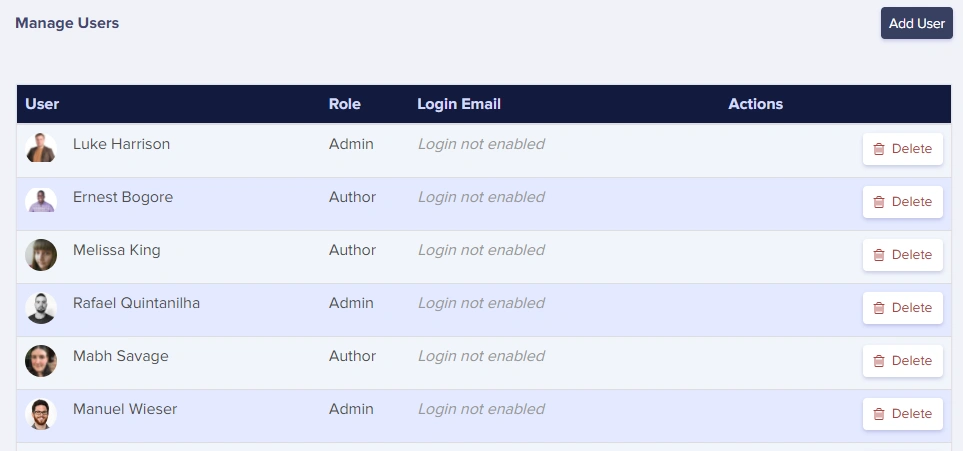 The system will prompt you to indicate which other team member should become the assigned author for any Post or Page content. The dialog looks like this:
Multi-site organizations
You cannot delete the account owner until ownership is transferred to another user. For details on account ownership and how to transfer it, see Account Ownership.