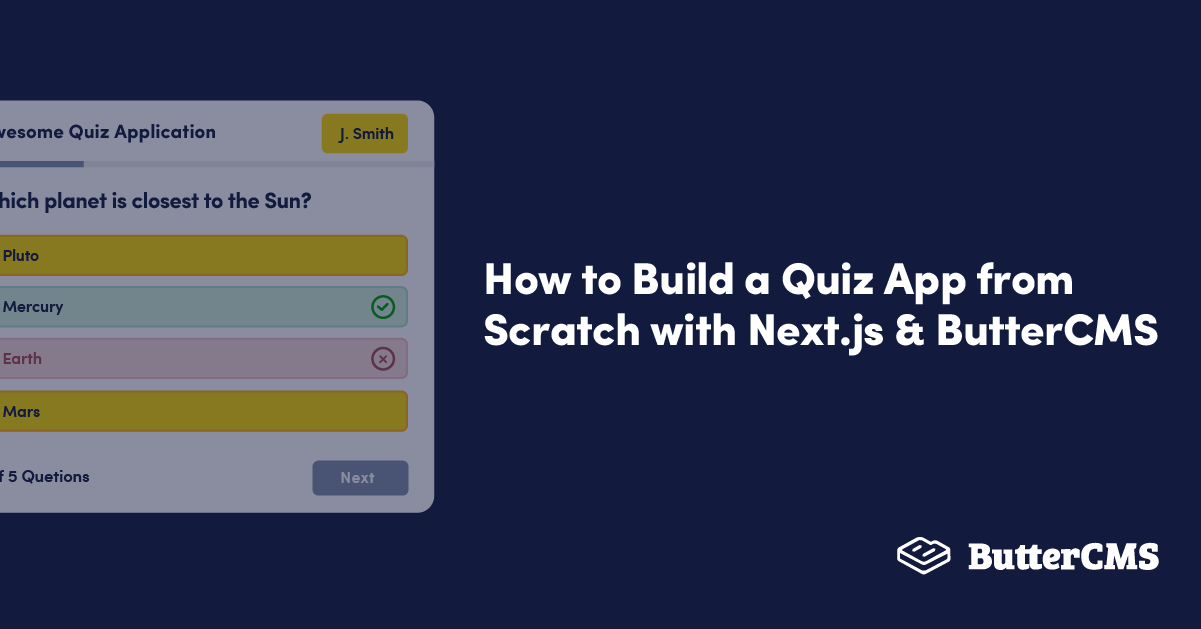
A quiz is a brief knowledge test with about ten or fewer questions that frequently use multiple-choice, fill-in-the-blanks, true/false, and short-answer formats. Over time, quizzes have proven to be fun and helpful in making people concentrate better, learn new things, and retain information. Even as a developer, taking development quizzes now and then can help test your knowledge of a programming language or a tech stack or even sharpen your abilities as a developer.
With ButterCMS, building a quiz app has never been easier.
In this tutorial, we will demonstrate ButterCMS in action by working on a quiz application. We will build the front end of our application with Next.js, style with Tailwind CSS, create and store potential quiz questions on ButterCMS, and connect our Next.js app to our CMS.
Why use Next.js?
Next.js is an open-source JavaScript framework created by Vercel. It allows developers to build fast and user-friendly web applications. Some advantages include:
- Development experience: Next.js provides the best development experience and all the production-ready features a developer wants, like TypeScript support, smart bundling, route pre-fetching, and hybrid, static, and server rendering. The good thing is there is no configuration required to get started, making it easier for us to start building our quiz application.
- Automatic code splitting: Next.js loads only the JavaScript and CSS required for any particular page. As a result, users' browsers don't have to download JavaScript and CSS that are unnecessary for the particular page they are viewing, which results in significantly faster page loading speeds. This improves the performance of our quiz, as the next page after answering a question comes up quickly.
- Community support: Both the user base and contributor base are expanding. Thanks to that, developers can find existing solutions rather than starting from scratch. If there is a problem while building our quiz, there is a large Next.js community that can help with solutions to the problem.
- Zero Configuration: Next.js offers automatic compilation and bundling. Therefore, it is optimized for production from the beginning. You do not need to make any major configurations before getting started with building the quiz.
- Middleware: Code can be executed before a request is completed thanks to Next.js’s support for the usage of code over configuration. Request responses can be modified and the user can be redirected from one route to another.
Experience ButterCMS: Start a Free 14-day trial and follow along with this tutorial!
Start free trial
Why use ButterCMS?
ButterCMS is a headless content management system (CMS) and blog engine that easily integrates into any new or existing web project within minutes.
The ButterCMS Content API is blazingly fast and integrates into any tech stack. For example, we are using Next.js for our project, but we could easily use React or Vue if we wanted. Since ButterCMS is a SaaS CMS, there are no security patches and maintenance hassles, which makes developers love ButterCMS.
Marketers love ButterCMS because, from a single location, our recognizable, simple-to-use content dashboard gives them complete creative control over even the most intricate and segmented content. Some advantages include:
- Creating and showing content anywhere: Without having to worry about displaying their content on various channels or any other technical details, marketers can concentrate on creating content. An easy-to-use text editor is already included with ButterCMS and is available for use right out of the box. Additionally, developers can set up different components, content fields, and page types for marketers to use and iterate upon without further assistance, as shown in this article, while building our application.
- Reduced costs: ButterCMS lets developers build web applications at reduced costs. For example, in our quiz, we do not need to invest any money on a large database, search engine, or background job processing software.
- Faster workflows: ButterCMS enables your content creators and developers to complete their tasks concurrently without needing to share or clog each other's resources. That speeds up the process of launching or marketing your application.
- Flexibility: Developers are not hindered by limitations or a lack of knowledge of a specific programming language. Developers can use the knowledge and tools they are currently familiar with to build interfaces and functional applications with ButterCMS, just as we will do with Next.js for our quiz app. You could just as easily be using React instead.
Building a quiz app from scratch: Tutorial prerequisites
To follow along with this tutorial, some prerequisites include:
- Basic knowledge of React and APIs
- A ButterCMS trial account
You can find the code for this tutorial in this GitHub repo.
Setting up ButterCMS
To make use of ButterCMS, you will require a user account. If you do not already have one, you can navigate in your browser to the ButterCMS webpage, create a user account, and log in. Upon logging in, you will arrive at your user dashboard:
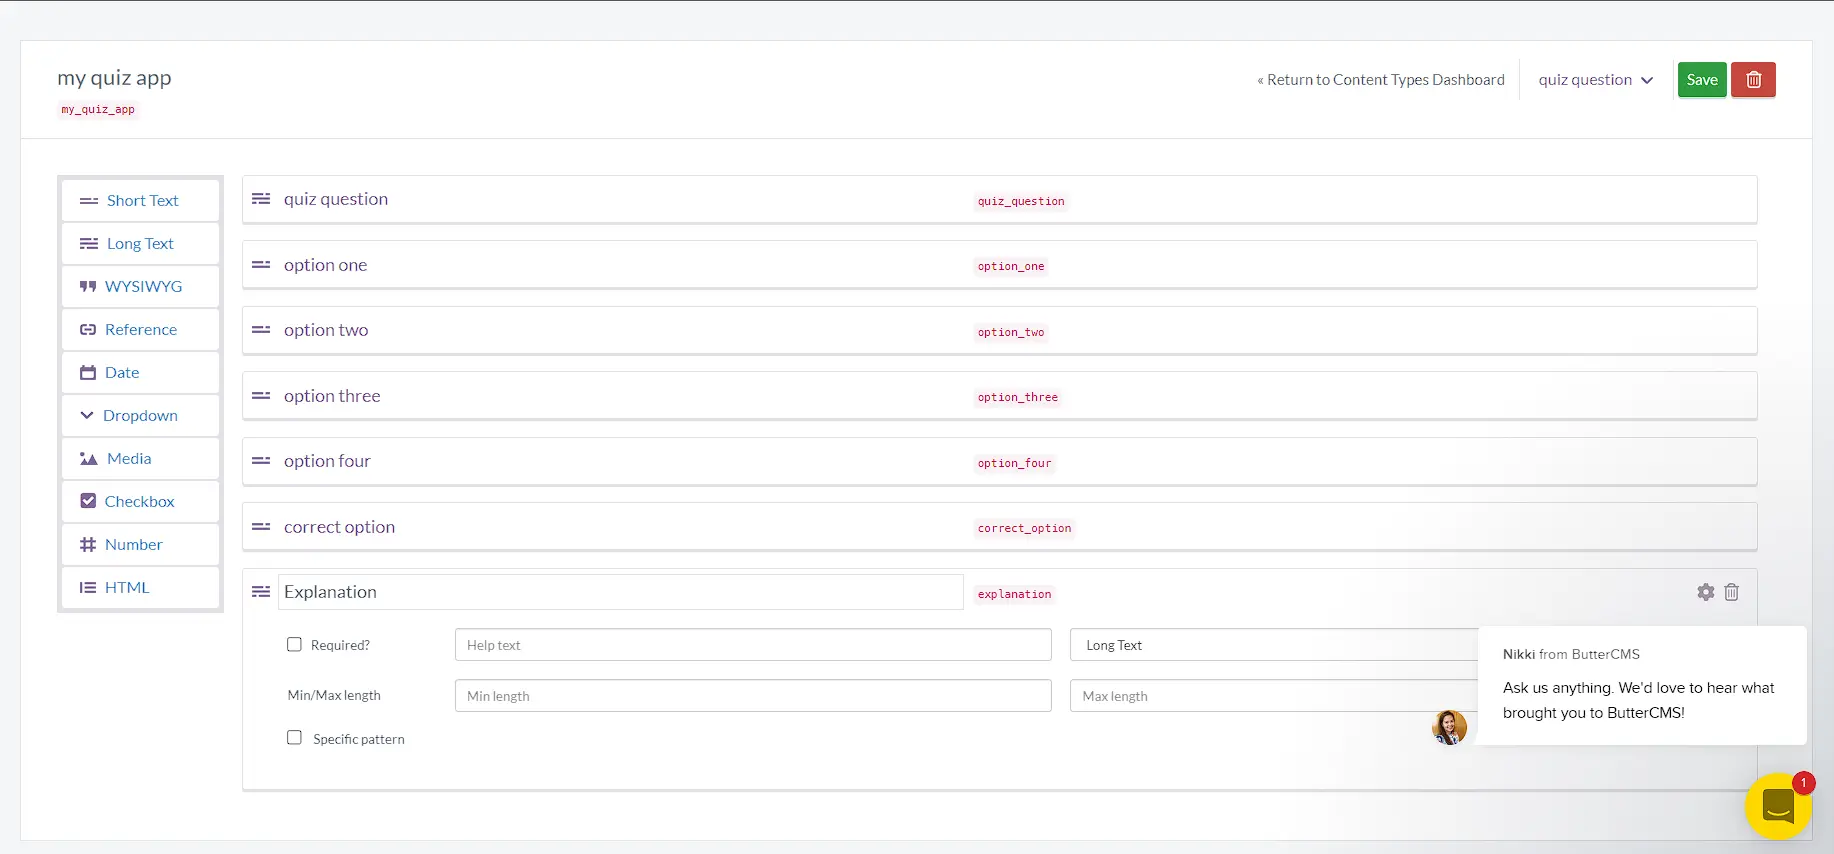
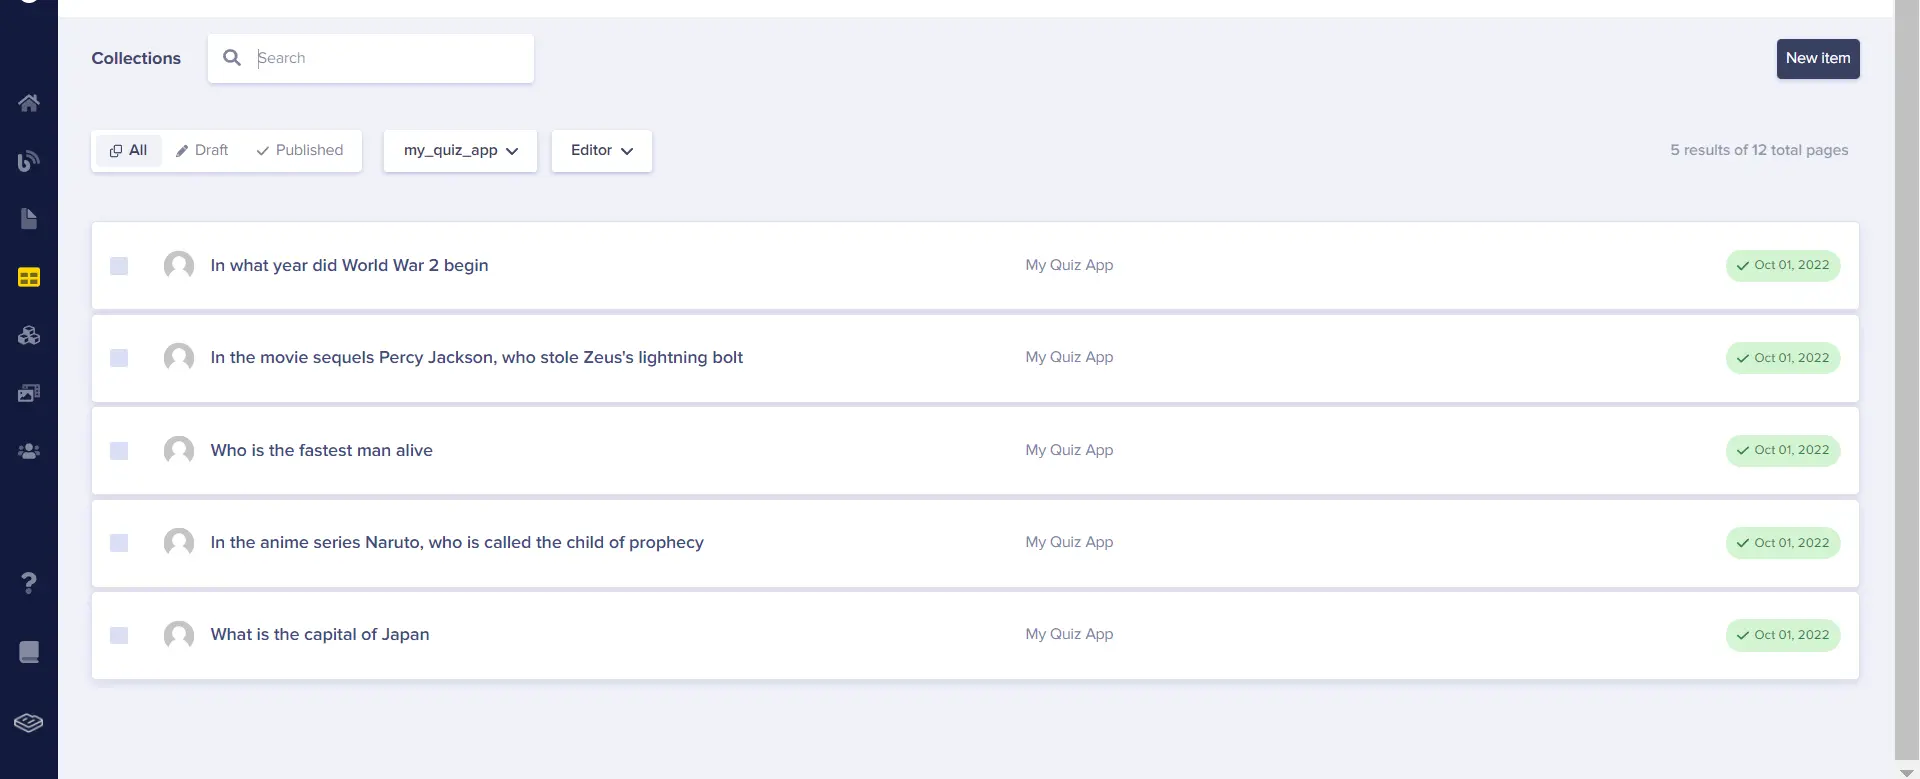
From the left side navigation menu, click on collections. We will create a new collection that will contain the following fields:
- A “long text” field for the quiz question
- Four “short text” fields for the available options
- A “short text” field for the correct option
- A “long text” field containing a short explanation of the correct answer
On the collection page, click on the New Item button and create a collection called my quiz app with the above-named fields.
Upon creating the collection, we get a new page asking us to make our first entry to it. Here, fill in the fields for the question, options, correct answer, and explanation as shown in the GIF below:
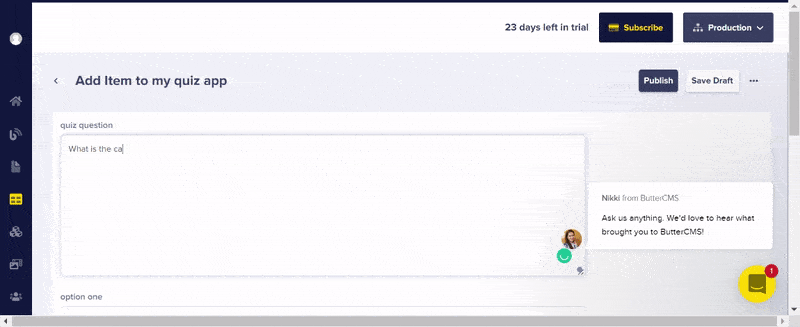
After filling in the fields, click on the Publish button to save the entry to the collection. Similarly, create 4 additional entries, making a total of 5 items in the quiz collection.
Installing dependencies
To build the front-end interface of our quiz application, we will be using the Next.js framework. To create a Next.js application, do the following:
Open up a command-line interface in a directory of your choice, and enter the following command:
npx create-next-app quizapp
The above command creates a new Next application called quizapp. To easily perform API requests between our application and ButterCMS, we will be using Axios. This can be installed with the following command:
npm install axios
To easily style our application, we will be making use of Tailwind CSS, which can be installed as follows:
npm install -D tailwindcss postcss autoprefixer
npx tailwindcss init -p
Once the installation is complete, open up the application’s directory in your code editor and modify the tailwind.config.js as shown below:
module.exports = {
content: [
"./pages/**/*.{js,ts,jsx,tsx}",
"./components/**/*.{js,ts,jsx,tsx}",
],
theme: {
extend: {},
},
plugins: [],
}
Our quiz application will consist of two major pages: a landing page providing the user the option to begin the quiz and a page presenting the quiz questions to the user.
Building the front-end of our quiz application
To get started, open the index.js file and replace the starter code in it with the following:
import React from "react"
import Quizselection from "../components/Quizselection"
export default function Home() {
  return (
    <div>
      <Quizselection/>
    </div>
  )
}
To create the Quizselection component, in your project directory, create a folder called components and a file within it called Quizselection.jsx. In this file, add the following code:
import { React } from "react";
import Link from "next/link";
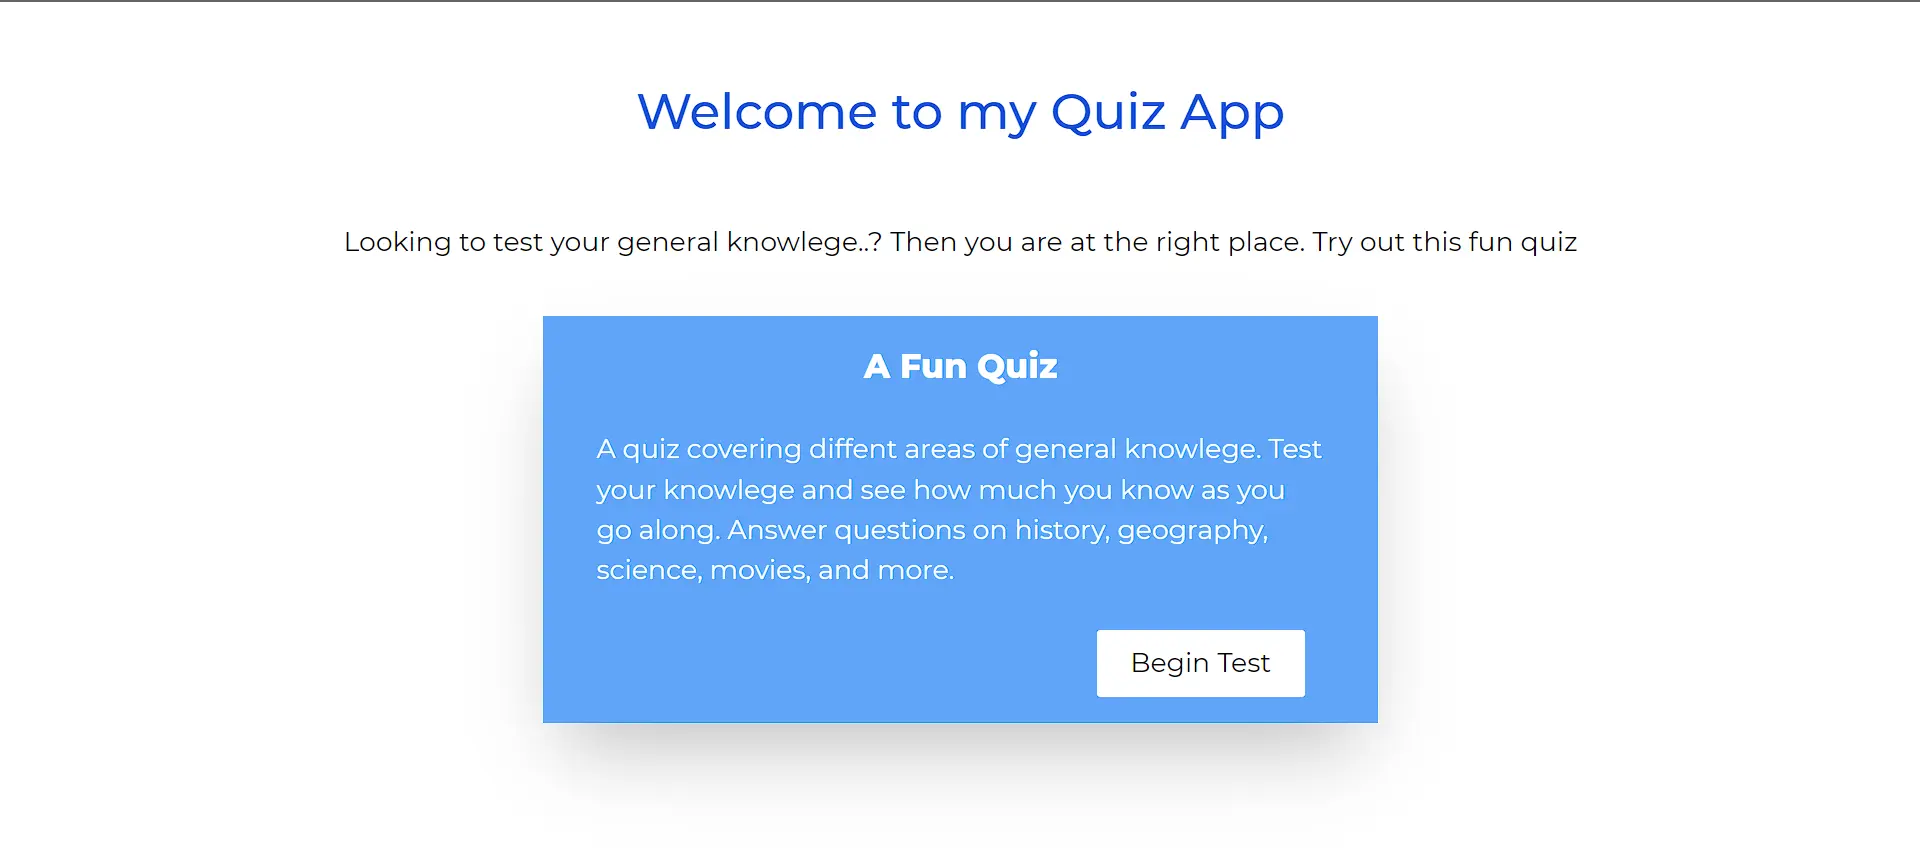
const Quizselection = () => {
return (
<div className=" pt-6">
<h1 className=" text-blue-700 text-center text-3xl font-medium my-6 ">
Welcome to my Quiz App
</h1>
<p className=" text-center mt-12 mb-8 ">
Looking to test your general knowledge..? Then you are at the right
place. Try out this fun quiz!
</p>
<div className=" flex justify-center items-center">
<div className=" w-[500px] px-8 py-4 shadow-2xl bg-blue-400 text-white flex justify-center items-center flex-col gap-6 ">
<h1 className=" font-extrabold text-xl ">A Fun Quiz</h1>
<p>
A quiz covering different areas of general knowledge. Test your
knowledge and see how much you know as you go along. Answer
questions on history, geography, science, movies, and more.
</p>
<div className="w-full flex justify-end pr-3">
<button className=" bg-white px-5 py-2 rounded-sm text-black hover:cursor-pointer ">
<Link href="/test" >Begin Test</Link>
</button>
</div>
</div>
</div>
</div>
);
};
export default Quizselection;
In the code block above, we have a simple page with a button leading to the /test route, where our quiz will take place.
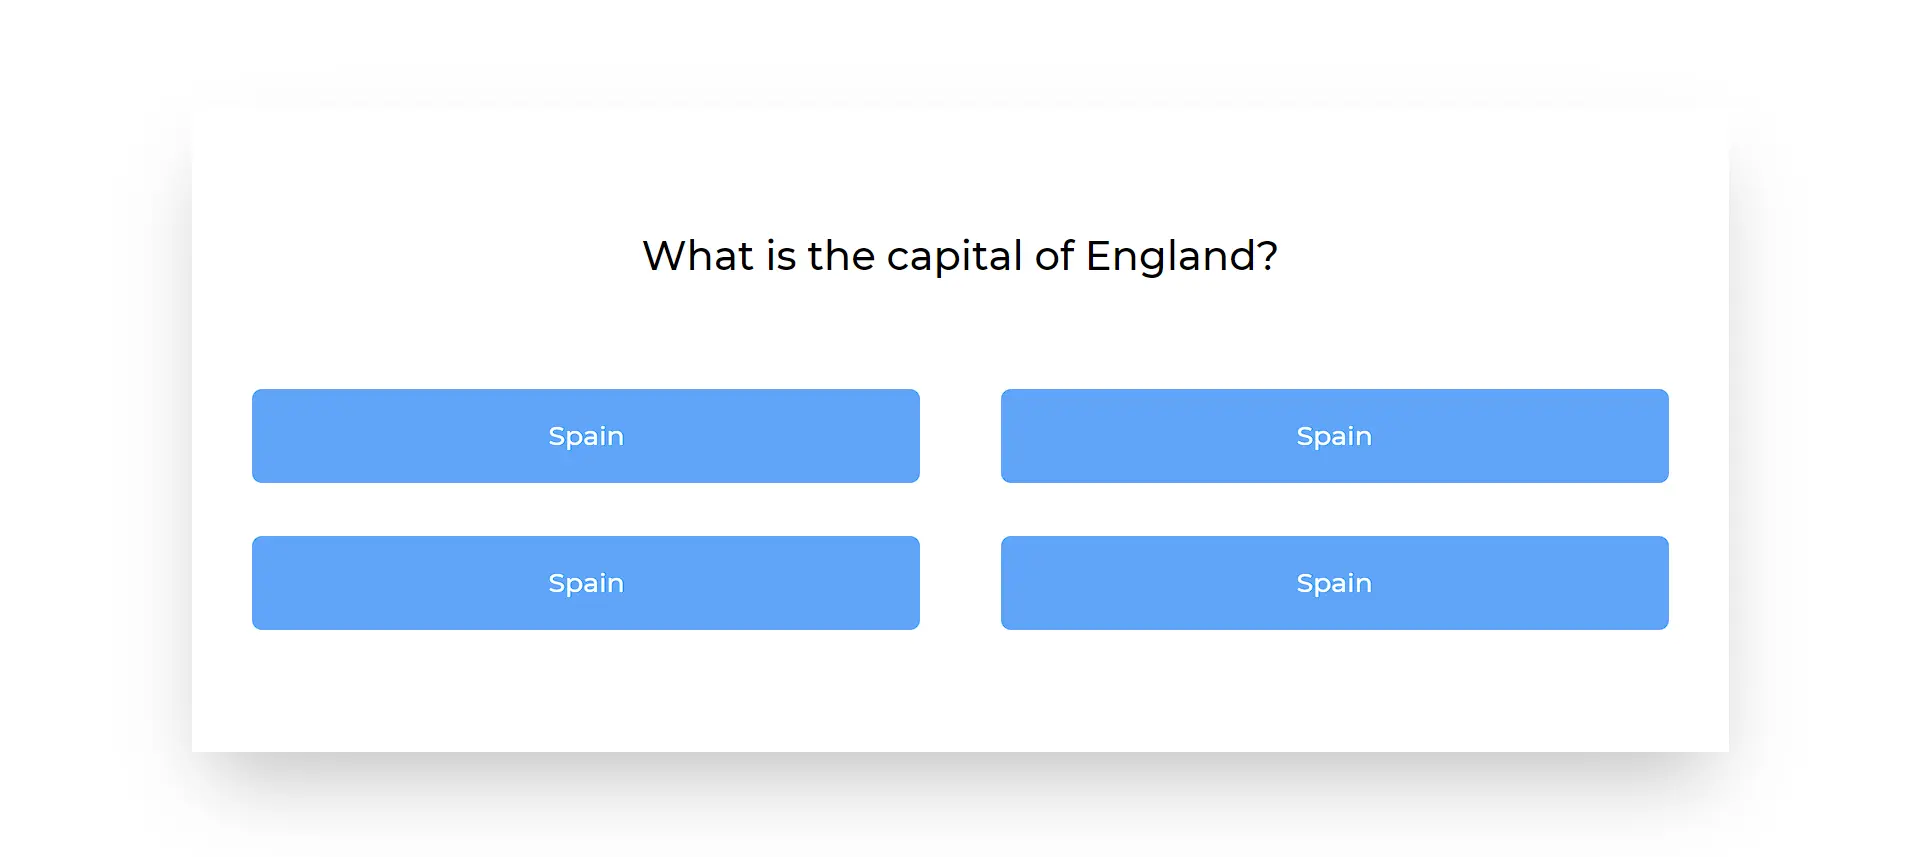
For the test page, in the pages folder, create a new folder test and add a file index.js to it. This will serve as our page to display the quiz questions to our users. Add the following code to this file:
import { React, useState, useEffect } from "react";
import Link from "next/link";

const Index = () => {
  const [isQuestionAnswered, setIsQuestionAnswered] = useState(false);
  return (
    <div className="h-screen w-full flex justify-center items-center ">
      <div className="w-4/5 h-3/4 shadow-2xl flex flex-col justify-center items-center font-medium gap-16 ">
        <h1 className="text-2xl">What is the capital of England?</h1>
        <div className=" grid grid-cols-2 gap-8 gap-x-12 ">
          {/* options */}
          <div className=" w-[400px] rounded-md flex justify-center items-center py-4 text-white bg-blue-400 hover:cursor-pointer hover:bg-blue-600">
            Spain
          </div>
          <div className=" w-[400px] rounded-md flex justify-center items-center py-4 text-white bg-blue-400 hover:cursor-pointer hover:bg-blue-600">
            Spain
          </div>
          <div className=" w-[400px] rounded-md flex justify-center items-center py-4 text-white bg-blue-400 hover:cursor-pointer hover:bg-blue-600">
            Spain
          </div>
          <div className=" w-[400px] rounded-md flex justify-center items-center py-4 text-white bg-blue-400 hover:cursor-pointer hover:bg-blue-600">
            Spain
          </div>
        </div>
        {isQuestionAnswered? (
        <div className=" w-full px-2 ">
          <p className=" max-h-[100px] overflow-y-scroll ">
           {/* correct answer explanation here */}
          </p>
        </div>
        ):null}
      </div>
    </div>
  );
};
export default Index;
Now, if we run our code with the npm run dev command, we will get the following results in our browser:
As for the /test route, we have:
Connecting our application to ButterCMS
To connect our application to ButterCMS, we will require the Read API token which can be found in the Settings tab of your ButterCMS account. Copy and paste this key into a .env file, saving it in a variable called REACT_APP_READ_TOKEN. In the index.js file in the test folder, and make the following modifications:
import axios from "axios";
const Index = () => {
const [isQuestionAnswered, setIsQuestionAnswered] = useState(false);
const [questionLength, setQuestionLength] = useState(0);
const [questionNumber, setQuestionNumber] = useState(0);
const [totalScore, setTotalScore] = useState(0);
const [quizQuestions, setQuizQuestions] = useState([]);
const read_token = process.env.REACT_APP_READ_TOKEN;
useEffect(() => {
const fetchData = async () => {
const result = await axios(
`https:
);
setQuizQuestions(result.data.data.my_quiz_app);
setQuestionLength(result.data.data.my_quiz_app.length);
};
fetchData()
}, []);
Here, we created a fetch request to our my quiz app collection and stored the returned data in the quizQuestions state. We have added states for question length, score, and the number of the current question. We will be making use of all three states as we proceed with this tutorial.
Experience ButterCMS: Start a Free 14-day trial and follow along with this tutorial!
Start free trial
Adding functionality to the quiz questions
Reading data from ButterCMS
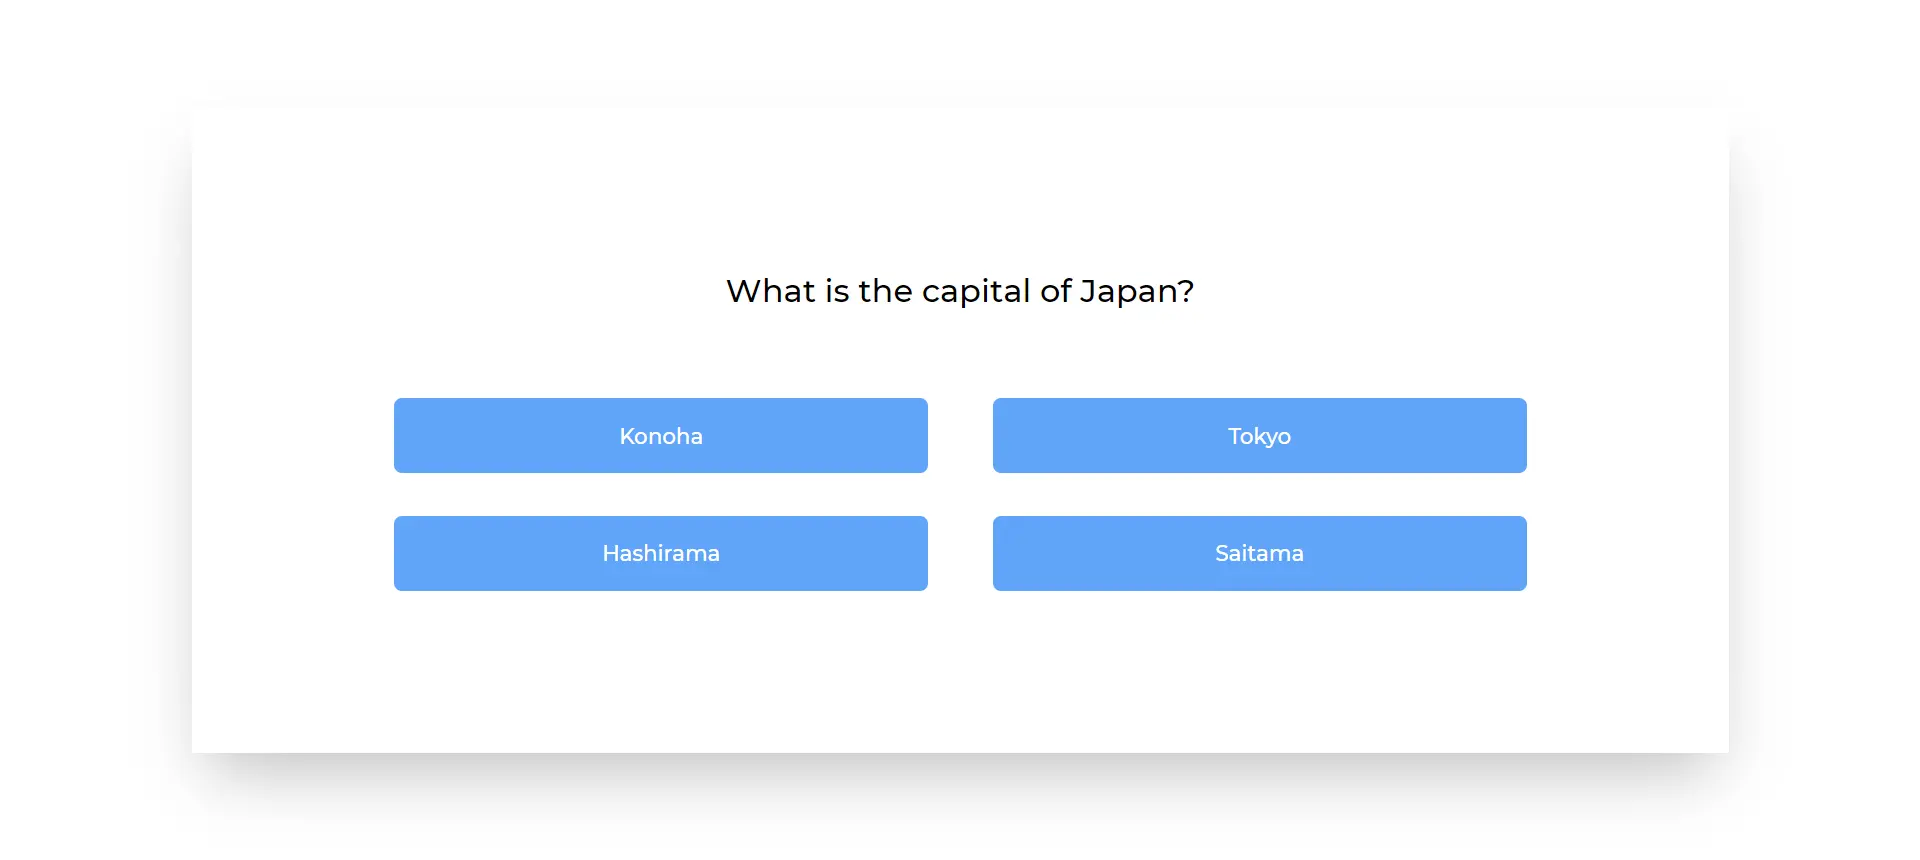
With the data containing our quiz questions fetched from ButterCMS, we can proceed to return these questions in our application as follows:
//...
 <h1 className="text-2xl">{quizQuestions[questionNumber]?.quiz_question}?</h1>
  <div className=" grid grid-cols-2 gap-8 gap-x-12 ">
    {/* options */}
    <div className=" w-[400px] rounded-md flex justify-center items-center py-4 text-white bg-blue-400 hover:cursor-pointer hover:bg-blue-600">
      {quizQuestions[questionNumber]?.option_one}
    </div>
    <div className=" w-[400px] rounded-md flex justify-center items-center py-4 text-white bg-blue-400 hover:cursor-pointer hover:bg-blue-600">
    {quizQuestions[questionNumber]?.option_two}
    </div>
    <div className=" w-[400px] rounded-md flex justify-center items-center py-4 text-white bg-blue-400 hover:cursor-pointer hover:bg-blue-600">
    {quizQuestions[questionNumber]?.option_three}
    </div>
    <div className=" w-[400px] rounded-md flex justify-center items-center py-4 text-white bg-blue-400 hover:cursor-pointer hover:bg-blue-600">
    {quizQuestions[questionNumber]?.option_four}
    </div>
  </div>
  {isQuestionAnswered ? (
    <div className=" w-full px-2 ">
      <p className=" max-h-[100px] overflow-y-scroll ">
        {/* correct answer explanation here */}
        {quizQuestions[questionNumber]?.explanation}
      </p>
    </div>
  ) : null}
See the result below:
Adding answering functionality to our application
Next, we will need a feature to take in the user’s answer choice when they click on any of the four option choices. To do this, we will add an onClick handler to the four options which will run a function handleChoice():
//...four options
 {/* options */}
<div className=" w-[400px] rounded-md flex justify-center items-center py-4 text-white bg-blue-400 hover:cursor-pointer hover:bg-blue-600" onClick={()=>handleChoice(quizQuestions[questionNumber]?.option_one)} >
  {quizQuestions[questionNumber]?.option_one}
</div>
<div className=" w-[400px] rounded-md flex justify-center items-center py-4 text-white bg-blue-400 hover:cursor-pointer hover:bg-blue-600" onClick={()=>handleChoice(quizQuestions[questionNumber]?.option_two)} >
{quizQuestions[questionNumber]?.option_two}
</div>
<div className=" w-[400px] rounded-md flex justify-center items-center py-4 text-white bg-blue-400 hover:cursor-pointer hover:bg-blue-600" onClick={()=>handleChoice(quizQuestions[questionNumber]?.option_three)} >
{quizQuestions[questionNumber]?.option_three}
</div>
<div className=" w-[400px] rounded-md flex justify-center items-center py-4 text-white bg-blue-400 hover:cursor-pointer hover:bg-blue-600" onClick={()=>handleChoice(quizQuestions[questionNumber]?.option_four)} >
{quizQuestions[questionNumber]?.option_four}
</div>
Here, we added the handleChoice() function to the click event handler and passed in the chosen option as an argument to it. Create the handleChoice() function with the following:
const handleChoice = (choice) => {
    if (choice === quizQuestions[questionNumber]?.correct_option && !isQuestionAnswered) {
      setIsQuestionAnswered(true);
      setTotalScore(totalScore + 1);
      alert("You got it correctly");
    } else if (choice !== quizQuestions[questionNumber]?.correct_option && !isQuestionAnswered) {
      setIsQuestionAnswered(true);
      alert("Oops, you got it wrong");
    }
    else{
      alert("You have already answered this question");
    }
  };
//return statement below
With this, whenever the user selects an option, the question explanation is shown, and they are told if they got the answer right or not. Now, we just need to add a button to move our quiz to the next question. We can add this below our last option:
//four options above
{isQuestionAnswered? (<button className=" bg-gray-900 px-3 py-2 w-max text-white " onClick={()=>{
    setQuestionNumber(questionNumber+1)
    setIsQuestionAnswered(false)
  }} >NextQuestion</button>):null}
The code above checks if the question has been answered. If this returns true, it increments the value of the questionNumber state by 1, taking our quiz to the next question. The value of the isQuestionAnswered state is also set to false to hide the question explanation for the next quiz question.
See the results below:
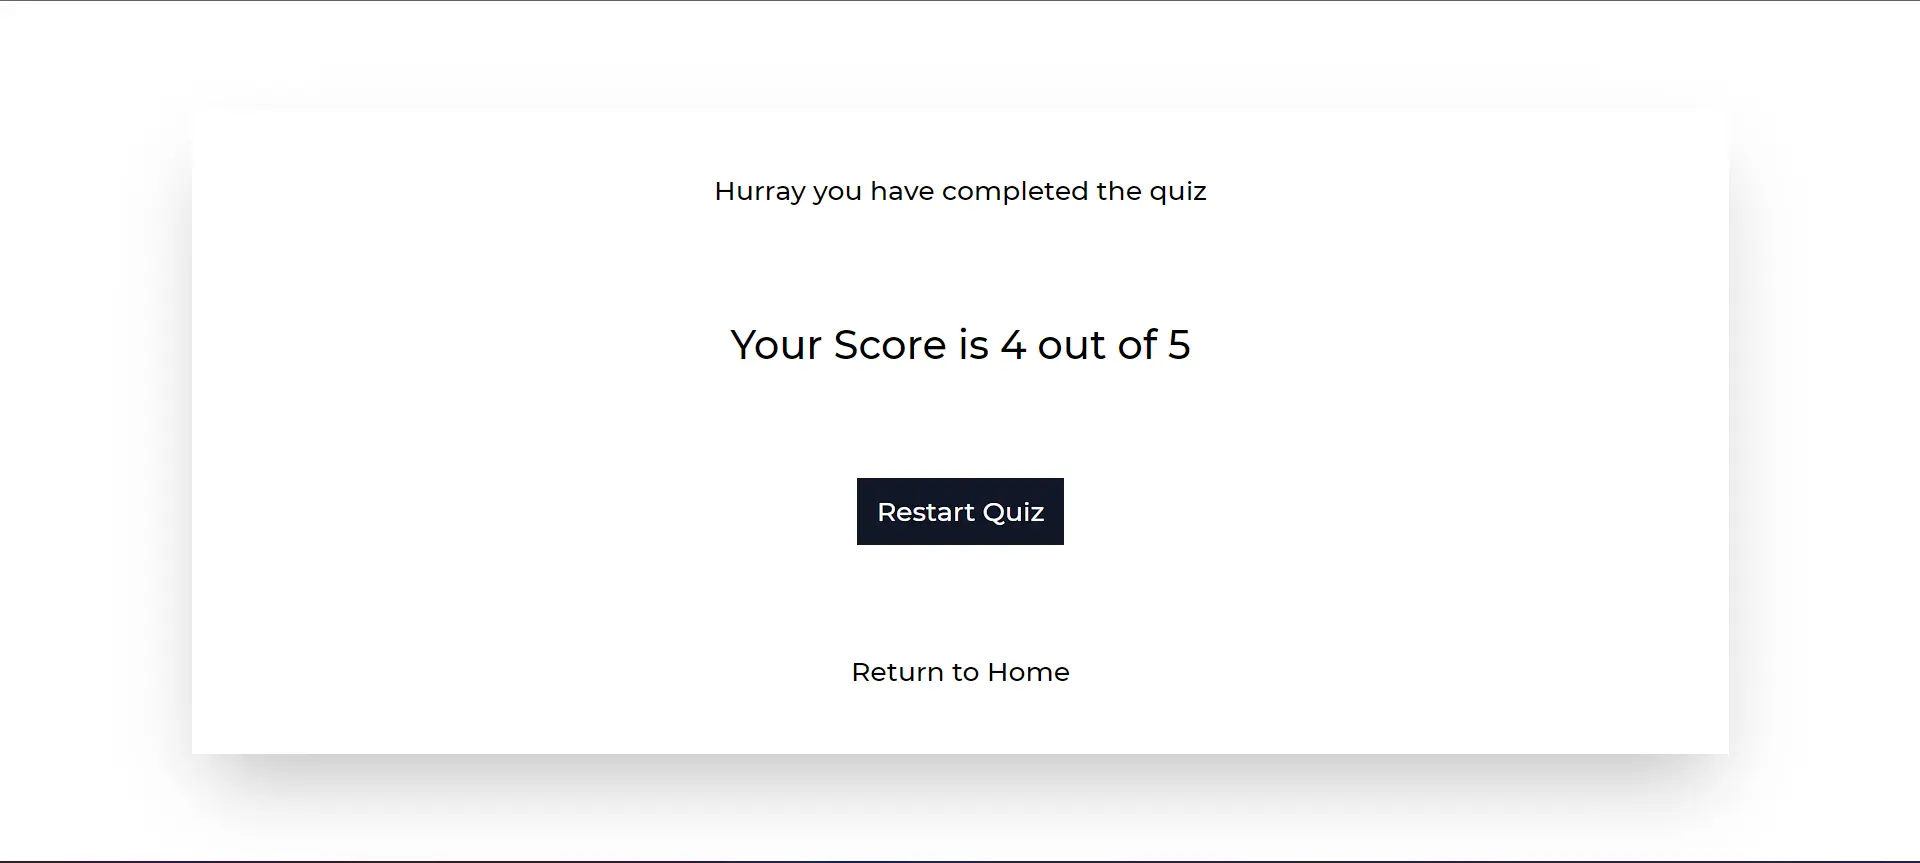
Ending the quiz
With our next button added, eventually the user will get to the end where there won’t be a “next question”. When this happens, we want to present them with an end quiz text along with their score instead. To do this, we will create a new state called endQuiz with an initial value of false. We will use a ternary operator to return our quiz if endQuiz is false, and the user’s result if endQuiz is true. The endQuiz state will be set to true when the questionNumber state is greater than the questionLength returned from our ButterCMS collection.
const [quizEnded, setQuizEnded] = useState(false);
And for our Return() block:
<>
      <div className="h-screen w-full flex justify-center items-center ">
        {!quizEnded ? (
          // quiz code block here
 ) : (
  <div className="w-4/5 min-h-[75%] shadow-2xl flex flex-col justify-center items-center font-medium gap-16 ">
    <h1>Hurray, you have completed the quiz!</h1>
    <h1 className="text-2xl">Your score is {totalScore} out of {questionLength}</h1>
    <button
      className=" bg-gray-900 px-3 py-2 w-max text-white "
      onClick={() => {
        setQuestionNumber(0);
        setQuizEnded(false);
        setTotalScore(0);
      }}
    >
      Restart Quiz
    </button>
    <Link href="/" >Return to Home</Link>
  </div>
)}
In the code block above, we have the score display at the end of the quiz. We also have two buttons: one to restart the quiz and another to return to the home page of our application. Finally, to set the quizEnded state to true to trigger the end of our quiz, modify the code in the Next button as shown below:
{isQuestionAnswered ? (
  <button
    className=" bg-gray-900 px-3 py-2 w-max text-white "
    onClick={() => {
      if (questionNumber + 1 === questionLength) {
        setQuizEnded(true);
      }
      else{
      setQuestionNumber(questionNumber + 1);
      }
      setIsQuestionAnswered(false);
    }}
  >
    NextQuestion
  </button>
) : null}
Now, if we run our application we will get the following result:
Upon completing the quiz, we are presented with the following page:
Closing thoughts
In this tutorial, we built a quiz application using Next.js and ButterCMS, and if you have followed this tutorial to the end, congratulations!! You've just built a quiz app with ButterCMS. We also made use of Tailwind CSS to style our beautiful application. Then, we installed Axios to easily perform API requests between our application and ButterCMS. This project can be further improved by adding different categories of quiz questions, user logins, and leaderboards.