- Understanding Astro
- How to use ButterCMS to power your knowledge base
- Tutorial prerequisites
- Configuring knowledge base content types in ButterCMS
- Adding your knowledge base content to ButterCMS
- Obtaining the Read API Token
- Setting up Astro
- Building out the knowledge base
- Creating pages
- Deploying to Netlify
- Final results
- Closing thoughts
It’s important to have a knowledge base that allows users to instantly access answers, guides, help articles, or product docs whenever they need them. It saves time for your support team and gives users a smooth self-service experience.
In this piece, we’ll show you how to build a fast and flexible knowledge base using ButterCMS and Astro. Let’s get started!
Table of contents
Understanding Astro
Astro is a static site builder that helps developers create fast, modern websites. It supports popular frameworks like React, Vue, Svelte, and more, and also lets you mix standard HTML and JavaScript with these frameworks as needed.
There are various advantages of using Astro to create a knowledge base, including:
-
Quick loading time: Astro creates pre-rendered HTML pages that can be served right away, which helps pages load faster and gives users a smoother experience.
-
Flexibility: Developers can create webpages with Astro using their preferred frameworks and tools, such as Markdown, React, and Vue. It is simple to incorporate different content management systems and APIs because of this versatility.
-
Simple maintenance: Because the Astro-generated site is pre-rendered, there is no need to handle server-side rendering or maintain databases. This makes maintenance easier and lowers the possibility of mistakes.
-
SEO optimization: Astro creates optimized HTML that has the necessary metadata and other information for search engines to understand the content. This increases the effectiveness of SEO and increases website traffic.
-
Community support: Astro is backed by a vibrant developer community that is always working to advance the framework. For programmers using Astro in their work, this community provides support and resources.
Overall, using Astro to build a knowledge base provides a powerful toolset that can be leveraged to create high-performance, flexible, and easy-to-maintain websites.

How to use ButterCMS to power your knowledge base
The ButterCMS headless content management system provides a simple and user-friendly interface for creating and managing content. ButterCMS will be used to develop and manage the material for your knowledge base for this tutorial, and its RESTful API will be used to integrate that content into the Astro static site.
Here are the core features of ButterCMS you'll use in this tutorial and why:
-
Content types: ButterCMS allows you to create custom content types that can be used to structure your knowledge base content. This means you can create different types of content, such as articles, tutorials, and FAQs, and add fields that are specific to each type.
-
Rich text editor: ButterCMS provides a rich text editor that allows you to create and format content easily. You can add images, videos, and other media to your content and format it using styles, lists, and other formatting options.
-
API access: ButterCMS's RESTful API allows you to fetch content from your ButterCMS account and integrate it into your Astro static site. This means you can build dynamic pages that display the content from ButterCMS in real-time.
-
Revisions and versioning: ButterCMS provides a revision history and version control system, which allows you to track changes to your content over time. This feature makes it easy to revert to previous versions of your content if needed.
-
Search: ButterCMS offers an integrated search feature accessible via API that enables users to look for information in your knowledge base. Users may quickly and easily access the information they need thanks to this functionality.
Overall, ButterCMS provides a powerful set of features that allows you to create and manage your knowledge base content efficiently and effectively. The API integration also enables you to deliver a dynamic and responsive experience for your users, making it an excellent choice for powering your knowledge base.
Tutorial prerequisites
To follow along, you should have the following:
-
A basic understanding of HTML, CSS, and JS
-
A ButterCMS account—get started here
-
A terminal—I recommend using VS Code’s integrated terminal
Configuring knowledge base content types in ButterCMS
In order to build out your knowledge base content in Butter, you’ll need to create a few page types and collections.
Set up a knowledge base article page type
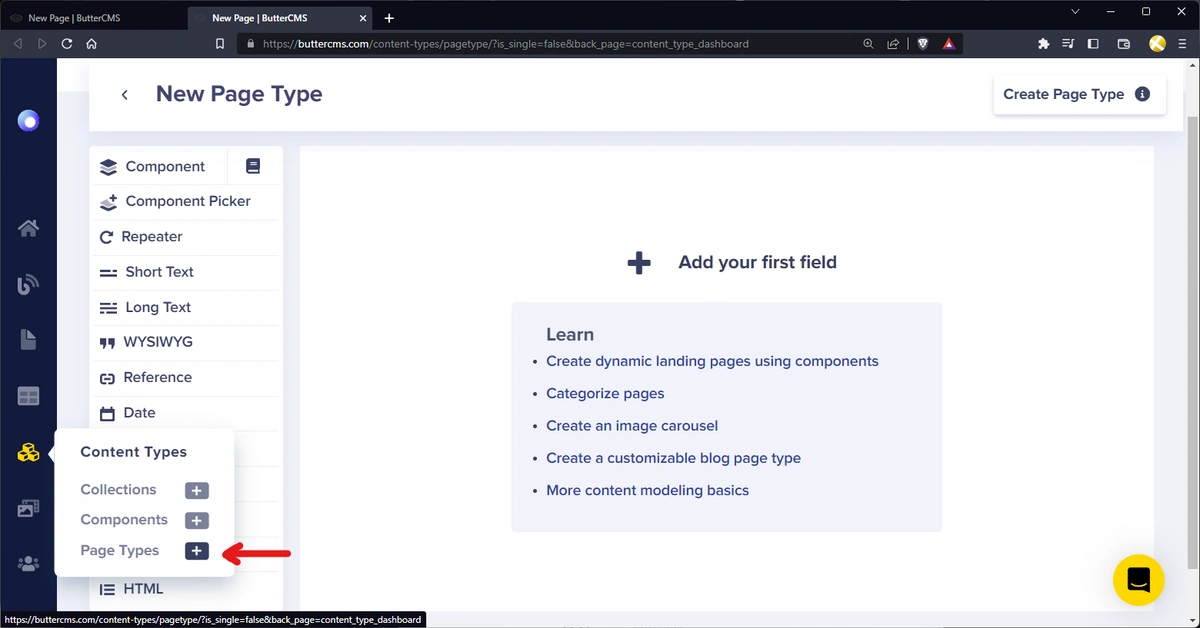
This will contain the structure for a knowledge base article page. Go to the New Page Type page by clicking on the “+” icon in the Page Types option on the Content Types drop-down from the side menu.
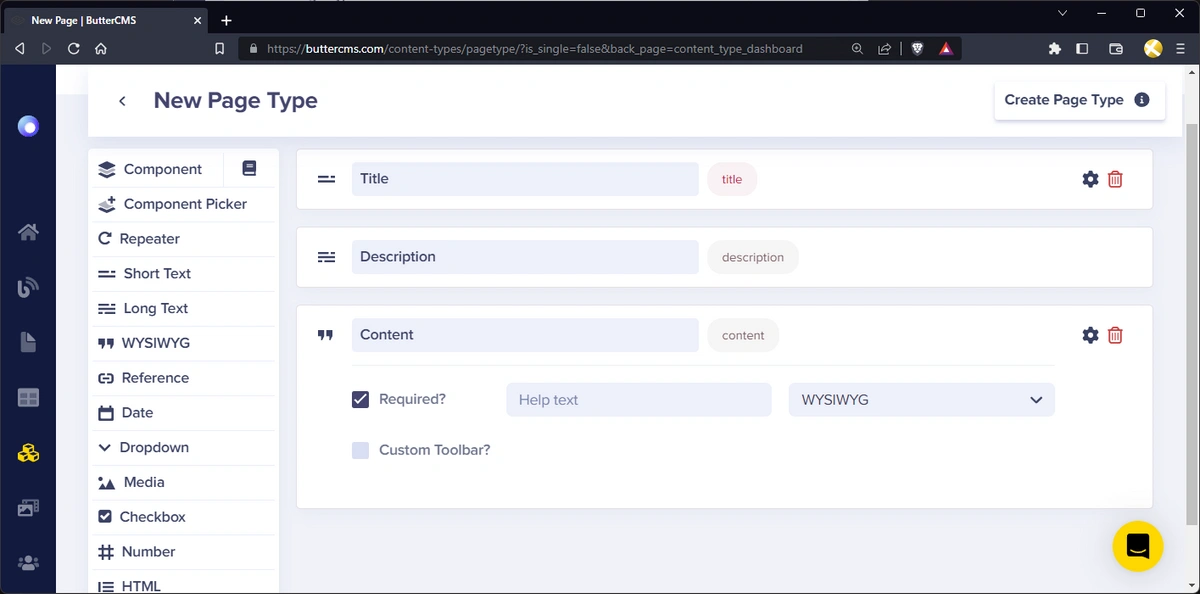
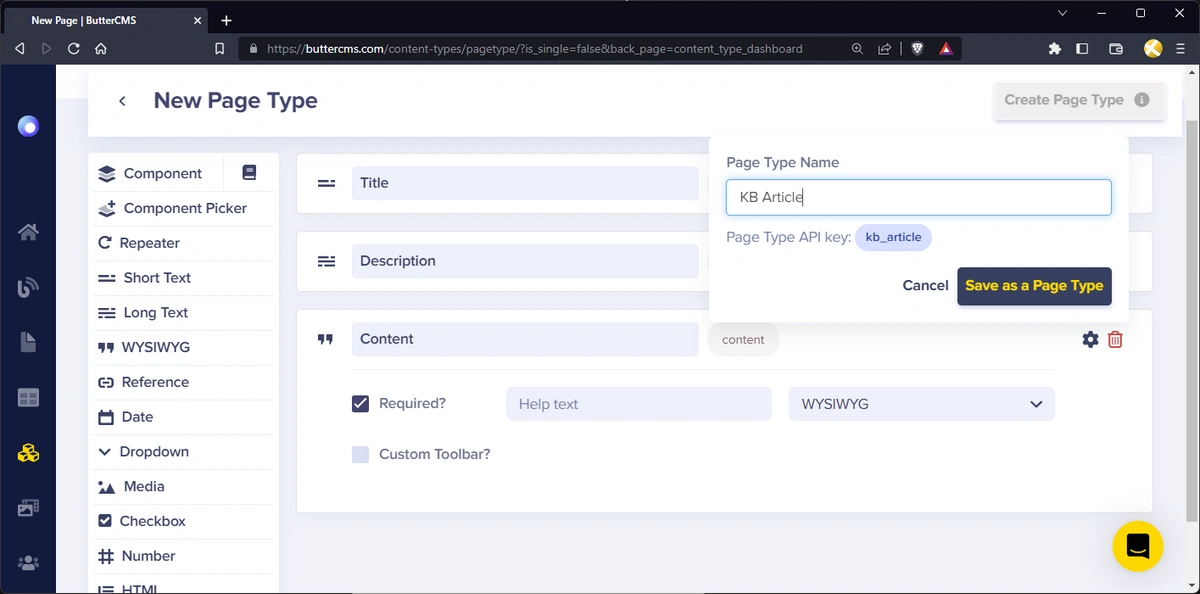
Now, you can create your page type structure, which includes:
-
A short text field with the name “Title” and the following attributes:
-
-
Required - ✅ True
-
-
A long text field with the name “Description” and the following attributes:
-
-
Required - ✅ True
-
-
A WYSIWYG field with the name “Content” and the following attributes:
-
-
Required - ✅ True
-
With that, you should have something like this:
Now, in order to save this page type to be used in your project, click the Create Page Type button at the top right of the page. This shows a modal where you can enter the page type name. Name it “KB Article” and click Save as Page Type.
Add Categories using Collections
The collection content type in ButterCMS is pretty handy and has several use cases. One popular use case that applies to your project is using it to create page facets to group/filter content. With this, you’ll be able to add categories to your article pages.
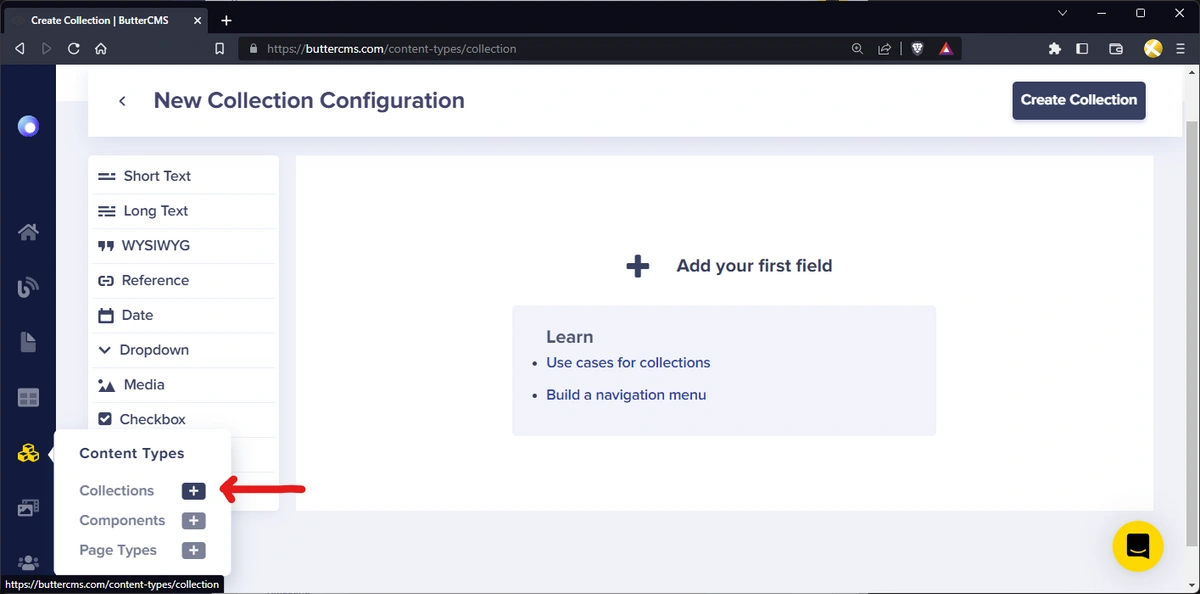
To create your collection, first, navigate to the New Collection Configuration page by clicking the “+” icon in the Collections option on the Content Types drop-down from the side menu.
Now you can create the collection structure which includes:
-
A short text field with the name “Name” and the following attributes:
-
-
Required - ✅ True
-
-
A short text field with the name “Slug” and the following attributes:
-
-
Required - ✅ True
-
-
A long text field with the name “Description”
With that, you should have something like this:
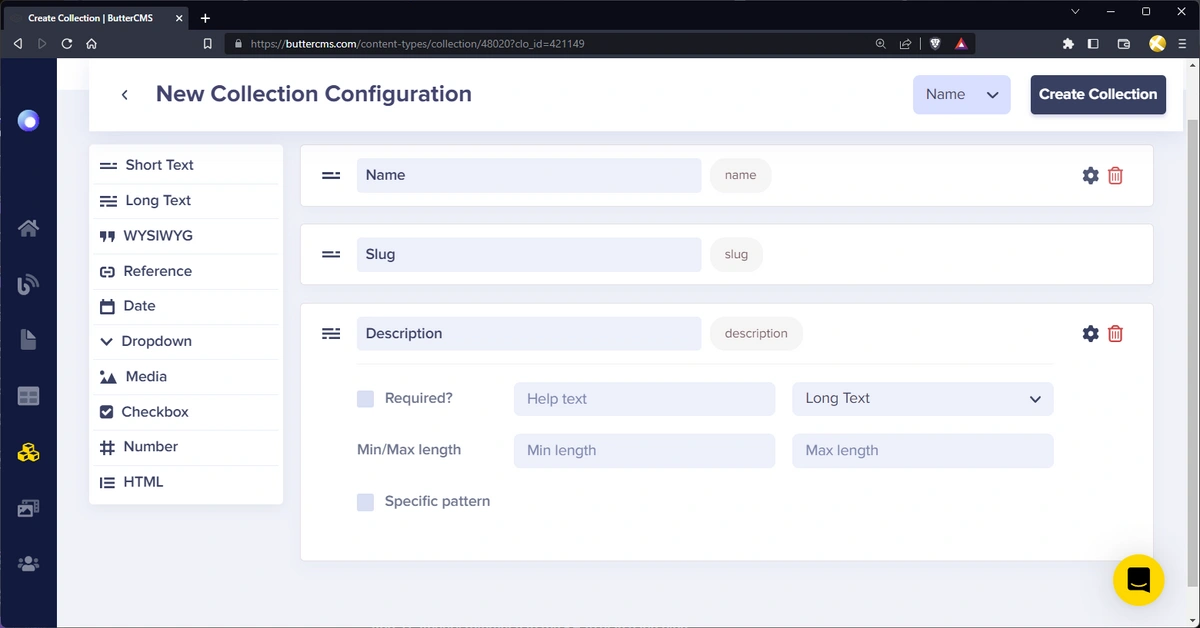
To save, click on the Create Collection button at the top of the page and enter “KB Category” as the Collection Name.
Now that you've created your category collection, you can add it as a reference in your KB Article page type. This will allow you to filter the pages using the category field in the API.
Add a category reference to the KB Article page type
Navigate to the Page Types Content Types page by clicking on the Page Types option in the Content Types drop-down from the side menu:
Now, open the KB Article page type configuration by clicking on it. In the KB Article page, add a new reference field with the name “Category” and the following attributes:
-
What will this reference? - “KB Category”
-
Reference type - One-to-Many: This is so that one article can have more than one category. If your use case requires an article to be under only one category, you can select the One-to-One relationship type.
Your page type structure should look like this now:
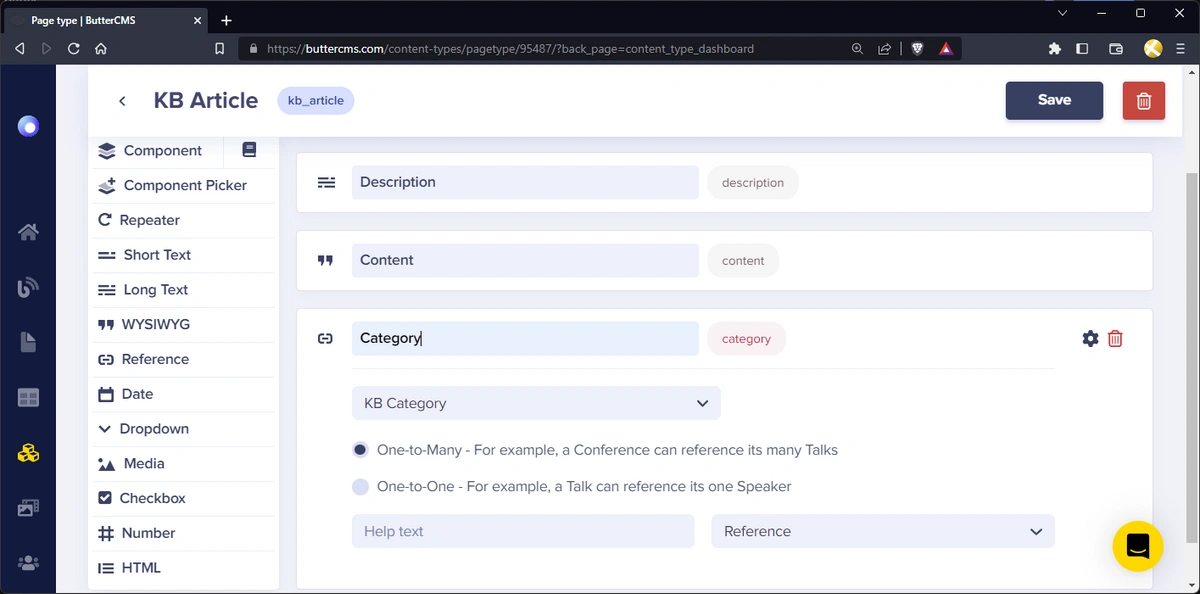
With that, click on the Save button to save the changes. In the next section, you’ll create another collection type for FAQs.
Create a FAQ collection type
Navigate to the Collection Type page by clicking on the “+” icon in the Collections option on the Content Types drop-down from the side menu.
Now, you can create your collection structure which includes:
-
A short text field with the name “Question” and the following attributes:
-
-
Required - ✅ True
-
-
A WYSIWYG field with the name “Answer” and the following attributes:
-
-
Required - ✅ True
-
-
A reference field with the name “Category” and the following attributes:
-
-
What will this reference? - “KB Category”
-
Reference type - One-to-one
-
With that, you should have something like this:
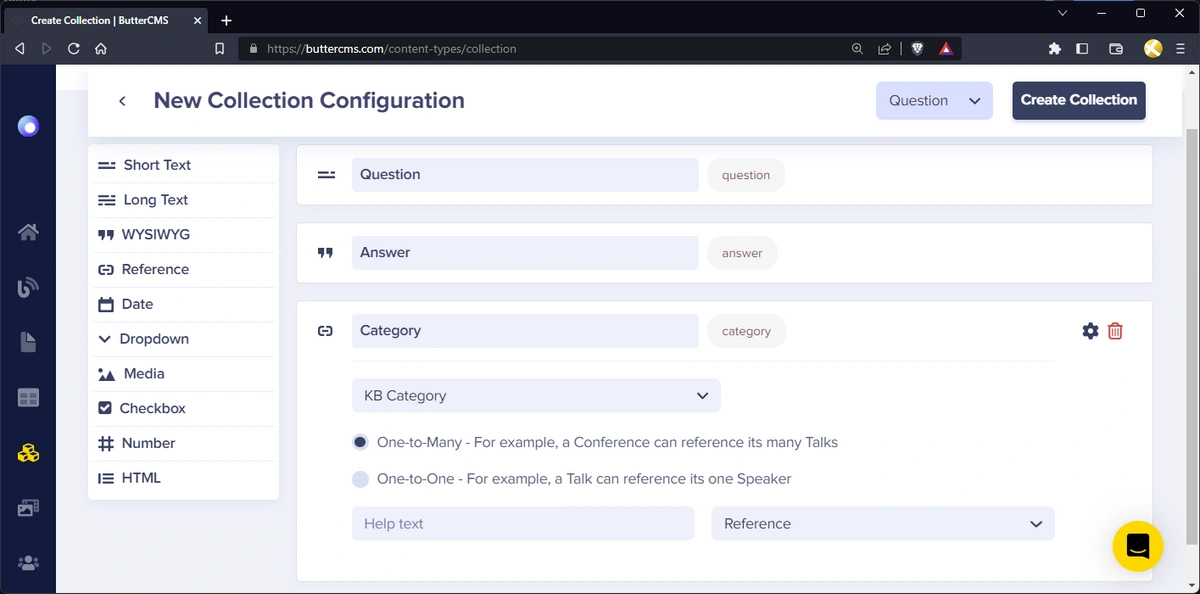
To save, click the Create Collection button at the top of the page and enter “KB FAQ” as the Collection Name. Next, you’ll create the page structure for your knowledge base landing page.
Create a dynamic landing page with components
Now, you’ll create the structure of your knowledge base landing page. First, create a new page. Go to the New Page Type page by clicking on the “+” icon in the Page Types option on the Content Types drop-down from the side menu.
Now, you’ll add a few components. First, add the SEO component by clicking on the “Book” icon for the Component Library option on the left menu:

Great. Next, you’ll create another component—KB Landing Hero—by clicking on the Component option and clicking on Create Component.
Enter the name and description of the component as:
-
Name: “KB Landing Hero”
-
Description: “Hero component for knowledge base landing page”
You can create the following fields for your component:
-
A short text field with the name “Caption” and the following attributes:
-
-
Required - ✅ True
-
-
A long text field with the name “Text” and the following attributes:
-
-
Required - ✅ True
-
-
A short text field with the name “Search field placeholder”
With that, it should look something like this:
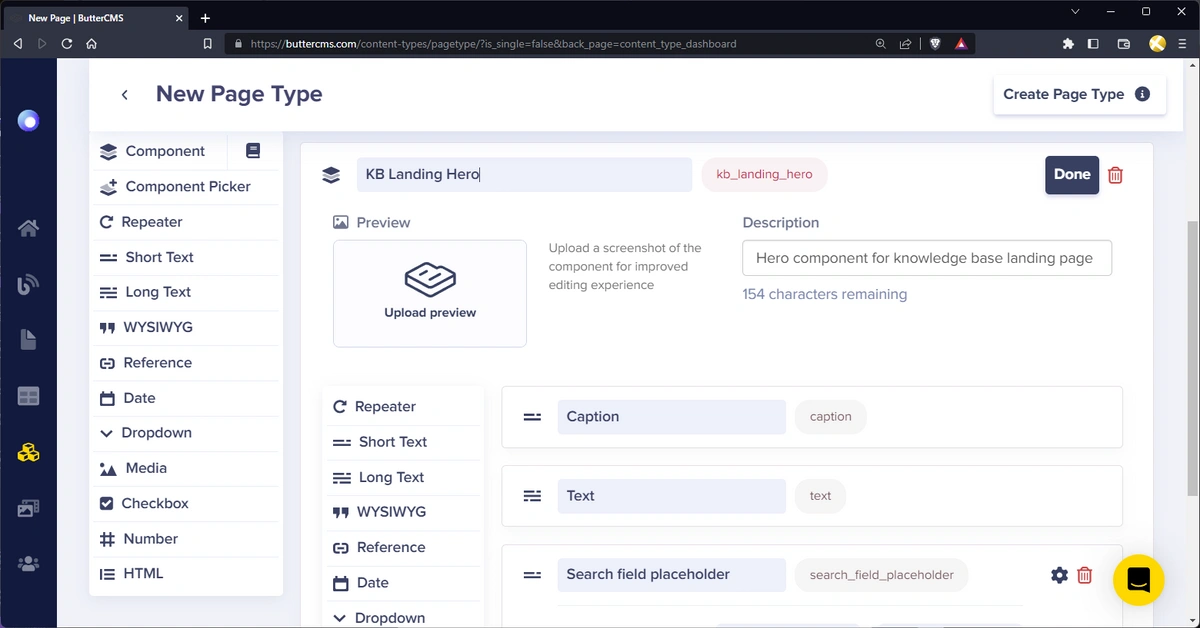
Click Done.
Next, you’ll add a Components Picker field where you can add multiple components. Click on the Component Picker option on the left menu to create a new field and name it Sections:
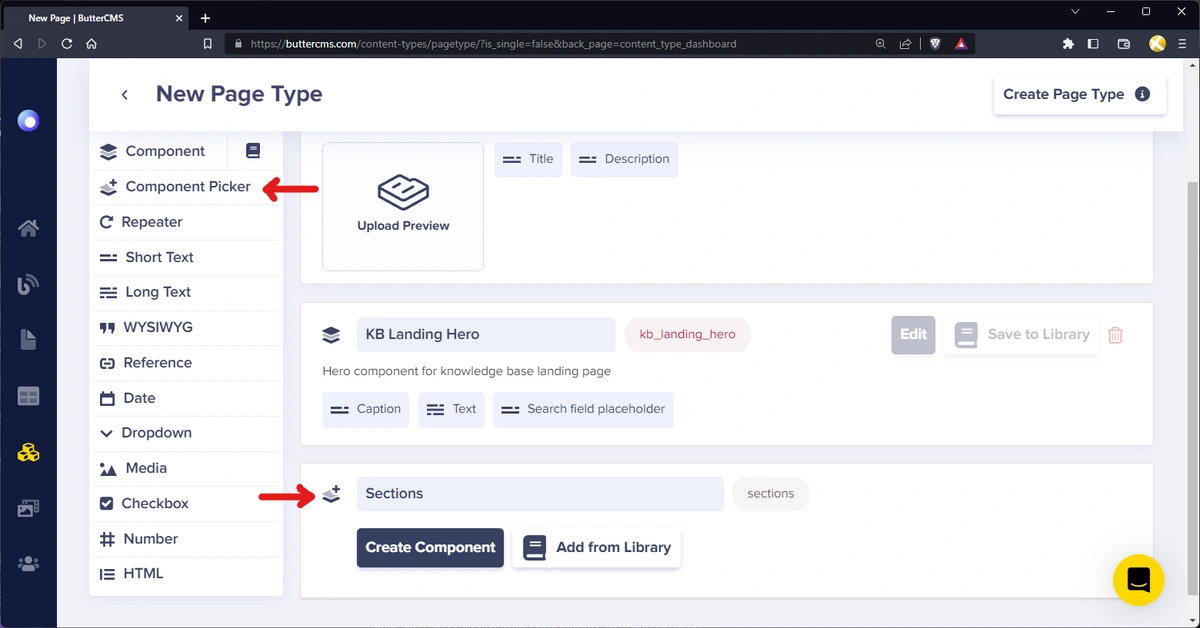
Now, you can start creating components that will be used.
Click on Create Component to create a new component and enter the name and description as:
-
Name: “KB Featured Categories”
-
Description: “List of categories to be featured on the landing page”
Next, add the fields for your component:
-
A short text field with the name “Caption” and the following attributes:
-
-
Required - ✅ True
-
-
A reference field with the name “Categories” and the following attributes:
-
-
What will this reference? - “KB Category”
-
Reference type - One-to-Many
-
It should look something like this:
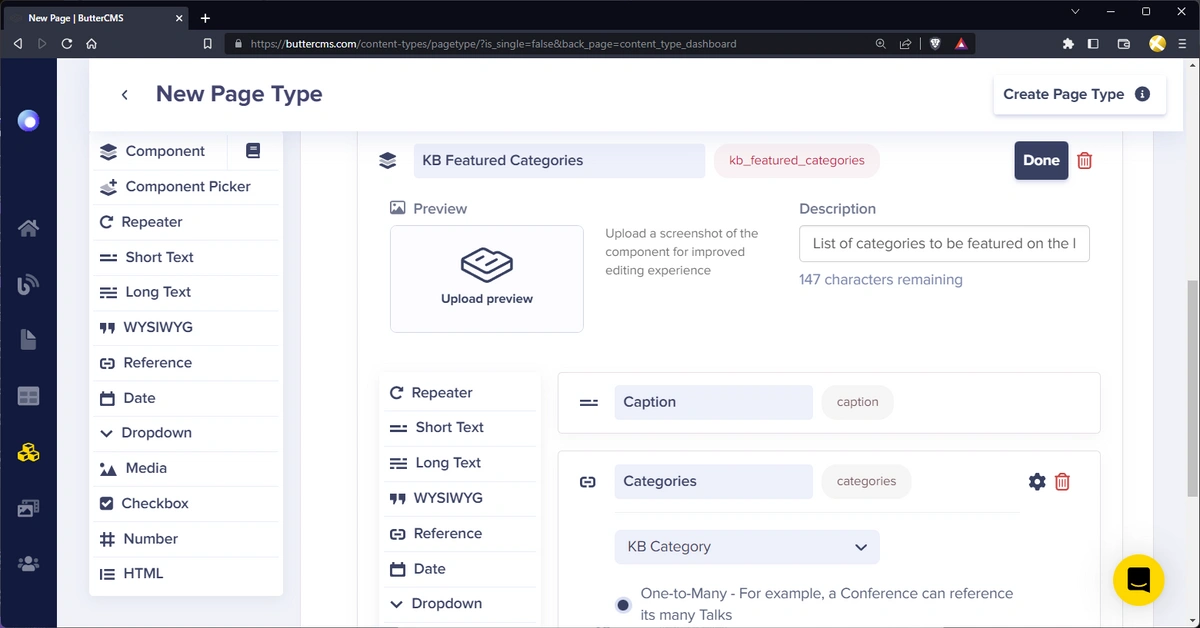
Click Done to save the component.
Next, create another component for featured articles.
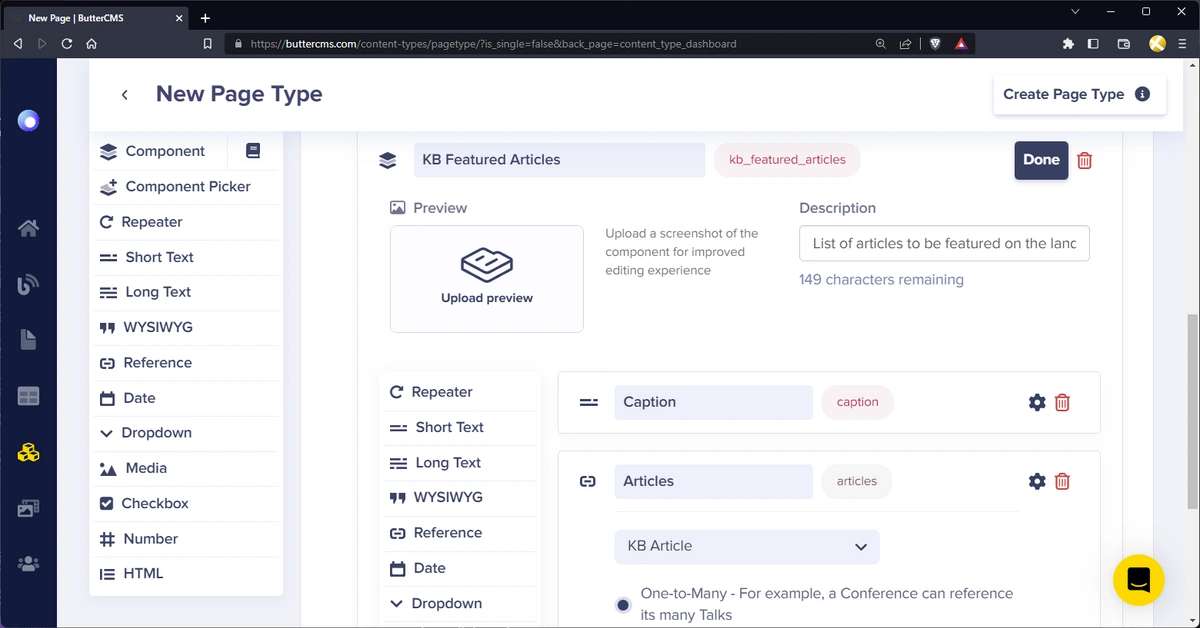
Click on Create Component to create a new component and enter the name and description as:
-
Name: “KB Featured Articles”
-
Description: “List of articles to be featured on the landing page”
Next, add the fields for your component:
-
A short text field with the name “Caption” and the following attributes:
-
-
Required - ✅ True
-
-
A reference field with the name “Categories” and the following attributes:
-
-
What will this reference? - “KB Article”
-
Reference type - One-to-Many
-
It should look like this:
Click Done to save the component.
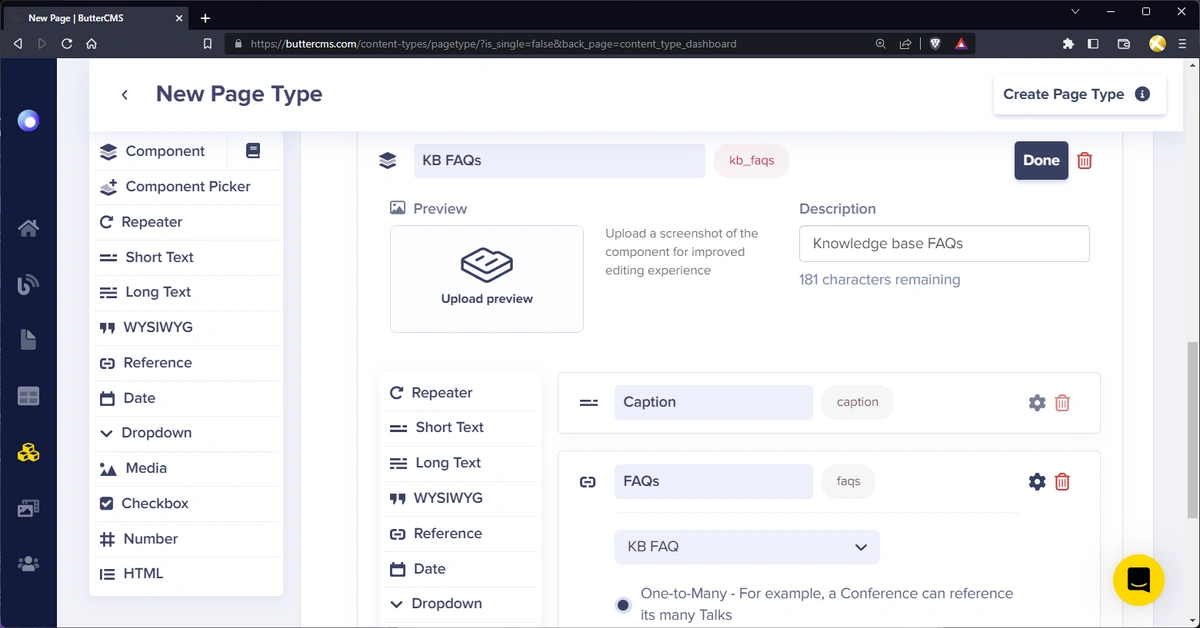
Lastly, you’ll create the FAQs component that will display your knowledge base FAQs.
Click on Create Component to create a new component and enter the name and description as:
-
Name: “KB FAQs”
-
Description: “Knowledge base FAQs”
Next, add the fields for your component:
-
A short text field with the name “Caption” and the following attributes:
-
-
Required - ✅ True
-
-
A reference field with the name “Categories” and the following attributes:
-
-
What will this reference? - “KB FAQ”
-
Reference type - One-to-Many
-
It should look like this:
Click Done to save the component.
To save the page type, click on Create Page Type. Then enter the page type name as “KB Landing Page”. With that, here’s what your landing page type should look like:
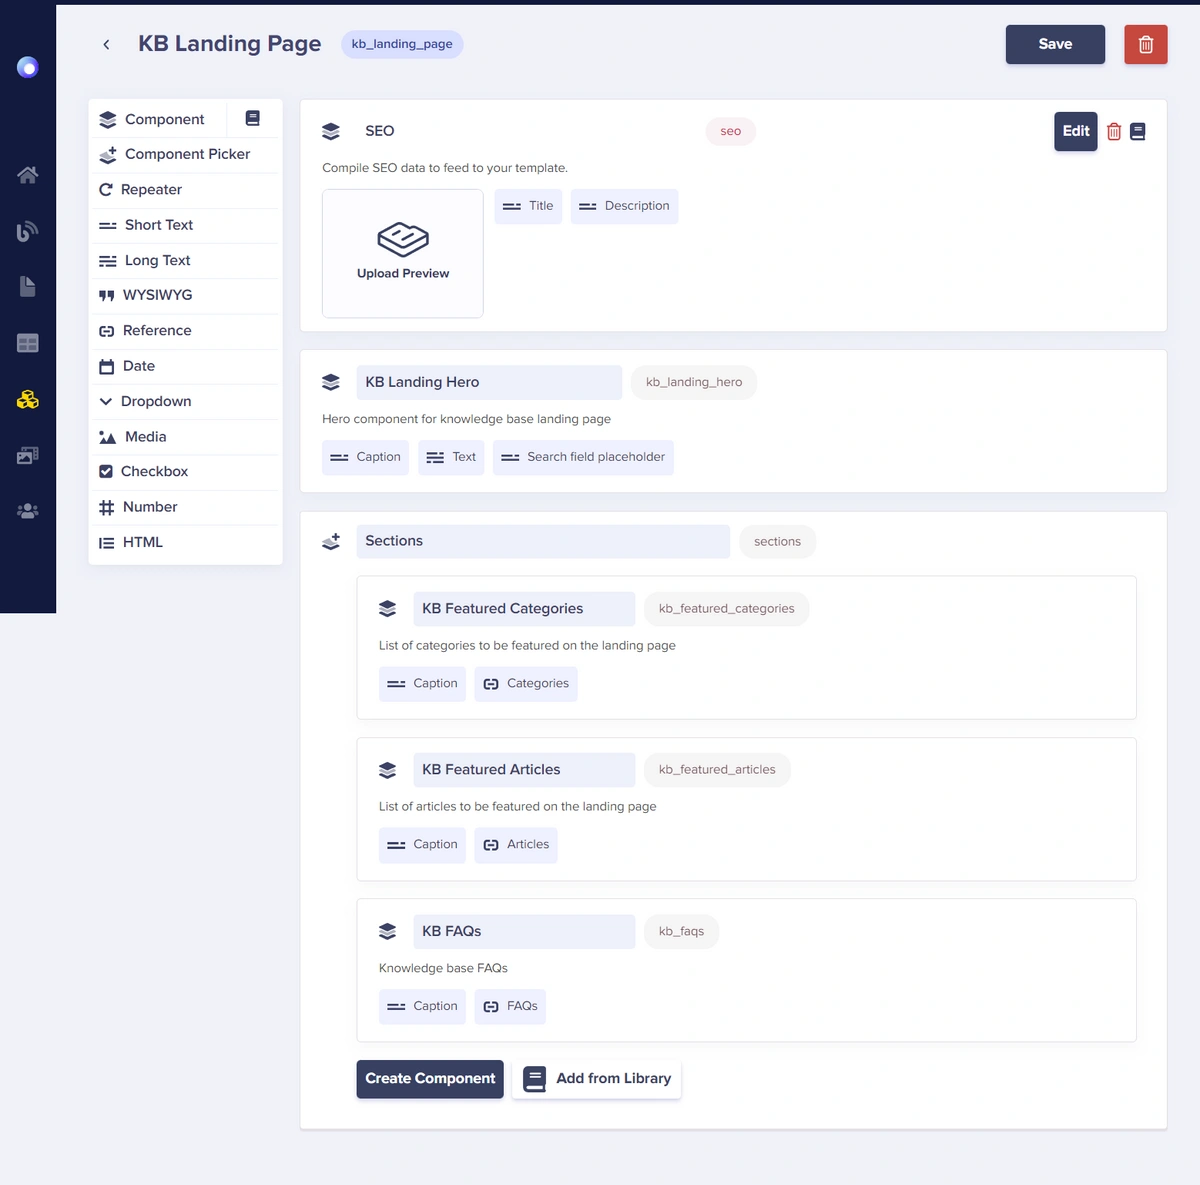
Awesome.
Adding your knowledge base content to ButterCMS
Now that you’ve defined the structure of your knowledge base, create some content. Start with the categories as they will be referenced in our articles and FAQs.
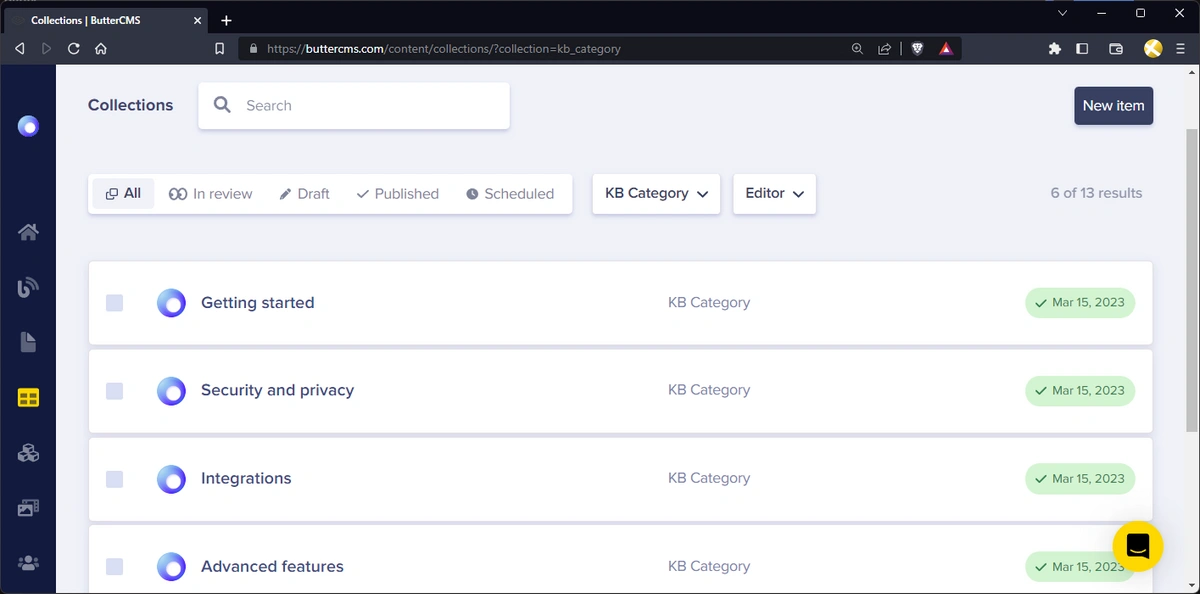
Create categories
To create a new collection, you can click on the “+” icon on the KB Category option in the Collections menu item on the sidebar. Or, navigate to the /content/collections page and click on the New Item button at the top right of the page and select the KB Category option:
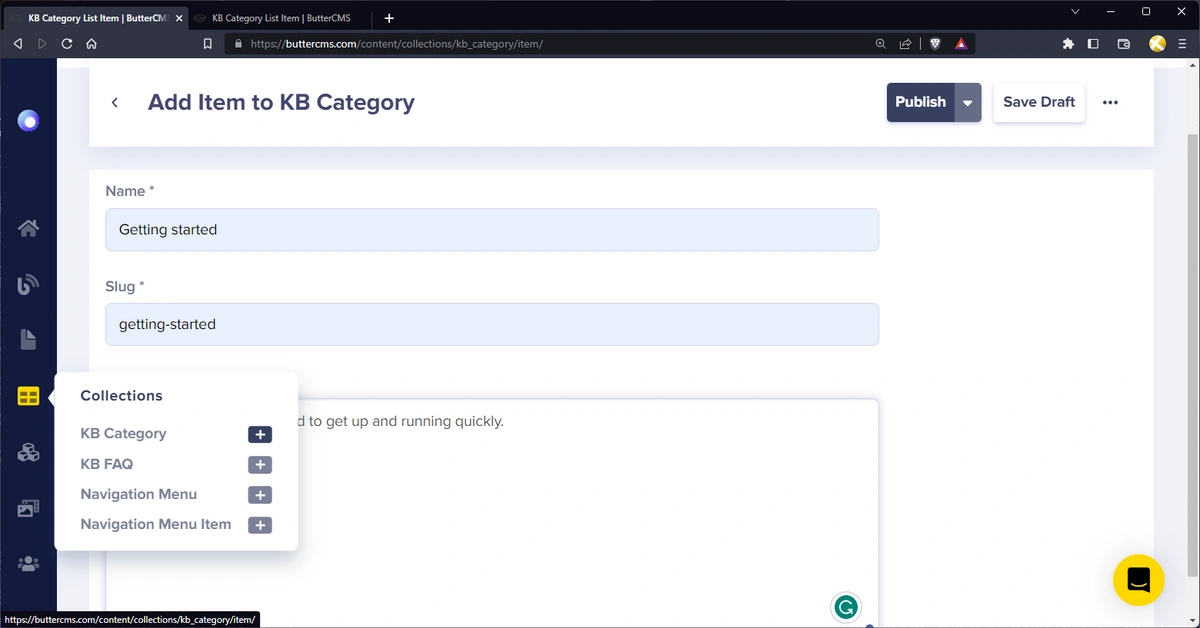
Now fill in the fields with the category name and slug and click on Publish to save changes. Repeat these steps and create multiple categories. Here are a few I created:
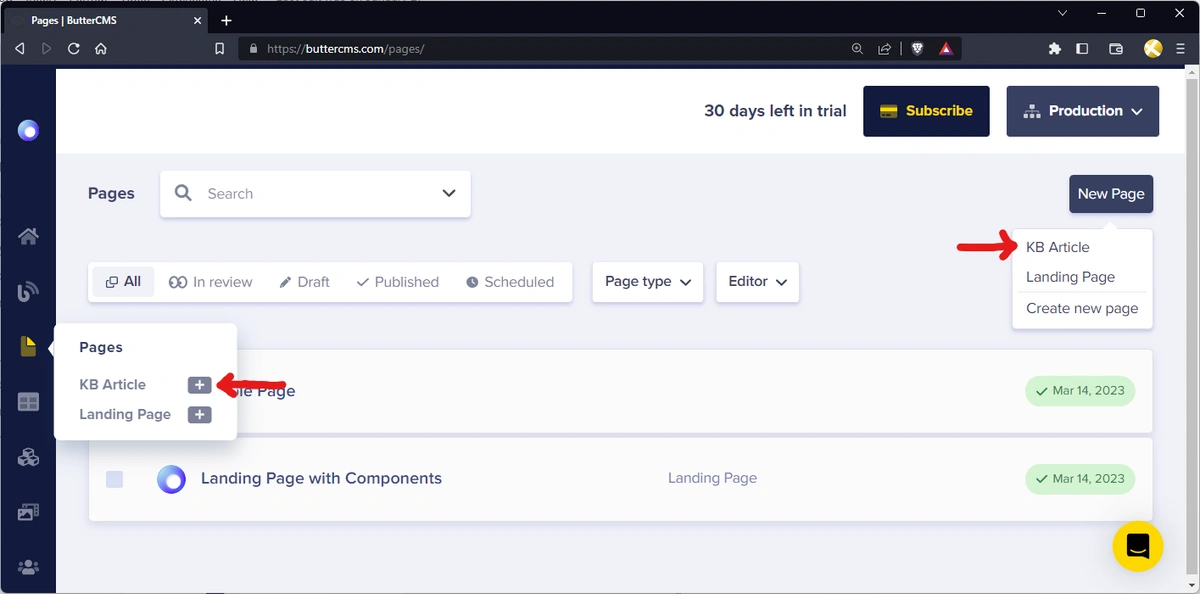
Create knowledge base articles
To create a new KB article, you can click on the “+” icon on the KB Article option in the Pages menu item on the sidebar. Or, navigate to the /pages page and click on the New Page button at the top right of the page and select the KB Article option.
Next, you’ll enter the page metadata, including the page title and the API slug (automatically populated) of your new KB article.
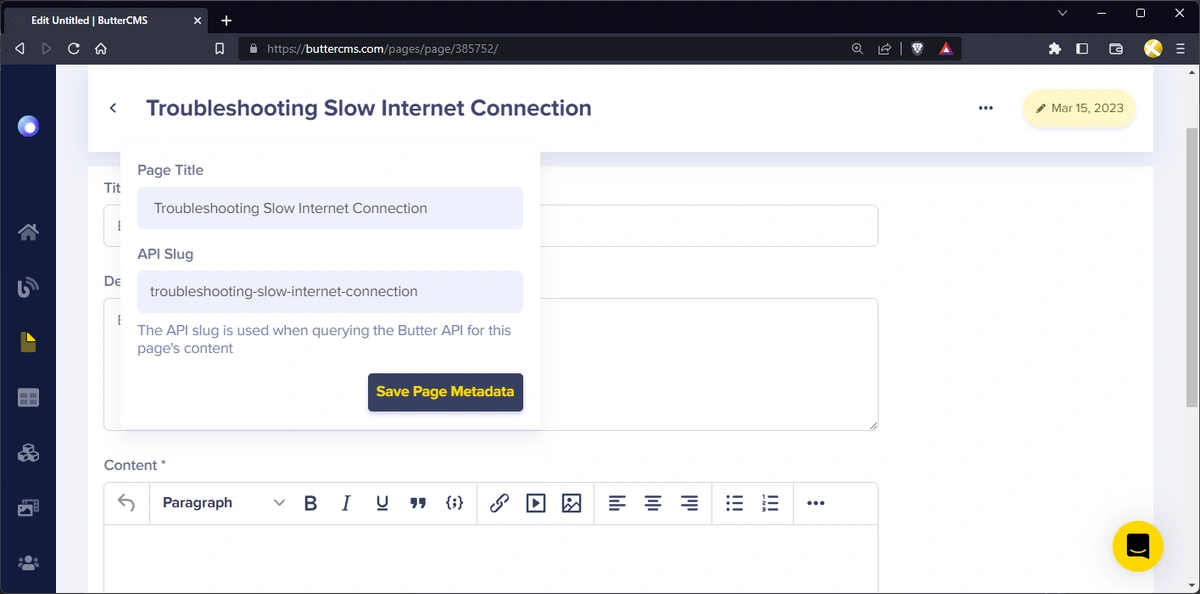
Next, you’ll enter the name, description, and content of your article and then select a category reference.
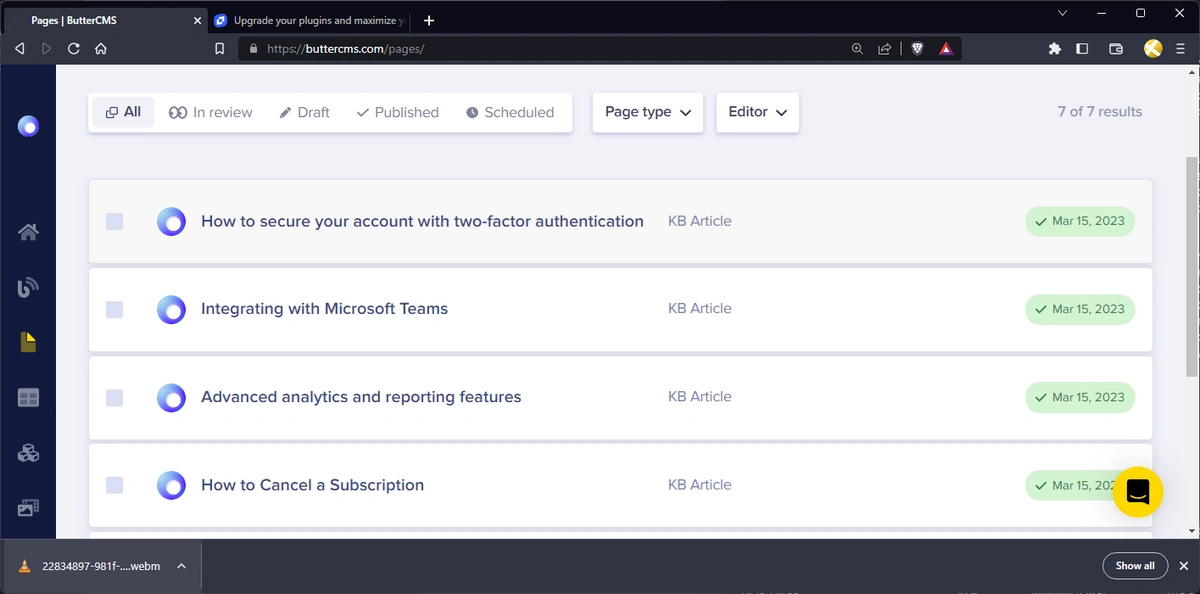
Once you’ve added the content for your article, click on Publish to save and publish the article. Repeat these steps and create multiple articles. Here are a few I created:
Next, you’ll create a few FAQs.
Create FAQs
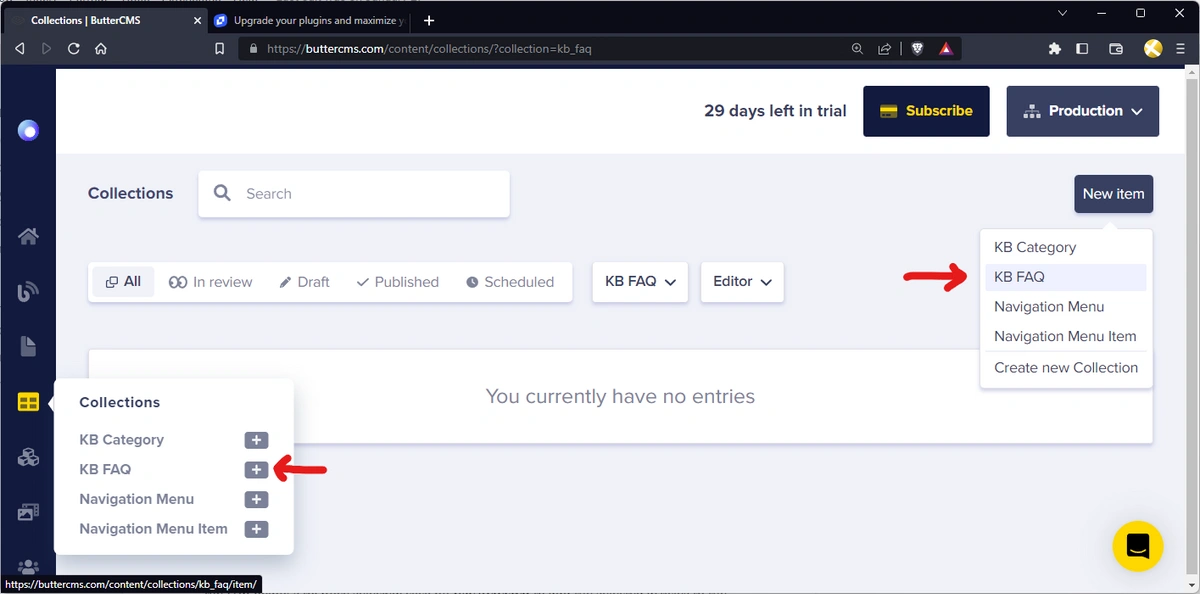
To create a new collection, you can click on the “+” icon in the KB FAQs option in the Collections menu item on the sidebar. Or, navigate to the /collections page and click on the New Collection button at the top right of the page and select the KB FAQs option:
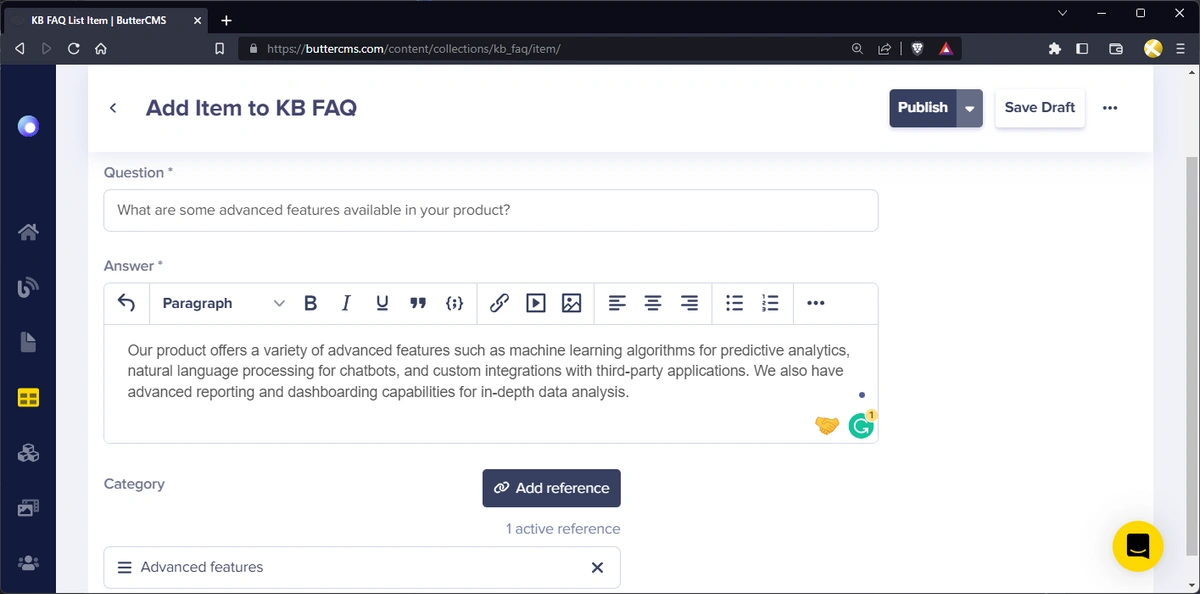
In the Add Item to KB FAQs page, enter the question and answer for the FAQ and category references to previously created KB categories:
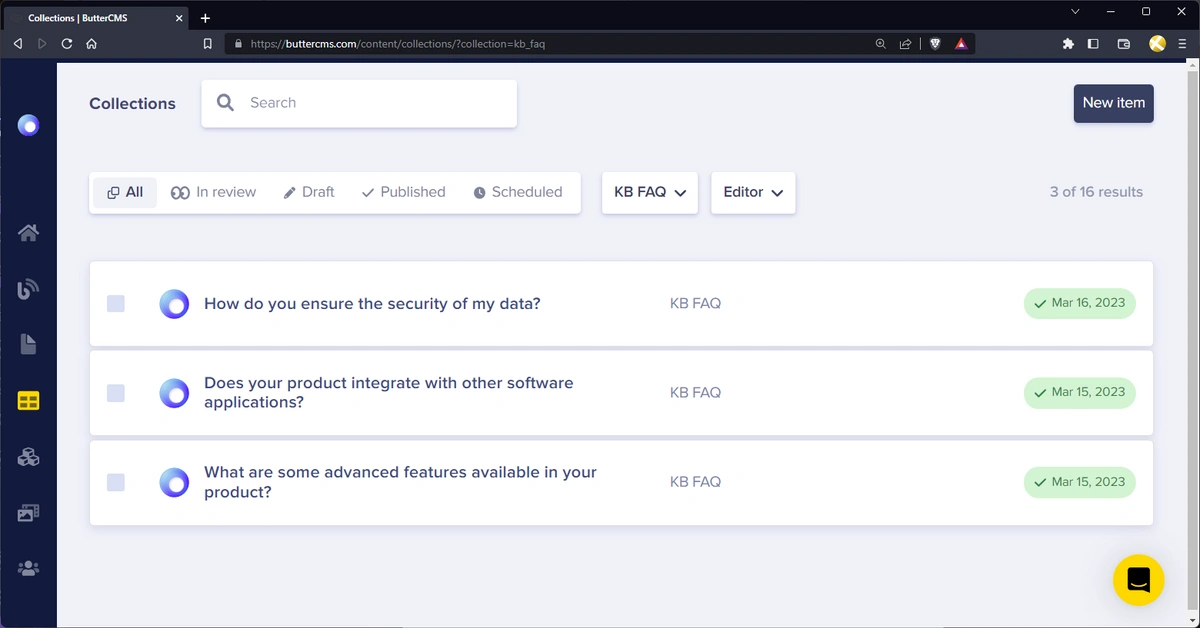
As usual, click on Publish to save and publish the FAQ. Repeat these steps to create multiple FAQs. Here are a few of mine:
Next, you’ll create your knowledge base landing page.
Create the knowledge base landing page
To create the KB landing page, click on the “+” icon on the KB Landing Page option in the Pages menu item on the sidebar. Or, navigate to the /pages page and click on the New Page button at the top right of the page and select the KB Landing Page option.
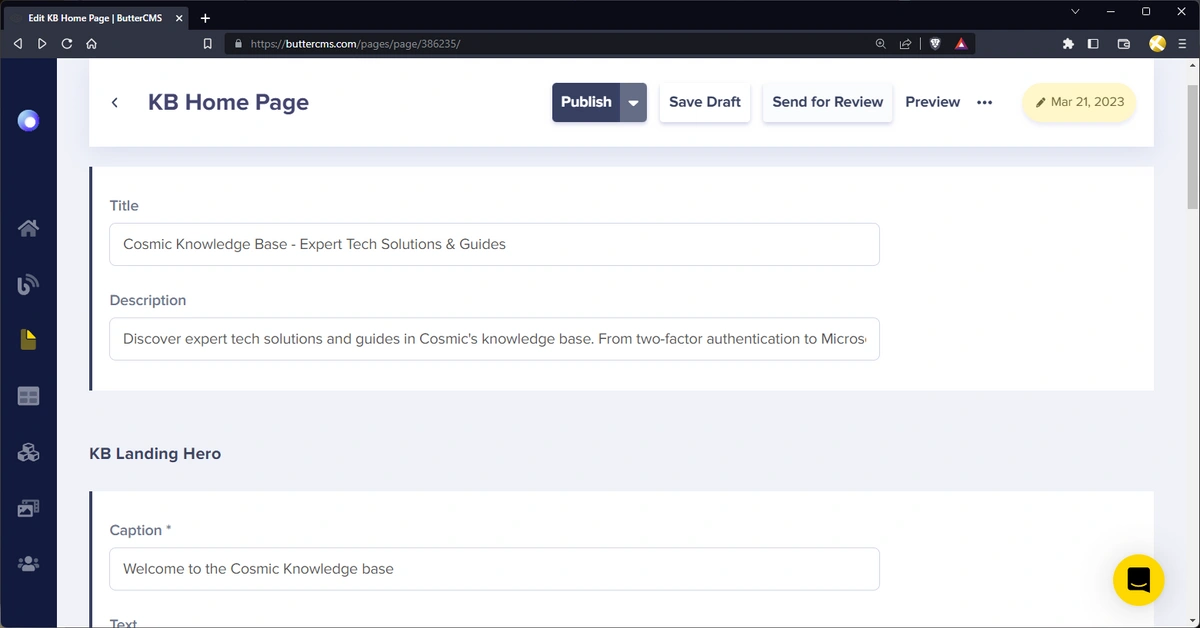
Now, enter the Page Title as “KB Home Page” and click on Save Page Metadata. Next, enter content for SEO, KB Landing Hero, and Sections. Here’s a quick look at what mine looks like:
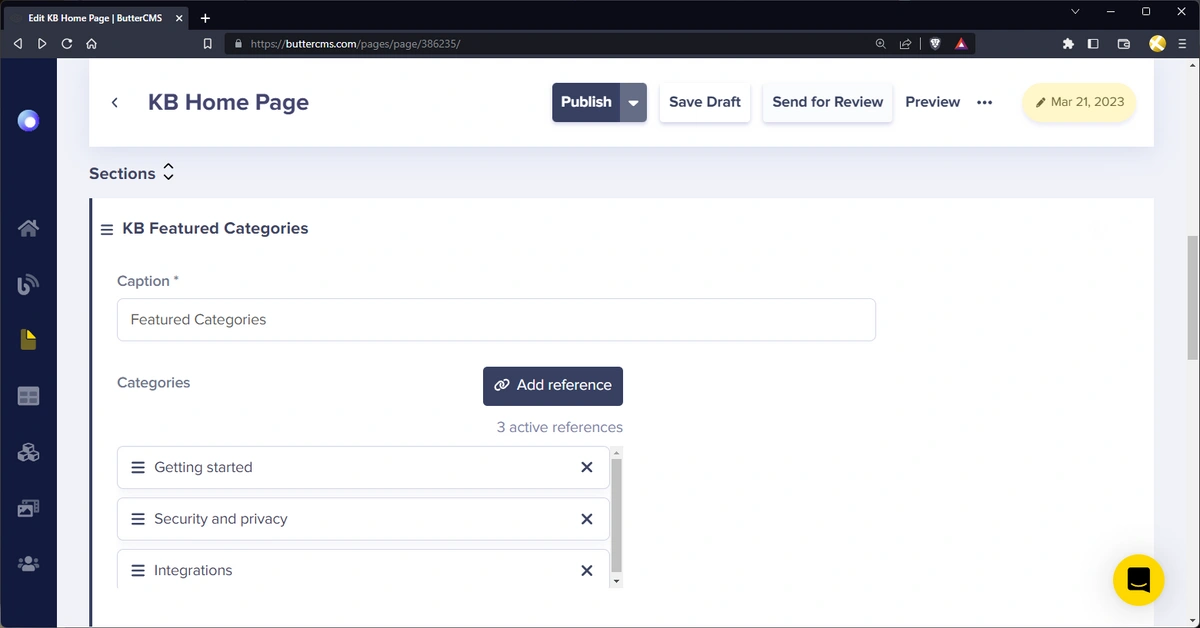
For Sections, you have the KB Featured Categories:
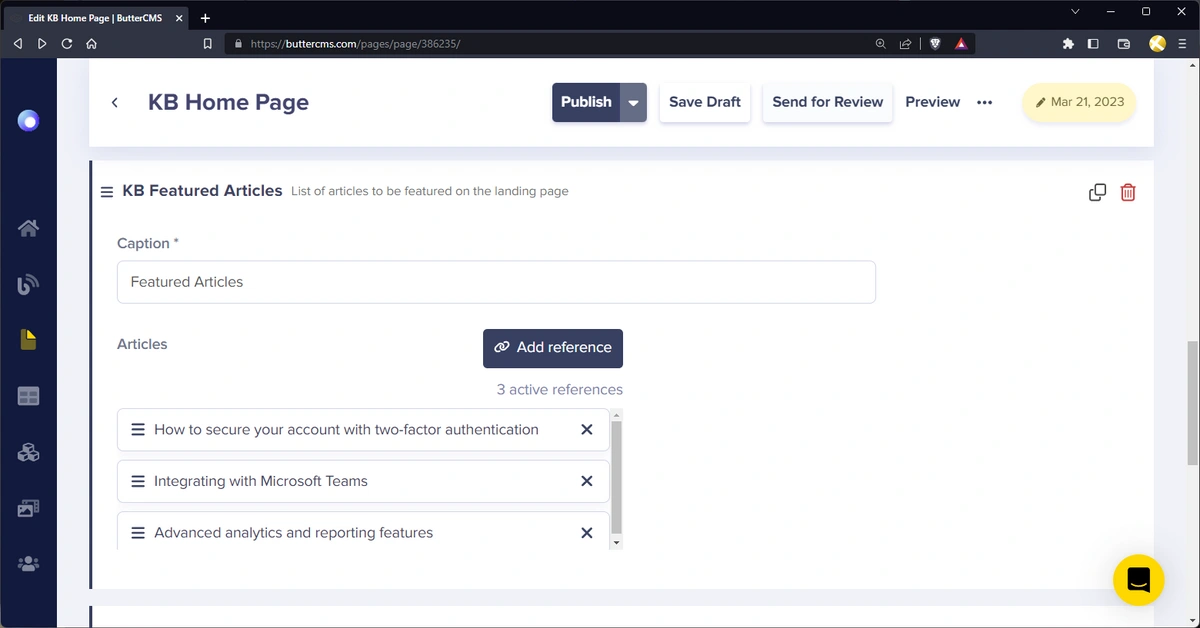
KB Featured Articles:
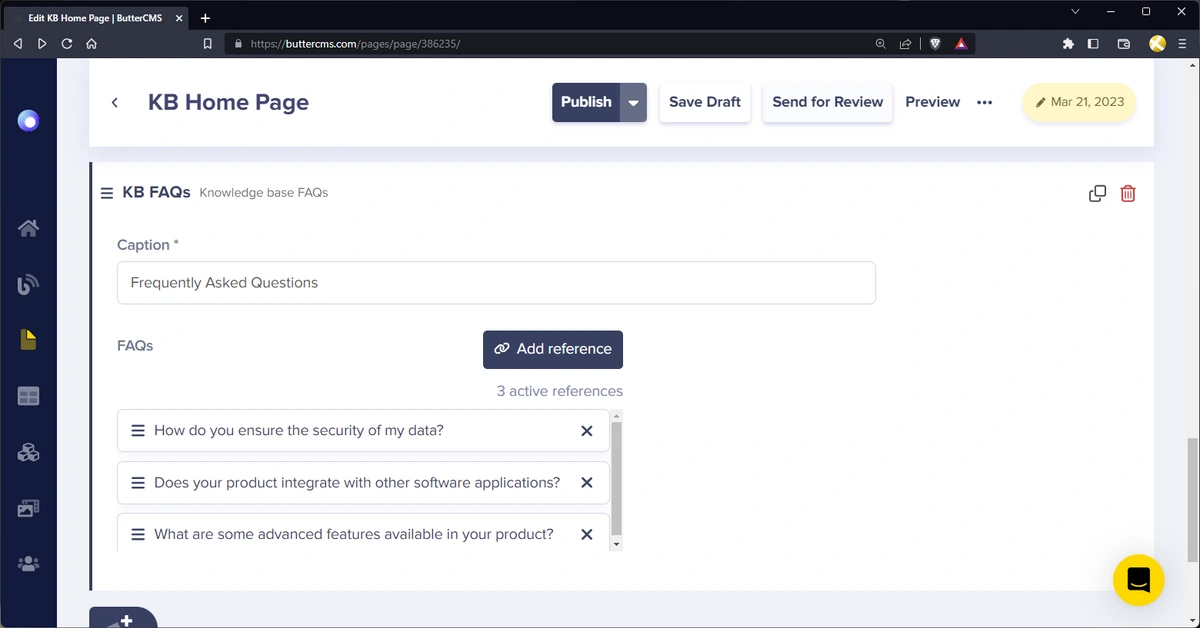
And, KB FAQs:
Good. Now click on Publish to save and publish the page.
Now that that’s all done and your content is set up, you can create and integrate your Astro front-end. You’ll need to obtain your token first.
Obtaining the Read API Token
First, navigate to the Butter dashboard and then to Settings in order to obtain the Read API Token for API integration on the Astro site.
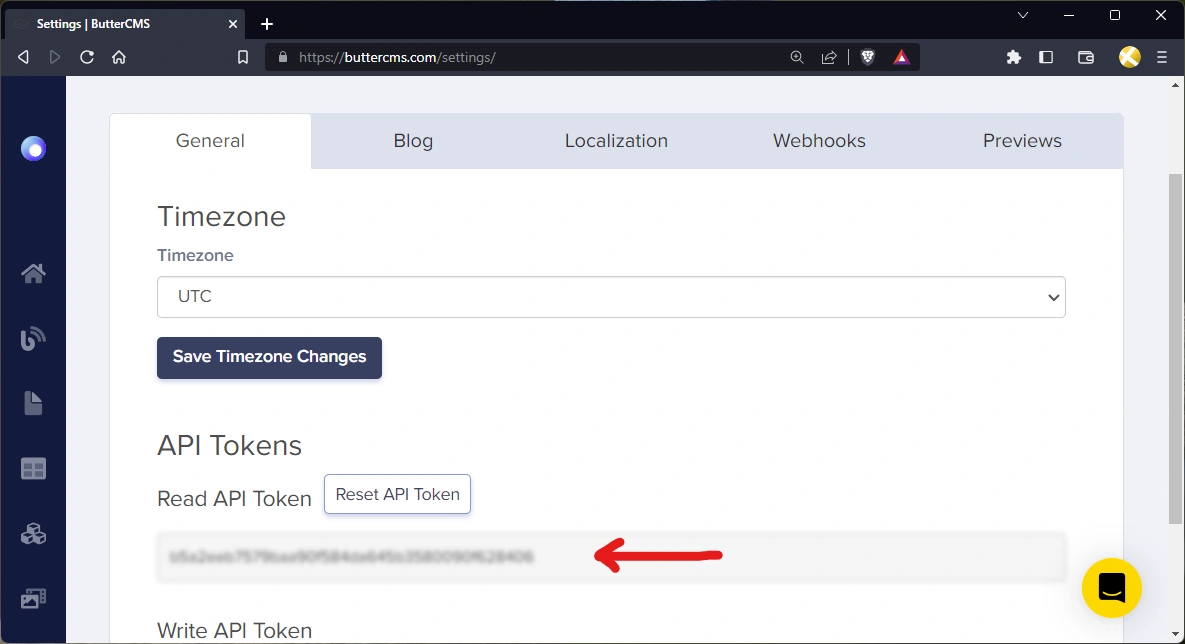
Great.
Setting up Astro
Create the front-end for your project. As mentioned earlier, you’ll use the Astro framework. To create a new project, run:
npm create astro@latest
This will take you through a few steps:
Need to install the following packages:
  create-astro@latest
Ok to proceed? (y) y

 astro   v2.1.3 Launch sequence initiated.

   dir   Where should we create your new project?
         ./astro-butter-kb

  tmpl   How would you like to start your new project?
         Include sample files
      ✔  Template copied
After this step, you’ll be asked if you want to install dependencies, enter y to install, or cancel to install later.
Once the project has been created, navigate to the folder and install the dependencies:
cd astro-butter-kb/
npm install
Once the installation is complete, you can proceed to install the Tailwind integration for Astro so you can build with Tailwind:
npx astro add tailwindThis will take you through a few steps; just confirm each one. Once Tailwind has been added, you can add the forms plugin for Tailwind. Install the plugin from npm:
npm install -D @tailwindcss/forms @tailwindcss/typographyThen add the plugin to your tailwind.config.cjs file:
// ./tailwind.config.cjs
/** @type {import('tailwindcss').Config} */
module.exports = {
  content: ["./src/**/*.{astro,html,js,jsx,md,mdx,svelte,ts,tsx,vue}"],
  theme: {
    extend: {},
  },
  plugins: [require("@tailwindcss/forms"), require("@tailwindcss/typography")],
};
Integrating ButterCMS
Now, you’ll create a .env file in the root of your project and add your API token as an environment variable:
// .env
BUTTER_TOKEN=YOUR_API_TOKEN_HERE
Next, you’ll install the ButterCMS SDK as a dependency:
npm install buttercmsOnce installed, you’ll create a buttercms.js file in a new src/lib/ directory in your project:
// ./src/lib/buttercms.js

import Butter from "buttercms";

export const butterClient = Butter(import.meta.env.BUTTER_TOKEN);
The exported butterClient initializes Butter using the BUTTER_TOKEN from your environment variable which authenticates your requests to the ButterCMS API.
Great. Now, create a few components for your site.
📝 Just a quick heads up! I’ll be omitting the styles for this project in order to reduce the lines of code in the article so it doesn’t seem overwhelming. You can always find it in the GitHub repo for this project.
Create the SiteHeader component
Create a new file called ./src/components/SiteHeader.astro:
<!-- ./src/components/SiteHeader.astro -->
<header class="site-header">
  <div class="wrapper">
    <a href="/">
      <div class="site-logo text-purple-400">
        <span class="logo-text">Andromeda </span>
        | Knowledge Base
      </div>
    </a>
  </div>
</header>
Now, you’ll add this component to your already-created layout file in ./src/layouts/Layout.astro:
---
// ./src/layouts/Layout.astro

import SiteHeader from "../components/SiteHeader.astro";

export interface Props {
  title: string;
  description?: string;
}
const { title, description } = Astro.props;
---
<!DOCTYPE html>
<html lang="en">
  <head>
    <meta charset="UTF-8" />
    <meta name="viewport" content="width=device-width" />
    <link rel="icon" type="image/svg+xml" href="/favicon.svg" />
    <meta name="generator" content={Astro.generator} />
    <title>{title}</title>
    <meta name="description" content={description} />
  </head>
  <body>
    <SiteHeader />
    <slot />
  </body>
</html>
Here, the layout component is responsible for defining the structure of the application, including the meta, header, and content.
The Props interface defines two props: title and description. These props are passed to the layout component and are used to set the title and description of the HTML document. The title and description props are destructured from the Astro.props object which contains all of the props passed to the component.
In the <body>, render the <SiteHeader> component and the <slot /> is where the page will be rendered.
Fetching data
To fetch page content, you’ll import the Butter client and use its page.retrieve function. In ./src/pages/index.astro:
---
// .src/pages/index.astro
import Layout from "../layouts/Layout.astro";
import { butterClient } from "../lib/butter";
// retrieve the page data from ButterCMS by type and slug
const response = await butterClient.page.retrieve(
  "kb_landing_page",
  "kb-home-page"
);
const pageData = response.data.data;
console.log({pageData})
---
<Layout title={pageData.fields.seo.title} description={pageData.fields.seo.description}></Layout>
Use the ButterCMS API to retrieve page data for your knowledge base landing page. First, import the Layout component and butterClient function.
Then, make an asynchronous API request to ButterCMS to retrieve data for a specific page with the type kb_landing_page and the slug kb-home-page.
You can see this in ButterCMS’s API Explorer:
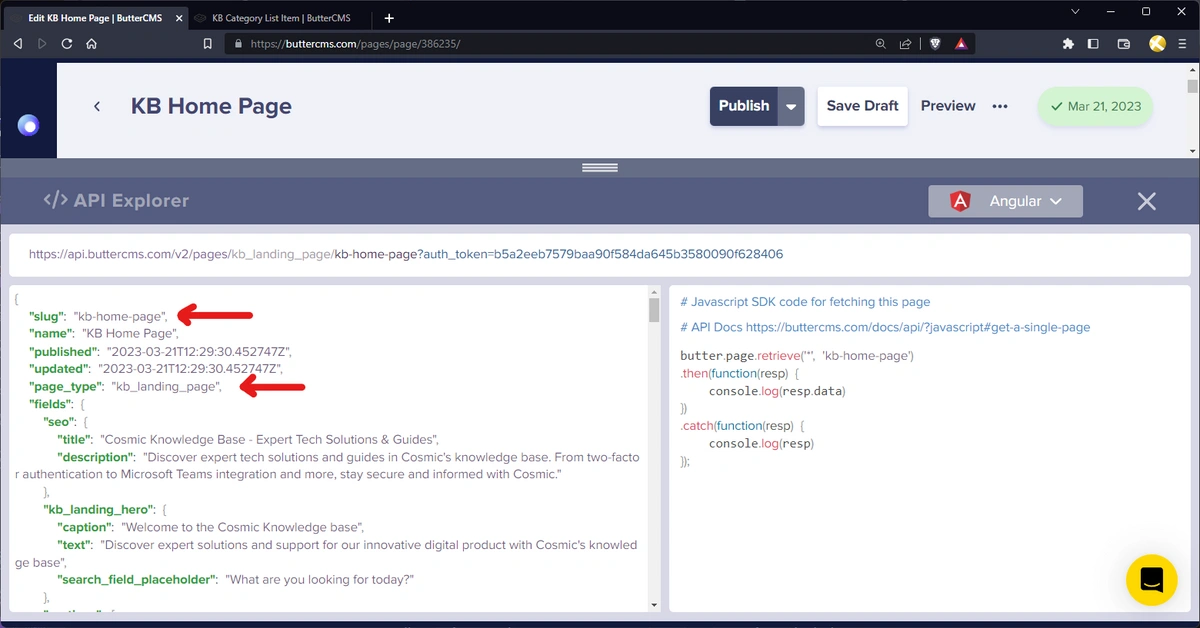
The response from the API is then stored in the response variable. The console.log({pageData}) statement logs the retrieved page data to the console.
Finally, the Layout component is rendered with title and description props passed in. These props are set to values retrieved from the pageData object, specifically the fields.seo.title and fields.seo.description properties. This allows the Layout component to dynamically render metadata for the page based on the data retrieved from the API.
Now, when you run:
npm run devYou should see the pageData in your console:

And on http://127.0.0.1:3000/:
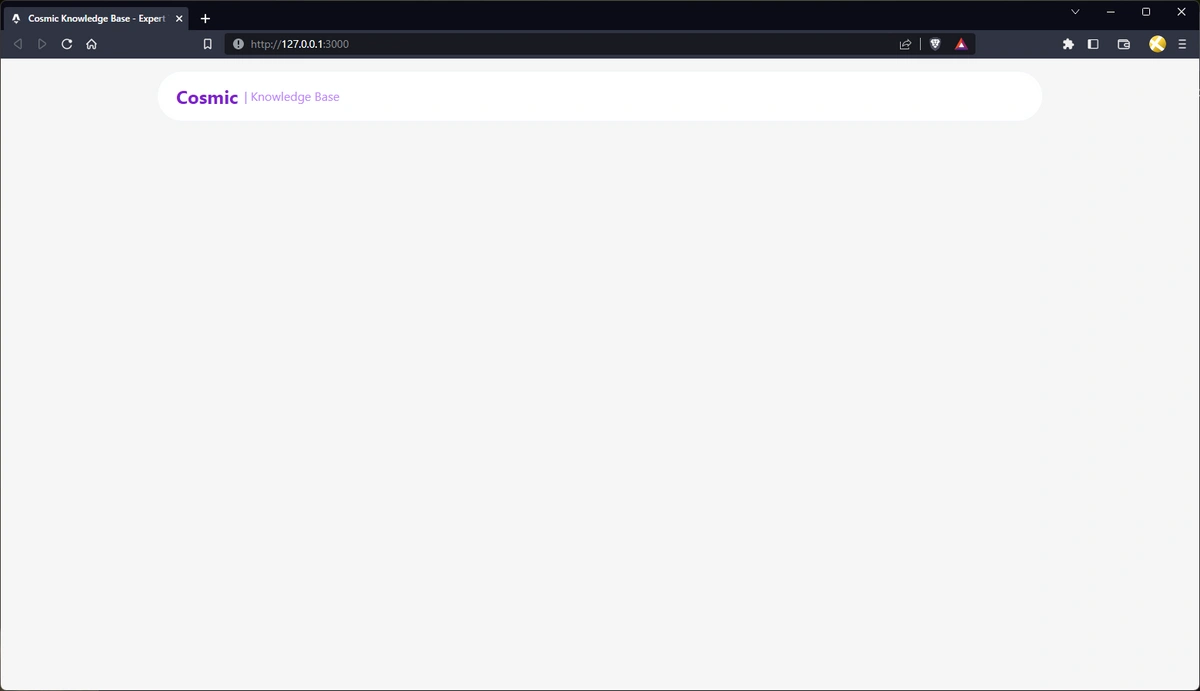
Great start!
Building out the knowledge base
Now, you’ll create the components and pages you need and build out your knowledge base. First, create components for your landing page and a couple of types to emulate the data ButterCMS provides.
Create type definitions
In your ./src/lib/butter.ts file, add the following interfaces:
// ./src/lib/buttercms.ts
import Butter from "buttercms";
export const butterClient = Butter(import.meta.env.BUTTER_TOKEN);
export interface kb_article {
  slug: string;
  name: string;
  published: string;
  updated: string;
  page_type: string;
  fields: {
    title: string;
    description: string;
    content: string;
  };
}
export interface kb_category {
  meta: object;
  name: string;
  description: string;
  slug: string;
}
export interface kb_featured_categories {
  type: "kb_featured_categories";
  fields: {
    caption: string;
    categories: [kb_category];
  };
}
export interface kb_featured_articles {
  type: "kb_featured_articles";
  fields: {
    caption: object;
    articles: [kb_article];
  };
}
export interface kb_faqs {
  type: "kb_faqs";
  fields: {
    caption: object;
    faqs: [
      {
        question: string;
        answer: string;
        category: [string];
      }
    ];
  };
}
export interface kb_landing_hero {
  caption: string;
  text: string;
  search_field_placeholder: string;
}
export interface kb_landing_page {
  slug: string;
  name: string;
  published: string;
  updated: string;
  page_type: string;
  fields: {
    seo: {
      title: string;
      description: string;
    };
    kb_landing_hero: kb_landing_hero;
    sections: [kb_featured_articles | kb_featured_categories | kb_faqs];
  };
}
This emulates the data returned by Butter’s API.
Create the LandingHero component
Create a new file - ./src/components/LandingHero.astro:
---
// ./src/components/LandingHero.astro
import type { kb_landing_hero } from "../lib/butter";
export type Props = {
  fields: kb_landing_hero;
};
const { fields } = Astro.props;
---
<header class="site-hero">
  <div class="wrapper">
    <h1 class="site-hero-caption">
      {fields.caption}
    </h1>
    <p class="site-hero-text">
      {fields.text}
    </p>
    <div class="site-hero-search">
      <input
        type="text"
        class="site-hero-search-input form-input"
        placeholder={fields.search_field_placeholder}
      />
      <button class="cta site-hero__search-button">
        <svg
          xmlns="http://www.w3.org/2000/svg"
          width="24"
          height="24"
          viewBox="0 0 24 24"
          fill="none"
          stroke="currentColor"
          stroke-width="2"
          stroke-linecap="round"
          stroke-linejoin="round"
          class="icon feather feather-search"
        >
          <circle cx="11" cy="11" r="8"></circle>
          <line x1="21" y1="21" x2="16.65" y2="16.65"></line>
        </svg>
      </button>
    </div>
  </div>
</header>
Here, you have a component used to render the hero section of your landing page.
Import the kb_landing_hero type from a file named in the ./lib/butter.ts. This type is used to define the Props type, which is an object that contains a single field named fields of type kb_landing_hero.
Next, extract the fields object from the Astro.props object which will be passed to the fields prop to the component.
The rest of the code is the markup for the hero section. Use the fields prop to dynamically render the content of the hero section, including the heading, subheading, search field placeholder text, and search button.
Next, create the components for your sections.
Create the ArticleCard component
Create a new file called ./components/ArticleItem.astro:
---
// ./src/components/ArticleItem.astro

import type { kb_article } from "../lib/butter";
export type Props = {
  article: kb_article;
};
const { article } = Astro.props;
---
<a href={`article/${article.slug}`}>
  <article class="article-item">
    <h3 class="title">{article.fields.title}</h3>
    <p>{article.fields.description}</p>
  </article>
</a>
Here, use the kb_article type for your article prop. The markup is simply an anchor element (<a>) with an href attribute that dynamically creates a link to the article based on its slug property. Then, we render the title and description.
Create the CategoryItem component
Create a new file called ./src/components/CategoryItem.astro:
// ./src/components/CategoryItem.astro
import type { kb_category } from "../lib/butter";
export type Props = {
  category: kb_category;
};
const { category } = Astro.props;
---
<a href={`category/${category.slug}`}>
  <article class="category-item group">
    <h3 class="name">{category.name}</h3>
    <p>{category.description}</p>
  </article>
</a>
Here, use the kb_category type for your category prop. The markup is simply an anchor element (<a>) with an href attribute that dynamically creates a link to the category page based on its slug property. Then we render the name and description.
Create the FeaturedCategories component
Create a new file called ./src/components/Sections/FeaturedCategories.astro:
---
// ./src/components/Sections/FeaturedCategories.astro
import { kb_featured_categories } from "../../lib/butter";
import CategoryItem from "../CategoryItem.astro";
export type Props = {
  section: kb_featured_categories;
};
const { section } = Astro.props;
---
<section class="site-section" data-section={section.type}>
  <div class="wrapper">
    <header class="section-header">
      <h2 class="caption">{section.fields.caption}</h2>
    </header>
    <ul class="categories-list">
      {
        section.fields.categories.map((category) => (
          <li>
            <CategoryItem category={category} />
          </li>
        ))
      }
    </ul>
  </div>
</section>
Here, import the kb_featured_categories type to define the Props type, which is an object that contains a single field named section which is for the section prop extracted from Astro.props.
The remainder of the code is the markup for the featured categories section. It uses the section prop to dynamically render the content of the section, including the section header and a list of categories.
The list of categories is rendered using the map() method to iterate over the categories array in section.fields.categories. For each category, the `CategoryItem` component is rendered.
Create the FeaturedArticles component
Create a new file called ./src/components/Sections/FeaturedArticles.astro:
---
// ./src/components/Sections/FeaturedArticles.astro
import { kb_featured_articles } from "../../lib/butter";
import ArticleCard from "../ArticleCard.astro";
export type Props = {
  section: kb_featured_articles;
};
const { section } = Astro.props;
---
<section class="site-section" data-section={section.type}>
  <div class="wrapper">
    <header class="section-header">
      <h2 class="caption">{section.fields.caption}</h2>
    </header>
    <ul class="articles-list">
      {
        section.fields.articles.map((article) => (
          <li>
            <ArticleItem article={article} />
          </li>
        ))
      }
    </ul>
  </div>
</section>
As you would expect, import the kb_featured_articles type for this component. Similar to your previous components, destructure the section prop from Astro.props and assign it the kb_featured_articles type.
In the markup, render a list of articles with the <ArticleItem/> components.
Create the KBFAQs component
Create a new file called ./src/components/KBFAQs.astro:
---
// ./src/components/KBFAQs.astro
import type { kb_faqs } from "../../lib/butter";
export interface Props {
  section: kb_faqs;
}
const { section } = Astro.props;
---
<section class={"site-section"}>
  <div class="wrapper">
    <header class="section-header">
      <h2 class="caption">{section.fields.caption}</h2>
    </header>
    <ul class="faqs-list">
      {
        section.fields.faqs.map((faq) => (
          <details class="faq-item">
            <summary class="summary">{faq.question}</summary>
            <div class="content" set:html={faq.answer} />
          </details>
        ))
      }
    </ul>
  </div>
</section>
Here, use the kb_faqs type for the section prop. Then, in the markup, render a <details /> element with the faq.question and faq.answer.
Notice that you’re using the set:HTML attribute to render the string as HTML.
Create the Search component
Since you’ll be adding search functionality to your knowledge base, create a Search component to handle that. Create a new file called ./src/components/Search.astro:
---
// ./src/components/Search.astro
interface Props {
  placeholder?: string;
}
const { placeholder } = Astro.props;
---
<form id="search" class="search">
  <input
    id="search-input"
    type="text"
    class="search-input form-input"
    placeholder={placeholder}
  />
  <button class="cta search-button">
    <svg
      xmlns="http://www.w3.org/2000/svg"
      width="24"
      height="24"
      viewBox="0 0 24 24"
      fill="none"
      stroke="currentColor"
      stroke-width="2"
      stroke-linecap="round"
      stroke-linejoin="round"
      class="icon feather feather-search"
    >
      <circle cx="11" cy="11" r="8"></circle>
      <line x1="21" y1="21" x2="16.65" y2="16.65"></line>
    </svg>
  </button>
</form>
<script>
  const form = document.getElementById("search") as HTMLFormElement;
  const searchInput = document.getElementById(
    "search-input"
  ) as HTMLInputElement;
  const handleSearch = (e: FormDataEvent) => {
    e.preventDefault();
    const search = searchInput.value;
    console.log(e.target);
    if (search) {
      window.location.href = `/search?query=${search}`;
    }
  };
  form.addEventListener("submit", handleSearch);
</script>
Here, include a <script> block that adds an event listener to the form's submit event. When the form is submitted, the handleSearch function is called. This function prevents the default form submission behavior, gets the search query from the input element, and redirects the browser to a search results page with the query as a parameter.
Now, you’ll import this component to your ./src/components/LandingHero.astro component:
---
// ./src/components/LandingHero.astro
import type { kb_landing_hero } from "../lib/butter";

// ...
---
<header class="site-hero">
  <div class="wrapper">
    <!-- ... -->
    <Search placeholder={fields.search_field_placeholder} />
  </div>
</header>
Next, you’ll build out the pages for your knowledge base.
Creating pages
Put the components you just created together to create your dynamic landing page.
Create the landing page
Back in your ./src/pages/index.astro file, import your components, map through the sections, and use a switch statement to conditionally render your section components:
---
// .src/pages/index.astro
import LandingHero from "../components/LandingHero.astro";
import FeaturedArticles from "../components/Sections/FeaturedArticles.astro";
import FeaturedCategories from "../components/Sections/FeaturedCategories.astro";
import KBFAQs from "../components/Sections/KBFAQs.astro";
import Layout from "../layouts/Layout.astro";
import { butterClient, kb_landing_page_fields } from "../lib/butter";
// retrieve the page data from ButterCMS by type and slug
const response = await butterClient.page.retrieve(
  "kb_landing_page",
  "kb-home-page"
);
// get the page data
const pageData = response.data.data;
// cast the fields to the correct type
const fields = pageData.fields as kb_landing_page_fields;
---
<Layout title={fields.seo.title} description={fields.seo.description}>
  <main class="site-main">
    <LandingHero fields={fields.kb_landing_hero} />
    {
      fields.sections.map((section) => {
        switch (section.type) {
          case "kb_featured_categories":
            return <FeaturedCategories section={section} />;
          case "kb_featured_articles":
            return <FeaturedArticles section={section} />;
          case "kb_faqs":
            return <KBFAQs section={section} />;
          default:
            return null;
        }
      })
    }
  </main>
</Layout>
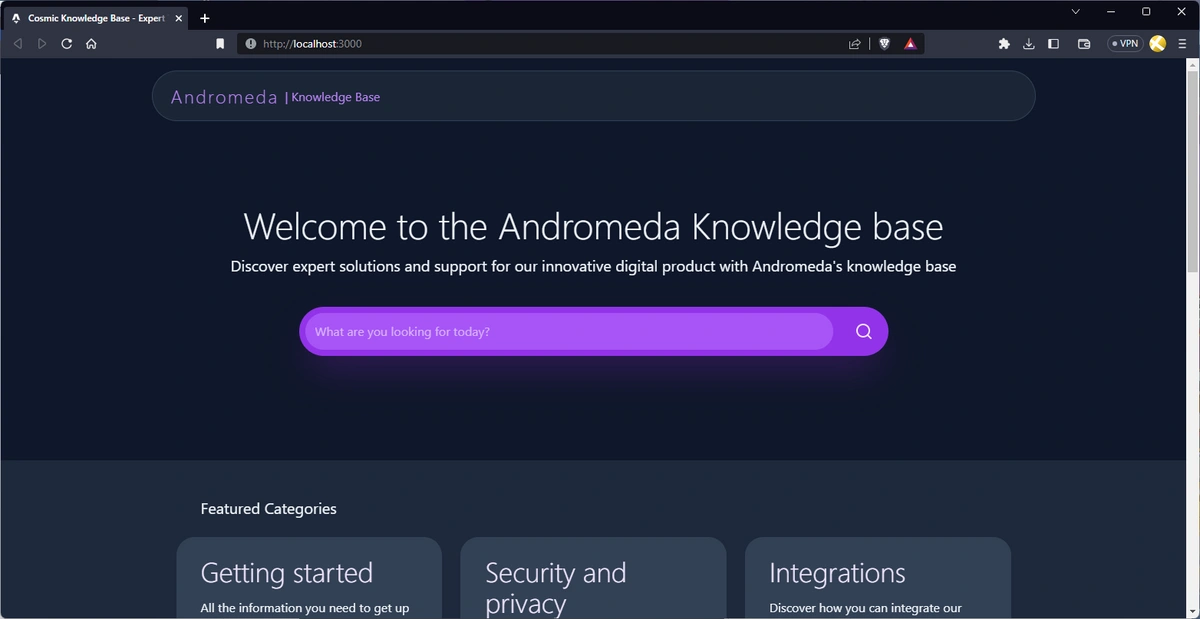
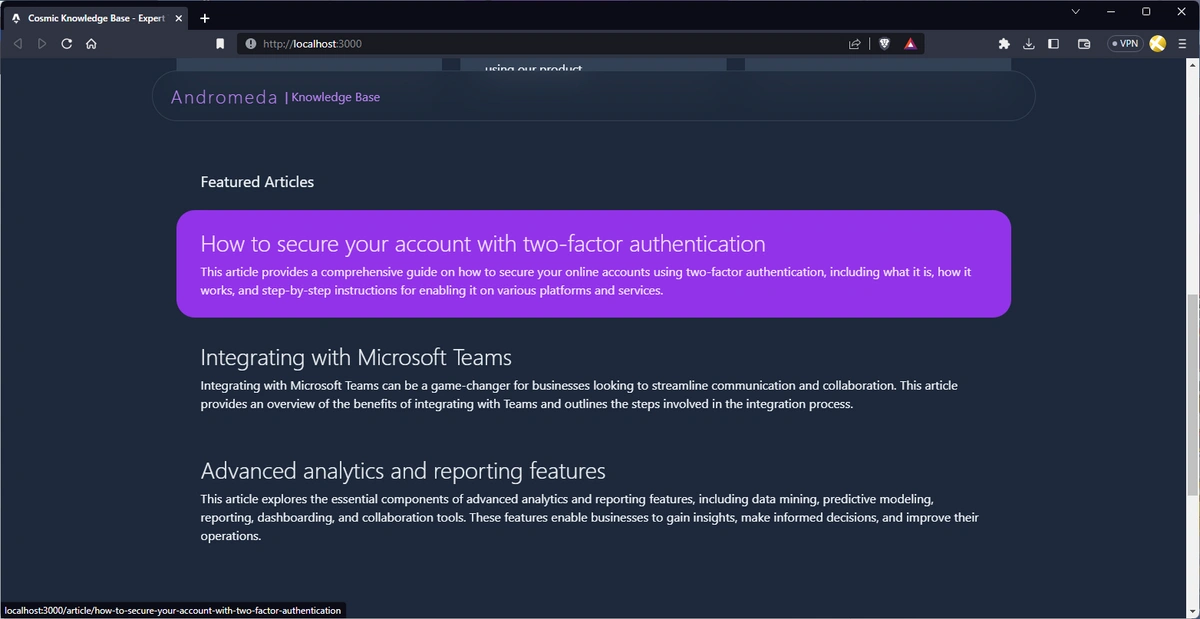
With that, you should have something like this:
Here, you can see the landing hero and featured categories.
Here, you can see the featured articles.
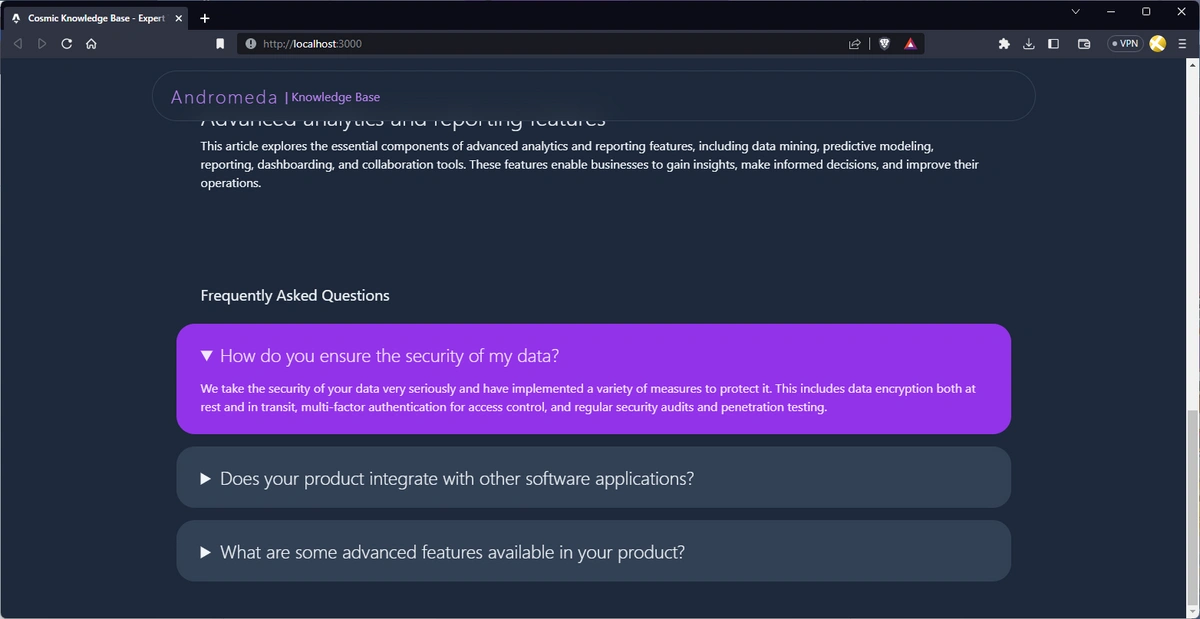
And finally, here you see the FAQs.
Create the dynamic categories page
First, enable SSR mode by adding output: "server" to your ./astro.config.cjs file:
// ./astro.config.mjs
import { defineConfig } from 'astro/config';
import tailwind from "@astrojs/tailwind";
// https://astro.build/config
export default defineConfig({
  integrations: [tailwind()],
  output: "server"
});
Now create a new - ./src/pages/category/[slug].astro file:
---
// ./src/pages/category/[slug].astro
import ArticleItem from "../../components/ArticleItem.astro";
import LandingHero from "../../components/LandingHero.astro";
import Layout from "../../layouts/Layout.astro";
import { butterClient, kb_article, kb_category } from "../../lib/butter";
const { slug } = Astro.params;
const params = {
  "fields.category.slug": slug,
};
const collectionResponse = await butterClient.content.retrieve(
  ["kb_category"],
  {
    "fields.slug": slug,
  }
);
const pagesResponse = await butterClient.page.list("kb_article", params);
const categoryData = collectionResponse.data.data;
const pagesData = pagesResponse.data.data;
const category = categoryData.kb_category as kb_category[];
const articles = pagesData as unknown as kb_article[];
---
<Layout title={category[0].name} description={category[0].description}>
  <main class="site-main">
    <LandingHero
      fields={{
        caption: category[0].name,
        text: category[0].description,
        search_field_placeholder: "Search for articles",
      }}
    />
    <section class="site-section">
      <div class="wrapper">
        <ul class="articles-list">
          {
            articles.map((article) => (
              <li>
                <ArticleItem article={article} />
              </li>
            ))
          }
        </ul>
      </div>
    </section>
  </main>
</Layout>
Here, the category data and article data are retrieved separately using the content.retrieve() and page.list() functions from the butterClient library. Gt the slug Astro.params and assign it to the fields.category.slug key in the params object which will be used to fetch the pages.
Assign the slug to the fields.slug key in the butterClient.content.retrieve() function which will be used to fetch the category.
The retrieved data is then used to display the category name, description, and a list of articles on the page.
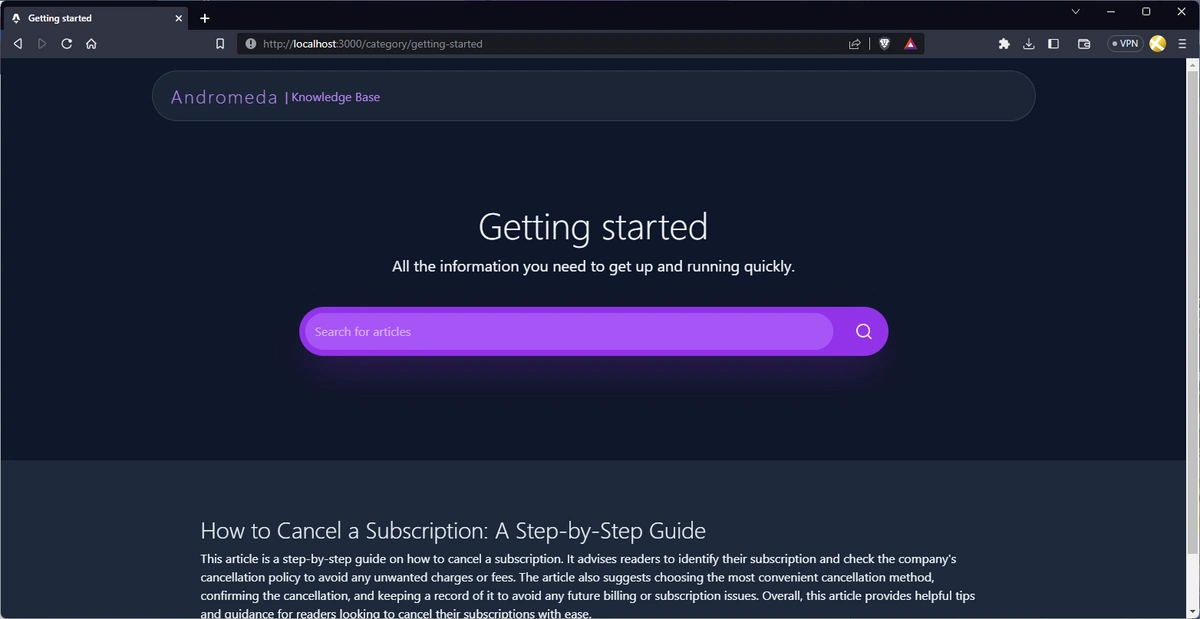
Now, when you navigate to category/getting-started, you should have something like this:
Create the Article page
Create a new file called ./src/pages/article/[slug].astro:
---
// ./src/pages/article/[slug].astro

import Layout from "../../layouts/Layout.astro";
import { butterClient, kb_article } from "../../lib/butter";
const { slug } = Astro.params;
const response = await butterClient.page.retrieve("kb_article", slug);
const article = response.data.data as kb_article;
---
<main class="site-main">
  <Layout title={article.fields.title} description={article.fields.description}>
    <article class="site-article">
      <div class="wrapper">
        <header class="article-header">
          <div class="wrapper">
            <h1 class="article-header-caption">
              {article.fields.title}
            </h1>
            <p class="site-hero-text">
              {article.fields.description}
            </p>
          </div>
        </header>
        <section class="site-section content-section">
          <div
            class="wrapper prose dark:prose-invert !max-w-4xl"
            set:html={article.fields.content}
          />
        </section>
      </div>
    </article>
  </Layout>
</main>
Here, extract the slug value from the Astro.params object, which is the identifier of the article being displayed.
Next, call the butterClient.page.retrieve() function to retrieve the article data. The function takes two arguments: the content type (in this case, kb_article) and the article slug. The response from the function call is stored in response, and the actual article data is extracted from it and stored in article.
Finally, the article data is used to populate the HTML of the web page. The article title and description are passed to the Layout component as props which set the page metadata. The article content is displayed within an article tag, with the title and description displayed in a header section, and the article content displayed in a section tag using the set:html attribute to populate it with the HTML content from the article.fields.content property.
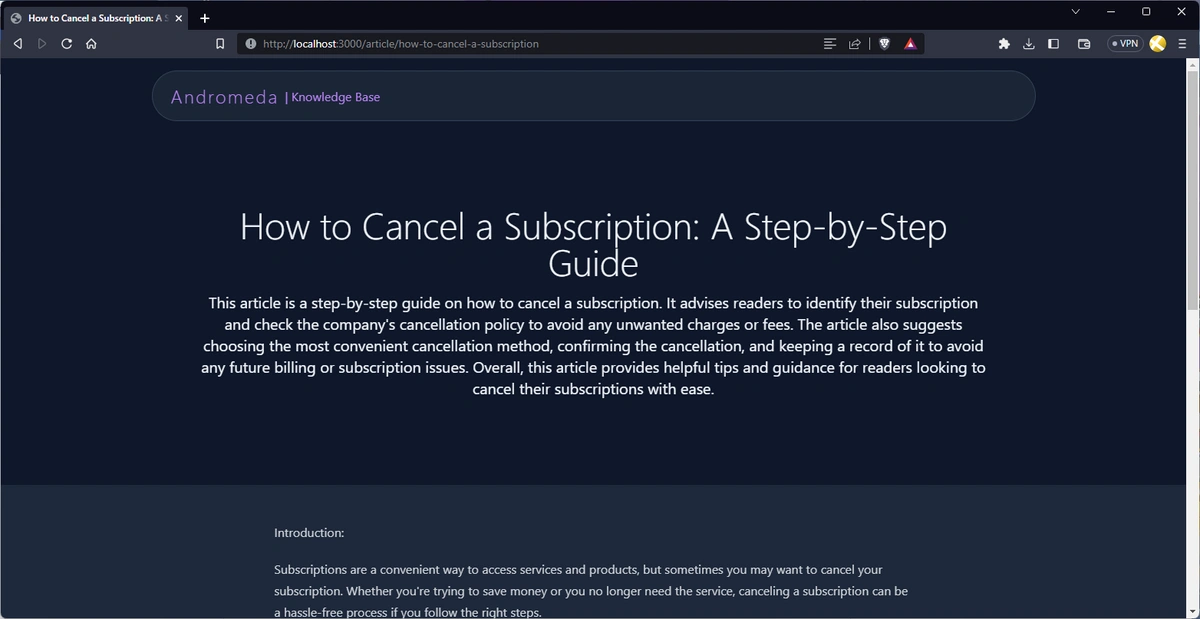
With that, your article page should look something like this:
Create the Search page
Create a new file called ./src/pages/search.astro:
---
// ./src/pages/search.astro
import ArticleItem from "../components/ArticleItem.astro";
import LandingHero from "../components/LandingHero.astro";
import Layout from "../layouts/Layout.astro";
import { butterClient, kb_article } from "../lib/butter";
const query = Astro.url.searchParams.get("query");
const response = await butterClient.page.search(query, {
  page_type: "kb_article",
});
const pagesData = response.data.data;
const articles = pagesData as kb_article[];
---
<Layout
  title={`Results matching ${query}`}
  description={`Results matching ${query}`}
>
  <main class="site-main">
    <LandingHero
      fields={{
        caption: `Results matching "${query}"`,
        text: `Here's what we could find matching "${query}"`,
        search_field_placeholder: "Search for something else",
      }}
    />
    <section class="site-section">
      <div class="wrapper">
        <ul class="articles-list">
          {
            articles.map((article) => (
              <li>
                <ArticleItem article={article} />
              </li>
            ))
          }
        </ul>
      </div>
    </section>
  </main>
</Layout>
Here, retrieve the search query from the URL using Astro.url.searchParams.get("query"). Then, call the butterClient.page.search method to retrieve a list of articles matching the query, passing in an object with page_type: "kb_article" to restrict the search to knowledge base articles only.
The search response is then used to extract the article data as an array of kb_article objects. Finally, the article data is used to render the search results on the page by mapping over the articles array and rendering an ArticleItem component for each one.
With that, your search page should look something like this:
Deploying to Netlify
Deploying a project is pretty straightforward. For this tutorial, you'll deploy using GitHub. First, add a Netlify adapter to your application because you’re using SSR in your Astro project.
Run the command to add the Netlify adapter:
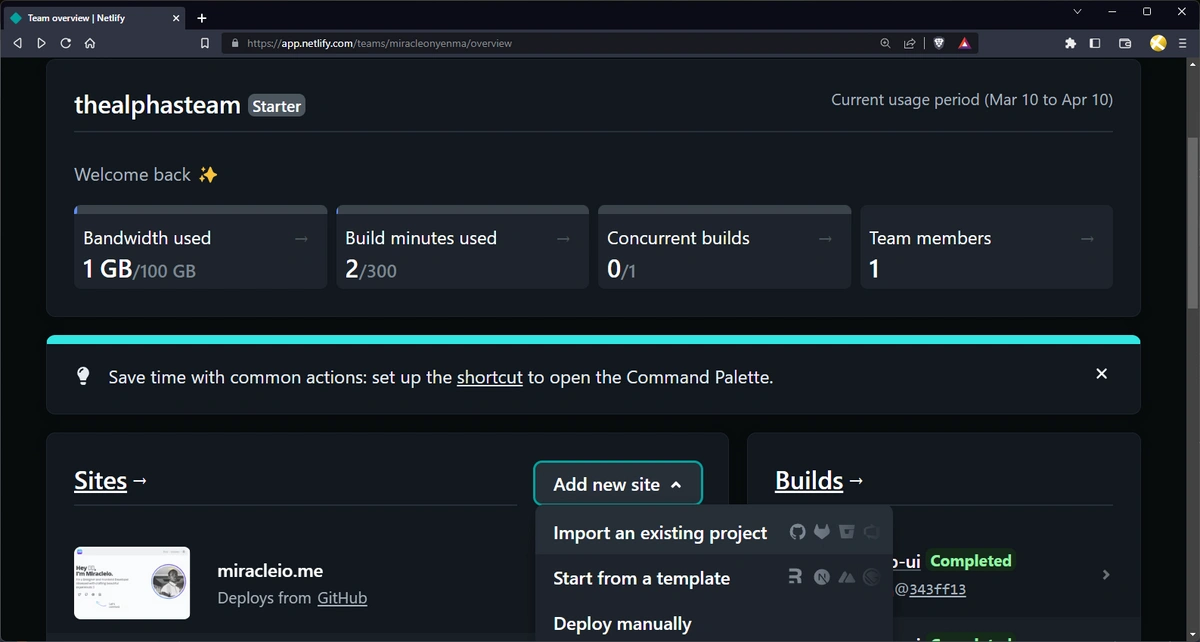
npx astro add netlifyCreate a repo on GitHub for your project and upload your code. After that’s done, navigate to the Netlify dashboard and create a new project:
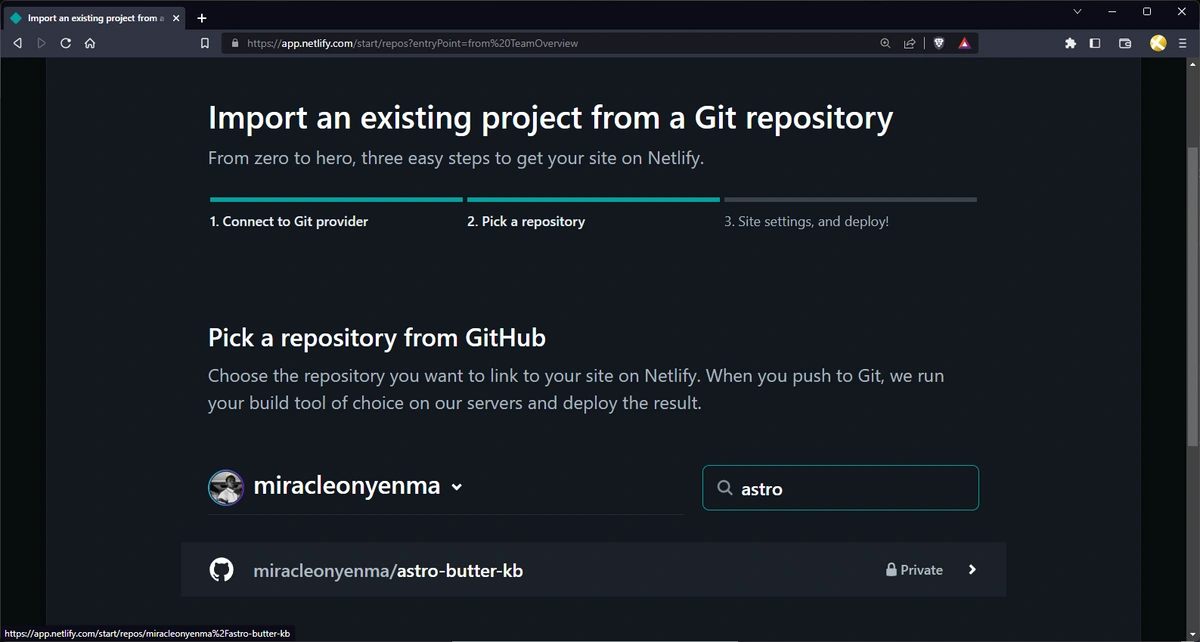
In the next step, select GitHub as the Git provider. Next, select the repo for the project:
Under the site settings, click on Advanced Options and enter the Butter API token env:
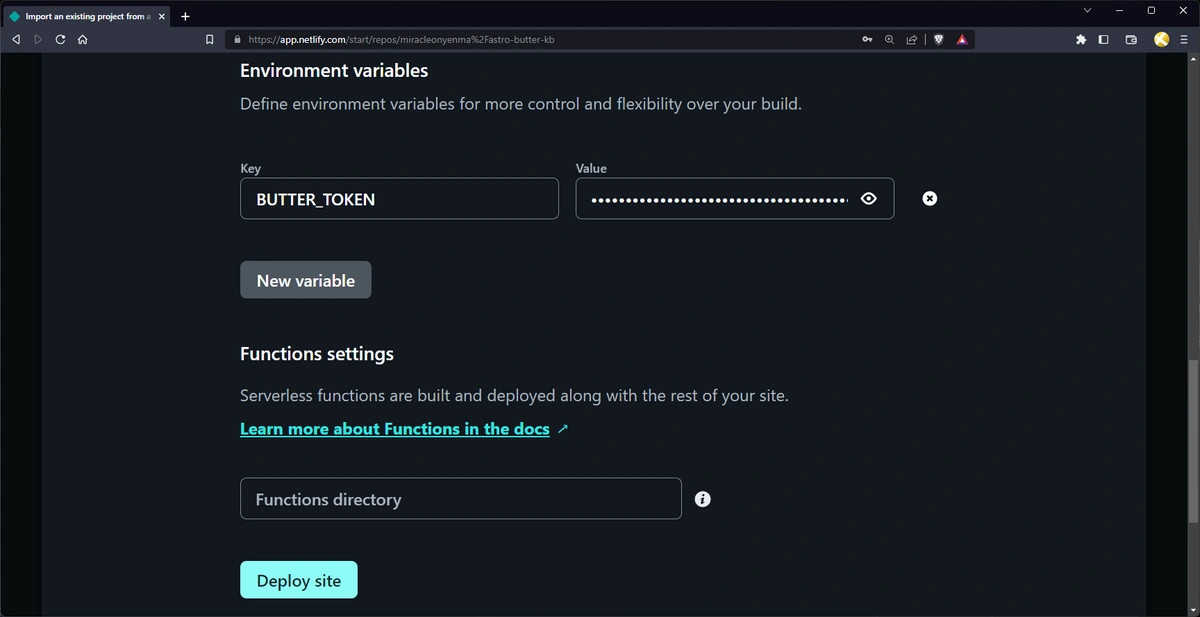
Now, click on Deploy Site.
Final results
Congratulations on making it this far into this tutorial. Hopefully, you’ve been able to set up your ButterCMS, create a few pages, and build out your Astro front-end by following this tutorial.
Once your site is deployed, you can always change the default randomly generated site name to something else.
Here’s a GIF of what the final result should look like:

Closing thoughts
In conclusion, building a knowledge base with Astro and ButterCMS is an effective and efficient way to create a robust, organized, and user-friendly resource for your audience. By following the steps outlined in this article, you can easily set up ButterCMS to power your knowledge base, create dynamic landing pages and components, and add content to ButterCMS.
With Astro, you can integrate ButterCMS and fetch data to build out your knowledge base using various components, including the landing hero, article card, category item, featured categories, featured articles, KB FAQs, and search. Deploying your knowledge base to Netlify is straightforward, and the final result will be a professional and comprehensive resource that is easy to navigate and use.
By investing the time and effort to create a knowledge base using Astro and ButterCMS, you can provide value to your audience and establish your brand as a knowledgeable and reliable source of information.
If you'd like to learn more about how you can use ButterCMS with Astro, check out the following tutorial:
Further reading and resources
Here are a few links I think you might find useful: