
- Planning the App
- Pre-requisites
- Getting Started
- The News API Service Setup
- Tweaking the template
- Building the Main Content Component
- Building the Side Menu Component
- Customizing the Side Scrollbar with CSS
- Adding Scrolling Animation with AOS
- Setup Icons For The News Resources
- Testing the Application
- Conclusion
Table of contents
This is not a clickbait title. It’s not another ugly project. Instead, this is a complete guide to build a stunning news application that is going to rock your world.
Today, I am going to show you step by step how to build a beautiful animated news application with minimum effort -- using Vue.js, one of the most popular JavaScript Frameworks for building interactive user interfaces along with Vuetify, a Vue-powered UI library, which will speed up the UI construction for us.
It’s not a complex application to build as it might sound, because in this tutorial, you’ll be impressed by the amount of code snippets we’ll be using. Beside, I’m going to explain everything in detail.
You can find the full source code at the following GitHub repo. And here’s a live link of what you’ll be building.
What will you learn during this tutorial?
By the end of this tutorial, here is what you'll be familiar with:
- How to integrate Vuetify UI components to perfectly design your Vue applications.
- How to communicate between Vue components using the Event Bus approach.
- How to connect your Vue apps with a backend-service, retrieve the response object and integrate it into the template.
- How to customize the browser’s scrollbar behavior with CSS.
- How to add some stunning animation effects when scrolling the news articles, using a library called AOS.
Now that you know what you’re about learn, the next step is figuring out what you’re about to build.
Planning the App
Before we start coding, we need at least some basic planning, which will help us to decide what we want to build and what functionality we need to implement. To make things even easier, we’ll use the following sketch to describe the UI we want to build.

Now that you have an clearer idea about what we want to build, the next step is to describe the functionality we intend to implement.
App Components
Vue.js is a component-based framework. So we’re going to use that feature to split the app into individual components (two in our case, as shown in the sketch above). The following outline features the functionality of each component.
Side Menu
This component will be responsible for displaying the news resources collected from the News API, and it will contain the following parts:
- A drawer that will be toggled from the toolbar side icon.
- A list that displays 97 news sources fetched from the News API.
Main Content
This component will render the latest news articles for the selected resource within the side menu, and it will contain the following UI components.
- A layout based on flexbox to control the central position of our main content.
- A card for displaying the title, description, and the article image…etc. For each news article data object.
Of course, the above outline cannot cover all the details and nuances, and that's perfectly fine. But what I want to you to understand is once the application fires up, you’ll see some news articles from TechCrunch as the default news resource. Next, the side menu will help you select a resource of your choice to consulate its latest articles in the main content section.
Continue expanding your Vue.js skills – learn to build a blog next!
Read the tutorialAnd you know what? We’ll handle the details in a short and sweet manner during the build process.
Pre-requisites
To follow along with this tutorial, you’ll need to have Node.js and npm installed on your system. Installing Node.js also installs npm.
Basic knowledge of JavaScript and Vue is also required. You can follow the official Vue documentation here to get up to speed.
Once the requirements are out of the way, proceed.
Getting started
There are a plenty of ways to setup a Vue project. But in this tutorial, we’ll be use a pre-made Vue template called Webpack to bootstrap the project with Vue-CLI. So open a command line window and run the following to install the Vue CLI:
npm install -g vue-cliWithin the directory you want to use for this project, let’s use the Vue CLI to scaffold our working project:
vue init webpack vue-news-appNote: Once you type the above command, you’ll be presented by a number of query prompts. Just answer them, and make sure to set all the project dependencies to “NO” even for the vue-router.
Once the project is setup and all the initial dependencies are installed, navigate to the newly created project to add the Vuetify UI package using npm
cd vue-news-app
npm install --save vuetify
This will install the Vuetify UI powered library that we’ve already stated, and you’ll see how it’s going to perfectly design our web application.
To perform some backend requests to the news services API, we’ll be making use of axios, which is a promise-based HTTP client library that works both in the browser and in a Node.js environment. So, let’s first install it:
npm install --save axiosFinally, run the app with:
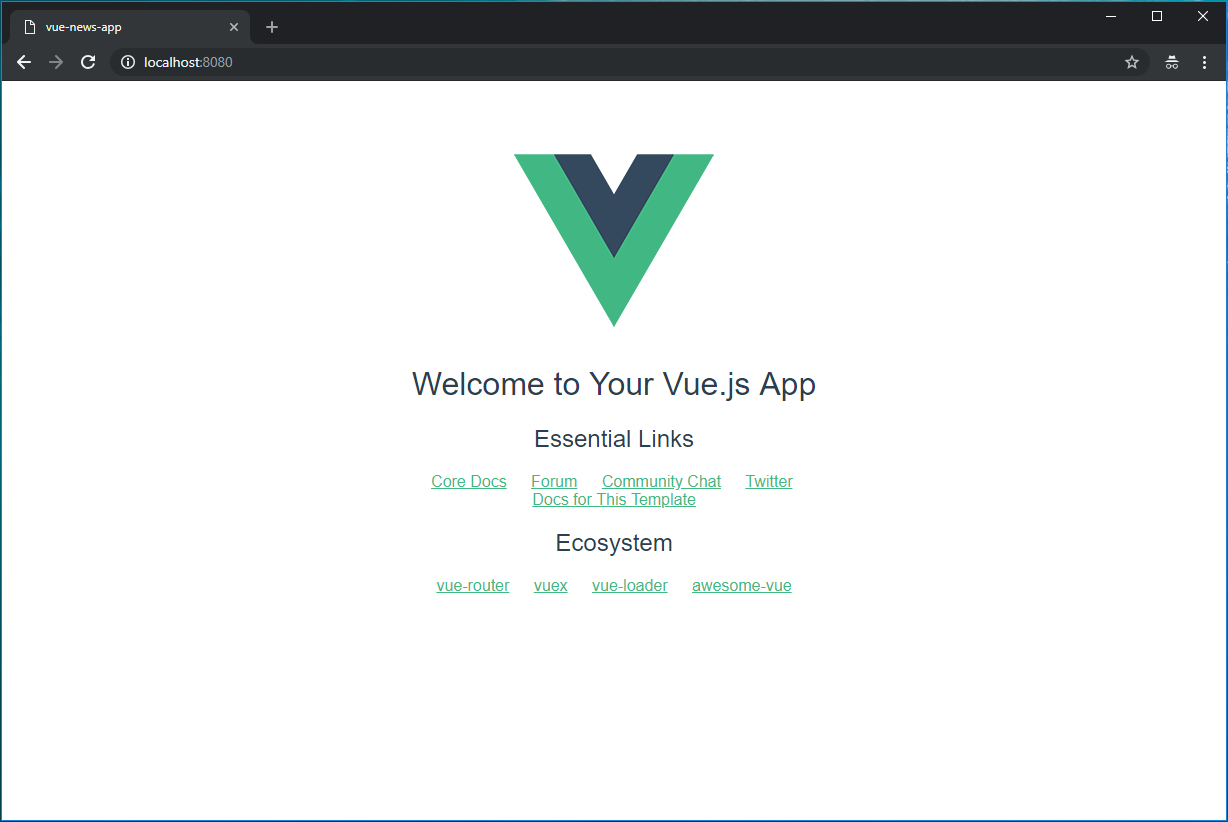
npm run devThis will start a local development server at http://localhost:8080 in you default browser with the following Vue starter template:
The News API Service Setup
For the backend-service part, we’re going to implement a service called News API , which is a simple API that returns JSON metadata for headlines and articles live from all over the web. It’s extremely fast in terms of response, free to implement for developers and you can easily integrate it within your apps using simple HTTP GET requests.
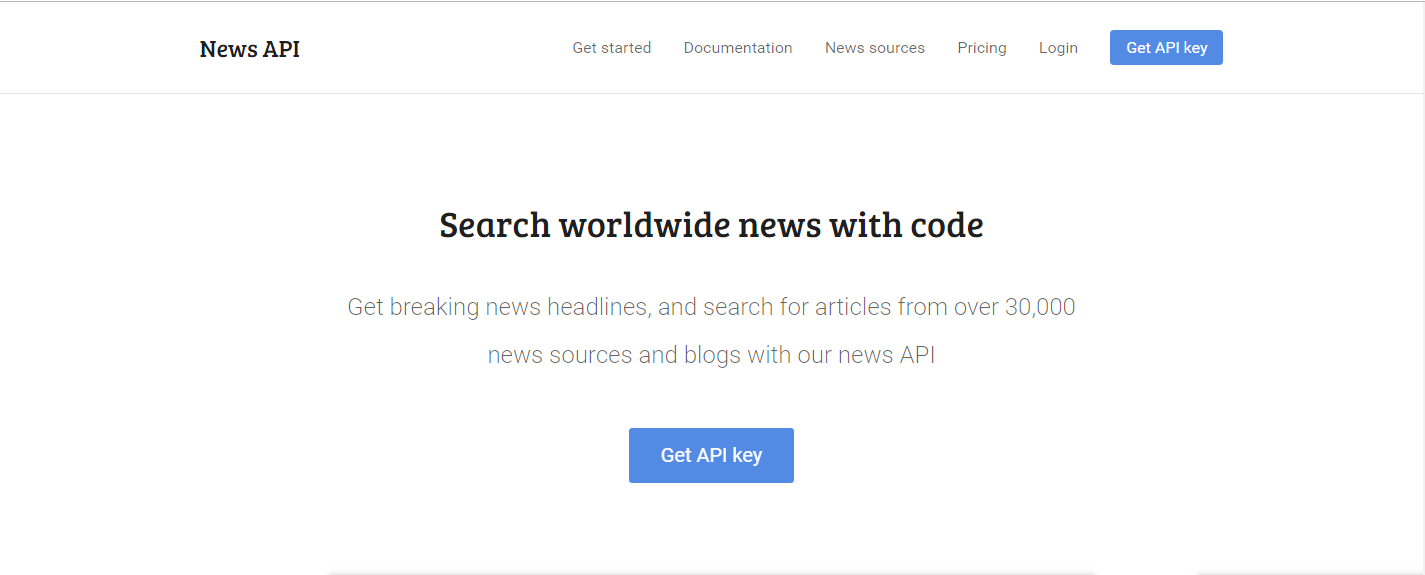
Now that you know what the News API service is, go ahead and visit the News API official site and click on the “Get API key” button to register for a new account.
We’ll be using that API key to validate the connection between our application and the news API backend service.
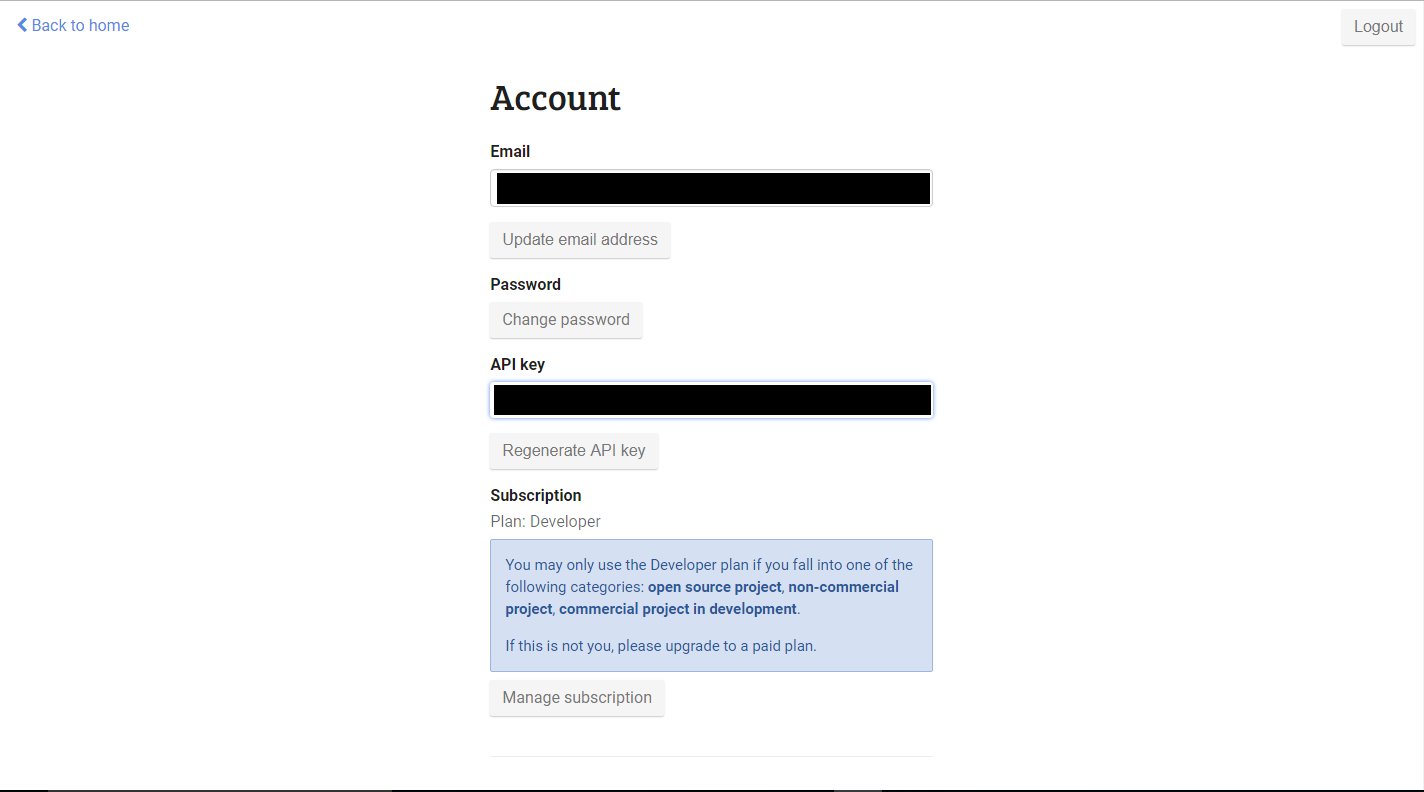
Once the registration process is done, you’ll be redirect to dashboard where the API key is already generated for you. Just save the key somewhere within a text file and I’ll tell you when to use it.
Now that you’ve claimed your key, let’s get into the fun part and write some code.
Tweaking the Template
To adjust it to our needs, we need to clean up the template and tweak it a bit. To do so, open the src/App.vue file, delete everything inside, and add the following instead:
  <template>
  <v-app light>
  <!--The Side Menu component go here -->
  <v-toolbar fixed app light clipped-left color="primary" class="elevation-2">
    <v-toolbar-side-icon @click="drawer = !drawer" class="white--text"></v-toolbar-side-icon>
    <v-toolbar-title class="white--text">News App</v-toolbar-title>
  </v-toolbar>
  <v-content>
    <v-container fluid>
      <!--The Main Content component go here-->
    </v-container>
   </v-content>
   <v-footer class="secondary" app>
<v-layout row wrap align-center>
        <v-flex xs12>
          <div class="white--text ml-3">
            Made with
            <v-icon class="red--text">favorite</v-icon>
            by <a class="white--text" href="https://vuetifyjs.com" target="_blank">Vuetify</a>
            and <a class="white--text" href="https://github.com/rachidsakara" target="_blank">Rachid Sakara</a>
          </div>
        </v-flex>
      </v-layout>
    </v-footer>
  </v-app>

</template>
<script>
export default {
  data () {
    return {
      drawer: true,
    }
  },
}
</script>
Note: All the tags starting with the “v-” prefixes are actually Vue elements, and not standard HTML elements.
The src/App.vue file serves as the app main component. And as you can see in the file above, we’re wrapping our News Application in the v-app component, which is required for the app to work properly. Then, we are also passing the light prop to apply the Vuetify light theme.
Within the <script> tag section, we have a Boolean property called drawer set to false as default, which will toggle the side menu visibility using a click event triggered when we click on the <v-toolbar-side-icon> component. So, if you’re looking to show the side menu from beginning, you’ll have to set the drawer value to true. Besides, you’ll better understand this part once we register the side menu component in file above.
Import & Initialize Vuetify
Now, open the main.js file, delete its original content, and update it with the following:
import Vue from 'vue'
import App from './App'
import Vuetify from 'vuetify'
import 'vuetify/dist/vuetify.min.css'

Vue.use(Vuetify)


Vue.config.productionTip = false

/* eslint-disable no-new */
new Vue({
  el: '#app',
  components: { App },
  template: '<App/>'
})
This will import the Vuetify package and tell the Vue instance to use it.
Adding Google Roboto Font & Font Awesome Icons
In your code editor, open the index.html file and update the content of the <head> block like so:
...
<head>
    <meta charset="utf-8">
    <meta name="mobile-web-app-capable" content="yes">
    <meta name="viewport" content="width=device-width,initial-scale=1.0">
    <title>vue-news-app</title>

    <!--Google Font-->
    <link rel="stylesheet" href="https://fonts.googleapis.com/css?family=Roboto:300,400,500,700,400italic|Material+Icons">

    <!--Font Awesome-->
    <link rel="stylesheet" href="https://cdnjs.cloudflare.com/ajax/libs/font-awesome/4.7.0/css/font-awesome.css" />


  </head>
...
The first link tag will add the Google Roboto Font along with Material Design icons for some Vuetify UI components to access. The second link tag is importing the Font Awesome icons and uses them to customize the social sharing buttons.
Building the Main Content Component
In the src/components directory, delete the default HelloWorld.vue file. Then, in the same folder, create the MainContent.vue file with the following content:
<template>
    <v-layout row wrap align-center>
          <v-flex xs8  offset-md2>
            <div v-for="article in articles" :key="article.title">
              <v-card class="my-3" hover>
                <v-img
                  height="350px"
                  v-bind:src="article.urlToImage"
                ></v-img>
                  <v-container fill-height fluid>
                    <v-layout>
                      <v-flex xs12 align-end d-flex>
                        <span class="headline">{{ article.title }}</span>
                      </v-flex>
                    </v-layout>
                  </v-container>
                </v-card-media>
                <v-card-text>
                  {{ article.description }}
                </v-card-text>
                <v-card-actions>
                  <v-chip small color="secondary" class="white--text">
                    {{article.source.name}}
                  </v-chip>
                  <v-spacer></v-spacer>
                  <v-btn icon class="red--text">
                    <v-icon small>fa-reddit</v-icon>
                  </v-btn>
                  <v-btn icon class="light-blue--text">
                    <v-icon small>fa-twitter</v-icon>
                  </v-btn>
                  <v-btn icon class="blue--text text--darken-4">
                    <v-icon small>fa-facebook</v-icon>
                  </v-btn>
                  <v-btn icon class="red--text">
                    <v-icon small>fa-google-plus</v-icon>
                  </v-btn>
                  <v-btn icon class="blue--text text--darken-4">
                    <v-icon small>fa-linkedin</v-icon>
                  </v-btn>
                  <v-spacer></v-spacer>

         <v-btn small replace color="info" v-bind:href="article.url" target="_blank" >Read More</v-btn>
                </v-card-actions>
              </v-card>
            </div>
          </v-flex>
        </v-layout>
</template>

<script>
export default {
  props: {
      articles: Array
  },
}
</script>
In the above template, we’re using the following Vuetify UI components: Card, Image, Button and Icon.
You’ll notice that we have an articles property declared as Array inside the props object, which we’ll be used to iterate on each article object and render it within the Vuetify v-card UI component. Now, the question is why we’ve defined it in the props object and not within the data attribute.
The articles property is going to be first defined and initialized with remote data in the App main component App.vue file. Next, we’ll pass this property down to the Main Content child component with a binding expression.
Then, to accept it, the child component (In this case, the main content component) needs to declare it inside its prop object as show in the file above.
In addition, the side menu component would also have access to articles property and change its state from the parent component App.vue, because we’re aiming to displays the latest news articles for each selected news resource from the side menu without reloading the page. So, we’re talking about implementing the Vue SPA (Single Page Application) feature.
Continue expanding your Vue.js skills – learn to build a blog next!
Read the tutorialRegistering the Main Content Component
Now, in the App.vue file, import the main content component, register it in the components object, and add it to the template:
<template>
<v-app light>
  <!--The SideMenu Component go here-->
  <v-toolbar fixed app light clipped-left color="primary" class="elevation-2">
    <v-toolbar-side-icon @click="drawer = !drawer"  class="white--text"></v-toolbar-side-icon>
    <v-toolbar-title class="white--text">News App</v-toolbar-title>
  </v-toolbar>

  <v-content>
    <v-container fluid>
      <MainContent :articles="articles"></MainContent> <!-- Add the component in the template -->
    </v-container>
   </v-content>
   <v-footer class="secondary" app>
      <v-layout row wrap align-center>
        <v-flex xs12>
          <div class="white--text ml-3">
            Made with
            <v-icon class="red--text">favorite</v-icon>
            by <a class="white--text" href="https://vuetifyjs.com" target="_blank">Vuetify</a>
            and <a class="white--text" href="https://github.com/rachidsakara"
target="_blank">Rachid Sakara</a>
          </div>
        </v-flex>
      </v-layout>
    </v-footer>
  </v-app>


</template>

<script>

import axios from 'axios' // importing the axios (a HTTP library) to connects the app with the News API
import MainContent from './components/MainContent.vue' // import the Main Content component

export default {

  components: {
        MainContent, // Register the component
  },

  data() {
    return {
      drawer: false, // false = Vuetify automatically "do the right thing" to show/hide the drawer
      api_key:'Your_API_KEY_HERE', // Your API Key go here
      articles: [],
      errors: []
    }
  },
  created () {
    axios.get('https://newsapi.org/v2/top-headlines?sources=techcrunch&apiKey='+this.api_key)
      .then(response => {
        //this.articles = response.data.articles
        this.articles = response.data.articles
        console.log('data:')
        console.log(response.data.articles) // This will give you access to the full object
      })
      .catch(e => {
        this.errors.push(e)
      })
  },


  }
</script>
As you can see, we’ve added some new properties within the data attribute. So, let’s describe bravely their functionalities:
- api_key: This is where to put your API key that you’ve generated from the News API service.
- articles: property defined as an Array that holds the app news articles fetched from the API.
- errors: another array property to hold unexpected messages during HTTP requests.
Just underneath the data attribute, we’ve added a Vue hook function called created, which fires once the component is first loaded.
Next, inside the created() function, we’re using the axios.get() method, which accepts an API endpoint as a first argument. Once that data is retrieved, the then() method will set the value of response.data.articles this.articles to the JSON array.
Once the articles property is initialized, we’ll pass it to the Main Content component using the following template definition:
<MainContent :articles="articles"></MainContent>Now, go ahead and run the application with npm run dev, and you’ll see something similar to the following page:
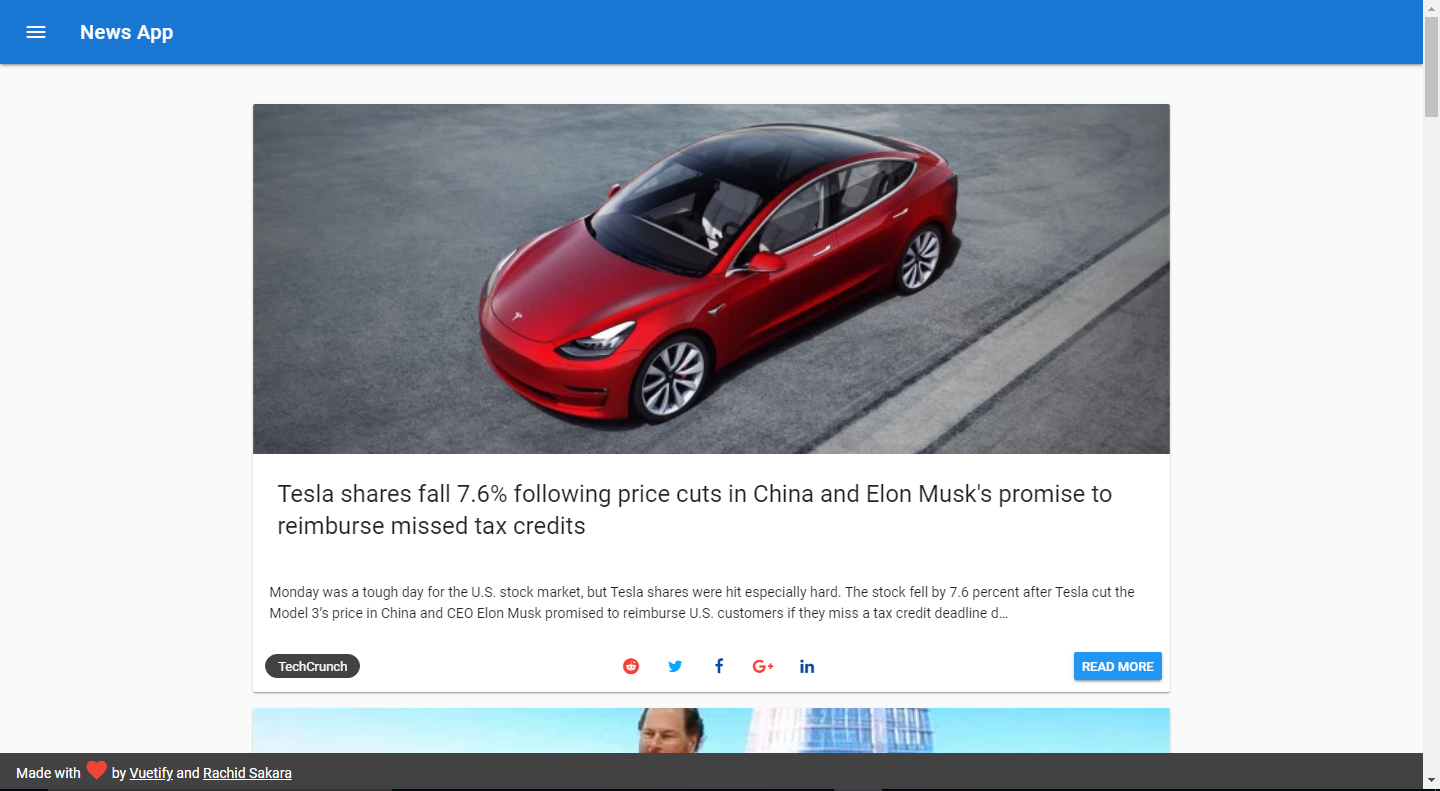
We’ll repeat the same steps for the side menu component. So, in the next section, I’ll tell you when to import, register and add the component in the template, and you should follow the same procedures.
Building the Side Menu Component
In the src/components directory once again, let’s create another component called SideMenu.vue, then add the following code inside:
<template>
  <v-navigation-drawer v-model="drawer" fixed app clipped  class="drawer-style" id="style-1">
    <v-list dense class="pt-3 white--text" >
      <v-list-tile
        v-for="source in sources"
        :key="source.id"
        @click="selectSource(source.id)"
      >
        <v-list-tile-action>
          <v-avatar size="32px">
                <img
                  class="img-circle elevation-7 mb-1"
                  :src="getImgUrl(source.id)" />
          </v-avatar>

        </v-list-tile-action>

        <v-list-tile-content>
          <v-list-tile-title>{{ source.name }}</v-list-tile-title>
        </v-list-tile-content>
      </v-list-tile>
    </v-list>
  </v-navigation-drawer>
</template>


<script>

import axios from 'axios'

export default {

   props: {
      api_key: String,
      drawer: Boolean
    },

  data: () => ({
    sources: [],
    errors: []
  }),

  created () {
    axios.get('https://newsapi.org/v2/sources?language=en&apiKey='+this.api_key)
      .then(response => {
        //this.articles = response.data.articles
        this.sources = response.data.sources
        console.log('data:')
        console.log(response.data.sources) // This will give you access to the full object
      })
      .catch(e => {
        this.errors.push(e)
      })
  },

  methods: {
      getImgUrl(pic) {
         return require('../assets/images/'+pic+'.png')
      },

      selectSource(source){
        this.$emit('selectsource',source)
      }
  }

}
</script>
Inside <template> tag, we’re using the following Vuetify UI components: Drawer, List and Avatar.
The important piece of code inside the <template> tag that I want you to focus on is v-for directive, which will render a list of items (news resources) within the sources data array.
Next, in <script> tag, we’ve imported the axios library in the first line of code to prepare the app to perform an HTTP request. Then, in the props object, we have two properties: api_key defined as String and the drawer as Boolean. Both property values will be passing from the app parent component App.vue. The drawer property will control the visibility of the v-navigation-drawer component using the v-model bound.
Inside the data function we have two data properties both defined as array: sources for storing the news resources data and errors to catch out any unexpected error messages.
Next, the axios get and then methods inside the hook created function that we’ve already stated, will set the value of this.sources to response.data.sources.
Finally, in the methods events hander, we’ve created two custom functions. getImgUrl(), which will render some dynamic values for the image src attribute (preparing the side icons for the news resources). And for the selectSource() function, it’s going to bring some articles for the passing parameter.
If you notice, inside the selectSource() function, there’s the following statement:
this.$emit('selectsource',source)
This instruction will be pass in the select news resource value for a specific list item in the template all the way to a function called selectsource(). This last function as we’re about to create in the App.vue file, is going to the update the articles property state without reloading the entire application page (SPA Feature).
Update the App.vue File to Include the Side Menu component
In the App.vue file, let’s import, register, and add the side menu component in the template like so
<template>
  <v-app light>
  <SideMenu :drawer="drawer"  :api_key="api_key" @selectsource="setResource" ></SideMenu><!--add this component in the template -->
<v-toolbar fixed app light clipped-left color="primary" class="elevation-2">
    <v-toolbar-side-icon @click="drawer = !drawer"   class="white--text"></v-toolbar-side-icon>
    <v-toolbar-title class="white--text">News App</v-toolbar-title>
  </v-toolbar>
  <v-content>
    <v-container fluid>
      <MainContent :articles="articles"></MainContent>
    </v-container>
   </v-content>
   <v-footer class="secondary" app>
      <v-layout row wrap align-center>
        <v-flex xs12>
          <div class="white--text ml-3">
            Made with
            <v-icon class="red--text">favorite</v-icon>
            by <a class="white--text" href="https://vuetifyjs.com" target="_blank">Vuetify</a>
            and <a class="white--text" href="https://github.com/rachidsakara" target="_blank">Rachid Sakara</a>
          </div>
        </v-flex>
      </v-layout>
    </v-footer>
  </v-app>
</template>
<script>
import axios from 'axios'
import MainContent from './components/MainContent.vue'
import SideMenu from './components/SideMenu.vue' // import the SideMenu component
export default {
      components: {
        MainContent,
        SideMenu // Register the component
      },
    data () {
      return {
       drawer: false,
       api_key:'6bd6c9a75fdb47b888def4eaec38d6c2',
       articles: [],
       errors: []
      }
    },
    created () {
      axios.get('https://newsapi.org/v2/top-headlines?sources=techcrunch&apiKey='+this.api_key)
        .then(response => {
          this.articles = response.data.articles
          console.log('data:')
          console.log(response.data.articles) // This will give you access to the full object
        })
        .catch(e => {
          this.errors.push(e)
        })
     },
     //add the methodes events hadler with setResource() function
      methods: {
            setResource(source){             axios.get('https://newsapi.org/v2/top-headlines?sources='+source+'&apiKey='+this.api_key)
              .then(response => {
                this.articles = response.data.articles
                console.log(response.data)
              })
              .catch(e => {
                this.errors.push(e)
              })

            }
         }
  }
</script>
Let’s explain what we did here?
In the template above, we’re binding the drawer, api_key and the @selectsource event with the once defined in the Side Menu component using the following template definition:
<SideMenu :drawer="drawer" :api_key="api_key" @selectsource="setResource" ></SideMenu>- drawer: Boolean property to hide/show and the side navigation drawer, and it’s controlled by @click="drawer = !drawer" event in the toolbar side icon.
- api_key: String property to validate HTTP requests towards the News API, and retrieve the available news resources.
- @selectsource: An App.vue’s function, which will be triggered whenever a new list item is selected from the Side Menu component.
Next, in the <script> tag, we’re importing the Side Menu component, and then, register it in the components object.
Finally, within the methods events handler, we’ve added a function, which is going to receive the emitted id from the selectSource function in the side menu component -- to render the latest news events for that specific source id in the main content section.
Customizing The Side Menu’s Scrollbar Behavior with CSS
The default Side Menu scrollbar behavior doesn’t perfectly fit with the rest of Vuetify UI components. That’s why we need to customize it a little bit to help the view of our application look and feel different. They are basically a few ways to implement a custom scrollbar. But in this tutorial, we will be using some CSS3 code since it’s the most straightforward way to do that.
In the src/componenets/SideMenu.vue file, and just underneath <script> tag, add the following <style> tag to customize the behavior of the navigation drawer scrollbar, and also change its background color.
<style scoped>
  #style-1::-webkit-scrollbar {
    width: 6px;
    background-color: #F5F5F5;
  }
  #style-1::-webkit-scrollbar-thumb {
    background-color: #F90;
    background-image: -webkit-linear-gradient(90deg, rgba(255, 255, 255, .2) 25%,
                        transparent 25%,
                        transparent 50%,
                        rgba(255, 255, 255, .2) 50%,
                        rgba(255, 255, 255, .2) 75%,
                        transparent 75%,
                        transparent)
  }
  #style-1::-webkit-scrollbar-track {
    -webkit-box-shadow: inset 0 0 6px rgba(0,0,0,0.3);
    background-color: #F5F5F5;
  }
  .drawer-style {
    background-color: #2196F3 !important;
    border-color: #2196F3 !important;
  }
</style>
Note: It’s recommended to use Google Chrome or Opera to visualize the scrollbar new custom design. Firefox, Microsoft Edge and other browsers software as well don’t fully support it. However, there is a W3C draft (https://drafts.csswg.org/css-scrollbars-1/) which aims to standardize this. Hopefully it get implanted soon.
If you want to implement other scrollbar custom designs with CSS, take a look at the following code snippets at CodePen.
We’re almost done, just hangout here for a little while longer. The next part it’s a bonus from me personally, which is implementing some stunning animation effects on the articles page scroll.
Adding Scrolling Animation with AOS
To add this kind of animation, we’re going to use a library called AOS, which stands for Animate on Scroll. It’ll allow us to apply different kinds of animation to elements as they scroll into view.
Now, let’s install the library from the command line, and get to work with it.
npm install --save aosNext, open the src/main.js file, and update it with the following:
import Vue from 'vue'
import App from './App'
import Vuetify from 'vuetify'
import 'vuetify/dist/vuetify.min.css'
// add this two import statements
import AOS from "aos";
import "aos/dist/aos.css";

Vue.use(Vuetify)

Vue.config.productionTip = false

/* eslint-disable no-new */
new Vue({
  el: '#app',
  created() {
    AOS.init({ disable: "phone" });  }, // add this to initialize AOS
  components: { App },
  template: '<App/>'
})
The above changes will link the AOS style and initialize its object. I also passed an option setting to disable the AOS for phone devices.
After initializing the library, all you have to do is add some specific animation attributes like data-aos=”animation_name” inside the template elements that you want to work on.
In the src/MainContent.vue file, inside the <template> tag, update the v-card UI component like so:
...
<v-card class="my-3" hover data-aos="zoom-in" data-aos-easing="ease">
...
Of course, there are several types of animation to implement like fade and flip animations. The following Demo demonstrates every single animation case within the library, so you can choose from them based on your own preferences.
Setup Icons for the News Resources
Using only the names of news sources isn’t enough for the application to look professional. Instead, we need to add some icons to represent them where users can easily recognize them. To do so, we have to options: We can either download them from this Google Drive Link or we can use the project Github repository.
Once the images are downloaded, open the src/assets folder in your code editor, create a new folder called images. Then, copy and paste all the images inside.
Now our application is completely setup. Nothing left but to test it out.
Testing the Application
The application now is ready for the final test, you can go ahead to run it within the project’s root folder using the following command:
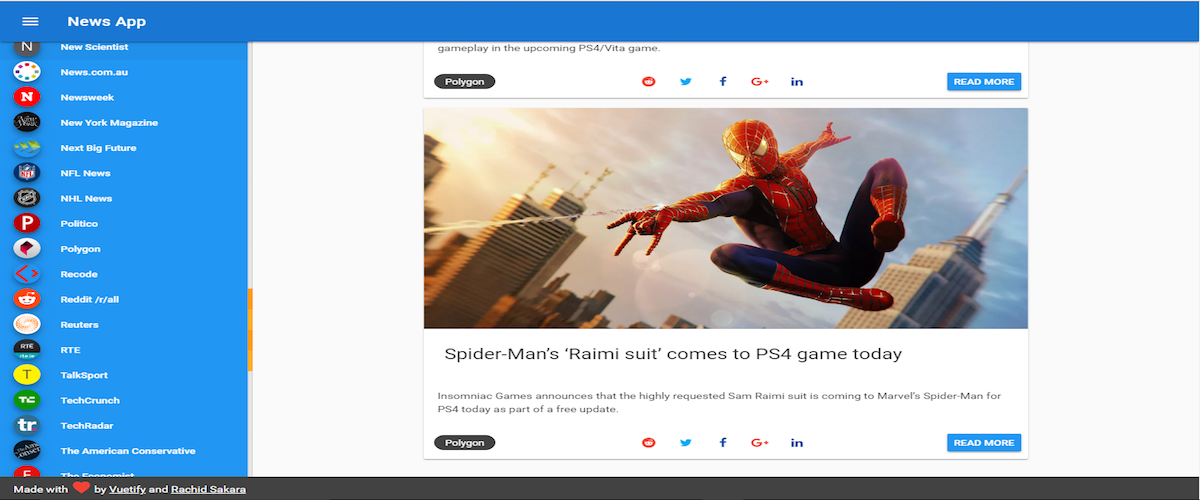
npm run devOnce the application opens in your browser, you’ll see something similar to the screenshot below:
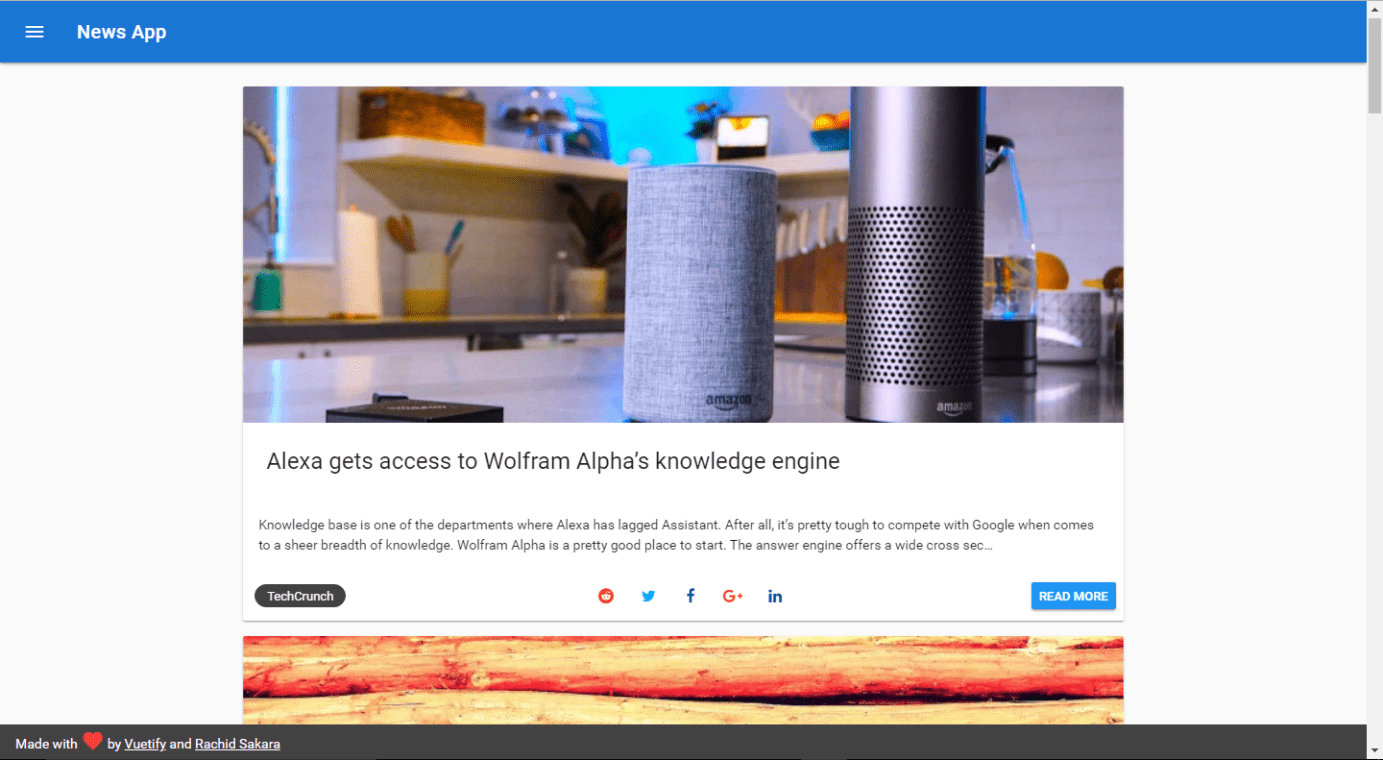
Next, from the left side menu that houses the news sources, using the toolbar side icon -- select any news provider from there.
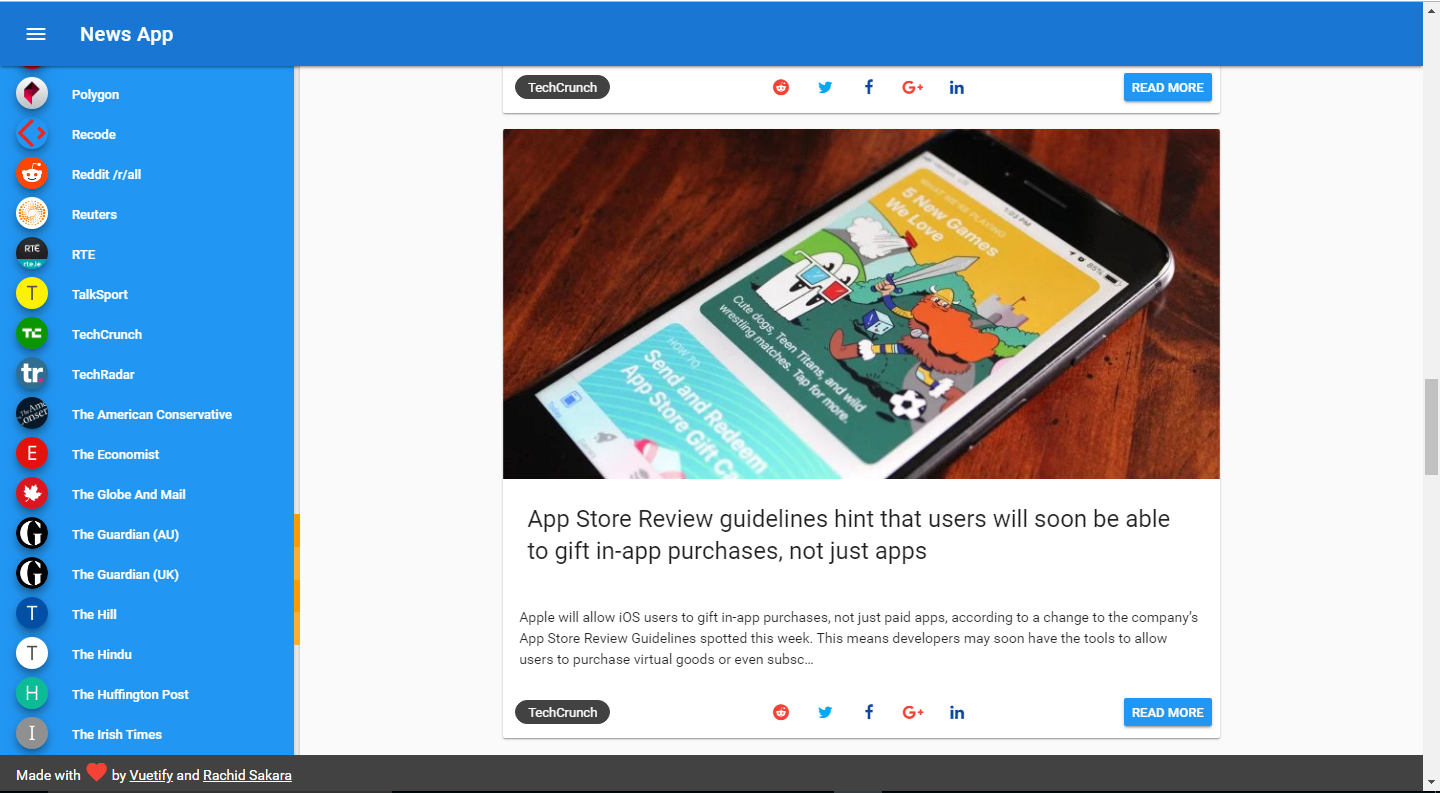
Note: For each article there’s a read more button, which takes the user to read the whole article where it’s originally published.
It’s a stunning application, isn’t it? Congratulations! You just built your own beautiful animated news application!
Conclusion
There you have it! In this tutorial, we’ve built a beautiful animated news application that is production ready if you take care of the social sharing actions of course, using Vue.je and Vuetify UI library -- starting from design, development all the way to animation.
Did you see the stunning application design? That’s because the Vuetify UI library has pretty cool documentation, which simplifies the implementation process. So now you have a great UI framework as an asset to make your future web applications looks gorgeous. If you want to add speed to that beauty, be sure to try your app on a headless CMS or a flat-file CMS.
For reference, you can check out the full source code from the Github repository. And if you have any questions or feedback, make sure to leave a comment down below.
If you use Wordpress, don't forget to check out our post on headless Wordpress and how to use their blog data in your app.

