A blog is a great place to share your ideas, reach a wide audience, and establish an online presence. But building one from scratch can be overwhelming, especially if you don’t know where to start, or need something up and running fast. Without a blog, you miss out on opportunities to establish yourself as an authority, build a community, drive traffic to your site, and simply get your voice heard.
In this Vue blog tutorial, we cut through the complexity and share a plug-and-play solution for launching a blog using Vue.js and a headless CMS.
Table of contents
Why use Vue.js?
Vue.js is an open-source, JavaScript-based framework for building user interfaces. It has gained popularity for its simplicity, flexibility, and focus on creating reactive and dynamic web experiences. Vue’s easy-to-learn syntax and component-based architecture allow you to quickly create reusable components for your blog posts, comments, and other interactive elements. Moreover, its reactivity system ensures that your blog updates in real-time as users interact with it, enabling a smooth and engaging experience.

Tutorial prerequisites
To follow along with this tutorial, you need the following:
- Knowledge of Vue3 and Vue Router
- Node.js v16 or greater installed on your system
- An active ButterCMS account (New accounts have a free trial period of 30 days.)
You can find the source code for this tutorial at this GitHub Repo.
Building a blog with Vue.js and ButterCMS
In the following sections, we will learn how to build a Vue blog powered by ButterCMS. ButterCMS is a cloud-based, user-friendly Headless CMS that comes equipped with a built-in blog engine, allowing us to launch our blog with minimal effort.
We will start by building the UI for our Vue js blog app. After that, we will set up ButterCMS which will hold our blog content that will then be fetched and displayed in our app. Please note that while we will be using the ButterCMS blog engine for this tutorial, you can also create custom blog pages using ButterCMS Page Types. Here is what we will be building in this tutorial:
Setting up Vue
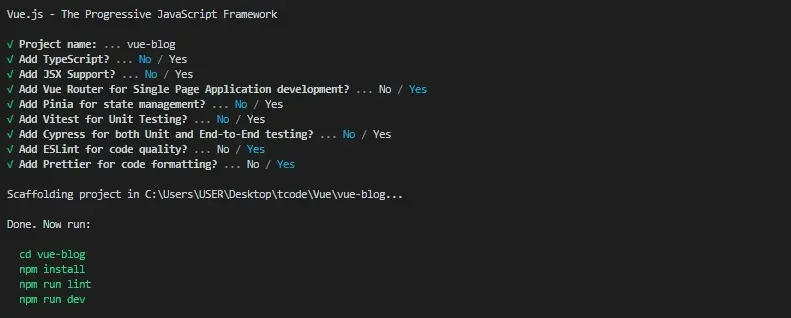
We will use the create-vue utility to scaffold our project. It will save us a lot of time by automatically configuring the project and setting up the directory structure. Enter the following command in your terminal:
npm init vue@3If you are prompted to install create-vue, enter Y to proceed. After that, answer the subsequent questions as shown in the screenshot below:
With this, a Vue app named vue-blog will be created which includes the Vue Router setup. Next, let’s install dependencies using the following command:
cd vue-blog
npm install
Now, let’s clean our app a little, removing the folders, files, and code not needed for this tutorial. Open the created app in a code editor, head over to the src folder, perform the following operations:
-
Delete the assets folder.
-
Open the main.js file in your favorite editor, and remove the first line (where main.css is being imported).
-
Navigate inside the components folder and delete all its contents.
-
Navigate inside the views folder and delete all its contents.
Next, modify the App.vue file to the following:
<script setup>
  import { RouterView } from 'vue-router'
</script>

<template>
  <RouterView />
</template>

<style >
* {
  margin: 0;
  padding: 0;
  box-sizing: border-box;
}

body {
  font-family: system-ui, sans-serif;
}

.wrapper {
  width: 95%;
  max-width: 110px;
}
</style>
Also, router/index.js to the following:
import { createRouter, createWebHistory } from 'vue-router'

const router = createRouter({
  history: createWebHistory(import.meta.env.BASE_URL),
  routes: [

  ]
})

export default router
In the above code snippet, we are setting up the main application structure with App.vue and configuring the router to manage navigation within our blog. These changes will make sure that our app can handle different routes and display content dynamically.
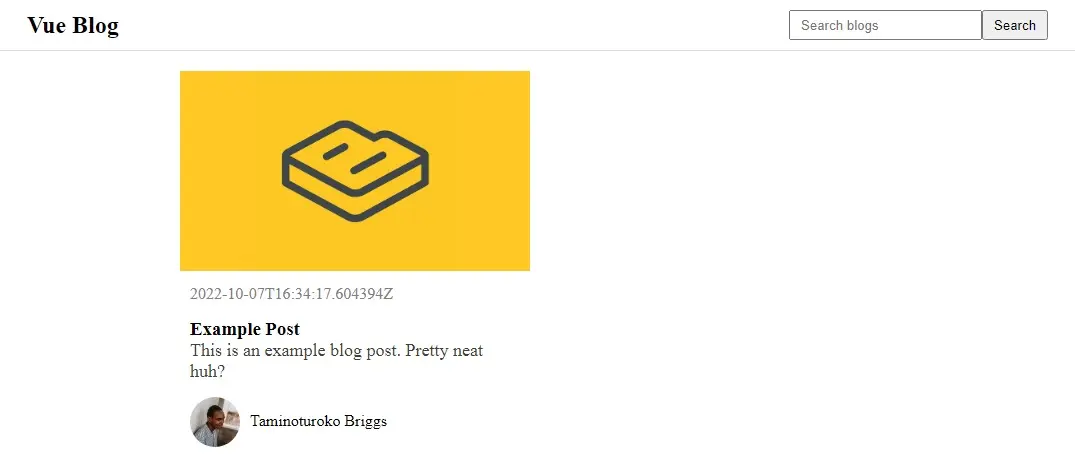
Creating the blog’s UI
The blog will have a homepage that displays all posts with a search bar for filtering, and a detail page for viewing individual posts. Let’s create these pages and the components to be used in them.
For the pages, navigate to the src/views folder and create two files: Home.vue and BlogDetail.vue. For the components, navigate to the src/components folder and create these two files: BlogCard.vue and Header.vue.
In BlogCard.vue, we'll create a component to display summarized blog post information in a clickable card format, linking to the full post on the details page. The Header.vue file will contain the search bar that will be used to filter blog posts.
After all the above changes, our directory structure should look like this:
src
 ┣ components
 ┃ ┣ BlogCard.vue
 ┃ ┗ Header.vue
 ┣ router
 ┃ ┗ index.js
 ┣ views
 ┃ ┣ BlogDetail.vue
 ┃ ┗ Home.vue
 ┣ App.vue
 ┗ main.js
Now, for the home page, head over to the views/Home.vue file and add the following lines of code:
<template>
  <Header @search="handleSearch" />
  <p v-if="!blogPosts.length" class="noBlogPost">No blog post available</p>
  <div v-else class="blogList wrapper">
    <BlogCard />
  </div>
</template>

<script setup>
  import { ref } from "vue";
  import Header from "../components/Header.vue";
  import BlogCard from "../components/BlogCard.vue";

  const blogPosts = ref([]);
  const handleSearch = (searchValue) => {}
<script>

<style scoped>
.blogList {{
  display: grid;
  margin-top: 20px;
  place-content: center;
  grid-template-columns: repeat(auto-fill, 350px);
  gap: 15px;
}

.noBlogPost {
  margin-top: 20px;
  text-align: center;
}
</style>
This code sets up the home page layout. It includes a header component (Header.vue) with a search event (@search="handleSearch"), a conditional message (No blog post available) if no posts are loaded, and a grid (blogList) for displaying blog posts using the BlogCard component.
For the details page, add the following line of code in views/BlogDetail.vue:
<template>
  <div></div>
</template>

<script setup>
</script>

<style>
.blogDetail {
  width: 95%;
  max-width: 900px;
  margin: 50px auto;
}

.blogDetail__head span:nth-child(2):after {
  content: '.';
  margin-left: 5px;
  vertical-align: top;
}

.blogDetail__head span {
  margin-left: 5px;
  color: rgb(128, 128, 128);
}

.blogDetail > h1 {
  margin-bottom: 15px;
}

.blogDetail > img {
  margin: 15px 0;
}

.blogDetail img{
  width: 100%;
}

.blogDetail .blogDetail__profileImg {
  width: 30px;
  height: 30px;
  border-radius: 100%;
  vertical-align: middle;
}

.blogDetail__body p {
  color: rgb(62, 60, 60);
  font-size: 18px;
}

.blogDetail__body h2, h3{
  margin: 20px 0 5px;
}

.blogDetail__body img, video {
  margin: 5px 0;
}
</style>
This code defines the layout for displaying individual blog posts. Inside the style tag, we are defining the width, responsiveness, and formatting for elements like titles, images, and paragraphs within the post body.
Now, let’s make these pages accessible by defining their routes. Head over to src/router/index.js and modify the router variable to the following:
const router = createRouter({
  history: createWebHistory(import.meta.env.BASE_URL),
  routes: [
    { path: "/", component: Home },
    { path: "/detail/:slug", component: BlogDetail },
  ],
});
This code defines the routes for the home page and blog detail page in Vue Router.
Now, let’s create the components. Head over to components/BlogCard.vue and add the following line of code:
<template>
  <div class="card" @click="$router.push(`/detail/${slug}`)">
    <img :src="image" />
    <div class="card__details">
      <span class="mgn">{{ date }}</span>
      <h3>{{ title }}</h3>
      <p class="mgn">{{ summary }}</p>
      <div class="card__author">
        <img :src="authorImage" />
        <span>{{ authorName }}</span>
      </div>
    </div>
  </div>
</template>

<script setup>
  defineProps([
    "slug",
    "image",
    "date",
    "title",
    "summary",
    "authorImage",
    "authorName",
  ]);
</script>

<style scoped>
.mgn {
  margin-bottom: 15px;
  display: block;
}
.card {
  max-width: 350px;
  cursor: pointer;
}
.card:hover {
  box-shadow: 0 2px 6px gainsboro;
}

.card > img {
  object-fit: cover;
  width: 100%;
  height: 200px;
}

.card__details {
  padding: 10px;
}

.card__details span:first-child {
  color: gray;
}

.card__details p {
  font-size: 16px;
  color: rgb(63 63 66);
}

.card__author img {
  object-fit: cover;
  width: 50px;
  height: 50px;
  border-radius: 100%;
  vertical-align: middle;
}

.card__author span {
  margin-left: 10px;
}
</style>
This code for the BlogCard component displays blog post information in a card format. Clicking the card takes you to the detailed view of the blog post identified by slug, showing its title, date, summary, author details, and images.
Next, add the following lines of code in components/Header.vue:
<template>
  <header>
    <div class="wrapper">
      <h2>Vue Blog</h2>
      <form @submit.prevent="this.$emit('search', searchValue)">
        <input
          v-model="searchValue"
          placeholder="Search blogs"
        />
        <button>Search</button>
      </form>
    </div>
  </header>
</template>

<script setup>
 import {ref} from 'vue'
 const searchValue = ref('')
</script>

<style scoped>
header {
  border-bottom: 1px solid gainsboro;
}

header .wrapper {
  display: flex;
  justify-content: space-between;
  align-items: center;
  height: 50px;
}

form input,button {
  height: 30px;
  padding: 0 10px;
}
</style>
This code defines the Header component. It displays the blog title ("Vue Blog") and a search bar. When users type in the input field and click “Search”, it triggers the search event to filter and display relevant blog posts.
With this, when we open our app in the browser, we will see the home page:

And we can navigate to the details page by appending the URL with /detail/<slug>. Right now, the home page displays no blogs and the details page is empty. Let’s work on that.
Setting up ButterCMS
To get started, navigate to the ButterCMS website and set up a new user account if you do not have one already.
After logging in, you should be redirected to the user dashboard. From here, you can access the blog engine by clicking the Blog posts icon from the sidebar.
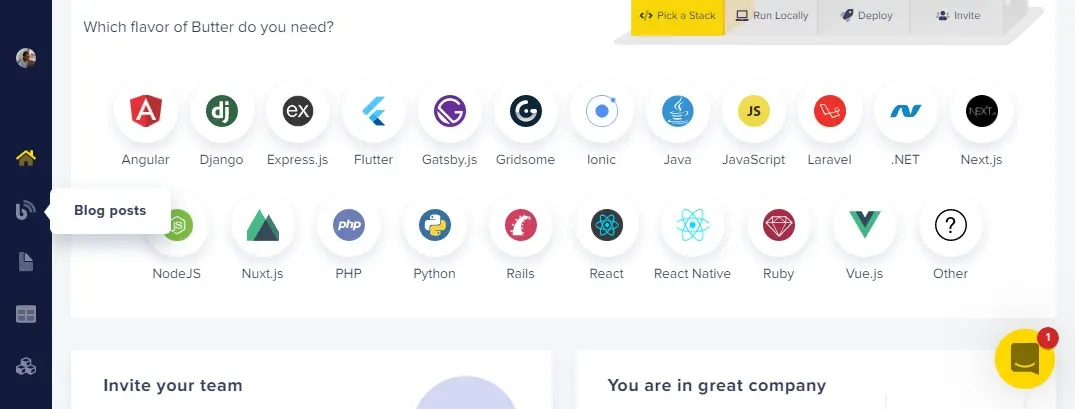
You should see the following page:
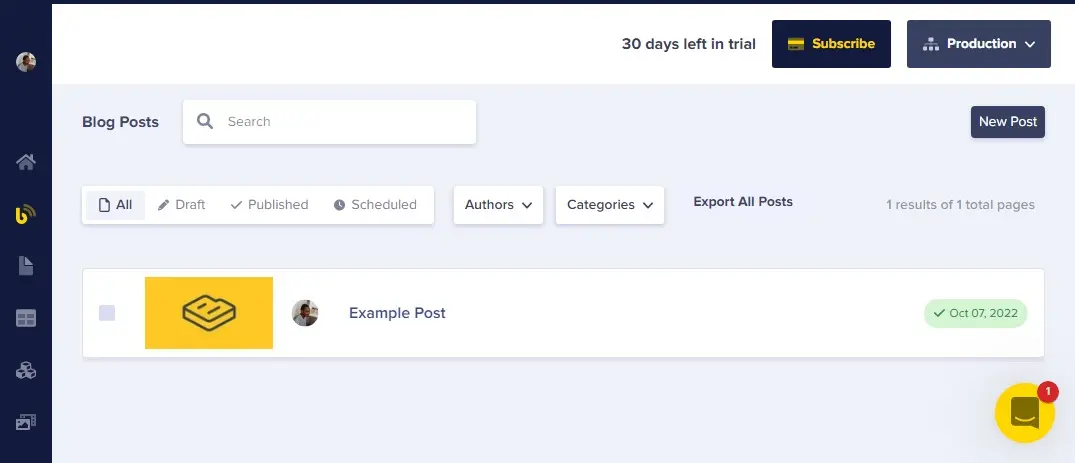
Here, an example post has already been created for us which we will use in this tutorial. But If you wish to create a new blog post, click on the New Post button at the top-right. On the page that opens, write your blog content with the WYSIWYG editor then fill out the rest of the inputs and click on the Publish button at the top-right of the page. Below is a gif demonstrating how to work with the WYSIWYG editor:
To access the ButterCMS APIs from our app, we will need a read API token. This token allows our application to authenticate and retrieve content securely from the APIs. To get your token, hover over your image at the top on the sidebar and click on Settings in the dropdown that appears. You should be taken to the settings page where the read API token will be present under the API tokens tab. See below:
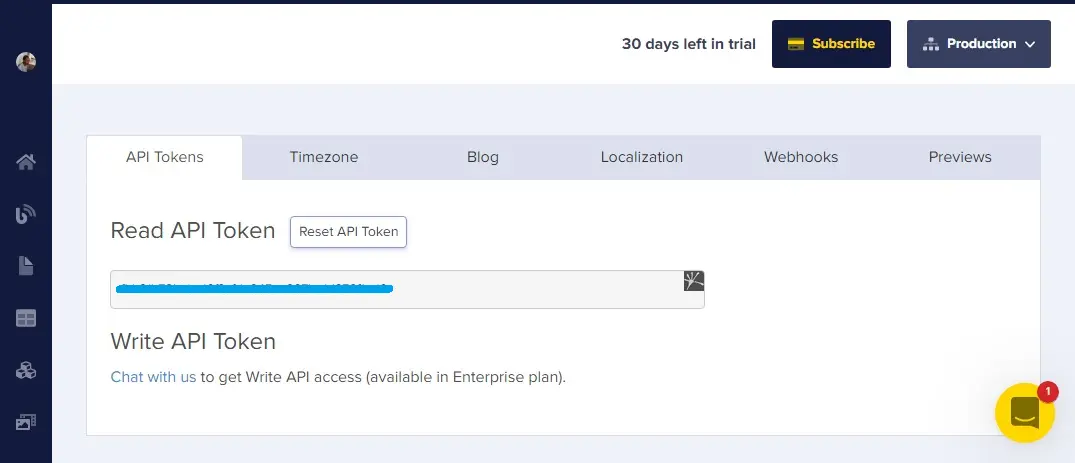
Create a new .env file inside the project directory and copy the token inside it. Like this:
VITE_READ_API_TOKEN = <your-read-api-token-here>Working with ButterCMS in our application
Now that everything has been set up, we are down to consuming our content created with the ButterCMS blog engine. For this, we can either use the content API or ButterCMS SDK, both of which function as stated in the API Reference. For this tutorial, we will be using the content API.
We will start by displaying all our blog posts on the home page. Head over to the src/views/Home.vue file and add the following code after blogPosts state:
fetch(`https://api.buttercms.com/v2/posts/?exclude_body=true&auth_token=${import.meta.env.VITE_READ_API_TOKEN}`)
  .then((res) => res.json())
  .then((data) => {
    blogPosts.value = data.data
 })
The above code will fetch all blog posts from our CMS and store them in the blogPosts state. In the URL passed to fetch, since we have set the exclude_body query parameter to true, the return posts will not include a body.
Now, to display our post, modify <BlogCard /> in the template to the following:
<BlogCard
  v-for="post in blogPosts"
  :slug="post.slug"
  :image="post.featured_image"
  :date="new Date(post.created).toISOString().split('T')[0]"
  :title="post.title"
  :summary="post.summary"
  :authorImage="post.author.profile_image"
  :authorName="post.author.first_name + post.author.last_name"
/>
This code iterates through blogPosts and dynamically renders a BlogCard component for each post, passing specific data attributes such as slug, image, date, title, summary, author image, and author name to populate each card.
With this, when we open our app in the browser, we should see the following:
Next, let’s add the search functionality where text entered in the search bar will be used to filter posts by their title. Here is what we will be creating:
For this, we will need to create another state that will hold the filtered posts and display the UI rather than directly filtering the fetched posts in the blogPosts state. This way, no post will be lost even after filtering.
First, let's render our UI from another state which will also hold the filtered results.
Add the following import in the script tag of the Home.vue file:
import {watch} from 'vue'
Next, add the following lines of code after the blogPosts state:
const filtered = ref([])

watch(blogPosts, (newData) => {
  filtered.value = newData
})
Next, modify the rendered BlogCard component to loop through the filtered state rather than the blogPosts state:
<BlogCard
   v-for="post in filtered"
   //...
 />
Now, to start filtering, modify the handleSearch function which, while creating the UI, we have passed to the search event emitted when the search form is submitted.
const handleSearch = (searchValue) => {
  const filtered = blogPosts.value.filter((post) => (
    post.title.toLowerCase().includes(searchValue.toLowerCase())
  ))
  filtered.value = result
 }
The above code filters the blog posts with titles that include the searched text passed as an argument and then sets the results in the filtered state. With this, when we enter text in the search bar in our app and click on the Search button, the appropriate posts will be displayed.
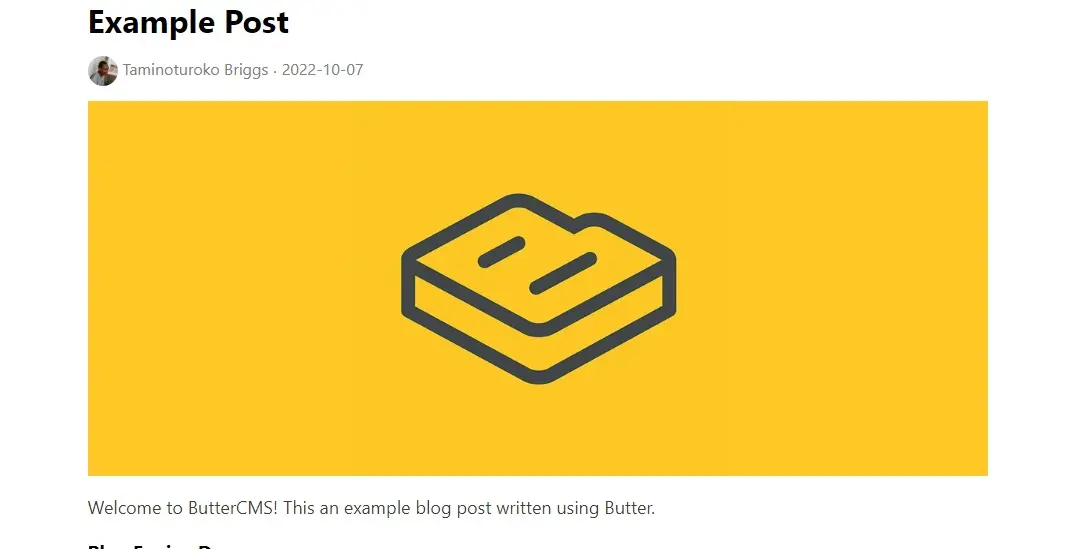
Finally, let’s work on the details page where we will view the full content of an individual post. For this, we will be using the slug attached to the URL when a post is clicked to fetch a single post from our CMS.
Head over to src/views/BlogDetail and modify the script tag to the following:
<script setup>
import { ref } from "vue";
import { useRoute } from "vue-router";

const route = useRoute();
const slug = route.params.slug;
const blogPost = ref({});

fetch(
  `https://api.buttercms.com/v2/posts/${slug}/?auth_token=${
    import.meta.env.VITE_READ_API_TOKEN
  }`
)
  .then((res) => res.json())
  .then((data) => {
    blogPost.value = data.data;
  });
</script>
In the above code, we get the slug from the page’s URL then use it to fetch the corresponding blog post and set the returned response in the blogPost state.
Now, let’s display the content of the post. Modify the template tag to the following:
<template>
  <div class="blogDetail">
    <h1>{{blogPost.title}}</h1>
    <div class="blogDetail__head">
      <img :src="blogPost.author.profile_image" class="blogDetail__profileImg" />
      <span>{{blogPost.author.first_name + ' ' + blogPost.author.last_name}}</span>
      <span>{{new Date(blogPost.created).toISOString().split('T')[0]}}</span>
    </div>
    <img :src="blogPost.featured_image"/>
    <div class="blogDetail__body" v-html="blogPost.body"></div>
  </div>
</template>
This code is used to display a blog post's details including title, author info (image, name, date), featured image, and body content using HTML bindings.
With this when we click on the example post in our app, we will be taken to the details page which will look like this:
Final thoughts
The ButterCMS blog engine is a shortcut for creating and launching blogs for web applications built using Vue.js and other frontend frameworks. Butter’s headless architecture allows complete customization of the blog's frontend, while your content remains centralized in a decoupled repository. We trust that the insights shared in this Vue blog tutorial will enable you to effortlessly add a beautiful blog to your Vue.js app. Let us know how it goes in the comments below!
Updated July 2024 by Maab Saleem.