Write API for Translating Content
- The pain of localization
- A Use Case for Content Translation
- Planning the Implementation
- The Implementation
- Back to Use Case
- Final Thoughts
Internationalization is a big topic in any context that involves content. If you’re writing for your company’s website and want the content to reach markets in several countries, you’ll need internationalization. If you’re working on a mobile app dealing with money, you’ll need internationalization. Anything you want to do that reaches or affects users in different countries will, most likely, require internationalization.
This article covers the specific use case in which you’ll need several copies of your content instead of dynamically changing parts of it. Particularly in the context of ButterCMS and pages with particular locales.
You’ll learn how to use the new Write API which is an Enterprise-level feature to simplify your life when it comes to localizing your content.
The pain of localization
First, let’s cover the dark side of localizing your content. Localization is the act of customizing your content to the specific locale (geographic location) of the person interacting with your content. In its simplest form, that means translating text into Spanish for a reader from Latin America, and translating it again into English when the reader is located in the United States.
A more complex scenario would involve dynamically changing the currency in order to provide correct prices (based on up-to-date exchange rates) for your e-commerce site, based on the locale of your customers.
In both cases, extra work is required to provide the service of translating content. This may entail either writing several versions of your content in different languages (and then maintaining them over time) or adding the extra code required to make the currency exchange work as expected by either maintaining an active exchange table or adding the required code to pull it from a hopefully, reliably up-to-date 3rd party API. Localization done right can sometimes be the stuff of nightmares for your team. At the same time, it can also be a huge benefit for your website users, making all the hustle worthwhile. This is why we all try to do it at some level.
The key is to do it right and try to help both your users and your team in the process.
Localization with ButterCMS
Since we’re covering the Write API, let’s discuss how to add localization to your site first, following the normal path (A.K.A by hand).
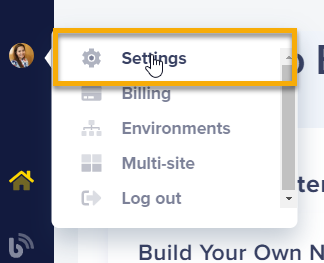
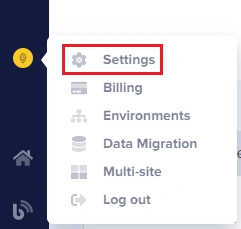
In order to enable localization within Butter, you’ll have to go to your profile (click on your name on the top left corner of the page) and select “Settings.”
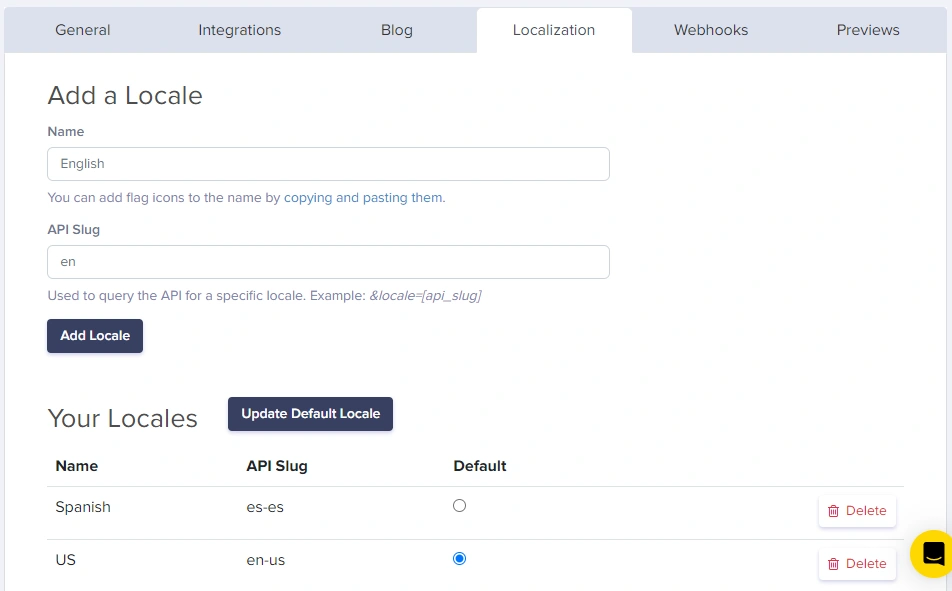
After that, simply select the “Localization” tab and add how many locales you’ll need for your pages for translation.
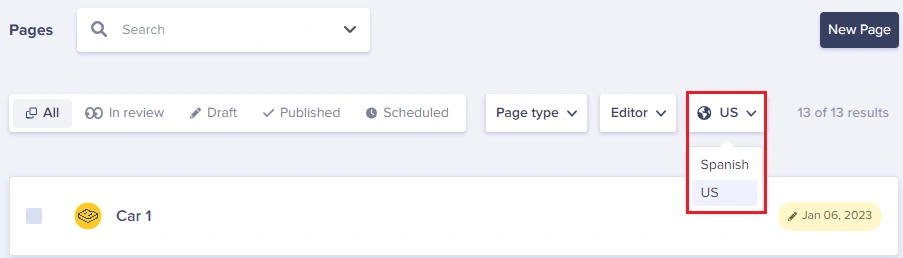
Once that is done, creating several versions of your pages, one for each locale you created is relatively easy. Simply select the locale from the list of available options on the list of pages:
That’s it! You’re officially playing the localization game with your own pages, and it works great! You don’t have to worry about it. You can even request the correct locale based on your user preferences from Butter’s API and it’ll return it for you, without having to do anything special.
That being said, you can see how if we were to scale the above scenario at any significant level, either vertically (adding a lot of new pages) or horizontally (adding a lot of new locales for each page) then that amazing feature you’ve added to your site, will become a large task.
But fear not! This is one way the new Write API feature can help you manage your content. We’re going to be looking at a way to automate your workflow for translating content in the hopes of minimizing your involvement in the localization process of your own content. Sounds exciting? That’s because it is!
Solving the localization headache
The rest of this article will show you how to set up an automated workflow, using ButterCMS and a bit of Node.js code, to automatically create or update a single page and all of your locales tied to it.
Here is the main idea:
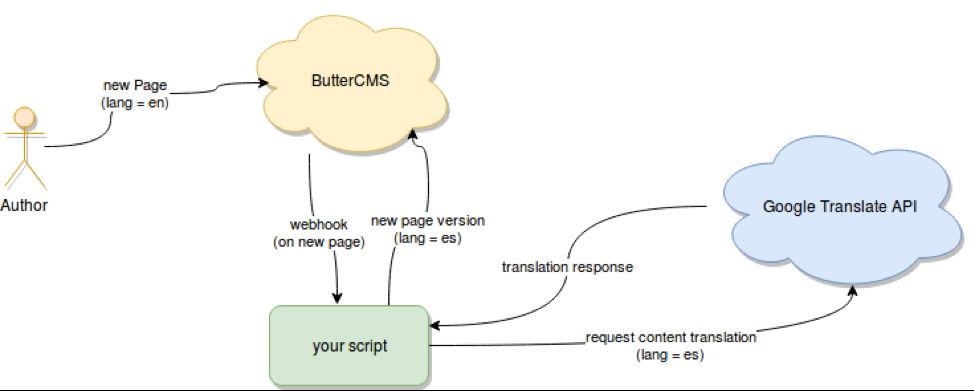
The way to read the above diagram would be:
- The author creates a new page using ButterCMS, specifying one particular locale (in this example “en” for English).
- A webhook is triggered once the new page is saved. This hook executes a script sending it the page data.
- The script, in turn, will use the Google Translate API in order to get a Spanish translation of the content of the page.
- Once received, the script will then save the translated content as a new version of the original page, using a different locale.
Simple enough, isn’t it? Let’s now take a look at the actual implementation.
A Use Case for Content Translation
For the purposes of this article, we'll implement the website below as an example for reference.
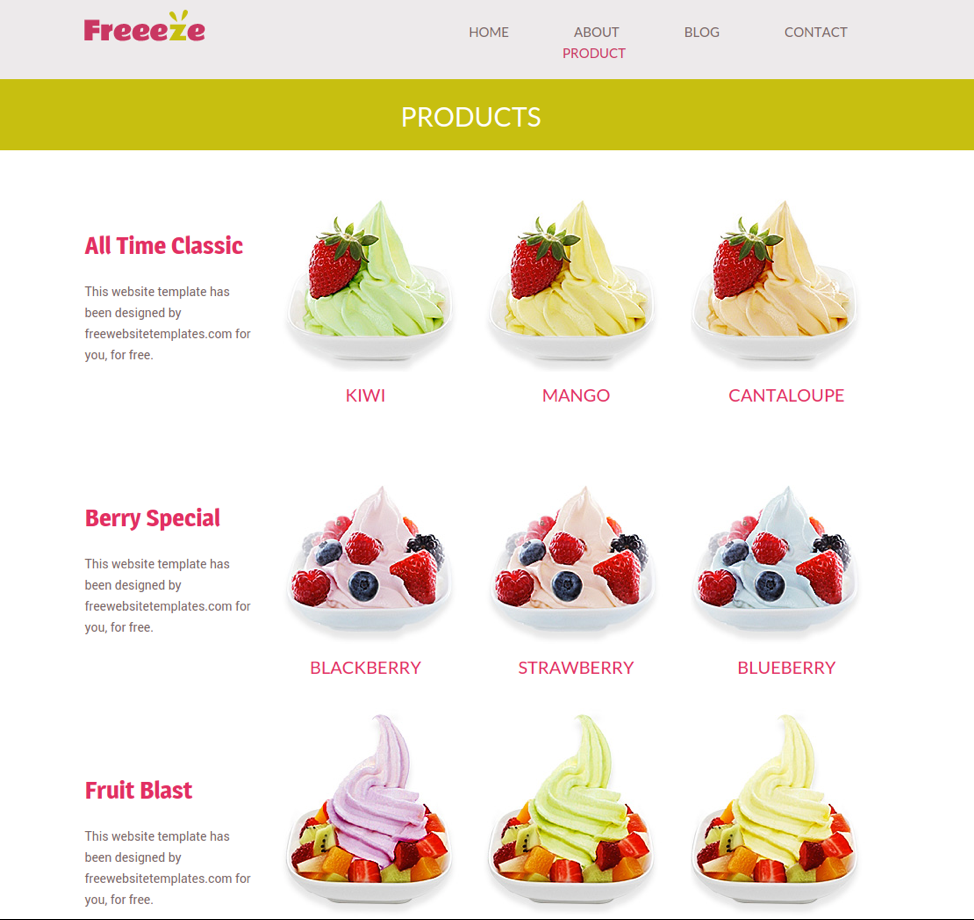
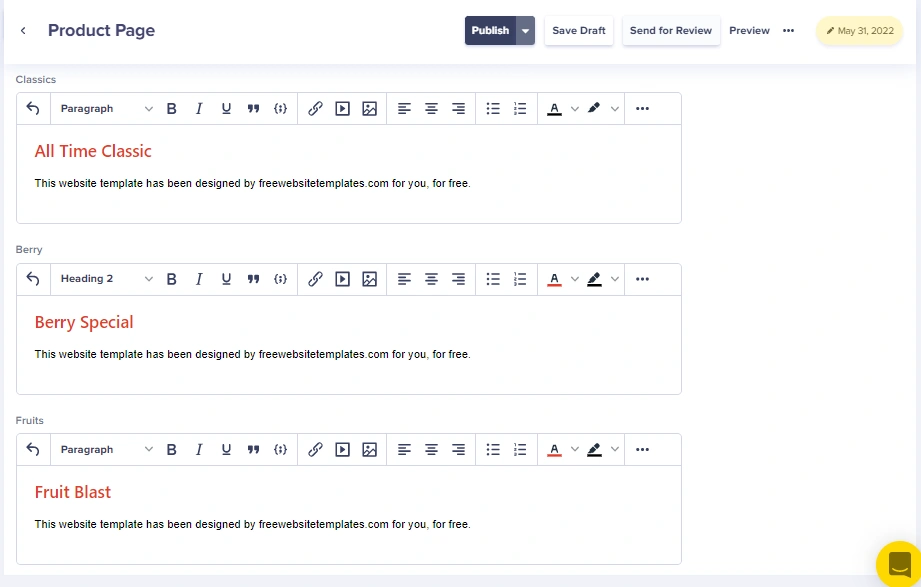
The above screenshot shows a typical commercial website, showing a set of products with a description. The way was set up in ButterCMS is by creating a single product page with three different fields. Each of these fields represents the name and description of each category.
When the page is created, you can set up a content translation process that gets triggered when an update to the page is made. This would perform the translation of the English content for each of the three WYSIWYG fields into Spanish without any direct interaction.
Planning the Implementation
The implementation of this solution for translating content is just as straightforward as the architecture diagram shown above. Let’s quickly review the APIs we’re about to use so we’re all on the same page.
Google Translate
For the translation service, we’ll be using this particular API. In order to set it up, you need to:
- Go to GoogleCloud’s Web Console and sign in.
- Once there, search for the Translate API and enable it. Do note, that in order to do that, you’ll have to enter payment information (by default you have up to 500k characters a month for free to test the API, but you’ll still have to enable payments regardless).
- Finally, you’ll need to download the JSON file with your account’s credentials. You can see how to do that here (pay special attention to setting up the environment variable called “
GOOGLE_APPLICATION_CREDENTIALS” otherwise nothing will work for you).
Once the above steps are done, you’re all set to start interacting with the API. And since we’re going to be using Node.js for our coding needs, you can simply use Google’s official npm module.
Getting a translation from the API using this library is as simple as doing the following:
async function quickstart(
  projectId = 'YOUR_PROJECT_ID' // Your GCP Project Id
) {
  // Imports the Google Cloud client library
  const {Translate} = require('@google-cloud/translate');

  // Instantiates a client
  const translate = new Translate({projectId});

  // The text to translate
  const text = 'Hello, world!';

  // The target language
  const target = 'ru';

  // Translates some text into Russian
  const [translation] = await translate.translate(text, target);
  console.log(`Text: ${text}`);
  console.log(`Translation: ${translation}`);
}
Another great benefit is that this API ignores markup code in the text you send. So, you can simply send a bunch of HTML code and you'll get the same tags with the content translated.
ButterCMS APIs
Even though the process will start as part of the Webhook being triggered, you still need to interact with both of Butter’s APIs, Read and Write. Together they will allow you to create the new pages directly from your code.
Just like with Google’s API, we do have an npm module for Butter as well, called buttercms. Do note, however, that this module only takes care of the interaction with the Read API, so we’ll have to manually tackle the Write API ourselves (not to worry though, it’s just a single HTTP request).
For the purposes of this article, we only need to perform a single API call into the Read API, in order to retrieve a single page, the page that is being updated. Because we’re only looking for the English version of the page (remember from above, where we defined the flow?), we’ll have to add an extra parameter to call.
Here is how:
butter.page.retrieve(“page type”, “your page slug”, {locale: 'en'}).then( (page) => {

//... your code here
})
Notice the third parameter, {locale: 'en'}, that’s all we need to let the API know we’re looking for one particular version of the page. If you want to know more (such as getting a paginated list of pages or creating a new page dynamically), you can read the official online docs for our API here.
Setting up the Webhook trigger
The final piece of the content translation puzzle involves setting up the trigger for the entire flow. ButterCMS already has support for triggering webhooks when a particular action happens. We support actions such as: creating a new blog post, publishing a blog post, creating a new page, deleting an existing page, and so on. You can view the full list of events in our online docs here. For any and all of the events we support, once they happen, a POST request will be triggered to a particular URL that you have set up, with a very specific payload describing the event that just happened (through the use of an event code) and the element that got affected (either a page, a blog post or a collection). That’s all you need really, although as you’ll see in the actual code for the script, you’ll need to have it published somewhere where it can be accessed by Butter. In other words, it’s not just a script you can upload and forget about. You’ll need a dedicated URL for it, which means it’ll have to be hosted somewhere (as a suggestion in case you don’t want to go through the struggle of maintaining a server somewhere, you can try a service such as https://zeit.co/ which provides a serverless like infrastructure for you to host your scripts).
That being said, setting the hook is trivially simple, just follow these steps:
1. Go to the settings section (like before):
2. Once inside, click on the Webhooks tab:
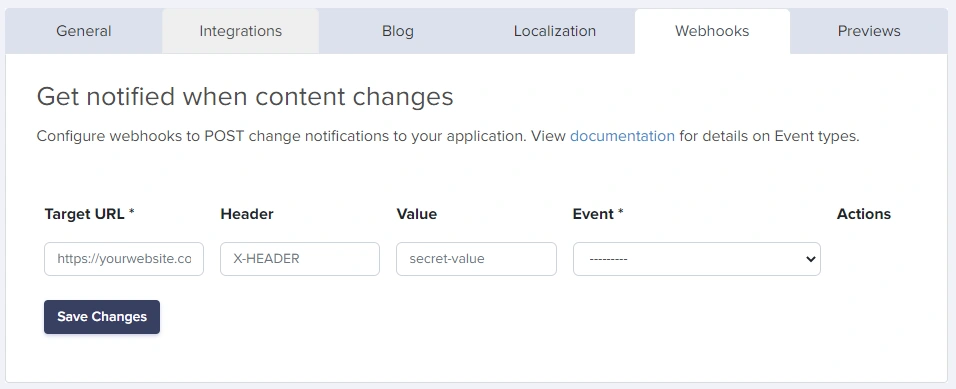
3. And finally, add the details for your hook like below:
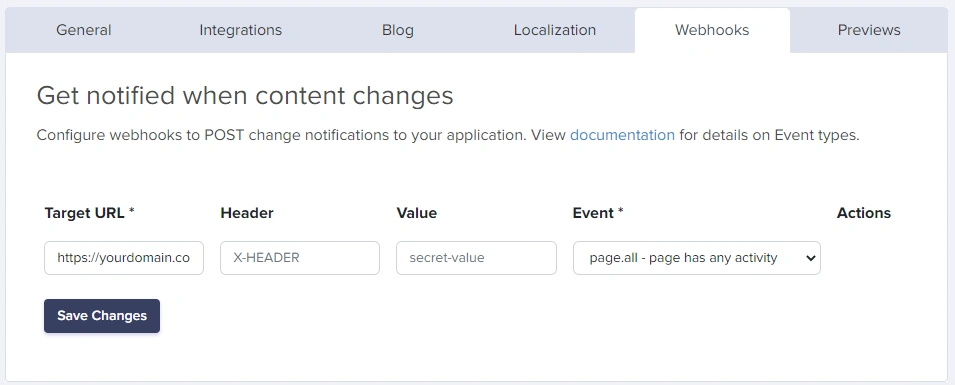
For our use case, you can ignore the Header fields and just set up the URL and the event.
The Implementation
Now that you have the hook and you understand what we’re trying to do, here is the relevant code for the script:
// The target language
const TARGET_LANG = 'es';
app.post('/webhook1', async function (req, res) {
    let pageSlug = req.body.data.id
    let pageType = req.body.data.page_type

    //get the original English version of the page
    butter.page.retrieve(pageType, pageSlug, {locale: 'en'}).then( async (page) => {
    let fields = Object.keys(page.data.data.fields)

    //Setup the structure and default values for the translated payload
    let tPage = {
    fields: {
    "es": page.data.data.fields
    },
    status: "draft", //we're going with a draft for the time being, just to make sure it works
    "page-type": page.data.data.page_type
    }
    let translations = []
    for(let i = 0; i < fields.length; i++) { //perform the actual translation
    let v = await translate(page.data.data.fields[fields[i]], TARGET_LANG)
    tPage.fields["es"][fields[i]] = v //update the default values to turn them into spanish
    translations.push(v)
    }
    let patchUrl = 'https://api.buttercms.com/v2/pages/*/' + page.data.data.slug + "/"
    request.patch({ //perform the page Patch
    url: patchUrl,
    headers: {
    "Authorization": "Token " + WRITE_TOKEN
    },
    json: true,
    body: tPage,
    }, (err, resp) => { //We're done!
    if(err) {
    console.log("There was an error: ", err)
    return res.json(err)
    }
    console.log("Done, patch finished")
    console.log(resp)
    res.json(resp)
    })
    }).catch(err => {
    console.log("There was an error: ", err)
    res.json(err)
    })
})
Note that if you want to look at the full source code for the script, you can do so here. But that being said, the relevant logic is in the route described above. We’re basically defining an Express.js web server with a single endpoint, a POST to /wehbook1, and that’s the URL you’ll have to set up on the webhook panel.
Once this endpoint is reached it performs the following steps:
- Get the English (original) version of the page.
- Creates the placeholder structure for the translated version (which will be the payload for our request down the line). This structure is already populated with default values, including the draft status, as well as all fields with their original values.
- For each field, the translation is done, and each response is then updated on the translated structure.
- Finally, a PATCH request is issued to ButtterCMS’s Write API. We’re basically adding a whole new set of fields (or replacing existing ones) for the Spanish locale.
That is pretty much it, once our API is reached, it’ll return a simple 200 OK with a body like the following:
{ status: 'pending' }
This is normal, since updates are done asynchronously on their side, so it takes a few seconds for everything to catch up.
Back to our Translation Use Case
Remember the fake Freeze website with the ice cream? Remember how it was set up in Butter? Here is the code used to load the content from Butter into the page:
function getPageContent() {
      var butter = Butter(‘my-butter-key’);
      let defaultLocale = 'en'
      let locale = defaultLocale
      if(window.location.search.indexOf("locale") != -1) {
      locale = window.location.search.split("=")[1]
      }
      butter
       .page
       .retrieve('product_pages',
                 "product-page",
 {locale: locale}
    ).then(function(response) {
      document.getElementById("berry").innerHTML = response.data.data.fields.berry
      document.getElementById("classics").innerHTML = response.data.data.fields.classics
      document.getElementById("fruits").innerHTML = response.data.data.fields.fruits
    })
    }
It’s very straightforward vanilla JavaScript. We're not using Angular or React or any of the fancy new frameworks out there. There is no need for any extra, but you should be able to extrapolate the code you’ll need from this and fill in the gaps where needed.
Of course, this is a very specific case, but here is what it does:
- This function gets called on the “onload” event of the Body element.
- Once it’s called, it checks the URL to see if you’ve specified the locale parameter.
- If you haven’t, it’ll use the default value (‘en’)
- But if you have, it’ll use whatever you send instead
- It’ll call the retrieve method and get the content of our page (by specifying its type and slug, as usual) using the set locale value.
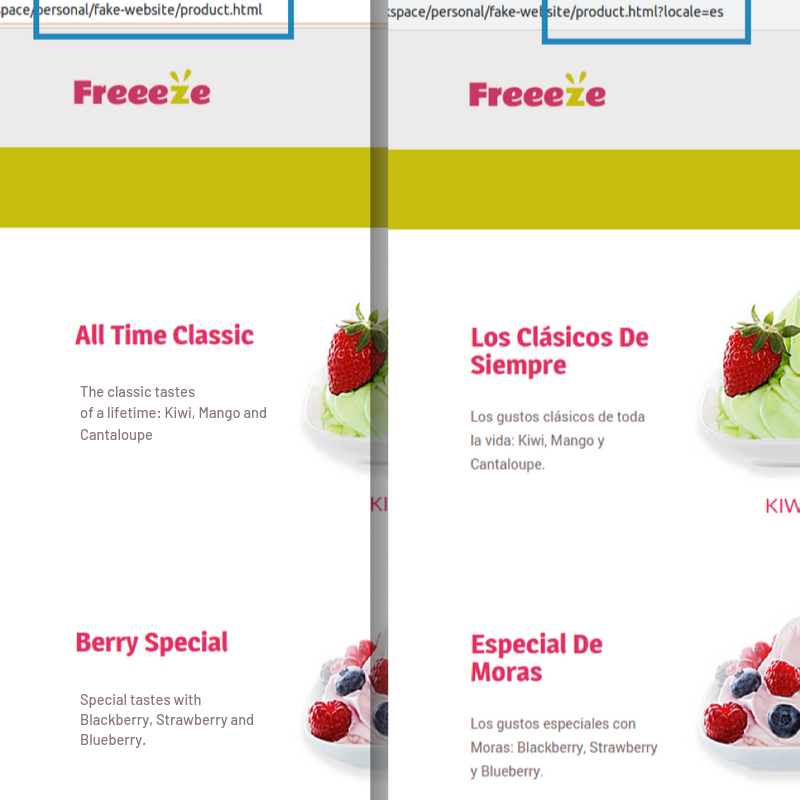
- With the response, our function will populate the content of three particular elements in the HTML code.
Check out the following image, showing side-by-side comparison of both versions of the site, with the only change being the added parameter to the URL:
Final thoughts
That is it for this article! We showed you how to use Butter’s new Write API and Webhooks features to set up a very simple, yet super powerful auto-translation workflow, allowing you to localize your content pages for translation in all the languages you’d like with very minimum effort.
All you have to do is:
- Grab the sample code, tweak it to your needs and publish it wherever you can.
- Setup your own accounts at ButterCMS and Google Cloud
- Configure the Webhook
And start enjoying your free time!
Also note that you could potentially improve the flow presented here, by adding further steps into the script. You could add calls to other APIs to perform grammar checks. You could also add a call to the API in order to get further insights into what you’re planning on publishing and, you could even send an email to yourself, notifying you of the results