Introduction
Integrating HubSpot forms into your ButterCMS instance provides a seamless way for you to capture leads and content information from your website visitors and connect with your CRM. By creating a component within ButterCMS and mapping it your code, you can create a flexible and dynamic solution for your team to add HubSpot forms to your frontend.
This guide will walk you through the process of creating a HubSpot form component in ButterCMS and embedding it in your frontend.
Adding HubSpot forms to ButterCMS
Step 1 — Create a component in Butter
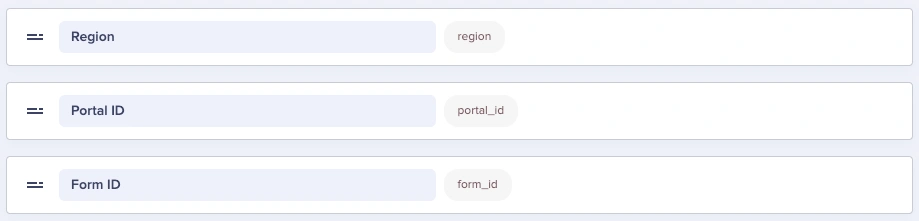
Here, we have three Short Text fields to use from our HubSpot form data. This will allow teammates to simply add in the values from their HubSpot form’s embed code. (You can read the HubSpot form documentation here.)
Step 2 — Map your Butter component to your code
In this next step, we are going to be using a React component.
import HubspotForm from 'react-hubspot-form'

const HubspotForm = ({ portalId, formId, region }) => {

    const submitHandler = () => {
        console.log('Submitting')
    }

    const readyLoadHandler = () => {
        console.log('Form is ready')
    }

    const loadingState =  () => {
        return (
            <div>Loading the form ....</div>
        )
    }

    return (
        <HubspotForm
            portalId={portalId}
            formId={formId}
            region={region}
            onReady={readyLoadHandler}
            loading={loadingState}
            onSubmit={submitHandler}
        />
    )
};

export default HubspotForm;
Step 3 — Test your form
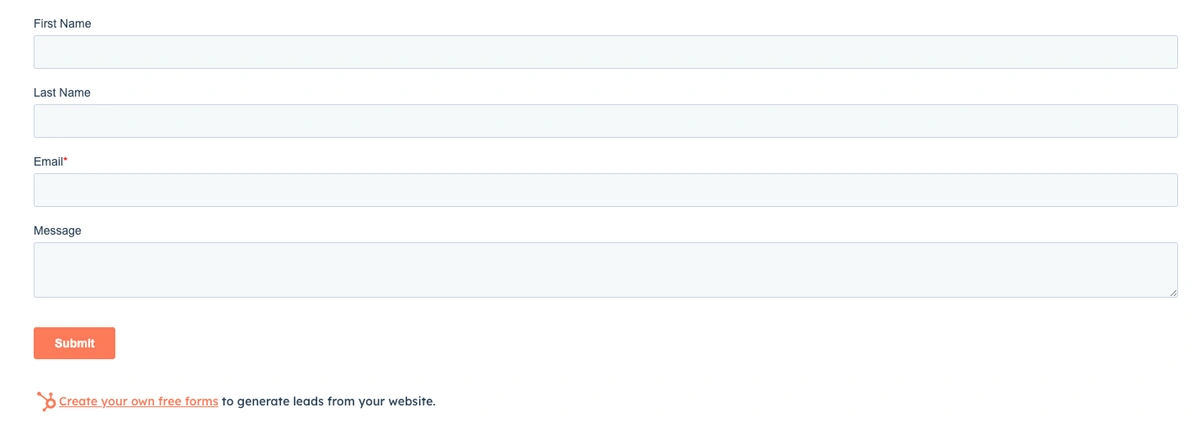
In this final step, you have a few different options — add some forced styling on your embedded form, test out your form submissions and analytics, etc.
Conclusion
By following these steps, you can create similar components for other form builders like Zoho, Wufoo, Tally, and more. Some form builders may only need an HTML field so that teammates can copy and paste the embed code into it.