For many businesses, blogging has become an integral part of their marketing strategy. Even though the ButterCMS blog engine is a fantastic tool for creating and managing blogs, some users may find themselves needing additional flexibility and functionality. ButterCMS pages can be useful in this situation by enabling you to define a schema more suited to your unique requirements. If you’re already using the blog engine, this would entail moving your content from the ButterCMS blog engine to pages using the Write API.
In this article, we'll go through creating a new page type in Butter, mapping the existing blog engine data to it, and then piping it into the new page type using the Write API. Basically, this will involve us using the Read API to fetch our blog posts and using the Write API to populate our custom blog page with the data.
We will also see how we can add additional functionality to our new blog page type through the use of components and collections. Finally, we’ll cover how we can add content to the components and populate additional SEO fields to enhance SEO if needed.
What we’re building
For this example, we’ll be creating custom blog pages using ButterCMS page types. Our custom blog page will contain fields from the default blog post page (found in the blog engine) such as the title, body, metadata, and SEO fields like author, categories, OG image, etc.
Our custom blog page will also allow us to add additional content such as product references, CTA blocks, and a Read More component which references other blog posts.
We’ll create all the necessary collection types such as an Authors collection, Categories collection, and Tags collection. We’ll also create a Product page and a Blog Product collection that will be used for the products referenced in our custom blog page.
After creating our custom blog page type, we will then migrate our content from the default blog post pages by exporting them. Then, using the ButterCMS Write API, we will pipe them into the custom blog pages.
Once that’s done, we can add content to the new components in our custom blog pages (the product references, CTA block, and Read More components mentioned earlier).
Now, let’s first create our collections.
Step 1: Create collections for categories, tags, and authors
Since ButterCMS’ default blog engine contains categories, tags, and author fields, let’s create collections for those fields.
Create the Categories collection
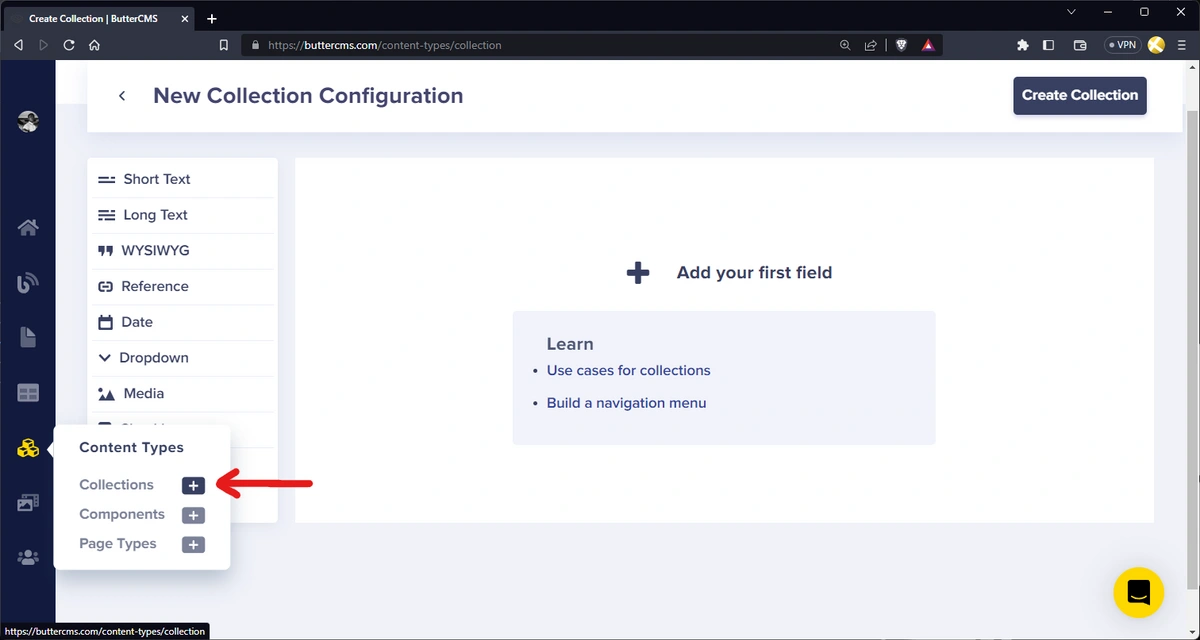
To create our Categories collection, first, navigate to the New Collection Configuration page by clicking the “+” icon on the Collections option in the Content Types drop-down from the side menu.
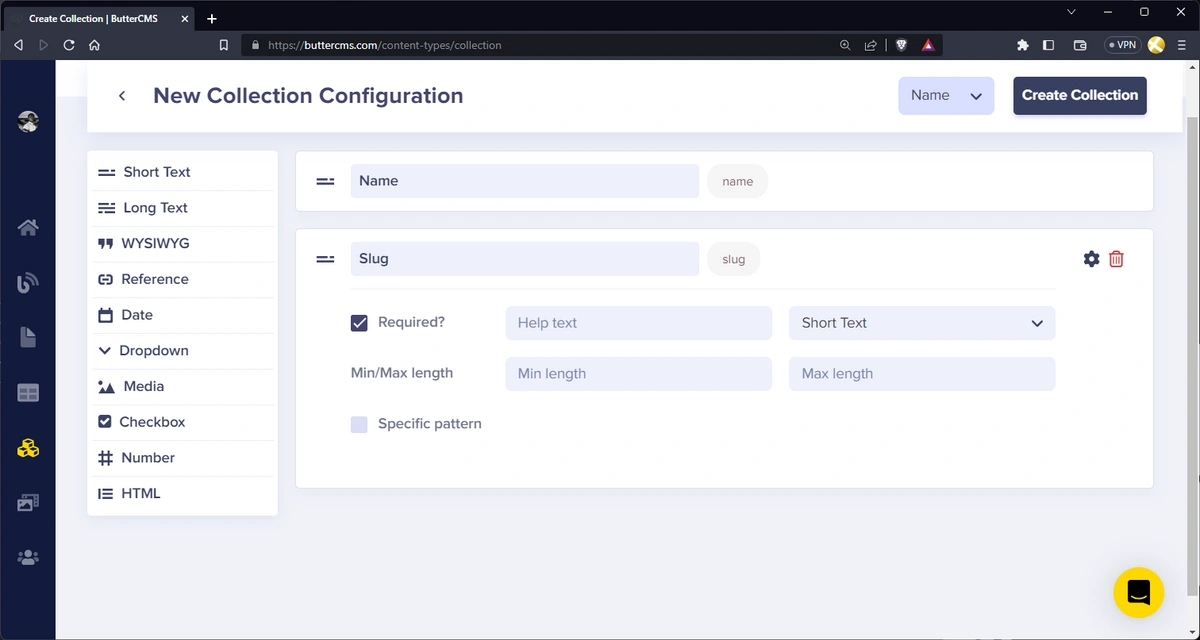
Now we can create the collection structure, which includes:
-
A short text field with the name “Name” and the following attributes:
-
-
Required - ✅ True
-
-
A short text field with the name “Slug” and the following attributes:
-
-
Required - ✅ True
-
With that, we should have something like this:
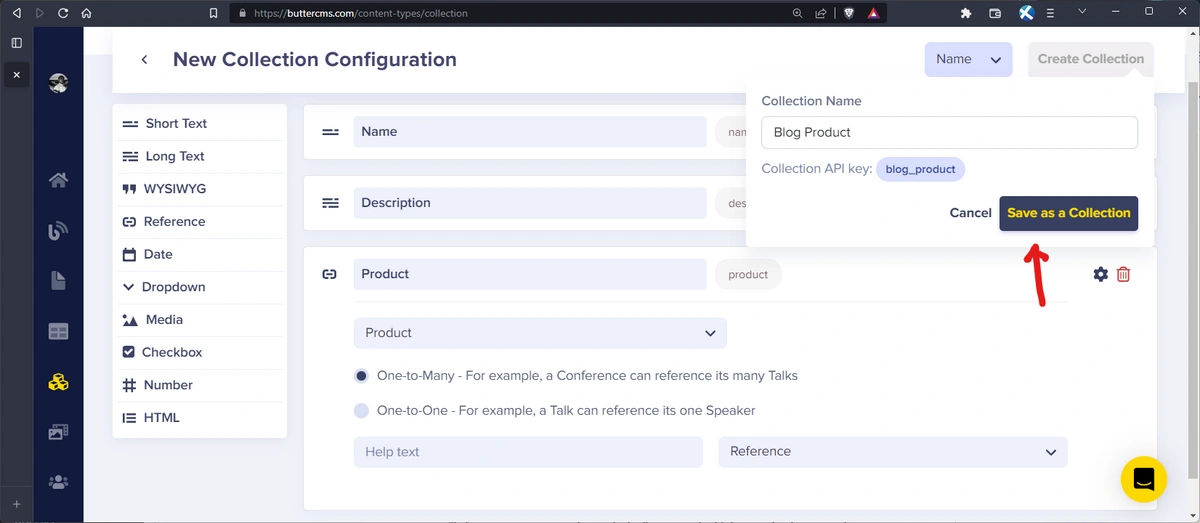
To save, click on the Create Collection button at the top of the page and enter “Blog Category” as the Collection Name. This automatically generates a Collection API Key for the collection:
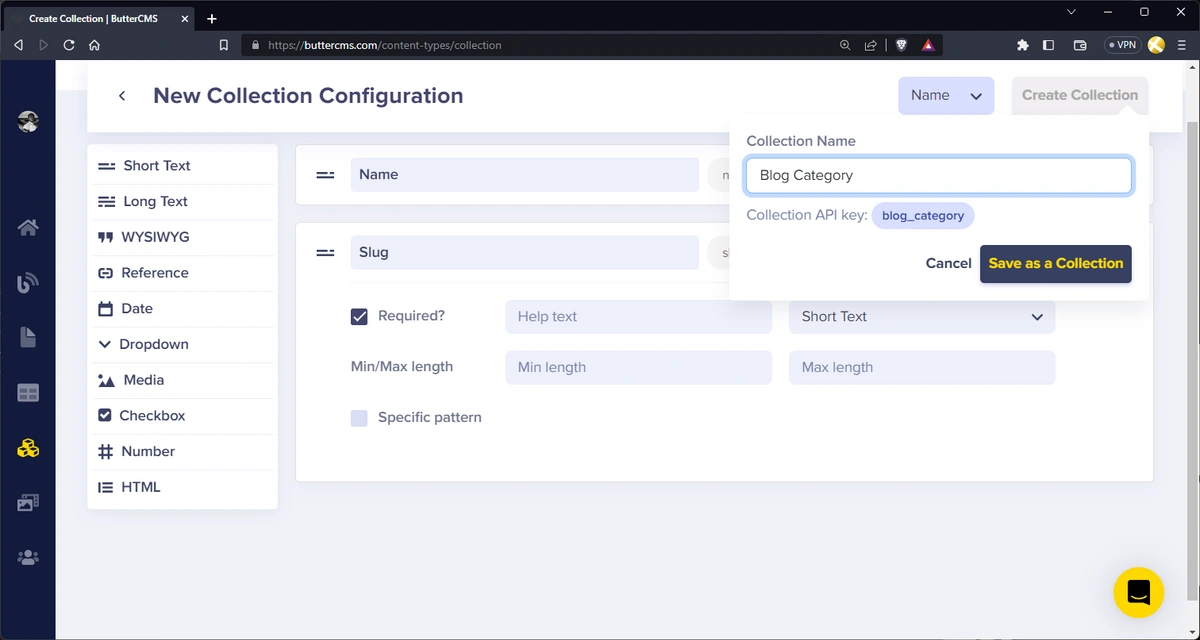
Click on the Save as a Collection button to save the collection.
Next, we’ll create our Tags collection.
Create the Tags collection
Similar to before, to create this new collection, navigate to the New Collection Configuration page by clicking the “+” icon on the Collections option in the Content Types drop-down from the side menu.
In the New Collection Configuration page, we can create the collection structure which includes:
-
A short text field with the name “Name” and the following attributes:
-
-
Required - ✅ True
-
-
A short text field with the name “Slug” and the following attributes:
-
-
Required - ✅ True
-
That should look something like this:
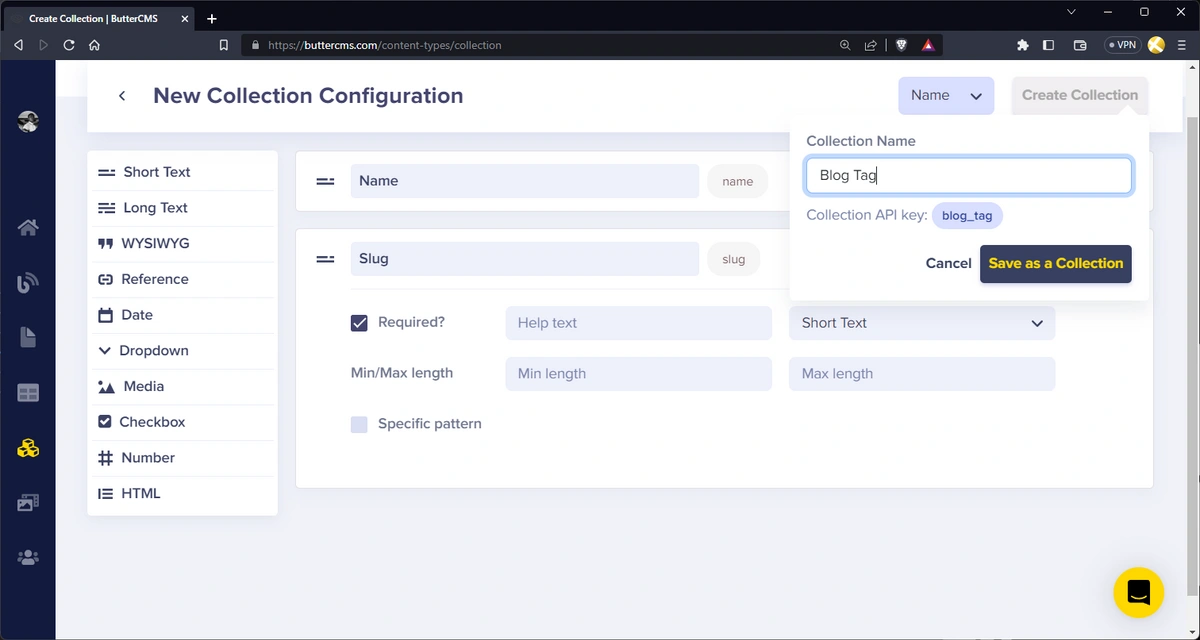
To save, click on the Create Collection button at the top of the page and enter “Blog Tag” as the Collection Name. Click on the Save as a Collection button to save the collection. **
Another collection we’ll create is the Author collection which will contain the author that is referenced in the blog posts.
Create the Author collection
Once again, to create a new collection, navigate to the New Collection Configuration page by clicking the “+” icon on the Collections option in the Content Types drop-down from the side menu.
In the New Collection Configuration page, we can create the collection structure which includes:
-
A short text field with the name “Name” and the following attributes:
-
-
Required - ✅ True
-
-
A short text field with the name “Slug” and the following attributes:
-
-
Required - ✅ True
-
-
A long text field with the name “Description”
With that, we should have something like this:
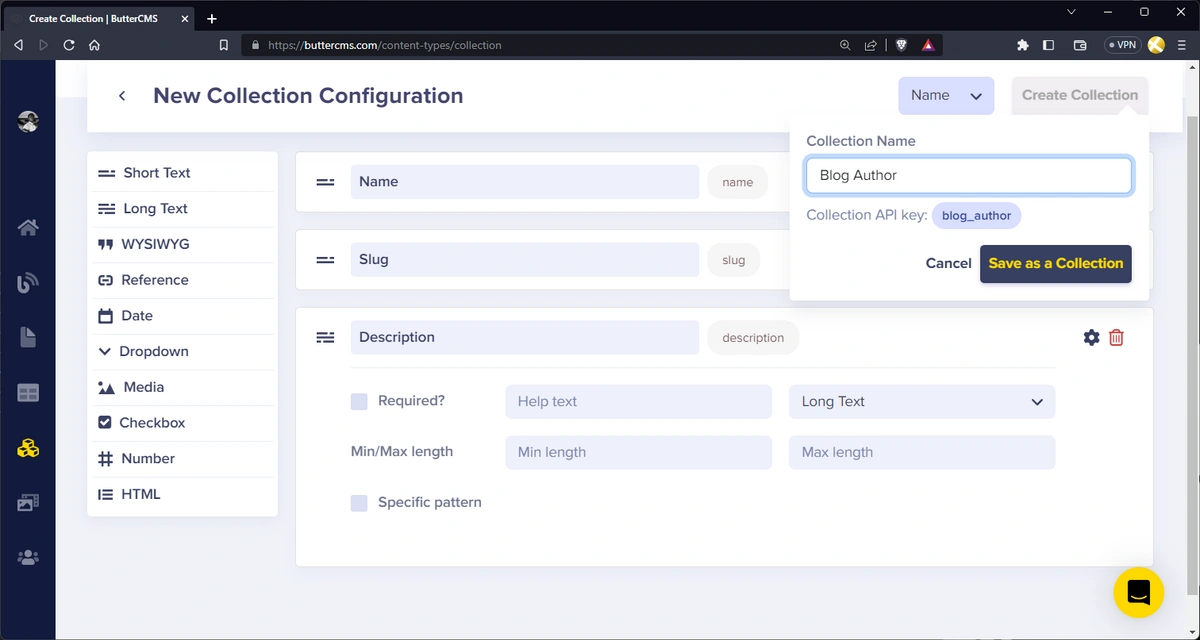
To save, click on the Create Collection button at the top of the page and enter “Blog Author” as the Collection Name and click on the Save as a Collection button.
Next, we’ll create the Product page type that will contain all the products that are referenced in the blog posts. After we create the Product page type, we can proceed to create a Product collection which will be used in the Custom Blog page type to display and reference the Product page.
Step 2: Create the Product page type and Product collection
This page type will allow you to easily manage and update product information without having to manually update each blog post.
This page type will also be used on the front-end to display full product information in a dynamic page on the website.
By using the reference field in the Product component of the Custom Blog page type we will create later on, you can link the blog post to relevant Product collection items which will in turn reference the Product pages we’re creating now.
This will enable you to display useful information about a relevant product within a blog post, such as the product name, image, and description, and also allow readers to click through to the product page for more information or to make a purchase.
Create the Product page type
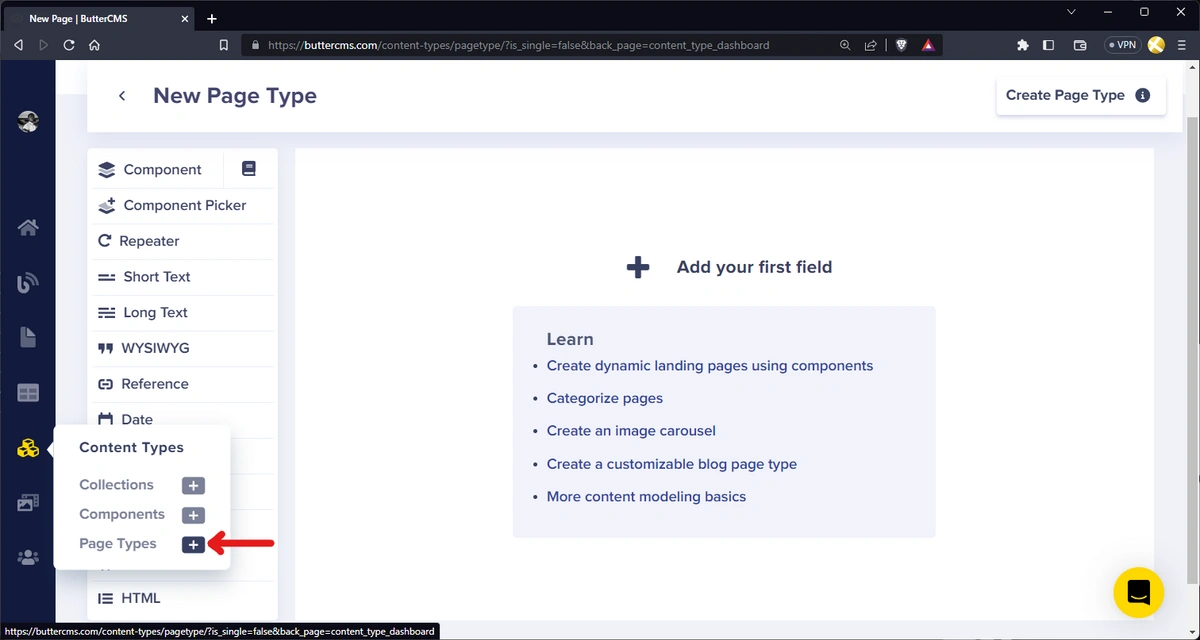
To create a new page type, go to the New Page Type page by clicking on the “+” icon on the Page Types option in the Content Types drop-down from the side menu.
Now, we can create our page type structure for our products, which includes:
-
A short text field with the name “Name” and the following attributes:
-
-
Required - ✅ True
-
-
A long text field with the name “Description” and the following attributes:
-
-
Required - ✅ True
-
-
A number field with the name “Price” and the following attributes:
-
-
Required - ✅ True
-
-
A media field with the name “Image” and the following attributes:
-
-
Required - ✅ True
-
-
A repeater field with the name “Specifications” and the following fields:
-
A short text field with the name “Name” and the following attributes:
-
Required - ✅ True
-
-
A long text field with the name “Value” and the following attributes:
-
Required - ✅ True
-
-
-
A repeater field with the name “Features” and the following attributes:
-
A long text field with the name “Value” and the following attributes:
-
Required - ✅ True
-
-
With that, we should have something like this:
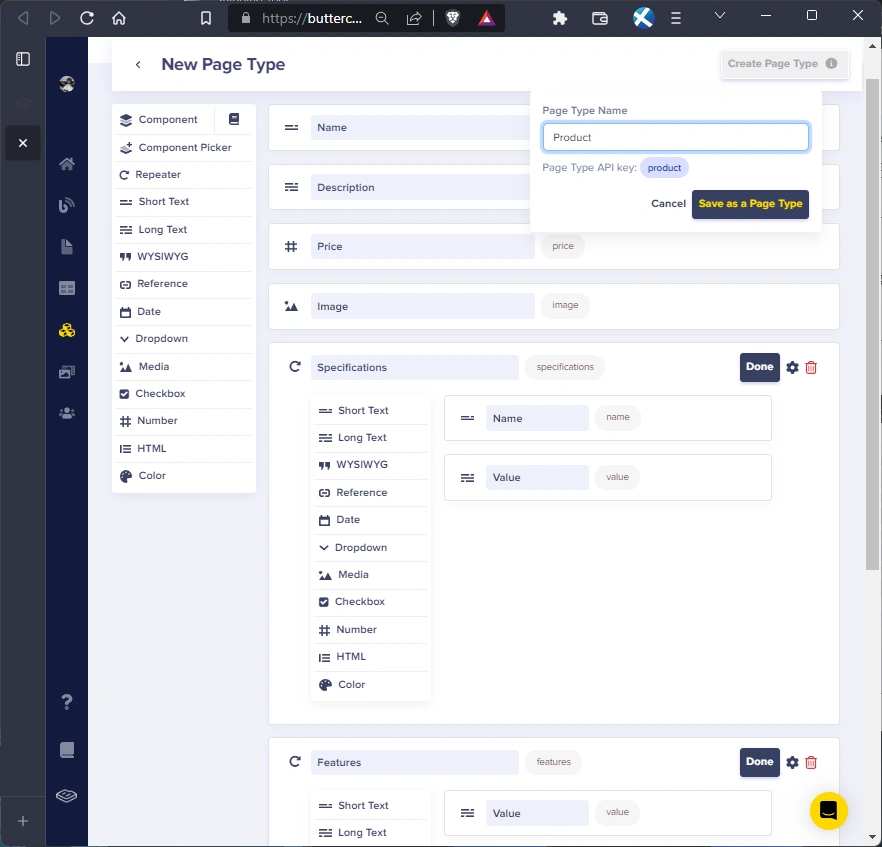
Now, to save this page type to be used in our project, click on the Create Page Type button at the top right of the page. This shows a modal where we can enter the page type name. We’ll name it “Product” and click on Save as Page Type.
Create the Product collection
Now that we’ve created our Product page type, we can proceed to create a Product collection that will display relevant product information and reference the Product page. To create our collection, first, navigate to the New Collection Configuration page by clicking the “+” icon on the Collections option in the Content Types drop-down from the side menu.
Now we can create the collection structure, which includes:
-
A short text field with the name “Name” and the following attributes:
-
-
Required - ✅ True
-
-
A long text field with the name “Description” and the following attributes:
-
-
Required - ✅ True
-
-
A media field with the name “Image”
-
A reference field with the name “Product” and the following attributes:
-
What will this reference - Product
-
Reference type - One-to-One
-
With that, we should have something like this:
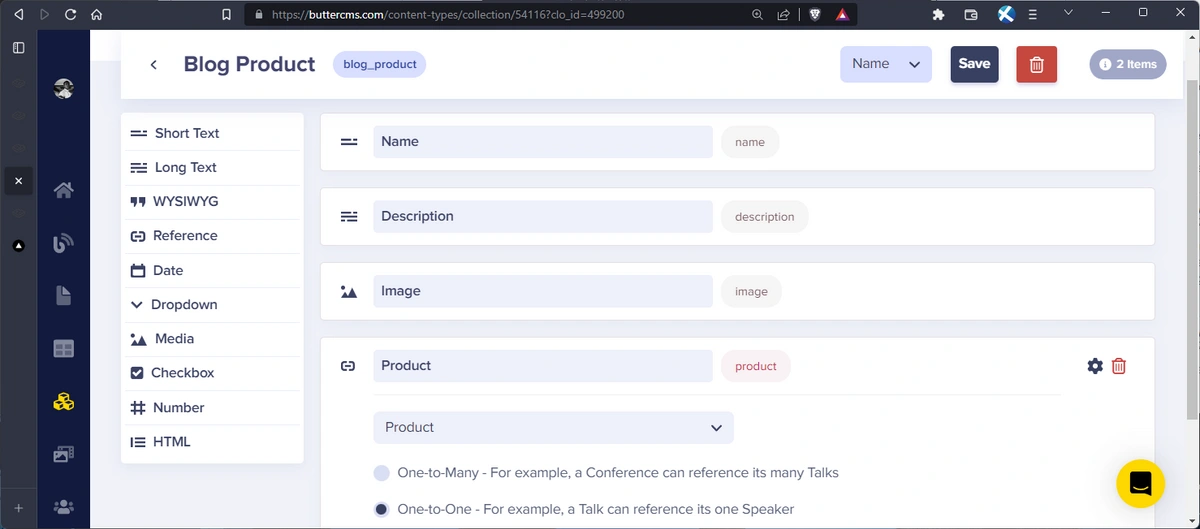
To save, click on the Create Collection button at the top of the page and enter “Blog Product” as the Collection Name and click on the Save as a Collection button.
Now that we’ve created the collections and page type we’ll use in our custom blog page, let’s proceed to create the custom blog page type.
Step 3: Create a Custom Blog page type
For this page type, we’ll be making use of components, which are modular building blocks that allow you to group specific fields and add them to your page. By combining different components, you can create a unique blog post template that meets your specific needs. For example, you can add a CTA Product component to display product information within the blog post, or an SEO component to optimize the post for search engines.
We’ll also use component pickers, which allow us to build dynamic pages by choosing from multiple components that can easily be reordered. This is because component pickers allow us to easily rearrange or omit components on the blog page type. With this flexibility, we can build highly customizable pages for almost any use case.
Just like before, to create a new page type, go to the New Page Type page by clicking on the “+” icon on the Page Types option in the Content Types drop-down from the side menu.
On this page, we’ll do a few things to create our page type structure.
Create the Blog SEO component
First, we’ll create a component for SEO. Click on Component from the menu on the right side of the page. Then, click on the Create Component button and enter the name and description of the new component, which for this example, is “Blog SEO” and “SEO information for blog post”, respectively.
Our new Blog SEO component will have the following fields:
-
A short text field with the name “Title” and the following attributes:
-
-
Required - ✅ True
-
-
A long text field with the name “Description” and the following attributes:
-
-
Required - ✅ True
-
-
A media field with the name “OG Image”
-
A short text field with the name “OG Image Alt”
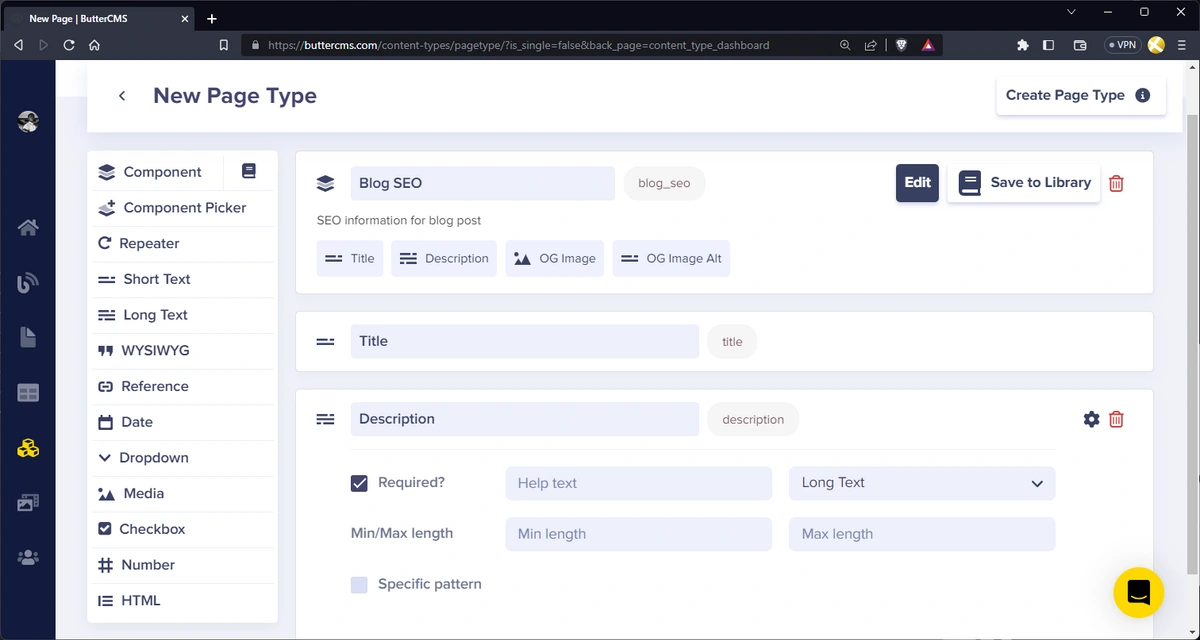
At this point, our page and component should look something like this:
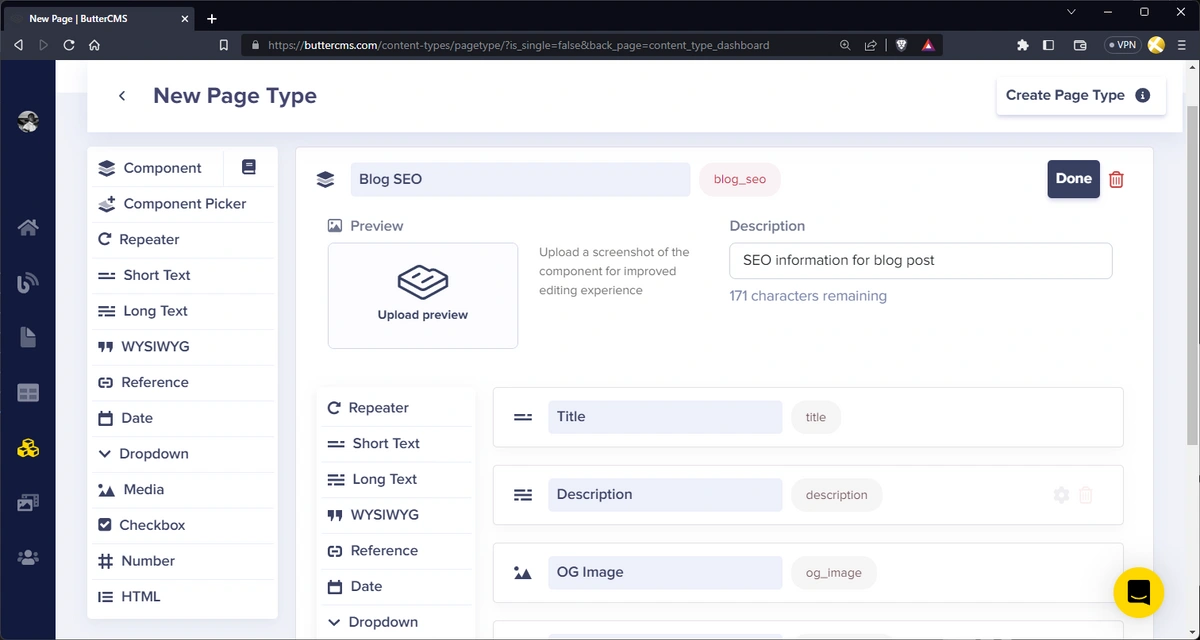
Click Done to save the component.
Create the title and description fields
Next, we will create the title and description fields for the article:
-
A short text field with the name “Title” and the following attributes:
-
-
Required - ✅ True
-
-
A long text field with the name “Description” and the following attributes:
-
-
Required - ✅ True
-
With that, our page type should look like this:
Next, we’ll be using the Component Picker to create the Body section of the page.
Create a Body component picker
Click on the Component Picker option from the menu, enter “Body” as the name of the field, and click on Create Component.
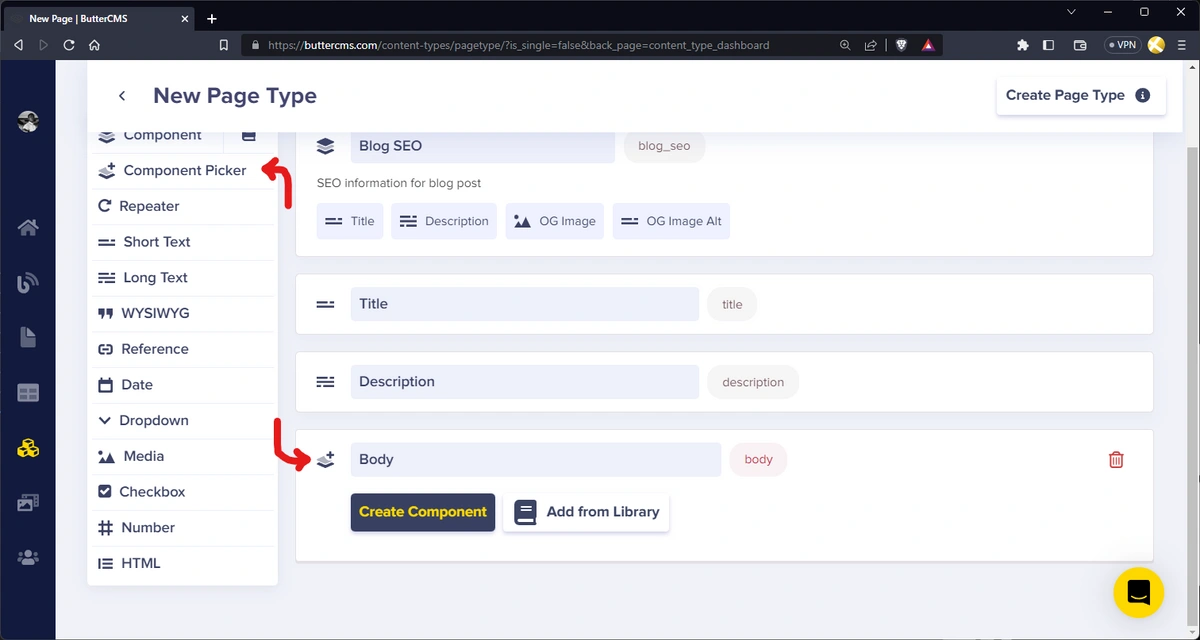
Now, we can create our Body components and their fields:
-
Content block
-
-
Description: “Content block for the blog page” with the following fields:
-
-
-
A WYSIWYG field with the name “Text” and the following attributes:
-
-
-
-
Required - ✅ True
-
-
-
Products block
-
-
Description: “Featured products collection to be displayed on the blog page” with the following fields:
-
-
-
A reference field with the name “Product” and the following attributes:
-
-
-
-
What will this reference - “Blog Product”
-
Reference type - One-to-Many
-
-
-
CTA block
-
-
Description: “Call to Action Block” with the following fields:
-
-
-
A short text field with the name “Caption” and the following attributes:
-
-
-
-
Required - ✅ True
-
-
-
-
A long text field with the name “Text”
-
A short text field with the name “Link” and the following attributes:
-
-
-
-
Required - ✅ True
-
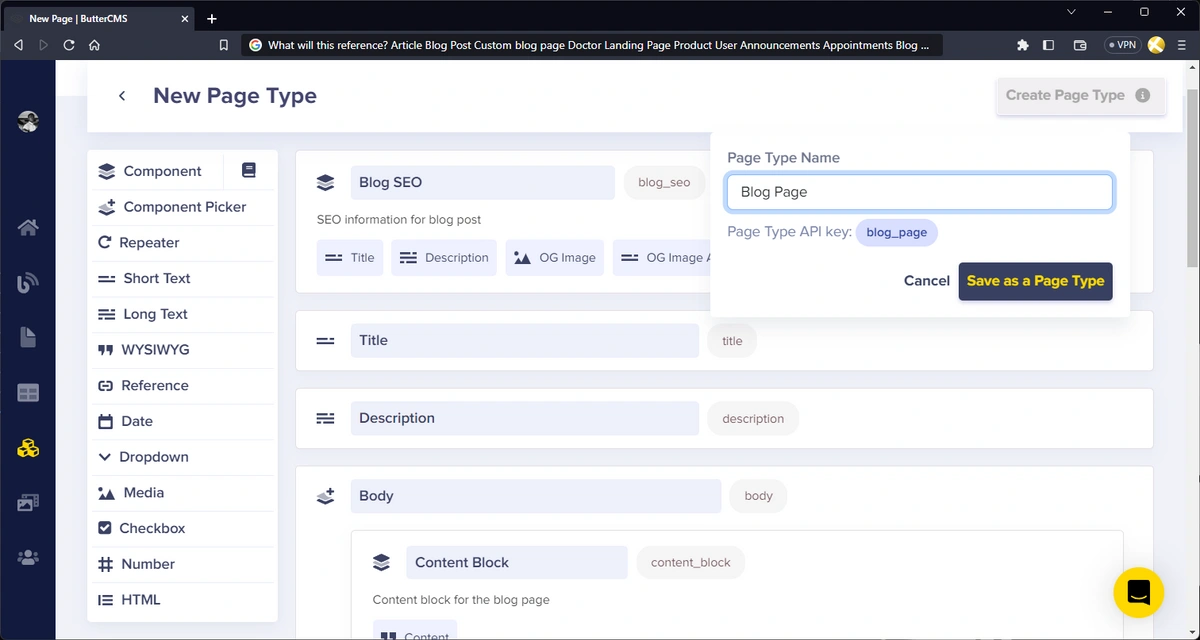
-
Before we continue, let’s save our page type with what we have so far. Click on the Create Page Type button at the top right corner of the page, enter the page name “Blog Page” and click on Save as a Page Type to save the page.
Once saved, we can create our last component block for our Body:
-
Read More block
-
-
Description: “Related blog posts” with the following fields:
-
-
-
A reference field with the name “Posts” with the following attributes:
-
-
-
-
What will this reference - Blog Page
-
Reference type - One-to-Many
-
-
With that, we should have the following components in our Body component picker:

Next, we’ll create the metadata fields for our blog page.
Create metadata fields
Add the following fields and their attributes:
-
A reference field with the name “Author” and the following attributes:
-
-
What will this reference - Blog Author
-
Reference type - One-to-One
-
-
A reference field with the name “Categories” and the following attributes:
-
-
What will this reference - Blog Category
-
Reference type - One-to-Many
-
-
A reference field with the name “Tags” and the following attributes:
-
-
What will this reference - Blog Tag
-
Reference type - One-to-Many
-
-
A long text field with the name “Summary” and the following attributes:
-
-
Required - ✅ True
-
-
A date field with the name “Publish Date” and the following attributes:
-
-
Required - ✅ True
-
With that, we should have something like this:
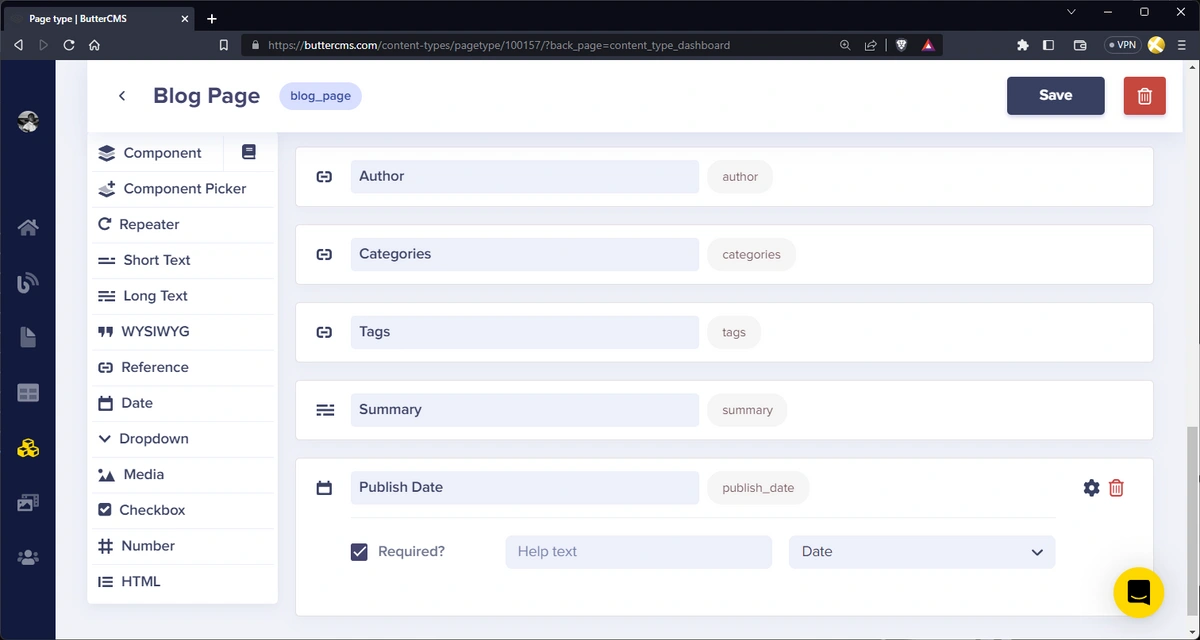
Awesome. Now click on the Save button to save the latest changes. Now, we’re just a few steps away from migrating our content to our custom blog pages.
Step 4: Migrate blog posts
There are different ways we can migrate our blog posts. We can export our blog posts as a .csv file and use that to create new pages in our custom blog page or we can use the Read API to fetch all blog posts and use that data to create new custom blog pages using the Write API.
For this tutorial, we’ll use the Read API to fetch our blog posts and use the Write API to populate our custom blog page with the data.
Here’s a basic overview of the steps we have to take to successfully migrate ButterCMS blog posts to our custom blog pages:
Fetch all blog posts:
This can be done using the ButterCMS API or with their buttercms package, which would look something like this:
const Butter = require("buttercms");
  // initialize buttercms
  const butter = Butter("BUTTERCMS_READ_TOKEN");

  // fetch all blog posts
  const fetchAllBlogPosts = async () => {
    const resp = await butter.post.list();
    return resp.data;
};
Next, for each blog post:
We have to generate a custom blog page object which we’ll use to create the custom blog page. In order to create the object, we have to:
First, get the author, categories, and tags fields of the blog post.
This is the structure of the blog post from Butter containing all the fields we’ll need:
  {
    status,
    scheduled,
    created,
    updated,
    published,
    title,
    slug,
    body,
    summary,
    seo_title,
    meta_description,
    featured_image_alt,
    url,
    featured_image,
    author: {
      bio,
      slug,
      last_name,
      first_name,
    },
    tags: [{ name, slug }],
    categories: [{ name, slug }],
  }
Second, create blog_author, blog_tag, and blog_category collections and return their meta IDs. The IDs will be used to reference the collection when passed to the new blog page.
Third, get the rest of the blog post field data and create a page data object. The code below shows the structure of the generated page data object:
  const newPageData = {
    "page-type": "blog_page",
    status: "published",
    scheduled: null
    title: post?.title,
    slug: post?.slug,
    fields: {
      blog_seo: {
        title: post?.seo_title,
        description: post?.meta_description,
        og_image: post?.featured_image,
        og_image_alt: post?.featured_image_alt,
      },
      title: post?.title,
      categories: categoryIDs,
      tags: tagIDs,
      author: authorID,
      summary: post?.summary,
      publish_date: post?.published,
      body: [
        {
          content_block: {
            content: post?.body,
          },
        },
      ],
    },
  }
Notice that for the body field, we pass in an array of objects. Each object corresponds to each component in our Body component block, which includes:
-
content_block -
products_block -
cta_block -
read_more_block
For now, we only pass one object, content_block, and its field - content which corresponds to the body of the post.
Also, it’s very important to note that we included "page-type": "blog_page" which specifies that we’re creating a blog_page. The status property is also set to published, which will automatically publish the created page.
Lastly, once the object for the custom blog page has been created, we can now make a request to Butter using our Write API key to create the blog page. The POST request will be sent to https://api.buttercms.com/v2/pages/. Using JavaScript, the request should look something like this:
const res = await fetch(`https://api.buttercms.com/v2/pages/`, {
    method: "POST",
    headers: {
      "Content-Type": "application/json",
      Authorization: `Token ${process.env.BUTTERCMS_WRITE_TOKEN}`,
    },
    body: JSON.stringify(blogPageData),
  }
This request will return the generated custom page data.
Finally, we can return all the generated blog pages
This means that if, for example, we used a function called generateBlogPage to generate a custom blog page for each blog post we got from Butter, we can store all the generated blog pages in a generatedBlogPages variable:
// generate custom blog pages from buttercms blog posts
const generatedBlogPages = await generateBlogPages(butterBlogPosts.data);
Now that’s a very basic overview of how the migration will work. In order to show how this can be implemented, here’s a working Node.js API built with Express that performs all the steps we outlined previously and provides a "/migrateBlogPosts" POST route which fetches all blog posts and tries to create new blog pages for each blog post.
Migration in action
Here, we’ll walk through an example implementation of the posts migration. We’re going to view a few posts from the blog engine and migrate them to the custom blog page.
This example implementation uses this Node.js API built with Express app that was created to demonstrate this migration process.
Let’s see the app in action.
Viewing the old blog posts
Here are some old blog posts within the blog engine, and we’ll open one of them to see the content:
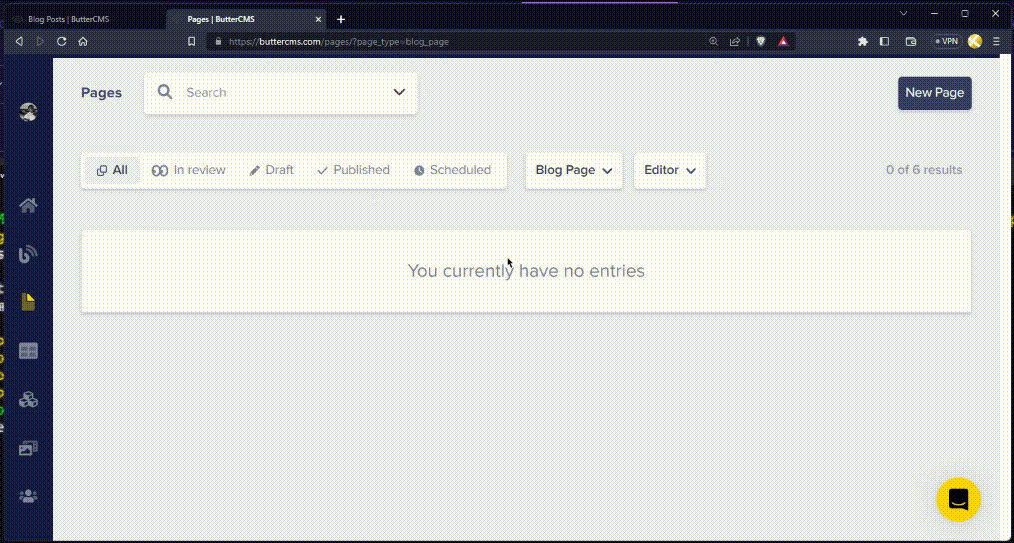
Currently, we have no custom blog pages:
Make the migration request to the Express API
Now, we’ll make the request to the API to migrate the blog posts:
From the logs, we can see the steps and the progress we’ve made in creating collections and the generated custom blog pages:
Once the pages have been migrated, we get the response from our API with an array of objects showing the status, message, and data of the generated page:
View the created custom blog posts
Finally, when we go to our dashboard, we can see that the pages have been migrated.
Now that our blog pages have successfully been created, let’s take a look at one page:
Awesome.
To use this Node.js app, clone or download the repository https://github.com/ButterCMS/migrate-from-blog-engine-to-pages-kb-tutorial and create a .env file that looks like this:
BUTTERCMS_WRITE_TOKEN=enter_your_write_token
BUTTERCMS_READ_TOKEN=enter_value_your_read_token
BUTTERCMS_API_URL=https://api.buttercms.com/v2
PORT=4000
It’s recommended to use the latest stable version (v18.16.0 at the time of writing) of Node while trying to run this app as it uses the fetch API which might not work on older versions of Node. You can install and use multiple versions of Node using nvm.
Once that’s done, install and start the app to start sending requests:
npm install
npm start
Step 5: Add content to the migrated custom blog pages
Now that we’ve been able to migrate our blog posts, let’s see how we can customize them by adding our block components to the body via the component picker.
First, we’ll create content for Product pages and Blog Product collections so that we can reference them in the Custom Blog page.
Add content to Product page and Product collection
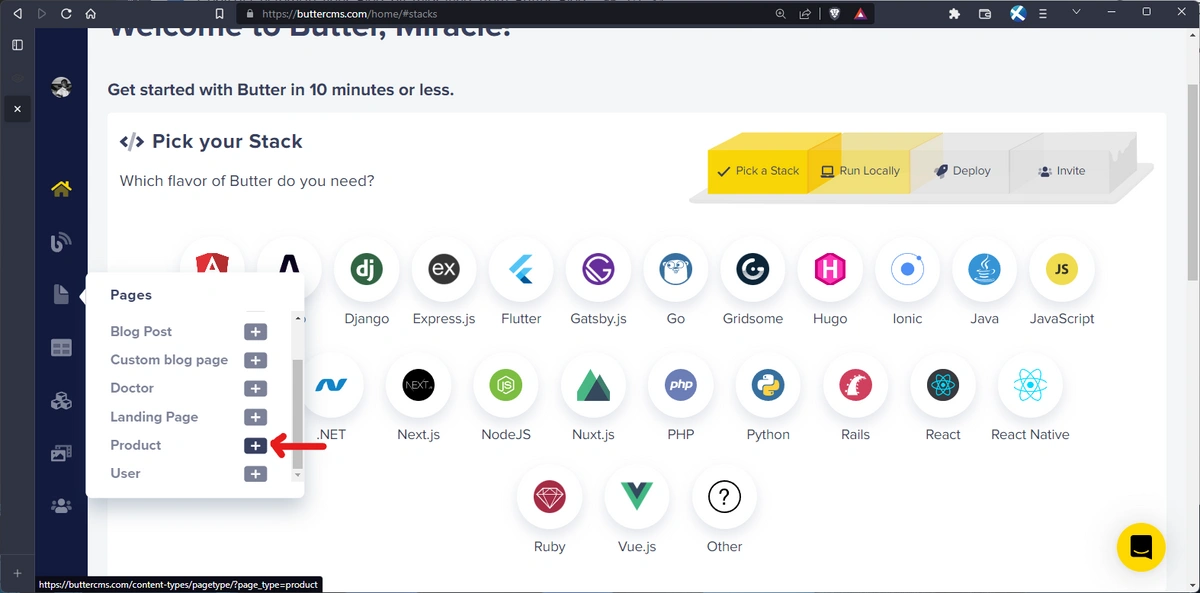
To create a Product page from the product page type, click the “+” icon on the Product option on the Pages drop-down from the side menu.
Now, enter the Page Title which can be the name of the product and the API Slug will automatically be generated.

Click on Save Page Metadata to start adding content to the page.
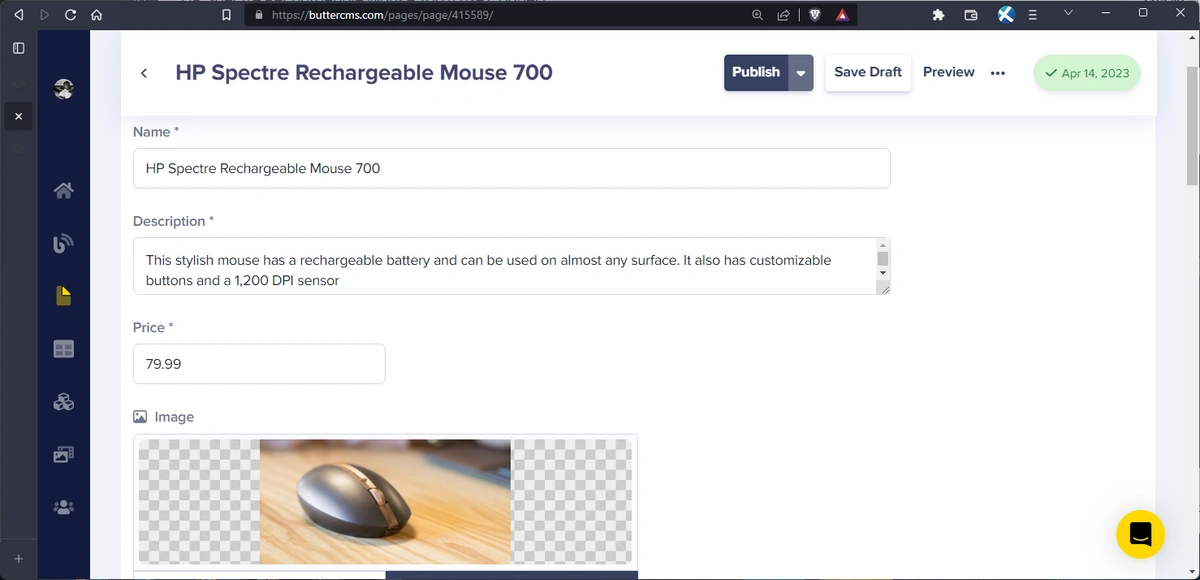
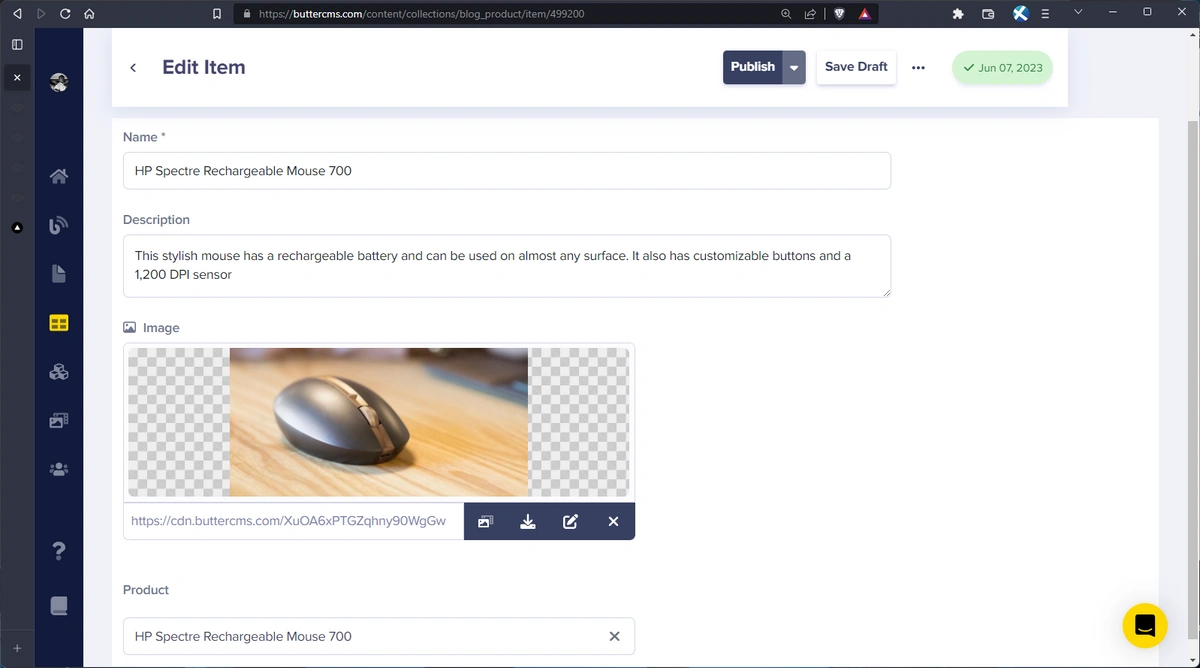
First, we add the name, description, price, and image.
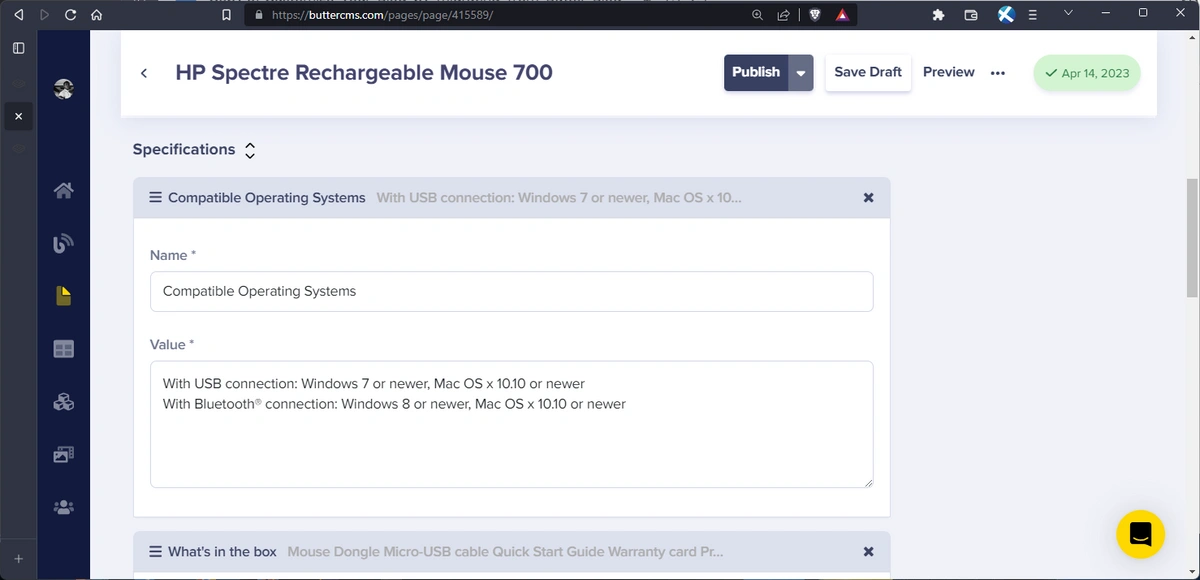
Then, using the repeater field Specifications, we add a few specifications:
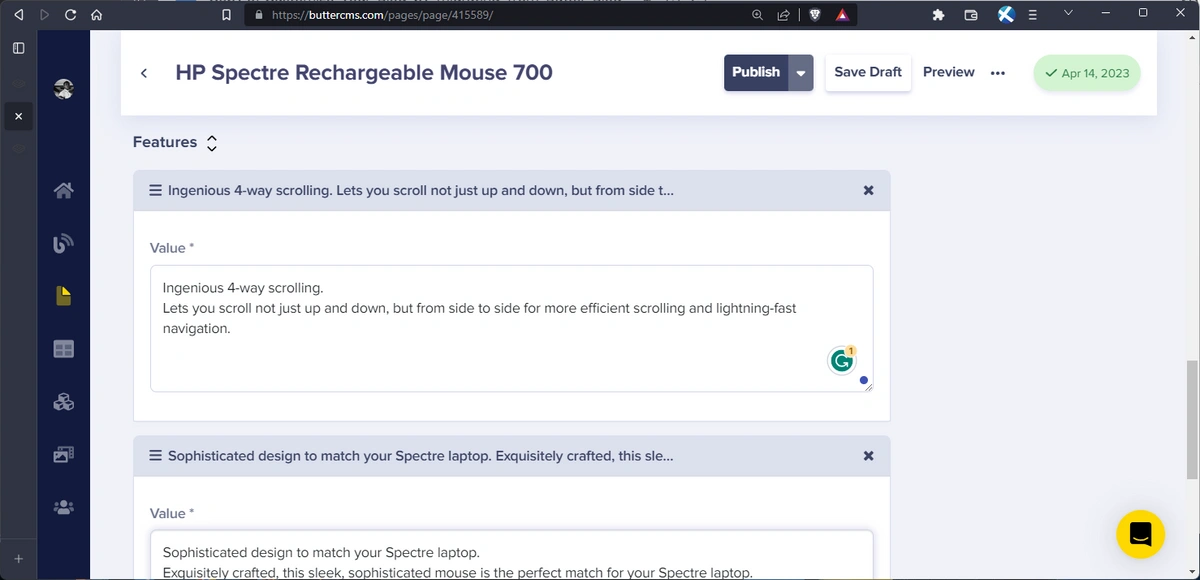
Lastly, we use the Features repeater field to add a few features:
With that done, we can click on Publish to save and publish our product.
Now that we have a product, we can create a collection item for it which we’ll use on the custom blog page. Here’s an example of the collection item for the product we just created:
Next, we’ll add content to our custom blog pages.
Add content to the Custom Blog page
Now, we can go to one of our migrated Custom Blog pages or create a new one and add content.
To edit and add components to the migrated pages, we can navigate to Pages and select the Blog Page page type to view all our migrated pages. We can then select a page, review the migrated content already populating several fields, and then begin adding blocks via our Body component picker and editing other fields.
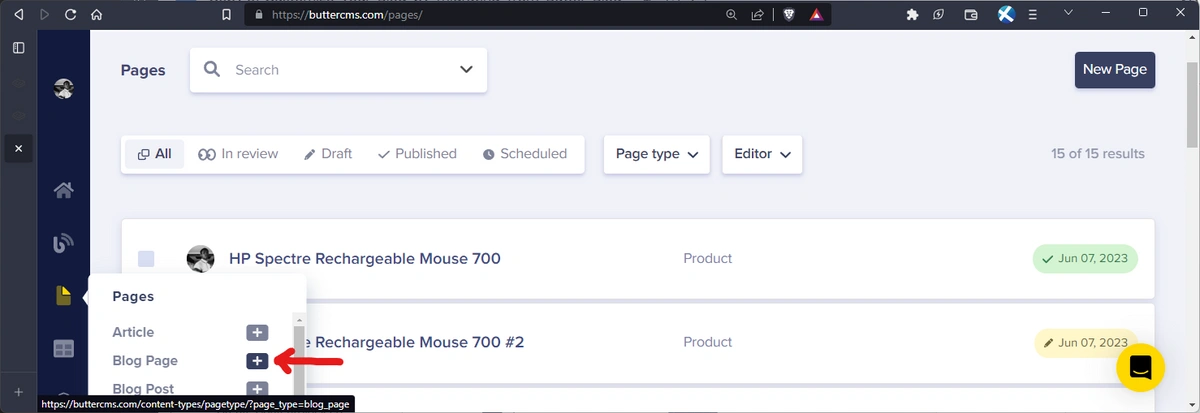
For this tutorial, however, we will create a new Custom Blog page. To do this, click the “+” icon on the Blog Page content type option from the Pages dropdown on the sidebar.
Now, enter and save the metadata to start adding content to the page:

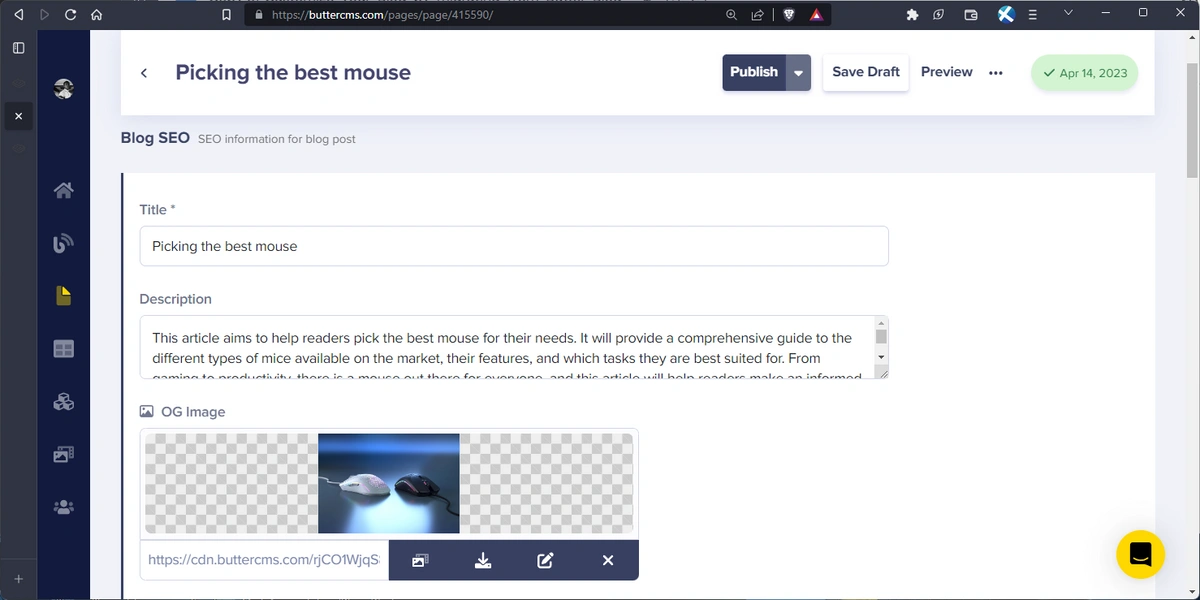
Now, enter the title, description, OG image, and OG image alt from the Blog SEO component:
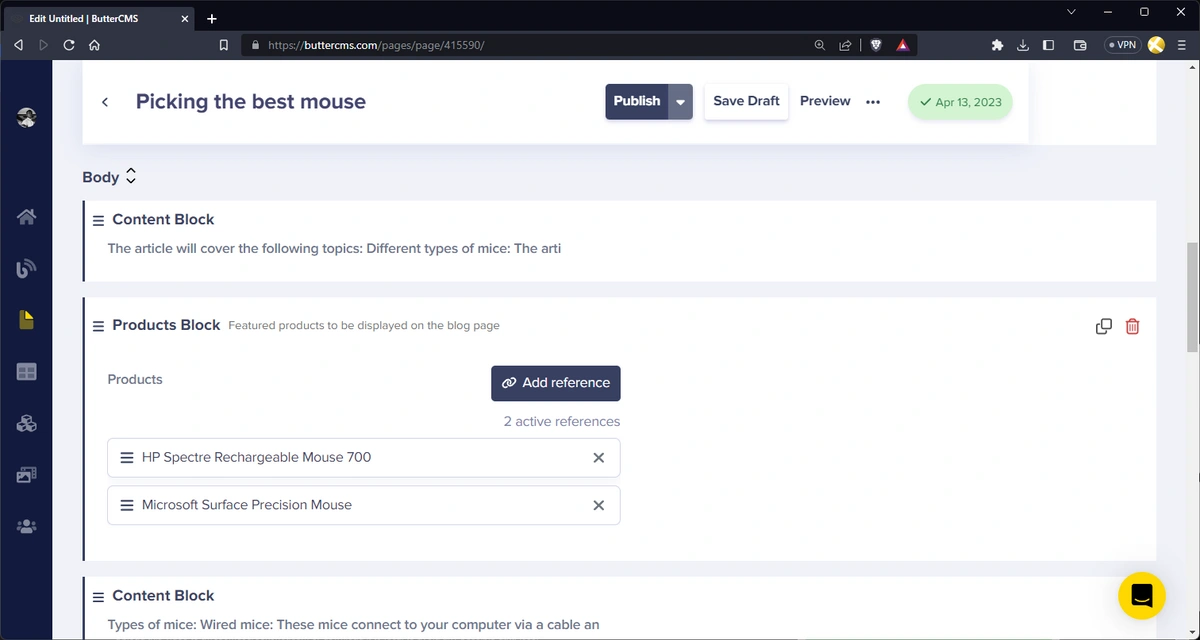
Next, we add the page title and start adding blocks to our Body component picker. We can add a new block by clicking the Add Component button and selecting a component from the Component Picker modal:
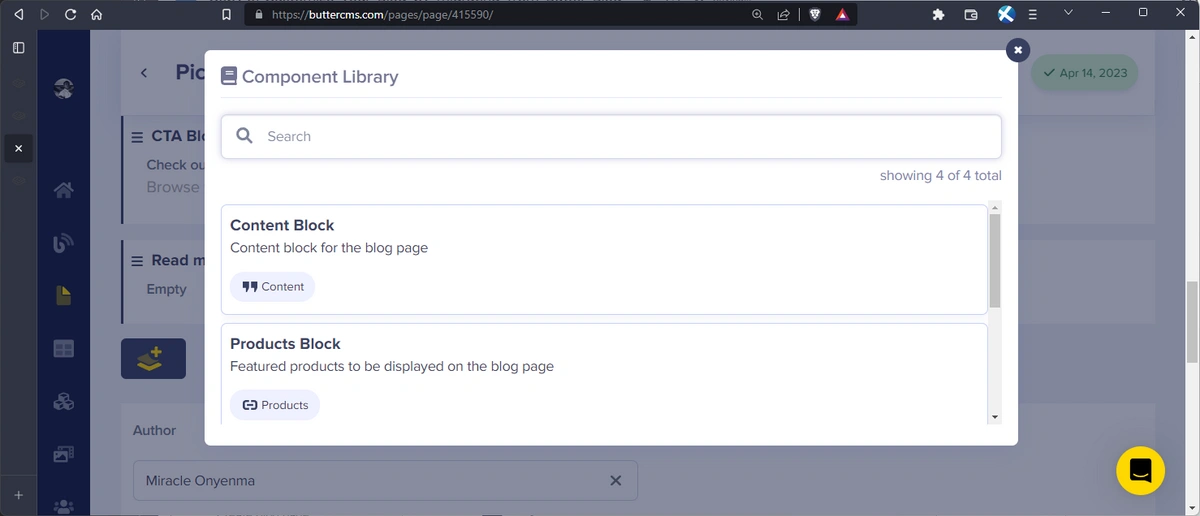
We can add a Content Block component for the WYSIWYG section, a Products Block component where we can select multiple product collections to be displayed on the page, a CTA Block, and a Read More Block.
Also, since we’re using a component picker for all these blocks, we have the ability to rearrange and structure them to our desire.
After the Title and Body, we can add content for other fields: Author, Categories, Tags, Summary, and Publish Date:
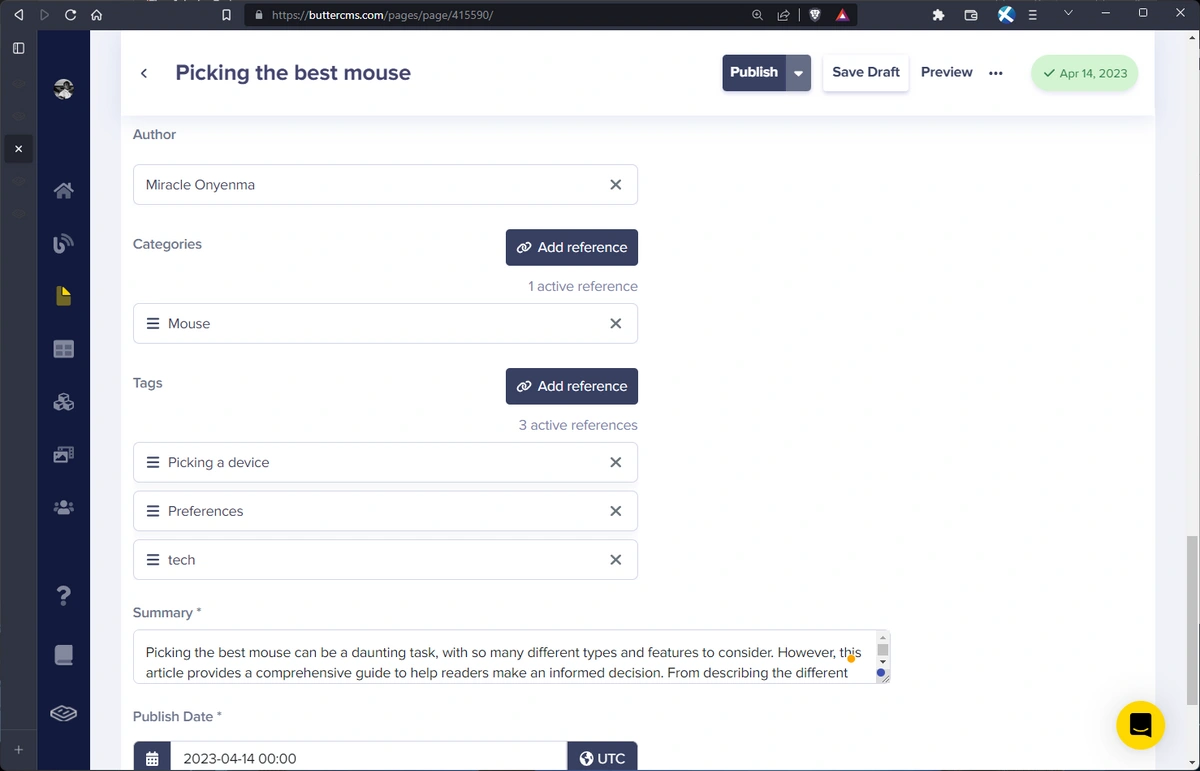
With that, we can click on the Publish button to save and publish the blog page.
Step 6: Build a dynamic blog website
The last step, of course, is to build out our website by fetching data from ButterCMS. Since ButterCMS supports a large number of frameworks for building sites, there are a lot of options we can choose from.
Below is what our blog website looks like with our custom blog page:
You can view this site at https://butter-custom-blog-pages.netlify.app/ .
The source code for this example project is available on GitHub at https://github.com/ButterCMS/blog-engine-to-pages-example-site .
Additionally, the example Next.js app also includes a /migrate page which migrates posts just like the Node.js app shown earlier.
It’s simply a bit more interactive process for doing the migration process.
Here’s an example:
Conclusion
In conclusion, migrating from Butter’s blog engine to pages using the Write API allows for greater flexibility and customization of your blog. By following the five steps outlined in this article, you can create custom collections, page types, and components to make your blog unique. With a dynamic blog page, you can display your blog posts in a visually appealing and organized way. This process may take some time and effort, but the result will be a personalized blog that stands out from the rest.