Write API
Importing Third-Party Data into ButterCMS
How do you import data into ButterCMS? Here's a quick tutorial of how to send your third-party data into your ButterCMS account.
- How do you import data into ButterCMS?
- Creating the car page type on Butter
- Extracting, Transforming and Loading the data into ButterCMS
- Writing a simple CLI tool to tie everything up
- Conclusion
Automating content creation through programming is a huge advantage of a headless CMS system. Discover how easy it is to import third-party data into ButterCMS using our Write API.
For the purposes of this exercise, I’ll be creating a Car catalog in Butter, which you could use later for your own car-related site. And for that, I’m going to be getting external data from a public API: the Car Query API. The concepts I’m going to cover, however, can be easily extrapolated to your own third-party data related use case.
How do you import data into ButterCMS?
Importing third-party data (i.e data that is not yours and is not stored in your own system) into any platform requires typically three steps:
- Extract: In other words, the action of querying that external resource in order to obtain the data you need.
- Transform: Sometimes this step is optional, but usually, the information is stored in a format that is not compatible with your system, so between extraction and storage, you need to perform some kind of transformation to the data before moving forward.
- Load: the final step in the process is to store (or load) the data into your system.
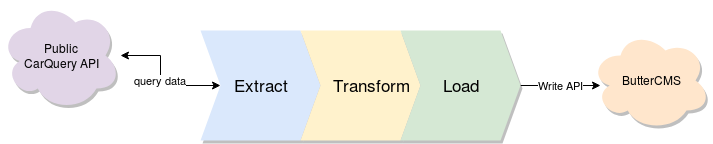
Applying these steps in our CarQuery use case, we can quickly identify the steps we need to perform in order to import the data and create our own car database in ButterCMS.
Because this is an on-demand use case, I’m going to be creating a simple script that can be used from any terminal in order to import the data. That being said, you could add this script into your own workflow, allowing for the import to work in the background as a side effect of your user’s actions.
In any case, this is what we’re going to do:
- We’ll create a new page type in ButterCMS. This page type will contain the fields we’ll want to show on our car catalog page.
- The script will query the API, it will gather up to 500 results (this is by design of the API, we can’t query more than that).
- For each item returned, we’ll create a new JSON object only with the fields we want (the ones defined in the page type).
- After that, the JSON will be posted to ButterCMS using its Write API.
So let’s get to it.
Creating the car page type on Butter
The steps required to create a new page in Butter are very straightforward, you just have to create a new page with your fields and then turn that page into a page type.
First, go to the Pages section and click on “Create New Page”, located on the top right corner of your screen (under the “New Page” button).
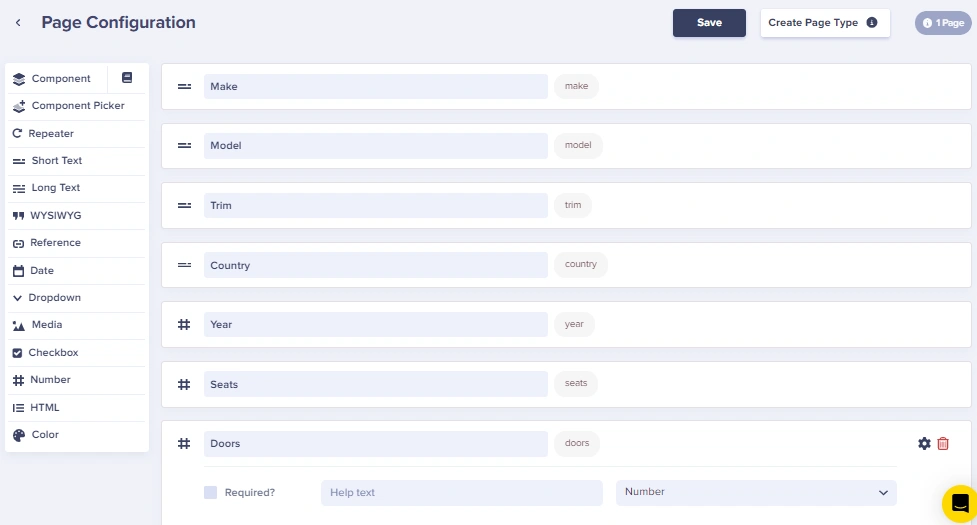
After that, add the fields you need using the UI as follows:

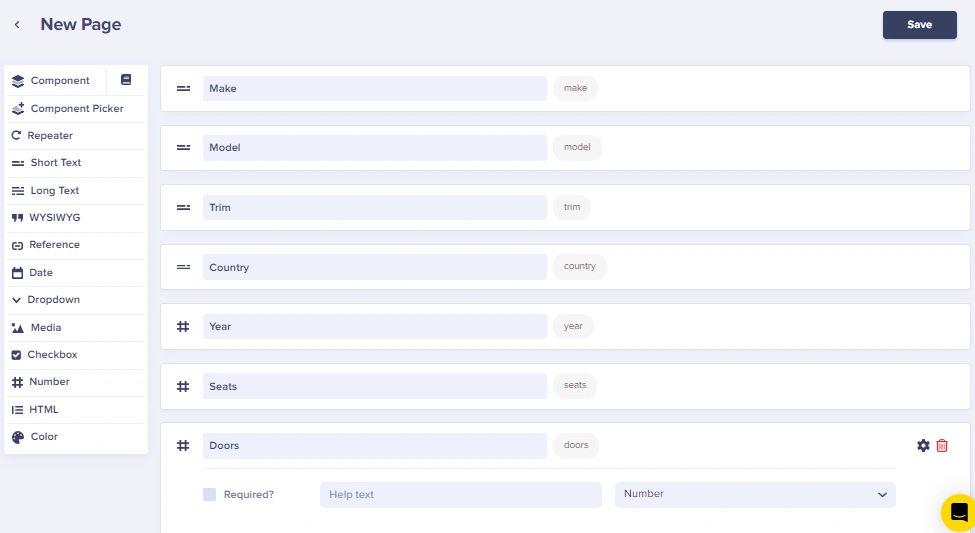
The fields we’re capturing from the API are:
- Make (String)
- Model (String)
- Trim (String)
- Country (String)
- Year (Numeric)
- Seats (Numeric)
- Doors (Numeric)
Once set up, you can save the page using the Save button on the top right corner. That will redirect you to the page you just created and ask you for the page name.
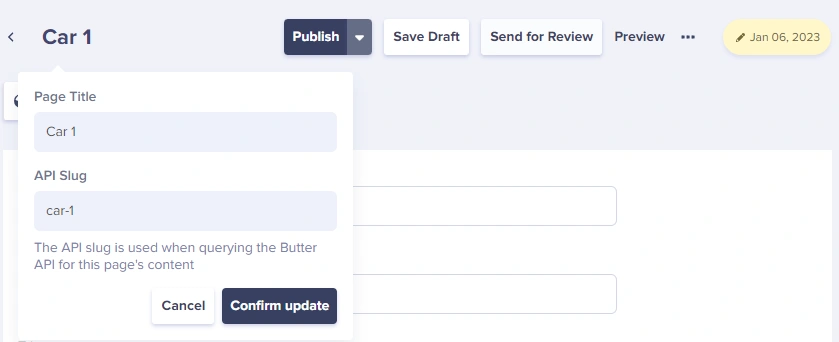
Name the page however you like (since the name will be asked again for the page type in a minute) and click on “Save Page Metadata”.
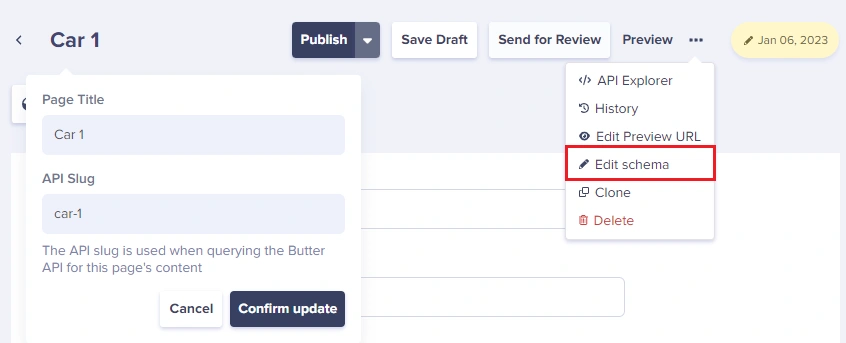
The next thing to do after you’ve created the page is to click on the ellipsis button (located, again, on the top right corner) and select “Edit schema” as shown below:
This will send you to a similar page as before, asking you to add or modify existing fields on the page. Don’t change anything here, just click on the “Create Page Type" button, enter the name (this time write down “car”) and click on the “Save as a Page Type”.
And that will finish the process, you’ve now successfully created the storage where our car records will be saved.
Creating the car page type on Butter
Extracting sounds like a complicated process where you pull data from some kind of storage, but that’s just the technical term. In our use case, we’re just querying data from a public API, so we’re going to be using the request module, which greatly simplifies the process of sending HTTP requests to third party services.
const request = require("request")
module.exports = class CarQuery {
	static queryByBody(bodyType, callback) {
    	let url = "https://www.carqueryapi.com/api/0.3/?callback=?&cmd=getTrims&body=" + bodyType
    	let dataRegExp = /\?\((.*)\);/g
    	request.get(url, (err, resp) => {
        	if(err) return callback(err)
        	let matches = dataRegExp.exec(resp.body)
        	if(matches) {
            	let obj = JSON.parse(matches[1])
            	callback(null, obj.Trims)
        	} else {
            	callback({
                	error:  true,
                	msg: "Invalid response format"
            	})
        	}

    	})
	}
}
The code for the extraction is very straightforward. A class is declared in which a single static method sends the HTTP GET request to CarQuery’s API, parsing the response.
The regular expression I’m using is there to extract the JSON part of the response from the string returned. This is due to the fact that the API returns something like:
‘?(<THE ACTUAL JSON);’so I’m just capturing the JSON content and parsing it.
The transform step is basically grabbing the fields of that JSON that we need and putting together a new one, which will be the payload of the POST request we’ll send to Butter’s Write API. That can be seen in this method (from the ButterCMSClient class):
static newPage(pData) {
let title = `${pData.model_trim}, ${pData.model_name} from ${pData.make_country}`
return {
title: title,
slug: slug(title),
"page-type": "car",
fields: {
"en": {
make: pData.make_display,
model: pData.model_name,
trim: pData.model_trim,
country: pData.make_country,
year: +pData.model_year,
seats: +pData.model_seats,
doors: +pData.model_doors
}
}
}
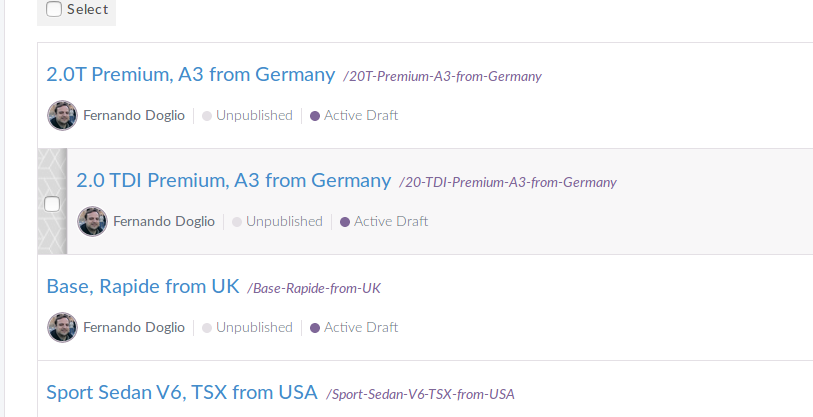
}This is just the JSON described in Butter’s Write API documentation, the year, seats and doors attributes are turned into numbers thanks to the “+” in there. The title for the pages is formed using the model trim, name and country of the make. Once in Butter, they look like this:
Finally, saving this data into Butter is easily done with a simple POST request to our Write API’s endpoint. Here is what that code looks like:
static savePage(pData, done) {
     let newPage = ButterCMSClient.newPage(pData)
     let postURL = 'https://api.buttercms.com/v2/pages/'
     request.post({ //perform the page Patch
         url: postURL,
         headers: {
             "Authorization": "Token " + WRITE_TOKEN
         },
         json: true,
         body: newPage,
     }, (err, resp) => { //We're done!
         if(err) {
             return done(err)
         }
         done(null, resp.body)
     })
}
Once more, very straightforward code, the WRITE_TOKEN constant contains your API key which you should’ve gotten once you signed-up for the enterprise plan.
Writing a simple CLI tool to tie everything up
In order to use the above code, we’re going to be creating a very simple CLI tool capable of receiving a parameter that will later be submitted to the CarQuery API (the body type of the cars to return).
const CQ = require("./lib/carquery"),
ButterClient = require("./lib/butterclient")
function savePage(pages) {
if(!pages) return;
let page = pages.shift()
ButterClient.savePage(page, (error, resp) => {
if(error) {
console.log("There was an error saving the page on ButterCMS (model id: " + page.model_id + ")")
} else if(resp.status == 'pending') {
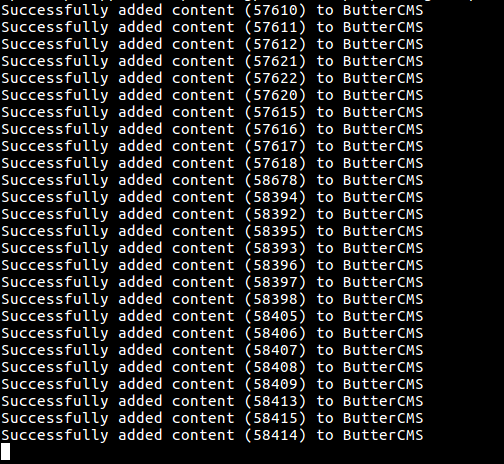
console.log(`Successfully added content (${page.model_id}) to ButterCMS`)
}
setTimeout( _=> savePage(pages), 400) //throttle the requests one every 400 milliseconds
})
}
let args = process.argv.slice(2);
if(!args) { //default value
args = ["Sedan"]
}
CQ.queryByBody(args[0], (err, data) => {
if(err) {
return console.log(err)
}
savePage(data)
})The code grabs the first attribute passed to the script and uses it as a body type (using “Sedan” as a default value if none is provided). With that value we query the API and using that list of cars, we iterate over each one saving it on Butter.
The only consideration to have here, is that due to the asynchronous nature of Node.js, sending all these POST requests to Butter’s API would be done nearly simultaneously and that might cause Butter (or any other public API) to either flag our IP and block all incoming requests or just block us temporarily due to us exceeding a request quota. Although this might not be the case with Butter, it’s still a good practice to try and throttle the requests in order to avoid any potential issues.
And the way I’ve implemented that throttling is by using the setTimeout function. Essentially what I’m doing here is sending all requests in serial mode, waiting 400 milliseconds between requests. Mind you, there are a lot of packages that can help you do some interesting stuff with the throttling in cases similar to this one. But because we’re trying to keep things simple and manageable, I thought implementing from scratch would actually provide some insight into the concept.
The output from the above script looks like:
Conclusion
Importing data from a third party service (i.e APIs, databases, etc) into your own instance of ButterCMS has never been easier. Once the data is there, you can create a simple page and build your content with a few simple steps.
You can also use the code shown above and store the data into your own ButterCMS instance (using it as a simple database). Should you later choose to automate the process of ETL, you can always re-use the code and make sure you’re correctly setting the triggers.