Creating, Editing, Scheduling and Deleting Collections
- Creating a Collection
- Cloning a Collection
- Cloning a Collection Item
- Updating a Collection
- Scheduling a Collection Item
- Deleting a Collection
- Deleting Collection Items
- Team Presence
Creating a Collection
Collections are tables of data to be referenced by Pages, extending the use cases that you can achieve with ButterCMS. This article dives into several use cases that outline three very common ways to use Collections.
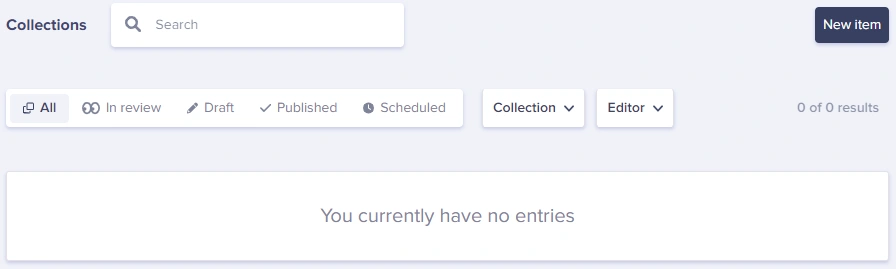
1. To create a Collection, the first thing you need to do is click on the Collections button from your Main Menu,

then click on the New Item > Create New Collection button located on the top right of the Collections window.
Or you can also click on the Content Types button on the main menu,

then click on the New Content Type button > Collection:

2. Configure your collection with all field types that you require. You can learn more about Content Fields here.
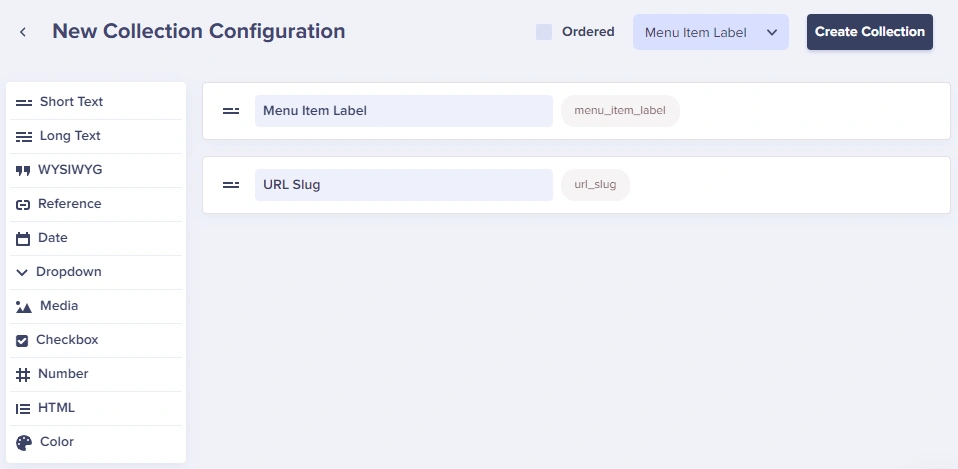
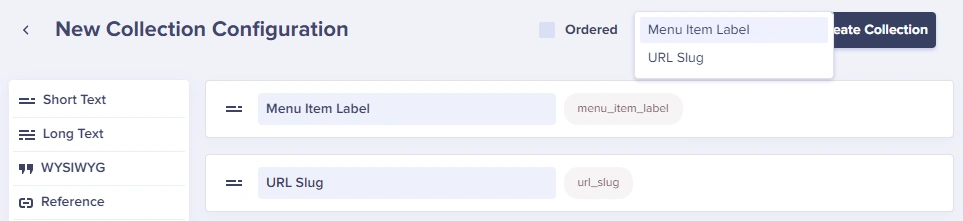
3. On the "Collection Label" dropdown, choose which field you would like your Collection Items to display in the Collections Dashboard. Then click the Create Collection button when done.
NOTE: Collection labels do not support Reference Fields. What we suggest is adding a short text field to your Collections configuration that will help in identifying the Collection item better. You can name it as Title, Name, etc., and this field will be the one displayed on your Collections dashboard.
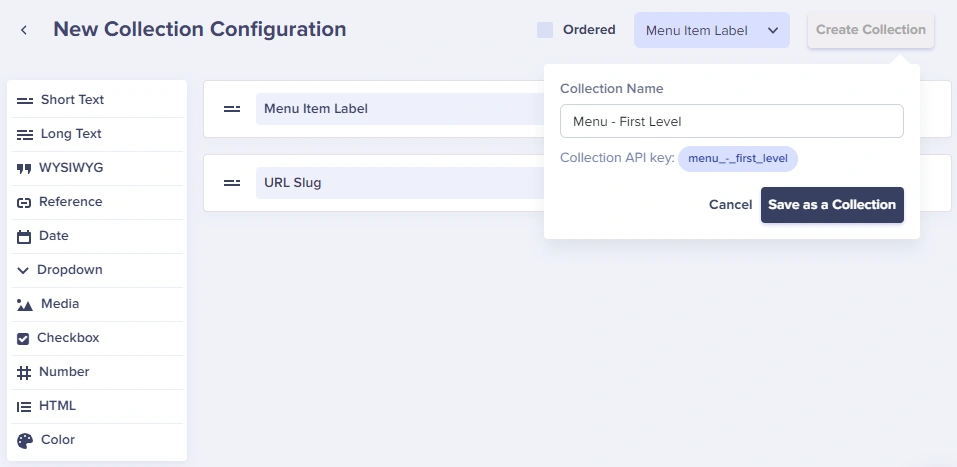
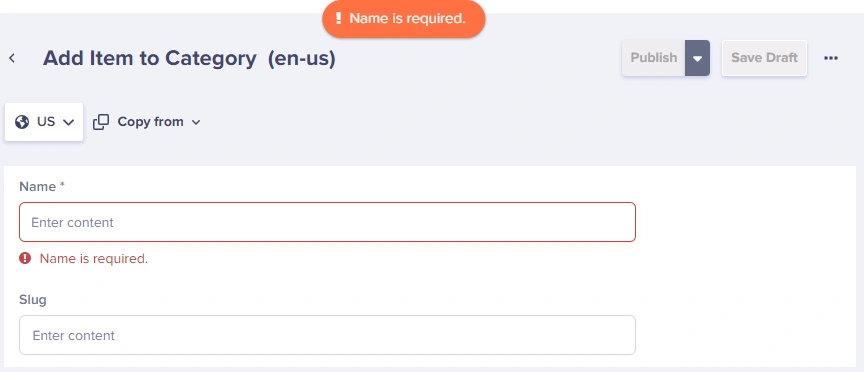
4. Enter a name for the Collection you just created.
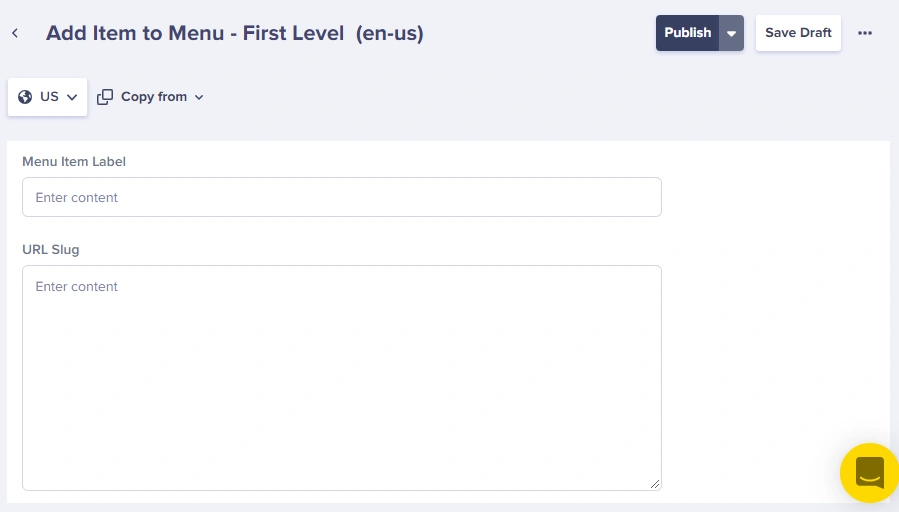
5. Add the first item to the Collection you create by filling out the fields. When done, you can save it as a draft or publish it right away.
Cloning a Collection
To clone or create a copy of an existing Collection, open the schema of the collection you'd like to duplicate and click on the ellipsis button (three dots) > Clone.
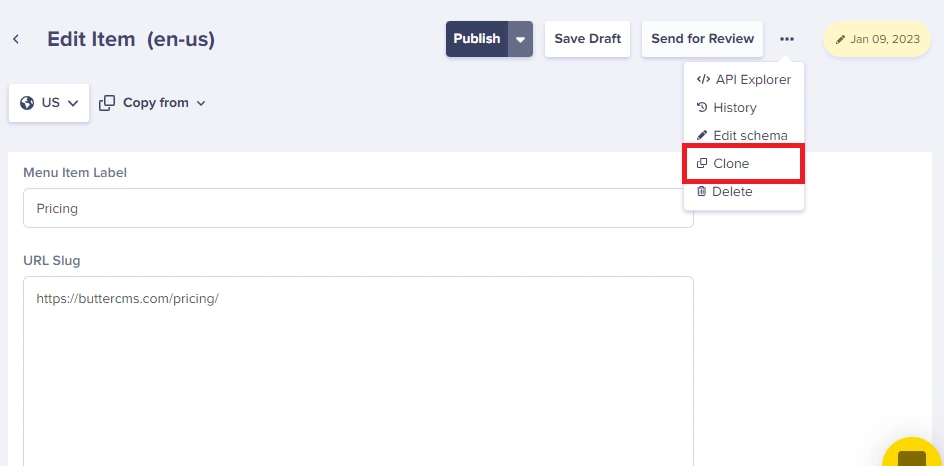
Cloning a Collection Item
To clone or create a copy of an existing Collection Item, click on the ellipsis button (three dots) > Clone.
Updating a Collection
You can also update a Collection configuration by adding or removing content fields.
1. Open the Collection configuration by clicking on the Content Types button on the main menu
then clicking on the collection you would like to make changes to:

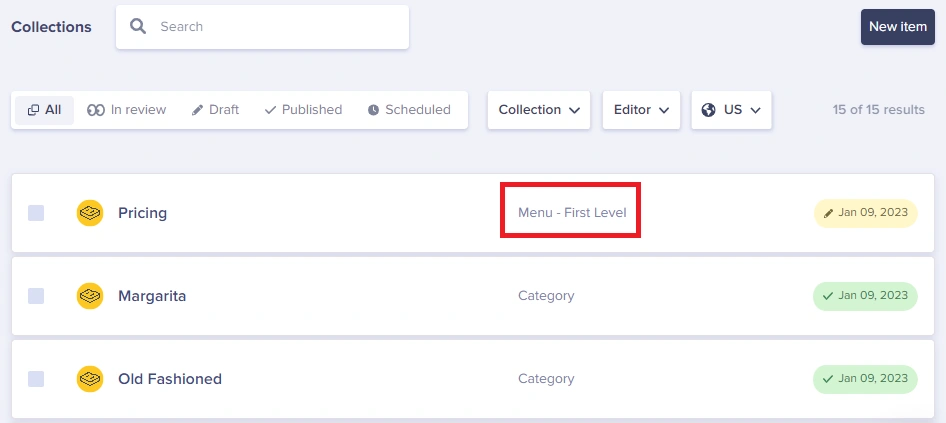
From the collections dashboard, you can also simply click on the link for the collection:
through this drop-down box when viewing a collection item:

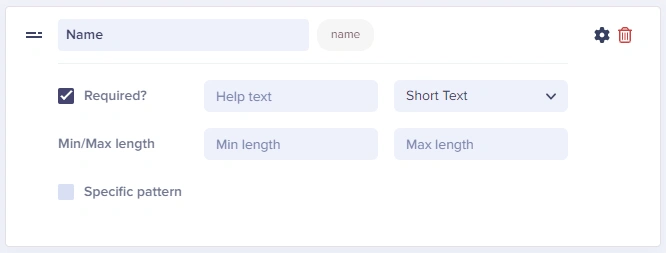
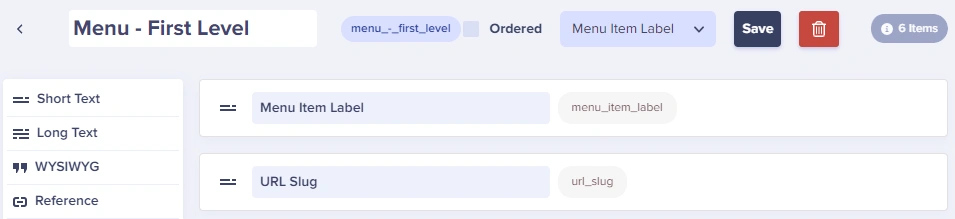
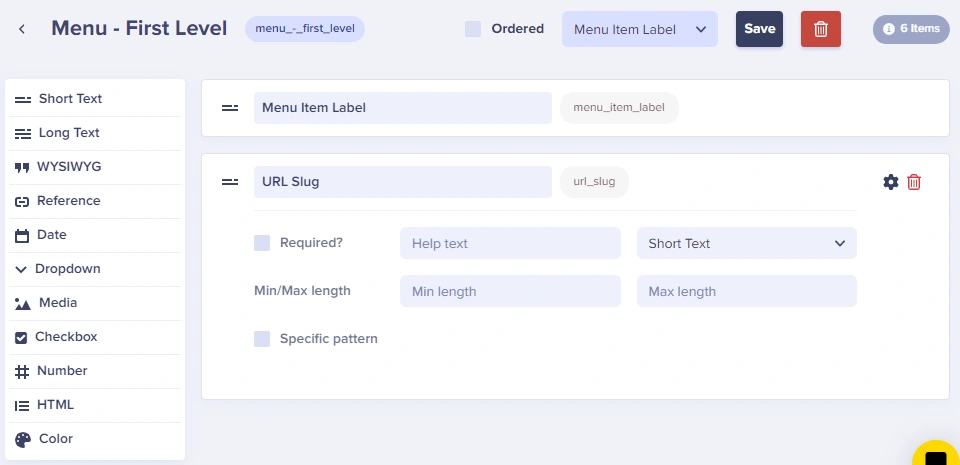
2. Make updates to the Collection that are required: adding or deleting content fields, changing what fields are mandatory, creating min/max length requirements for text fields, etc.
Adding a field to the Collection configuration adds this field to all the existing Collection Items for that Collection. All of these items will remain blank until updated by your team. Note that if your update has included making any fields "mandatory", all Collection items will remain blank until they are reviewed for a future update. Only at that time will you be required to update the mandatory field before any changes can be saved to that Collection item.
Removing a field from the Collection configuration removes the same exact field on all Collection Items along with the content for those fields. Please only do this if you're certain this field is no longer necessary for all items in this Collection because all content associated with that item will also be deleted.
Renaming a Collection is also very simple. Just click on the Collection Name box and enter the new name you'd like to use for the Collection.
Scheduling a Collection Item
To schedule a collection item, just click on the drop-down arrow on the Publish button to choose a date and time for your Page to go live. Click Schedule.
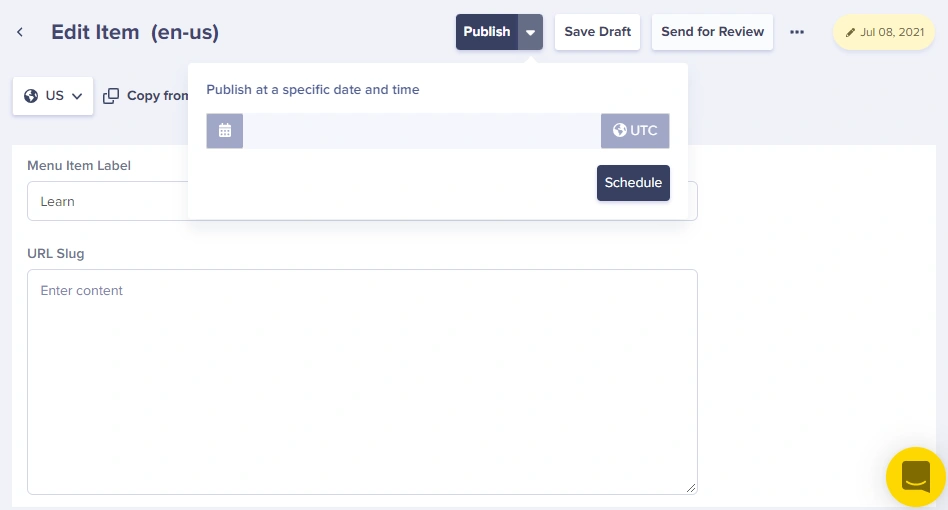
Note: You can use also the 'Publish at a specific date and time' to schedule drafts to go live even if the Collection Item is currently Published.
Deleting a Collection
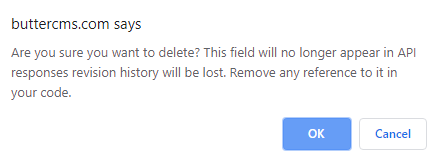
IMPORTANT: Deleting a Collection will delete all Collection Items and the content associated with them in that Collection. You will get a prompt to confirm this action.
1. Open the Collection configuration by clicking on the Content Types button on the main menu
then click on the collection you would like to delete:
Note: You should see the number of items created under each Collection which will give you a better idea of the total number of items that will be deleted from your account.
From the collections dashboard, you can also simply click on the link for the collection:
2. Then you can click on the red delete button at the top right:
To confirm you want to delete the Collection, you will receive a prompt as follows in order to confirm this change:
Deleting Collection Items
You can delete a single item from your Collection, by opening the item you'd like to delete and clicking on the 'Delete Item' button:

Or by ticking the checkbox for it on your Collections dashboard, and then clicking on the 'Delete' button at the top:
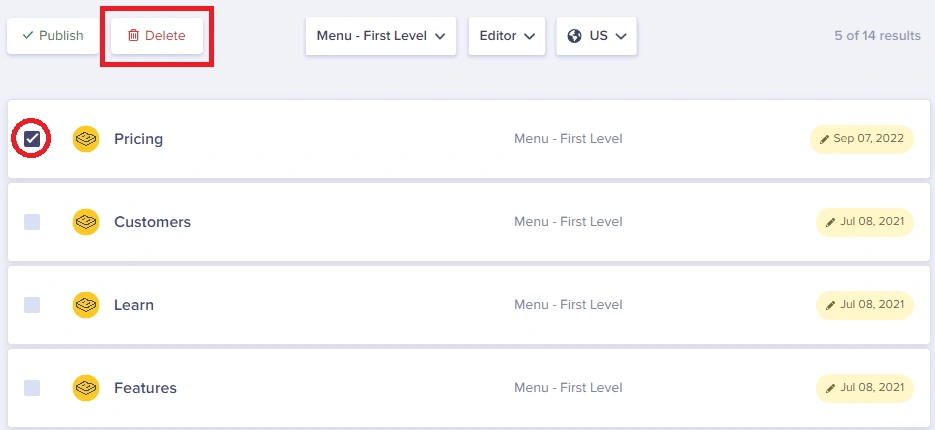
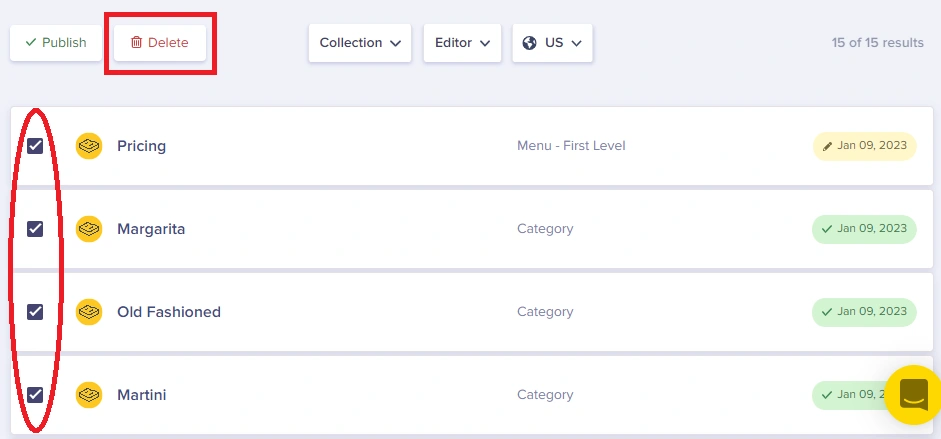
If you need to delete multiple items from your collection, just tick on all the boxes for the items that need to be deleted, and click on the 'Delete' button:
Team Presence
Team presence notifies when your team member is also viewing the same content in ButterCMS as you. Avoid lost work and stay in sync with team members easier than ever.
