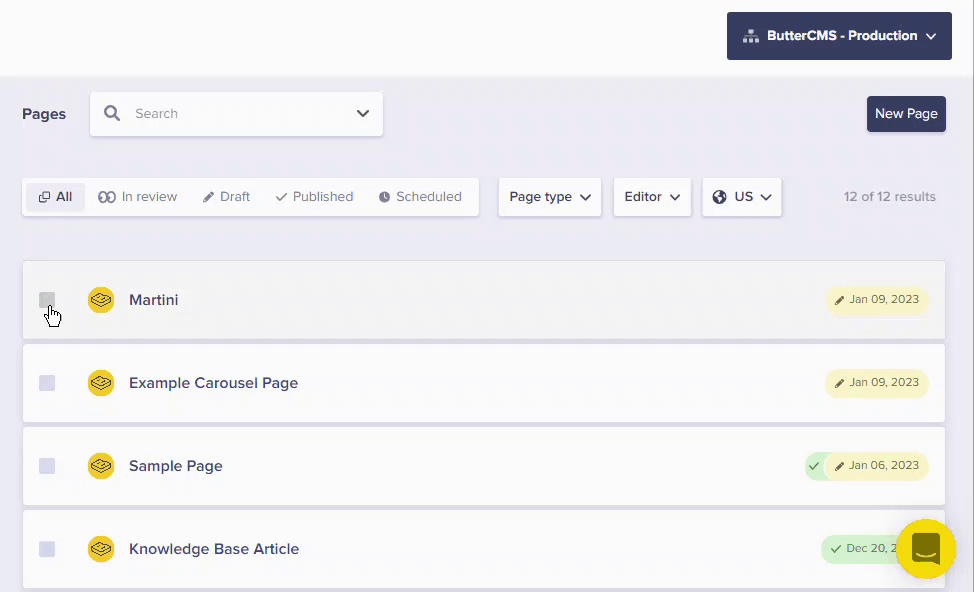
- Creating a Page
- Creating a Page Type
- Creating a new Page for a Page Type
- Cloning a Page Type
- Cloning a Page
- Scheduled Publishing of a Page
- Unpublishing a Page
- Scheduled Unpublishing of a Page
- Adding Components to Pages
- Updating a Page or a Page Type
- Deleting a Page Type
- Team Presence
Creating a Page
Pages are the core building block of any website. Page Types, pre-configured page templates that can be used to create a new page, allow you to quickly launch a new marketing site and add pages to your existing site as a Marketer.
1. To create a Page, the first thing you need to do is click on the Pages icon from your Main Menu

2. Click on the New Page button located on the top right of the Pages window, then choose the option New Page.

3. Add the fields you'd like to use for the Page you are creating and click Save when done. Learn more about Content Fields here. We also have Content Modeling Tutorials to help get you started: Content Modeling Basics

4. Enter a name for the Page you just created.
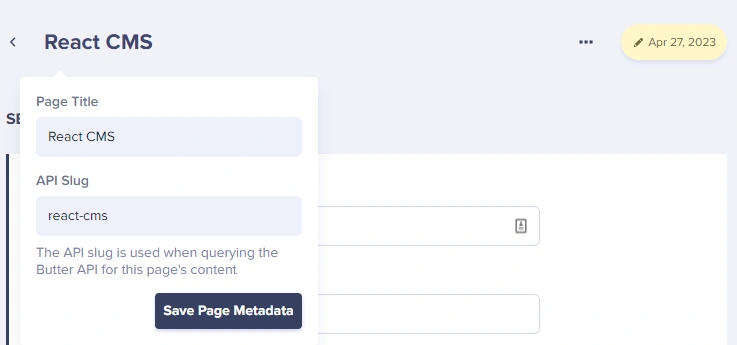
Note: When you create the page name, the API slug for that page will automatically generate to match. You have the flexibility to also change the default slug for your page by simply changing it in the API Slug text box.
Creating a Page Type
From the Pages dashboard
Now that you have a saved page, you can make it into a re-usable Page Type or template containing all of the content types you've modeled for this page.
1. Click on the ellipsis button (three dots) > Edit schema.
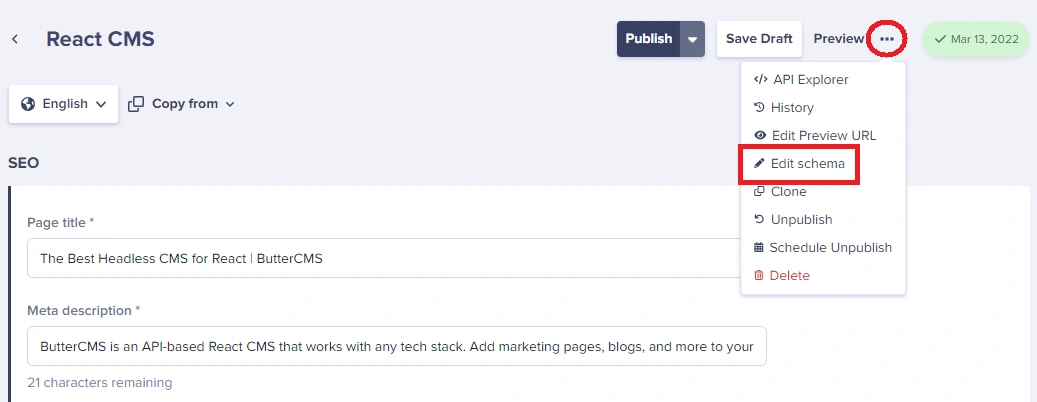
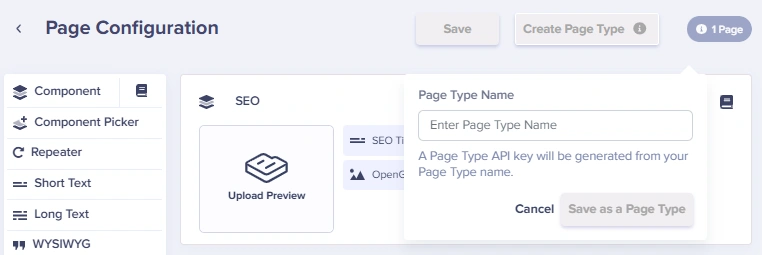
2. Enter the name you would like to call this Page Type then click the Save as a Page Type button.
From the Content Types dashboard
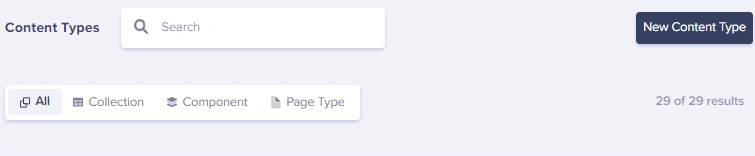
1. To create a Page Type from the Content Types dashboard, the first thing you need to do is click on the Content Types icon from your Main Menu
2. Click on the New Content Type button located on the top right of the Content Types window.
3. Add the fields you'd like to use for the Page Type you are creating and click Create Page Type when done.
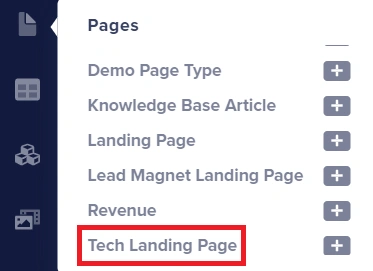
Creating a new Page for a Page Type
There are two ways to do this.
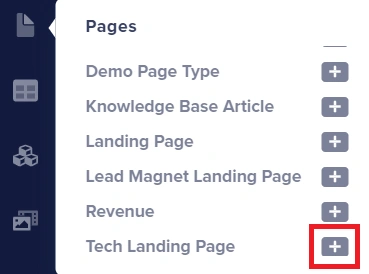
The first option is to click on the plus "+" sign next to the page type you'd like to create a new page for.
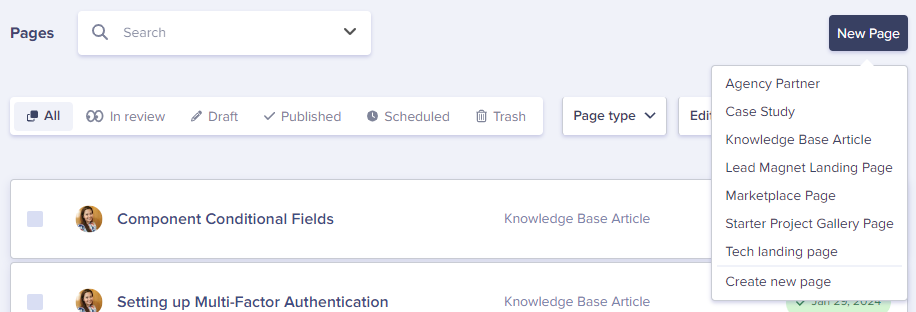
Or you can click on the New Page button and select the Page Type from the list that you'd like to make a new page for.
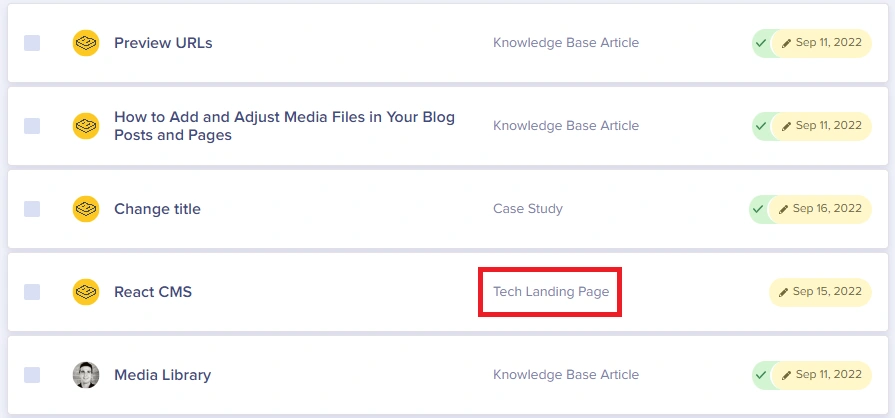
Note: You can also view all the pages for any given Page Type by clicking on the name of the Page type from the Main Menu
Cloning a Page Type
To clone a page type, open the schema of the page type you'd like to duplicate and click on the ellipsis button (three dots) > Clone.
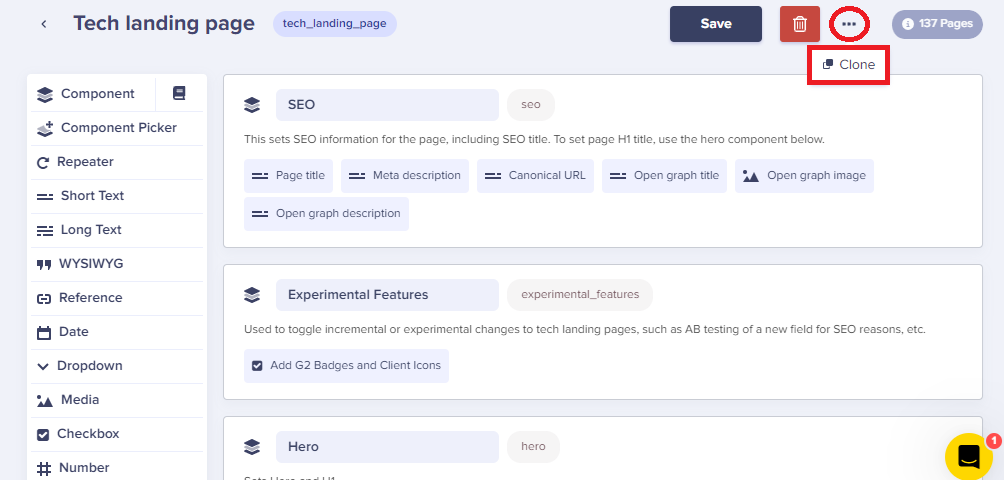
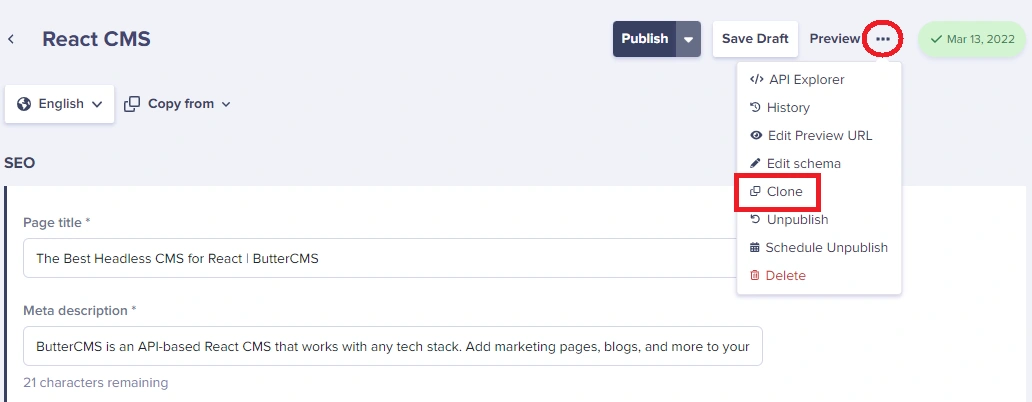
Cloning a Page
You can clone a page by clicking on the ellipsis button (three dots) > Clone.
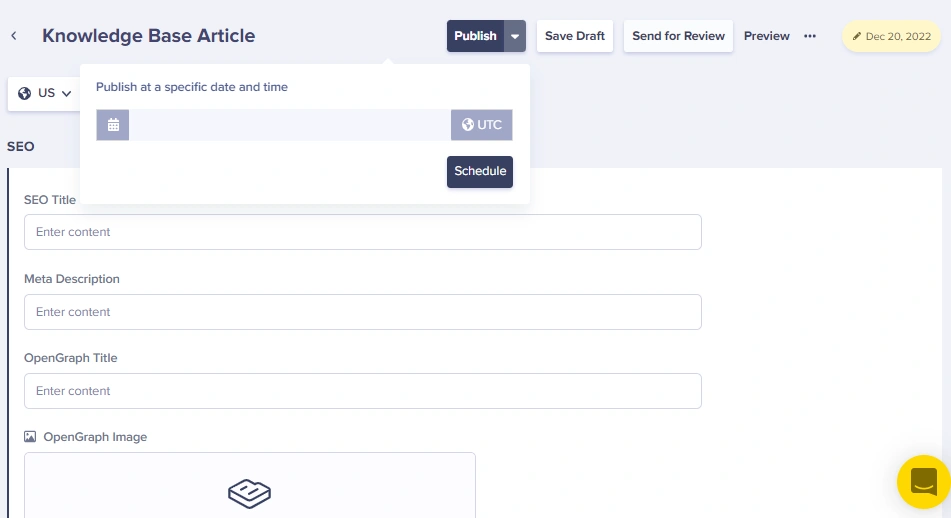
Scheduled Publishing of a Page
To schedule a single page, just click on the drop-down arrow on the Publish button to choose a date and time for your Page to go live. Click Schedule.
To schedule multiple Pages to Publish on the same exact date and time, select each Page from Pages Dashboard and set the scheduled publish date:
Note: You can use also the 'Publish at a specific date and time' to schedule drafts to go live even if the Page is currently Published.
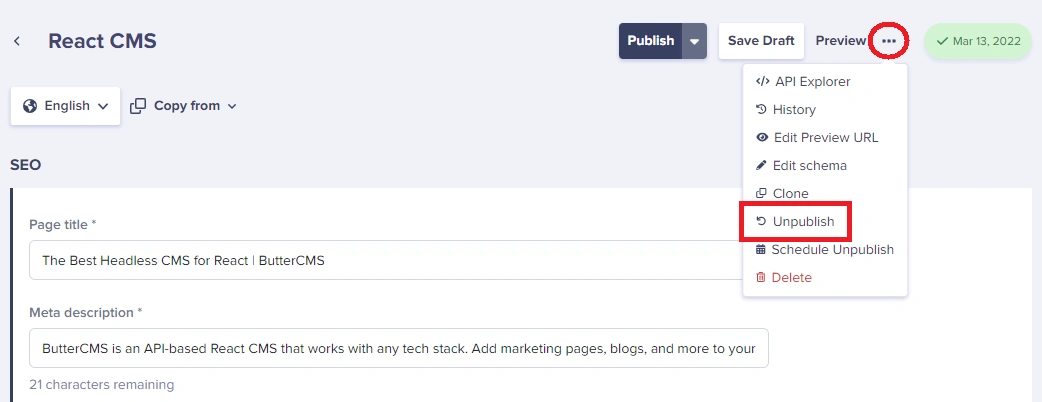
Unpublishing a Page
You can unpublish a page by clicking on the ellipsis button (three dots) > Unpublish.
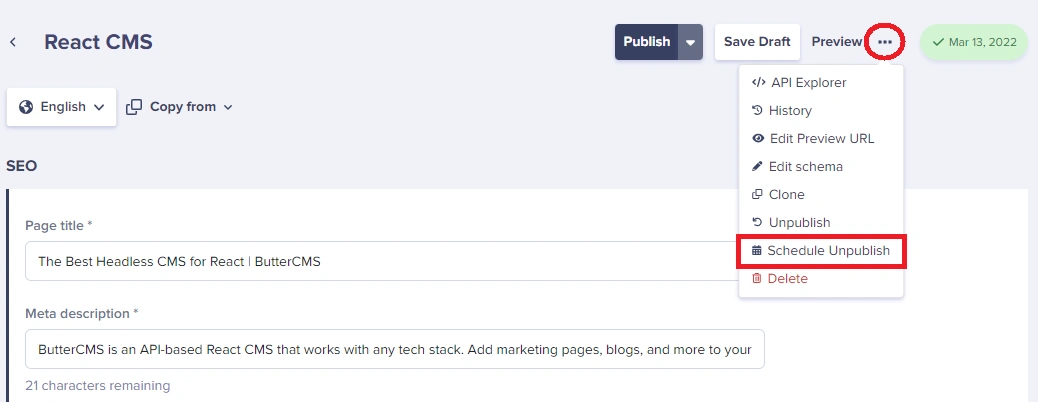
Scheduled Unpublishing of a Page
You can schedule a page to get unpublished by clicking on the ellipsis button (three dots) > Schedule Unpublish.
Adding Components to Pages
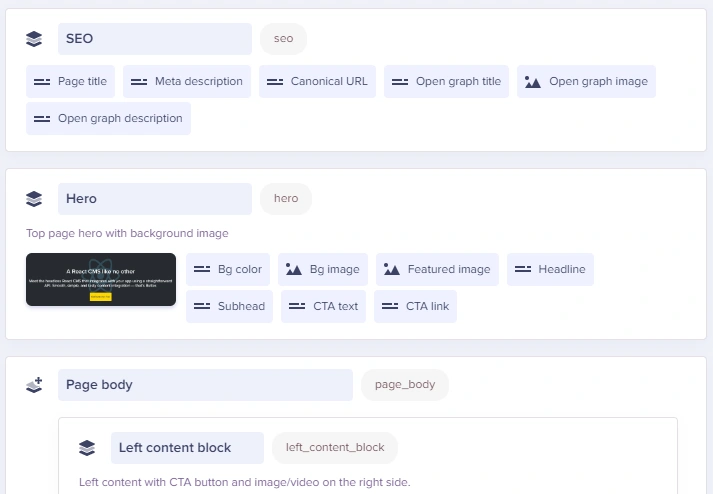
As a marketer, you will have the freedom and flexibility you need to compose compelling, unique content experiences with Pages built using Components. Your team can define a library of reusable, custom Components that you can use to create limitless kinds of experiences.
The video below is an in-depth tutorial that covers how to configure Components and Component Pickers to create beautiful dynamic landing pages.
Updating a Page Type
You can also re-configure a Page Type by adding or removing content fields from an existing Page Type.
Option 1: Open the Page Type configuration by clicking on the Content Types icon from your Main Menu, and then clicking on the name of the Page Type you would like to make changes to:
Option 2: Open the Page Type configuration by clicking on this link:
OR by clicking on the ellipsis button (three dots) > Edit schema.
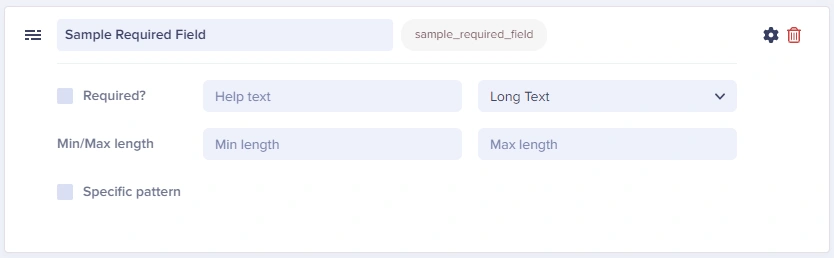
2. Make updates to the Page Type that are required: adding or deleting content types, changing what fields are mandatory, creating min/max length requirements for text fields, etc.
Adding a field to the Page Type configuration also adds the same field to all the existing Pages using that Page Type. It is IMPORTANT to note that when you add a "mandatory" field to your Page Type, the very next time you edit a Page using that Page Type, you will be required to update the mandatory field before any changes can be saved.

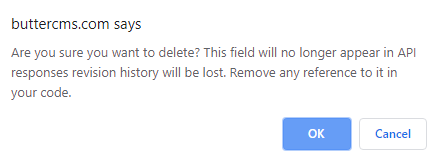
Removing a field from the Page Type configuration removes the same exact field on all Pages using that Page Type along with the content for those fields. Please only do this if you're certain this field is no longer necessary for all pages of this Page Type. Here's the message you may see:
Renaming a Page Type is also very simple. Just click on the Page Type Name box and enter the new name you'd like to use for the Page Type. It's important to note the slug for this page will change as a result.

Deleting a Page or a Page Type
You can delete a single page by clicking on the ellipsis button (three dots) > Delete.

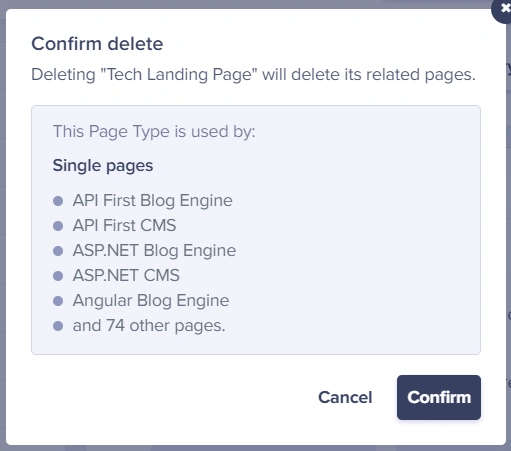
IMPORTANT: Deleting a page type will delete all pages created using that page type. You will get a prompt to confirm this action and it will also display all the pages that will be deleted.
Option 1: Open the Page Type configuration by clicking on the Content Types icon from your Main Menu.
Note: You should see the number of pages created using each Page Type, which will give you a better idea of the total number of pages that will be deleted from your account.
Option 2: Open the Page Type configuration by clicking on the Page Type name next to any article from the Pages dashboard.
Option 3: Click on the ellipsis button (three dots) > Edit schema.
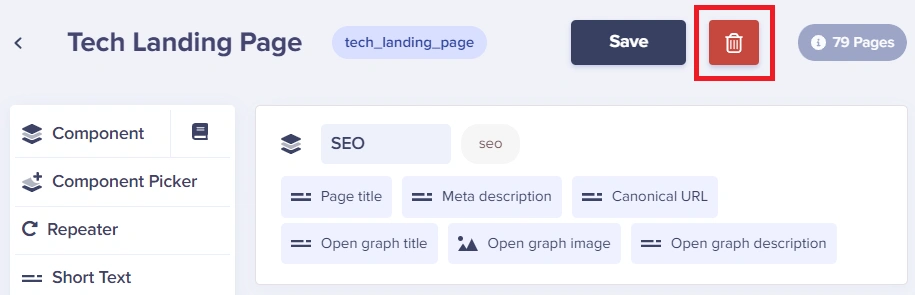
And then click on the delete or trash icon found in the upper-right corner of your page:
To confirm you want to delete the Page Type, you will receive a prompt as follows in order to confirm this change:
Team Presence
Team presence notifies when your team member is also viewing the same content in ButterCMS as you. Avoid lost work and stay in sync with team members easier than ever.
