Write API
How to Use the Write API to Migrate Content into ButterCMS
Effortlessly transfer content to ButterCMS using our Write API. Say goodbye to manual migration.
The data-handling part of moving from one CMS platform to another is always a huge concern for businesses, especially e-commerce brands that have large amounts of product data. They need to maintain their data structure and integrity, and, most importantly, make the migration data transfer process as programmatic as possible to reduce manual labor.
This article will serve as a guide to show you how to build a Python script that interacts with the ButterCMS Write API to migrate your content into ButterCMS without manually having to insert the data. We will assume that you have an e-commerce brand that sells clothes and you have your content data already exported into a structured file format such as JSON or CSV.
Within this tutorial, this is the JSON data that you will migrate into your ButterCMS content types:
{
 "pages": [
   {
     "title": "Sarah Johnson",
     "slug": "sarah-johnson",
     "page-type": "review",
     "type": "customer_reviews",
     "fields": {
       "en": {
         "customer_image": "https://cdn.buttercms.com/n0IPElPSM2JWsiGeBhYC",
         "customer_name": "Sarah Johnson",
         "review": "I recently purchased the Classic White Button-Down Shirt from this fashion brand and I have to say, I am extremely happy with my purchase.",
         "date_created": "2022-10-31T16:30:130000Z"
       },
       "de": {
         "customer_image": "https://cdn.buttercms.com/n0IPElPSM2JWsiGeBhYC",
         "customer_name": "Sarah Johnson",
         "review": "Ich habe kürzlich das Classic White Button-Down Hemd von dieser Modemarke gekauft und ich muss sagen, ich bin extrem glücklich mit meinem Kauf.",
         "date_created": "2022-10-31T16:30:130000Z"
       }
     }
   },
   {
     "title": "Classic White Button-Down Shirt",
     "slug": "classic-white-button-down-shirt",
     "page-type": "product",
     "type": "product_collections",
     "fields": {
       "en": {
         "image": "https://cdn.buttercms.com/y0tF1WBdTaKEhaH5w0HU",
         "name": "Classic White Button-Down Shirt",
         "price": "$89.99"
       },
       "de": {
         "image": "https://cdn.buttercms.com/y0tF1WBdTaKEhaH5w0HU",
         "name": "Klassisches weißes Button-Down-Hemd",
         "price": "EUR 89.99"
       }
     }
   }
 ],
 "collection": {
   "title": "Brand Page",
   "key": "ecommerce_brand_page",
   "collection-type": "ecommerce_brand_page",
   "fields": [
     {
       "de": {
         "hero_section_text": "Doe line, Wo Mode auf Komfort und Qualität für Stil trifft",
         "mission_section_text": "Bei unserer Kleidungsmarke lautet unsere Mission, hochwertige und modische Kleidung anzubieten und gleichzeitig Nachhaltigkeit und soziale Verantwortung zu fördern.",
         "mission_section_image": "https://cdn.buttercms.com/ow62Tv1RpKCkeVDz218C",
         "hero_section_image": "https://cdn.buttercms.com/YY0uCQ2XSYug1MBCVQbG",
         "customer_reviews": [],
         "product_collections": []
       },
       "en": {
         "hero_section_text": "Doe line, Where fashion meets comfort and quality for style",
         "mission_section_text": "At our clothing brand, our mission is to provide high-quality, fashionable clothing while also promoting sustainability and social responsibility.",
         "mission_section_image": "https://cdn.buttercms.com/ow62Tv1RpKCkeVDz218C",
         "hero_section_image": "https://cdn.buttercms.com/YY0uCQ2XSYug1MBCVQbG",
         "customer_reviews": [],
         "product_collections": []
       }
     }
   ]
 }
}
The code contains JSON formatted data for the customer_review, production_collections, and ecommerce_brand_page collection in English (en) and German (de) locales. ButterCMS will also download the images for the entries via their URL endpoint and serve them from the ButterCMS CDN.
You will make use of the data.json file when you begin building the Python script for the tutorial. In the meantime, let’s create the resources you will need for the tutorial in ButterCMS.
Preparing the ButterCMS resources
Before you proceed to create the Python script for the migration, you need to prepare the resources in ButterCMS to store the data. For this guide, you will be migrating your content into the page and collection content types in ButterCMS.
Creating our page types
The demo fashion brand within this guide has two distinct data categories. One category is for the products while the other is for the customer reviews on products purchased.
Let’s proceed to create two pages of content types for the two data categories.
Product page type
Add the following content fields into a page content type:
-
A short text field with “name” specified as the name of the field
-
A short text field with “price” specified as the name of the field.
-
A media field with “image” specified as the name of the field
-
A checkbox field with “is featured” specified as the name of the field
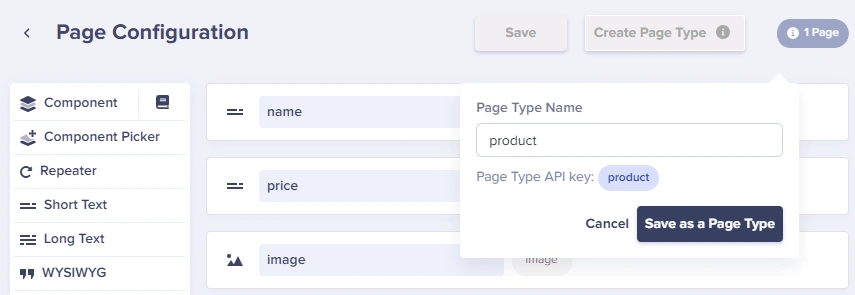
Click the Create Page Type button to begin saving the fields you have added.
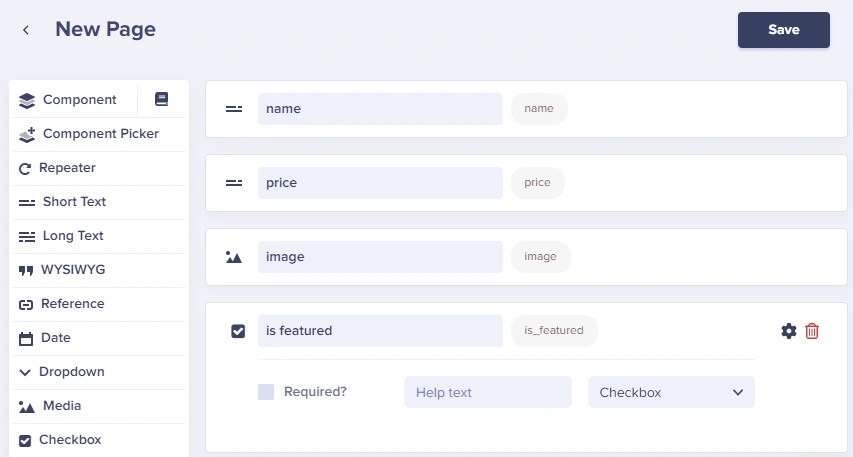
Type “product” into the Page Type Name field and click the Save As Page Type button to create the page.
Review page type
Now, repeat the previous process to create another page type to store the review data from customers.
Add these content fields to the page type:
-
A short text field and name it “customer name”
-
A long text field with the name “review text”
-
A date field with the name “date created”
-
A media field with the name “customer image”
Click the Create Page Type button then input “review” into the Page Type Name input field.
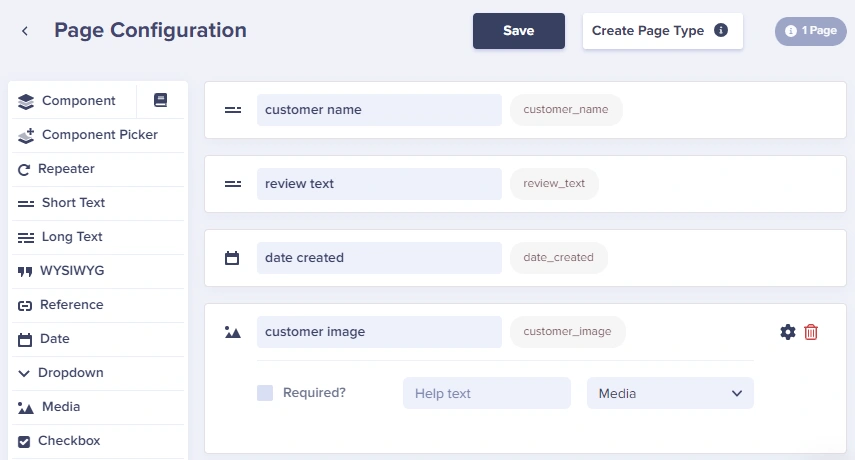
Click the Save as a Page Type button to save the reviews page.
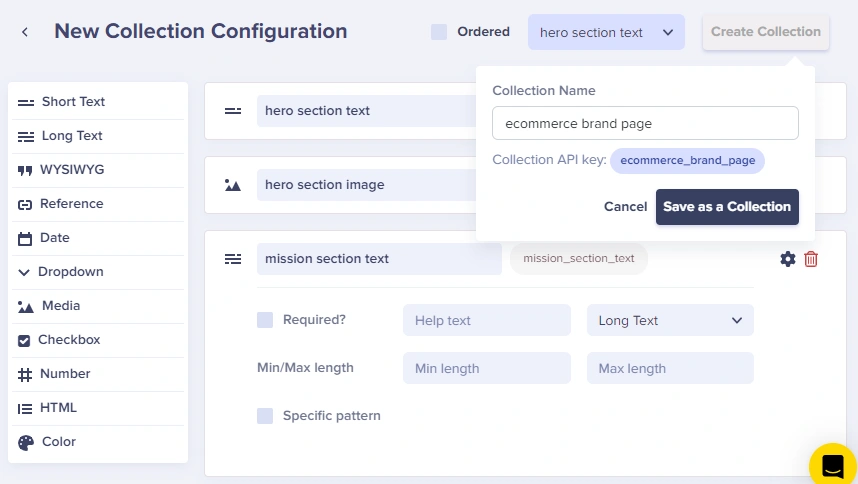
Creating the collection type
The collection will store the data for the brand landing page and reference the two pages that you have created.
Add these fields to the collection:
-
A short text field with the name “hero section text”
-
A media field with the name “hero section image”
-
A long text field with the name “mission section text”
-
A media field with the name “mission section image”
-
A reference field with the name “product collections” that references the product type
-
A reference field with the name “customer reviews” that references the review type
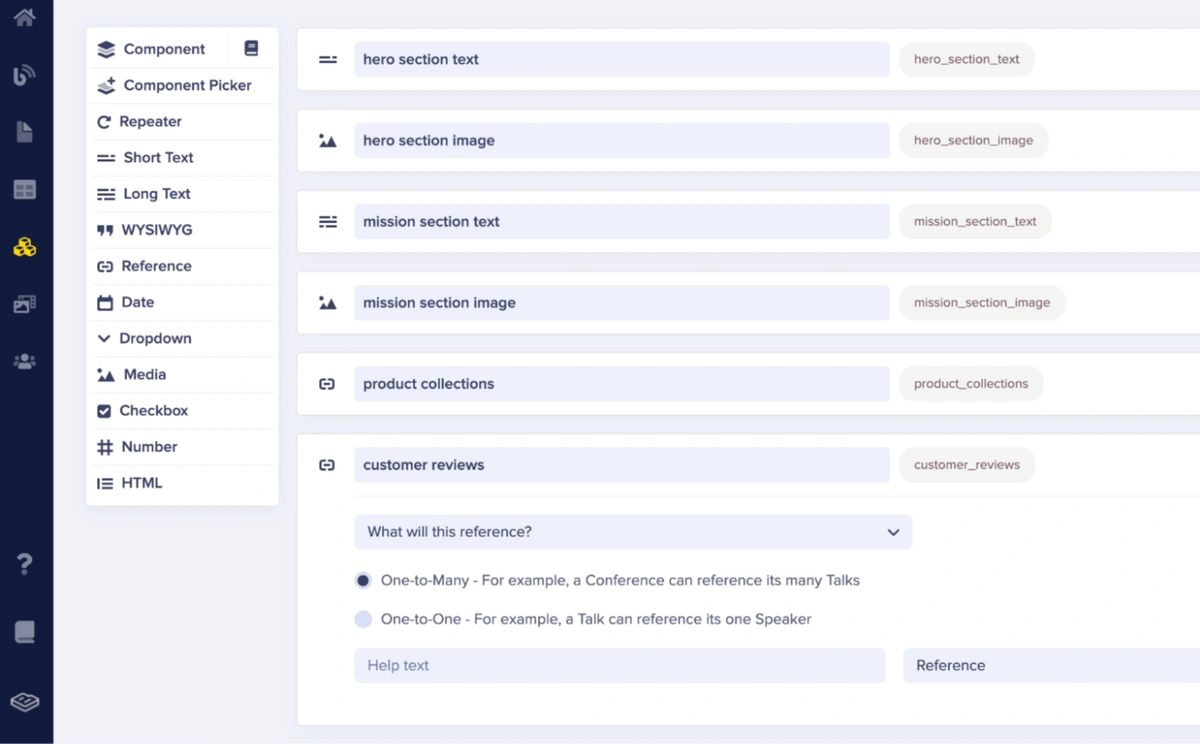
Next, click the Create Collection button, and input “ecommerce brand page” into the Collection Name field to save the collection.
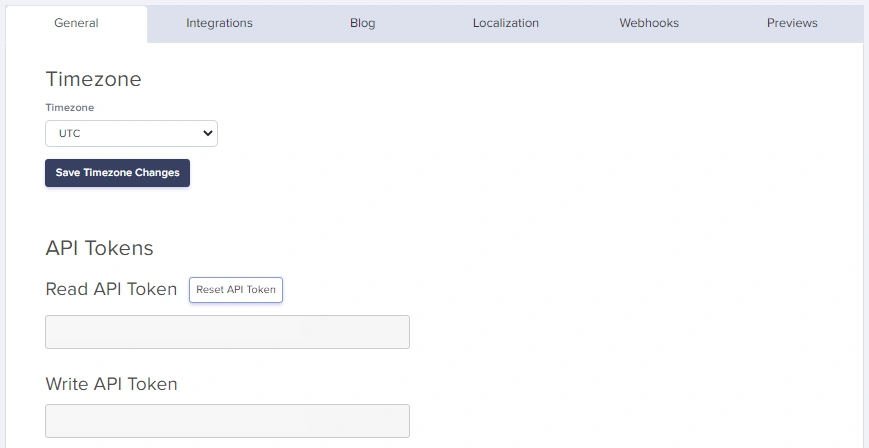
Obtaining your Write API Token
An API token is required to perform any external operation on your data stored within ButterCMS.
Navigate to the Settings page of your ButterCMS dashboard to view your tokens in the API Tokens tab.
Take note of both the Write and Read API Tokens as you will make use of them when writing the migration script and consuming the data via a template.
Note: You need to reach out to ButterCMS customer support via chat or email at support@buttercms.com to request your Write API Token.
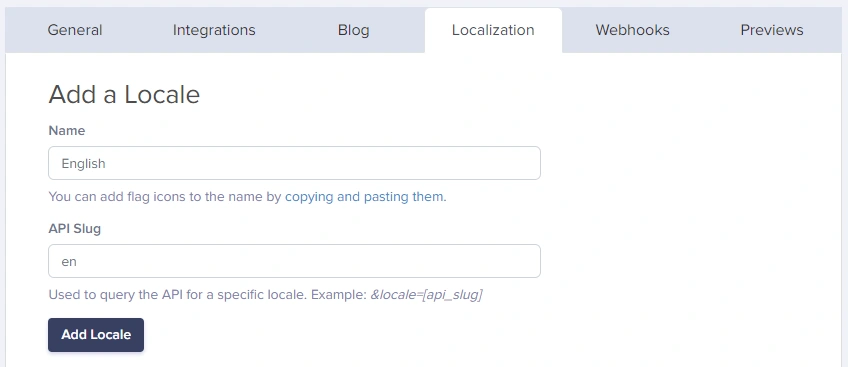
Creating content locales
Localization provides content teams with the ability to add multiple languages to their content. Each of these languages is stored within Locales in ButterCMS.
Within the Settings page, click the Localization tab to configure the locales for your content. You will create a locale to store and retrieve content in English and also German.
Enter “English” into the Name input field and “en” in the API Slug input field.
Click the Add Locale button to save the English locale.
Repeat the step above once more, using “German” in the Name input field and “de” in the API Slug input field.
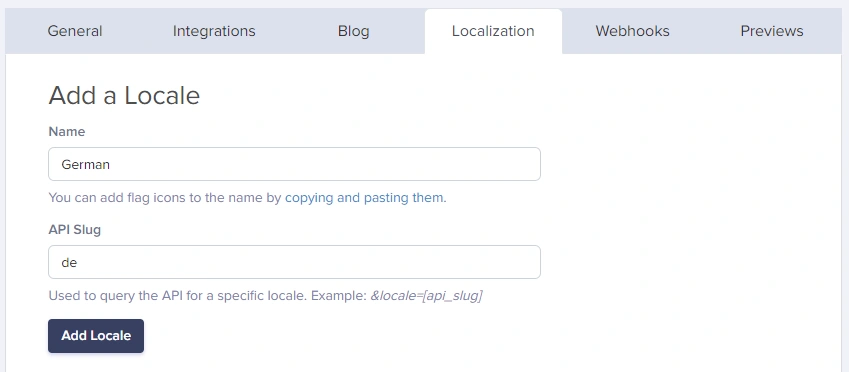
After creating the two locales, you will have them listed within the Your Locales section.
Note: The radio button for the Default column allows you to switch the locale that will be used by default. This tutorial is using the en locale by default.
Creating the migration script
This guide will walk you through the process of using the Python language to create a migration script. Although implemented in Python, you will have an idea of how to replicate the logic across your preferred programming languages.
Preparing the script resources
Launch the terminal or command prompt application on your computer to get started.
Execute the commands below to create a directory named buttercms-python-migration for the project, move into the directory, then create a virtual environment for the Python application:
mkdir buttercms-python-migration

cd buttercms-python-migration

python3 -m venv migration-env

source ./migration-env/bin/activate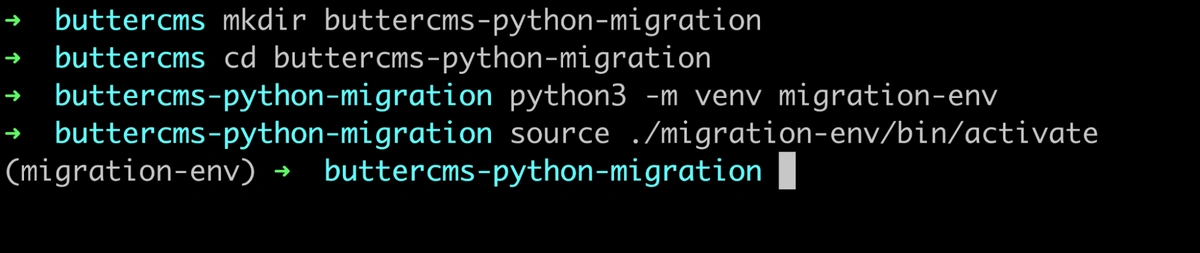
Execute the next command to install the python-dotenv and requests Python packages into the application:
pip install python-dotenv requestsCreate a .env file within the root of the buttercms-python-migration project directory to securely store your credentials.
Replace the API_KEY placeholder text within the code with your Write API Key from the ButterCMS dashboard and paste it into the .env file.
# buttercms-python-migration/.env
BUTTERCMS_WRITE_API_KEY="API_KEY"
Create a .gitignore file within the root of the buttercms-python-migration project directory. This file will make sure the git CLI does not push the .env file to your repository on GitHub.
# buttercms-python-migration/.gitignore

./migration-env
migration-env
.env
Creating a data source file
A data source file for the program contains the content you want to migrate into ButterCMS. The data source file should contain pages and collection keys, each containing a list of objects to represent entries on ButterCMS.
For this tutorial, you will use the data.json file that you created at the start of this tutorial. Ensure that the data.json file is placed at the root of the buttercms-python-migration directory.
Creating a Python script
Within the project, create a Python file and name it init.py. The init.py file will contain the Python code to migrate content from a data source file to ButterCMS.
To understand how the code works, you will put it together gradually over the next code blocks. Note that Python is indentation sensitive; hence, where you place the blocks of code matters. The complete init.py file is available within the GitHub Repository for reference.
Add the content of the code block below to the init.py file. The code will declare imports, retrieve your Write API Key, then parse CLI arguments to configure the program.
# buttercms-python-migration/init.py

from requests import request, exceptions
from dotenv import dotenv_values
from argparse import ArgumentParser
from json import load
from time import sleep

config = dotenv_values("env")
BUTTERCMS_BASE_URL = "https://api.buttercms.com/v2"

parser = ArgumentParser(
   prog="ButterCMS Migration",
   description="A utility script for migrating your content into ButterCMS"
)
parser.add_argument(
   '-u',
   '--update',
   help="Update either existing pages or collections on ButterCMS",
   choices=['pages', 'collection']
)
parser.add_argument(
   '-s',
   '--status',
   default="draft",
   help="Set status of the content being created on ButterCMS",
)
parser.add_argument(
   '-v',
   '--verbose',
   default=False,
   action='store_true',
   help="Instruct script to print output at every step along the way",
)
parser.add_argument(
   '-f',
   '--file',
   help="Specify the path to the data source file containing the migration data",
)

args = parser.parse_args()
The four CLI arguments parsed within the code above perform the following actions:
-
The optional -u or --update argument will cause the program to update the content within ButterCMS via PATCH requests containing the updated data.
-
The optional -s or --status argument will set the status of the content being created in ButterCMS to either published or draft. By default, the CLI argument has a “draft” status.
-
The optional -v or --verbose argument when present will direct the program to print out text for every major operation performed. This will enable the user to know what step in the migration process the program is at and their immediate results.
-
The required -f or --file argument will specify a path to a data source file. The data source file should contain the data you want to migrate to ButterCMS.
Next, add the next block of code below into the init.py file, right below the existing code. The code contains a class with a constructor method to set the values needed for other methods within the class.
class DataMigrator:
   def __init__(self, file_path):
       if args.verbose:
           print('Reading data from {0} input source'.format(file_path))

       file = open(file_path)
       data = load(file)

       if 'pages' not in data or 'collection' not in data:
           raise Exception("Input data from {0} does not contain pages or collection keys".format(file_path))

       self.content = data
       self.page_slugs = {"product_collections": [], "customer_reviews": []}
At this point, you have created a Python class to encapsulate the entire logic for migrating content. You will need to add the content of the next code blocks into the DataMigrator class to build the logic.
Add the following code to create a method that will be used to interact with the ButterCMS API.
  @staticmethod
   def api_request(route, data, method="POST"):
       try:
           req = request(
               url="{0}/{1}".format(BUTTERCMS_BASE_URL, route),
               json=data,
               method=method,
               headers={"Authorization": "Token {0}".format(config['BUTTERCMS_WRITE_API_KEY'])}
           )

           return req

       except exceptions.HTTPError as error:
           raise Exception("Connection Error: {0}".format(error))
Add the code below to build a method that will be responsible for inserting entries into the page content types in ButterCMS. The method will iterate over the pages key value in your data source file—each time sending a POST request to ButterCMS with the page data.
 def create_pages(self):
       for index, page in enumerate(self.content['pages']):
           page['status'] = args.status

           req = self.api_request('pages', page)

           if req.status_code in [200, 202]:
               self.page_slugs[page['type']].append(page['slug'])

               if args.verbose:
                   print("Created page {0} with slug: {1}".format(index, page['slug']))

       if args.verbose:
           print("{0} items processed".format(len(self.content['pages'])))
Add the following code to build a method that will create a collection entry in ButterCMS. The create_collection method will first execute the create_pages method, then create a collection having the slugs of the pages created as reference values.
 def create_collection(self):
       self.create_pages()

	for item in self.content['collection']['fields'][0].values():
   		item['product_collections'] = self.page_slugs['product_collections']
   		item['customer_reviews'] = self.page_slugs['customer_reviews']

       self.content['collection']['status'] = args.status
       req = self.api_request('content', self.content['collection'])

       if req.status_code in [200, 202]:
           if args.verbose:
               print("Created collection item with key: {0}".format(self.content['collection']['key']))
Add the following code to build a method to update existing content in ButterCMS. Using the -u or --update CLI argument value, the update_content method will either update the pages or collection entries in ButterCMS.
   def update_content(self):
       if args.update == "collection":
           collection = self.content['collection']

           req = self.api_request('content/{0}/'.format(collection['key']), collection, "PATCH")

           if req.status_code in [200, 202]:
               if args.verbose:
                   print("Updated collection with key: {0}".format(self.content['collection']['key']))
           return

       if args.update == "pages":
           for index, page in enumerate(self.content['pages']):
               page['status'] = args.status

               if args.verbose:
                   print("Updating content for slug: {0}".format(page['slug']))

               req = self.api_request(
                   'pages/*/{0}/'.format(page["slug"]),
                   page,
                   method="PATCH"
               )

               print(req)

               if req.status_code in [200, 202]:
                   print('Data updated')
At this point, the DataMigrator class has been fully implemented. You are now left with instantiating the class and executing its methods.
Add the code below the DataMigrator class block to instantiate the class and add a conditional statement to either create or update data.
Migrator = DataMigrator(args.file)

if args.update:
   Migrator.update_content()
else:
   Migrator.create_collection()
Using the migration script
Over the past sections, you built a Python program to migrate content from a JSON file to ButterCMS. The moment has arrived for you to use the Python program and confirm that it works.
Execute the next command to run the Python script with all four CLI arguments present.
python init.py --status published --verbose --file ./data.json
The GIF below shows the Python script used to create entries in ButterCMS from the data file.
Note: More objects were added to the lists within the data.json file to have more data.
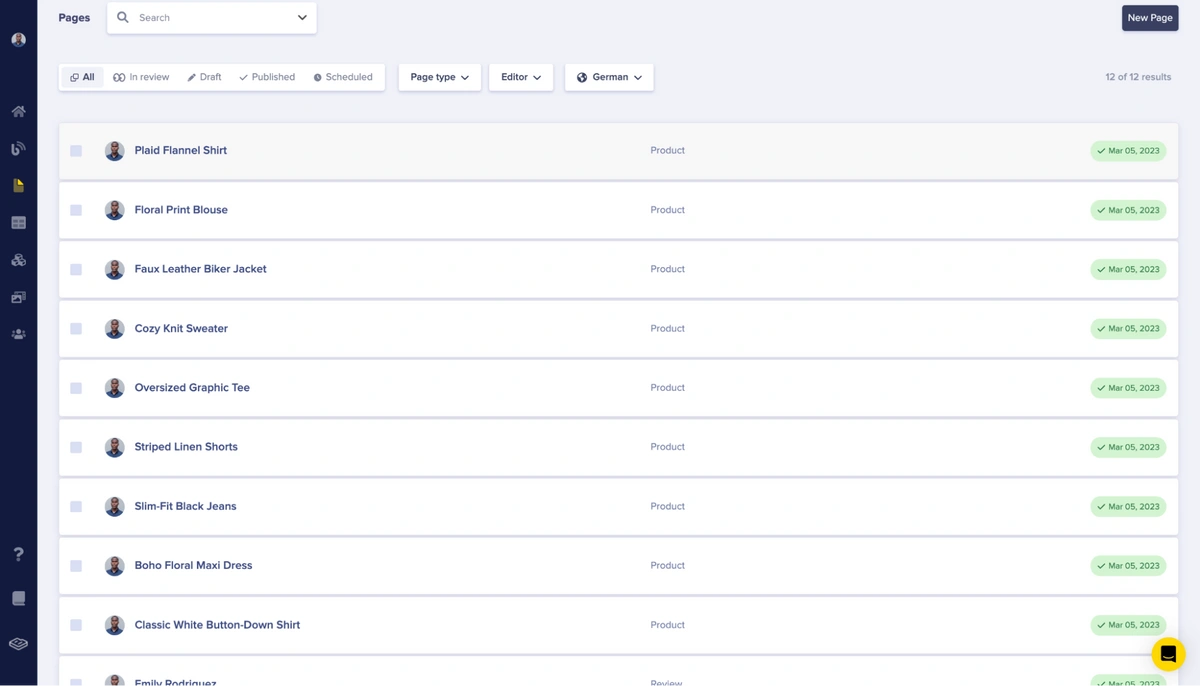
Open the ButterCMS dashboard through your web browser to view the entries.
Navigate to Pages to view the entries within the customer_reviews and product_collections content types in their locales.
Navigate to the Collections page to view the single ecommerce_brand_page entry from the Python migration program.
Click the ecommerce_brand_page entry to view more of the data and its references to the two other page entries.
Consuming the migrated data
At this point, the content of your data.json file now resides within ButterCMS through the help of the Python program.
Let’s consume the data within a front-end template built using the Next.js framework. You will clone this template from its GitHub repository and supply your ButterCMS Read API Key to fetch data.
Execute the command below to clone the template from its repository:
git clone https://github.com/ButterCMS/migrate-content-into-buttercms-kb-article-frontend-template
Change into the buttercms-migration-template directory and install the project dependencies.
cd buttercms-migration-template

npm install
Create a .env.local file within the project directory and add your Read API Key in the format below, replacing the READ_API_KEY placeholder.
Note: Use your ButterCMS Read Key and not the Write Key for the template to prevent malicious users from performing a READ, UPDATE, or DELETE operation on your ButterCMS data.
BUTTERCMS_READ_KEY="READ_API_KEY"
BUTTERCMS_BASE_URL="https://api.buttercms.com/v2"
BUTTERCMS_COLLECTION_SLUG="ecommerce_brand_page"
Execute the final command to start the Next.js application:
npm run dev
Launch your web browser and access the application running on your localhost at http://localhost:3000.
The GIF below shows the Next.js application rendering the data fetched from ButterCMS within its components using the English (en) and German (de) locales.

Closing Thoughts
Congratulations to you on completing this hands-on guide!
The guide aimed to provide you with the knowledge of how to create a Python script to migrate your content from a local JSON file into ButterCMS using the RESTful Write API. The guide first walked you through the process of creating the ButterCMS resources with localization enabled then you created the Python application.
For a large-scale use where you might insert hundreds of entries into ButterCMS via the script, it is recommended that you modify the Python code to make use of asynchronous HTTP requests to improve the performance.