- What are Laravel migrations?
- When to use Laravel migrations and why
- Tutorial prerequisites
- Setting up the Laravel project
- Getting started with migrations
- How to structure your Laravel migrations
- Running your migration
- How to create, modify, and drop tables
- How to use columns within Laravel migrations
- How to use indexes within Laravel migrations
- How to remove migrations
- How to squash migrations
- How to use migration events
- Final thoughts
Originally written January 2024
As your application grows, database schemas change to support new features, fix issues, or improve performance. Early in development, sharing an SQL file to transfer database changes may seem like the best decision. But, this approach is risky—version mismatches, incompatible data, and schema conflicts can cause errors, data loss, and application downtime.
Migrations offer a cleaner, more reliable way to handle database changes. They allow you to define changes in a structured, repeatable, and error-resistant manner. Well-written migration scripts ensure that your database schema stays in sync across all environments, without requiring any manual steps.
Laravel comes with built-in tools to automate and simplify the migration process. In this guide, we’ll go in-depth on how to create, run, and manage migrations in Laravel applications.
If you’re just getting started with Laravel but still want to try out ButterCMS, check out our Laravel starter project to jumpstart your development.
Table of contents
What are Laravel migrations?
Migrations in Laravel are a way to manage database schema changes using PHP instead of raw SQL. They allow developers to create and modify tables, columns, indexes, and other database elements in a version-controlled manner.
The database/migrations directory stores migration files in Laravel. Each migration file has an up method that defines the changes and a down method that reverts them. When you run php artisan migrate, Laravel applies all pending migrations to update the database structure to the latest version. Laravel offers out-of-the-box migration support for MariaDB 10.3+, MySQL 5.7+, PostgreSQL 10.0+, SQLite 3.26.0+, and SQL Server 2017+.
Laravel 11 introduced several improvements to enhance the overall framework, including:
-
Streamlined application structure for better organization.
-
Per-second rate limiting for more precise API request handling.
-
A new health routing directive that serves a simple health-check endpoint by default.
-
Graceful encryption key rotation for improved security.
-
Queue testing improvements to make job testing easier.
-
New Artisan commands to automate common tasks.
-
Laravel Reverb, a built-in WebSocket server for real-time applications.
The minimum PHP version required for Laravel 11.x is 8.2
The minimum PHP version required for Laravel 11.x is 8.2.
When to use Laravel migrations and why
Use migrations whenever you need to make changes to your database structure. For example, when:
-
Adding new tables: Define tables via code instead of manually creating them in a database manager.
-
Modifying existing tables: Add or remove columns, change data types, or update indexes easily without worrying about breaking anything.
-
Seeding initial data: Migrations work well with seeders to populate the database with default values.
-
Rolling back changes: If a change introduces a bug, you can revert to a previous state using
migrate:rollback.
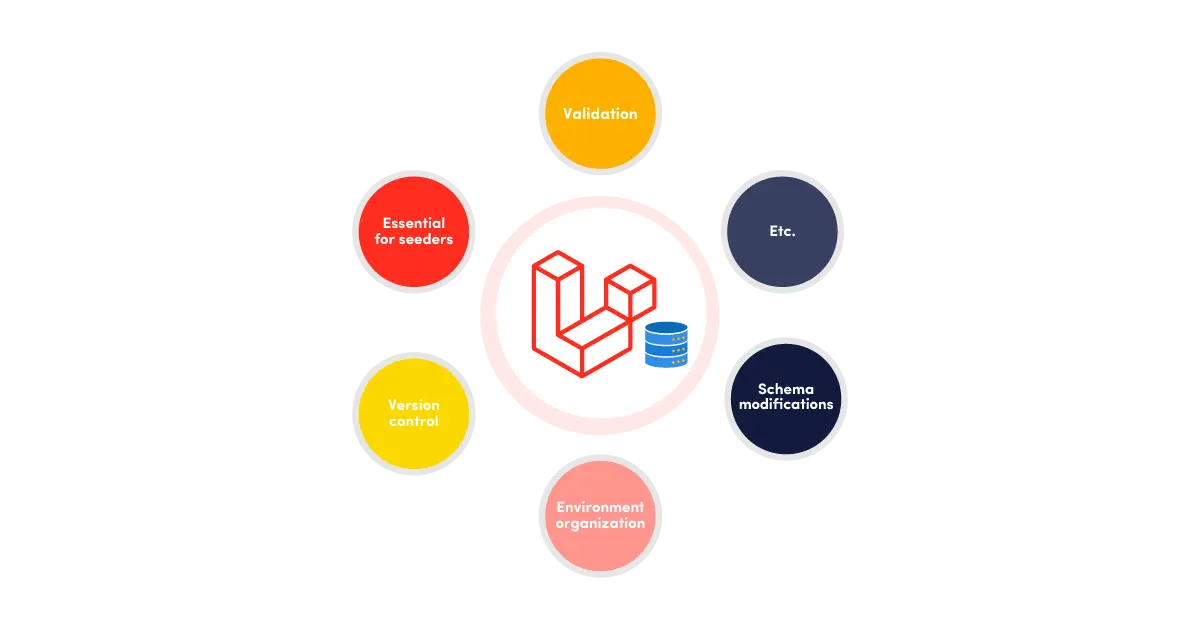
Any application that interacts with a database needs migrations. Here’s why:
-
Version control for your database: Just like Git tracks code changes, migrations track database changes.
-
Easier collaboration: With a single run of the migrate command, your colleagues can update their schemas to match yours.
-
Works with Laravel’s Schema Builder: Provides an easy-to-use, fluent interface for defining database changes.
-
Rollback support: Quickly revert mistakes or changes that didn’t work out.
Tutorial prerequisites
To follow along with this tutorial, ensure you have the following:
-
PHP installed (version 8.2)
-
Terminal or a CLI
-
Code editor – Visual Studio Code (VS Code)
Note: the operating system used in this tutorial is MacOS. If you use MacOS, you can install PHP and Composer in minutes via Laravel Herd.
Setting up the Laravel project
Let’s create a new Laravel project to create, use, and manage Laravel migrations. Using Composer, run the following command:
composer create-project laravel/laravel voyage-appOpen the project in your code editor and start the local development server by running the following command:
php artisan serveAfter running the command, your application will start on localhost:8000, opening in your browser as follows:

Setting up the database
Now that your application is running, you can set up your database. This tutorial uses SQLite 3.8.8+. To initialize a new SQLite database, run the following command from inside your project’s root directory:
touch database/database.sqlite This command creates an empty SQLite database file database.sqlite in the database directory.
Getting started with migrations
Laravel comes with an Artisan command called make:migration, which you can use to generate a migration file. The generated file’s name includes a timestamp to ensure that migrations are executed in the correct order. Inside the Laravel migration file, you can write the code to create or modify the schema of a table inside your database.
In your project’s directory, run the following command to create the file:
php artisan make:migration create_users_tableAfter running the command, you’ll see the following in your terminal:

How to structure your Laravel migrations
The migration file contains two key methods: up() and down(). The up() method defines the changes you want to apply to your database, such as creating a table or adding a column. The down() method does the opposite: it reverses those changes, such as dropping the table or removing the column.
Let’s explore the structure of a migration file by defining one to create a users table.
The first step is to add the PHP start tag <?php at the top of your file, specifying that the following code will be written in PHP. Then, proceed with the following:
-
Import the migration and blueprint classes that define the structure of the migration.
-
Import the Schema facade, which provides access to the schema builder.
<?php

use Illuminate\Database\Migrations\Migration;
use Illuminate\Database\Schema\Blueprint;
use Illuminate\Support\Facades\Schema;
Next, define an anonymous class that extends the Migration class with the following:
return new class extends Migration {}Then, create a method that defines the logic for creating the database table as follows:
return new class extends Migration {

public function up(): void {}

}
Define the users table within the up() method of the Laravel create migration file. This table will have an auto-incrementing integer primary key column named id, and two timestamp columns, created_at and updated_at.
return new class extends Migration {

public function up(): void {}
	Schema::create('users', function (Blueprint $table) {
            $table->id();
            $table->timestamps();
        });
}
Finally, add the down() method that defines the logic for reversing the migration with the following:
<?php


use Illuminate\Database\Migrations\Migration;
use Illuminate\Database\Schema\Blueprint;
use Illuminate\Support\Facades\Schema;

return new class extends Migration {

public function up(): void {}
	Schema::create('users', function (Blueprint $table) {
            $table->id();
            $table->timestamps();
        });

public function down(): void
    {
        Schema::dropIfExists('users');
    }
}
};
As you can see, Schema::dropIfExists('users') will delete the users table if it exists, effectively undoing the changes made by the up() method. This will come in handy if you want to revert your changes at any point.
Running your migration
Before running migrations, ensure your database connection is set up correctly. Open the .env file in your application’s root directory for editing and replace the placeholder values with your database credentials:
DB_CONNECTION=mysql
DB_HOST=127.0.0.1
DB_PORT=3306
DB_DATABASE=<Enter your database name>
DB_USERNAME=<Enter your database username>
DB_PASSWORD=<Enter your database password>
Next, run your migrations by using the migrate Artisan command to execute all pending migrations:
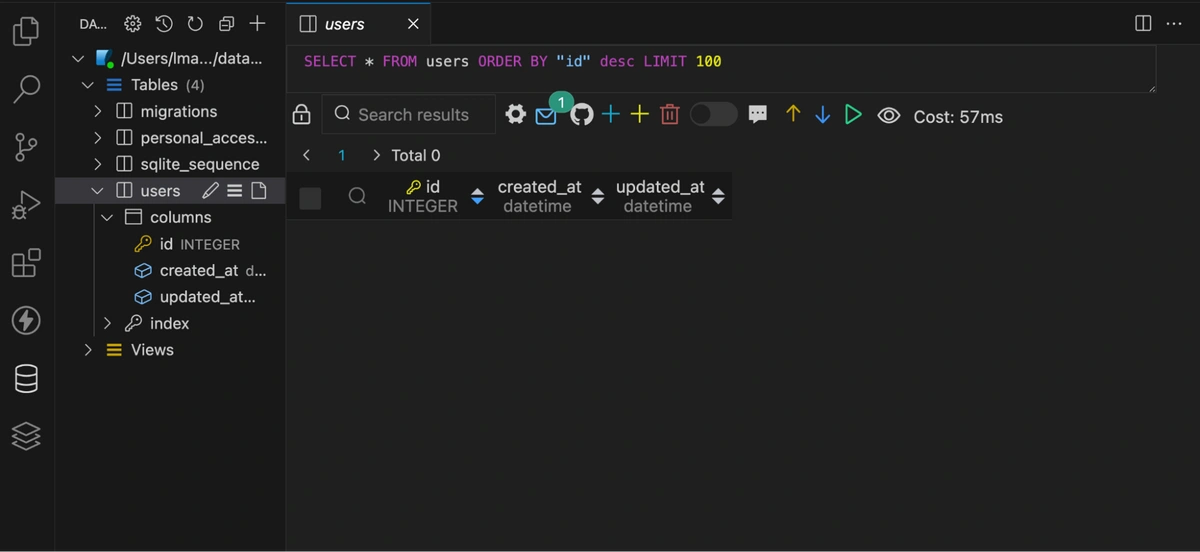
php artisan migrateAfter defining the migration, your database should have a users table with columns: id, created_at, and updated_at, generated by the timestamps() in your migration file:
When deploying, run migrations on a single server at a time to prevent conflicts. Use the following command to ensure this:
php artisan migrate --isolatedFor production databases, Laravel will prompt you to confirm any migrations that could result in data loss. If you’re certain and want to bypass this safety check, you can force the migration using the --force flag:
php artisan migrate --forceUse this option with caution to avoid unintended data loss.
How to create, modify, and drop tables
Let’s explore how to use built-in Laravel functions to streamline database schema management.
Creating tables for Laravel migrations
You can use the Schema facade's create() method to create a new database table by providing the table name and a closure defining the table using a Blueprint object.
In your migration file, replace the code in the up() function with the code to create a new users table.
Schema::create('users', function (Blueprint $table) {
            $table->id();
            $table->string('name');
            $table->string('role');
            $table->timestamps();
});
In the code snippet above, the Schema::create('users', function($table) {...} defines and modifies columns for the users table, namely the id, name, string, and timestamps (created_at and updated_at). Run the migration with the command:
php artisan migrateAfter running the command, you'll see in the terminal that your users table was created successfully:

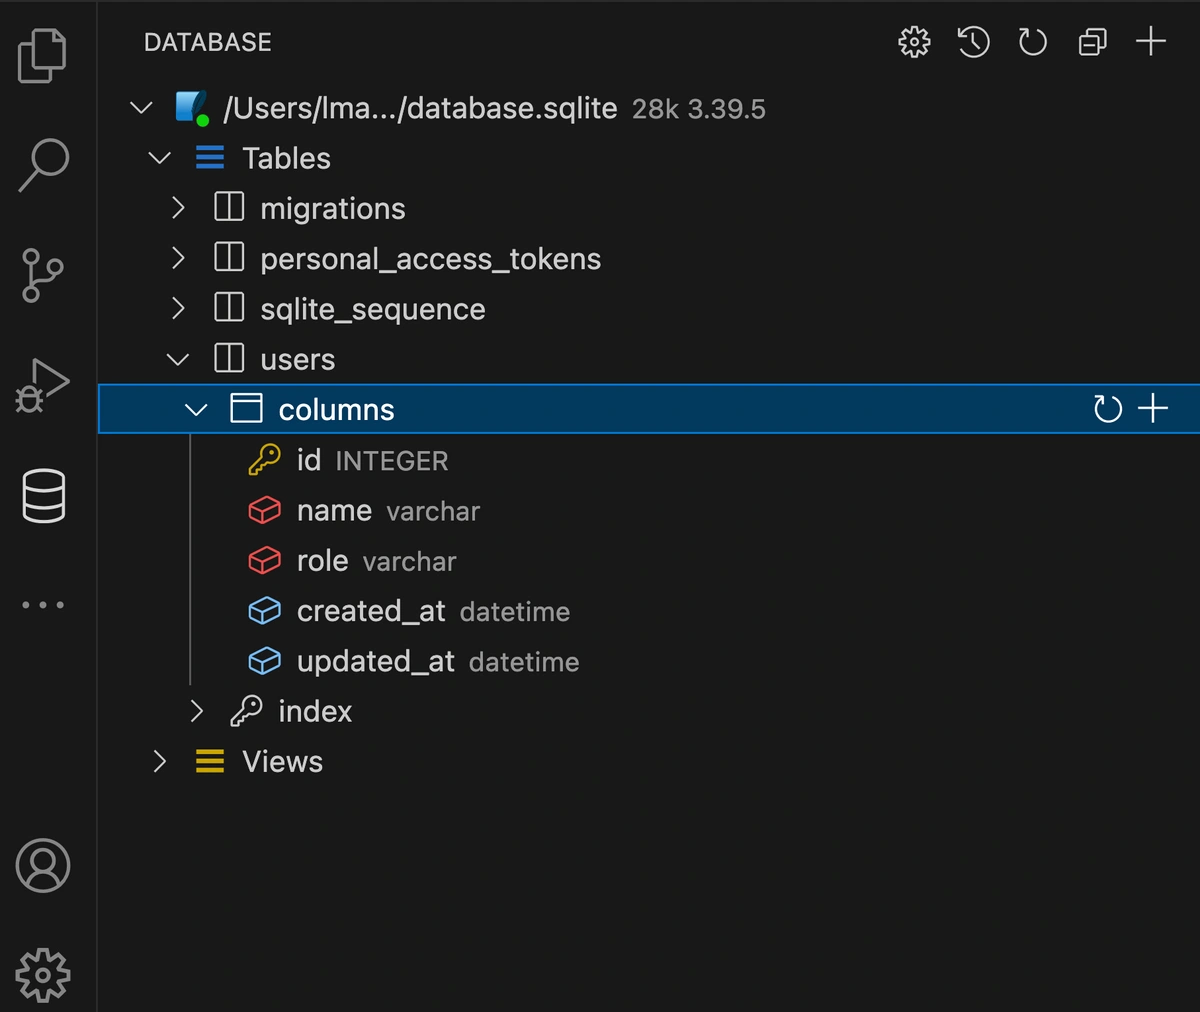
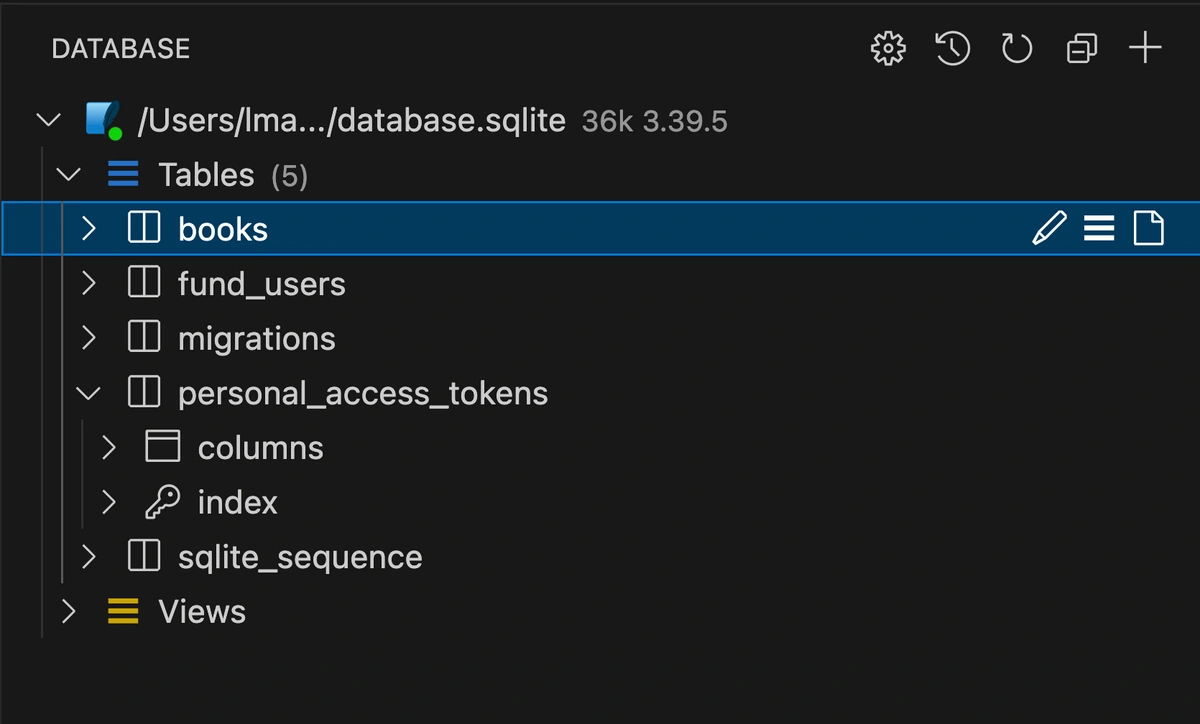
Check your database for the table with the specified columns:
Modifying tables for Laravel migrations
Laravel migrations provide methods like rename in the Schema facade to modify tables. When renaming a table, always define explicit foreign key constraint names to prevent errors after renaming. With that in mind, let’s get started.
Create another migration file called create_fund_users_table and use the rename() method to rename the users table to fund_users:
return new class extends Migration
{
public function up(): void
{
Schema::rename('users', 'fund_users');
}
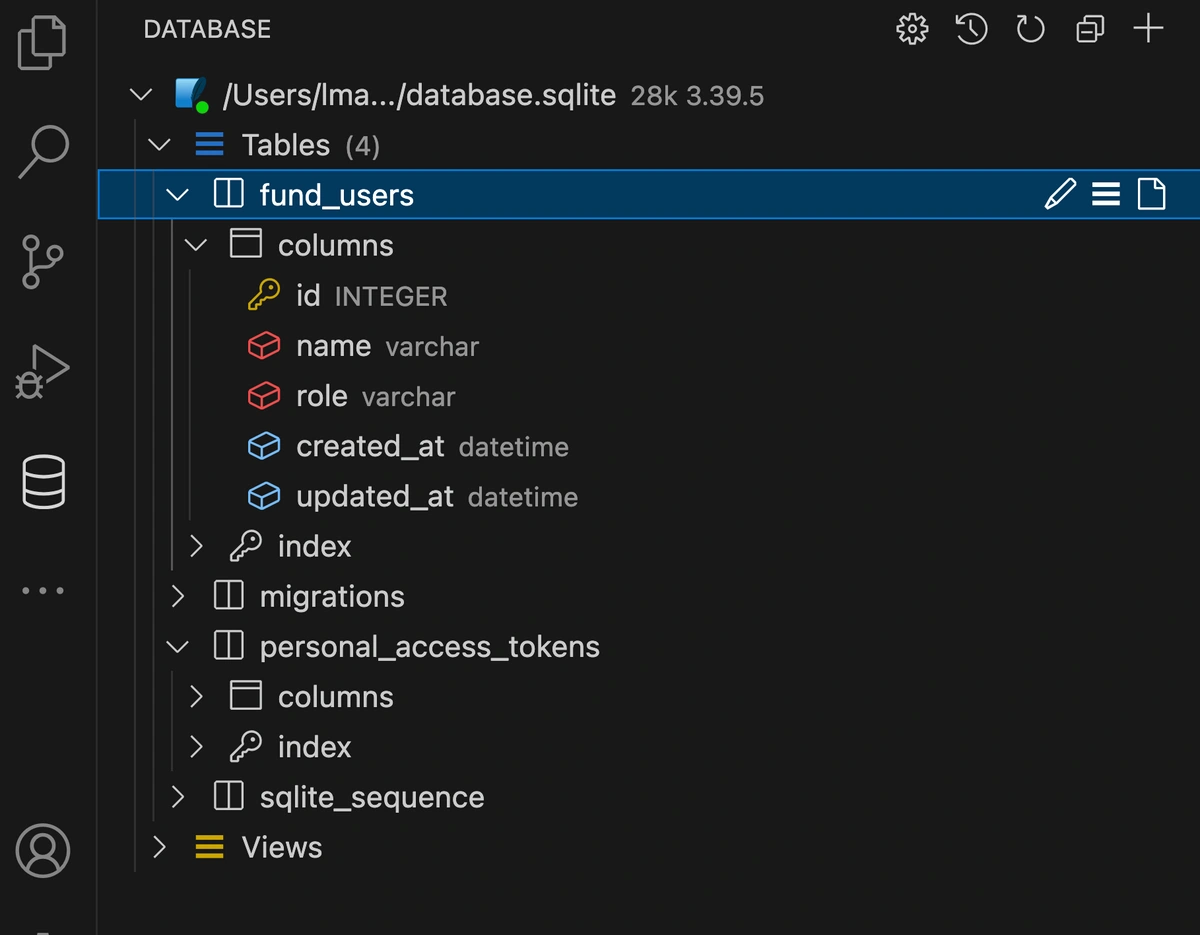
}Run the Laravel migration using the migrate command, and then check if the users table in your database has been renamed to fund_users:

How to drop tables
To reverse table creation, use the Schema::drop or Schema::dropIfExists methods within the down() method of your migration. Schema::dropIfExists is generally preferred since it safely checks if the table exists before attempting to drop it.
For example, to rollback the creation of a users table, the down() method would look like this:
public function down(): void
    {
        Schema::dropIfExists('students');
    }
Now, let’s try a slightly different example. If your original migration created a users table, but your down() method mistakenly references students:
public function down(): void
{
       Schema::dropIfExists('students'); // Incorrect table name!
}
And you then run php artisan migrate:rollback, the rollback will still appear to succeed. See the screenshot below. This is because Schema::dropIfExists('students') will simply do nothing. It will check for a students table, not find it, and therefore not throw an error.

But what if you replace Schema::dropIfExists with Schema::drop and then try to drop a non-existing table? Let’s see.
public function down(): void
{
Schema::drop('students');
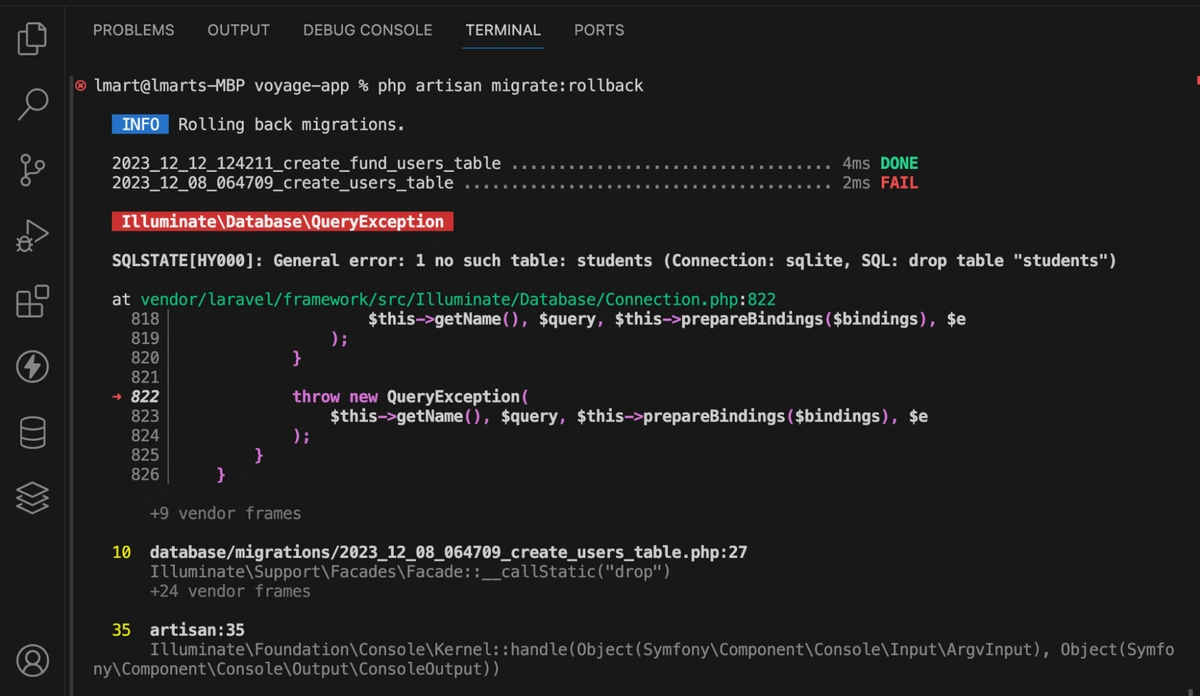
}If you use the update snippet and then run the migration rollback command, you'll encounter an error saying “no such table”:
How to use columns within Laravel migrations
Laravel offers methods for column creation, deletion, and modification.
How to create columns
Use the table() method in the Schema facade to update existing tables with additional columns. It accepts the same arguments as the create() method. You can select the column's data type from these available fields.
To add a wallet column to the fund_users table, create a migration file named add_wallet_column and include the following in the up() method of the generated file:
public function up(): void
{
Schema::table('fund_users', function (Blueprint $table) {
$table->double('wallet');
});
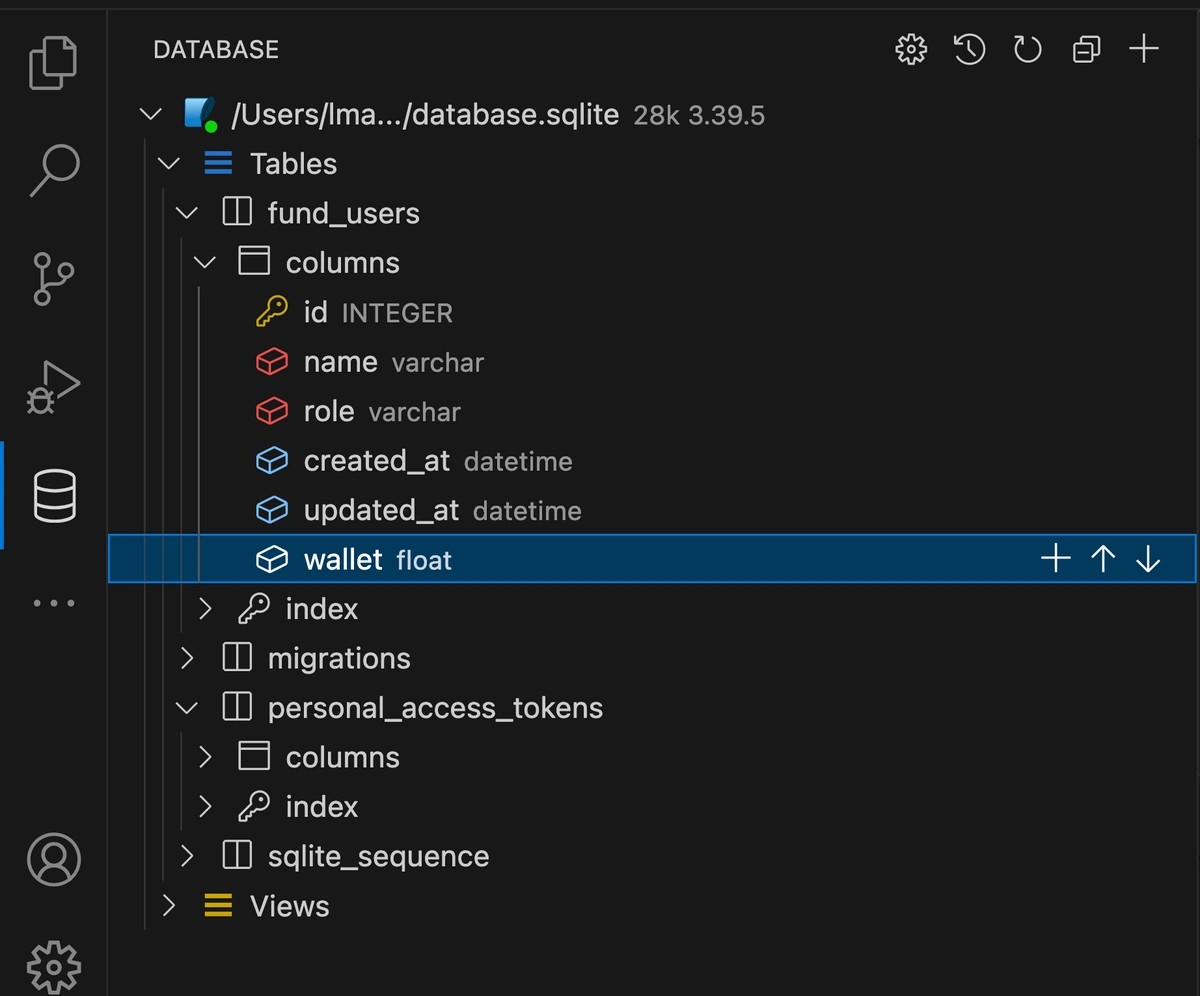
}Run the migration and check your database for the new column:
How to drop a column
You can use the dropColumn() method on the Schema facade to drop columns. Let’s try dropping the wallet column that you added. To do this, you need to create another migration file. In your migration file, under the up() method, drop the wallet column with the following code:
public function up(): void
    {
        Schema::table('fund_users', function (Blueprint $table) {
            $table->dropColumn('wallet');
        });
    }
Run the migration and check if the wallet column is removed from your database:
How to modify a column
To modify a column in SQLite, install the doctrine/dbal package using Composer by running the following command in your project directory:
composer require doctrine/dbalAfter installation, include the following configuration in your app's config/database.php file:
use Illuminate\Database\DBAL\TimestampType;
'dbal' => [
'types' => [
'timestamp' => TimestampType::class,
],
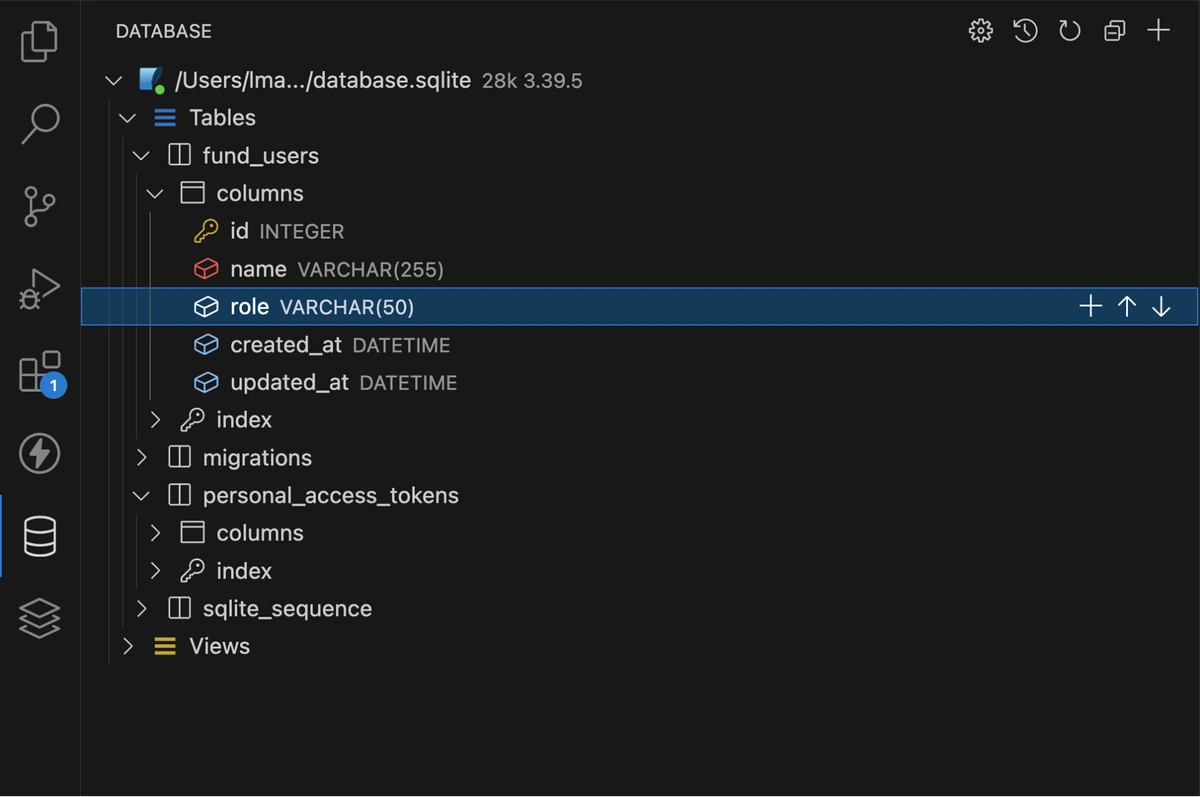
],To change the role column in the fund_users table to a nullable string with a maximum length of 50 characters, create a new migration and add the following within the up() method:
Schema::table('fund_users', function (Blueprint $table) {
    $table->string('role', 50)->nullable()->change();
});
Run the migrate command and verify that the role column in your database is updated to a maximum length of 50 characters:
How to use indexes within a Laravel migration
Next, let’s explore how to manage indexes in Laravel migrations.
How to create indexes
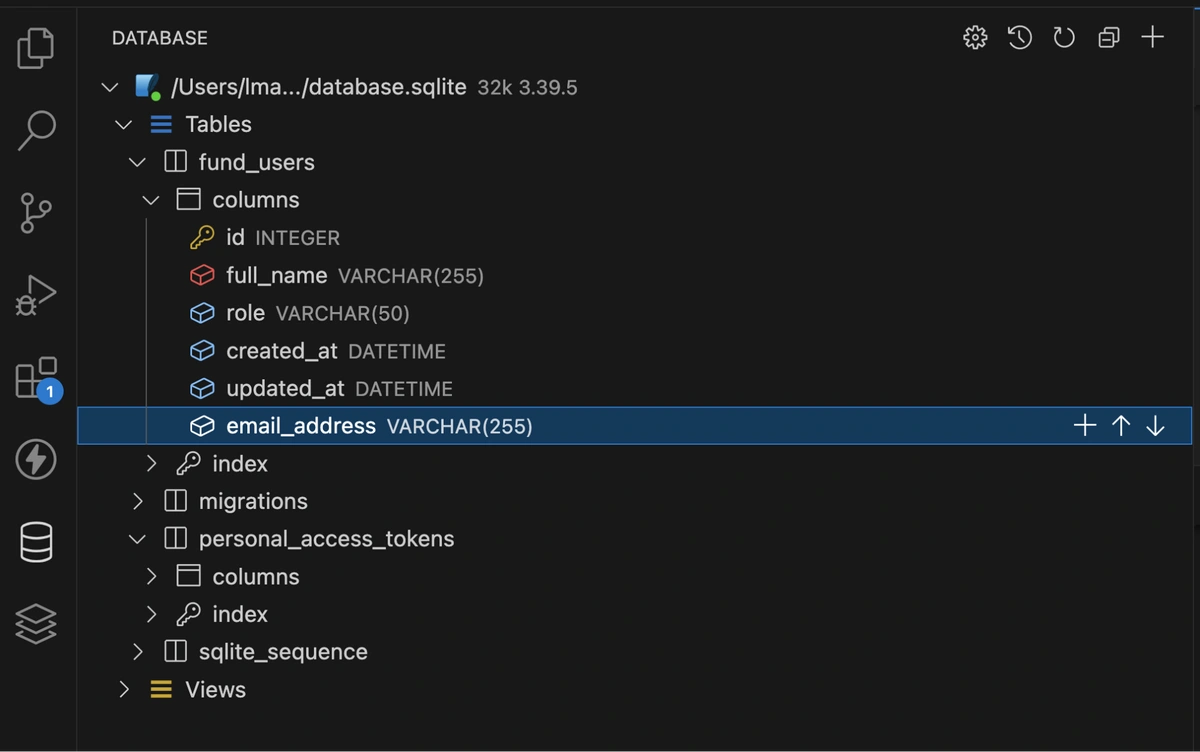
An excellent example of an index type is unique. It ensures that all values in a column are distinct. Create a migration file to make the email address column unique by adding the following:
Schema::table('fund_users', function (Blueprint $table) {
    $table->string('email address')->unique();
});
Run your migration file and the email address column will be defined as unique in your database as follows:
How to drop indexes
Laravel automatically assigns an index name based on the table's name, indexed column, and index type. To drop an index, specify the assigned name in the migration's up() method:
public function up(): void
    {
        Schema::table('fund_users', function (Blueprint $table) {
            $table->dropUnique('fund_users_email_address_unique');
        });
    }
The $table->dropUnique('fund_users_email_address_unique'); removes the unique index 'fund_users_email_address_unique' on the email address column.
Run your migrations and confirm the removal of the unique constraint by inserting a duplicate email address without encountering errors.
How to rename indexes
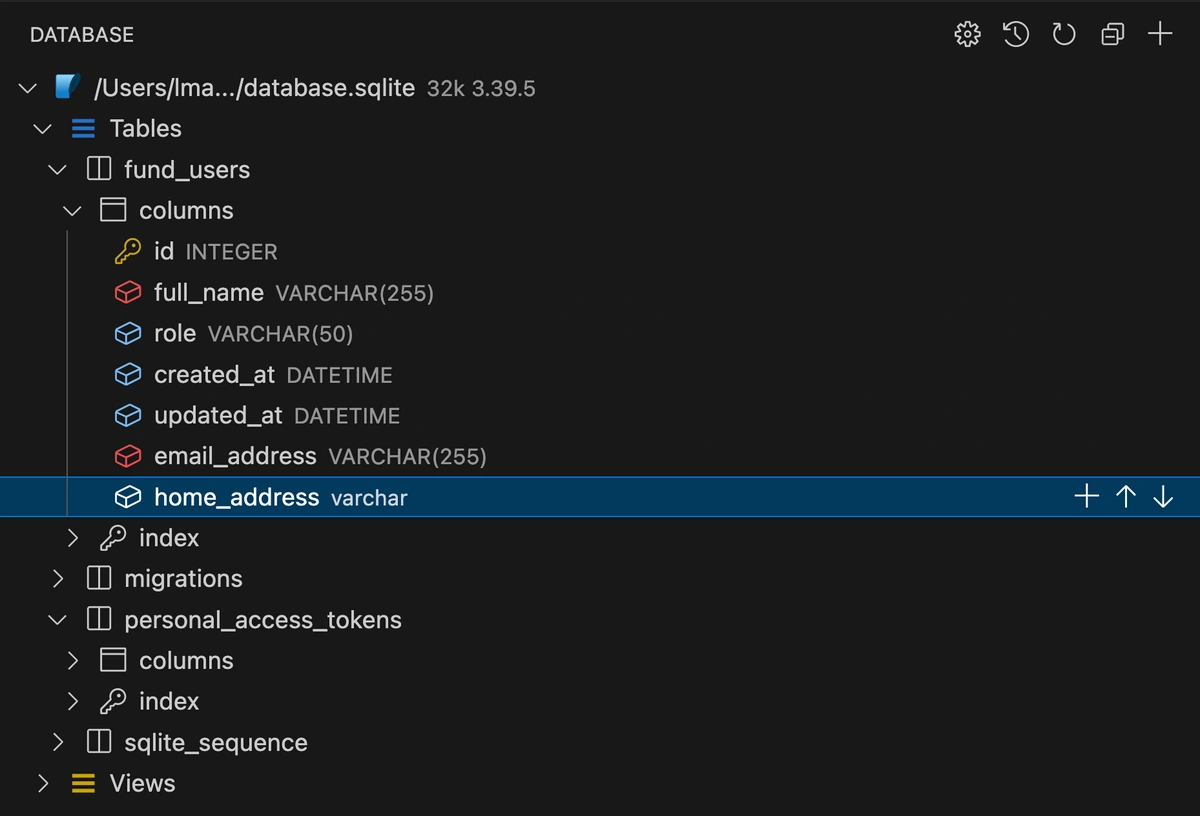
The Schema Builder Blueprint provides a renameIndex method. The method takes the current and new index names as arguments. Create a new migration file and add a unique() index for a home address column:
public function up(): void
    {
        Schema::table('fund_users', function (Blueprint $table) {
            $table->string('home address')->unique();
        });
    }
Verify the new indexed column in your database:
Next, create a new migration file to rename the index and put the following code inside it:
public function down(): void
    {
        Schema::table('fund_users', function (Blueprint $table) {
            $table->renameIndex('fund_users_home_address_unique', 'office_address');
        });
    }
How to handle foreign key constraints
Foreign key constraints in relational databases, like those in Laravel using the foreign() and references() methods, maintain data accuracy by ensuring values in a “foreign key” column exist in the corresponding “primary key” column of the referenced table.
To see this in action, create a new migration file for a books table called create_books_table and run the migrations:
Next, create a migration file called create_foreign_key_constraints_for_books_table to define foreign key constraints referencing the fund_users table. Follow Laravel's naming convention (tablename_columnname) and use the foreign() method with references() and on() properties to specify the referenced column and table (fund_user_id referencing id in the fund_users table):
public function up(): void
    {
        Schema::table('books', function (Blueprint $table) {
            $table->unsignedBigInteger('fund_user_id');

            $table->foreign('fund_user_id')->references('id')->on('fund_users');
        });
    }
Run the migration to create the fund_user_id in your database:

To remove a foreign key constraint in Laravel, use the dropForeign() method. Make sure to specify the constraint's name. This name follows a convention: table_name_column_foreign. For example, a foreign key on the user_id column of the posts table would be named posts_user_id_foreign.
Here's how to drop this foreign key in a migration: First, create a new migration file. Then, within the up() method of the migration, add the following code:
 public function up(): void
    {
        Schema::table('books', function (Blueprint $table) {
            $table->dropForeign('fund_user_id_foreign');
        });
    }
To toggle (enable or disable) foreign key constraints in migrations, use these methods enableForeignKeyConstraints(), disableForeignKeyConstraints(), withoutForeignKeyConstraints():
Schema::enableForeignKeyConstraints();

Schema::disableForeignKeyConstraints();

Schema::withoutForeignKeyConstraints(function () {
    // Constraints disabled within this closure...
});
How to remove a Laravel database migration
Now you know how to create migration in Laravel, let’s explore how to remove one.
Note that there’s no Artisan command for removing a Laravel database migration. If you want to undo a migration, the recommended approach is to roll it back. To see which migrations have already been run, use the following command:
php artisan migrate:statusAfter running the command, you'll see the following in your terminal:

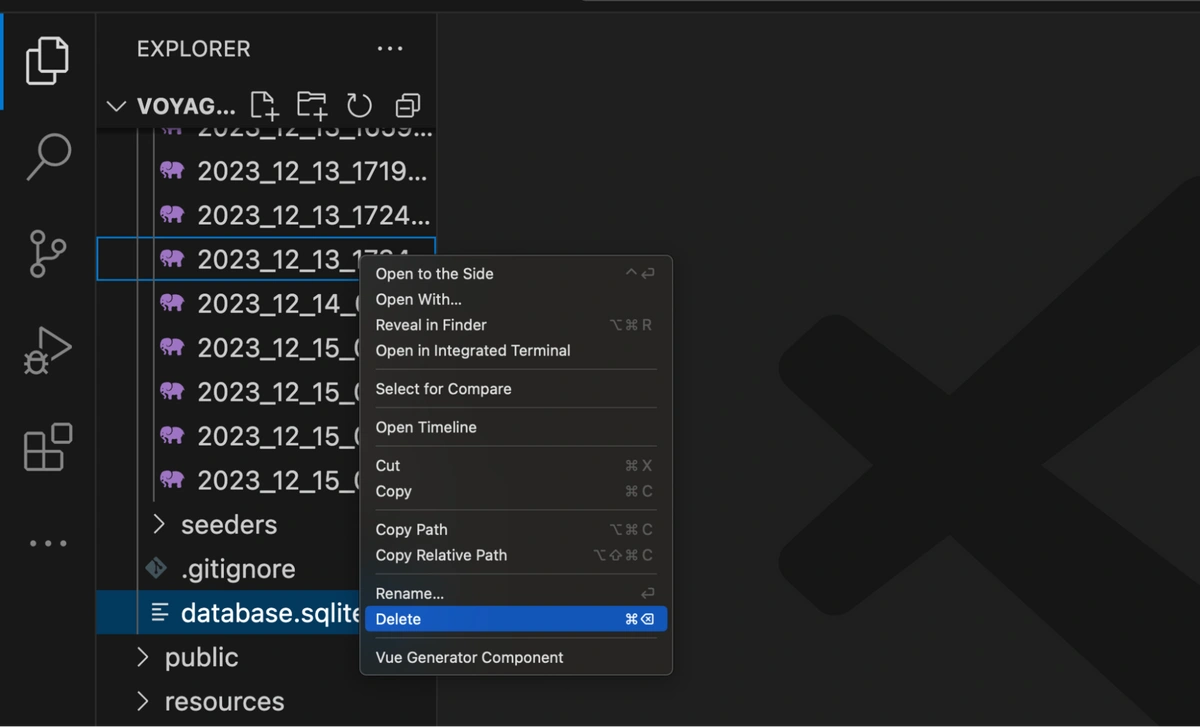
If you haven't yet run php artisan migrate for a migration, you can delete its file directly (e.g., by right-clicking and selecting Delete).
However, if the migration has been executed, you can roll back a specific migration using php artisan migrate:rollback with the batch number. To remove the last migration, use the command:
php artisan migrate:rollback --step=1The -step option specifies the migrations to rollback; for example, -step=2 rolls back the last two migrations. After executing the command, the last migration is rolled back:

How to squash migrations
As your application scales, it may require additional migrations, leading to numerous files in the database/migrations directory. You can use the schema:dump command to squash these files into a single SQL file:
php artisan schema:dumpWhen you run this command, Laravel generates a schema file in your app's database/schema directory:
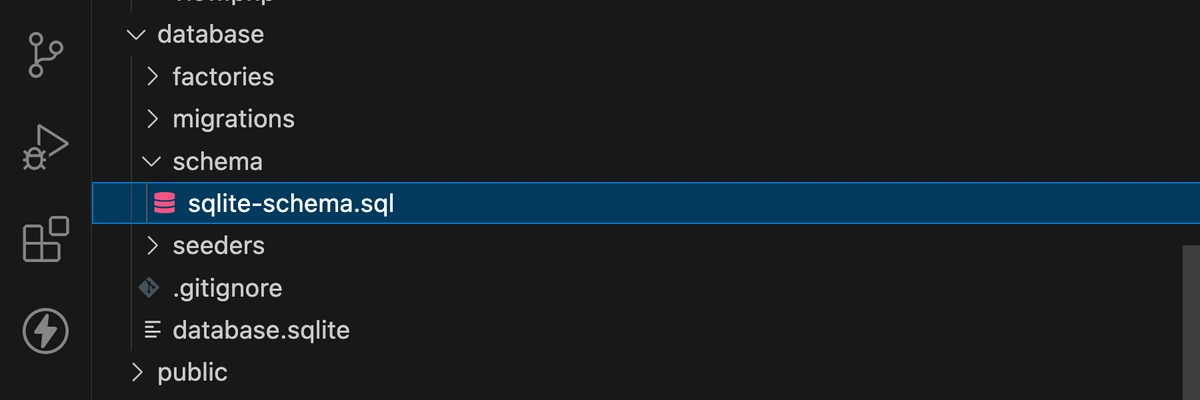
The schema file contains SQL statements. When you initially set up your database, Laravel will execute the SQL statements within this schema file before running any remaining migrations (that are not included in the dump). This allows for a much faster initial database setup.
How to use migration events
Laravel provides dispatch migration events for post-migration actions, such as notifying the admin via email. Events include the following:
-
MigrationsStarted - when a batch is about to execute.
-
MigrationStarted - when a single migration is about to execute.
-
MigrationsEnded - when a batch execution has ended.
-
MigrationEnded - when a single migration execution has ended.
These events extend the Illuminate\Database\Events\MigrationEvent class. You can register a listener (a class that responds to specific events) in the app\Providers\EventServiceProvider directory to use them. This listener will contain the code you want to execute when the corresponding migration event occurs.
Final thoughts
You've come a long way, congrats!
In this article, you have learned how to create migration in Laravel to make your database schemas more manageable. The examples and code snippets shown here, along with the complete migration files, are available on GitHub. For more details and advanced usage, check out the official Laravel documentation.
Once your schema is in good shape, adding a content layer is a natural next step. ButterCMS integrates natively with Laravel and lets your team manage blogs, pages, and dynamic content without adding complexity to your codebase. Start a free trial to explore on your own, or request a demo and we'll walk you through it. You can also check out our guide to building a Laravel blog with ButterCMS to see how it all fits together.