
Prerequisites
Before configuring webhooks, ensure you have:- Admin access to your ButterCMS account
- A publicly accessible endpoint URL to receive webhook requests
- HTTPS support on your endpoint (required for production environments)
Step 1: access webhook settings
Navigate to your webhook settings in ButterCMS:- Log into your ButterCMS dashboard
- Click on Settings in the left sidebar
- Select Webhooks from the settings menu
Step 2: configure your webhook URL
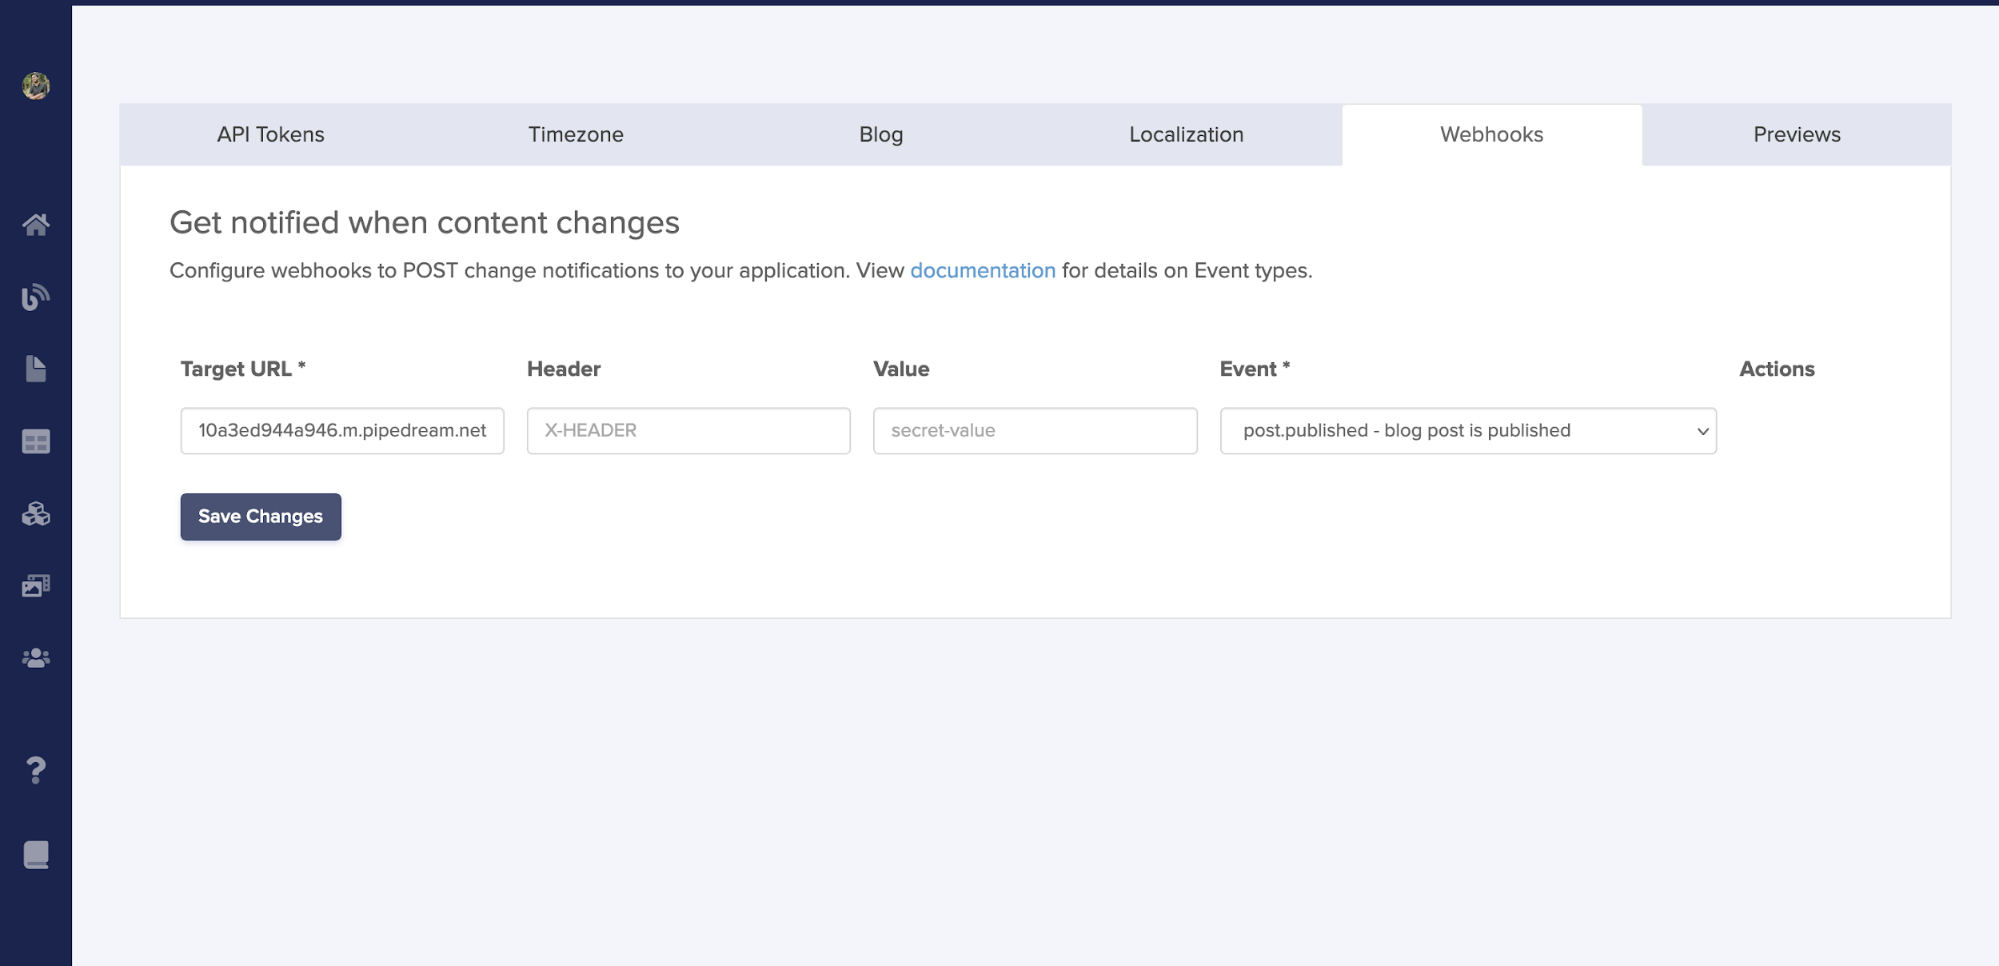
Enter your webhook endpoint URL in the configuration screen. This is where ButterCMS will send HTTP POST requests when content events occur.URL requirements
| Requirement | Description |
|---|---|
| Protocol | HTTPS strongly recommended (HTTP allowed for development) |
| Accessibility | Must be publicly accessible from the internet |
| Response Time | Must respond within 5 seconds |
| Response Code | Return 2xx status code to acknowledge receipt |
Example URLs
Step 3: select event types
Choose which content events should trigger webhooks. You can select specific events or use the.all event to receive all notifications for a content type. See Event Types Reference for the complete list.
Step 4: save and test
After configuring your webhook:- Click Save Changes to activate the webhook
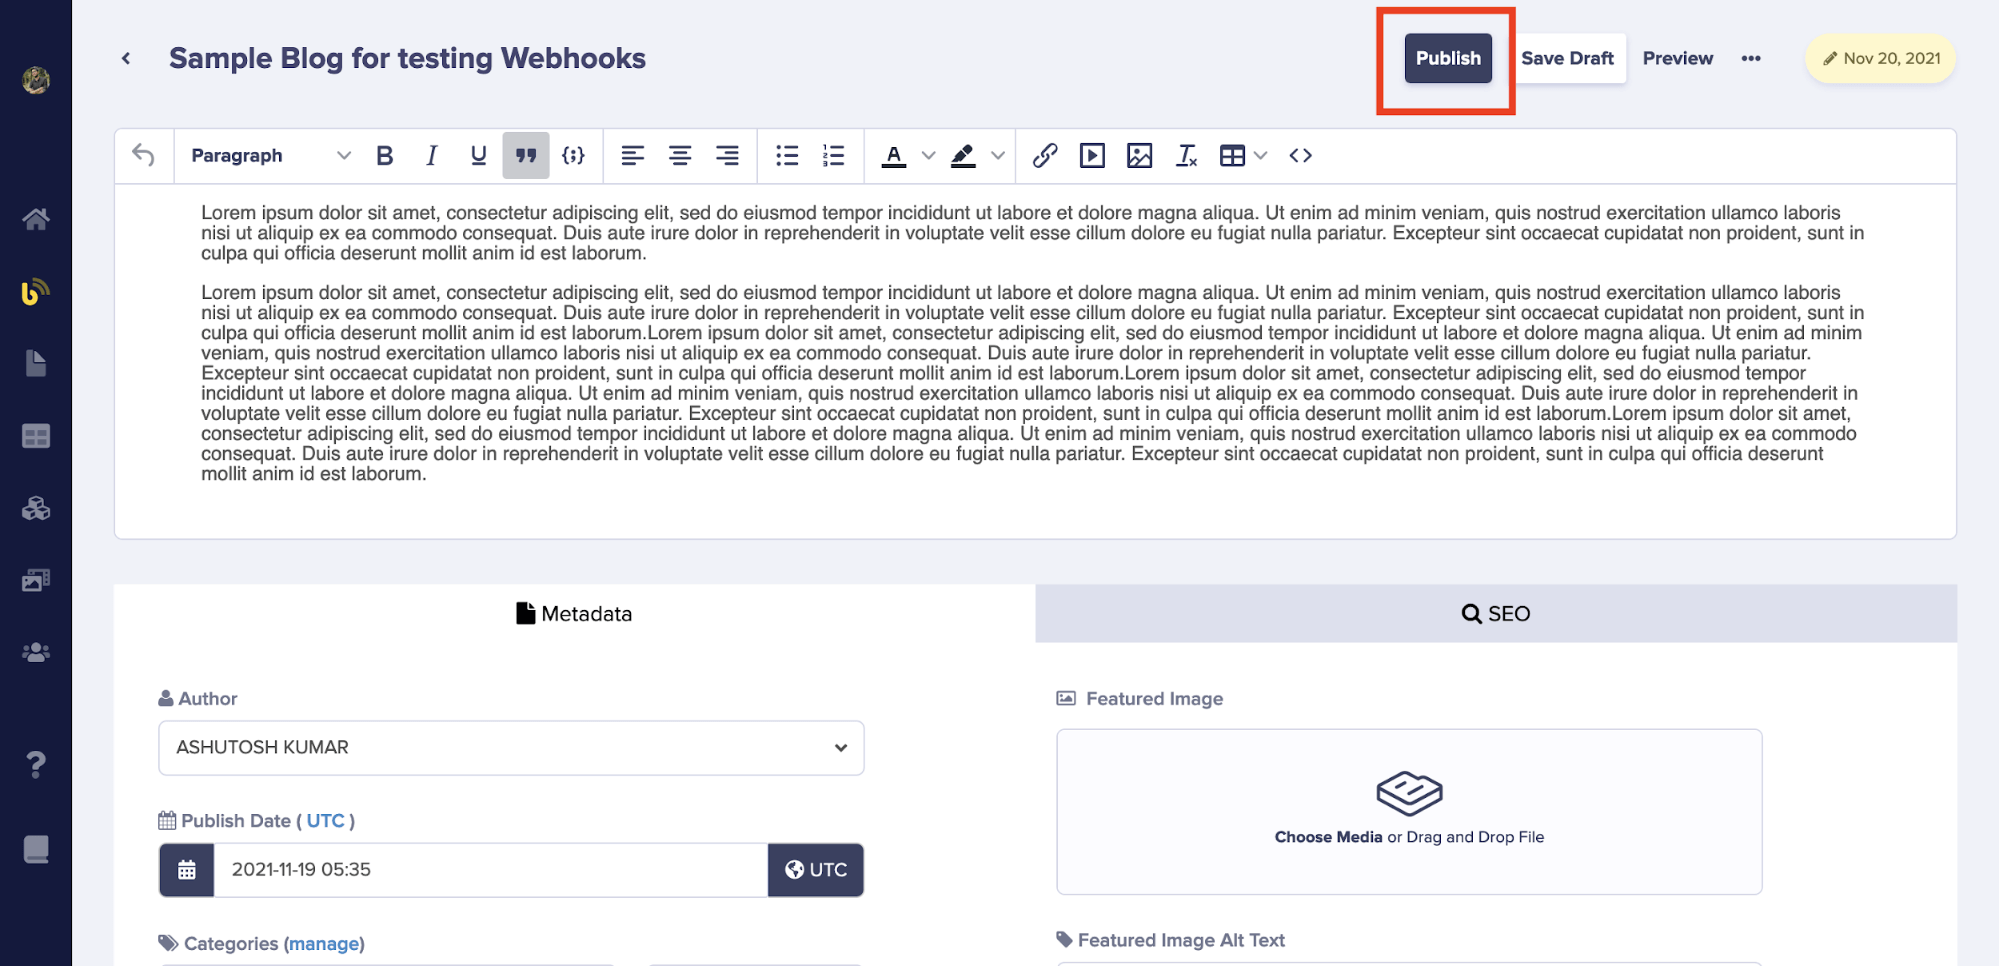
- Test by making a content change in ButterCMS
- Verify your endpoint received the webhook payload
Implementing your endpoint
Your webhook endpoint must acceptPOST requests with JSON payloads, respond within 5 seconds, and return a 2xx status code to acknowledge receipt.
Node.js / Express
Python / Flask
PHP / Laravel
Multiple webhooks
You can configure multiple webhooks to send events to different endpoints:- Separate by environment: Different endpoints for production vs staging
- Separate by purpose: One endpoint for cache invalidation, another for email notifications
- Separate by content type: Route page events to one service, blog events to another
Best practices for multiple webhooks
- Keep endpoints focused - Each endpoint should handle a specific task
- Use descriptive names - Label webhooks clearly for easy management
- Monitor independently - Track success/failure rates for each webhook
- Consider failover - Set up backup endpoints for critical integrations
Troubleshooting
Common issues
Webhook not triggering
Webhook not triggering
- Verify the webhook is enabled in settings
- Check that you selected the correct event types
- Ensure the content change matches a selected event (e.g., publishing, not just saving)
Endpoint not receiving requests
Endpoint not receiving requests
- Confirm your endpoint URL is publicly accessible
- Test the URL directly with a tool like curl or Postman
- Check firewall rules aren’t blocking ButterCMS IP addresses
- For local development, ensure your tunnel (ngrok) is running
Webhook shows as failed
Webhook shows as failed
- Verify your endpoint returns a 2xx status code
- Check that your endpoint responds within 5 seconds
- Review server logs for errors in your webhook handler