Over the last 11 months, ecommerce has been fast-tracked in our lives. It’s changing the way we purchase many goods and services, from buying groceries from our favorite shops to filling prescriptions.
The web needs powerful ecommerce tools to provide a dynamic experience where consumers can easily find what they're looking for and easily make purchases.
This post will explore how a few of these tools—ButterCMS, Snipcart, and Next.Js—can help developers create these high-quality ecommerce experiences.
I won't only tell you that these tools can deliver dynamic UX, I'll also show you by crafting a shopping list in a step-by-step tutorial.
Table of contents
Introduction
The ongoing pandemic has made it difficult to continue doing business the way it used to be. Many companies globally have had to strictly move business operations to the internet.
The situation has compelled business owners to look for modern solutions to re-strategize business operations as quickly as possible to win the growing race for new customers online. As a result, ecommerce has evolved dramatically from how it used to be in the early 2000s.
The modern pattern has settled down with the headless approach that involves decoupling the frontend and backend to get frontend freedom and working on both layers separately. In this case, frontend freedom means that you can design your store using any web framework of your choice and adapt it over time to your evolving needs and users' expectations.
This is where ButterCMS, Snipcart, and Next.js come in.
According to stats, consumers spent $861.12 billion online with U.S. merchants in 2020, up an incredible 44.0% year over year.
This fact shows how profitable the ecommerce space is becoming. Companies are constantly looking out for ways to build scalable ecommerce platforms with less human resources and at a relatively low cost. Therefore, If you're looking for a modern, fast-performing, and secured ecommerce solution, a headless CMS like ButterCMS is your sure bet!
Prerequisites
- A basic understanding of single-page applications (SPAs) using Next.js
- A free ButterCMS trial account
- A Snipcart account (forever free in test mode)
You do not need to be a pro in React; however, having some experience with React will come in handy.
If you're in a hurry, you can skip ahead to any of the tutorial steps below:
- Getting Started with ButterCMS
- Creating Products in ButterCMS
- Getting Started with Snipcart
- Displaying Products on Your Website
- Fetching Products From Your Website Into Snipcart
- Deploying to Vercel
This tutorial will help create a base to kickstart a unique ecommerce project you can do super quick with ButterCMS, Next.js, and Snipcart.
What is ButterCMS?
ButterCMS is a SaaS (software as a service) headless CMS that hosts and maintains the entire CMS platform, including the CMS dashboard (where you manage your content) and the content API. You query our API to pull content into your app using your tech stack of choice.
You define your custom content models within Butter to represent whatever your marketing team needs to manage.
- With Butter, you can deliver content to any front end using any coding language via RESTful APIs, open-source SDKs, and JAMstack technologies.
- You can power company blogs, SEO landing pages, customer case studies, company news and updates, events and webinar pages, education centers, location pages, and more with ease.
- This cloud-native, API-first platform is hosted on Microsoft Azure so that scaling can happen instantly at a moment's notice. On your side, you can host your solution anywhere you like. Host solutions on your terms and provide industry-leading security and page load speeds. Your customers will always get the best experience no matter what.
- With built-in page management features, you can create, manage and organize pages using reusable components and sitemaps — all without having to rely on a developer.
What is Next.js?

Next.js is a JavaScript framework (built on top of React—similar to Remix) that enables you to build web applications using React and super-fast static websites.
Thanks to Automatic Static Optimization, "static" and "dynamic" become a reality.
This feature gives Next.js the capacity to build hybrid applications, which can be rendered on the server and client-side.
At the time of this article, Next.js has termed itself The React Framework for Production, and with such a claim comes a group of features that offer developers the liberty to take React websites from zero to production.
While the various hallmarks might mean more things to learn, its attempt at simplicity and perhaps success is something to have in your armory.
Inspired by PHP, Next.js benefits from JavaScript modules, enabling developers to export an app's components and perform individual tests for each element and thousands of other components and modules from npm.
- Next.js enables developers to create a solution where, instead of loading all of the JavaScript, the application will only load the bundle needed.
- Prefetching, one feature of Next.js, picks up where code splitting leaves off, allowing optimized bundles of code to be lazily loaded behind the scenes.
- Next.js enables hot-module replacement, which means that instead of reloading an entire application when code is changed, it only recreates modules that have been altered.
What can you build with Next.js?
Before we start building our shopping list, let's take a look at some cool things you can create with Next.js.
With Next.js, you can build several digital products and interfaces such as:
- MVPs (minimum viable products)
- Web portals
- Single web pages
- Static websites
- SaaS products
- Ecommerce and retail websites
- Dashboards
- Complex and demanding web applications
- Interactive user interfaces
You can only build a product around the hemisphere of your creativity. Hence you can create almost any web app with Next.js.
Why Next.js in this Tutorial?
Perhaps you want to know what makes companies like Netflix, Uber, and Twitch use Next.js. Here are the reasons why:
Relatively Easy to Learn
That's it. If you've written any React at all, you will find yourself at home with Next.js. It offers you advanced tools and robust API support, but it doesn't force you to use them.
Client and Server-Side Support
Next.js is a double edge framework; its usage can cater to both client and server-side applications with ease.
Somewhere along the line in our eCommerce app, we will need to fetch products via Butter’s Restful API. It will demand that we leverage the server-side feature of Next.js instead of using any other framework like Node.js.
Ease of Deployment
The parent company of Next.js, Vercel, is a deployment and collaboration platform for frontend developers. Vercel enables developers to host websites and web services that deploy instantly and scale automatically – all without any configuration.
Think of it like, you build with Next.js and host with Vercel, all in one place.
Built-in CSS Support
Writing CSS in component-driven frameworks comes with a blissful need for the "cascade." It's why you have CSS-in-JS tools, but Next.js comes out of the box with its offering, styled-jsx, that supports quite a lot of styling architectures.
Automatic TypeScript Support
TypeScript lovers will enjoy using it because it supports TypeScript configuration and compilation.
File-System Routing
Navigating is made extremely easy with Next.js. You do not need any particular library to handle routing, because the file system of your app supports it by default.
Great SEO Support
Next.js is SEO compliant.
It uses Server-Side Rendering (SSR), and at the same time it can also be a tremendous Static Site Generator (SSG).
In both cases, it will help you a lot with:
- Growing organic traffic faster
- Ranking your high-intent keywords higher
Fully Omnichannel
Next.js websites and web apps work on any device to be accessible to everyone.
Zero Config
By default, Next.js has support for automatic compilation and bundling. In other words, Next.js is optimized for production right from the start.
Community Support
As Next.js is becoming the number one framework for many big brands, it's becoming more famous and, naturally, so is the number of its contributors. That means, even if you face an issue, there will probably be a solution for it already.
What Is Snipcart?
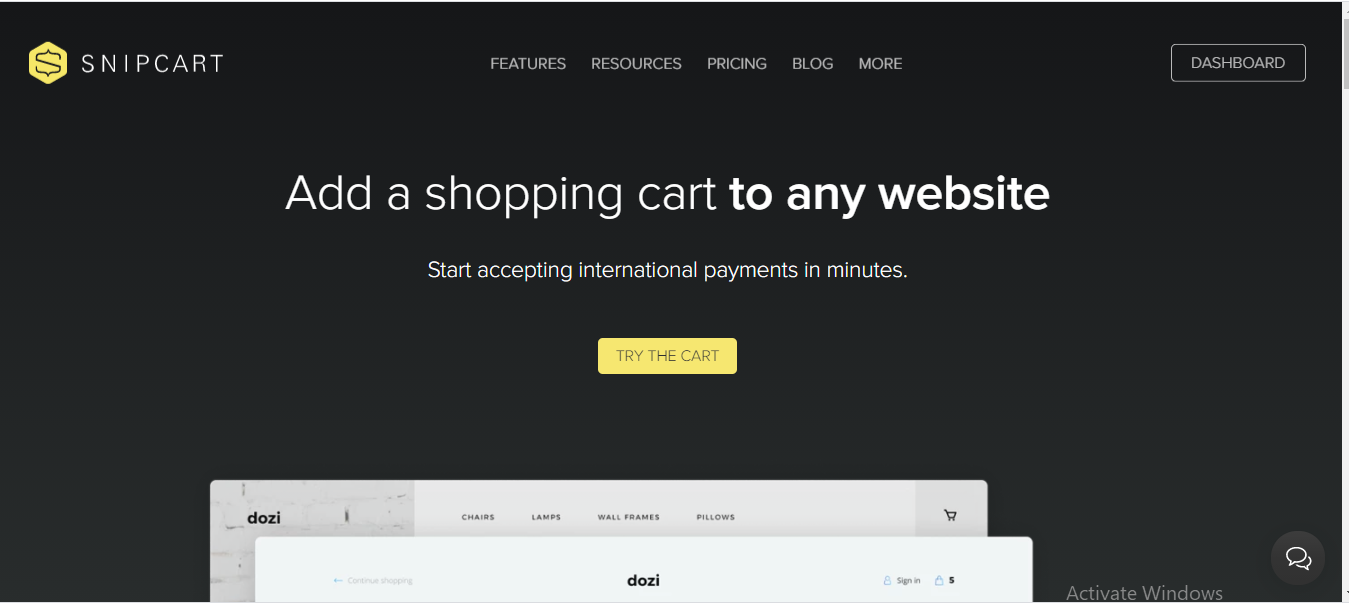
Snipcart is an ecommerce platform that seamlessly enables developers to build shopping cart features into a website with a few clicks.
Snipcart is many JAMstackers' favorite tool to add a shopping cart to your website and start accepting international payments in minutes. But it is not just that.
The beauty of Snipcart is that it works perfectly with headless CMS, which means better security, scalability, speed, and functionality for your JAMstack solutions.
It has an easy-to-manage dashboard where developers can track sales, orders, customers, and carts.

Ecommerce Tutorial: Getting Started
To make this process more manageable, we'll break it down into steps, which will enable us to build incrementally. Here are the steps we'll take to create our shopping cart:
- Set Up ButterCMS and Create Products
- Create a New Next.js App
- Add an Environment Variable
- Set Up Snipcart
- Add the Snipcart Shopping Cart
- Deploy to Vercel
Step 1: Set Up ButterCMS and Create Products
Before getting started, we'll assume that you've already created a free Butter account. If you don't have an account, you can sign up here.
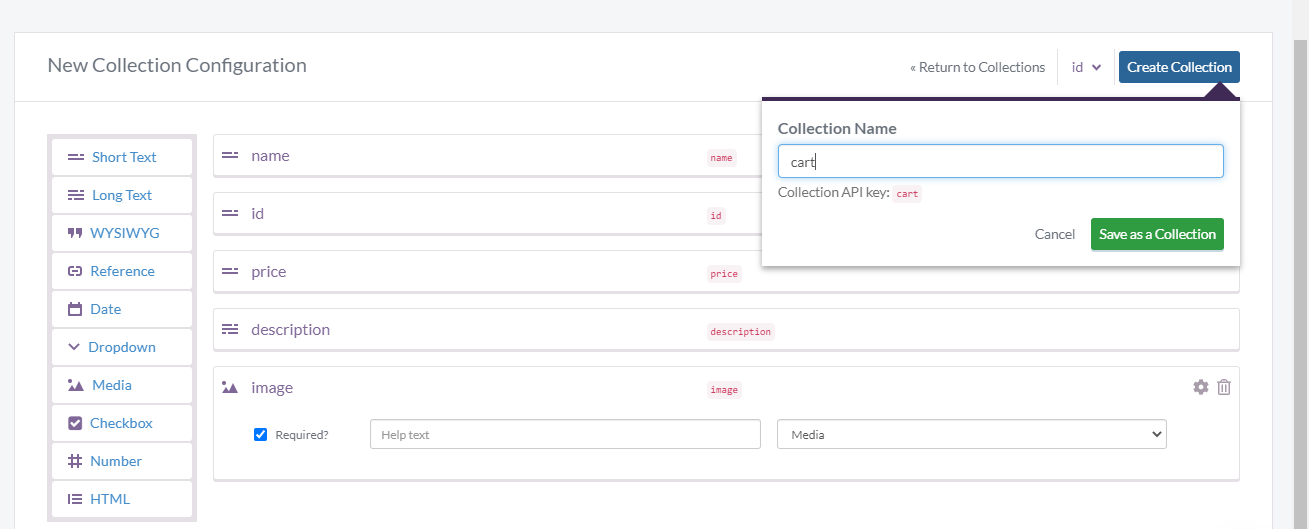
Once logged in, from your ButterCMS Collections dashboard, create a new Collection called butter-cart by clicking the + New Collection button.
Add the following fields to your Collection, by drag-and-dropping the property names.
Let's go ahead and create our system fields;
- id:
- Type: The field type is
Short-Text - Is required
- name:
- Type: The field type is
Short-Text - Is required
- price:
- Type: The field type is
Number - Is required
- description:
- Type: The field type is
Long-Text - Is required
- image:
- Type: The field type is
Media - Is required
Your Cart Collection should look like this:
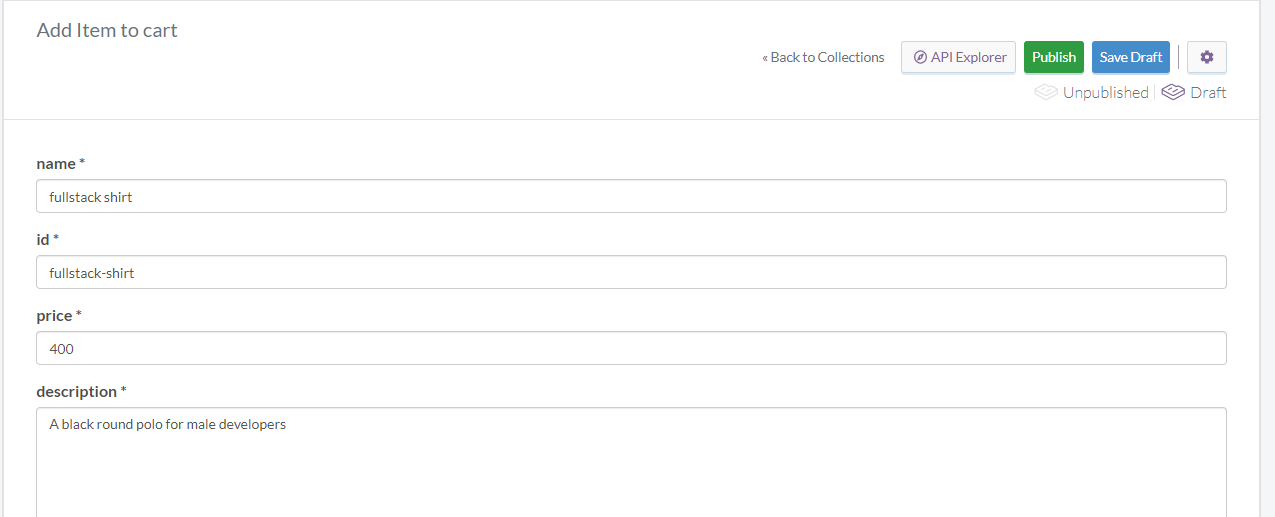
After saving your Collection, you get sent to the page to add items to your Cart by providing the relevant details.
You can edit both the Cart Collection and its content at any time, either by adding or removing Cart or changing the Collection Item Properties.
That's it for creating content!
Here's how it ought to look if you do things correctly.
Before leaving this section, we need our API KEY. Navigate to settings and copy your API key. You'll need it later in this tutorial.
Step 2: Create a New Next.js App
We'll be using the default Next.js template. To do that, we can use npm to create a new app.
First, navigate to the directory in your terminal that you want to create your new app in and run:
npx create-next-app butter-storeYou can optionally replace butter-store with the name of the directory you want to create this project in.
This will create a new Next.js project and install the dependencies. Once it's finished, you can navigate to that directory and run the development command to start the server.
cd butter-store
npm run dev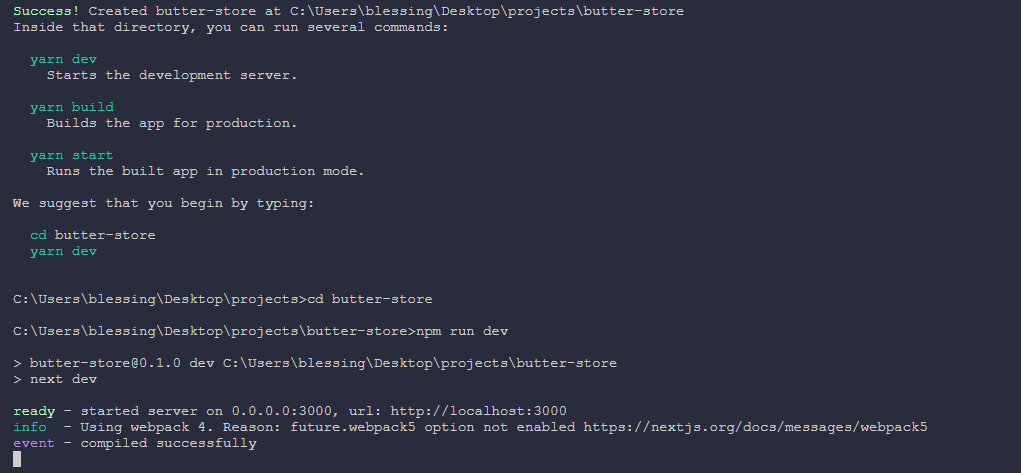
And once it's finished, you can now open up the project at http://localhost:3000
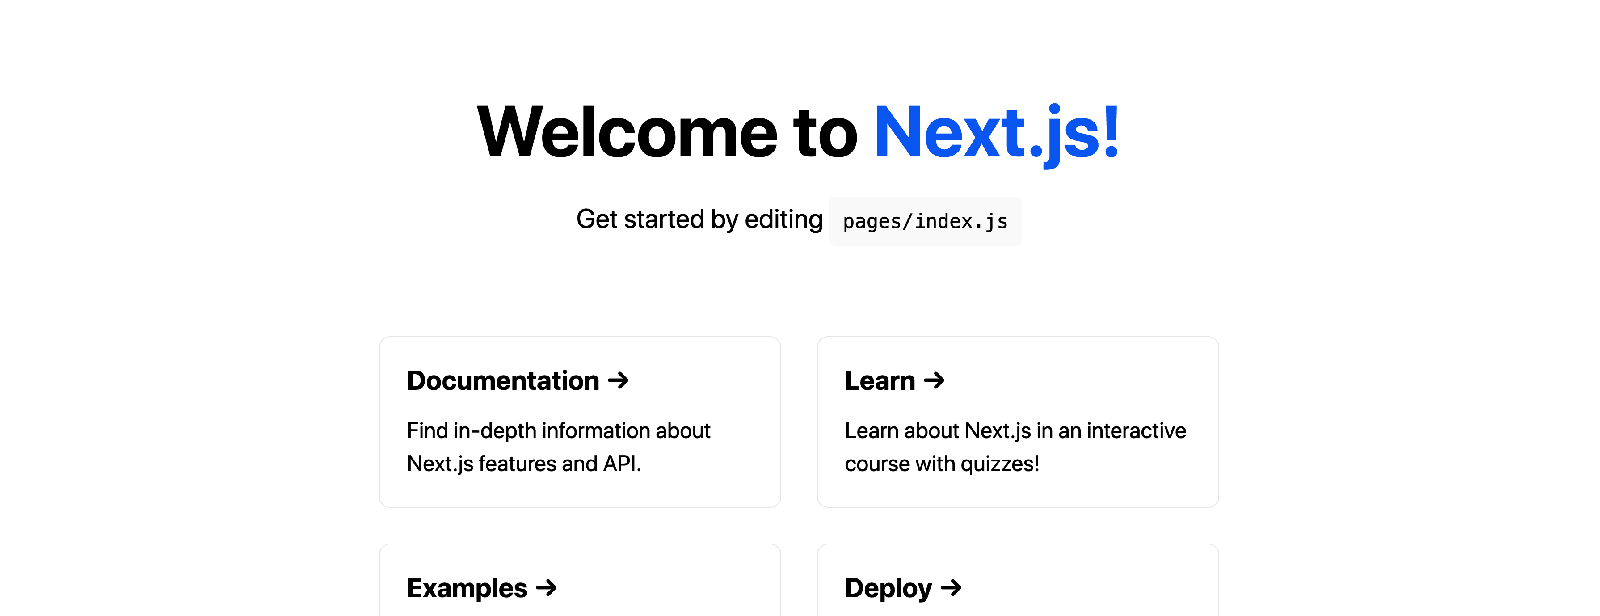
Next, inside the /pages directory locate the index.js file and paste the following code into it:
import { useEffect, useState } from "react";
import Head from "next/head";
import styles from "../styles/Home.module.css";
export default function Home() {
  const [posts, setPosts] = useState([]);
  useEffect(() => {
    async function getPosts() {
      const url = `https://api.buttercms.com/v2/content/products/?auth_token=${process.env.API_TOKEN}`;
      const res = await fetch(url);
      const { data } = await res.json();
      const allProducts = data.products;
      setPosts([...allProducts]);
    }
    getPosts();
  }, []);
  return (
    <div className={styles.container}>
      <Head>
        <title>Butter Store</title>
        <link rel="icon" href="/favicon.ico" />
        <link rel="preconnect" href="https://app.snipcart.com" />
        <link rel="preconnect" href="https://cdn.snipcart.com" />
        <link
          rel="stylesheet"
          href="https://cdn.snipcart.com/themes/v3.0.21/default/snipcart.css"
        />
      </Head>
      <main className={styles.main}>
        <h3 className={styles.title}>
          Welcome to <a href="/">Butter Store!</a>
        </h3>
        <p className={styles.description}>World's best Online store 😎</p>
        <div className={styles.grid}>
          {posts.length > 0
            ? posts.map((p) => {
                return (
                  <div key={p.id} className={styles.card}>
                    <img
                      style={{ "max-width": "100%" }}
                      src={p.image}
                      alt={`Preview of ${p.name}`}
                    />
                    <h3>{p.name}</h3>
                    <p>{p.description}</p>
                    <p>${p.price}</p>
                  </div>
                );
              })
            : "Loading..."}
        </div>
      </main>
      <footer className={styles.footer}>
        <a
          href="https://vercel.com?utm_source=create-next-app&utm_medium=default-template&utm_campaign=create-next-app"
          target="_blank"
          rel="noopener noreferrer"
        >
          Powered by{" "}
          <img src="/vercel.svg" alt="Vercel Logo" className={styles.logo} />
        </a>
      </footer>

    </div>
  );
}
Let's take a look at what this file does.
In the useEffect hook, a getPosts function is defined. It is then called in the useEffect hook to retrieve the products immediately when the component loads.
Retrieved products are then mapped over to be displayed with some HTML elements.
Step 3: Add an Environment Variable
In this section, we will use a few environment variables.
Create a vercel.json file at the root of your project directory and paste in the following code:
{
  "build": {
    "env": {
      "BUTTER_API_TOKEN": "Your-butter-token"
    }
  }
}
With the vercel.json file checked off, you can go ahead and create a next.config.js file at the root of your project directory with the code below:
module.exports = {
  env: {
    API_TOKEN: process.env.BUTTER_API_TOKEN,
  },
}
The next.config.js file provides access to Environment Variables inside your Next.js app.
Next, create a .env.local file at the root of your project directory with the following code, adding your API key obtained in Step 1 where instructed to make your API key available to your app during local development.
This is how your env file should be:
BUTTER_API_TOKEN= 49df4cb95fdc01c0ed5df1118c2d0d7be27169d1
SNIPCART_KEY=[YOUR-API-KEY]
If everything works well from your end, your app should look like this.
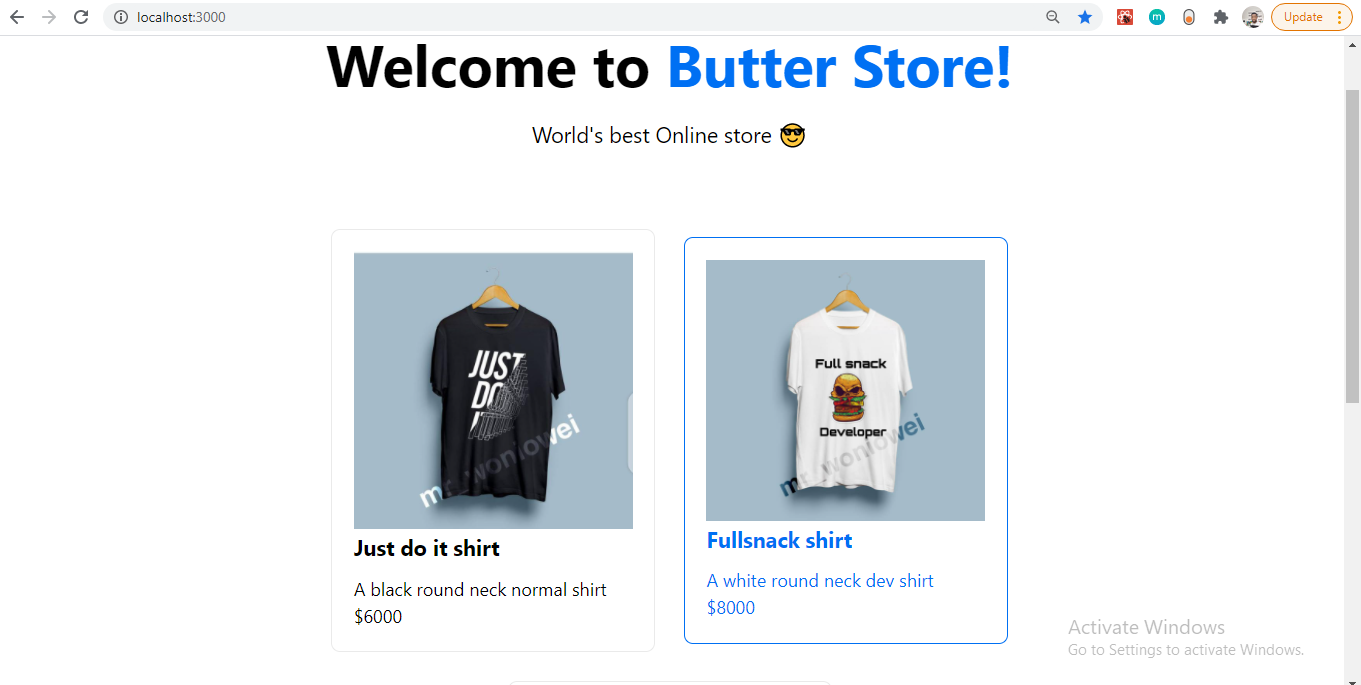
Now that our products have been fetched let's add the shopping cart functionality to our app; follow the next section judiciously.
Note: Where to find the snipcart-key variable will come in the next section.
Step 4: Set Up Snipcart
Before getting started, we'll assume that you've already created a free Snipcart account. If you don't have an account, you can sign up here. It's forever free in "Test" mode.
The second step towards integrating Snipcart into our app involves adding a few files from the Snipcart public CDN.
Inside of pages/index.js, the default Next.js template comes with a <Head> component that allows us to add additional tags and scripts to the <Head> of our page.
In between the Head component, add the following:
<link rel="preconnect" href="https://app.snipcart.com" />
<link rel="preconnect" href="https://cdn.snipcart.com" />
<link rel="stylesheet" href="https://cdn.snipcart.com/themes/v3.0.21/default/snipcart.css" />
This will tell the browser to connect to all two of Snipcart's subdomains that concern this tutorial, which will help with performance.
We also include a CSS file that contains cool default Snipcart styles for the shopping cart.
Next, at the bottom of the file, right after the <footer>, add the following:
<script
async
src="https://cdn.snipcart.com/themes/v3.0.31/default/snipcart.js">
</script>
<div
  id="snipcart"
  data-config-modal-style="side"
  data-api-key={`${process.env.SNIPCART_KEY}`}
  hidden>
</div>
Here, we include the Snipcart script that will provide all of our shopping cart's functionality. We also have a hidden <div> where we need to specify our API key from our account.
Getting Your Snipcart Key
To find the API key inside your Snipcart account, navigate to your account settings, see the API Keys page, and then copy the Public Test API Key under Credentials.
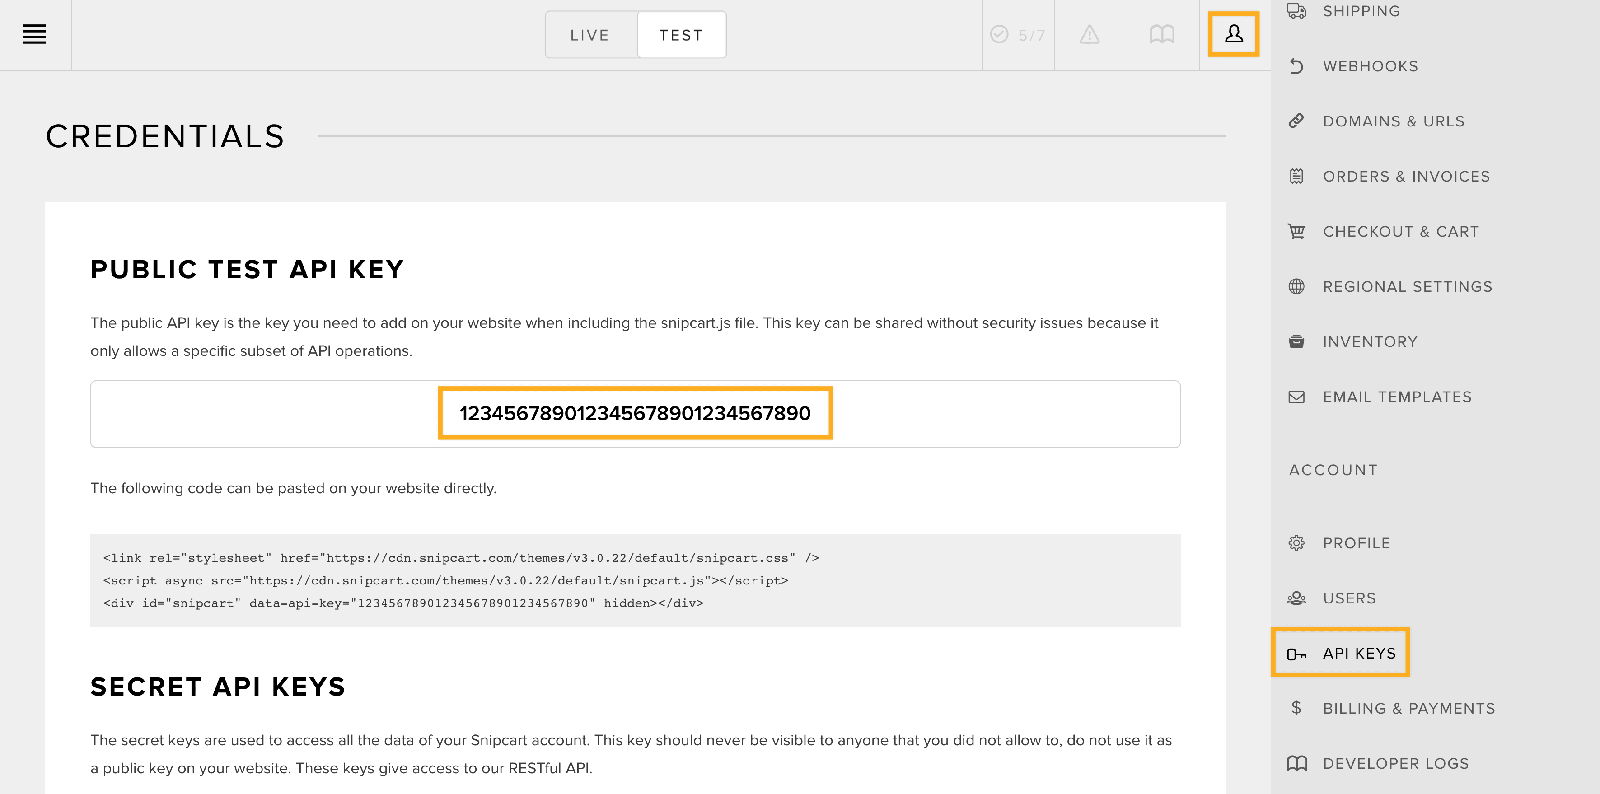
Copy that value and replace [YOUR-API-KEY] in the snippet above with your key:
<div hidden id="snipcart" data-api-key="123456789012345678901234567890" />At this point, if we save and reload the page, we shouldn't notice any difference.
Step 5: Add the Snipcart Shopping Cart
To let people add our products to their shopping cart, we need to add a few attributes to our product buttons.
Let's update our Add to Cart button to the following:
{/* Paste this code after the last p tag */}
  <p>
    <button
      className="snipcart-add-item"
      data-item-id={p.id}
      data-item-image={p.image}
      data-item-name={p.name}
      data-item-url="/"
      data-item-price={p.price}
    >
      Add to Cart
    </button>
  </p>
With the snipcart-add-item class and these attributes, Snipcart can smartly look at our products and find out the details about each of them.
Additionally, because we're adding the class selector, Snipcart can now transform our buttons into working buttons to add our items to the shopping cart with a bit of animation.
As we can see, Snipcart knows what product we added to our Cart by looking at the attributes on our button!
Step 6: Deploy to Vercel
To deploy our app with Vercel for Git, make sure it has been pushed to a Git repository.
Import the project into Vercel using your Git of choice:
After your project has been imported, all subsequent pushes to branches will generate Preview Deployments. All changes made to the Production Branch (commonly "main") will result in a Production Deployment.
The supporting repo for this tutorial is available at Github.
Follow this link to see a live demo.
Ecommerce Tutorial Conclusion
The ecommerce space is a highly competitive and complicated industry, and it requires highly dynamic content to scale apps on demand.
With Next.js, ButterCMS, and Snipcart, we can provide a dynamic app that will accommodate large traffic influxes when a product goes viral and offers an intuitive experience for people to buy our products.
In this example, ButterCMS can act as our database to create our products on the fly and deliver them to us via Butter’s Restful API so our Next client-side can consume them.
Snipcart lets us handle the entire checkout process in the browser allowing people to quickly and securely make payments.
By leveraging these tools, we can bring the dynamic experiences needed in the ecommerce world to the static web.
I'd like to know your thoughts and experiences about using Next.js, ButterCMS, and Snipcart to build an ecommerce app in the comments section below.
Resources
- A Next CMS like no other - Butter
- An API First CMS like no other - Butter
- How Snipcart Works - Snipcart
- Build a React Universal Blog with Next.js and ButterCMS - ProgrammableWeb
- Next.js; what is it and why do we use it? - Adam Duncan
- Performance differences in Next.js vs. Create React App - Sean Connolly
- Deploying your Next.js App - Next docs