
In today's digital environment, centralized information storage is essential for individuals and organizations. A knowledge base is a valuable resource with easy access to information, solutions, and answers to specific questions or concerns. It is an intelligent solution designed to store and organize knowledge conveniently. For quick retrieval, files can be easily browsed using categories, tags, and hierarchies. Integrating advanced search features based on keywords or phrases further speeds up the process.
Whether it's a product development company looking to build a self-service library for their customers or a customer support team tired of solving the same old questions and more, a knowledge base is the answer. In this Kotlin tutorial, you will learn how to use the power of Kotlin and ButterCMS to create a Kotlin-enabled application.
Table of contents
Understanding Kotlin
Kotlin is a general-purpose, cross-platform, statically typed programming language with type inference. It is designed to interoperate with Java, and the JVM version of the Template Library is based on the Java Class Library, but the syntax is defined by type inference.
Kotlin is syntactically similar to Java, but there are a few important differences:
-
Coroutines: Kotlin supports coroutines-lightweight threads that can execute code asynchronously. This makes it easier to write efficient and understandable code.
-
Functional programming features: Kotlin supports many functional programming features such as lambdas, higher-order functions, and pattern matching. This allows you to write more content and presentations.
Using Kotlin can offer benefits such as:
-
A concise and expressive syntax that can help reduce the amount of boilerplate code needed.
-
Compatibility with existing Java libraries and frameworks.
-
Improved code safety and fewer runtime errors.
-
Enhanced productivity and faster development times.
Why use ButterCMS?
ButterCMS is a headless content management system that allows developers to easily create and share content on their websites and applications using a RESTful API. The headless approach allows users to manage content easily and efficiently. There are many great reasons to use ButterCMS for your app experience, including:
-
Page types: A page type is the default method when creating a page in ButterCMS. This template has different elements which can contain different types of elements. When creating knowledge base pages, you create templates using page types.
-
Collections: ButterCMS provides a way to store content in ButterCMS, making it easier to process and display data consistently on a website or application. Categorize your knowledge base using the collections feature.
-
WYSIWYG editor: Creating and editing content with ButterCMS is easy with the intuitive WYSIWYG (what you see is what you get) editor. Easily manage and preview content in real-time without coding knowledge.
Kotlin tutorial: Building a knowledge base with Kotlin and ButterCMS
This tutorial will use Kotlin powered by ButterCMS to create a native mobile app. We will also see how to use the collections feature to categorize a knowledge base. Here's a preview of what we're going to create.
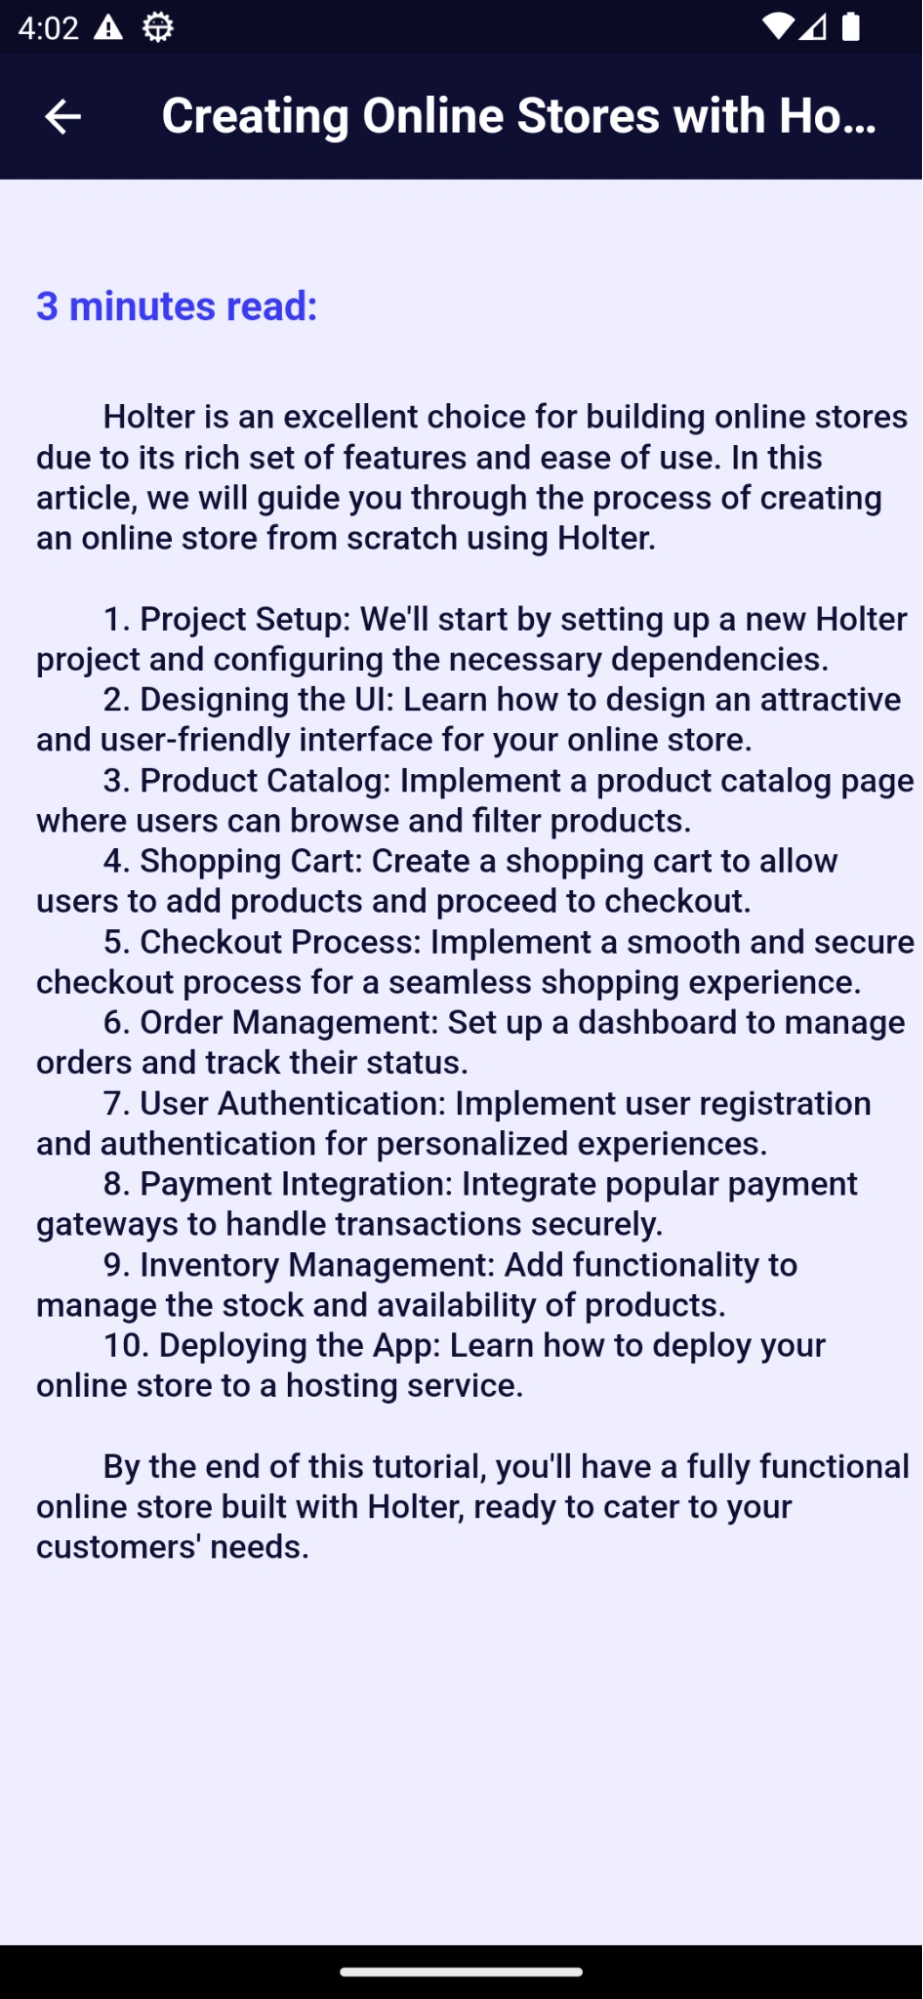
All the code for this tutorial can be found in this GitHub repo.
Tutorial prerequisites
To follow along with this tutorial, you will need the following:
-
A basic understanding of Kotlin and Retrofit
-
ButterCMS account
-
Kotlin and Android Studio installed on your local machine
Configure the knowledge base article page
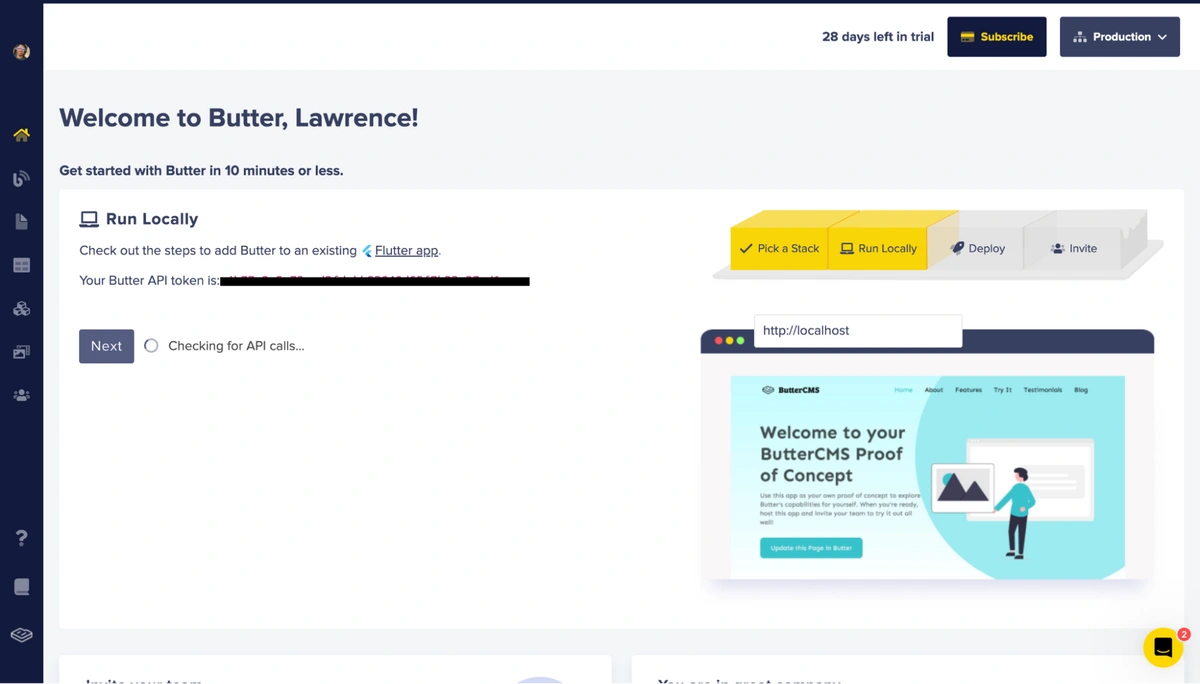
This section will focus on setting up the knowledge base article page. First, create a ButterCMS account. Then, navigate to the ButterCMS dashboard.
To create our article page, we must first categorize our pages using the collections feature. This will allow us to use collections as filterable properties for our pages.
Building the category collection
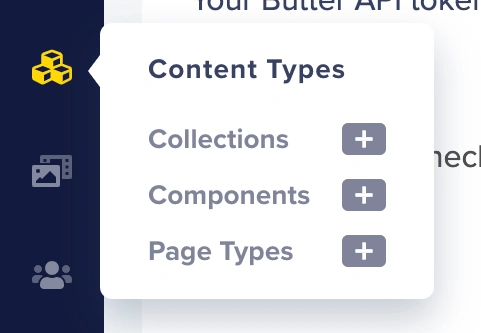
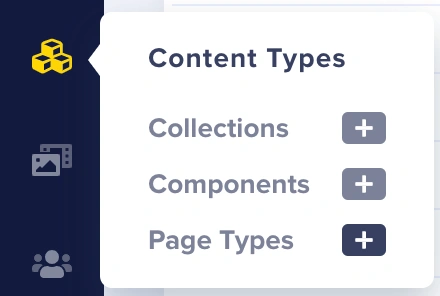
To create a collection, navigate to the New Collection Configuration page by hovering over the Content Types icon on the left sidebar and clicking the "+" icon next to Collections.
Add two fields in the collection configuration page:
-
Short text → “title”
-
Short Text → “slug”
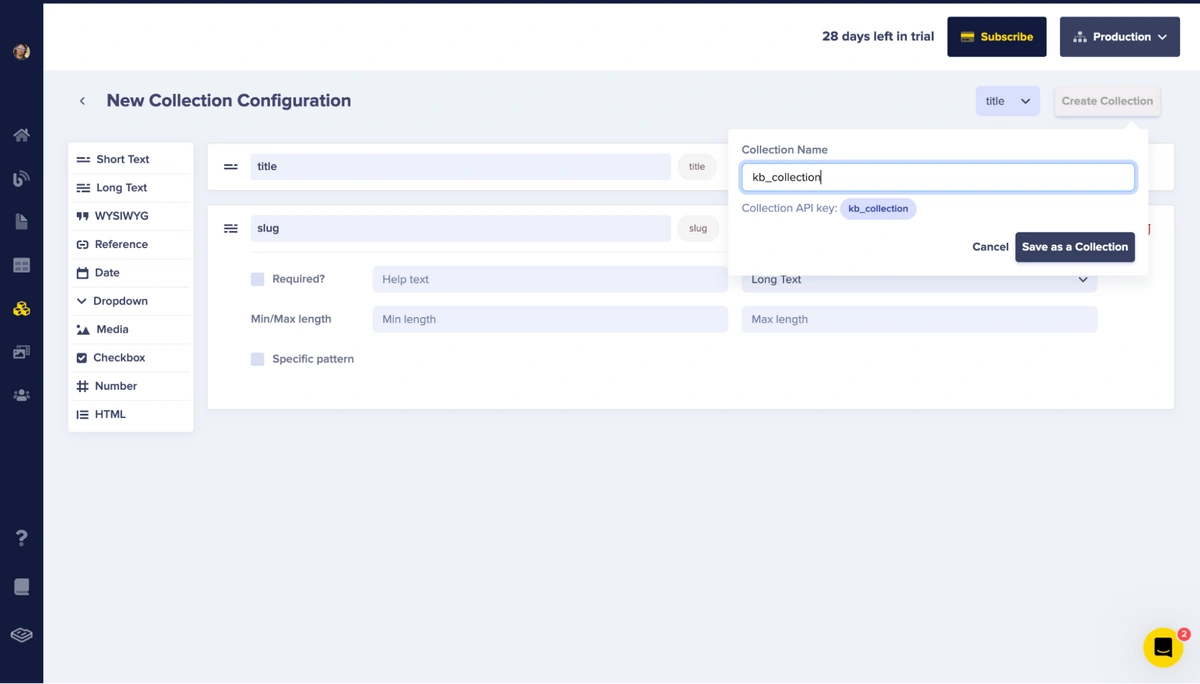
To save this collection, enter kb_collection as the name and click the Save as a Collection button.
Next, we would introduce three sections “Blog, Faq’s, Articles”. For each section, populate the collection with items representing the defined categories by assigning an appropriate name and slug to each item and then clicking the Publish button. This helps in providing clear and concise information about the content focus.
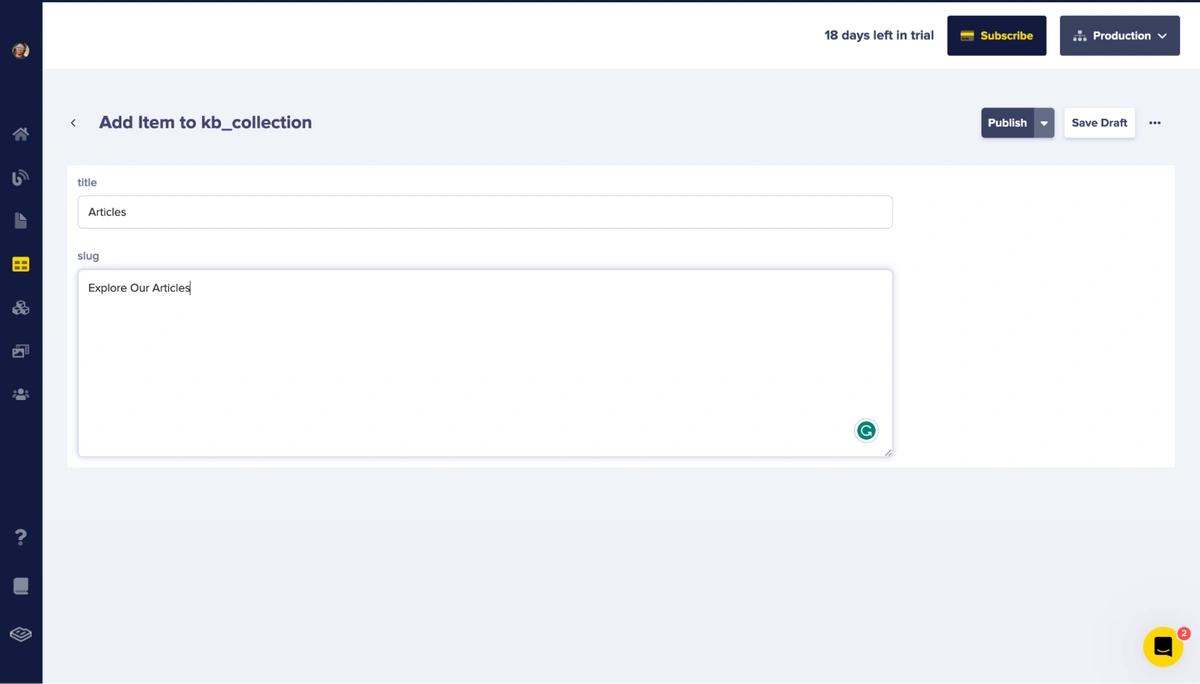
Add an Articles item to the collection

Add a Blog item to the collection
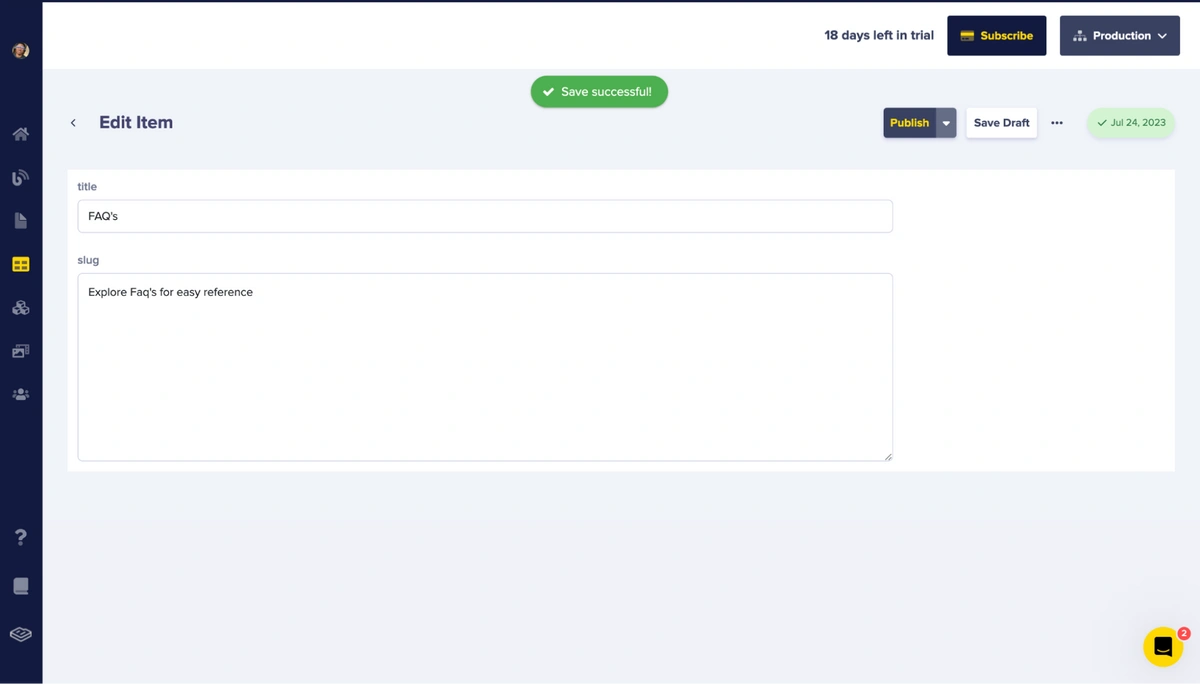
Add FAQ item to the collection
Now, we can build our knowledge base and reference our newly built collections.
Creating the knowledge base article page
Access the Content Types section on the dashboard by hovering over the icon in the image below and select the Page Types option by clicking the "+" symbol.
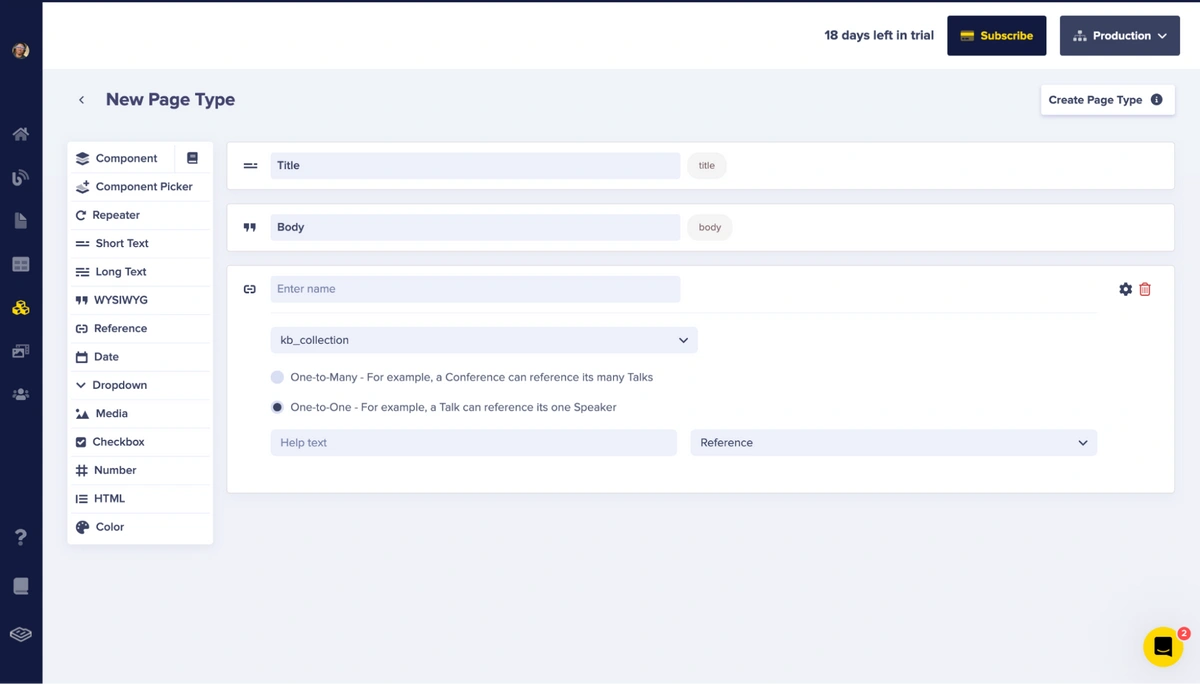
Following that, we’ll be directed to an empty New Page Type page to configure our Knowledge base.
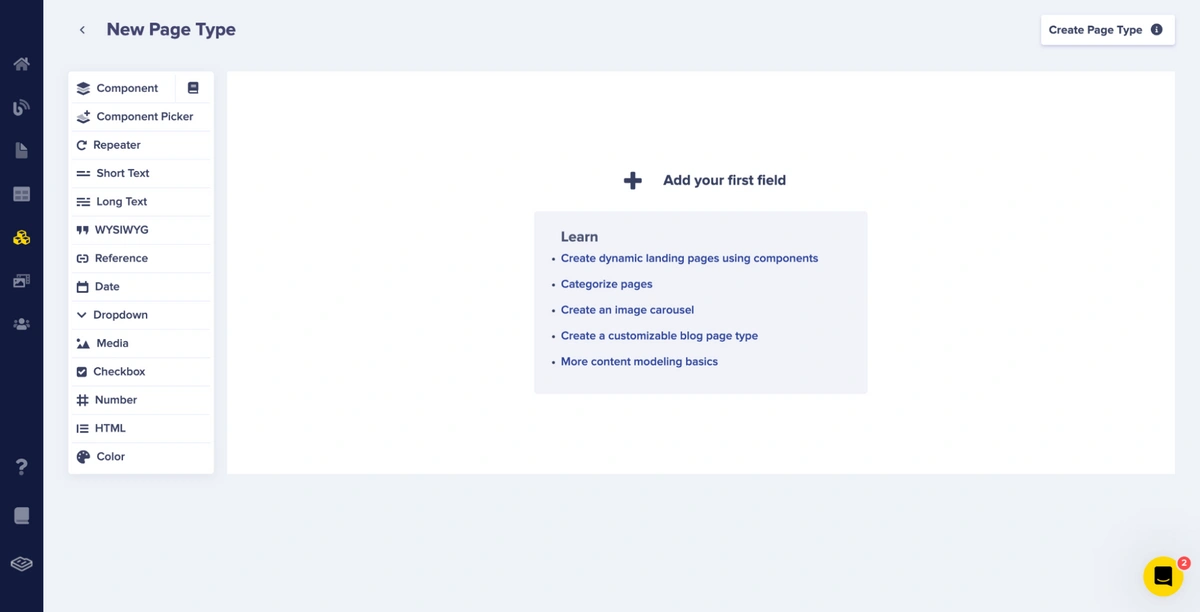
In the page type configuration, add the following fields:
-
Short text => Title
-
WYSIWYG => Body
-
Reference => kb_collection (this references the collections created to help categorize our content)
Here we can create content and refer to our different content types and we created earlier.
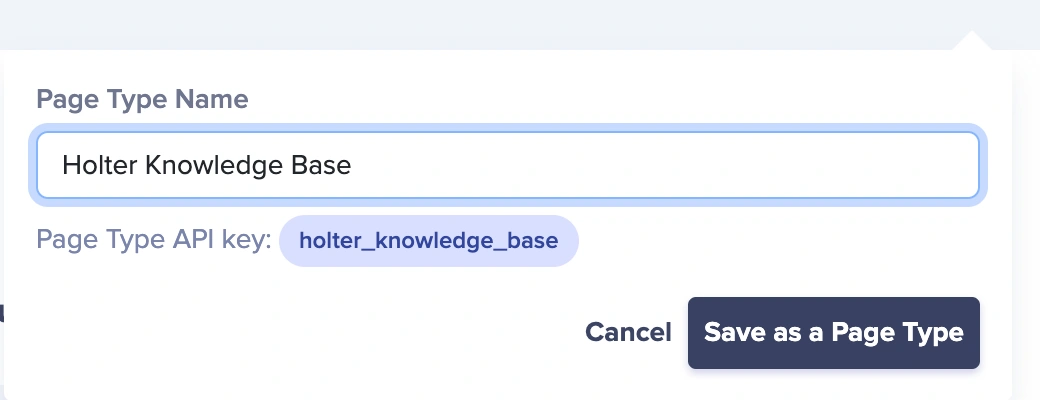
Then save the page type as “Holter Knowledge Base” and click on the Save as a Page Type button.
Our page is now ready for some valuable content. To enhance our user experience, we will address some frequently asked questions.
Creating content using the article page type
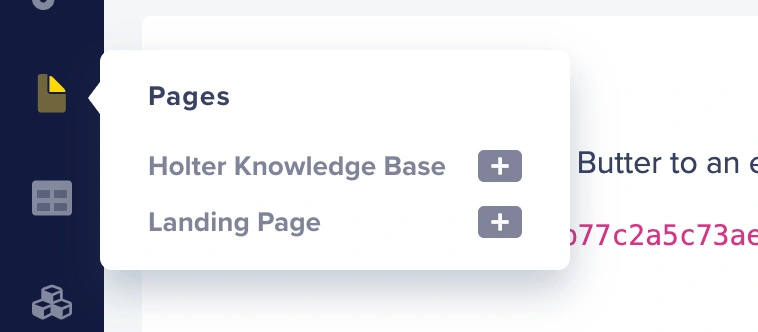
To add content to the newly created page type, hover over the Pages icon at the sidebar and click the “+” button attached.
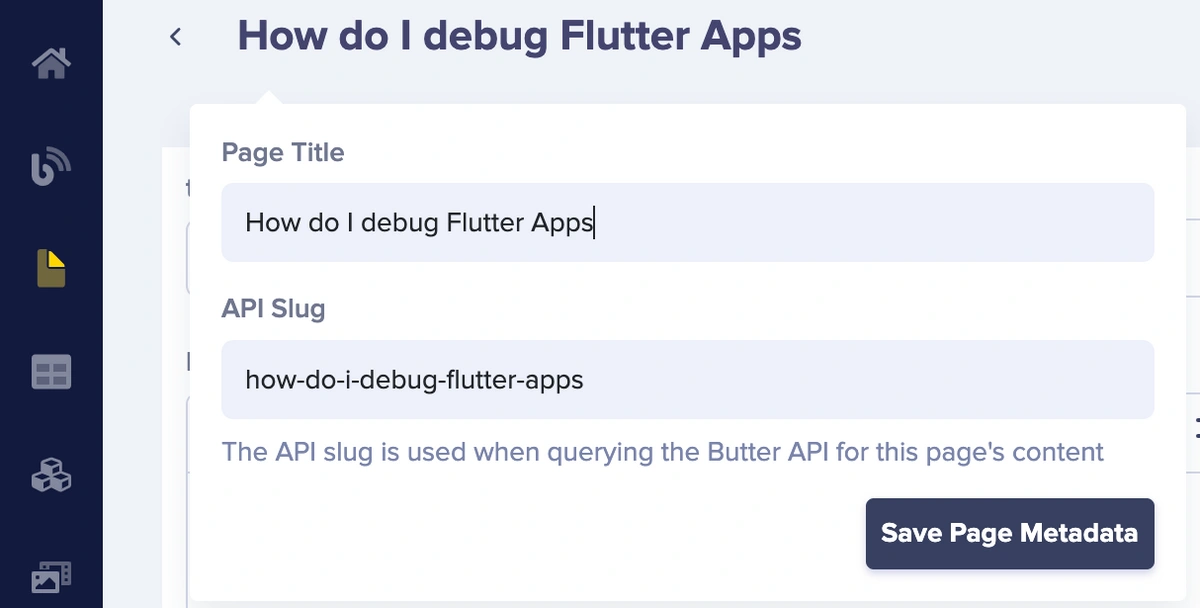
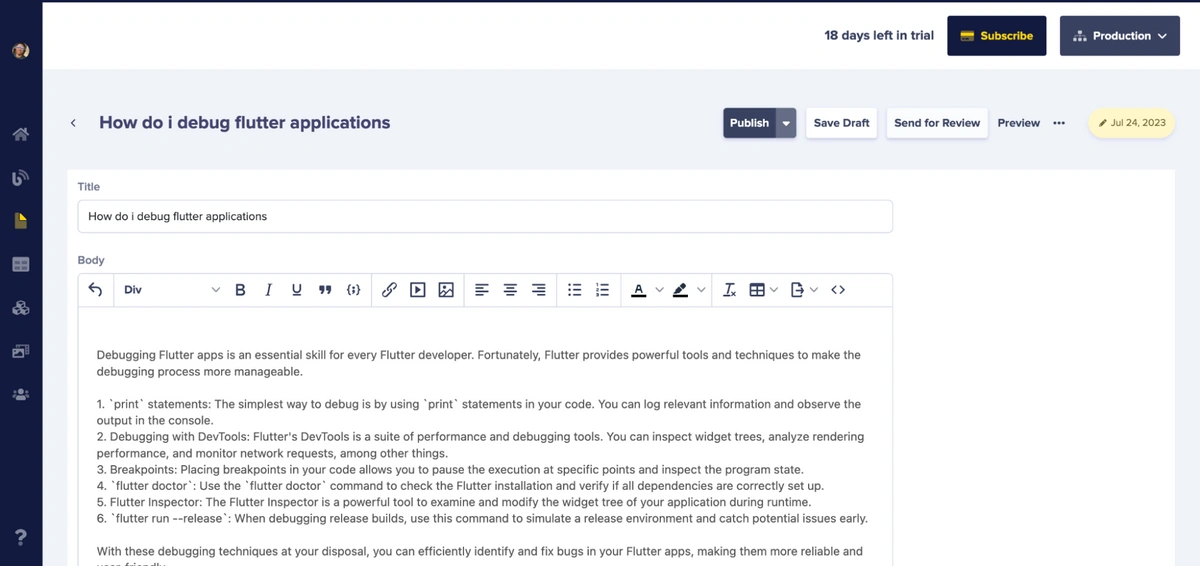
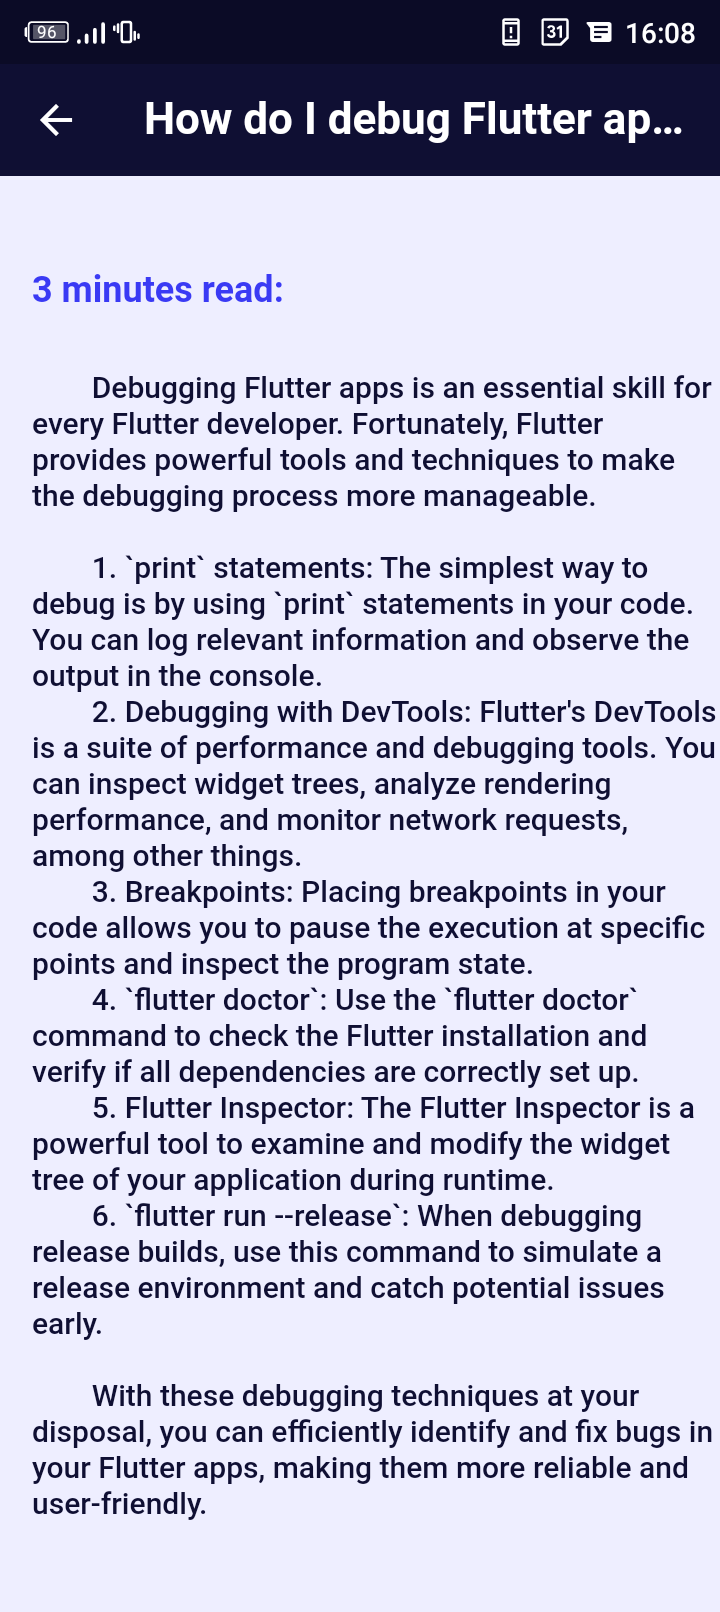
We will be directed to a page where we can easily input all our required content. There, provide the page title “How do I debug Flutter Apps” and API slug “how-do-i-debug-flutter-apps” as metadata, and then click the Save Page Metadata button to save the content and proceed to the text editor.
Next, fill in the different fields with content (corresponding to the title), like so:
To add a reference, click the Add Reference button and select the item we added to our collection earlier. This way, this page will be categorized under the collection.
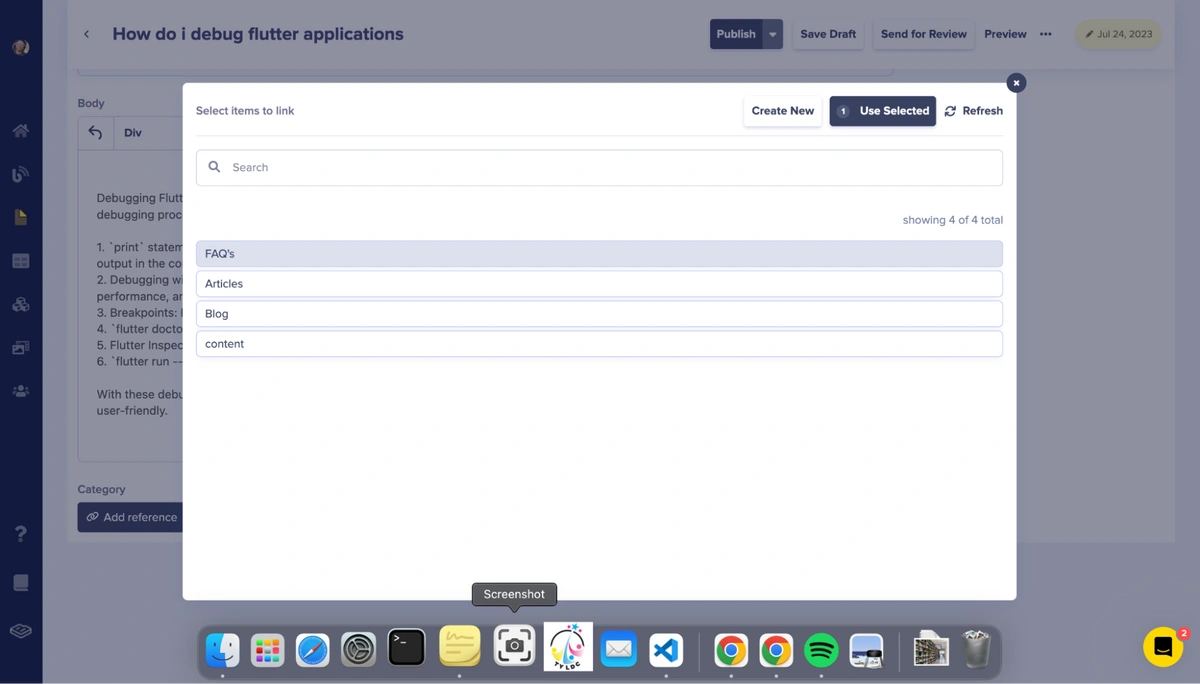
Next, click the Use Selected button, then click the Publish button.
Integrate Kotlin with ButterCMS
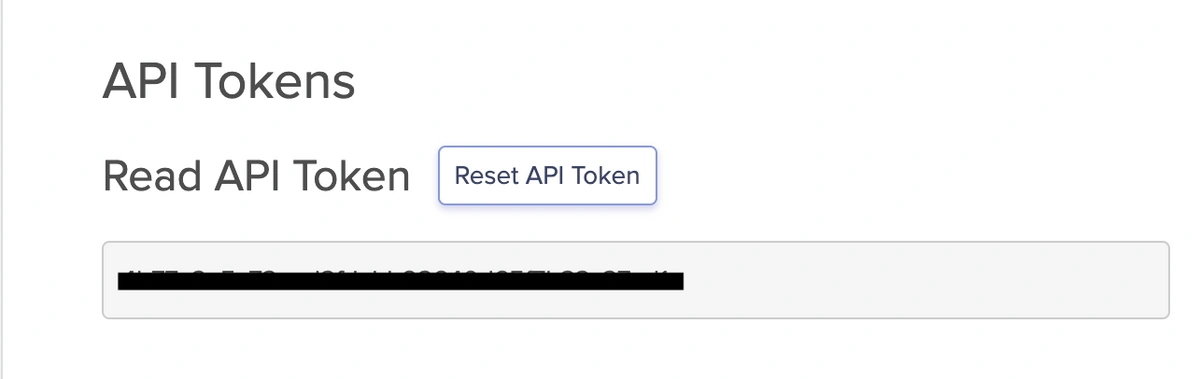
Now, let’s Integrate Kotlin with ButterCMS.Open Android Studio (or any editor you choose) and create a new Kotlin application. Integrating ButterCMS with a Kotlin application requires a secret key that can be retrieved from the ButterCMS dashboard.
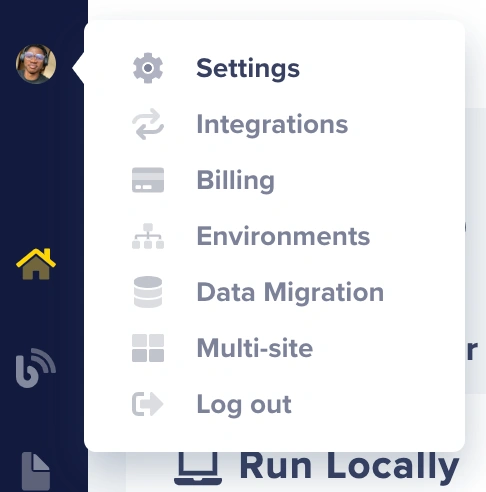
Let's copy the secret key, which we'll use to fetch our data from ButterCMS.
Fetching data from ButterCMS
To make an API call to ButterCMS using Retrofit, we will follow the following steps:
First, add Retrofit and the required dependencies by adding the following code to your application's 'build.gradle' level.
use 'com.squareup.retrofit2:retrofit:2.9.0'
use 'com.squareup.retrofit2:converter-gson:2.9.0'
Second, define the data structure corresponding to the API response we expect from ButterCMS, like this:
data class BlogPost (
    val id: string,
    val title: string,
    val content: string,
    // Add other elements if necessary.
)
Next, create an interface that represents the API endpoint. Define the requirements for receiving data from ButterCMS, like so:
interface ButterCmsApiService {
    @GET(“-YOUR ENDPOINT-”)
    suspend fun getBlogPosts(
      @Query("auth_token") authToken: String,
      ): Response <List<BlogPost>>
}
Next, create a Retrofit instance and configure it with the ButterCMS base URL.
val authToken = "your_auth_token"
val retrofit = Retrofit.Builder()
    .baseUrl("https://api.buttercms.com/v2/")
    .addConverterFactory(GsonConverterFactory.create())
    .construire()

val butterCmsApiService = rénovation. créer (ButterCmsApiService :: class. java)
Fifth, make the API call using the defined methods in the 'ButterCmsApiService' interface. Retrofit supports operations, allowing the use of the 'suspend' function for asynchronous requests. For example, to take the blog post:
try power {
    Response value = ButterCmsApiService.getBlogPosts(authToken)
    if (response. isSuccessful) {
        val blogPosts = field. body()
        // manage blog posts
    } other {
        // handle API errors
    }
} catch (e: exception) {
    // touch network or other exceptions
}
Lastly, Implement the appropriate error and data handling logic based on your application code.
You must also include an API key to access the ButterCMS API with the ButterCMS file for authentication.
Take note if using a Gson converter for JSON serialization and deserialization. If you need a different JSON converter library or format, replace 'GsonConverterFactory.create()' with the appropriate converter factory.
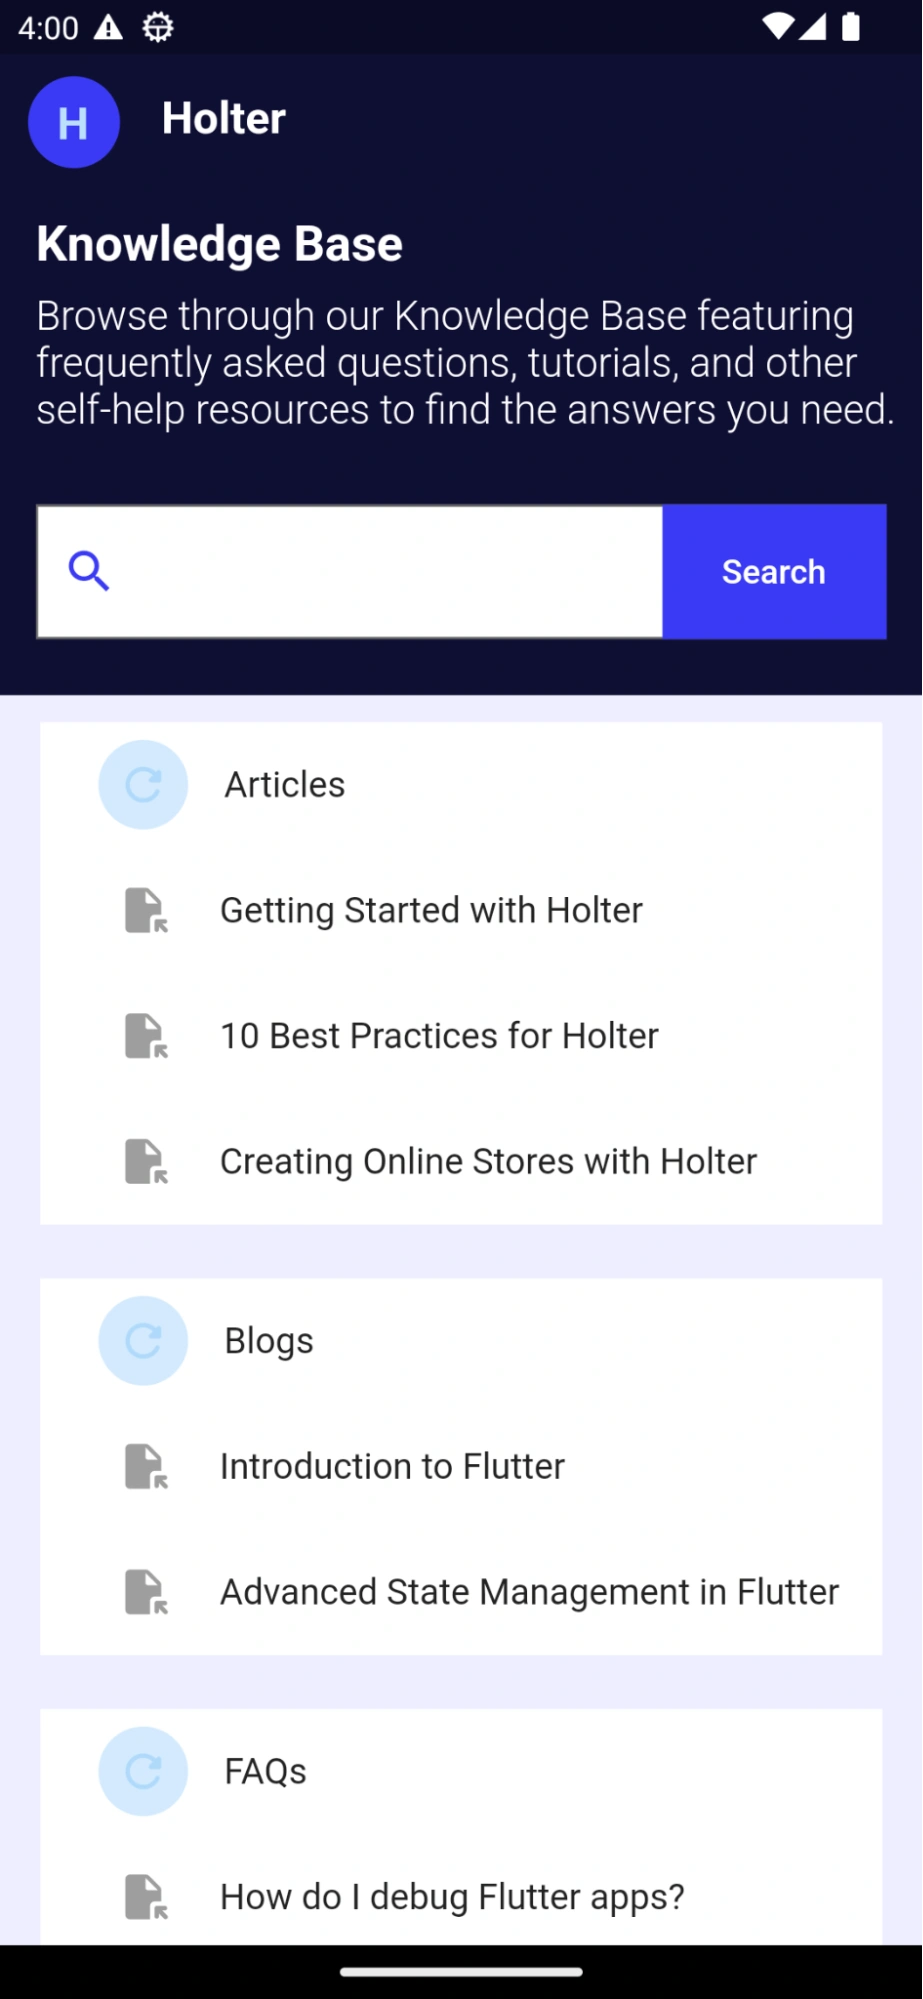
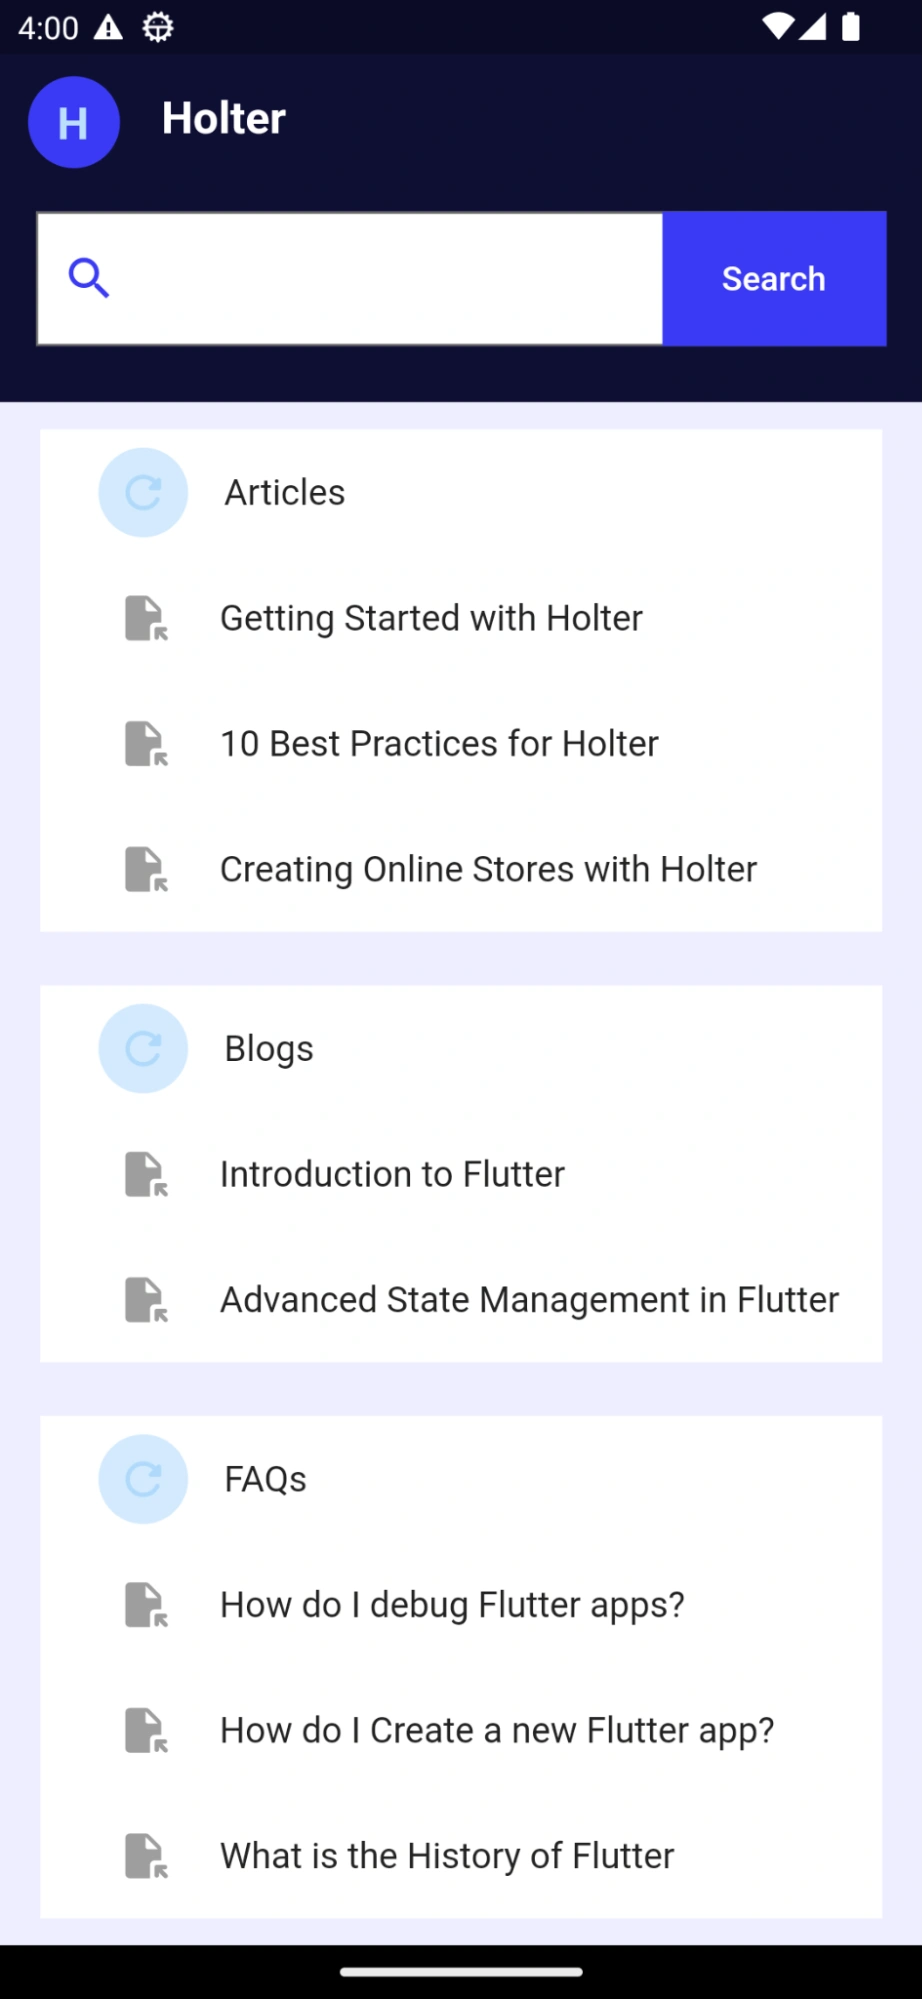
Home page
- Objective: The objective of this section is to retrieve our content from Butter and display it on a homepage we’d be creating for our Android application. The content would be presented using the Jetpack Compose UI toolkit.
- Function Components: The code defines several composable functions, which are the building blocks of the UI in Jetpack Compose:
- HomePage: This is the main composable function that represents the home page. It is responsible for setting up the page's overall layout using the
Scaffoldcomponent, which provides a basic structure with a top app bar and content area. The content area contains a column with the page title, a search fieldSearchField, and a list viewListView. - AppBar: This composable function represents the top app bar. It uses the
TopAppBarcomponent from the Material Design library and displays the title "My App" in the app bar. - SearchField: This composable function represents the search field where users can input their search query. It uses the
TextFieldcomponent from Compose and fills the maximum available width. - ListView: This composable function represents the list view. It uses the
LazyColumncomponent, which efficiently loads and displays only the visible items on the screen. The list view displays three items: "Article," "Blog," and "FAQ," using theListItemcomposable for each item. - ListItem: This composable function represents an individual item in the list. Each item is displayed as a
Cardwith a text label showing the type of content ("Article," "Blog," or “FAQ").
- HomePage: This is the main composable function that represents the home page. It is responsible for setting up the page's overall layout using the
- UI Customization: The UI is customized using various modifiers provided by Jetpack Compose. For example:
- The home page's background is set to blue with the help of the
.background(Color.Blue)modifier. - Padding is added around the entire column using the
.padding(16.dp)modifier. - The elevation of the
Cardcomponents is set to create a subtle shadow effect. - Spacers are used to add vertical gaps between different UI elements, creating proper spacing and layout.
- The home page's background is set to blue with the help of the
- Preview Function: The
@Previewannotation is used to create a preview of the HomePage composable, allowing developers to see how the UI will look while designing and developing the application. This code creates a basic home page for the Android application using Jetpack Compose. The page has a top app bar, a search field, and a list of content items. The retrieval and display functionality of the search fields are not implemented yet (marked as "TODO" in the SearchField), we’d cover this later in this tutorial.
import androidx.compose.foundation.background
import androidx.compose.foundation.layout.*
import androidx.compose.foundation.lazy.LazyColumn
import androidx.compose.foundation.lazy.items
import androidx.compose.material.*
import androidx.compose.runtime.Composable
import androidx.compose.ui.Modifier
import androidx.compose.ui.graphics.Color
import androidx.compose.ui.tooling.preview.Preview
import androidx.compose.ui.unit.dp

@Composable
fun HomePage() {
    val searchQuery = remember { mutableStateOf("") }

    Scaffold(
        topBar = {
            AppBar()
        },
        content = {
            Column(
                modifier = Modifier
                    .fillMaxSize()
                    .background(Color.Blue)
                    .padding(16.dp)
            ) {
                Text(
                    text = "Browse through our Knowledge Base featuring frequently asked questions, tutorials, and other self-help resources to find the answers you need.",
                    style = MaterialTheme.typography.h4,
                    color = Color.White
                )
                Spacer(modifier = Modifier.height(16.dp))
                SearchField()
                Spacer(modifier = Modifier.height(16.dp))
                ListView()
            }
        }
    )
}

@Composable
fun AppBar() {
    TopAppBar(
        title = {
            Text(text = "Holter")
        }
    )
}

@Composable
fun SearchField() {
    TextField(
        value = "",
        onValueChange = { /* TODO: Implement search functionality */ },
        label = { Text(text = "Search") },
        modifier = Modifier.fillMaxWidth()
    )
}

@Composable
fun ListView() {
    LazyColumn {
        items(listOf("Article", "Blog", "FAQ")) { item ->
            ListItem(item)
        }
    }
}

@Composable
fun ListItem(text: String) {
    Card(
        modifier = Modifier
            .fillMaxWidth()
            .padding(vertical = 8.dp),
        elevation = 4.dp
    ) {
        Text(
            text = text,
            modifier = Modifier.padding(16.dp),
            style = MaterialTheme.typography.body1
        )
    }
}

@Preview
@Composable
fun PreviewHomePage() {
    HomePage()
}
You can go ahead to add more content and give them their different categories to create a vast Knowledge base.
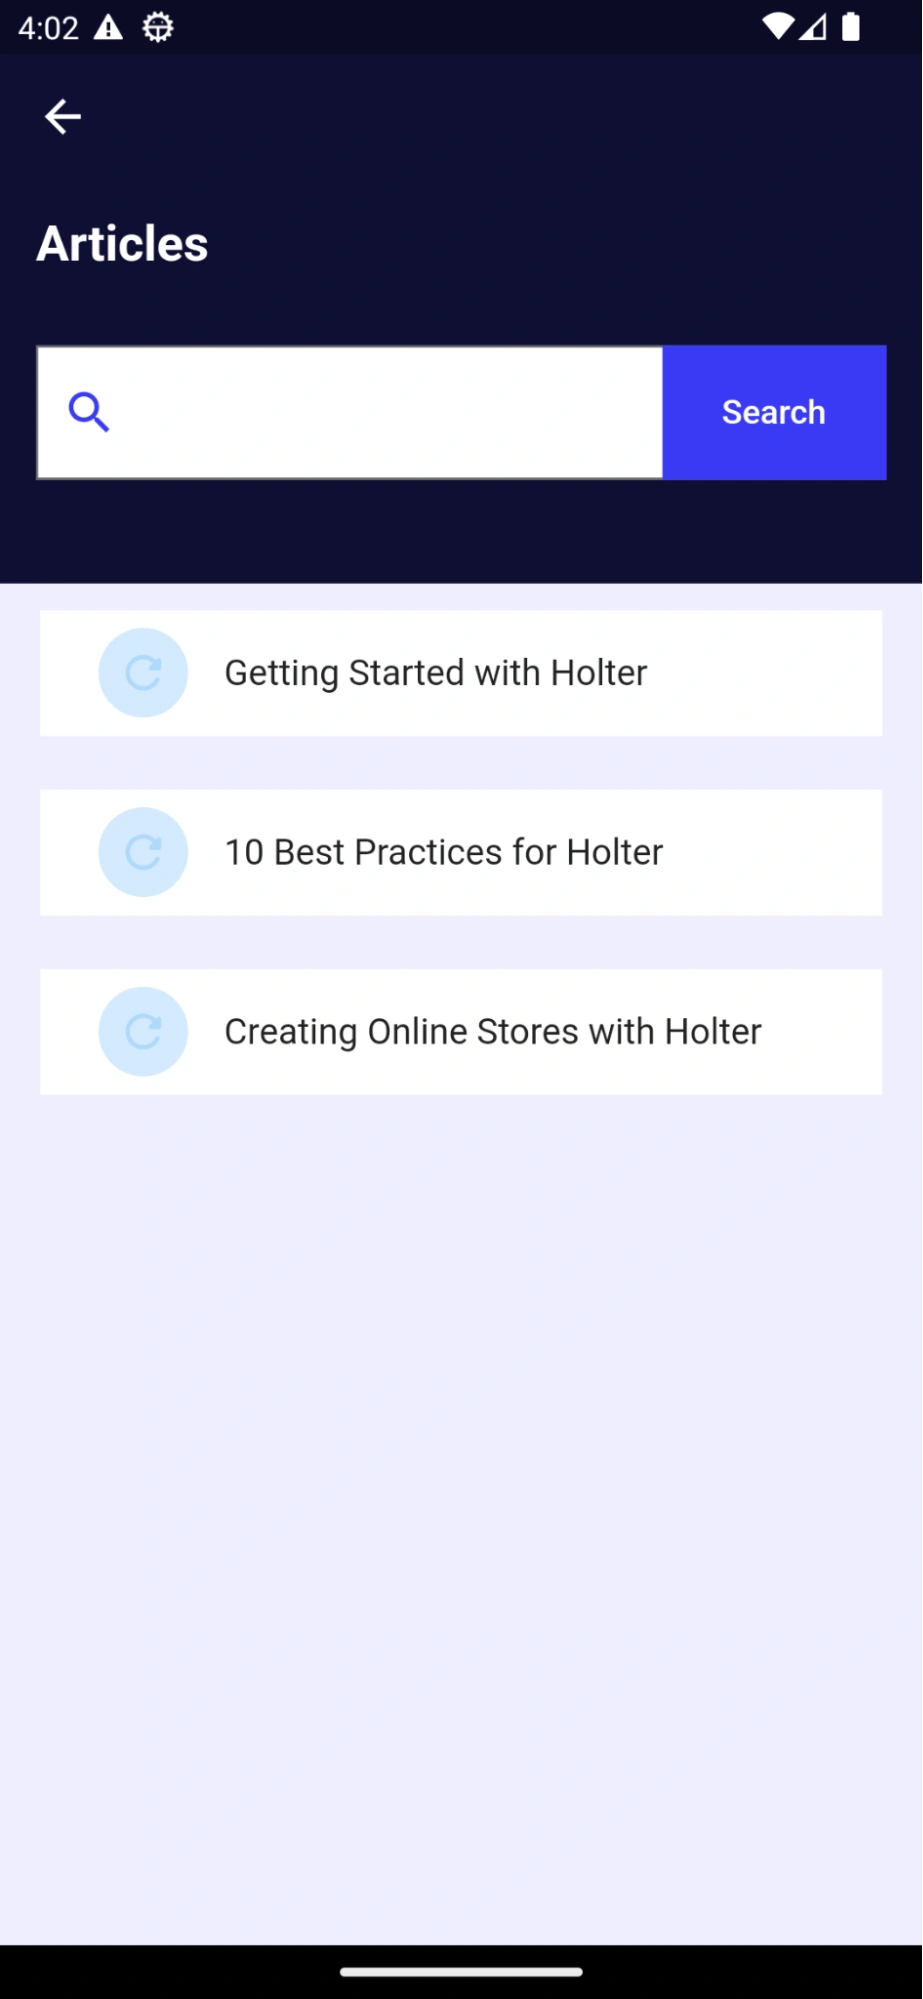
Details page
On the home page, when we click on a FAQs card, we need to be redirected to a separate page to view all the post's details, such as the body. Therefore, we will establish another route that accepts parameters to achieve this.
Let's head over and update it by adding the following code:
@Composable
fun ShowDetailView(itemId: String) {
    val selectedItem = remember { mutableStateOf(itemId) }

    Column(
        modifier = Modifier
            .fillMaxSize()
            .background(Color.White)
            .padding(16.dp)
    ) {
        Text(
            text = "Detail View",
            style = MaterialTheme.typography.h4,
            color = Color.Black
        )
        Spacer(modifier = Modifier.height(16.dp))
        Text(
            text = "${time} minutes read",
            style = MaterialTheme.typography.h4,
            color = Color.Black
        )
        Spacer(modifier = Modifier.height(16.dp))
        Text(
            text = "Selected Item: ${selectedItem.value}",
            style = MaterialTheme.typography.body1,
            color = Color.Black
        )
    }
}
Adding filtering functionality
To add the filtering functionality, we need to create a new route that accepts parameters to view FAQ posts associated with the selected option from the search field.
interface ButterCmsApiService {
    // Existing method for getting blog posts
     @GET(“-YOUR ENDPOINT-”)
    suspend fun getBlogPosts(
      @Query("auth_token") authToken: String,
      ): Response <List<BlogPost>>

    // New method for searching blog posts
    @Post(“pages/drop_knowledge_base/”)
    suspend fun searchBlogPosts(
        @Query("auth_token") authToken: String,
        @Query("fields.category.slug") query: String,
          ): Response<List<BlogPost>>
}
To use this search method, we provide the authentication token and search query when making the API call. Here's how you should search for blog posts. We’ll reference “searchQuery” which we created earlier.
val retrofit = Retrofit.Builder()
    .baseUrl("https://api.buttercms.com/v2/")
    .addConverterFactory(GsonConverterFactory.create())
    .build()

val butterCmsApiService = retrofit.create(ButterCmsApiService::class.java)

val authToken = "your_auth_token"

try {
    val response = butterCmsApiService.searchBlogPosts(authToken, searchQuery)
    if (response.isSuccessful) {
        val blogPosts = response.body()
        // Process the search results (blog posts)
    } else {
        // Handle API error
    }
} catch (e: Exception) {
    // Handle network or other exceptions
}
Now, we’ll update the UI to show queried data
@Composable
fun HomePage() {
    // Create a mutable state to hold the search query
    val searchQuery = remember { mutableStateOf("") }

    Scaffold(
        topBar = {
            AppBar()
        },
        content = {
            Column(
                modifier = Modifier
                    .fillMaxSize()
                    .background(Color.Blue)
                    .padding(16.dp)
            ) {
                Text(
                    text = "Welcome to the Home Page",
                    style = MaterialTheme.typography.h4,
                    color = Color.White
                )
                Spacer(modifier = Modifier.height(16.dp))
                // Pass the searchQuery value and onValueChange callback to the SearchField
                SearchField(searchQuery.value, onValueChange = { newValue ->
                    searchQuery.value = newValue
                })
                Spacer(modifier = Modifier.height(16.dp))
                ListView(searchQuery.value, onItemClick = { selectedItemId ->
                    // Open the detail view for the selected item
                    ShowDetailView(selectedItemId)
                })
            }
        }
    )
}

@Composable
fun SearchField(query: String, onValueChange: (String) -> Unit) {
    TextField(
        value = query,
        onValueChange = onValueChange,
        label = { Text(text = "Search") },
        modifier = Modifier.fillMaxWidth()
    )
}
That’s it!
Your basic knowledge base application has been completed.
If you want more content, you must return to your ButterCMS console and create more pages with different scopes.
Congratulations on making it to the end of this Kotlin tutorial!
Final thoughts
In summary, Kotlin and ButterCMS are powerful tools for building modern, dynamic applications, and this tutorial has shown how they can work together to create a seamless content management experience. By leveraging the strengths of Kotlin and ButterCMS, you can create applications that are easy to build, maintain, and scale.
Overall, this tutorial has only scratched the surface of what Kotlin and ButterCMS can do. We encourage you to continue learning about both topics and exploring how they can be used to create powerful, dynamic applications.

