

Over the last two decades, blogging has become an indispensable marketing tool companies use to engage with and stay connected to their target audience.
Leveraging this tool, companies can improve their brand visibility, drive website traffic, generate leads, and establish themselves as an authority in a particular industry.
In this article, we will discuss how you can set up a blog using Swift and ButterCMS so you can start writing captivating articles to help boost your sales.
Table of contents
Why use Swift and ButterCMS?
Swift is a high-level general-purpose language for all Apple platforms. Swift was made with the intention to replace Objective-C, Apple’s legacy language, and it has grown to be the most preferred language among Apple developers because of its safety and expressive syntax.
Meanwhile, ButterCMS is a headless content management system (CMS) that provides a simplified way for developers to integrate and manage content within their applications or websites. It offers a headless CMS approach, meaning it focuses solely on managing content and provides APIs for developers to retrieve and display that content in their applications.
Swift and ButterCMS, when used together, make the best combination for an exceptionally dynamic blog. Here is how they work together:
-
Content manager: ButterCMS serves as the content backend for the blog application. This allows content creators to create, update, delete, and organize content without needing to know the underlying technical aspects.
-
API integration: ButterCMS provides a REST API that allows developers to fetch content (such as blog posts, tags, and categories) and integrate them into their Swift application directly. With the Swift SDK, it is even easier to use the ButterCMS API.
-
Real-time updates: Since ButterCMS is a cloud-based technology, every change made and published instantly reflects on the Swift application without any need for redeployments. This ensures that our Swift blog has the most up-to-date content.
-
Performance: Swift’s speed and efficiency play a major role in the performance of the application. With optimized Swift code, the blog will be responsive to requests and deliver a good user experience.
-
Scalability: ButterCMS’ infrastructure allows the blog to scale seamlessly without much effort, while Swift handles the smooth interactions and handles the fetching of content from ButterCMS as traffic continues to grow.
Tutorial prerequisites
To follow along with this tutorial, you need the following:
-
Knowledge of Swift
-
A ButterCMS account (if you don’t already have one)
-
Vapor Toolbox (CLI)

Swift tutorial: Building a blog from scratch with ButterCMS and Swift
To kick off this tutorial, we need to set up ButterCMS using pages and page types to create the underlying structure of our blog website, after which we can start creating our content. We can start integrating these into our Swift blog once these tasks are done.
Here is what our blog website should look like once we are done:
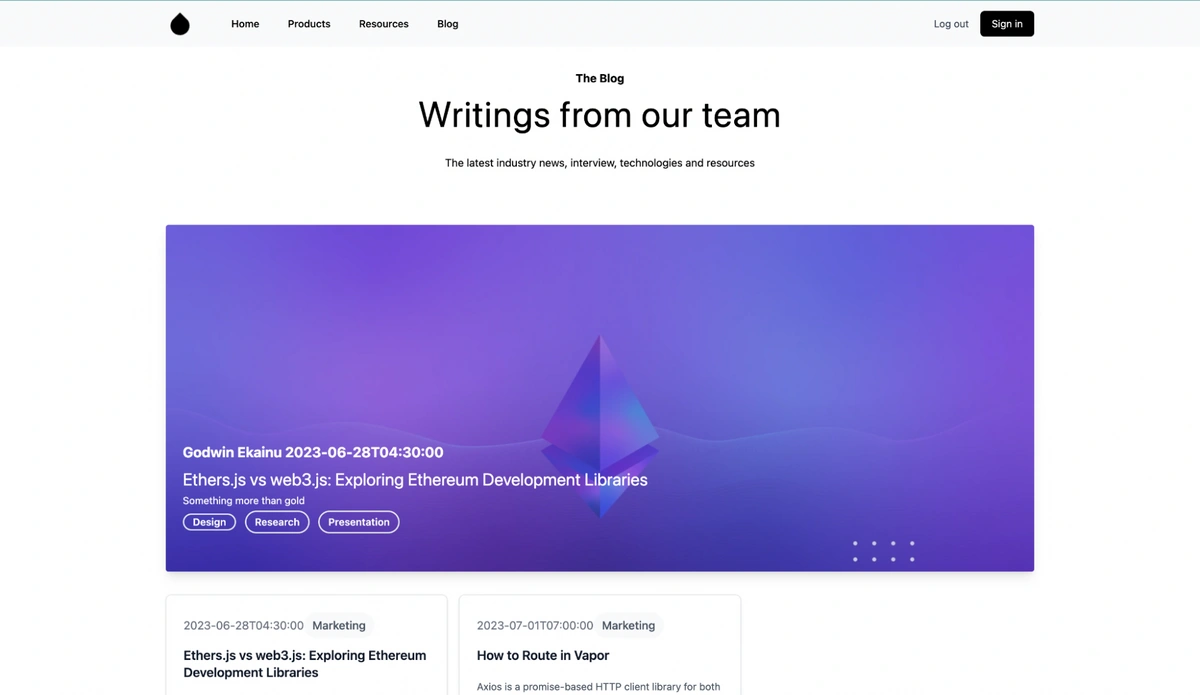
To set up our website, we have two main pages: a landing page and a blog page. These two main pages will be page types. All the code for this tutorial can be found in this GitHub repo.
Creating the Blog page type
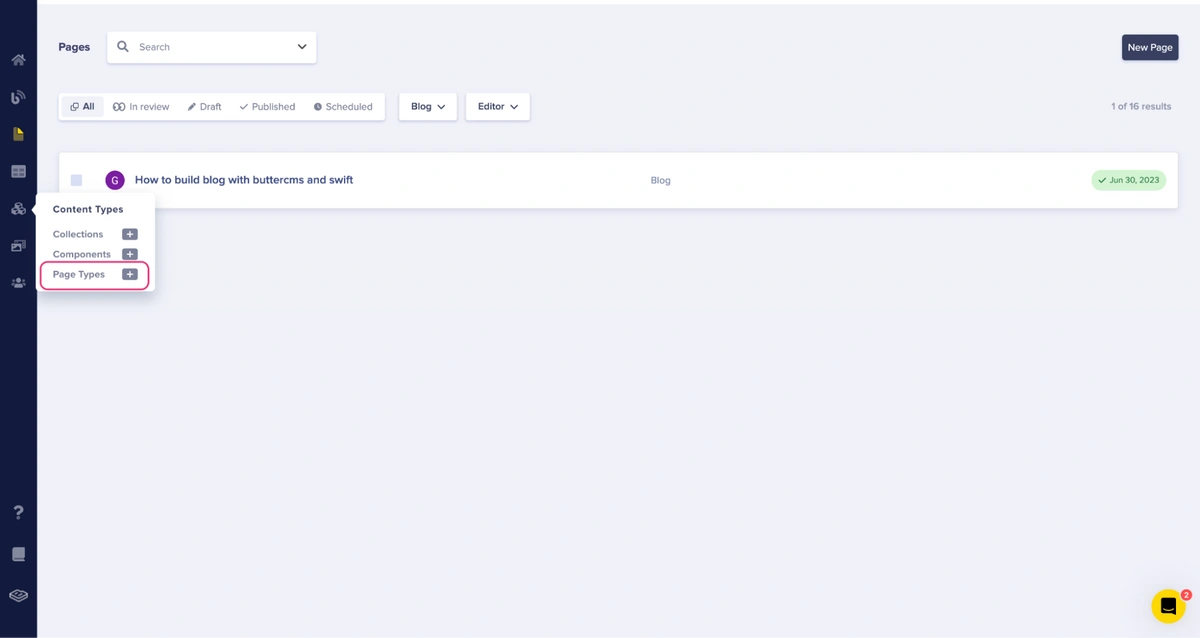
To create a page type, on the ButterCMS left-side navigation bar, hover over the Content Types button and click on Page Types. See the image below:
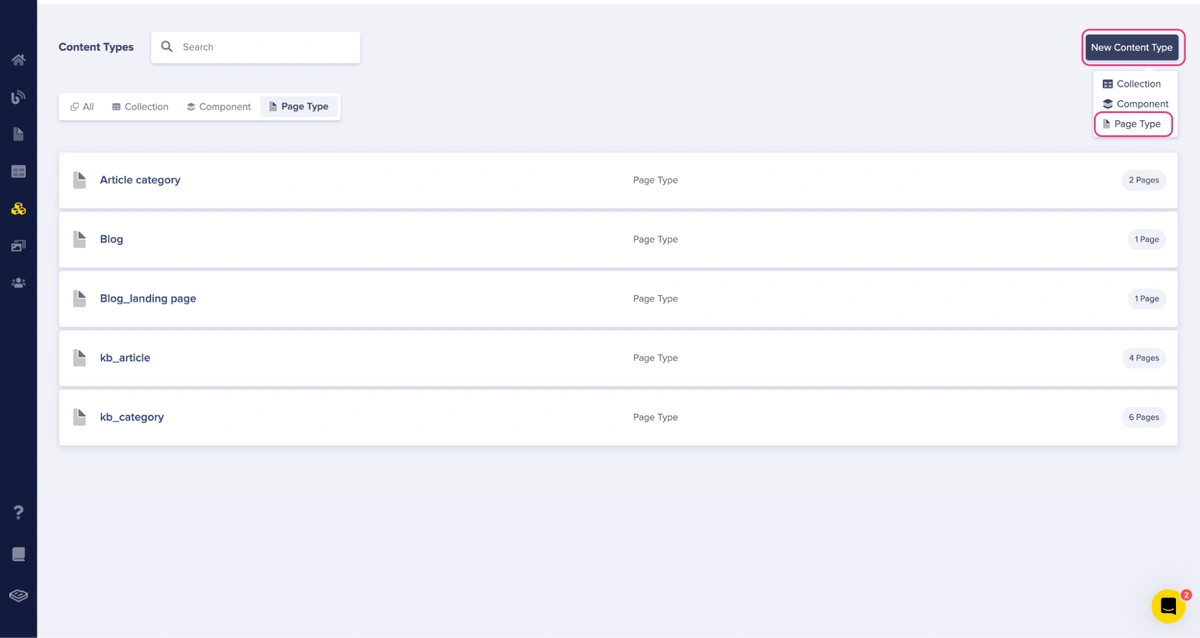
To start creating a page type quickly, click the Plus (+) button in front of the Page Type content type or click.
An alternative is to click on Page Type entirely. Click on the New Content Type and choose the content type of Page Type. See the image below:
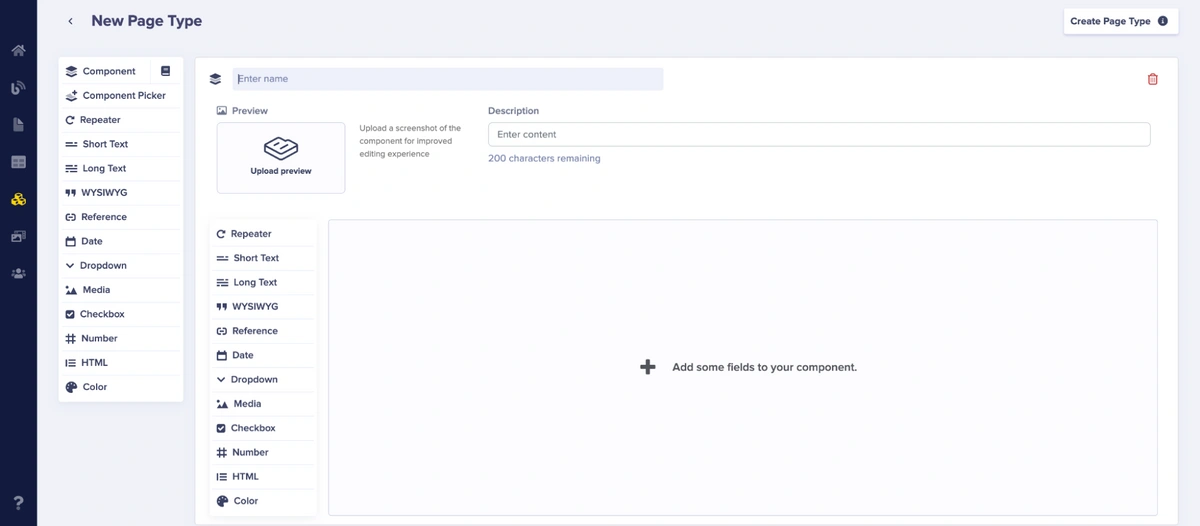
You should see a new page like the image below after clicking Page Type:
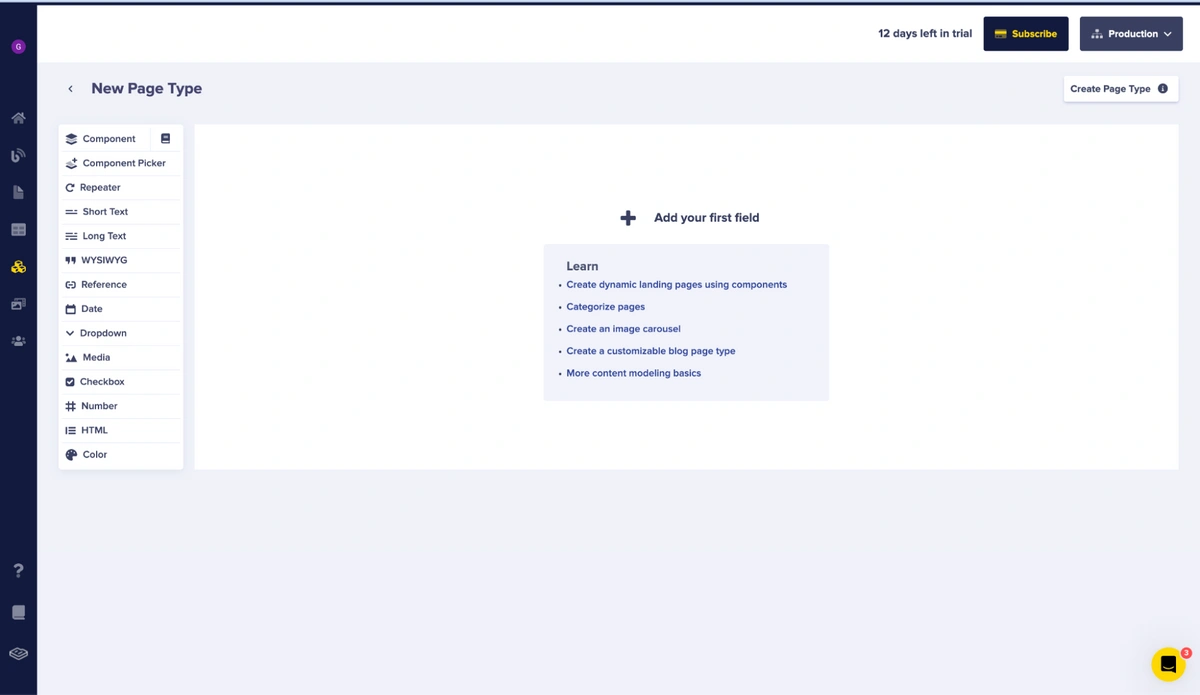
To create this page type, we need to add fields. We will be adding the following fields types and their names:
-
WYSIWYG: content
-
Short text: title
-
Long text: author_details
-
Date: published_date
-
Short text: slug
-
Image: featured_photo
-
Short text: featured_alt_text
-
Long text: summary
After creating your fields, click the Create Page Type button at the top right of your screen and give it the name Blog and click Save.
It should look like the image below:
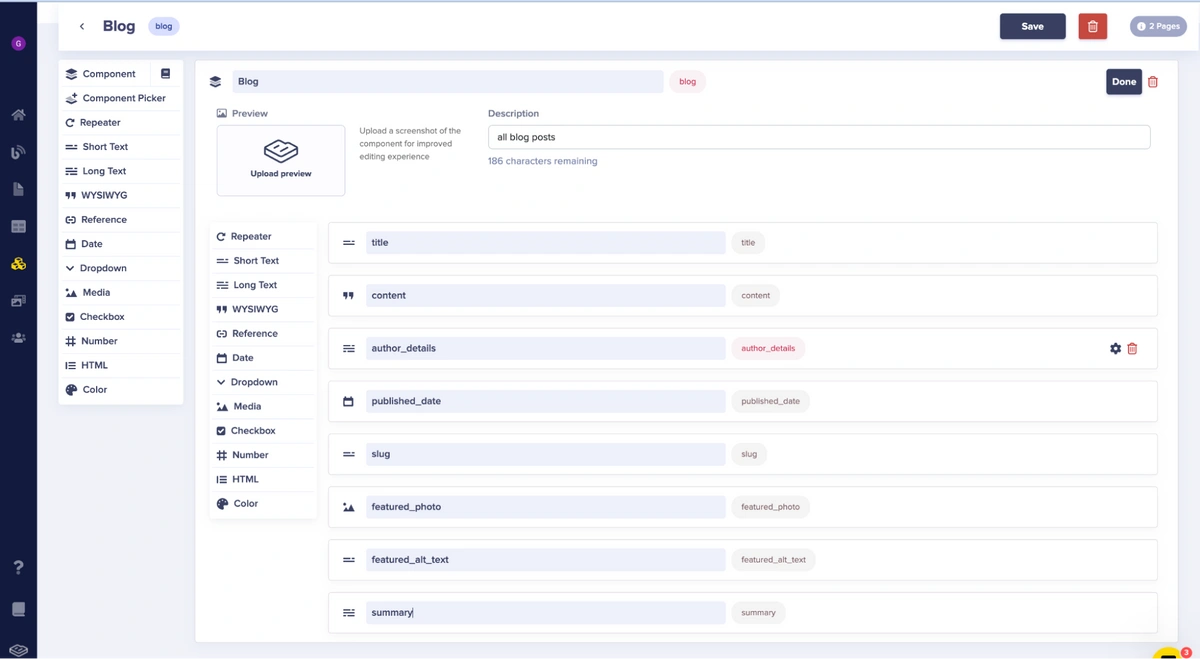
Please note that in the image below all the fields below were added to a component named blog and that this is not necessary. You can also just add fields to the schema without putting them in a component.
To ensure that blog posts, such as featured and recent articles, are properly displayed on the home page, it is logical to create the Blog page type beforehand. By referencing the Blog page type in our blog landing page, we can effortlessly showcase blog posts on our blog home page.
Creating the blog landing page
When trying to create a landing page, it is important to take into consideration how your website’s landing page is structured. This will give you a better idea of how to create your page type schema so it renders like you want.
In this tutorial, after the header, the next thing we have to display is the headline text and a featured article. Just below that, we will add some recently added blog posts.
So, let’s create a new page type called Blog landing page. This will serve as our blog homepage. To create our Blog landing page, go to your ButterCMS navigation, and select Content Types. You will then be directed to your Content Types dashboard. From there, click the New Content Type button, and then select Page Type from the drop-down menu.
After selecting Page Type you will land on the New Page Type configuration page where we will construct our landing page schema.
To create this page type, we will make our hero section a component so we can separate other sections of the landing page.
To do this, click the Component field. After clicking the Component field, you should see the New Component page. See the image below:
Enter the name Hero Section as the component name. You can optionally add a description and an image to uniquely identify a particular component if you intend to have more.
Inside our component, we will add a long text field for our headline:
-
Long Text: headline
After our headline, there is a featured article section where a featured post is displayed. To do this, we need to utilize a reference field to link the Blog page type and retrieve the necessary articles for these sections.
Click the Reference field type and give it the name Recent_blogs. See the image below:
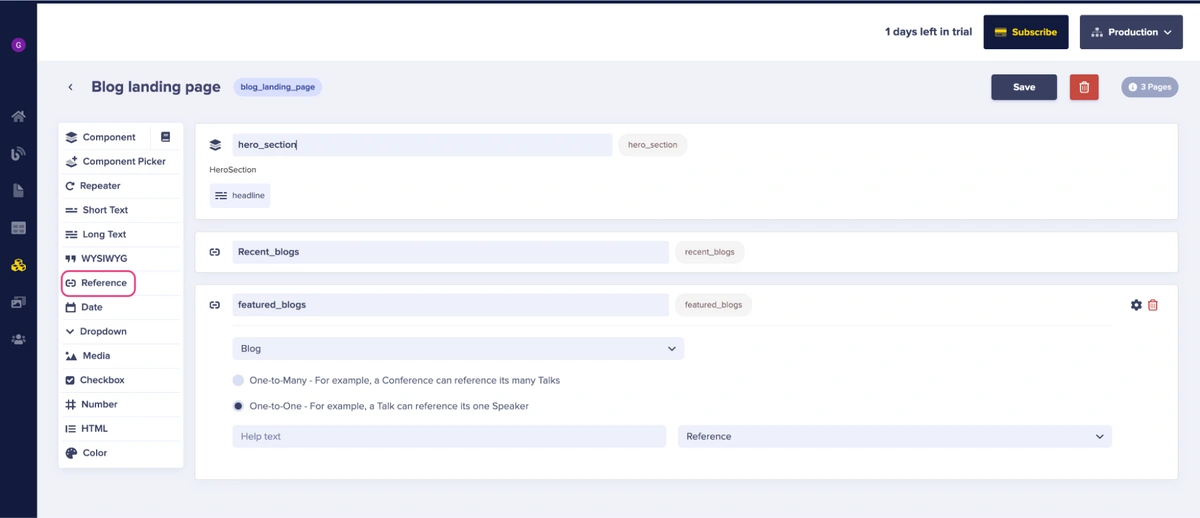
Right under the name field is a dropdown list button where you need to choose which page type you want to reference. Choose the Blog page type and choose One-to-Many as the relationship. See the image below:

Next, add a second reference field and give it the name featured_blogs. Select Blog as its reference and One-to-One as the relationship, as there can be only one featured article.
Creating a blog post using the blog page type
We are creating this now because we will make a reference to it for our home page.
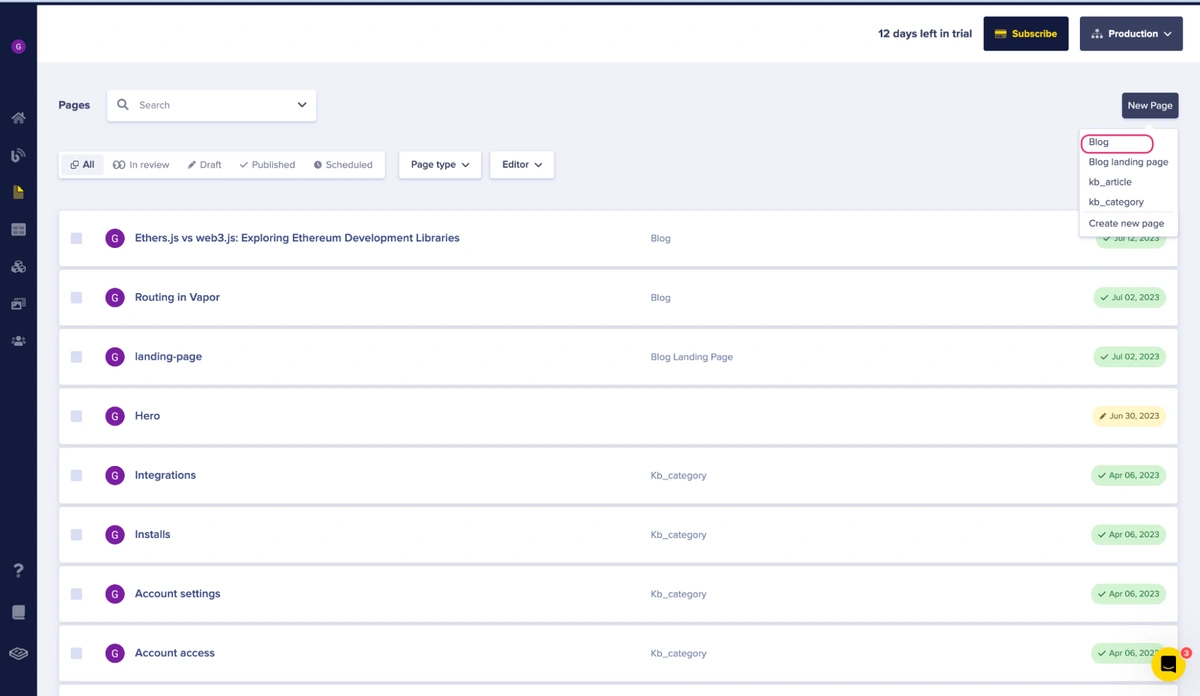
To create a blog post, go to your navigation pane and click on Pages. Next, click on the New Page button at the top-right corner of your screen. See the image below:
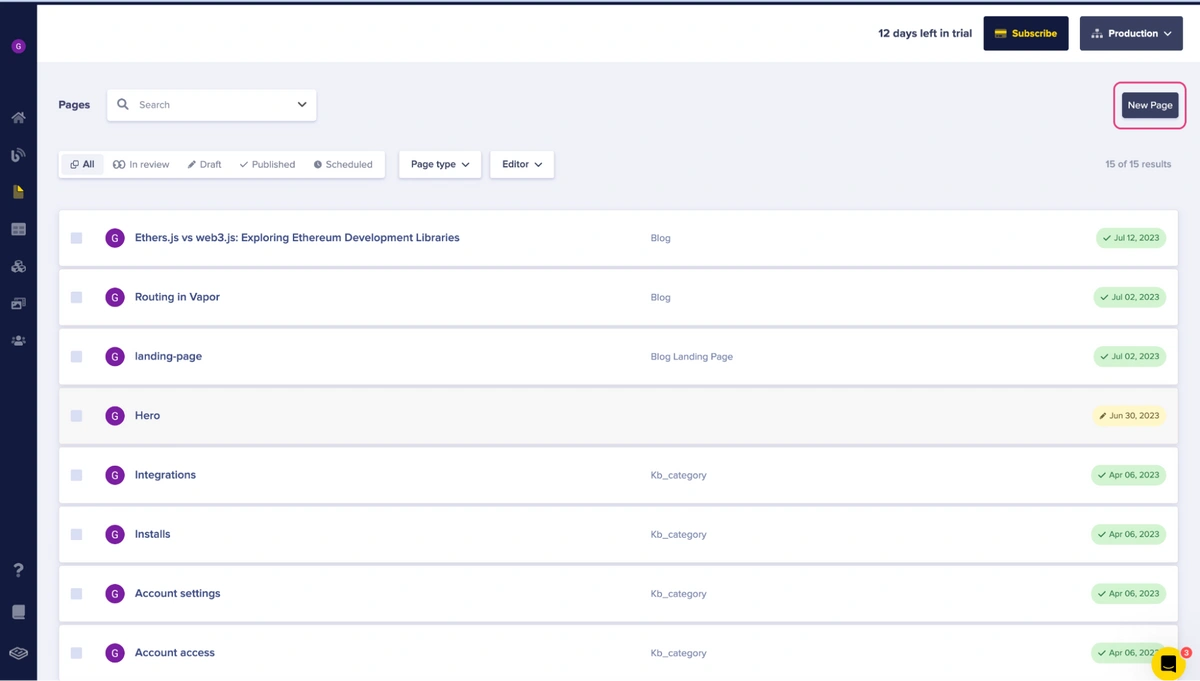
After clicking the New Page button, you should see a dropdown where you can select the page type for the page you want to create. Select Blog as the page type. See the image below:
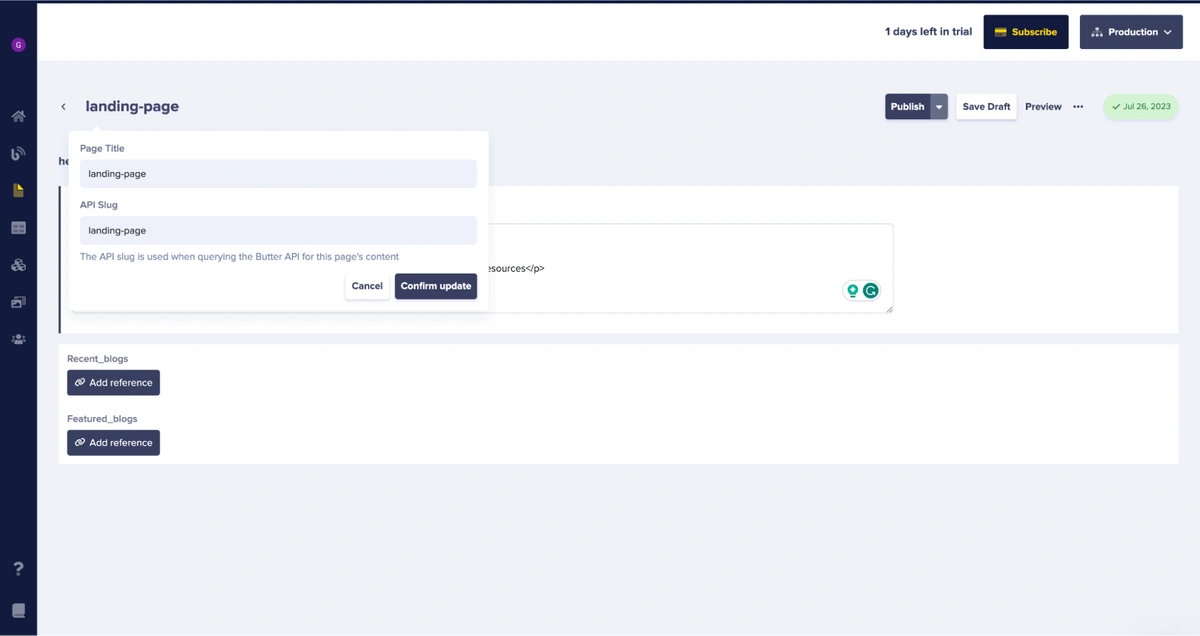
After clicking the Blog page type, you will land in the page editor where you will add your blog content. First, you will input the page title and slug and then save the metadata. The API slug is automatically generated for you as you type in the title.
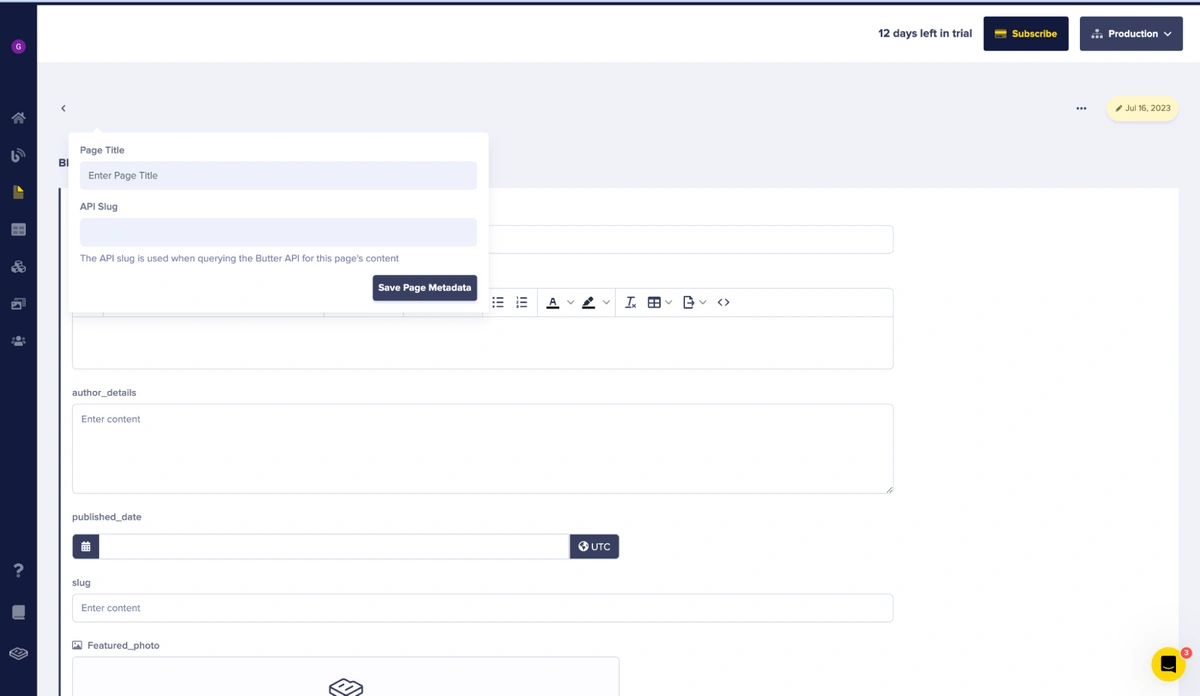
Next, you can start adding content for your blog post.
After adding your content, make sure to save and publish it by clicking the Publish button at the top of your screen.
Creating the blog homepage using the blog landing page type
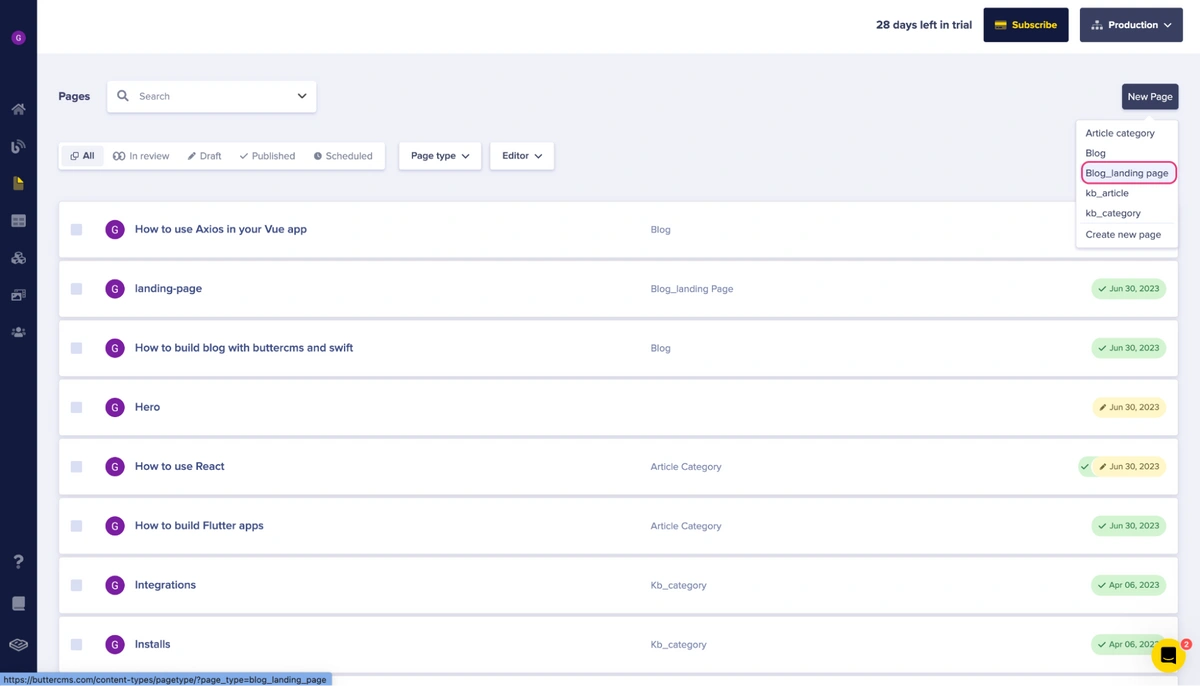
To start creating our blog home page, click on Page on the navigation bar in the ButterCMS dashboard, and click New Page at the top-right of the screen.
After clicking the New Page button, and from the dropdown, select Blog_landing_page.
Next, you should see a new page to add your content. Give the new page a name called landing-page.
Now, add the headline text for your hero section.
Next, let us add recent posts and featured posts to our home page. To achieve this, click the Add Reference button under the Recent_blogs label.
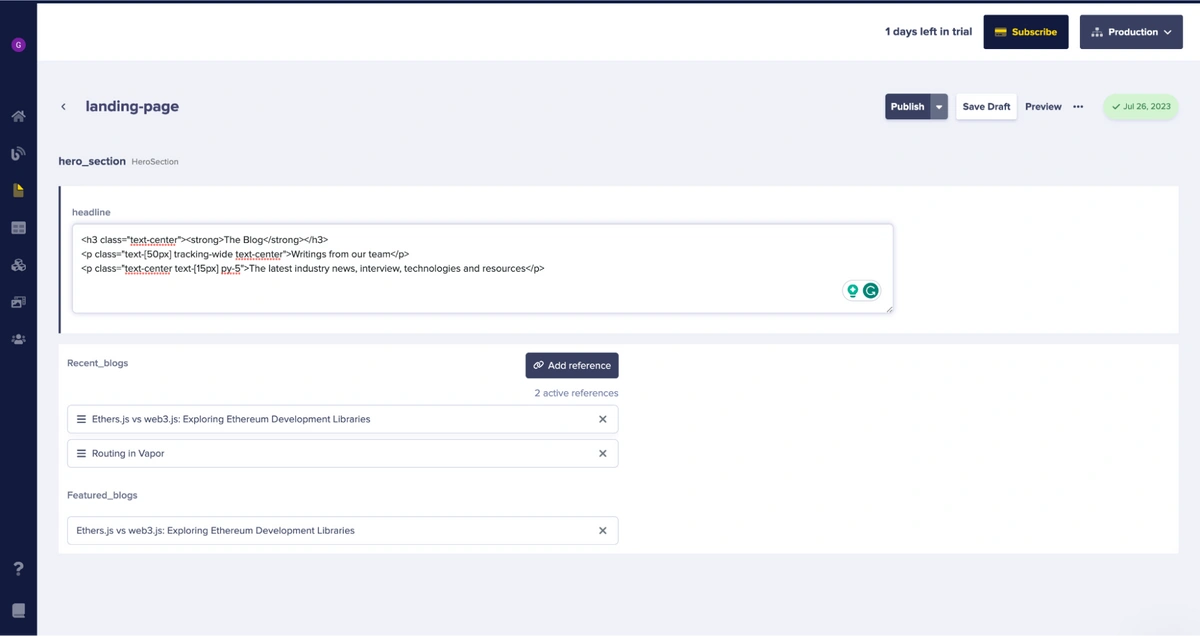
You should see all the blog posts available. You can select which article is your most recent and add it. See the image below:

The above step also applies to featured_blogs. If these steps were followed properly, our landing page should look like below:
Congratulations, we have successfully set up ButterCMS for our application. Let’s move to the next fun section of the tutorial.
Setting up Swift
We will be using Vapor to bootstrap our project using the Vapor CLI.
Installing the Vapor toolbox
Vapor is a web framework for Swift. It allows you to build backends, web APIs, and HTTP servers using Swift.
The Vapor Toolbox or a command line interface (CLI) is needed to start using Vapor because it comes with special utilities that you will need, such as the Create command to create or build your Vapor project.
To install Vapor, use the command below:
//macOS
brew install vapor//Linux
git clone https://github.com/vapor/toolbox.git
cd toolbox
git checkout <desired version>
make install
To confirm that it is properly installed, run the command below:
vapor --helpThe above command, when run, should show the list of available Vapor commands.
Installing the Leaf templating engine
Leaf is a templating engine that allows you to render dynamic values in your HTML website and is inspired by Swift syntax. You can learn more here.
To use Leaf inside our project, we need to add it as a package in your package file.
Add the following lines to your dependencies array, if not already there:
 dependencies: [
        // 💧 A server-side Swift web framework.
        .package(url: "https://github.com/vapor/vapor.git", from: "4.76.0"),
        .package(url: "https://github.com/vapor/leaf.git", from: "4.0.0"),
    ],
 targets: [
        .executableTarget(
            name: "App",
            dependencies: [
	 // Add these two lines if not available
                .product(name: "Vapor", package: "vapor"),
                .product(name: "Leaf", package: "leaf")
            ],
            swiftSettings: [
                              .unsafeFlags(["-cross-module-optimization"], .when(configuration: .release))
            ]
        ),
        .testTarget(name: "AppTests", dependencies: [
	 // Add this line
            .product(name: "XCTVapor", package: "vapor"),
        ])
    ]
Inside the Resources folder, create a View folder and create a file called index.leaf. Add the following dummy HTML code to your index file.
<!DOCTYPE html>
<html>
<head>
<title>Page Title</title>
</head>
<body>

<h1>This is a Heading</h1>
<p>This is a paragraph.</p>

</body>
</html>
Rendering our HTML file
To render our HTML file on the web, follow the two steps below:
Step 1: Create a folder called Controller inside your Sources/App folder. Inside the Controller folder, create a new file called WebsiteController.swift.
This controller will hold all the website routes, such as one that will return a template that contains an index.
Replace the content of the controller file with the code below:
import Vapor
import Leaf

struct WebsiteController: RouteCollection {

  func boot(routes: RoutesBuilder) throws {
    routes.get(use: indexHandler)
  }

  func indexHandler(_ req: Request) -> EventLoopFuture<View> {
    return req.view.render("index")
  }
}
Here, req.view returns a ViewRenderer. Since we configured LeafRenderer as our ViewRenderer, we can use the file extension .leaf.
Step 2: You need to register your Websitecontroller. Inside your routes file located at Sources/App, open the routes folder and you should see the following code:
app.get { req in
  return "It works!"
}
Replace the code with the following:
import Vapor

func routes(_ app: Application) throws {
    let websiteController = WebsiteController()
    try app.register(collection: websiteController)

}
Tell Vapor to use Leaf
Open configure.swift and add the following to the imports section below:
import Vapor
import Leaf
It is simple to swap between several templating engines when you retrieve the view renderer using the generic req.view().
Even while this might not be effective when running your application, testing can benefit greatly from it. For instance, it enables you to avoid parsing HTML in your test cases and instead utilizes a test renderer to generate plain text.
Vapor is asked for a type that complies with ViewRenderer by req.view().
Vapor only offers PlaintextRenderer, but LeafKit—the module on which Leaf is based—offers LeafRenderer.
Add the next line to configure.swift
app.views.use(.leaf)Congratulations, Vapor is now aware that we will be using Leaf as our renderer. Click the build button. Once this is done, your app is built on the web.
You should see this on your terminal
Copy the local server link and you can view your website. See the image below:

You can write your static HTML and apply CSS like you usually do. However, in this project, I will be using CDN tailwind CSS.
If you wish to use CSS files, go to your Public folder, and create a styles.css file. You can also include your assets in the Public folder. See the image below:

Integrating ButterCMS into Swift
Before integrating ButterCMS into our Swift app, we need to get our API key. The API key is an authentication token that allows us to access the ButterCMS endpoint.
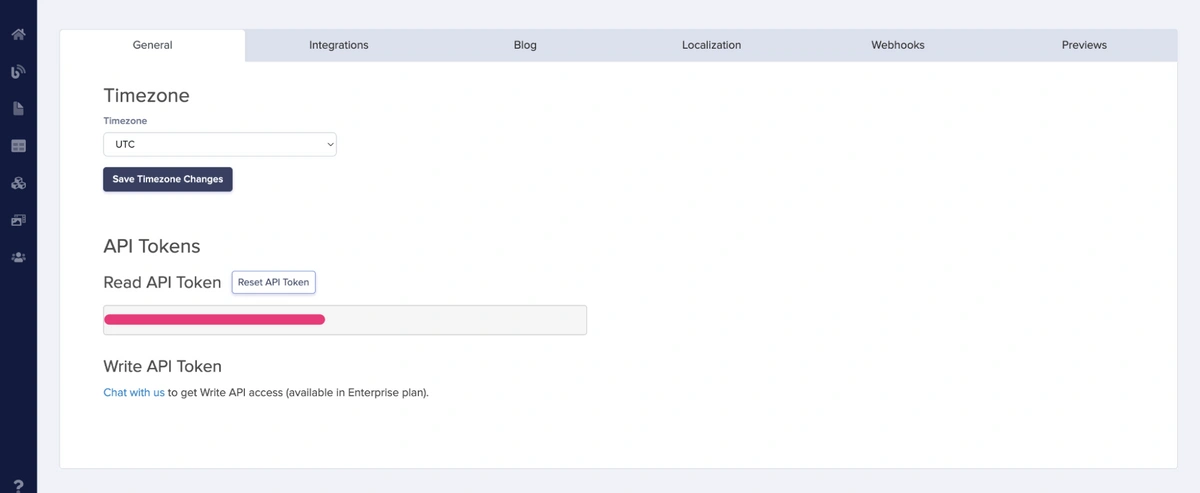
To access this token, you need to go to your Settings page. See the image below:

On the next page that opens, there we can find our API. See the image below:
You can add your API key to your .env file or you can use the scheme editor to save your token and use the ProcessInfo class and its property processInfo to access your API key inside your project.
Creating our models
In previous sections, we created our content in ButterCMS, and to use this content inside our Swift application, we need models, as Swift cannot directly consume JSON formats.
Head over to your Sources/App folder and create a new folder called Models and add a new file called BlogPageFields.swift. Inside this file, add the following code:
import Foundation
import ButterCMSSDK
public struct BlogPageFields: Codable {
    var title, content, authorDetails, publishedDate: String?
    var slug: String?
    var featuredPhoto: String?
    var featuredAltText, summary: String?
}

public struct LandingPageFields: Codable {
    let heroSection: HeroSection?
    let recentBlogs: [Page<NestedBlogFields>]?
}
struct HeroSection: Codable {
    let headline: String?
}
//struct RecentBlog: Codable {
//    let fields: Fields
//
//}
//
struct NestedBlogFields: Codable {
    let blog: BlogPageFields?
}
The BlogPageField struct contains the model for our Blogs page while the LandingPageFields struct contains all the possible strings we will need for our landing page.
From the above code, if you notice models, they all have a type of Codable. This type is a class that helps transformation between Swift data types and JSON.
Still, inside the Model folder, add another file called CaseStudyPageFields.swift and paste the following code:
//
//  CaseStudyPageFields.swift
//  ButterCMSSample
//
//  Created by Martin Srb on 22.10.2021.
//

import Foundation
import ButterCMSSDK

struct CaseStudyPageFields: Codable {
    var title: String
    var content: String
    var industry: String
    var subindustry: String
    var featuredImage: String
    var reviewer: String
    var studyDate: Date
}
Create another file called HomePageFields.swift and add the code below:
//
//  HomePage.swift
//  ButterCMSSample
//
//  Created by Martin Srb on 17.09.2021.
//

struct HomePageFields: Codable {
    var headline: String
    var subheadline: String
    var section: [Section]
    var documentationurl: String
}

struct Section: Codable {
    var title: String
    var subtitle: String
    var buttonurl: String
}

struct HomePageHeader {
    var headline: String
    var subheadline: String
}

enum TableViewSectionType: Int {
    case header
    case sections
    case docUrl
}
Making our request
The ButterCMS SDK will be handling our requests. The ButterCMS file manages our requests to the ButterCMS endpoint.
Inside our Sources/App folder, create another folder called Manager, and inside the Manager folder, create a file called ButterCMSManager.swift and paste the following modified code inside the file:
//
//  ButterCMSManager.swift
//  ButterCMSSample
//
//  Created by Martin Srb on 17.09.2021.
//

import ButterCMSSDK
import Combine
import NIO

class ButterCMSManager {
    static var shared = ButterCMSManager()
    let butter = ButterCMSClient(apiKey: "YOUR APIKEY")
    let blogPagesSubject = PassthroughSubject<PagesResponse<BlogPageFields>, Error>()


    func getPages(eventLoop: EventLoop) -> EventLoopFuture<[Page<BlogPageFields>]> {
        let promise = eventLoop.makePromise(of: [Page<BlogPageFields>].self)

        butter.getPages(pageTypeSlug: "blog", type: BlogPageFields.self) { result in
            switch result {
            case let .success(pages):
                promise.succeed(pages.data)

            case let .failure(error):
                promise.fail(error)
                print(error)
            }
        }

        return promise.futureResult
    }

    func getLandingPage(eventLoop: EventLoop) ->EventLoopFuture<[Page<LandingPageFields>]> {
        let promise = eventLoop.makePromise(of: [Page<LandingPageFields>].self)
        butter.getPages(pageTypeSlug: "blog_landing_page", type: LandingPageFields.self) { result in
            switch result {
            case let .success(page):
//                print(page)
                promise.succeed(page.data)


            case let .failure(error):
                promise.fail(error)
                print(error)
            }
        }
        return promise.futureResult
    }

//
    func getPage(slug: String) {
        butter.getPage(slug: slug, parameters: [.locale(value: "en")], pageTypeSlug: "blog", type: BlogPageFields.self) { result in
            switch result {
            case let .success(page):
                print("pages\(page)")
            //    self.caseStudyPageSubject.send(page)
            case let .failure(error):
                print(error)
                //    self.caseStudyPageSubject.send(completion: .failure(error))
            }
        }
    }

}
Request won’t work if you do not add your API key. So, make sure to add your key.
Creating controllers to handle our logic
Recall that we created a Controller folder and a file called Website Controller. This controller will contain the logic for our webpage.
First, we will begin with our homepage. We will create a Swift function called homepageHandler( _ :).
func homepageHandler(_ req: Request) -> EventLoopFuture<View> {
        let pagesFuture = ButterCMSManager.shared.getPages(eventLoop: req.eventLoop)
        let landingPageFuture = ButterCMSManager.shared.getLandingPage(eventLoop: req.eventLoop)


        return pagesFuture
            .flatMap { pages in
                return landingPageFuture.flatMap { landingPages in
                    let typedPages = landingPages as [ButterCMSSDK.Page<LandingPageFields>]?
                    print(pages.count)
                    let firstBlog = typedPages?.first?.fields.recentBlogs?.first?.fields.blog;
                    let blogs = typedPages?.first?.fields.recentBlogs?.map({ val in
                        return val.fields.blog
                    })


                    let context = IndexContext(title: "Home page", pages: pages, landingPages: landingPages, firstBlog: firstBlog, blogs: blogs)
                    return req.view.render("index", context)
                }

            }
    }
The homepageHandler function takes in a parameter Request and returns an asynchronous operation of type EventLoopFuture. Furthermore, we made two asynchronous calls to ButterCMSManager getPages() and getLandingPage(). The function further goes on to chain the two values pagesFuture and landingPageFuture using a flatMap when the values are available.
landingPages is cast to the type of [ButterCMSSDK.Page<LandingPageFields>]?. This casting allows us to have access to properties like our blogs and recentblog. This way, we can avoid a runtime error if a wrong type is assumed. We passed the list to the new variable typedPages. With this, we can easily access our blog list using dot properties.
To use this value on the front, we need to create a struct that conforms to an Encodable.
struct IndexContext: Encodable {
  let title: String
    let pages: [ButterCMSSDK.Page<BlogPageFields>]?
    let landingPages: [ButterCMSSDK.Page<LandingPageFields>]?
  let firstBlog: BlogPageFields?
  let blogs: [BlogPageFields?]?

}
The above code allows us to pass values as a keypair value, assigned to the context variable and passed to the index renderer.
Rendering the Blog page
This page handles rendering all our articles on the Blog page.
func blogsHandler(_ req: Request) -> EventLoopFuture<View> {
        let landingPageFuture = ButterCMSManager.shared.getLandingPage(eventLoop: req.eventLoop)

        return landingPageFuture.flatMap { landingPages in
            let typedPages = landingPages as [ButterCMSSDK.Page<LandingPageFields>]?
            let blogs = typedPages?.first?.fields.recentBlogs?.map({ val in
                return val.fields.blog
            })
            let context = BlogsContext(title: "Blogs", blogs: blogs)
            return req.view.render("blogs", context)
        }
    }
The above code performs a Request and returns a Future of type EventLoopFuture. It makes a call to the ButterCMS manager to getLandingPage as it also contains our blog page list. We mapped landing pages and transformed it into a list of type [ButterCMSSDK.Page<LandingPageFields>]?. So, a list of blog pages is returned and passed into the BlogsContext struct.
 struct BlogsContext: Encodable {
  let title: String?
  let blogs: [BlogPageFields?]?
}
We finally pass the context to the blog renderer for the Leaf templating engine to consume.
Blog details page
This page handles any article selected on the homepage of the Blogs page so that the user can have a detailed view of their desired article.
 func blogHandler(_ req: Request) -> EventLoopFuture<View> {

        let slug = req.parameters.get("blogSlug")

        let landingPageFuture = ButterCMSManager.shared.getLandingPage(eventLoop: req.eventLoop)


        return landingPageFuture.flatMap { landingPages in
            let typedPages = landingPages as [ButterCMSSDK.Page<LandingPageFields>]?
            let blogs = typedPages?.first?.fields.recentBlogs?.map({ val in
                return val.fields.blog
            })
            let selectedBlog = findBlogFromSlug(slug: slug, blogs: blogs)
            let blogAnchors = getBlogAnchors(selectedBlog: selectedBlog)


            let context = BlogContext(title: slug, blog: selectedBlog, blogAnchors: blogAnchors)

            return req.view.render("blog", context)
        }
    }
When an article is selected, it finds the article using a helper function called findBlogFromSlug() that takes in two parameters: a slug of type String? and a blog of type BlogPageField.
func findBlogFromSlug(slug: String?, blogs: [BlogPageFields?]?) -> BlogPageFields? {
        if let unwrappedBlogs = blogs {
            return unwrappedBlogs.compactMap { $0 }.first { val in
                val.slug == slug
            }
        } else {
            return nil
        }
    }
The function uses a compactMap to loop through all the elements of the blog and checks if its element matches the slug provided and returns a blog with the details or returns nil or null.
Rendering the blog’s table of contents
To render a table of contents for our blog, we will use a library called SwiftSoup. This library helps us parse our HTML coming from ButterCMS. With this library, we will extract all tags from the HTML document with an ID, as every header has an ID. See the following code:
func getBlogAnchors(selectedBlog: BlogPageFields?) -> [BlogAnchor]{
        var idValues: [BlogAnchor] = [];

        do {
            if let html = selectedBlog?.content {
                let doc: SwiftSoup.Document = try SwiftSoup.parse(html)

                // Extract specific tags
                let allTags: Elements = try doc.select("*") // Extract all tags

                // Iterate over the extracted tags
                for tag in allTags {
                    let link = try tag.attr("id")
                    let title = link.capitalized.replacingOccurrences(of: "-", with: " ")
                    idValues.append(BlogAnchor(title: title, link: link))
                }
            }
        } catch {
            print("Error parsing HTML: \(error)")
        }
        return idValues;
    }
This function takes one parameter: selectedBlog of type BlogPageFields. The functions use a do-catch to handle errors during parsing of the HTML document. Inside the do block, the content property of the selected blog page is checked.
If the content is not nil, it proceeds to parse the HTML content using the SwiftSoup.parse method. It creates a SwiftSoup.Document object named doc that represents the parsed HTML.
Next, the code selects all the tags within the parsed HTML document using doc.select("*") and assigns the result to the allTags constant of type Elements. Elements is a collection of HTML elements.
It then loops over the extracted tags using a for loop, accessing each tag in the allTags collection. Within the loop, it extracts the value of the id attribute from each tag using tag.attr("id") and assigns it to the link constant.
The id attribute typically represents an anchor point within an HTML document. The code then modifies the link value by capitalizing it and replacing any hyphens ("-") with spaces (" ") using link.capitalized.replacingOccurrences(of: "-", with: " "). The modified value is assigned to the title constant. It creates a new BlogAnchor object with the title and link values and appends it to the idValues array using idValues.append(BlogAnchor(title: title, link: link)).
After the loop completes, the function returns the idValues array containing the extracted blog anchors.
All these are passed into BlogContext. With this, we can display the table of contents of any selected blog.
Implementing the search function
Recall that Vapor is a server-side rendering framework. So to get the search term from the user, we need to send the user input to the server.
The search bar has a form field with an input tag and a button tag. When the button is clicked, the form will be submitted to the URL specified in the action attribute. In this case, the action attribute is set to "/search", indicating that the form data will be sent to the "/search" endpoint on the server using an HTTP POST method.
<form action="/search" class="flex">
      <input class="border rounded-l-md py-2 px-4 outline-none" name="text" type="text" placeholder="Search...">
      <button class="bg-blue-500 hover:bg-blue-600 text-white py-2 px-4 rounded-r-md" type="submit">Search</button>
    </form>
The server will handle the request and call the searchHandler function, which is associated with the "/search" endpoint in the routing configuration.
 func searchHandler(_ req: Request) -> EventLoopFuture<View> {
        let searchTerm = req.query[String.self, at: "text"]
        let landingPageFuture = ButterCMSManager.shared.getLandingPage(eventLoop: req.eventLoop)

        return landingPageFuture.flatMap { landingPages in
            let typedPages = landingPages as [ButterCMSSDK.Page<LandingPageFields>]?
            let blogs = typedPages?.first?.fields.recentBlogs?.map({ val in
                return val.fields.blog
            })

            let searchResults = searchArticlesByName(blogs: blogs, searchTerm: searchTerm)
            let context = SearchContext(title: searchTerm, blogs: searchResults)
            return req.view.render("search", context)
        }

    }
From the above code, inside the searchHandler, the function receives the Request object req, which represents the incoming request.
The function then extracts the value of the "text" query parameter from the request using req.query[String.self, at: "text"] and assigns it to the searchTerm constant. The "text" query parameter corresponds to the value entered in the search input field.
The function returns the landing page asynchronously using ButterCMSManager.shared.getLandingPage(eventLoop: req.eventLoop).
It returns an EventLoopFuture representing the landing page data. The code then chains the future using the flatMap method.
Inside the flatMap closure, it casts the landingPages as an array of ButterCMSSDK.Page<LandingPageFields> and assigns it to the typedPages constant. It maps the recentBlogs array of the first typedPages to extract an array of blogs using the closure { val in return val.fields.blog } and assigns it to the blogs constant. The code calls a custom function searchArticlesByName(blogs: blogs, searchTerm: searchTerm) with the blogs and searchTerm parameters.
 func searchArticlesByName(blogs: [BlogPageFields?]?, searchTerm: String?) -> [BlogPageFields] {
        guard let searchTerm = searchTerm, !searchTerm.isEmpty else {
            return blogs?.compactMap { $0 } ?? []
        }

        let filteredBlogs = blogs?.compactMap { $0 }.filter { blog in
            if let title = blog.title {
                return title.localizedCaseInsensitiveContains(searchTerm)
            }
            return false
        }

        return filteredBlogs ?? []
    }
The above function performs a search operation based on the entered searchTerm within the blogs array, and returns the search results.
The searchHandler creates a SearchContext object, which represents the context data needed to render the search results view. This context includes the title (using the searchTerm value) and the searchResults (the result of the search operation). Finally, it renders the "search" view using req.view.render and passes the context object as a parameter. See how the search function works below:
Download post as PDF feature
Allowing users to download a web page is useful in certain scenarios like having offline access, sharing, content backup, and more.
To implement this feature, we need to use the web API called “blob”, and we can only access that using JavaScript. Swift offers a JavaScriptCore lib to help you write JavaScript functions and access them without hassle. With a few tweaks, you can get it to work.
However, Vapor has a community package that allows us to download a web page. To use this package, you need to install the library wkhtmltopdf. Read the docs for more information.
Add the following block of code to your WebsiteController.swift file:
func downloadPageHandler(_ req: Request) -> EventLoopFuture<Response> {
        let document = Document(margins: 15)
        let slug = req.parameters.get("blogSlug")
        let landingPageFuture = ButterCMSManager.shared.getLandingPage(eventLoop: req.eventLoop)


        return landingPageFuture.flatMap { landingPages in
            let typedPages = landingPages as [ButterCMSSDK.Page<LandingPageFields>]?
            let blogs = typedPages?.first?.fields.recentBlogs?.map({ val in
                return val.fields.blog
            })
            let selectedBlog = findBlogFromSlug(slug: slug, blogs: blogs)
            let blogAnchors = getBlogAnchors(selectedBlog: selectedBlog)

            let context = BlogContext(title: slug, blog: selectedBlog, blogAnchors: blogAnchors)
            let renderPage = req.view.render("download", context)
            let pages = [renderPage]
                .flatten(on: req.eventLoop)
                .map { views in
                    views.map { Page($0.data) }
                }

            return pages.flatMap { pages in
                // Add the pages to the document
                document.pages = pages
                // Render to a PDF
                let pdf = document.generatePDF(on: req.application.threadPool, eventLoop: req.eventLoop)
                // Now you can return the PDF as a response, if you want
                return pdf.map { data in
                    return Response(
                        status: .ok,
                        headers: HTTPHeaders([("Content-Type", "application/pdf")]),
                        body: .init(data: data)
                    )
                }
            }
        }
    }
The downloadPageHandler function generates a downloadable PDF version of a web page based on a specified blog slug. It fetches the necessary data, including the landing page and recent blog entries, and uses it to render a view. The view is then converted into a PDF document using the Document class. The generated PDF is returned as the response, allowing the user to download it. See how it works:
Using dynamic values in our HTML template
All data needed for your static page to be dynamic is made available to you from the controller file through the context struct.
The Leaf templating engine uses the following template syntax #(name) to provide dynamic values.
Let's take a look at the values individually:
-
Token #: This notifies the leaf parser to start looking for a tag.
-
Name: This is the name of the tag. There are default tag names like count, for, extend, import, and export. However, creating custom tags is possible.
-
Body: This is an optional body given to your template in case you need to use if tags or for tags for if statements and for-loops, respectively.
Now that we have an understanding of how Leaf tags work, let us head to our Resources/Views folder and create a file called index.leaf. Inside this folder, add the following code:
<div class="mx-auto max-w-7xl py-8 sm:px-6 lg:px-8">
<div class="flex justify-center">
   <div>
      #for(page in landingPages):
      <p class="text-center">#unsafeHTML(page.fields.heroSection.headline)</p>
      #endfor
   </div>
</div>
<div class="py-14 ">
   <div class="h-screen w-full h-[250px] bg-cover bg-center bg-no-repeat mb-8 md:h-[50vh] rounded bg-[url(#(firstBlog.featuredPhoto))] overflow-hidden shadow-lg">
      <div class="px-6 py-4 my-72">
         <div class="font-bold text-xl mb-2 text-white">#(firstBlog.authorDetails) #(firstBlog.publishedDate)</div>
         <p class="text-gray-700 text-2xl text-white">
            #(firstBlog.title)
         </p>
         <p class="text-gray-700 py-4 text-sm text-white">
            #(firstBlog.summary)
         </p>
         <div>
            <span class="inline-block border-2 border-solid rounded-full px-3 py- text-sm font-semibold text-gray-50 mr-2 mb-2">Design</span>
            <span class="inline-block border-2 border-solid rounded-full px-3 py-1 text-sm font-semibold text-gray-50 mr-2 mb-2">Research</span>
            <span class="inline-block border-2 border-solid rounded-full px-3 py-1 text-sm font-semibold text-gray-50 mr-2 mb-2">Presentation</span>
         </div>
      </div>
   </div>
   <div class="flex -mx-2">
      #for(blog in blogs):
      <div class="md:w-4/12 px-2">
         <!-- More posts... -->
         <article class="h-full p-6 bg-white border border-gray-200 rounded-lg shadow dark:bg-gray-800 dark:border-gray-700">
            <div class="flex items-center ">
               <time datetime="2020-03-16" class="text-gray-500">#(blog.publishedDate)</time>
               <a href="#path()/blog" class="relative z-10 rounded-full bg-gray-50 px-3 py-1.5 font-medium text-gray-600 hover:bg-gray-100">Marketing</a>
            </div>
            <div class="group relative">
               <h3 class="mt-3 text-lg font-semibold leading-6 text-gray-900 group-hover:text-gray-600">
                  <a href="/blog">
                  <span class="absolute inset-0"></span>
                  #(blog.title)
                  </a>
               </h3>
               <p class="mt-5 line-clamp-3 text-sm leading-6 text-gray-600">#(blog.summary)</p>
            </div>
            <div class="relative mt-8 flex items-center gap-x-4">
               <img src="https://images.unsplash.com/photo-1519244703995-f4e0f30006d5?ixlib=rb-1.2.1&ixid=eyJhcHBfaWQiOjEyMDd9&auto=format&fit=facearea&facepad=2&w=256&h=256&q=80" alt="" class="h-10 w-10 rounded-full bg-gray-50">
               <div class="text-sm leading-6">
                  <p class="font-semibold text-gray-900">
                     <a href="#">
                     <span class="absolute inset-0"></span>
                     #(blog.authorDetails)
                     </a>
                  </p>
                  <!-- <p class="text-gray-600">Co-Founder / CTO</p> -->
               </div>
            </div>
            <a href="/blog/#(blog.slug)" class="my-6 inline-flex items-center px-3 py-2 text-sm font-medium text-center text-white bg-blue-700 rounded-lg hover:bg-blue-800 focus:ring-4 focus:outline-none focus:ring-blue-300 dark:bg-blue-600 dark:hover:bg-blue-700 dark:focus:ring-blue-800">
               Read more
               <svg aria-hidden="true" class="w-4 h-4 ml-2 -mr-1" fill="currentColor" viewBox="0 0 20 20" xmlns="http://www.w3.org/2000/svg">
                  <path fill-rule="evenodd" d="M10.293 3.293a1 1 0 011.414 0l6 6a1 1 0 010 1.414l-6 6a1 1 0 01-1.414-1.414L14.586 11H3a1 1 0 110-2h11.586l-4.293-4.293a1 1 0 010-1.414z" clip-rule="evenodd"></path>
               </svg>
            </a>
         </article>
      </div>
      #endfor
   </div>
</div>
Recall that the data used in our HTML template are accessed from our WebsiteController.swift file. If you look carefully at the file, we passed the data received from our request into a context struct of type Encodable, which helped us access values in our template. See the code below:
  struct IndexContext: Encodable {
  let title: String
    let pages: [ButterCMSSDK.Page<BlogPageFields>]?
    let landingPages: [ButterCMSSDK.Page<LandingPageFields>]?
  let firstBlog: BlogPageFields?
  let blogs: [BlogPageFields?]?

}
 let context = IndexContext(title: "Home page", pages: pages, landingPages: landingPages, firstBlog: firstBlog, blogs: blogs)
                    return req.view.render("index", context)
This is what our resulting landing page should look like after implementing data from the ButterCMS delivery API.
Closing thoughts
Congratulations on completing this Swift app tutorial!!. In this article, we talked about how to use pages and page types to create custom pages for our Swift application. We also talked about how to create models in Swift using Leaf templating engine syntax in our code and using Vapor as a templating engine.
Swift and ButterCMS offer an expansive realm of possibilities beyond blog websites. From event management apps to content-rich mobile applications and e-commerce platforms, the potential for building complex and diverse projects knows no bounds. Let your creativity and innovation take the lead.

