
- The APIs
- A Basic Web Component
- Using HTML templates
- Updating Components
- Using External Templates
- Why Web Components and ButterCMS
From an architectural point of view, a Component is a reusable part of a codebase that contains both UI and code. This concept is at the base of a lot of modern front-end frameworks like React or Angular. Web Components is a suite of native technologies that let developers create Components without the help of any third-party libraries, to use in their web pages and web apps. In this post, we will cover the APIs that compose the Web Components suite and how to integrate them with ButterCMS.
The APIs
Web Components consist of three main technologies
HTML Templates: the
<template> tag is useful if you want to keep content that can be used by JavaScript code as a “stamp” to create dynamic content.
Custom Elements: this API lets developers create their own fully-featured DOM elements.
Shadow DOM: This technique is useful if the web components should not be affected by the DOM outside the component itself.
Shadow DOM is out of scope for this first post about Web Components. In this article, we will explore the first two APIs with some examples as references. All three APIs are available in modern browsers such as Chrome, Safari and Firefox, and they will soon be available be available soon in Edge. In any case, a polyfill is available on npm.

A Basic Web Component
In this first example, we will use the Custom Elements API to create a simple “Hello, world!” Component in order to understand how this API works. To create a Custom Element, we need to create a class that extends HTMLElement, like the one that you see in the followingnext snippet.
export default class HelloWorld extends HTMLElement {
  connectedCallback () {
    this.innerHTML = '<div>Hello World!</div>'
  }
}
The connectedCallback method will be invoked when the component is connected to the DOM and ready to work. In this callback, you should put initial rendering and attaching DOM event handlers.
Before using the HelloWorld component, we need to give it a tag name. We can do that via the customElements object.
window.customElements.define('hello-world', HelloWorld)With the previous instruction, we are linking the HelloWorld class to the hello-world HTML tag. Now it’s possible to use the newly created tag like any other standard HTML element.
<hello-world></hello-world>Congrats! You just created your first Web Component.
Using HTML Templates
In the next example, we will create a ButterCMSList component that will utilize the JavaScript ButterCMS client to fetch a list of posts and display them in a list. To do that we will need two <template> elements, one for the list and one for the row. For now, we will put them in the body of the index.html file. These templates will not be rendered by the browser, they are just invisible containers.
<template data-list-container>
<div>
<h3>Latest Posts</h3>
<ul data-list></ul>
</div>
</template>
<template data-row>
<li>
<strong data-title></strong>
<div>
<small>Published on: <span data-published></span></small>
</div>
</li>
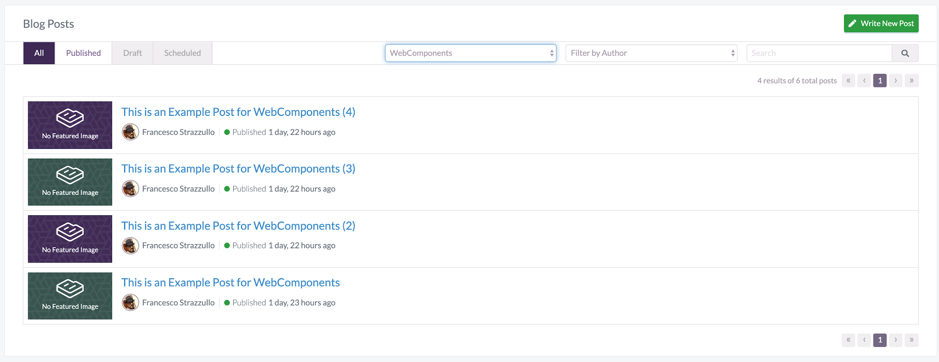
</template>I also created a small list of fake posts with the “WebComponents” category to play with.
This is the code of the first version of the ButterCMSList component
import config from '../config.js'

const generateListContainerElement = () => {
 const template = document.querySelector('template[data-list-container]')
 return document.importNode(template.content.firstElementChild, true)
}

const generatePostElement = post => {
 const template = document.querySelector('template[data-row]')
 const element = document.importNode(template.content.firstElementChild, true)

 element
   .querySelector('[data-title]')
   .textContent = post.title

 element
   .querySelector('[data-published]')
   .textContent = (new Date(post.published).toLocaleString())

 return element
}

export default class ButterCMSList extends HTMLElement {
 async connectedCallback () {
   const listContainer = generateListContainerElement()
   const list = listContainer.querySelector('[data-list]')

   const butter = new Butter(config.BUTTERCMS_TOKEN)
   const response = await butter.post.list({
     page: 1,
     page_size: 2,
     category_slug: 'webcomponents'
   })

   const posts = response.data.data

   const postElements = posts.map(generatePostElement)

   postElements.forEach(element => {
     list.appendChild(element)
   })

   this.appendChild(listContainer)
 }
}
We create an empty list, cloning the contents of the template with the instruction document.importNode(template.content.firstElementChild, true) and then we do the same thing with the rows, creating one row for every ButterCMS post. At last, we add the populated list the DOM appending it to the component. Just like before, we need to add the component to the customElements registry and then put it in the DOM.
window.customElements.define('buttercms-list', ButterCMSList)<buttercms-list><buttercms-list/>This is the result of the usage of the ButterCMSList component.

At the beginning of this blog post, we said that the main advantage of Components (in any environment, not just Web Components) is that they are reusable. But the ButterCMSList is not reusable in the current form. All the parameters are hardcoded in the component itself, so the first step to make this component reusable is to transform them in attributes.
const generateListContainerElement = () => {
 ...
}

const generatePostElement = post => {
 ...
}

const DEFAULT_PAGE = 1
const DEFAULT_PAGE_SIZE = 2

export default class ButterCMSList extends HTMLElement {
 get token () {
   return this.getAttribute('token')
 }

 set token (value) {
   this.setAttribute('token', value)
 }

 get page () {
   if (!this.hasAttribute('page')) {
     return DEFAULT_PAGE
   }

   return parseInt(this.getAttribute('page'))
 }

 set page (value) {
   this.setAttribute('page', value)
 }

 get pageSize () {
   if (!this.hasAttribute('page-size')) {
     return DEFAULT_PAGE_SIZE
   }

   return parseInt(this.getAttribute('page-size'))
 }

 set pageSize (value) {
   this.setAttribute('page-size', value)
 }

 get category () {
   return this.getAttribute('category')
 }

 set category (value) {
   this.setAttribute('category', value)
 }

 async connectedCallback () {
   const listContainer = generateListContainerElement()
   const list = listContainer.querySelector('[data-list]')

   const butter = new Butter(this.token)

   const options = {
     page: this.page,
     page_size: this.pageSize
   }

   if (this.category) {
     options.category_slug = this.category
   }

   const response = await butter.post.list(options)

   const posts = response.data.data

   const postElements = posts.map(generatePostElement)

   postElements.forEach(element => {
     list.appendChild(element)
   })

   this.appendChild(listContainer)
 }
}
We created four attributes: token, page, pageSize and category. Notice that the getters/setters for these attributes are just wrapper around getAttribute/setAttribute. This approach lets developers put attributes directly on the HTML, just like any tag.
<buttercms-list
   page="1"
   page-size="2"
   category="webcomponents">
</buttercms-list>
But also to set an attribute programmatically when it’s hard to put them directly on the page - for example the token.
const list = document.querySelector('buttercms-list')

list.token = config.BUTTERCMS_TOKEN
Updating Components
One of the attributes that we pass to the ButterCMSList component is the page that we want to show. I would like to change it programmatically (like in the next example) to show the next page of posts.
const list = document.querySelector('buttercms-list')

document
  .querySelector('button')
  .addEventListener('click', () => {
    list.page = list.page + 1
  })
Running this code will not have any effect on the page. In order to make the component to do something when an attribute changes its value, we should slightly modify the code, adding a new callback called attributeChangedCallback
const generateListContainerElement = () => {
  ...
}

const generatePostElement = post => {
  ...
}

export default class ButterCMSList extends HTMLElement {
  static get observedAttributes () {
    return [
      'page'
    ]
  }

  /* Attributes getters and setters */

  async loadPosts () {
    const options = {
      page: this.page,
      page_size: this.pageSize
    }

    if (this.category) {
      options.category_slug = this.category
    }

    const response = await this.butter.post.list(options)

    const posts = response.data.data

    const postElements = posts.map(generatePostElement)

    postElements.forEach(element => {
      this.list.appendChild(element)
    })
  }

  async connectedCallback () {
    const listContainer = generateListContainerElement()
    this.list = listContainer.querySelector('[data-list]')
    this.butter = new Butter(this.token)

    await this.loadPosts()

    this.appendChild(listContainer)
  }

  attributeChangedCallback (name, oldValue, newValue) {
    if (oldValue !== null) {
      this.list.innerHTML = ''
      this.loadPosts()
    }
  }
}
The attributeChangedCallback is invoked every time that one of the attributes listed in the observedAttributes array changes. In our case, we simply clear the list, load the next page of posts with ButterCMS client and then generate a new list of items. You can see a live demo of the application here.
Using External Templates
Our ButterCMSList component is ready to use and it also has a good grade of reusability. But, what if we want to release this component to other teams on some public CDN, we need to solve a problem. The template elements that we use as “stamps” are inside the index.html file and we need some way to put them in separate files that we can share together with the JavaScript code. The first step that we should take is to put the content of the list and the row templates in separate files called list.html and row.html. As you can see in the next example, we can load the content of these files with an asynchronous HTTP request made with Fetch API.
const htmlToElement = htmlAsString => {
 const temp = document.createElement('div')
 temp.innerHTML = htmlAsString
 return temp.firstElementChild
}

const generateRemoteElement = async url => {
 const response = await window.fetch(url)
 const html = await response.text()
 return htmlToElement(html)
}

const generatePostElement = (baseElement, post) => {
 const element = baseElement.cloneNode(true)

 element
   .querySelector('[data-title]')
   .textContent = post.title

 element
   .querySelector('[data-published]')
   .textContent = (new Date(post.published).toLocaleString())

 return element
}

const DEFAULT_LIST_TEMPLATE_URL = '/templates/list.html'
const DEFAULT_ROW_TEMPLATE_URL = '/templates/row.html'

export default class ButterCMSList extends HTMLElement {
 /* Attributes */

 get listTemplateURL () {
   if (!this.hasAttribute('list-template-url')) {
     return DEFAULT_LIST_TEMPLATE_URL
   }

   return this.getAttribute('list-template-url')
 }

 set listTemplateURL (value) {
   this.setAttribute('list-template-url', value)
 }

 get rowTemplateURL () {
   if (!this.hasAttribute('row-template-url')) {
     return DEFAULT_ROW_TEMPLATE_URL
   }

   return this.getAttribute('row-template-url')
 }

 set rowTemplateURL (value) {
   this.setAttribute('row-template-url', value)
 }

 async loadPosts () {
   const options = {
     page: this.page,
     page_size: this.pageSize
   }

   if (this.category) {
     options.category_slug = this.category
   }

   const response = await this.butter.post.list(options)

   const posts = response.data.data

   const postElements = posts.map(post => {
     return generatePostElement(this.baseListItem, post)
   })

   postElements.forEach(element => {
     this.list.appendChild(element)
   })
 }

 async connectedCallback () {
   const listContainer = await generateRemoteElement(this.listTemplateURL)
   this.list = listContainer.querySelector('[data-list]')

   this.baseListItem = await generateRemoteElement(this.rowTemplateURL)

   this.butter = new Butter(this.token)

   await this.loadPosts()

   this.appendChild(listContainer)
 }

 attributeChangedCallback (name, oldValue, newValue) {
   if (oldValue !== null) {
     this.list.innerHTML = ''
     this.loadPosts()
   }
 }
}
I designed the URLs to use to load the template as attributes of the component. In this way, we can release the default templates together with the code, but advanced users can provide their own templates and change the corresponding attribute.
The code is quite similar to the previous version. The only “trick” that may seem strange at first glance is the htmlToElement function, that takes any HTML strings (like the ones that we load with Fetch API). To do that, we create a virtual empty div and we inject the HTML via the innerHTML property. In that way, the div contains the DOM elements as children and we can safely extract them.
With these examples, we just scratched the surface of the Web Component APIs. If you want more resources about Web Components you may consult the awesome frameworkless list on GitHub. This list is curated by the Frameworkless Movement: a group of developers interested in developing applications without frameworks.

Why Web Components and ButterCMS?

In this post, we covered how to create a Web Component that shows a list of blog posts. It’s quite easy to build a component for the single post, passing the slug attribute, or other components for the other elements of ButterCMS like pages, categories and so on and so forth. But why you should care? I think that Web Components are quite important for ButterCMS (or headless CMS in general) users for a number of reasons that I will explain in this section.
 Loading Time
The most immediate selling point of this technology is loading time. You will not have any kind of extra JavaScript to load. This will speed up your loading time of your applications. If you need a boost in performances you can use some small rendering library like lit-html with some of the components.
 Porting to a new CMS
Another important feature is to be a standard way of rendering custom content. You can export some kind of widget that you can use in any website without knowing the original application stack. You don’t need to create different widgets for different frameworks, you just add a custom HTML tag and the component does the work for you.
This can lead to another selling point, you can use Web Components when porting an old CMS (for example WordPress) to a new one based on ButterCMS. You can easily do that because the two systems can easily live together while you’re working at the porting. You just need to create a custom page in Wordpress that contains the ButterCMSList component. In this way, you can do an incremental refactoring instead of the “Big Rewrite”. The incremental approach is far less risky, and Web Components are a very good way to implement it.
 Micro Frontends
At last, Web Components are the central concept of Micro Frontends: a new way to design complex front-end application similar to the Microservices architecture. With this architecture we can use Web Components to create micro applications, each with a specific mission. These micro applications are then put together to create a single application. Wrapping every micro application in a Web Component let developers to use different frameworks for every different micro app. This could be a very interesting way of working if ButterCMS is part of a more complex application.

Conclusion
In this post, we learned some basic principles of the Web Components ecosystem. We also implemented a simple list component for ButterCMS and talked about the main selling point of this suite of APIs for ButterCMS users. If you’re curious, the complete code of the sample application is available on GitHub.

