
GSD
Build Your Own News Aggregator Site with ButterCMS and Zapier
Posted by Fernando Doglio on October 12, 2023
Table of contents
Aggregator sites can be a very useful source of information for their users, and they can save you a lot of time by presenting all the information you seek in a single place.
But capturing that data from outside sources and keeping it updated in a single place can be a very tedious task if done manually. Even if you code your own site, going through the process of building the ETL (Extract, Transform, and Load) scripts for each source can also be very time-consuming.
So to help you out, I’m going to show you how to capture data from external sources and save it into a single, centralized CMS that you can later leverage to create your own aggregator site. And you’ll be able to do this with less than 50 lines of code thanks to the help of products like Zapier, Zeit and ButterCMS.

Connecting the dots: How to create an aggregator site
If we leave aside the coding required for this scenario and focus only on the logic behind it, these are the steps required to create an aggregator site:
- Poll the data source (or sources) to obtain the latest records from it.
- Capture these records, clean them up, and format them for storage.
- Finally, save them into some form of data storage that can later be queried in order to list them on your site.
In other words, the steps are those involved in any ETL process. And as I mentioned above, writing the code for this is possible, but it would require a lot of work, great attention to detail, and quite a lot of testing and bug fixing (as any normal development cycle requires).
Instead of writing all that code, we can use external platforms for each step of the process, thus greatly simplifying the needed work and reducing the amount of time required. Here are the platforms we’ll be using:
Zapier
This platform allows its users to connect applications and create automation actions based on events. It allows you to integrate over 1,500 apps with one another. And if you’re creating a custom application (like we’ll do in this article), you can even set up webhooks to be executed during particular events.
Zapier will come in handy for the first part of the process (i.e, the Extract step). We can quickly create a Zap (which is what they call their automation tasks) to poll our data source and make sure we’re notified when new data is available.
Zeit
The second step in the process requires us to write custom code since we’ll be marshalling the data records extracted from the previous step. This code needs to live and run somewhere that’s publicly available for the webhook from Zapier to reach. This is essentially a web server that will receive a POST message. Although Node.js is known for how simple it is to create a web server, making it available for the entire internet is not an easy (or particularly cheap) task. After all, you’ll need some form of hosting and probably a domain name that you can reference. There are a lot of services that help with this task by providing the platform you need to deploy your code into.
That being said, Zeit goes one step further and simplifies the process even more by extracting the boilerplate code (in this case, the web server code). It then allows you to simplify the code by using a lambda function that is publicly available with an auto-generated domain name.
ButterCMS
Finally, the last portion of our platform is the storage of the data records that have been captured and transformed. Thanks to Butter’s Write API, we’re able to send these records straight into it. The best part? It’s not just a simple storage. Essentially, the records will be saved as individual pages that we can later edit and format as we see fit. This gives us complete control over the content we’re aggregating. We can then use these records through a REST API to create the visualization we need (e.g., a web page, a mobile app, or even another ETL process!)
That being said, the three platforms working together look like this:
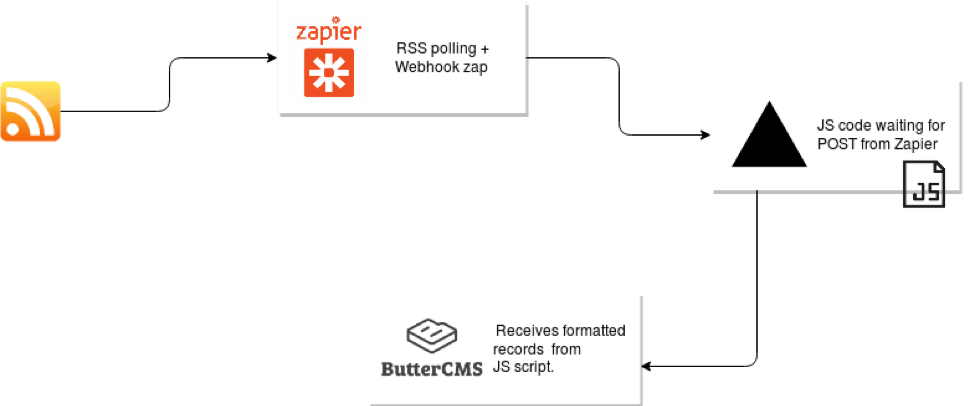
As you can see, the data flow is quite straightforward. The external data source we will be using for the purposes of this article is an RSS feed. Feel free to browse through Zapier’s offerings to find the best one suited for your needs.
Also, remember that the first step can be duplicated as many times as you need in order to integrate as many external sources as you require, without having to add extra parts to the next steps of the process.
Making things happen: Using Zapier, Zeit, and ButterCMS together
With the architecture out of the way, let’s take a quick look at how to work with each of the boxes shown above.
There is a certain dependency tree in this architecture—automation is dependent on having the script published in Zeit, and the script depends on having the page type defined in ButterCMS. Because of this, we’ll actually work our way backwards, starting by defining the page type in Butter and eventually defining the Zap as our last step.
As a note of interest, today we’ll be capturing data from a public RSS feed, specifically NASA’s Breaking News feed. (You can see the full list of feeds for NASA here.)
Adding a new page type to Butter
You can think of this as creating the table structure for our data storage. But instead of simply having a database, we have a headless CMS where we can store and query our data using a very simple RESTful API.
The first thing we need to do is create a new page type, which will work as a template for our new pages.
As you can see from a simple download of the RSS feed file, each news item has the following elements:
<item>

    <title>NASA Announces New Tipping Point Partnerships for Moon and Mars Technologies</title>

    <link>http://www.nasa.gov/press-release/nasa-announces-new-tipping-point-partnerships-for-moon-and-mars-technologies</link>

    <description>NASA has selected 14 American companies as partners whose technologies will help enable the agency’s Moon to Mars exploration approach.</description>

    <enclosure url="http://www.nasa.gov/sites/default/files/styles/1x1_cardfeed/public/thumbnails/image/cuberover_4wd_moon.jpg?itok=5knylIUv" length="949867" type="image/jpeg" />

    <guid isPermaLink="false">http://www.nasa.gov/press-release/nasa-announces-new-tipping-point-partnerships-for-moon-and-mars-technologies</guid>

    <pubDate>Fri, 27 Sep 2019 14:15 EDT</pubDate>

    <source url="http://www.nasa.gov/rss/dyn/breaking_news.rss">NASA Breaking News</source>

    <dc:identifier>452614</dc:identifier>

</item>
More specifically:
- Title: This contains the actual title of the news article.
- Description: This element gives the reader a short description of the content of the article.
- Link: This is the full link to the story in case the reader wants to read more.
- Enclosure: This contains a link to the header image of the news item. It can come in handy if you want to use a visual aid on your site.
- Guide: As the name suggests, this is a global, unique ID for the article. It can either be a permalink (if the attribute isPermalink is set to true) or a simple Guid. Either way, the content of this element is used to identify the article on a global scale.
- PubDate: This element contains the publication date for the article.
- Source: This references the RSS feed from which this news item came from. This is particularly useful if you’re importing data from several different sources.
- DC:Identifier: This element seems to be an internally used ID, but it will be of no interest to us.
From these elements, we’ll only use the title, the description, the original link, its publication date, and the image URL.
Creating the page type
In ButterCMS, in order to create a page type, you first need to create a page, then turn it into a template (a page type). So, we’ll start by creating the page.
1. Creating a new page
Once logged in, go to the Pages section and click on the “Create New Page” option. This is located under the “New Page” button at the top right corner of your screen.

Once there, add the fields we discussed earlier:
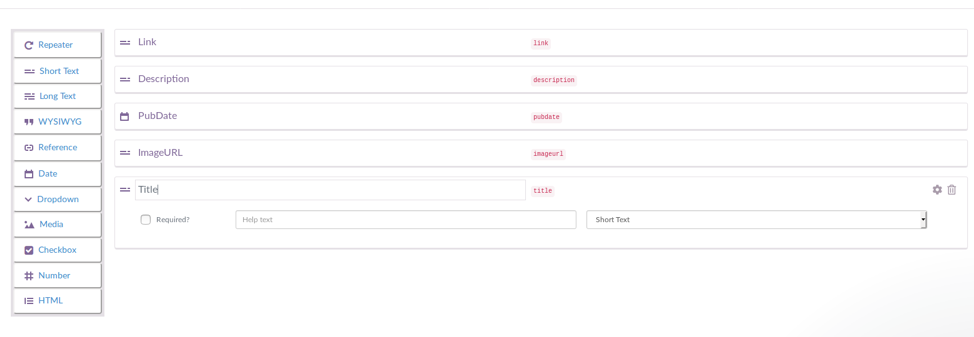
Using the different field types on the left side of your screen, select the desired one for each field and then simply fill in the name for each one.
Finally, click on the Save button (top right corner of your screen) and add a page name.
Once this is done, you’ll have a page ready to add some content to.
2. Creating the page type from the existing page
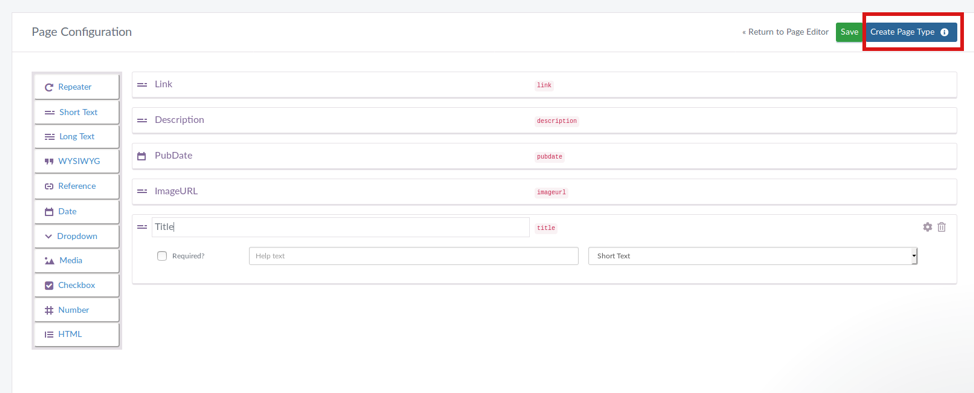
Back on the Pages section, click on the new page. Then, from the detailed view, select the Configure Page Type option inside the cog icon, as shown below:

You’ll then be redirected to the page configuration screen, where you can add any last-minute field you might need. Once you’re done, click on the Create Page Type button on the top right corner as shown below:
This in turn will ask you for the name of the new page type. Fill that in and click Save as a Page Type:
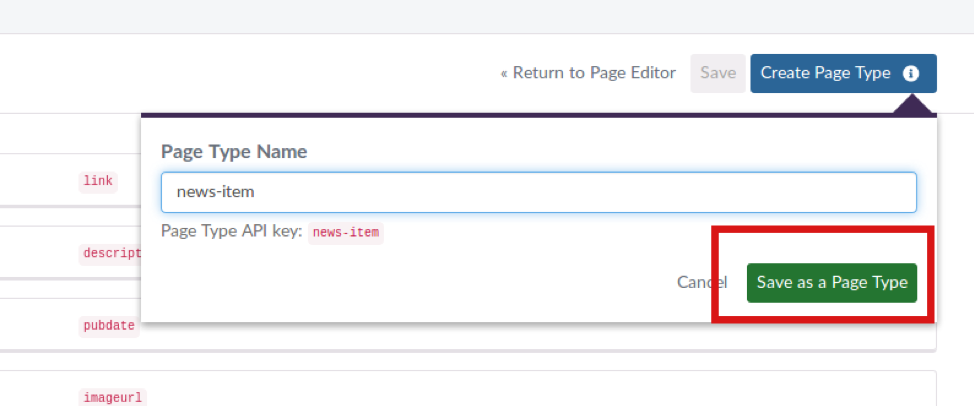
Notice how the “Page Type API key” is generated for you. Take note of this because you’ll need it in the next step.
With the new page type created, we can move on to the script.
Transforming the data with Node.js
Now I’ll show you how to use Node.js to receive the data from Zapier in a POST request and send it to ButterCMS as a new page of news-item type.
Essentially, the code needs to grab the request’s body, extract the desired fields, and create a new request meant for Butter’s Write API.
This code is quite straightforward if you’re using something like ExpressJS, which does everything you need when it comes to capturing the POST request content (with plain Node.js code, it can take a bit more effort.). But thanks to Zeit.co, we don’t even need to worry about the web server. We’ll just create and export a function that takes two arguments: the request and response objects. With that, we can do everything we need.
Here is the full code for our function:
const request =  require("request")
const slug = require("slug")

const WRITE_TOKEN = "<YOUR WRITE API KEY>"

module.exports = async (req, res) => {
const { body } = req

	let tPage = { //1. capture the wanted fields
   	 title: body.title,
  	 slug: slug(body.title),
  	 "page-type": "news-item",
  	 fields: {
    	 "en": {
      	link: body.link,
      	description: body.description,
      	pubdate: body.pubDate,
      	imageurl: body["raw__enclosure__@url"],
      	title: body.title
    	  }
  	 }
	}

	//Some basic debug logging
	console.log("== Request sent ===")
	console.log(tPage)

	//2. Send the request to create a new page
	let postUrl = 'https://api.buttercms.com/v2/pages/'
   	 request.post({ //perform the page creation
   		 url: postUrl,
   		 headers: {
   			 "Authorization": "Token " + WRITE_TOKEN
   		 },
   		 json: true,
   		 body: tPage,

   	 }, (err, resp) => { //We're done!
   		 if(err) {
   			 console.log("There was an error: ", err)
   			 return res.json(err)
   		 }
   		 console.log("Done, news page created!")
   		 console.log(resp.body)
   		 res.json(resp)
   	 })
}
As advertised, it’s less than 50 lines of code. Note that the field names from the request’s body may not be exactly the same ones shown on the XML sample. This is because Zapier is transforming the XML into JSON (which is what we receive as the POST’s payload), and the element names and their properties need to be merged into a single property name for the request JSON. This is why we receive fields such as raw_enclosure@type and raw_enclosure@url, which reference a single enclosure element back in the original XML (with its two properties, type and url).
Publishing the code
In order to make the code accessible to the Zap we’ll be creating in a minute, we need to deploy it somewhere. This is where Zeit comes in.
In just a few simple steps, we can publish our function on Zeit.co and make it available as an API. Here is what you need to do.
Note: I’ll be using Zeit’s CLI tool for this, but their website provides great GitHub integration for you to automate deployments based on hooks.
1. Download Zeit’s CLI tool
To install Zeit’s CLI tool (called now), all you need to do is have npm installed on your computer. This should already be the case if you’re working with Node.js.
With this, simply run the following command:
$ npm install now -g Once the installation process is complete, you can log in (assuming you already signed up on their website).
$ now loginInput your credentials and you’ll be ready to start publishing!
2. Structure your project
Now, simply make sure the code from above is inside an api folder, located inside your project’s folder. For example, it should look similar to this:
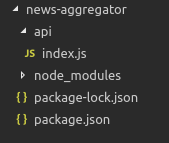
This is the structure Zeit is looking for when it comes to a Node.js project.
3. Deploy your code
Wait, that’s it?! Well, yes—yes it is! You can now deploy your code to a cloud-based web service simply by typing this:
$ nowThe tool will create a new project in your account (if it doesn’t already exist) based on the folder’s name, and it’ll also give you the domain name you need in order to access your API.

That is the output of the now command. Notice the last line where it shows where the code was deployed to. You need to add the /api URI to this domain in order to access our function, but we’ll get to that in a second.
Automating data gathering
The final step is to automate the process of data-gathering, and in order to do that, we’ll be using Zapier. This amazing platform allows you to integrate over 1,500 different applications with one another. I’m talking about Slack, Google Spreadsheets, MailChimp and even Twitter—and the list goes on and on!
The steps required to create the Zap are quite a few, as you’re about to see. But don’t worry—they’re very straightforward.
1. Start the creation process
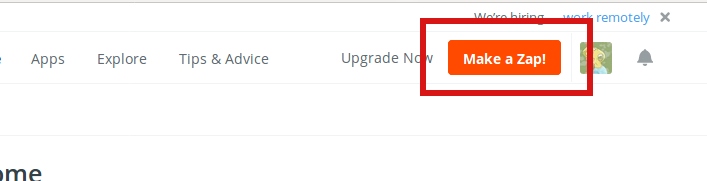
In order to start the process, click on the Make a Zap! button at the top right corner of your screen:
2. Find the right type of trigger
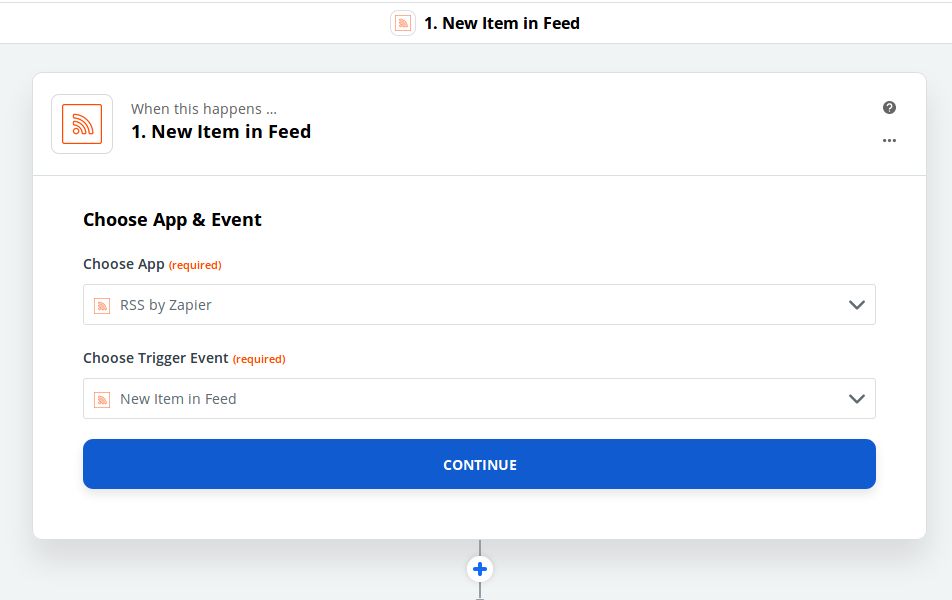
We’re looking for an RSS-based trigger, so we’ll look for it on Zapier’s store by searching for RSS:

3. Configure the trigger
You need to let Zapier know what needs to happen for the automation to get triggered. In this case, it would be to find a new item in the feed. So we’d write this:
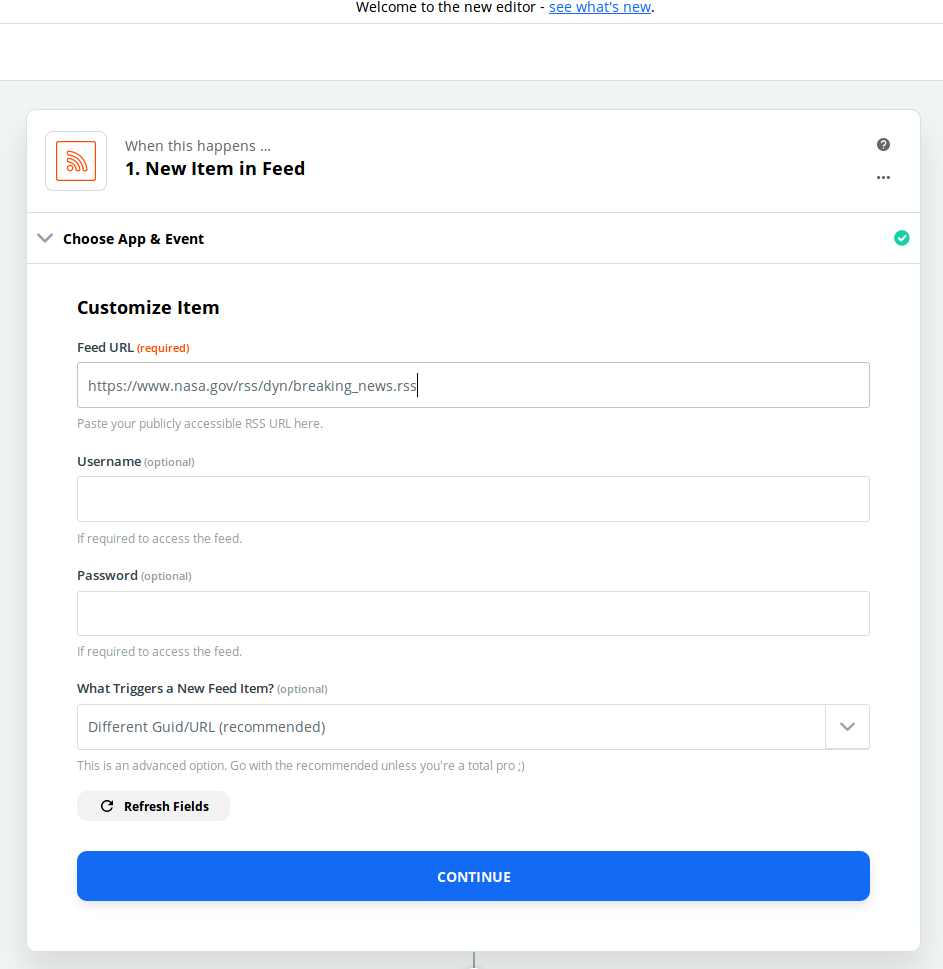
After that, just click on Continue, then you’ll get asked about the feed to monitor. Fill in the URL for it, but the rest of the fields can be left with their default values (or lack thereof).
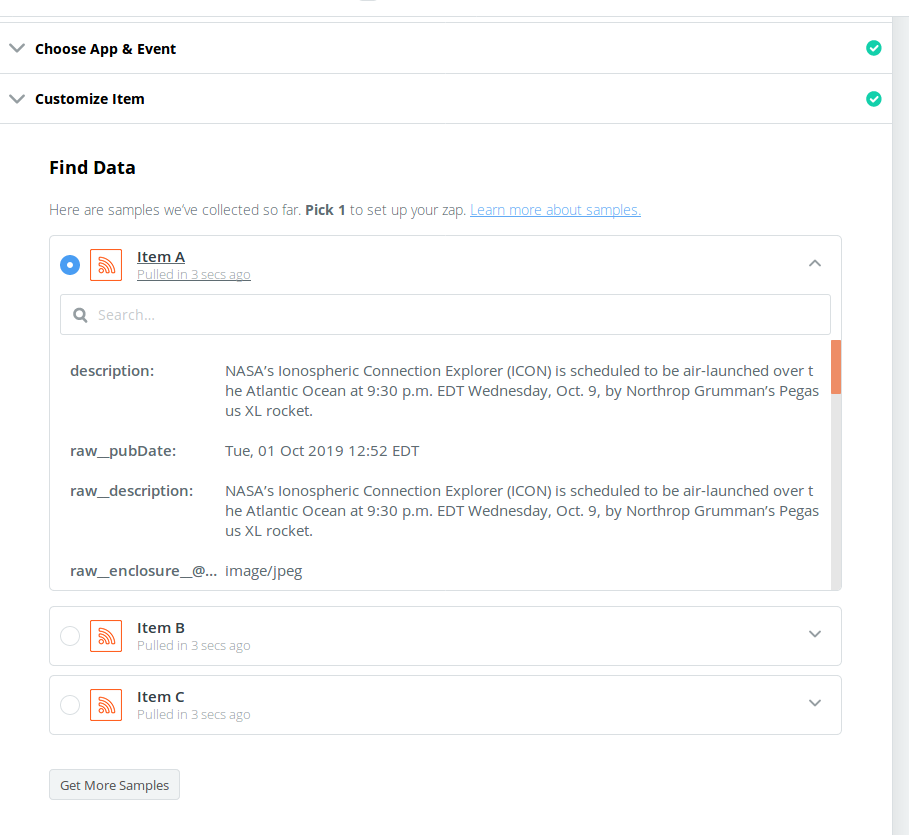
After clicking Continue, you’ll get a chance to test the connection. I suggest you do this because it’ll show you the list of fields it was able to obtain along with the content of each one. This is crucial in making sure the logic of your script is solid and will work with the parsed fields.
4. Configure the action
Once the trigger is ready, we need to automate the action that takes place once the trigger conditions are met.
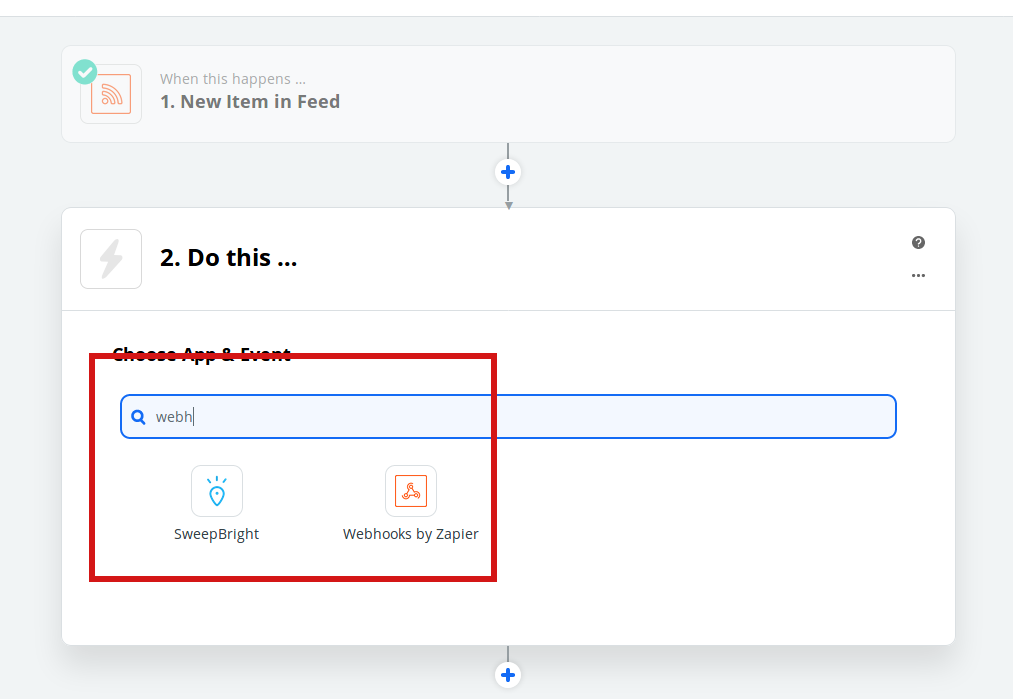
For that, you’re presented with an actions finder where you can enter the word “webhook” and select “Webhooks by Zapier”.
This action will let you configure where the webhook is published and test how it works with real data.
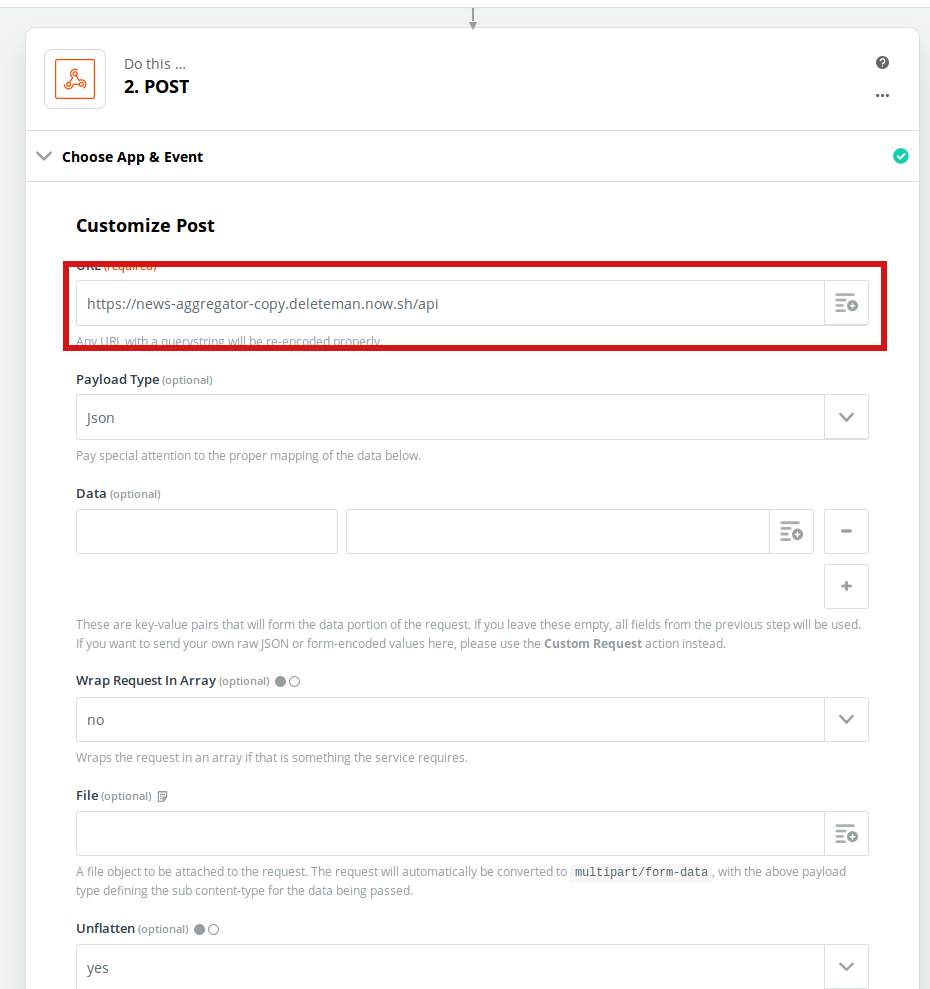
There are a lot of things you can customize for this action, but for now we’ll just worry about its URL. (Remember to add the /api to the domain given by the CLI tool.) Once the hook is configured, you’ll have the ability to test it by having Zapier send a request, just like it would do during normal production hours.
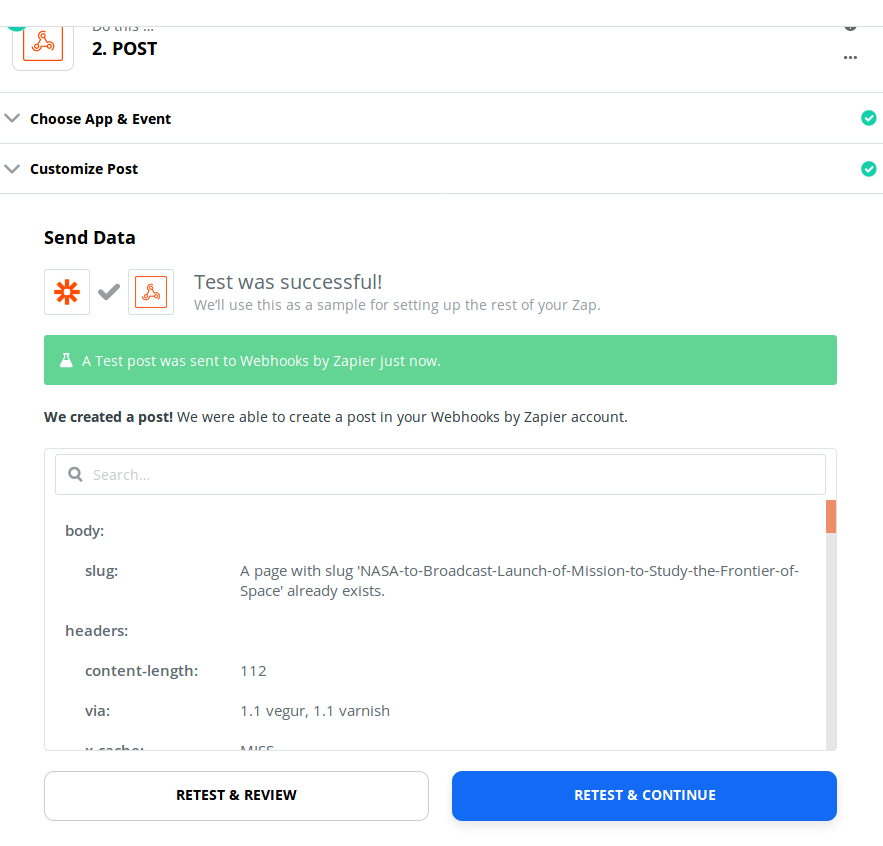
You’ll get a green bar if your function sends a valid response code; otherwise, it’ll be a red one. If everything works, then hit Continue and you’ll be ready to go!
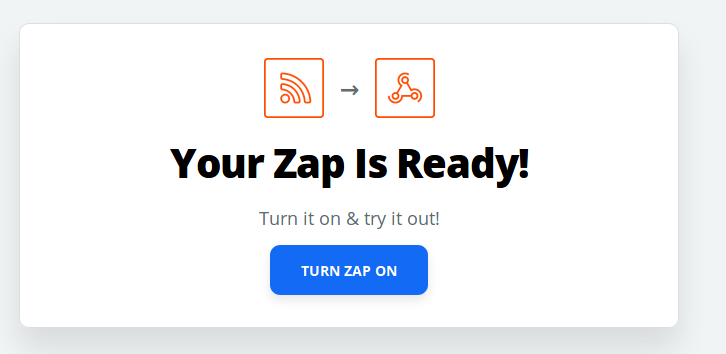
Congrats! Your Zap is now ready and can be turned on at any time.
I left mine running for the past two days, and I’m already seeing news items come in:
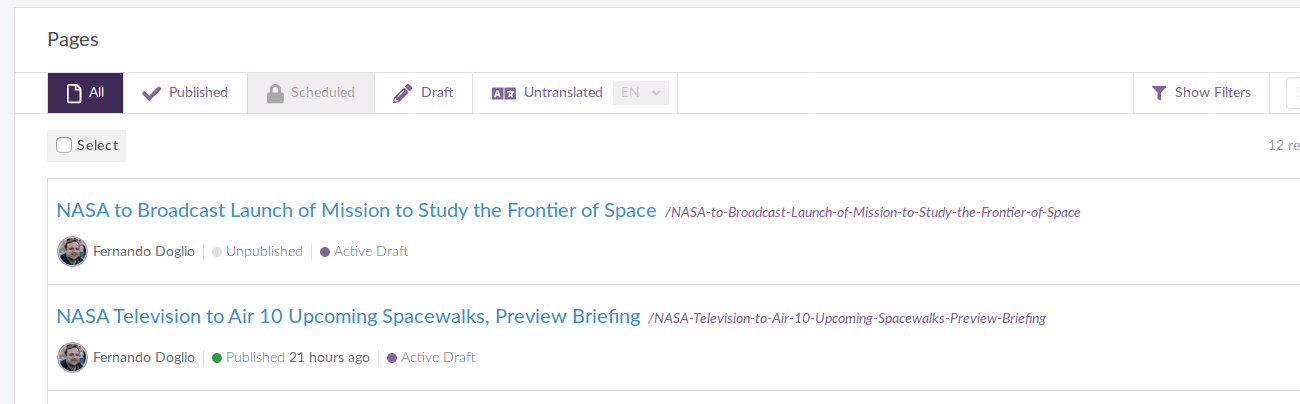
Although there’s only two of them, this shows you how you can create a very powerful and useful application with just a simple set of steps.
Final words
By now, you can clearly see how easy and powerful this setup is. And if you wanted to, you could create an aggregation of all of NASA’s feeds by adding more Zaps and pointing them to the same webhook. Scaling is not a problem since all platforms are managed and you can be up and running in less than 10 minutes.
Once this is ready, you’re free to use the data taken from ButterCMS’s Read API in any way you want. It’s there as draft pages—just to make sure you’re not auto-publishing things you don’t care for.
By following this tutorial you’re now ready to bring any RSS feed into your Butter account. If you’re in the Marketing industry, you can grab a set of Marketing RSS feeds and enhance your site by providing these “Latest trends in the Marketing Industry” articles for your clients in just a few hours (which is crazy fast if you think about the value you’re providing to your audience).
If you’re looking for other interesting ways to use our Write API, check out our article on How to Set Up Auto-Translation of Your Pages.
Let me know in the comments if you’ve used any of these tools or if you found this architecture helpful in any way! I’d love to know!
ButterCMS is the #1 rated Headless CMS


Related articles
Don’t miss a single post
Get our latest articles, stay updated!
Fernando Doglio has been working as a Web Developer for the past 10 years. In that time, he's come to love the web, and has had the opportunity of working with most of the leading technologies at the time, suchs as PHP, Ruby on Rails, MySQL, Node.js, Angular.js, AJAX, REST APIs and others. He can be contacted on twitter at: @deleteman123 or you can read more about him and his work at www.fdoglio.com