While WordPress powers 43% of the web, there are plenty of easier ways through which you can create your marketing site. WordPress can give you a basic outlook to your site. But, to make changes to it, you need to understand how WordPress works. Apart from that, WordPress tends to slow down as you need to add more plugins to modify your site.
You can create a marketing site with ease using React.js on the Front End and ButterCMS on the Back End. In this way, you can easily construct and manage the data that your Front End needs. You can use Butter as a headless CMS to build websites in any tech stack. Also, ButterCMS works with any tech stack and works with zero maintenance.
In this tutorial, we’ll cover seven reasons marketers are quitting WP for API-based alternatives like ButterCMS and walk you through how you can use it to easily create a marketing site. In addition to using ButterCMS, we will also be using Next.js on the front end. Next.js is a React.js framework that will do Server Side Rendering for you. As a result, your site will have a much better SEO score all while avoiding WordPress.
Table of contents
What Your Dev Team Won't Tell You About WordPress
Dev teams rarely raise their concerns about WordPress. Marketers give them a brief; they execute it the best they can. But, every so often, developers take to the internet and share what they really think. And it's juicy:
- "Anyone else hate WordPress with a passion?"
- "WP remains popular, not because it serves any client's purpose (it doesn't), but because those who deploy it already use it and don't know any better."
- "It's a bit like running. People say they like to run. Hell, people even go so far as to be passionate about running. But really, deep down inside, everyone hates to run. Just like everyone hates WordPress."
Ask your dev team what they think. Then ask yourself if WordPress is still the best alternative. If the only good reason to use WordPress is that WordPress is what you’ve always used, then it might be a good idea to take a look at what else is out there.
Is API-Based CMS an Alternative to WordPress?
API-based CMS — also called headless CMS — is a brand-spanking-new approach to content management. The best way to understand API-based CMS is to think of CMS as two separate parts: A 'head' and a 'body.'
- Head: This is the presentation layer in website design — the place you send your content.
- Body: This is the content repository — the place you store your content.
The idea behind API-based CMS is that you don't need a 'head' to manage content. Because the 'head' operates independently from the 'body,' you can chop it off and publish content via an API. Then someone else takes care of the 'head,' or presentation layer, for you. That means you get rid of all the scaling, security, and maintenance that slows your dev team down.
The above might sound complicated, but it's not. An API-based CMS has a similar interface to WP, so you don't need to learn new skills to create and update content. You send your content to a decoupled presentation layer using the API. Another company does all the hard work for you. This approach allows your content to be stored in one central place so you can display it across different devices (websites, mobile sites, apps, and digital displays) each having its own presentation layer, or look and feel.
ButterCMS is a powerful headless CMS that you and your developers will love. It has a WordPress-like interface for content editors but radically improves the platform by managing all the back-end problems dev teams hate. Goodbye out-of-date templates, plugins, security issues, and scaling problems.
But more about Butter later.
Why is Quitting WordPress So Scary?
Jumping from WP to an API-based CMS might fill you with fear, and that's totally understandable. WordPress has dominated CMS for nearly 20 years:
- WordPress "powers" 39.5 percent of all websites.
- Many of the world's most successful corporations use WP, including countless Fortune 500 companies.
- There are over 55,000 WordPress plugins.
Perhaps WordPress is a platform you've used for some time. You're familiar with it. So quitting WP is hard.

However, you'll soon realize there are better WordPress alternatives out there — platforms with a similar interface that offer better performance and productivity. Flexibility and freedom are available when you choose the best of breed digital marketing solutions for your entire organization.
7 Reasons to Quit WordPress
#1. Your Developers Don't Like (Or Don't Know) WP
Many developers think WordPress is an outdated system that has evolved little since its conception in 2003. They know there are newer, better approaches to CMS that manage and publish content. But marketers still insist on WP.
It's a struggle.
Talk to your developers, and if they don't like WordPress, consider an alternative. Something like 'headless' CMS might sound like a big change. But it’s really a small change that makes life easier for your dev team and helps you generate better marketing results.
Some developers don't know how to manage WordPress sites. That's because WP requires PHP knowledge, and some developers use more modern programming languages to enable better overall performance. Why not go with the faster, more scalable technology? Choosing a low-code CMS solution opens you up to new possibilities and better collaboration with your dev team.
#2. WordPress Slows You Down
Page load speed is one of the most critical metrics for SEO and user experience. Forty-seven percent of consumers expect web pages to load in two seconds, while bounce rates rise by 32 percent if page load times increase from one to three seconds. It's clear: Fast-loading pages prevent website visitors from clicking the 'Back' button on their browsers.
WordPress sites can be notoriously slow. You rely on third-party developers to keep their plugins and templates optimized - and sometimes they don’t do that. (More on that in a couple of sections.) Your in-house team might struggle to maintain page speeds because of problems that are completely out of their control.

Upgrading to a headless CMS solves these challenges. ButterCMS uses a global content delivery network (CDN) and caching, which optimizes page speeds. Because headless CMS requires less code, your team can focus on creating a faster, more performant user experience in the front-end application.
#3. The Upgrade 'Hole'
WordPress plugins and templates require constant maintenance. Adding a new element to your page can create a chain reaction that increases page loading times and causes other UX problems.
Say a developer can't update a plugin because it doesn't support the newest version of WP yet. But another plugin requires the newest version of WP. Now add in the update requirements for several more plugins, a theme, and some other add-ons. It's a vicious cycle — an upgrade 'hole.'
You need to update WordPress itself for performance and security reasons, whether you like it or not. But every upgrade kicks off another round of the plugin and theme conflicts. Not only is this expensive, but it also loads your dev team with work just to keep a live site up and running.
An API-based CMS like ButterCMS requires no plugin updates. Or security patches. Ever. It's maintenance-free. You’ve severed the ‘body’ from the ‘head’. The body takes care of itself, and you only change the head when you want to.
#4. Developers Abandon Plugins and Themes
This problem is a major pain point for dev teams. You chose a great-looking theme, but the third-party developers who created it later abandon it and stop maintaining it. The result? The theme malfunctions. It now presents a security risk, so you have to go through the process of implementing a new theme all over again.
Your dev team ends up designing the same website over and over again, moving from one theme to the next. The same process happens for plugins. Some third-party developer - unknown to you and your team - stops maintaining their plugin, which causes serious problems for your site. You have a new security risk, and you’re facing a new chain reaction of upgrade conflicts.
Rather than relying on strangers online, API-based CMS lets your in-house developers take ownership and build your pages with their existing tech stack. This is also great for you as a marketer, as you’re no longer chained to one platform. You can mix and match to get the best, most modern solution for each element of your marketing stack.
#5. WordPress is More Expensive Than You Think
Creating a very basic WordPress site might take a couple of days and a few hundred dollars, but you'll have to spend at least ten times that amount if you want to compete with your rivals. Some marketers have an agency build their site, but hiring a third-party team will set them back $50,000-100,000. And they have to pay a retainer — sometimes $10,000 or more a month — for maintenance.
So marketers hire an in-house dev team, just for the build. But the build team often sticks around fixing plugins, managing update conflicts, backing up data, doing general maintenance, etc.
As we mentioned above, outdated templates and plugins cause security vulnerabilities that inadvertently force you to redesign and rebuild your site periodically, which brings further costs. WordPress says it’s ‘free,’ but when you employ a full-time specialized PHP developer just to manage your software updates - you have to start asking some questions.
An API-based solution results in a lower total cost of ownership compared to a WordPress solution because there's less maintenance and less code. Security patches, version control, and plugin conflicts become a thing of the past.
#6. WordPress Websites Look the Same
It's usually easy to tell which companies use WordPress (without checking the source code!). They’re all using different themes, but somehow they all have a certain ‘look.’ It’s the boxy design, the same old fonts, similar sidebars, etc. The templates create a cookie-cutter site.
This might be fine for some businesses, but if you’re trying to differentiate your brand from your competition, this certainly doesn’t help.
With a WP theme, if one element of the site becomes dated or deprecated, you might have to rebuild the whole site. With headless CMS, you just update that one element without touching the rest of the site.
#7. WordPress Support
Customer support at WordPress is pretty much what you would expect from a free CMS. You’ll need to rely on your in-house dev team to resolve issues and troubleshoot conflicts. You can get in touch with a WordPress representative via live chat, but the process can be slow.
ButterCMS provides world-class support and our customers rave about it. Our documentation is thorough and detailed, and we support any language or framework you want to use. We have an extensive knowledge base, and you can get in touch with an actual human being whenever you need help.
Tutorial: Building a CMS-powered site without WordPress
- Getting Started with an API-based CMS
- Storing data in ButterCMS
- Fetching data from ButterCMS
- Using data in a component
- Building the Hero section
- Building the Clients section
- Building the Features section
- Building the Testimonials section
- Building the Pricing section
- Building the FAQ section
- Building the Contact section
Getting Started with an API-based CMS
Here's a look at the beautiful marketing website I created using ButterCMS:
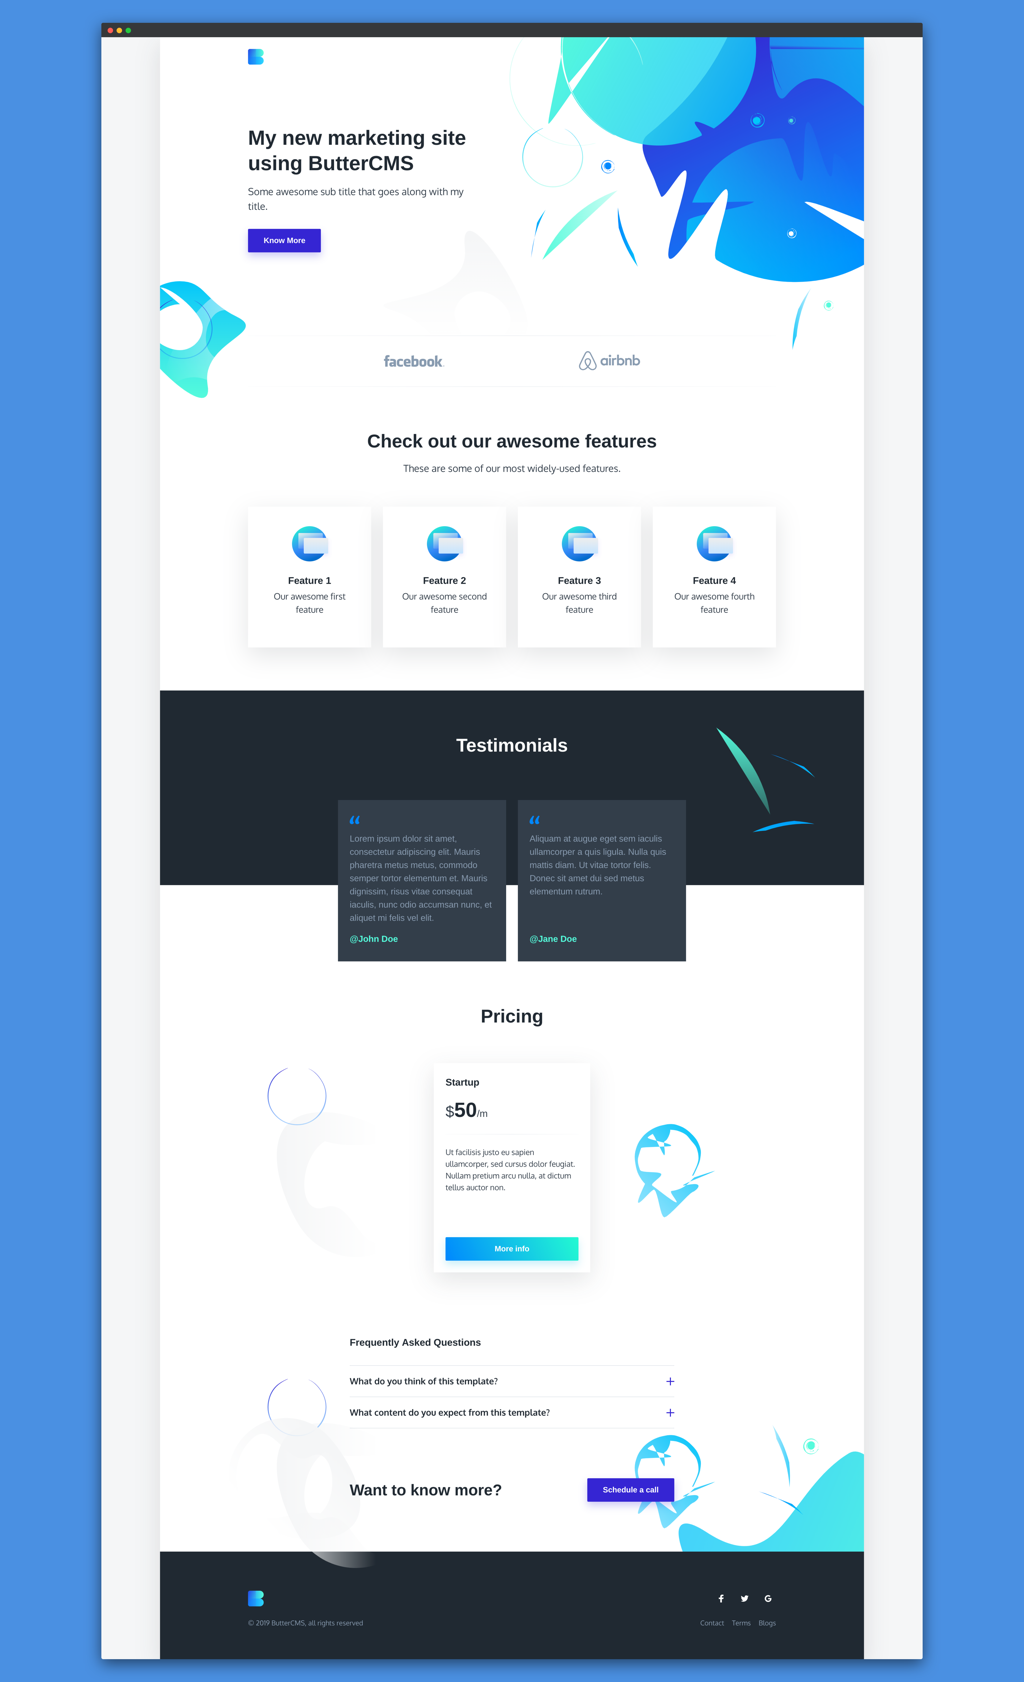
Follow along with me as I show you how to build your own dynamic CMS-powered marketing website, all without using Wordpress. Let's get started.
An online demo is hosted at ZEIT Now and the code is available on GitHub. We will be using the React API Client of ButterCMS. You can start with my initial commit on GitHub to get started with the code.
First, you need to install ButterCMS JavaScript SDK:
yarn add buttercmsThis will add buttercms to your list of dependencies in your project. You will need to initialize ButterCMS with an API key which you can find in the settings page of ButterCMS. In this case, we will use React Context to create and pass props to the consumer. To create a React Context, you need to add the following in pages/index.js:
const ButterCMSContext = React.createContext();
const butter = Butter(process.env.BUTTER_CMS_API_KEY);
Deploying
- Create a ZEIT account at https://zeit.co/signup and download the CLI
- Add the API key as a secret
now secrets add butter-cms-api-key "YOUR_API_KEY" - Run
nowat the project root

Storing data in ButterCMS
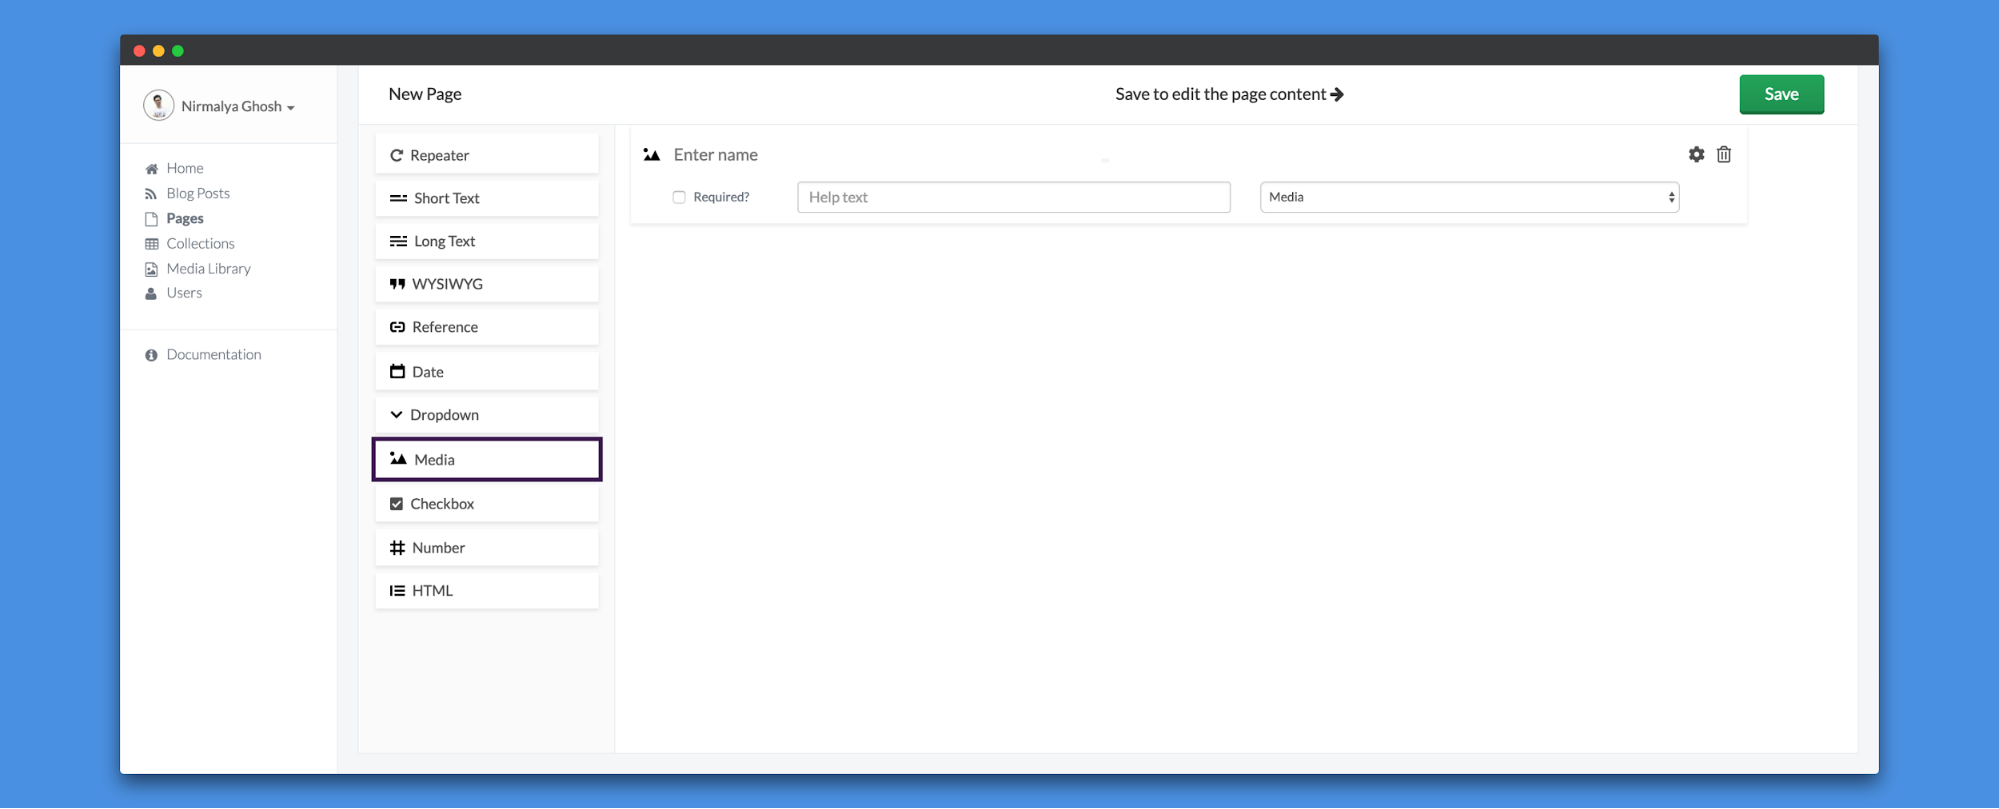
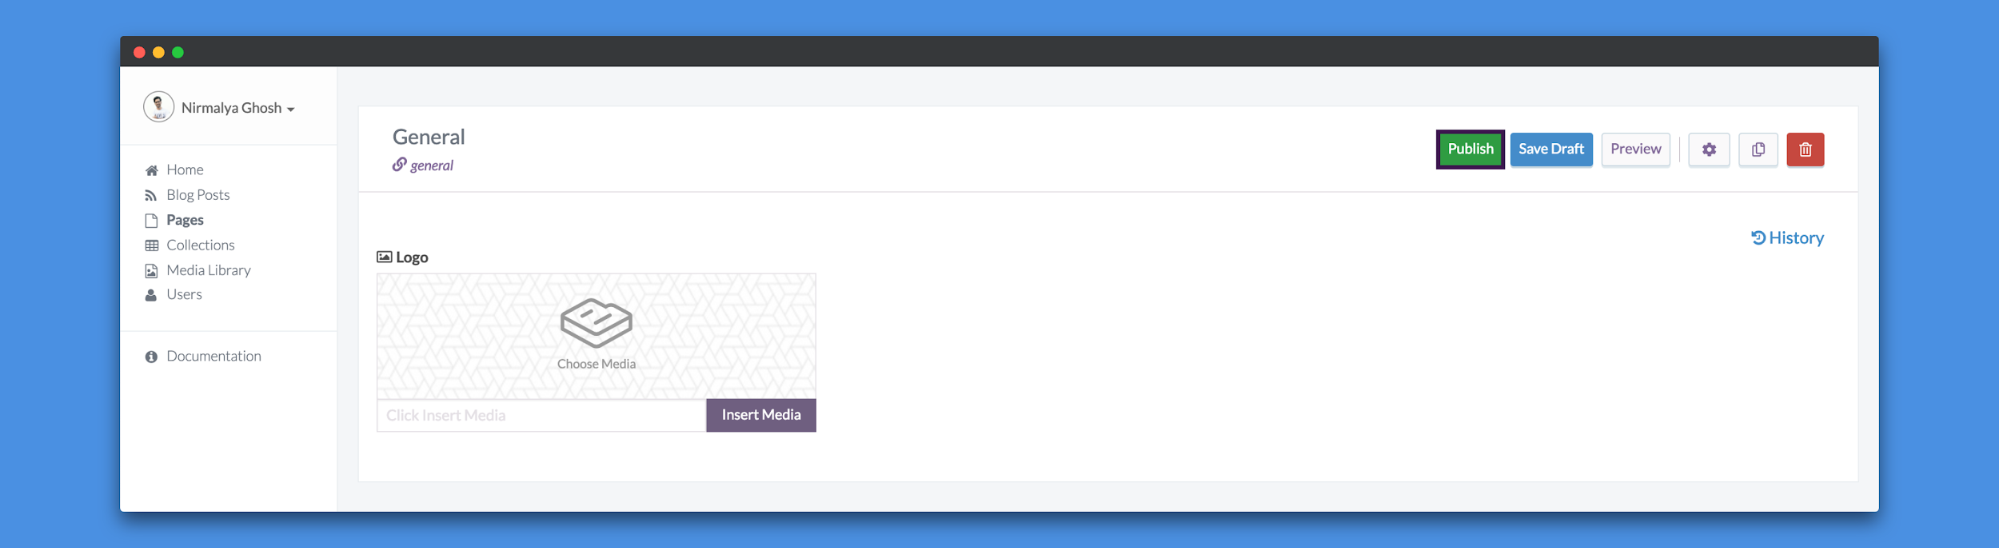
You can create pages in ButterCMS to store your data. Go to the New Page tab and select the Media option from the sidebar:
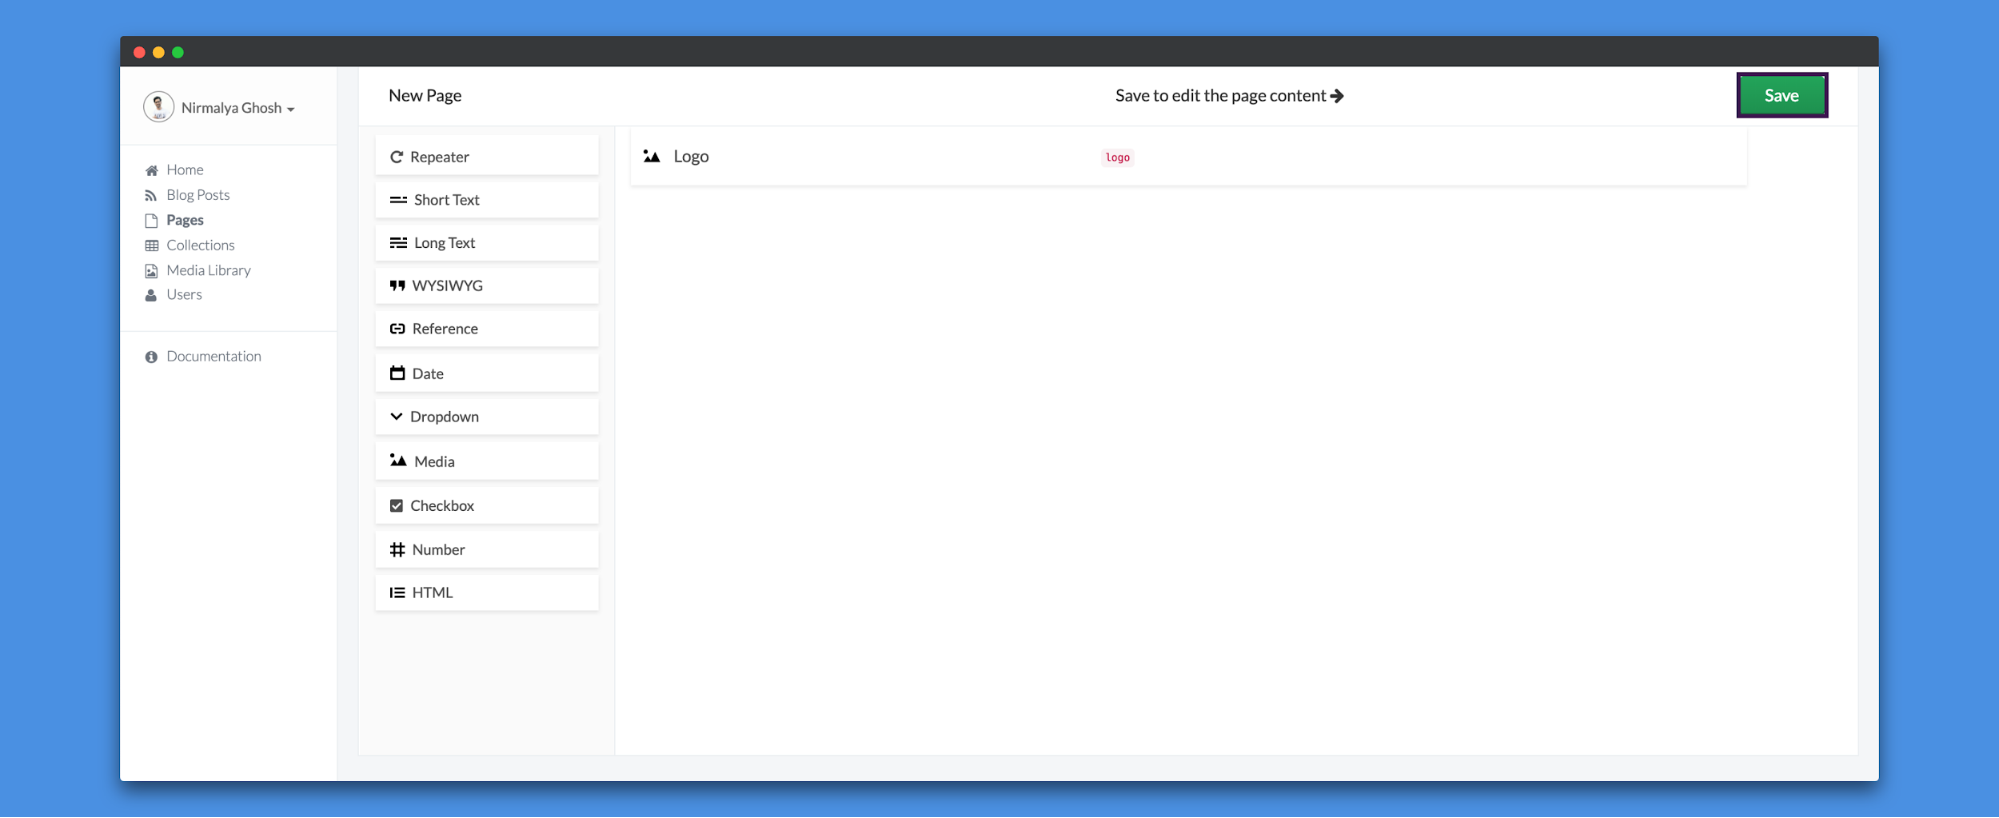
Then, you need to add a slug (logo) to the Media option and click on Save to save the page:
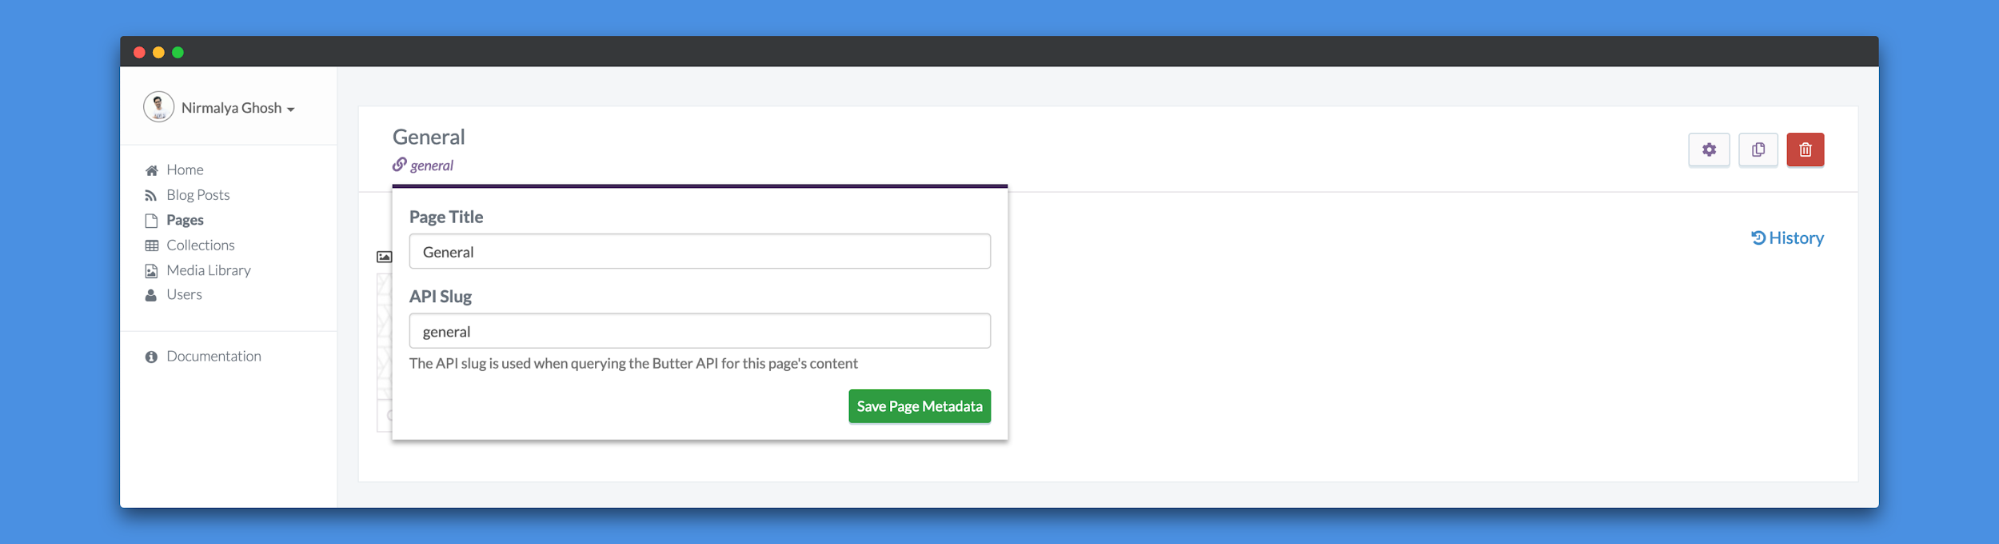
Then, you can add the Page Title and API Slug for the page:
Click on Insert Media to add a new Logo and click on Publish to publish the page:
Fetching data from ButterCMS
We will fetch the data from ButterCMS required for that page using ButterCMS pages API in the getInitialProps hooks provided by Next.js. First, you can create a data object which will store the data fetched from ButterCMS:
 data = {
   generalData: {}
 };
Then, you use getInitialProps to fetch the data from ButterCMS using a async/await:
static async getInitialProps() {
  try {
    const response = await Promise.all([
      butter.page.retrieve("*", "general")
    ]);

    this.data = {
      generalData: response[0].data.data
    };
  } catch (error) {
    console.error(error);
  }

  return {
    data: this.data
  };
}
So, this data is now available as a prop which can be accessed as this.props.data in the render method. We can pass this prop to our components like Header, Footer, etc. using the Consumer Render Props:
<ButterCMSContext.Provider
value={{
  generalData: data.generalData
}}
>
<ButterCMSContext.Consumer>
  {({
    generalData
  }) => {
    return (
      <Fragment>
        <Header data={generalData} />
      </Fragment>
    );
  }}
</ButterCMSContext.Consumer>
</ButterCMSContext.Provider>
Now, this data is available as a prop in the Header component.
Using data in a component
You can use this data in the Header component which will look like the following:
function Header({ data }) {
return (
  <header className="site-header">
    <div className="container">
      <div className="site-header-inner">
        <div className="brand header-brand">
          <h1 className="m-0">
            <Link href="/">
              <a>
                <img src={data.fields.logo} alt={data.fields.company_name} />
              </a>
            </Link>
          </h1>
        </div>
      </div>
    </div>
  </header>
);
}
The logo will appear in the Header section.
So far you've learned how you can save and fetch data from ButterCMS while building the Header section of your site. You can use a similar approach to fill in all the sections for your CMS-powered marketing site. At the end of the tutorial, you will be able to create a full site using the API of ButterCMS.
Building the Hero section
For the Hero section, you can have four fields: title (Short Text), sub_title (Long Text), button_text (Short Text) and button_link (Short Text).
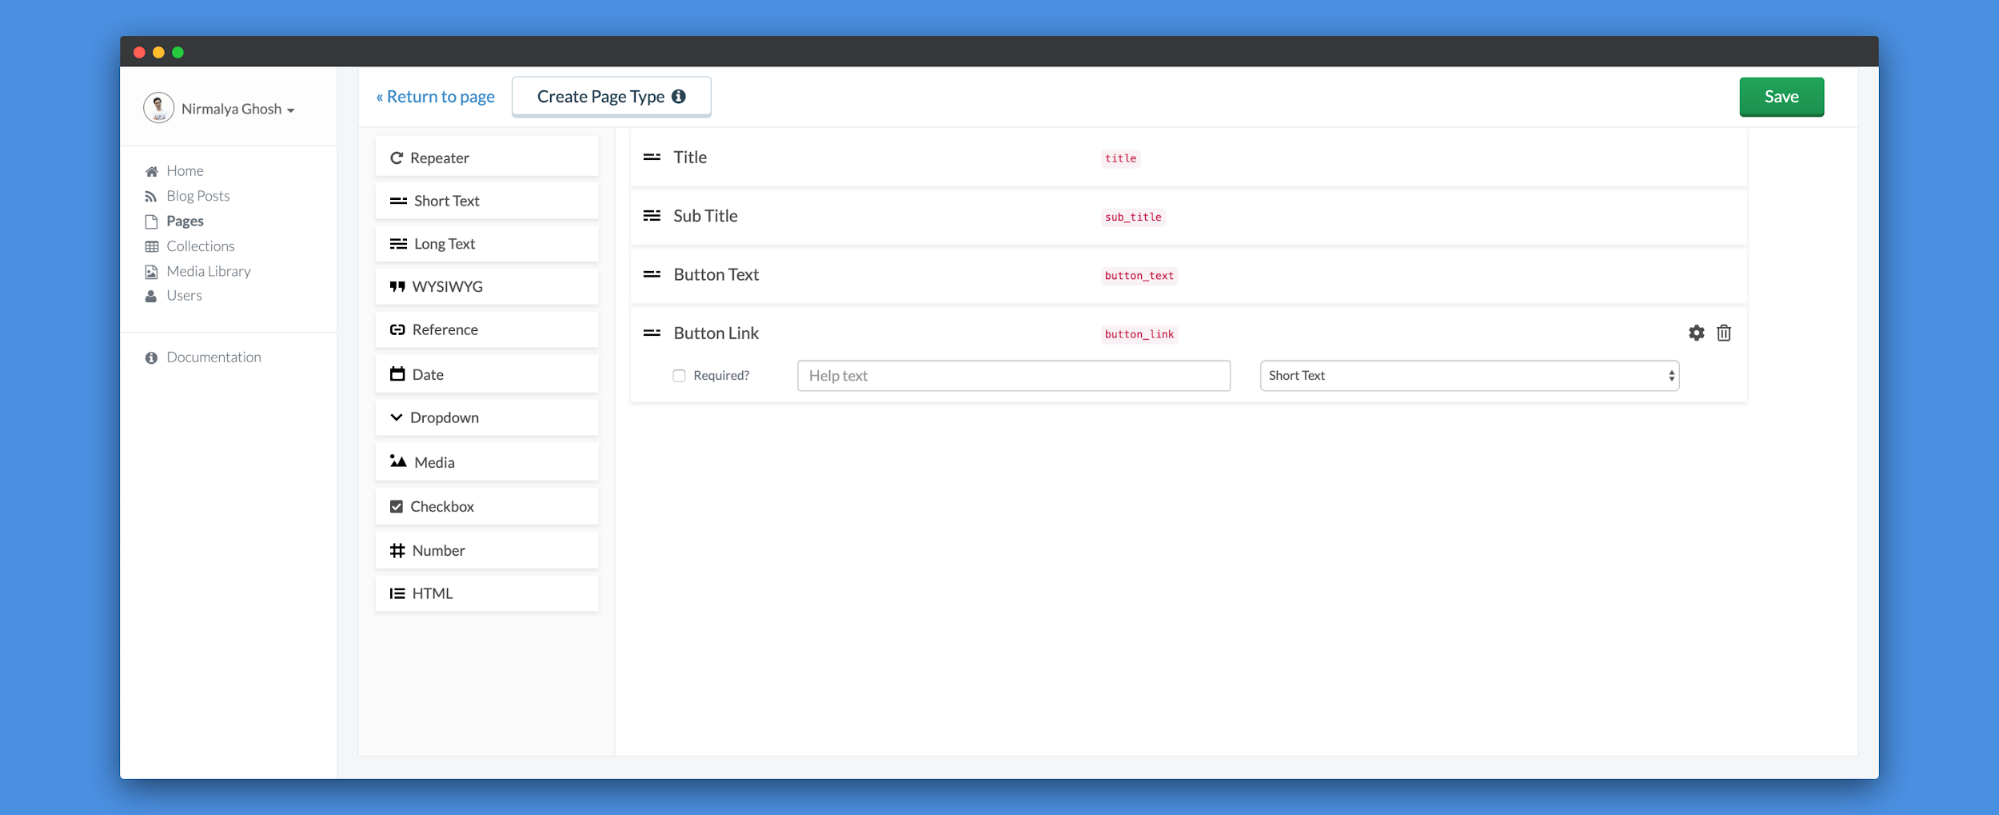
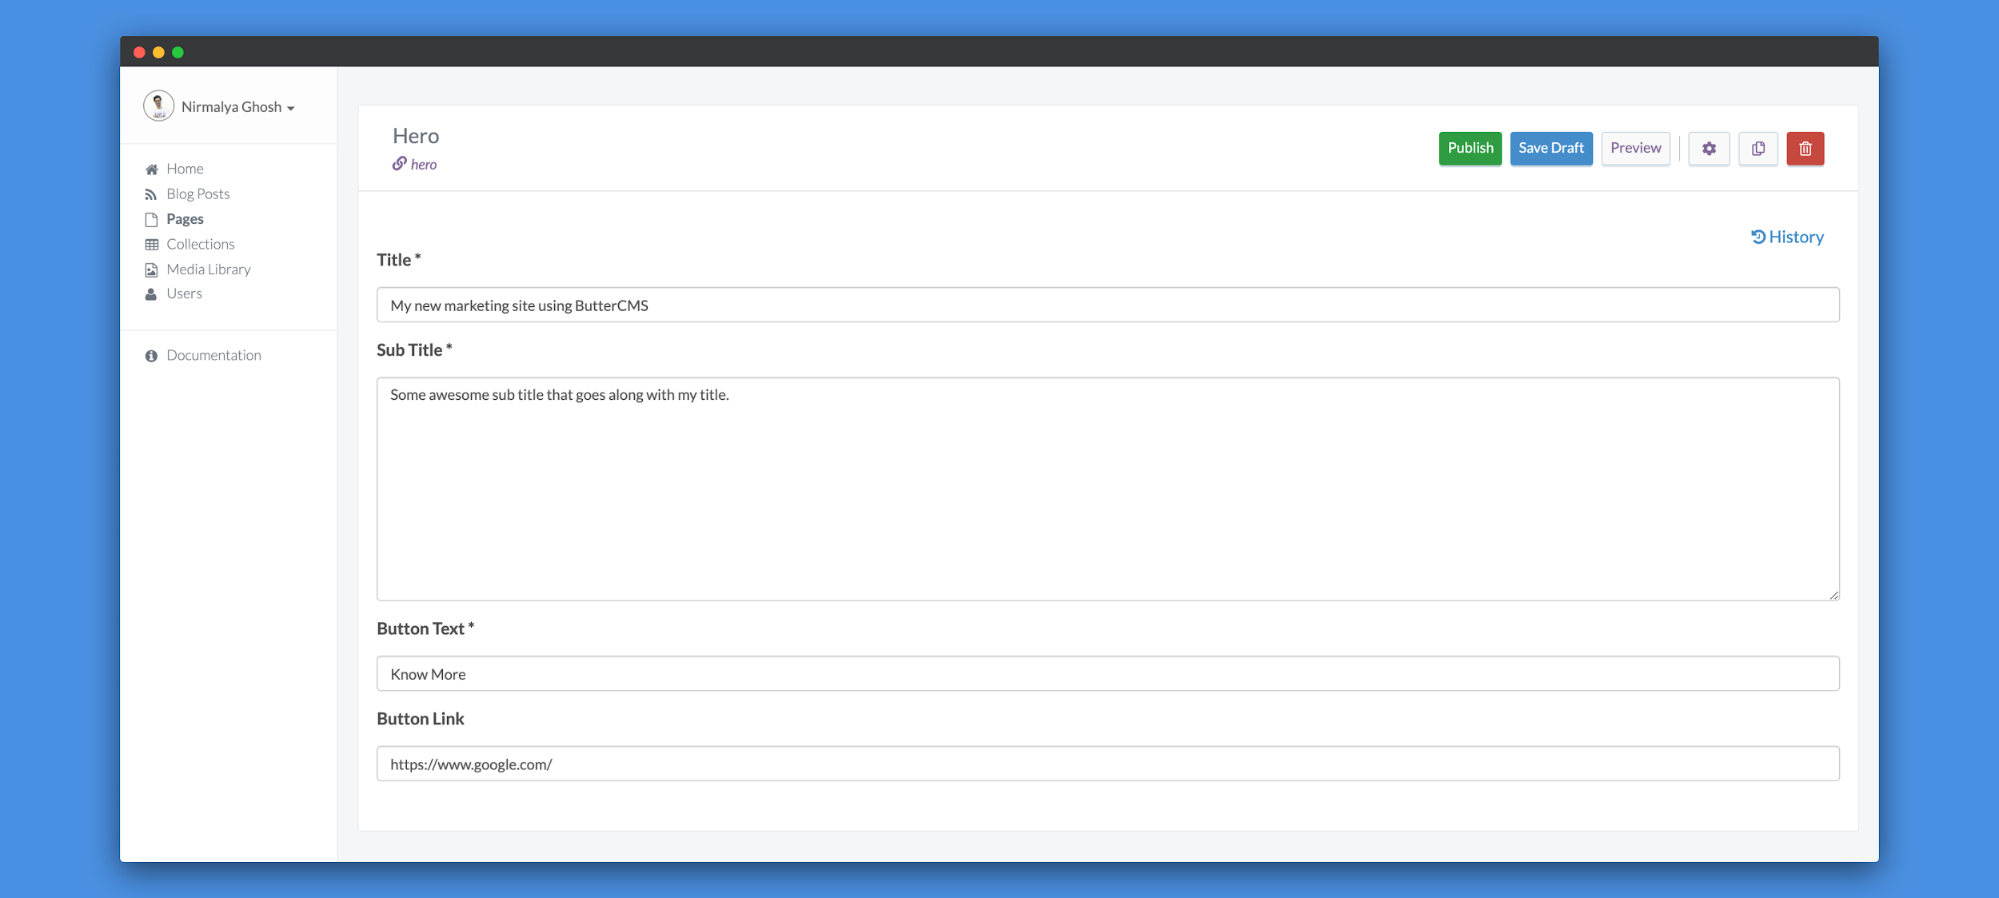
You can save this page and fill in with appropriate details:
You can use this data in the Hero component which will look like the following:
function Hero({ data }) {
return (
<section className="hero">
<div className="hero-left-decoration " />
<div className="hero-right-decoration " />
<div className="container">
<div className="hero-inner">
<div className="hero-copy">
<h1 className="hero-title mt-0 ">{data.fields.title}</h1>
<p className="hero-paragraph ">{data.fields.sub_title}</p>
<p className="hero-cta mb-0 ">
<a
className="button button-primary button-shadow"
href={data.fields.button_link}
>
{data.fields.button_text}
</a>
</p>
</div>
<div className="hero-illustration" />
</div>
</div>
</section>
);
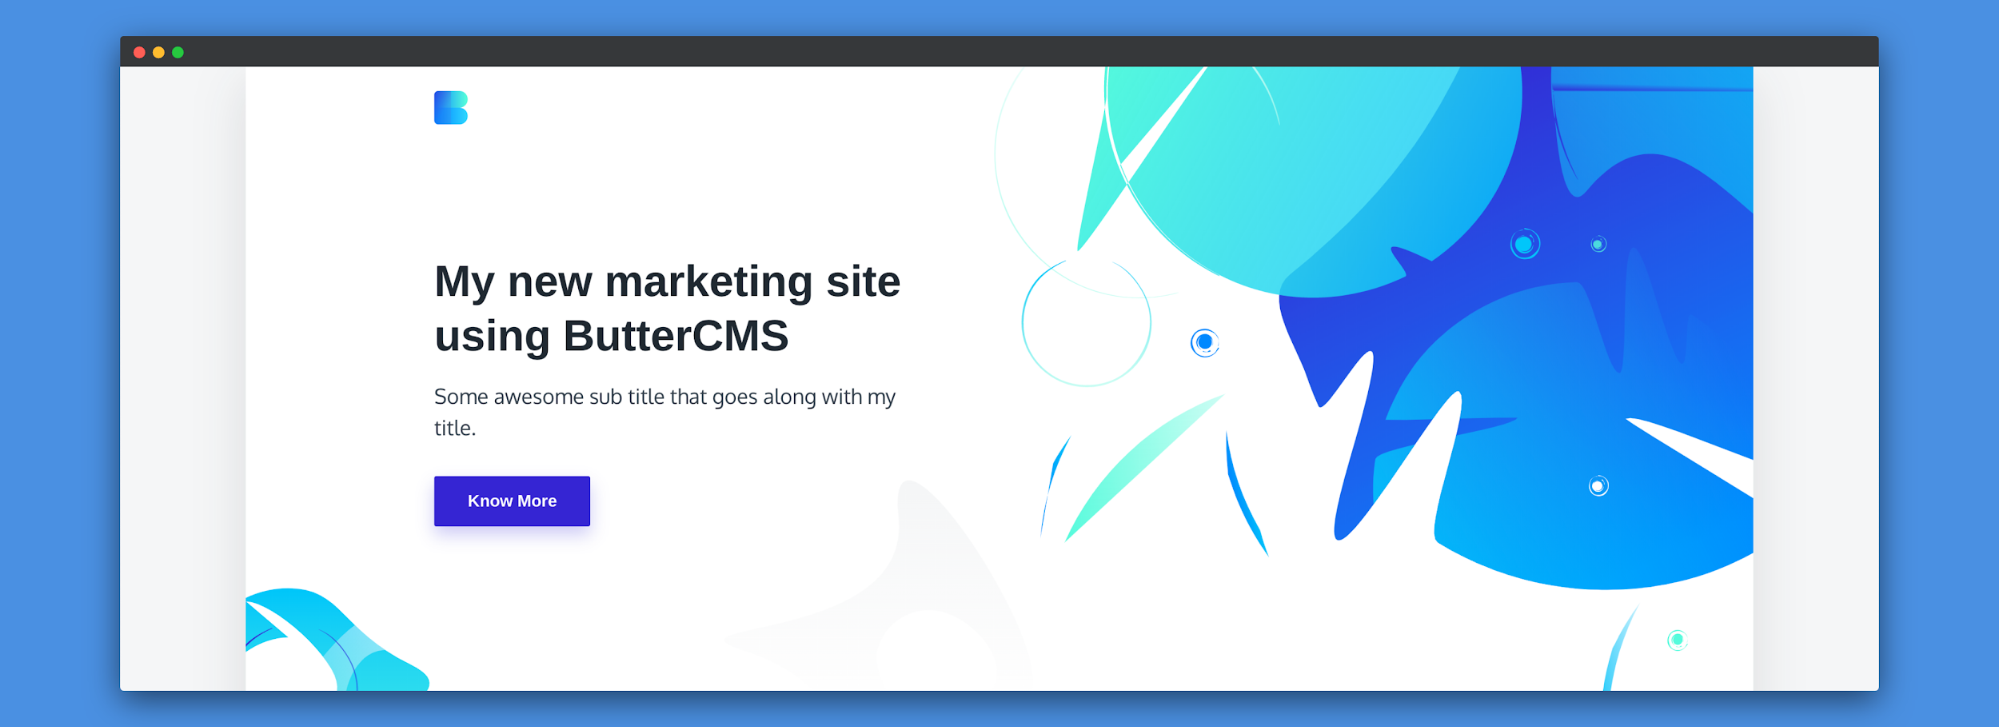
}Once you Save and Publish this page, you can see the changes reflecting on your page:
Building the Clients section
For the Clients section, you can have one repeater field which will have an image (Image) and a name (Short Text) fields inside it:

You can save this page and fill in with appropriate details:
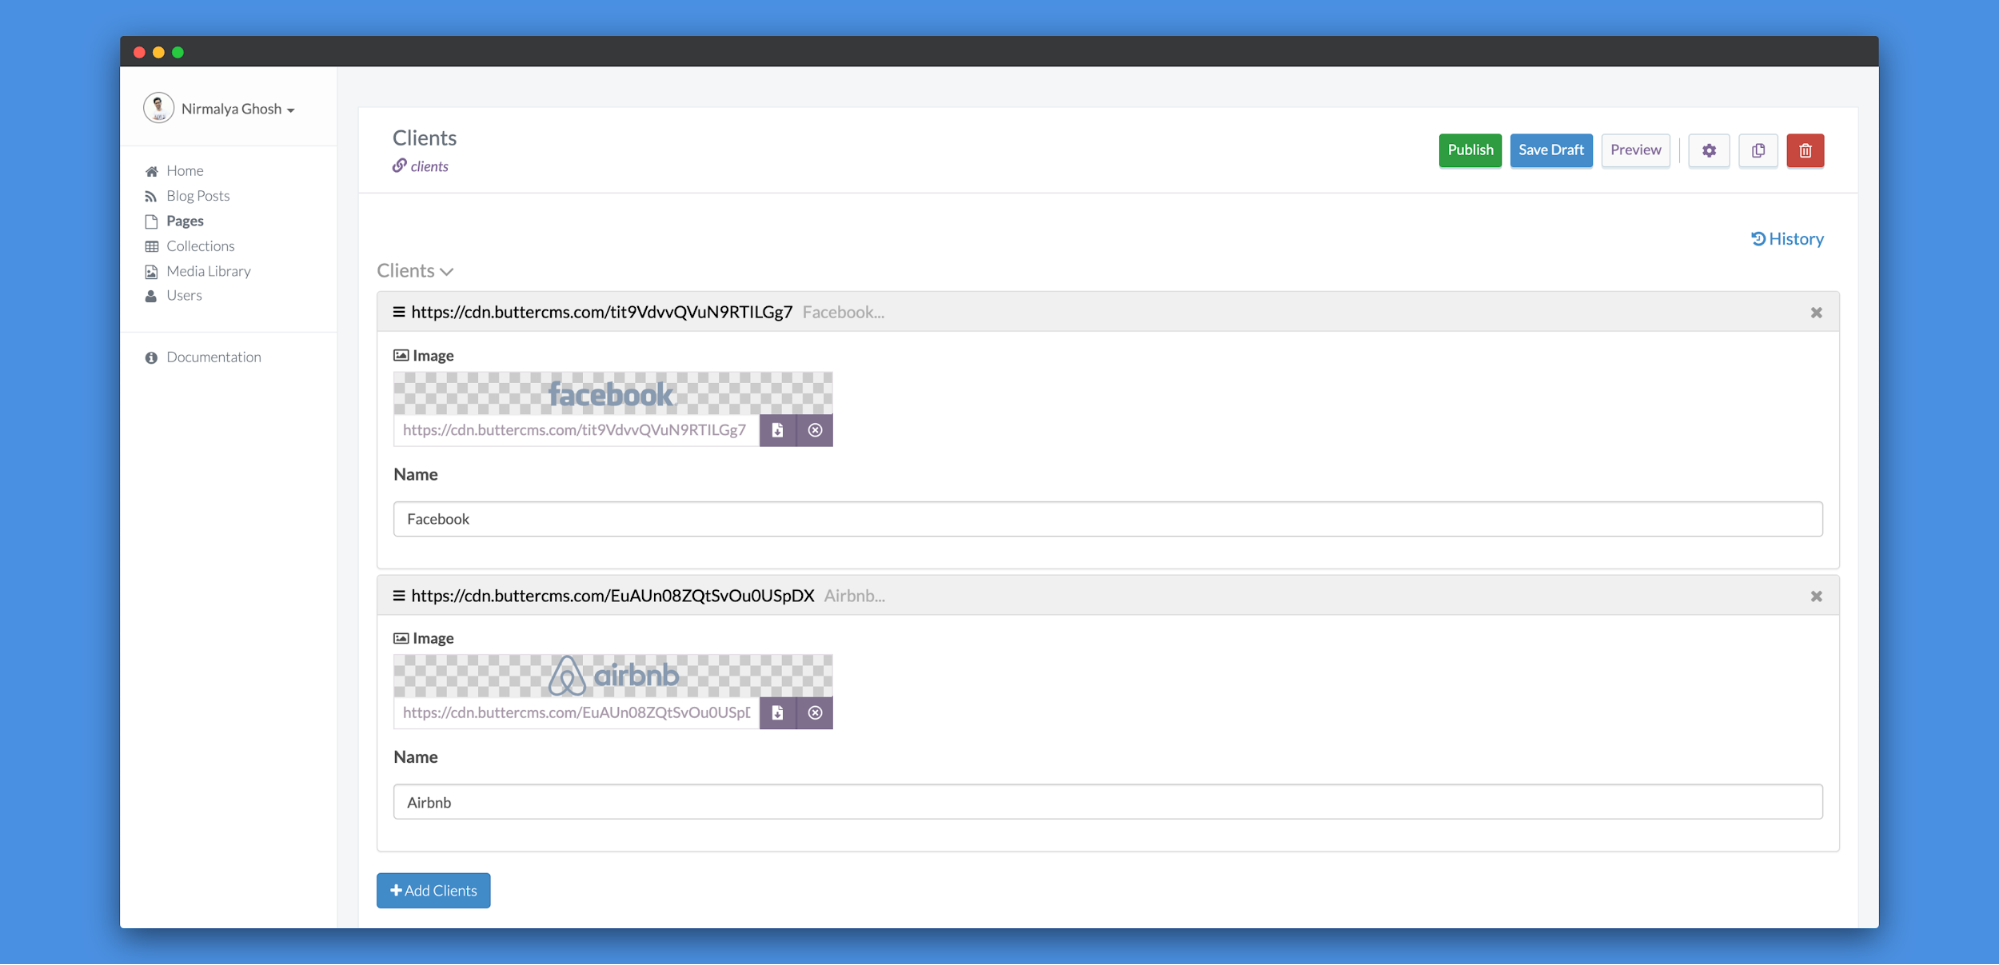
You can use this data in the Clients component which will look like the following:
function Clients({ data }) {
return (
  <section className="clients section">
    <div className="container">
      <div className="clients-inner section-inner has-top-divider">
        <div className="container-sm">
          <ul className="list-reset mb-0">
            {data.fields.clients.map((client, index) => {
              return (
                <li key={index} className="">
                  <img src={client.image} alt={client.name} />
                </li>
              );
            })}
          </ul>
        </div>
      </div>
    </div>
  </section>
);
}
Once you Save and Publish this page, you can see the changes reflecting on your page:

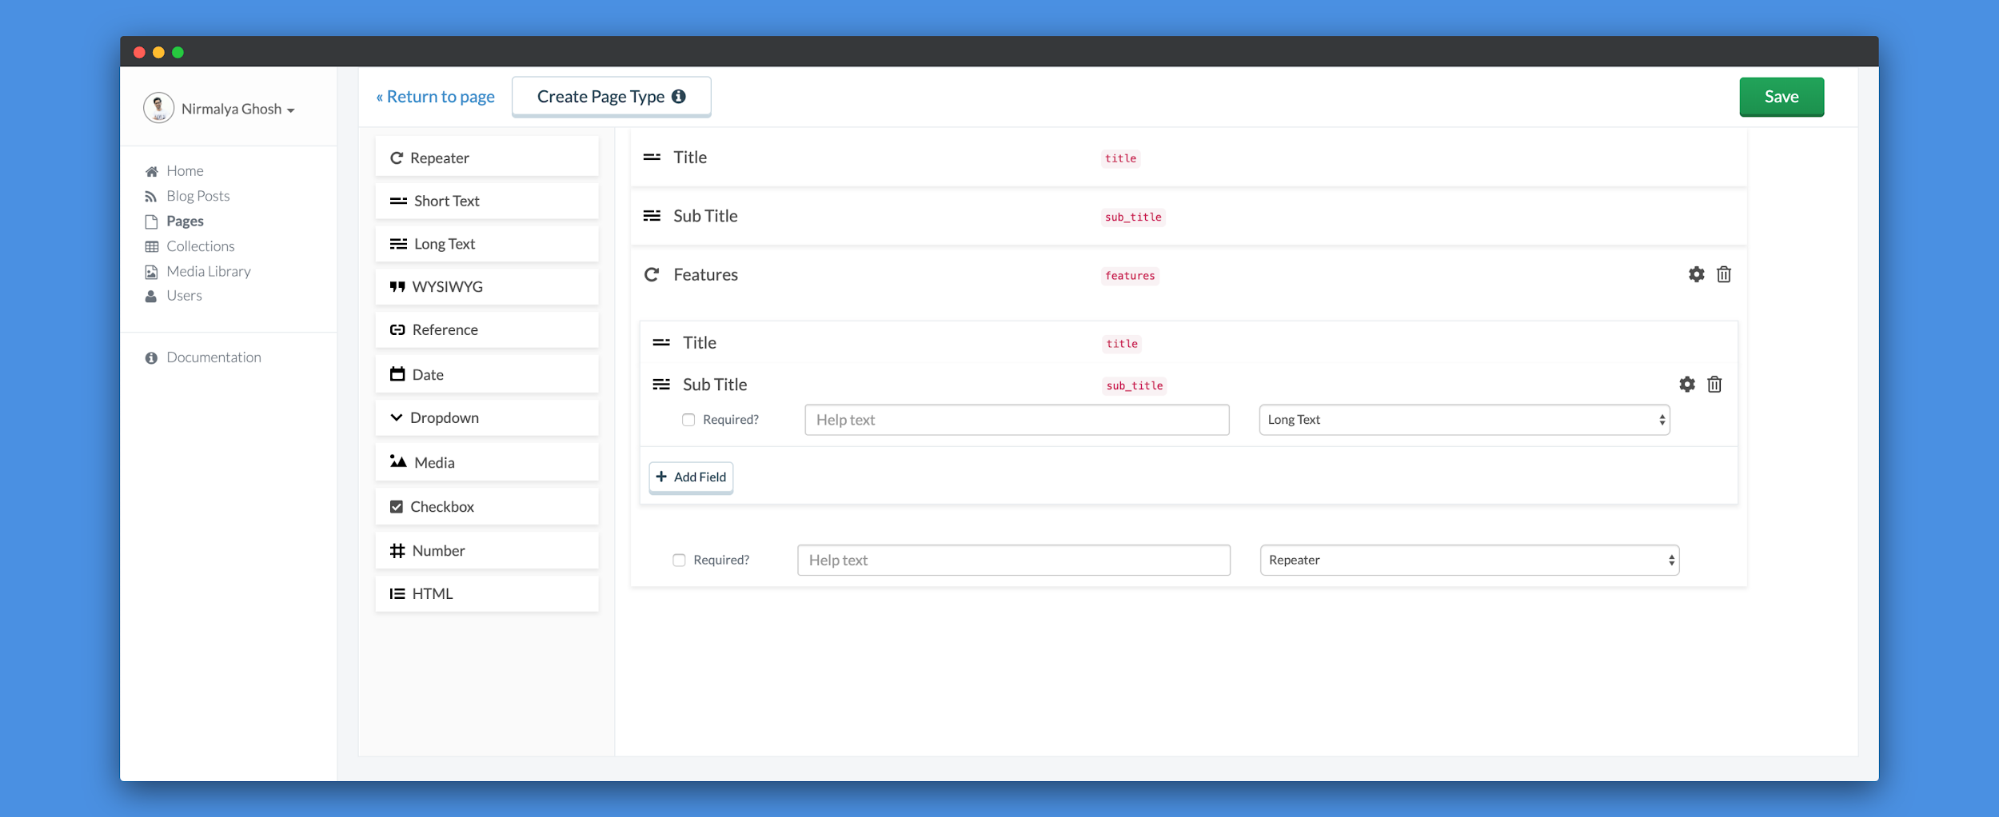
Building the Features section
For the Features section, you can have one title (Short Text), sub_title (Long Text) field and one repeater field which will have a title (Short Text) and a sub_title (Long Text) fields inside it:
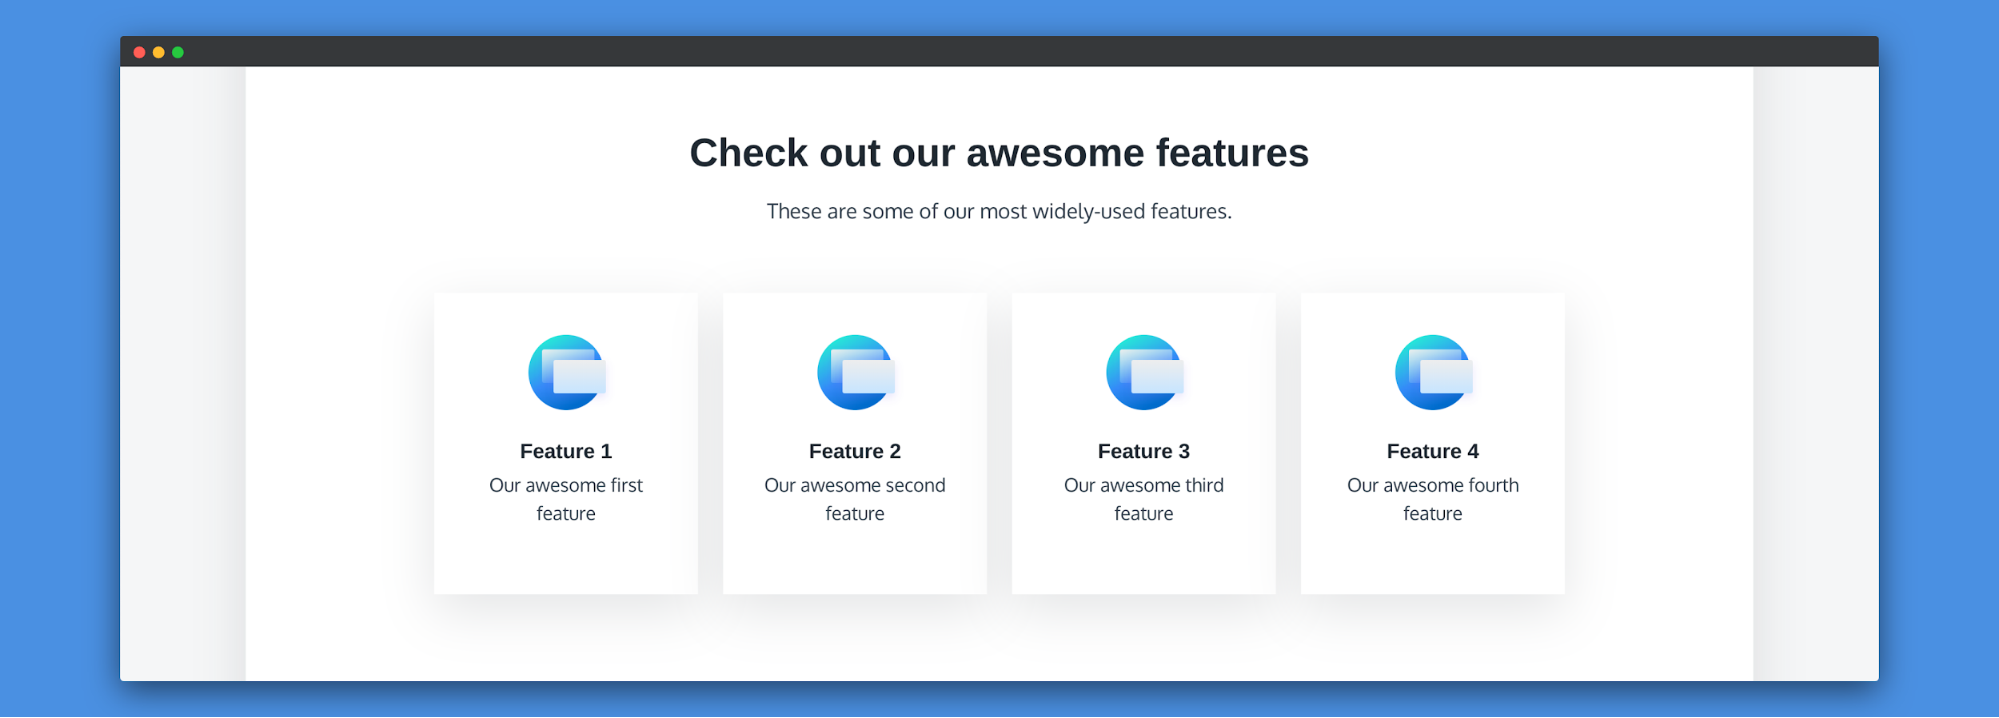
You can use this data in the Features component which will look like the following:
function Features({ data }) {
return (
  <section className="features section text-center">
    <div className="container">
      <div className="features-inner section-inner has-top-divider">
        <div className="features-header text-center">
          <div className="container-sm">
            <h2 className="section-title mt-0">{data.fields.title}</h2>
            <p className="section-paragraph mb-0">{data.fields.sub_title}</p>
          </div>
        </div>
        <div className="features-wrap">
          {data.fields.features.map((feature, index) => {
            return (
              <div className="feature " key={index}>
                <div className="feature-inner">
                  <div className="feature-icon">
                    <img src={FeatureIcon1} alt="Feature 01" />
                  </div>
                  <h4 className="feature-title">{feature.title}</h4>
                  <p className="text-sm">{feature.sub_title}</p>
                </div>
              </div>
            );
          })}
        </div>
      </div>
    </div>
  </section>
);
}
You can save this page, fill in with appropriate details and Save and Publish this page, you can see the changes reflecting on your page:
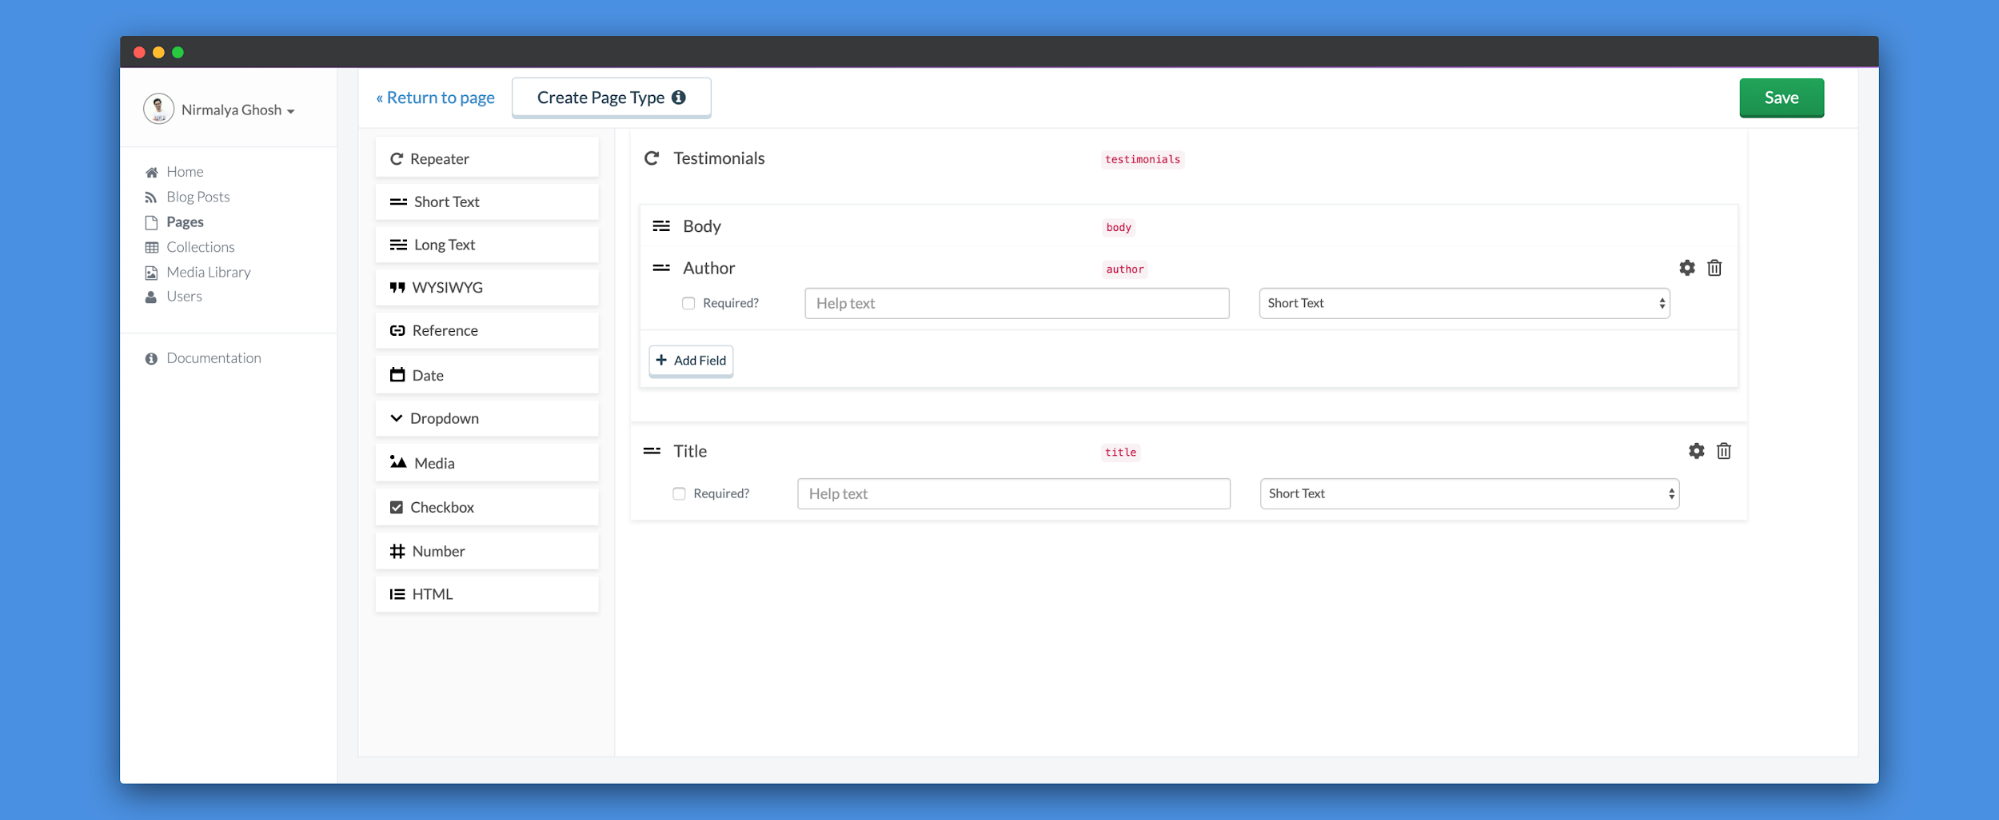
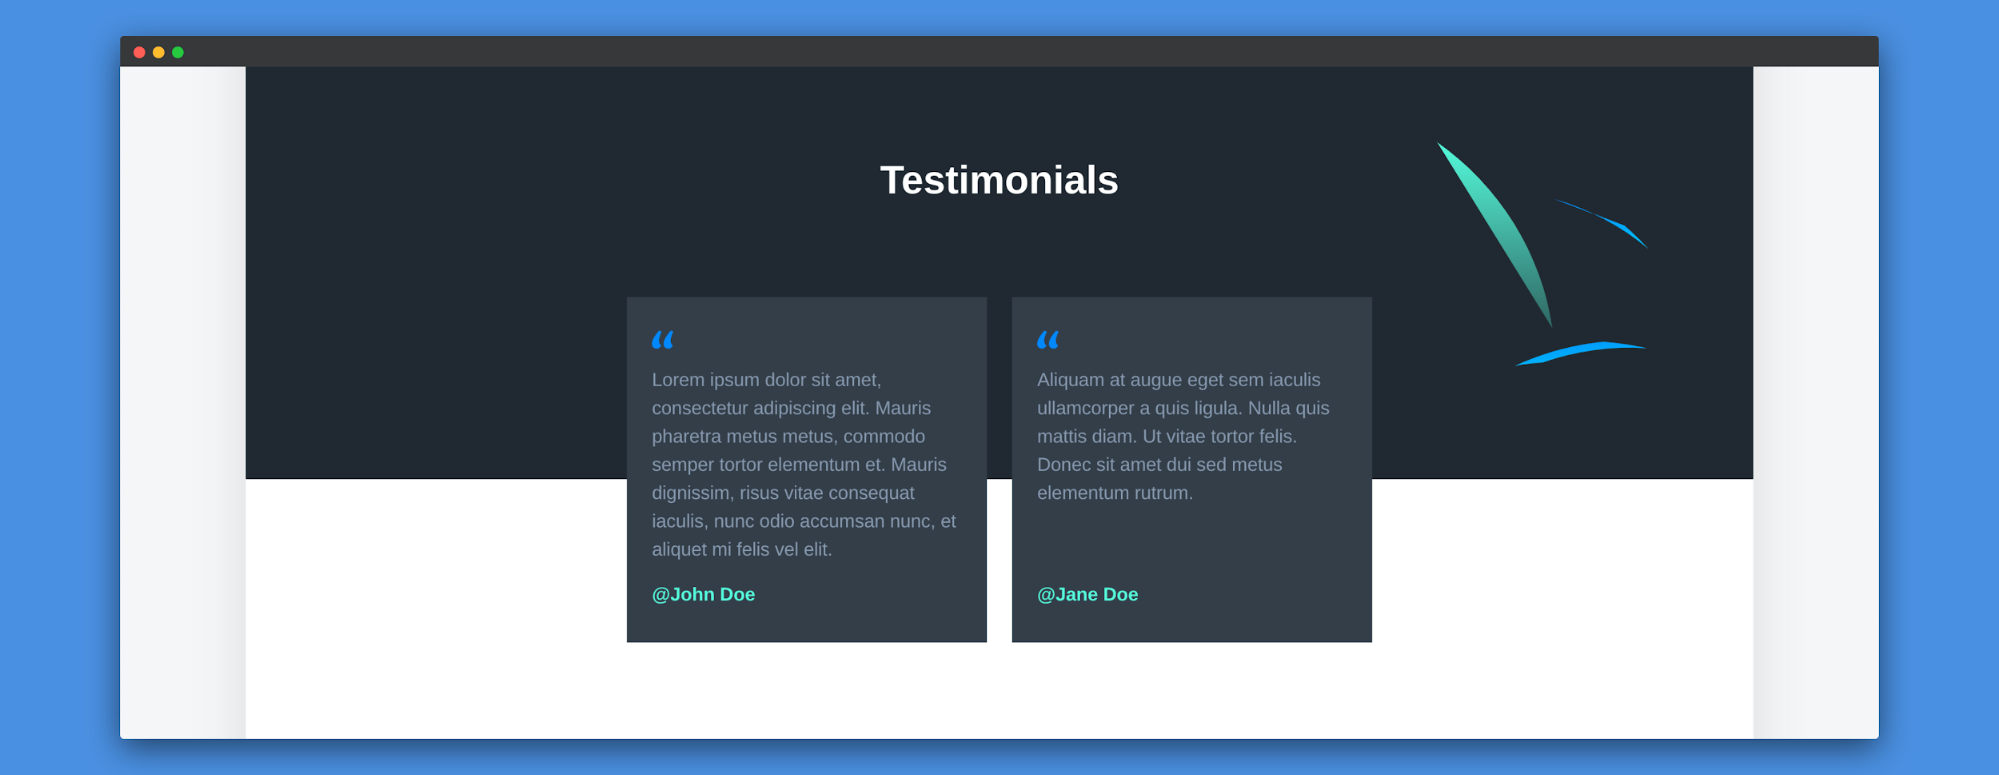
Building the Testimonials section
For the Testimonials section, you can have one title (Short Text), sub_title (Long Text) field and one repeater field which will have a body (Short Text) and an author (Long Text) fields inside it:
You can use this data in the Testimonials component which will look like the following:
function Testimonials({ data }) {
return (
  <section className="testimonials section">
    <div className="container">
      <div className="testimonials-inner section-inner">
        <div className="testimonials-header text-center text-light">
          <h2 className="section-title mt-0">{data.fields.title}</h2>
        </div>
        <div className="testimonials-wrap">
          {data.fields.testimonials.map((testimonial, index) => {
            return (
              <div className="testimonial text-sm " key={index}>
                <div className="testimonial-inner">
                  <div className="testimonial-main">
                    <div className="testimonial-body">
                      <p>{testimonial.body}</p>
                    </div>
                  </div>
                  <div className="testimonial-footer">
                    <div className="testimonial-name">
                      <a href="#">@{testimonial.author}</a>
                    </div>
                  </div>
                </div>
              </div>
            );
          })}
        </div>
      </div>
    </div>
  </section>
);
}
You can save this page, fill in with appropriate details and Save and Publish this page, you can see the changes reflecting on your page:
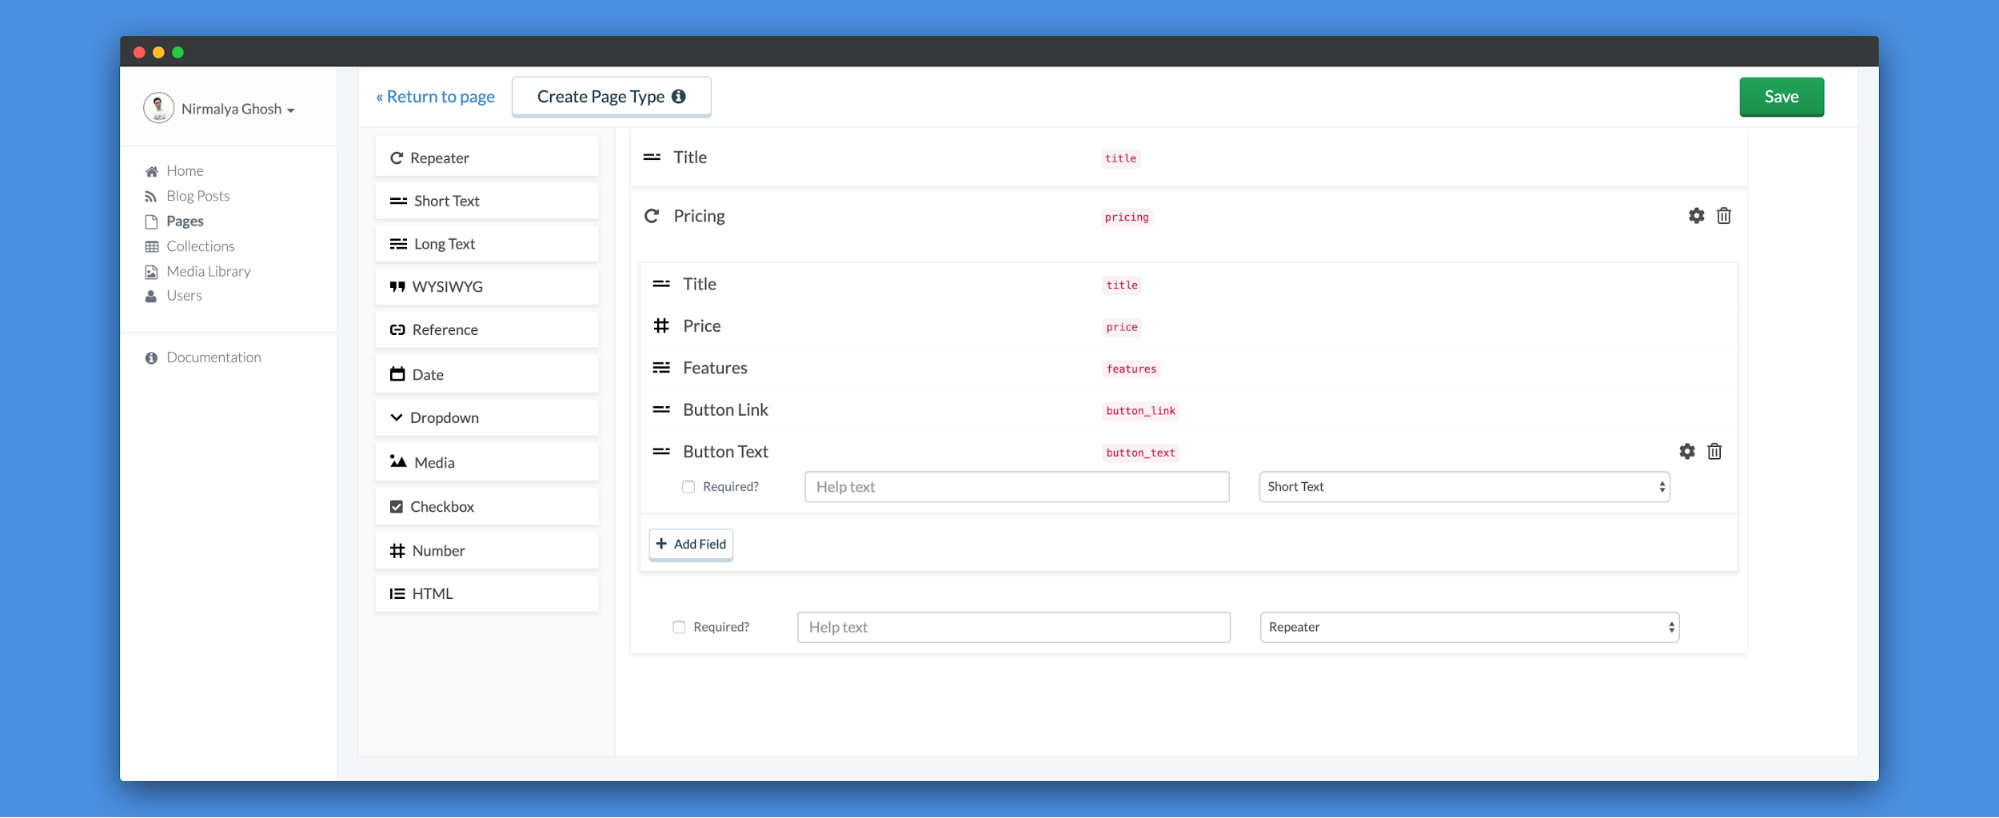
Building the Pricing section
For the Pricing section, you can have one title (Short Text) and one repeater field which will have a title (Short Text), price (Number), features (Long Text), button_link (Short Text) and a button_text (Short Text) fields inside it:
You can use this data in the Pricing component which will look like the following:
function Pricing({ data }) {
return (
<section className="pricing section">
<div className="container">
<div className="pricing-inner section-inner">
<h2 className="section-title mt-0 text-center">
{data.fields.title}
</h2>
<div>
<div className="pricing-tables-wrap">
{data.fields.pricing.map((preset, index) => {
return (
<div className="pricing-table " key={index}>
<div className="pricing-table-inner">
<div className="pricing-table-main">
<div className="pricing-table-header mb-24 pb-24">
<div className="pricing-table-title h4 mt-0 mb-16">
{preset.title}
</div>
<div className="pricing-table-price">
<span className="pricing-table-price-currency">
$
</span>
<span className="pricing-table-price-amount h1">
{preset.price}
</span>
/m
</div>
</div>
<ul className="pricing-table-features list-reset text-xs">
{preset.features}
</ul>
</div>
<div className="pricing-table-cta">
<a
className="button button-secondary button-shadow button-block"
href={preset.button_link}
>
{preset.button_text}
</a>
</div>
</div>
</div>
);
})}
</div>
</div>
</div>
</div>
</section>
);
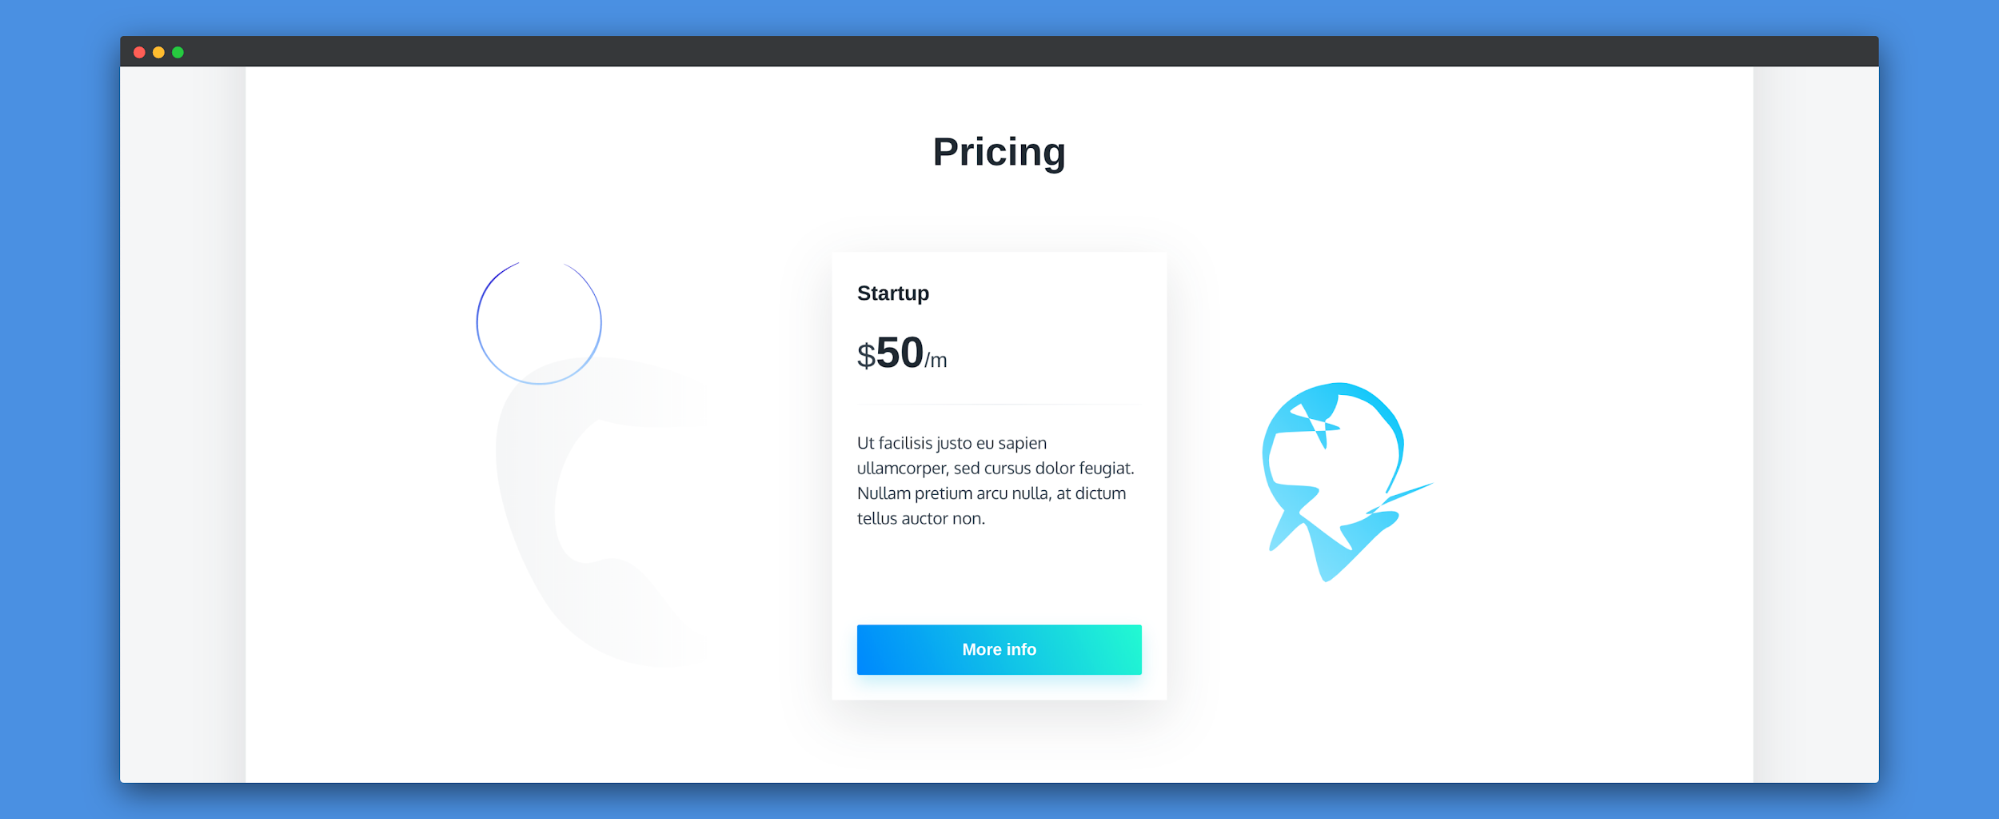
}You can save this page, fill in with appropriate details and Save and Publish this page, you can see the changes reflecting on your page:
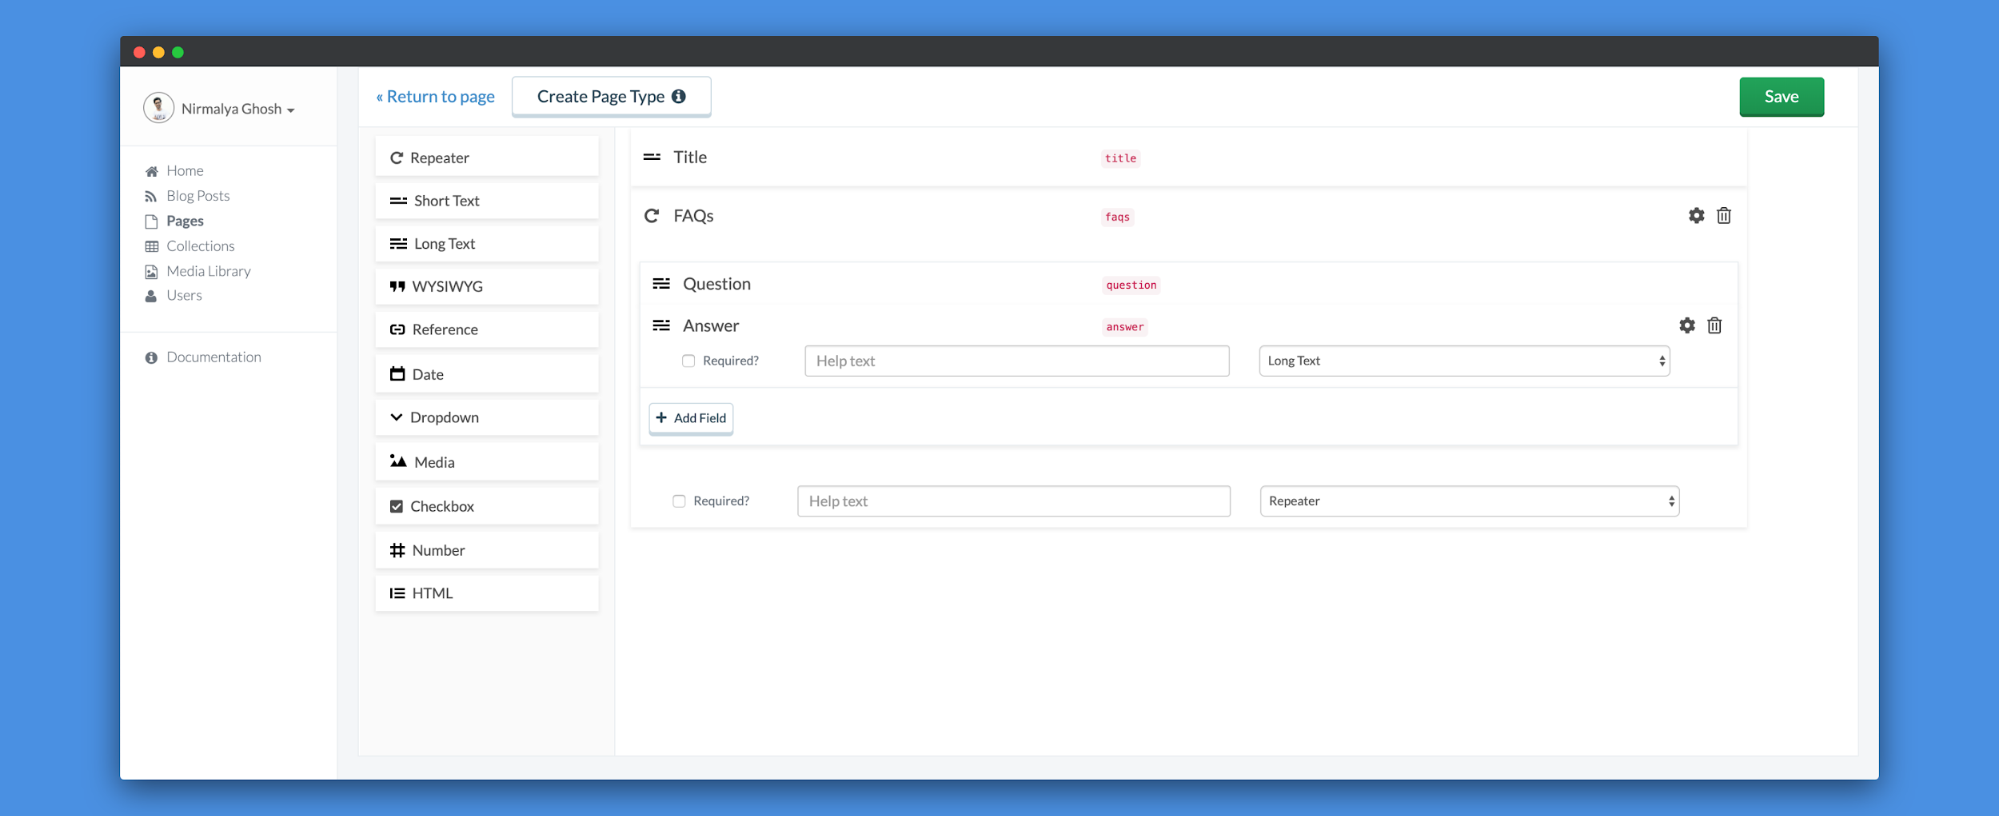
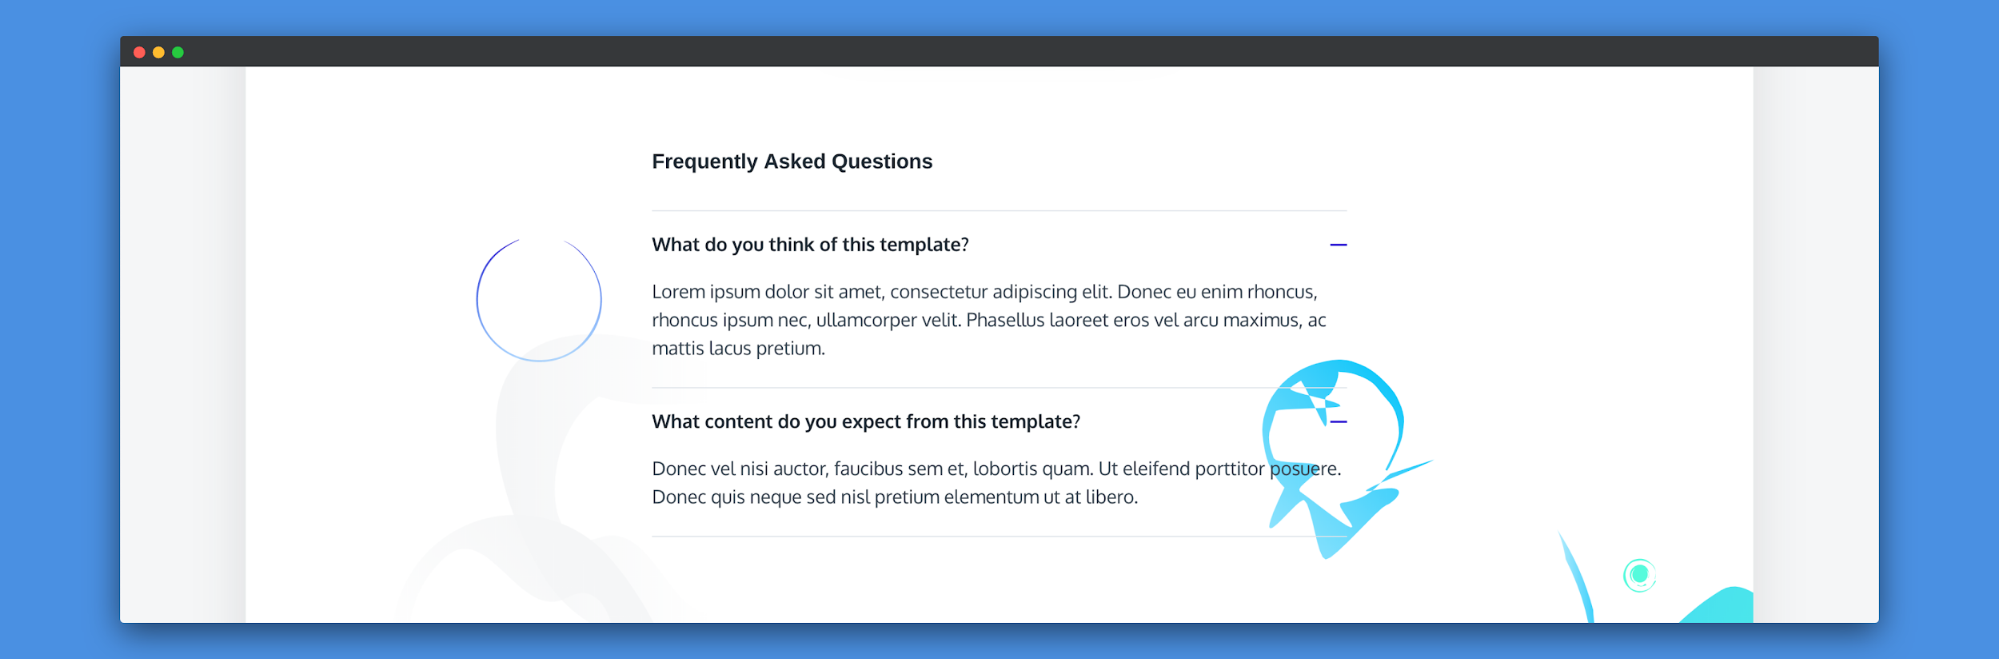
Building the FAQ section
For the FAQ section, you can have one title (Short Text) and one repeater field which will have a question (Long Text) and answer (Long Text) fields inside it:
You can use this data in the FAQ component which will look like the following:
function FAQ({ data }) {
return (
  <section className="pricing section has-animations">
    <div className="container">
      <div className="pricing-inner section-inner">
        <div className="pricing-faqs container-sm ">
          <h4 className="mt-40 mb-32">{data.fields.title}</h4>
          <ul className="accordion">
            {data.fields.faqs.map((faq, index) => {
              return (
                <li key={index}>
                  <div className="accordion-title">
                    <span>{faq.question}</span>
                    <div className="accordion-icon" />
                  </div>
                  <div className="accordion-body">
                    <p>{faq.answer}</p>
                  </div>
                </li>
              );
            })}
          </ul>
        </div>
      </div>
    </div>
  </section>
);
}
You can save this page, fill in with appropriate details and Save and Publish this page, you can see the changes reflecting on your page:
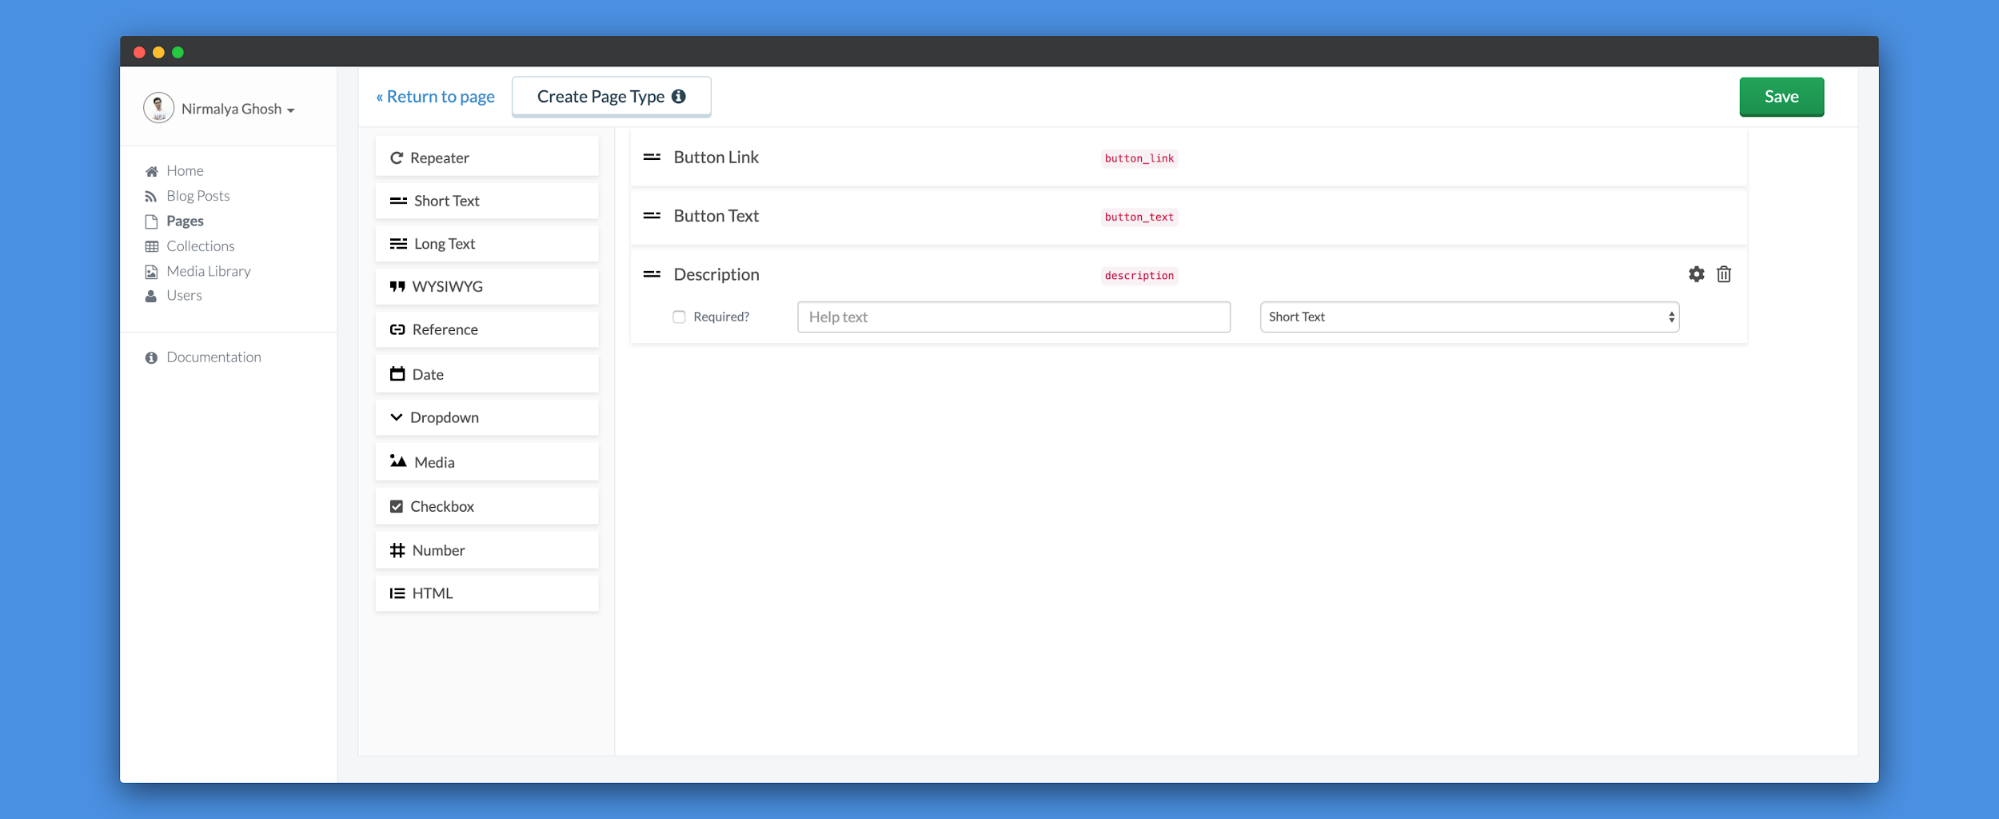
Building the Contact section
For the Contact section, you can have one button_link (Short Text), button_text (Short Text) and a description (Short Text) fields inside it:
You can use this data in the Contact component which will look like the following:
function Contact({ data }) {
return (
  <section className="cta section">
    <div className="container">
      <div className="cta-inner section-inner ">
        <h3 className="section-title mt-0">{data.fields.description}</h3>
        <div className="cta-cta">
          <a
            className="button button-primary button-shadow"
            href={data.fields.button_link}
          >
            {data.fields.button_text}
          </a>
        </div>
      </div>
    </div>
  </section>
);
}
You can save this page, fill in with appropriate details and Save and Publish this page, you can see the changes reflecting on your page:

Building a Blogs page
You can also create a separate page which will list out all the blogs. You can create pages easily using Next.js. (We have a guide on setting up CMS-powered pages for any tech stack here)
For generating the API from ButterCMS, you can make use of their Blog Engine feature. You need to click on the Blog Posts menu on the sidebar:
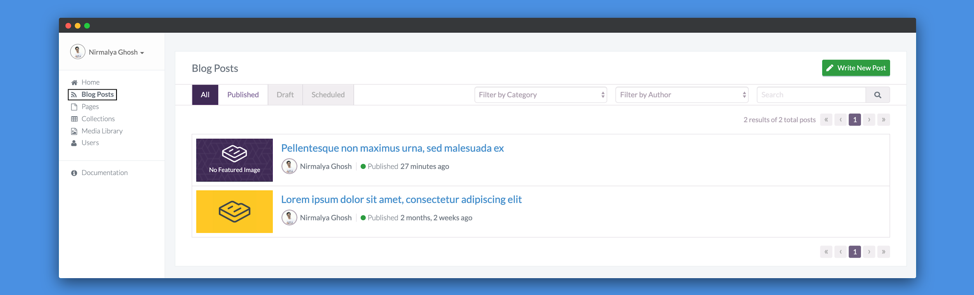
By default, there will be one sample post present. You can add more by clicking on the Write New Post button or by visiting the New Post url.
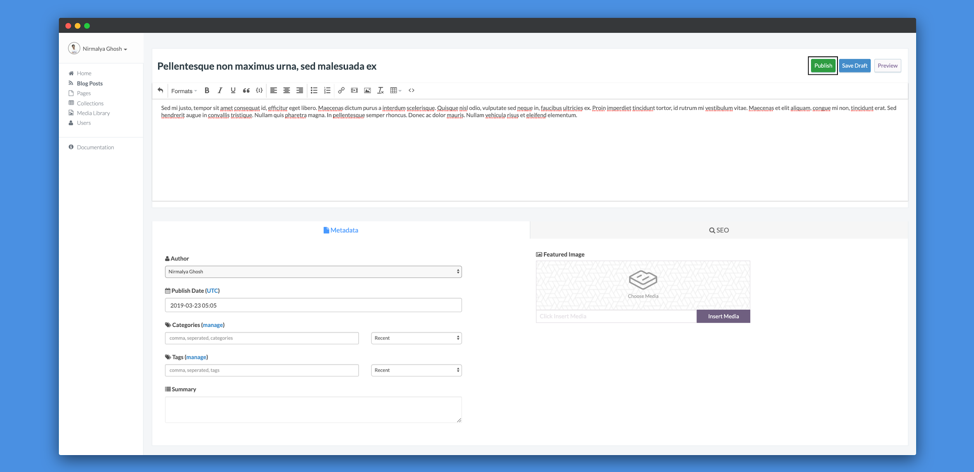
You can write your own article there and click on the Publish button to publish your blog post:
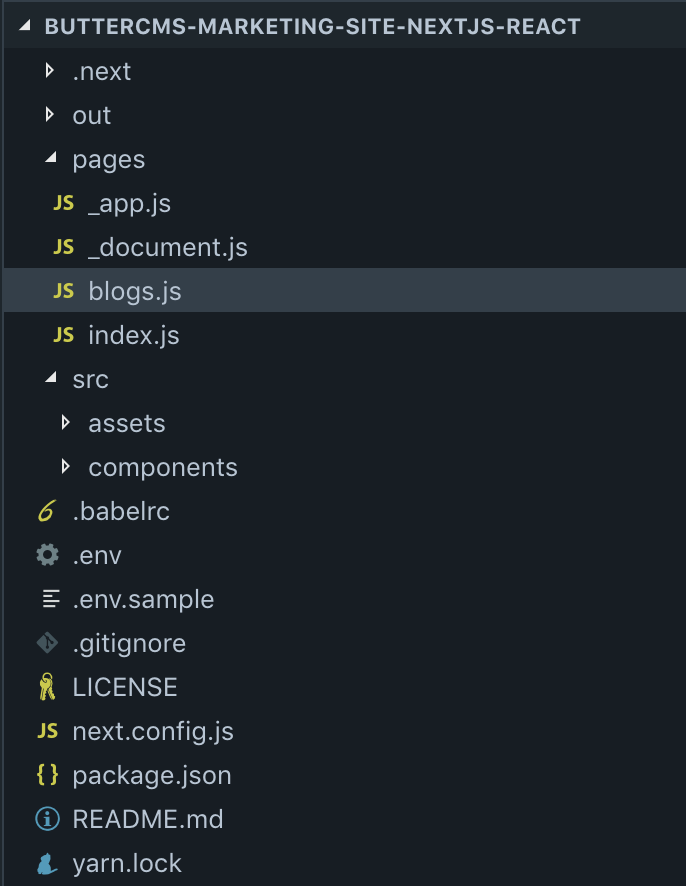
Once that is done, you need to create a new page in your code to show all the blogs. To create a new page in Next.js, you just need to create a new file called blogs.js inside the pages directory:
Similar to our pages/index.js, you can create a data object to store the data from API:
data = {
loading: true,
generalData: {},
blogsData: {},
contactData: {}
};
Then, you use getInitialProps to fetch the data from ButterCMS using a async/await:
static async getInitialProps() {
try {
  const response = await Promise.all([
    butter.page.retrieve("*", "general"),
    butter.post.list(),
    butter.page.retrieve("*", "contact")
  ]);

  this.data = {
    generalData: response[0].data.data,
    blogsData: response[1].data.data,
    contactData: response[2].data.data,
    loading: false
  };
} catch (error) {
  console.error(error);
}

return {
  data: this.data
};
}
Then, you can create a Provider and a Consumer like we did earlier in our pages/index.js to display the data:
<ButterCMSContext.Provider
value={{
  loading: data.loading,
  generalData: data.generalData,
  blogsData: data.blogsData,
  contactData: data.contactData
}}
>
<ButterCMSContext.Consumer>
  {({ loading, generalData, blogsData, contactData }) => {
    if (loading)
      return (
        <div className="loading">
          <img src={Loader} />
        </div>
      );

    return (
      <Fragment>
        <Header data={generalData} />
        <Blogs data={blogsData} />
        <Contact data={contactData} />
        <Footer data={generalData} />
      </Fragment>
    );
  }}
</ButterCMSContext.Consumer>
</ButterCMSContext.Provider>
You can create a new Blogs component which will look like the following:
function createMarkup(html) {
return { __html: html };
}

function Blogs({ data }) {
return (
  <section className="testimonials section">
    <div className="container">
      <div className="testimonials-inner section-inner">
        <div className="testimonials-header text-center text-light">
          <h2 className="section-title mt-0">Blogs</h2>
        </div>
        <div className="testimonials-wrap">
          {data.map((blog, index) => {
            return (
              <div className="testimonial text-sm " key={index}>
                <div className="testimonial-inner">
                  <div className="testimonial-main">
                    <div className="testimonial-body">
                      <div
                        dangerouslySetInnerHTML={createMarkup(blog.body)}
                      />
                    </div>
                  </div>
                  <div className="testimonial-footer">
                    <div className="testimonial-name">
                      <a href="#">
                        {blog.author.first_name} {blog.author.last_name}
                      </a>
                    </div>
                  </div>
                </div>
              </div>
            );
          })}
        </div>
      </div>
    </div>
  </section>
);
}
Now, if you add some data on ButterCMS, you can see the blogs appearing on your page:
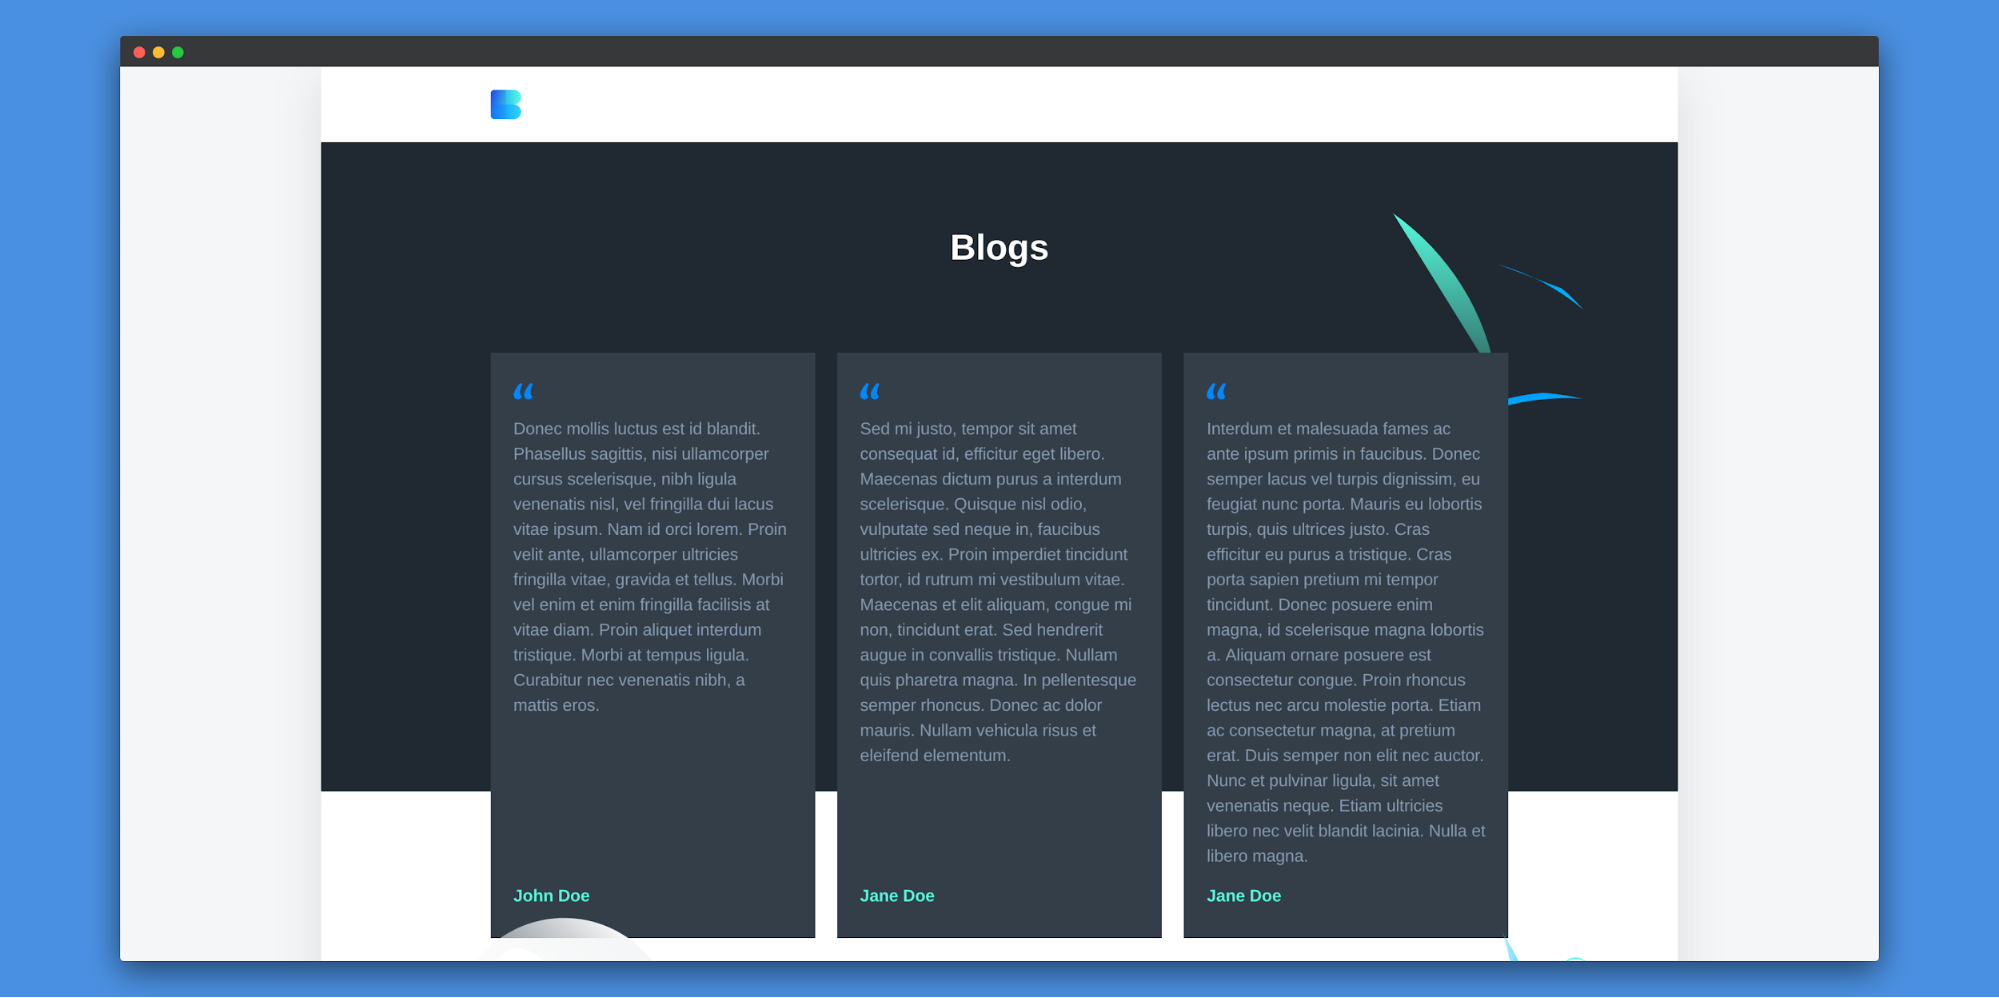
You can also create individual pages for each blog as well as show a paginated view for the blogs section. You can also show Categories, Tags and Authors.
Final word
At this point, you should be able to understand how to create a beautiful site using ButterCMS and Next.js. Your own CMS-powered marketing website without using Wordpress. ButterCMS play really well with React.js and Next.js and would be very useful to create a visually beautiful website using its APIs.
I hope this tutorial helps you in your future projects. Please feel free to share your feedback in the comments section below.
Interested in JAMStack? We have a guide that covers the foundations, architecture and a step-by-step tutorial on how to build a site using Jamstack. Check it out!