
A knowledge base is a carefully structured and centralized repository of information. It serves as a one-stop hub for storing and accessing valuable knowledge, which ultimately helps reduce the need for time-consuming information searches. With a well-organized knowledge base website, businesses can save money, and customers can easily find the information they need about the company or its products without hassle.
Considering its numerous advantages, it becomes essential for companies to have a knowledge base website. To create such a website, several components need to work seamlessly together. These components include a user-friendly and robust content management system (CMS) for organizing and managing the information and a framework to construct the website. This is where ButterCMS, coupled with ASP.Net, comes into play.
Table of contents
Why use ASP.Net & ButterCMS?
ButterCMS is a headless content management system that aims to simplify the organization and management of information while providing an enjoyable user experience. With its intuitive interface, ButterCMS empowers users to handle content—making updates and modifications effortless.
A powerful headless CMS still needs a solid foundation to build upon, and that's where ASP.Net comes in. ASP.Net, an open-source web framework for building web applications, provides the necessary structure and flexibility to create a robust and scalable website. It ensures seamless integration with ButterCMS via ButterCMS SDK, creating a harmonious partnership that brings your knowledge base website to life.
Here are some of the features offered by ASP.Net and ButterCMS that can be effectively used together to build your knowledge base:
-
Page management with ButterCMS: The Pages feature in ButterCMS allows you to create, organize, and manage web pages seamlessly. With this feature, you can easily add, update, or remove content from the knowledge base, ensuring that users always have access to relevant and up-to-date information.
-
Components for modular design: ButterCMS supports components, enabling you to create modular content that can be reused across multiple pages. This feature enhances consistency and makes maintaining and updating content throughout the knowledge base easier.
-
Collections for structured data: Utilizing ButterCMS collections, you can organize and display structured data efficiently. For instance, you can create a collection for frequently asked questions (FAQs), allowing users to access relevant information quickly and intuitively.
-
Customization and theming: ASP.NET, together with CSS, allows you to extend ButterCMS's capabilities and customize the presentation layer according to your requirements. You can leverage ASP.NET's flexibility to design and implement custom templates, themes, or layouts that integrate seamlessly with the content managed in ButterCMS. This enables you to maintain consistent branding and user experience across your knowledge base website.
-
Caching and performance optimization: ASP.NET offers various caching mechanisms and performance optimization features, such as output caching, in-memory caching, and bundling and minification of resources. These features help improve the responsiveness and speed of the knowledge base, enhancing the user experience.
-
ASP.NET routing: ASP.NET routing enables you to define custom URL patterns for different pages and resources in the knowledge base. This feature improves the SEO-friendliness of the website and provides clean and user-friendly URLs.
ASP.Net website tutorial: Building a knowledge base
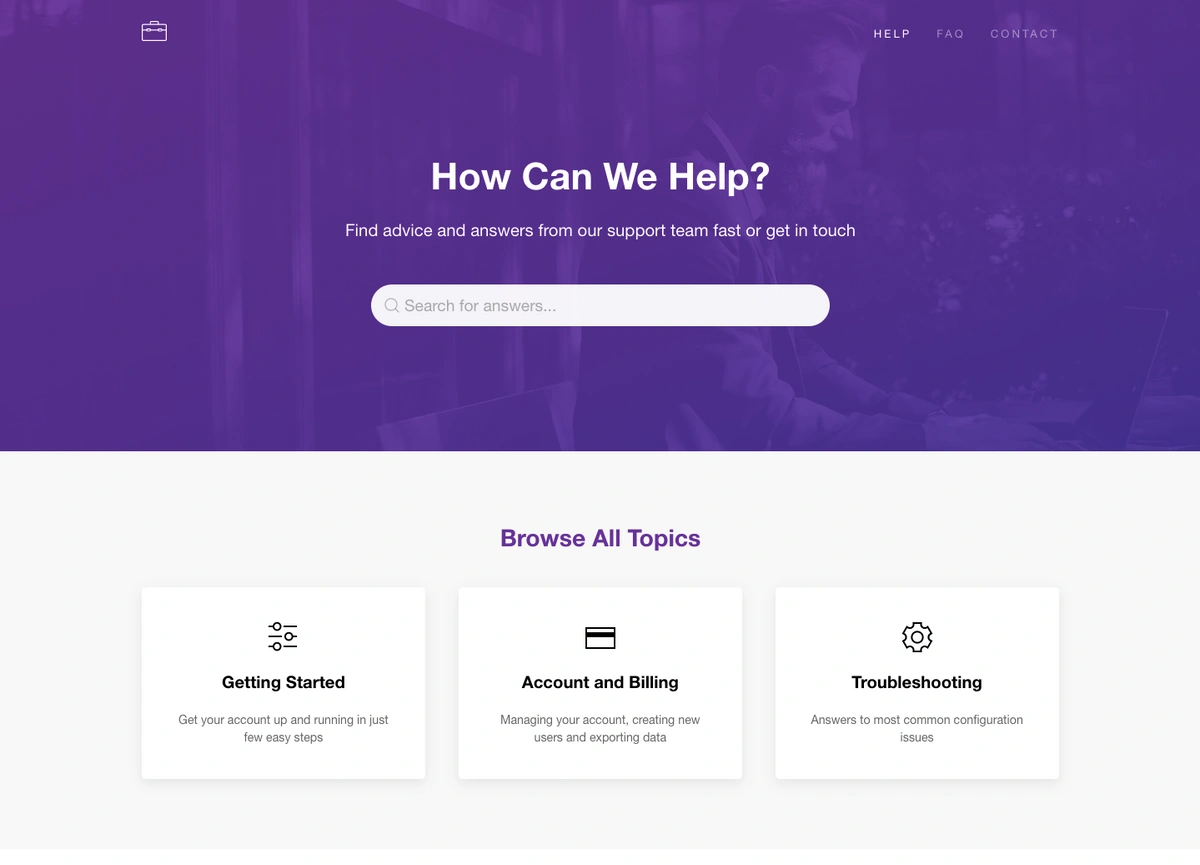
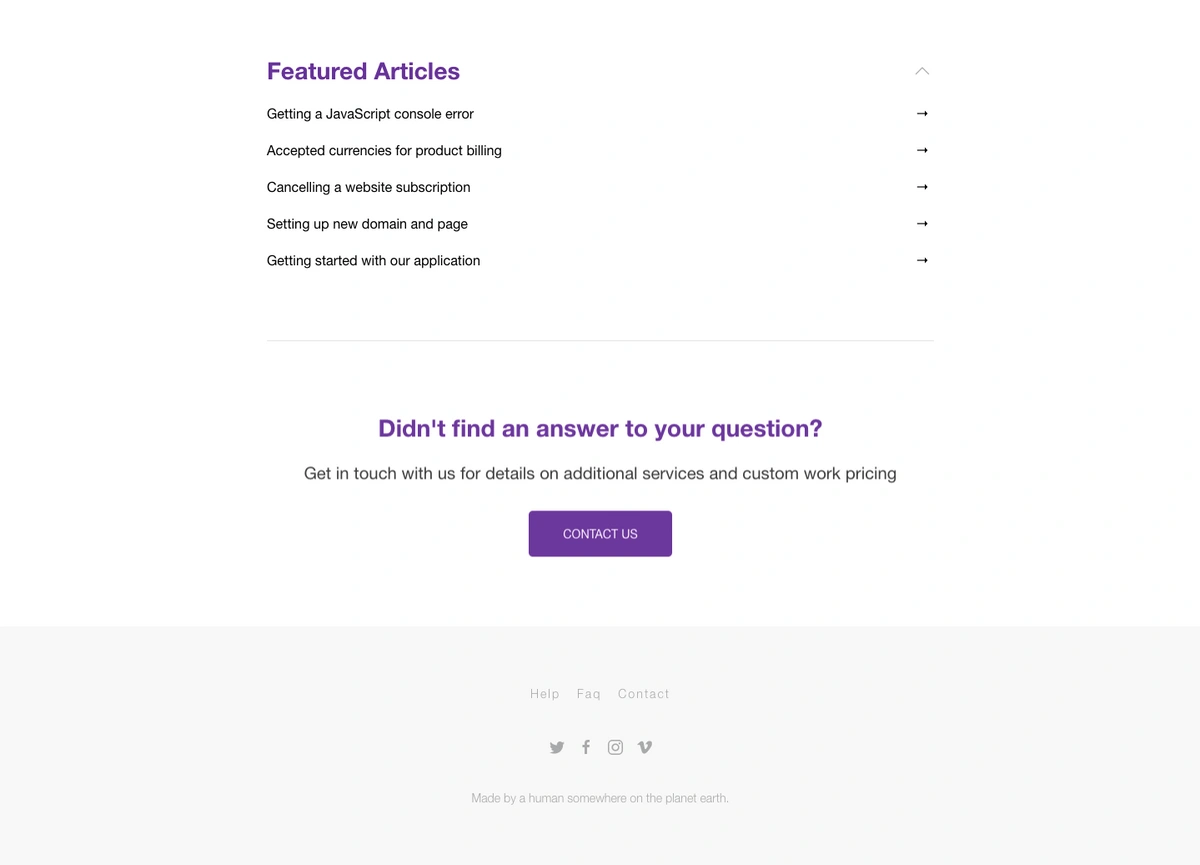
To showcase the seamless utilization of ButterCMS and ASP.NET to build the knowledge base application, you’ll be building a knowledge base for a JavaScript framework using this design by IVNCO.
Tutorial prerequisites
For you to follow this ASP.Net website tutorial, you must have the following:
-
Knowledge of C#, Razor, HTML, and CSS
-
Code editor (VS Code, preferably)
-
DotNet SDK installed
-
ButterCMS account
All the code for this tutorial can be found in this GitHub repo.
Setting up the knowledge base in ButterCMS
In this context, the knowledge base will comprise individual articles, which will be created and managed within the platform. To start, you'll establish a specific page type for these knowledge base articles and set up a landing page on ButterCMS. By using the designated knowledge base page type, adding new articles to the knowledge base will be a seamless process, allowing administrators to contribute whenever needed.
Creating the knowledge base categories
Before you proceed to create the knowledge base landing page and its article page type, you’ll need to create the kbcategory collection. This handles categorizing your knowledge base's content.
To do this, proceed to your ButterCMS dashboard and click on the Content Types menu.
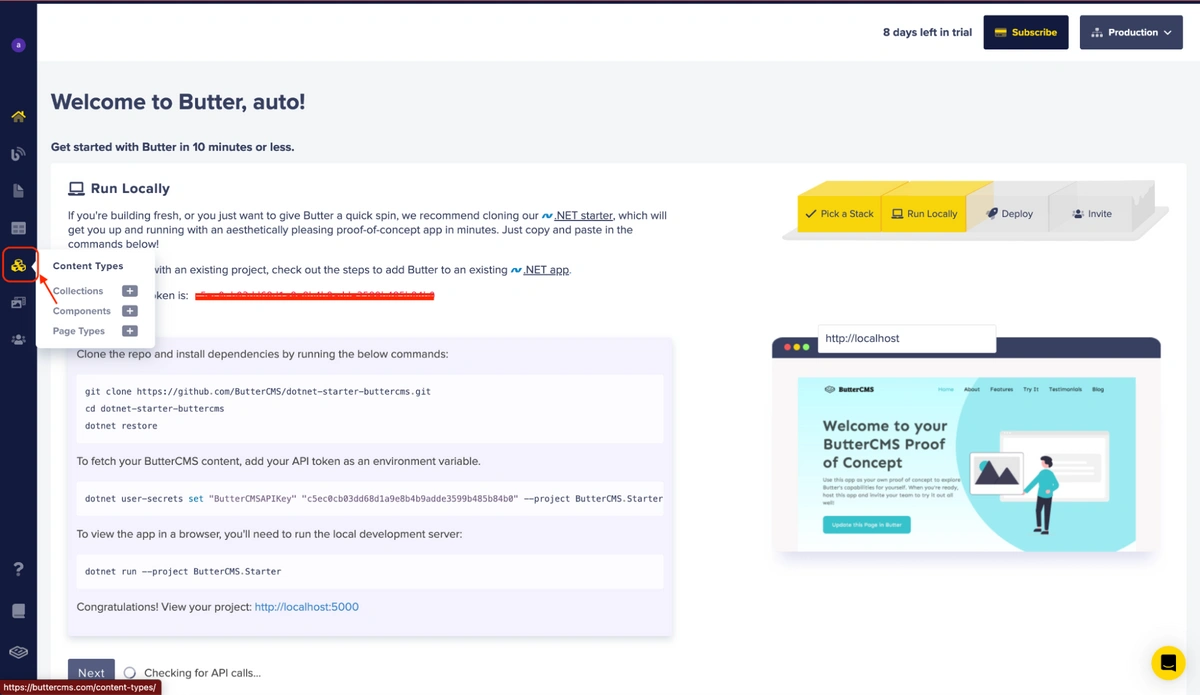
A screenshot showing the Content Types menu
Click on New Content Type and select Collections.
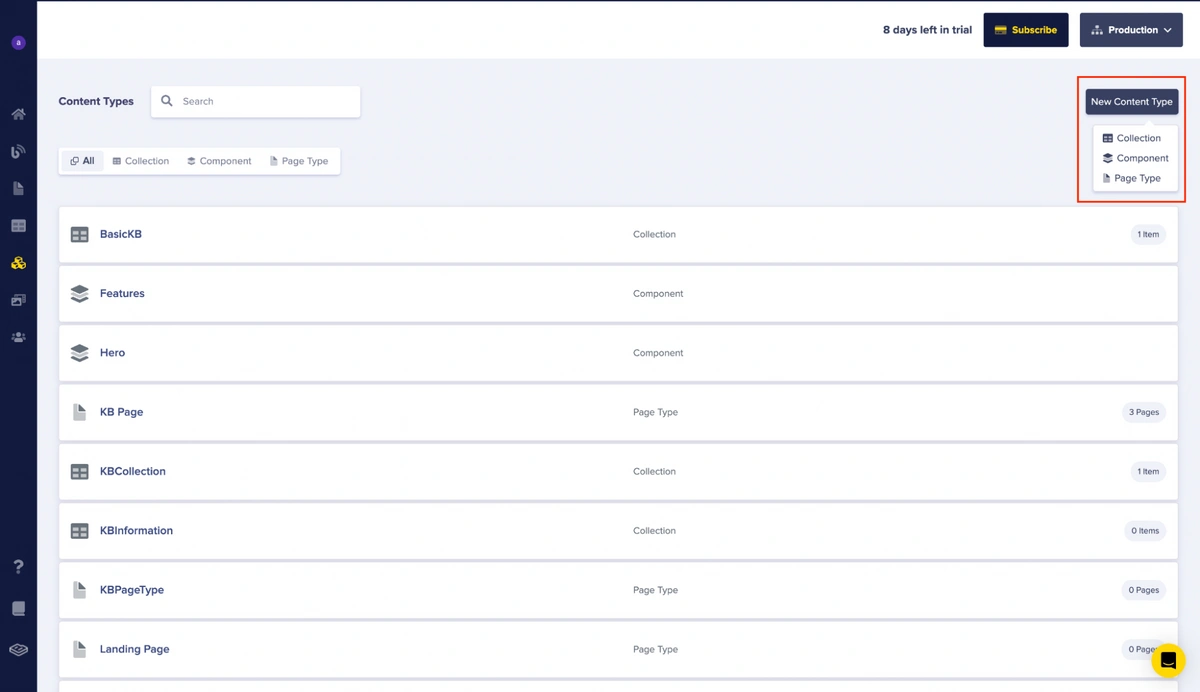
A screenshot showing the New Content Type button and the collection options
After that, create the following items using the options in the menu indicated below.
-
Name — Short text
-
Icon — Media
-
Description — Short text
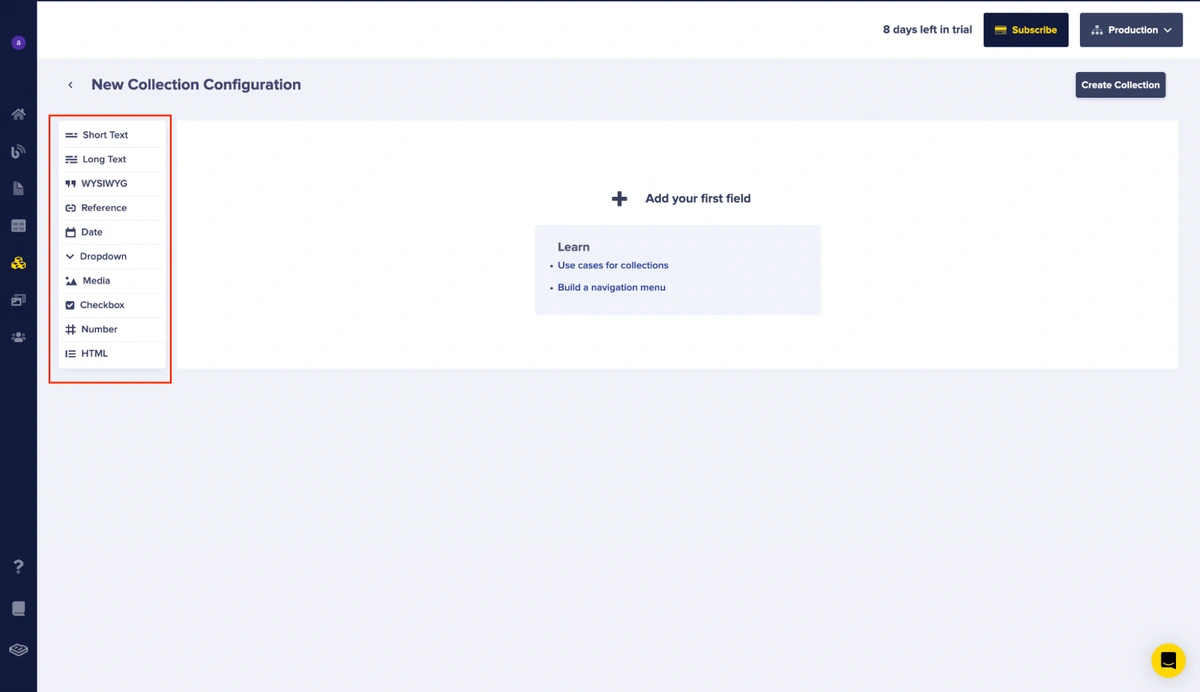
A screenshot showing a menu of different fields we can add
Each item on the list is a field for the new collection type you are creating.
To create an item, for instance, in the Name — Short text, click on the Short text option and enter the name of this field as ‘Name’.
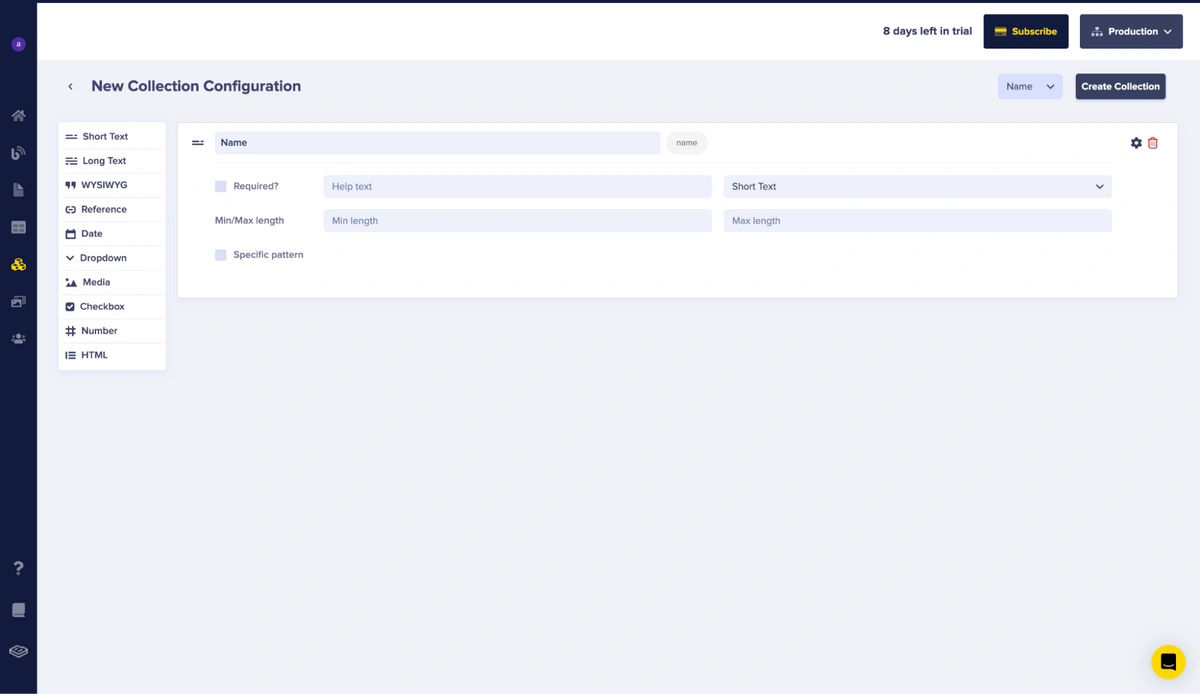
Repeat these same steps for the rest of the items on the list.
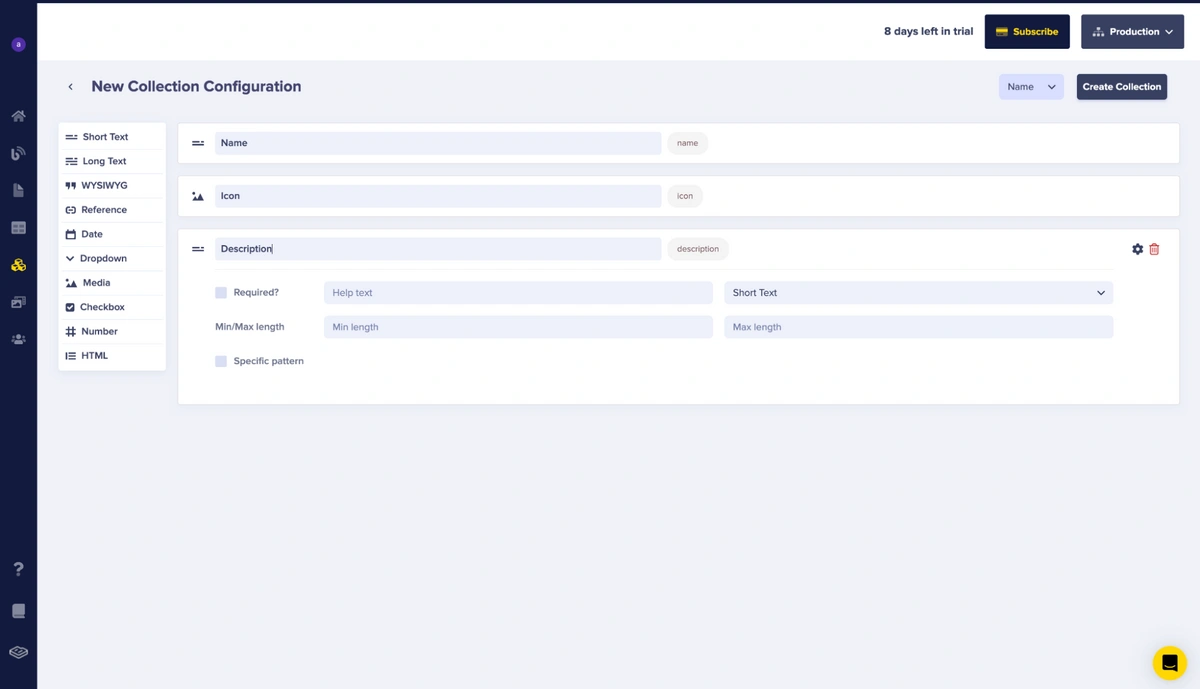
A screenshot showing all the added fields listed earlier
After that, click Create Collection.
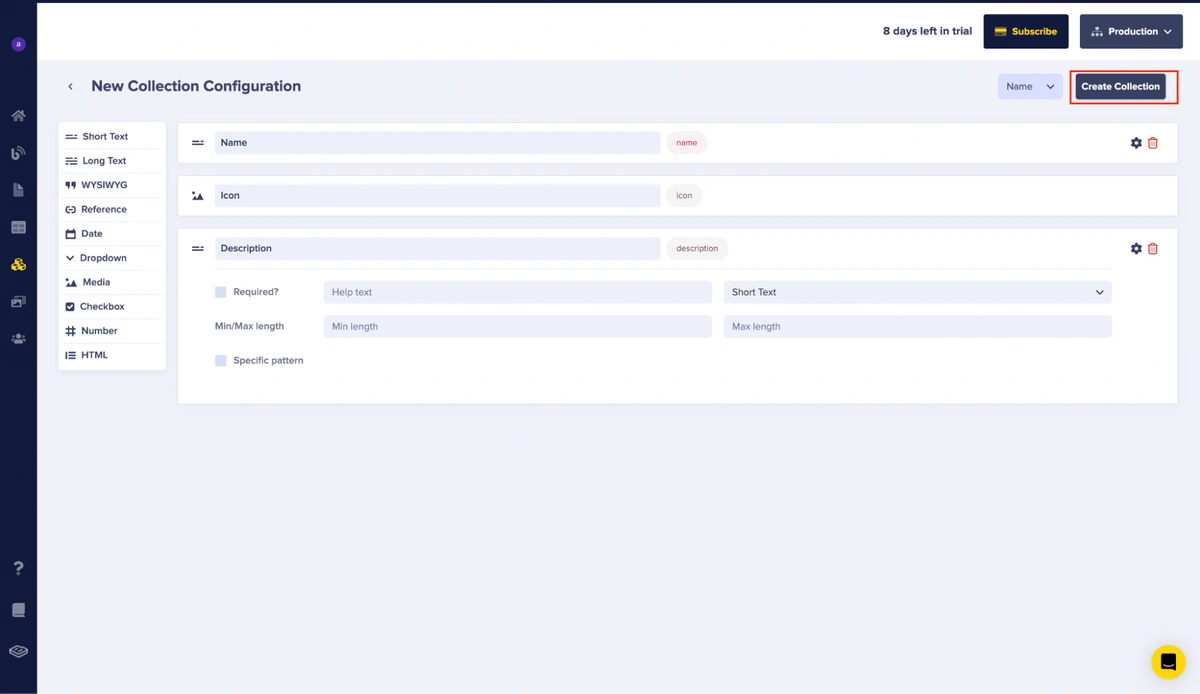
A screenshot showing the Create Collection button
This will prompt you to enter your desired name for the collection. Enter ‘KBCategory,’ then click Save as a Collection.
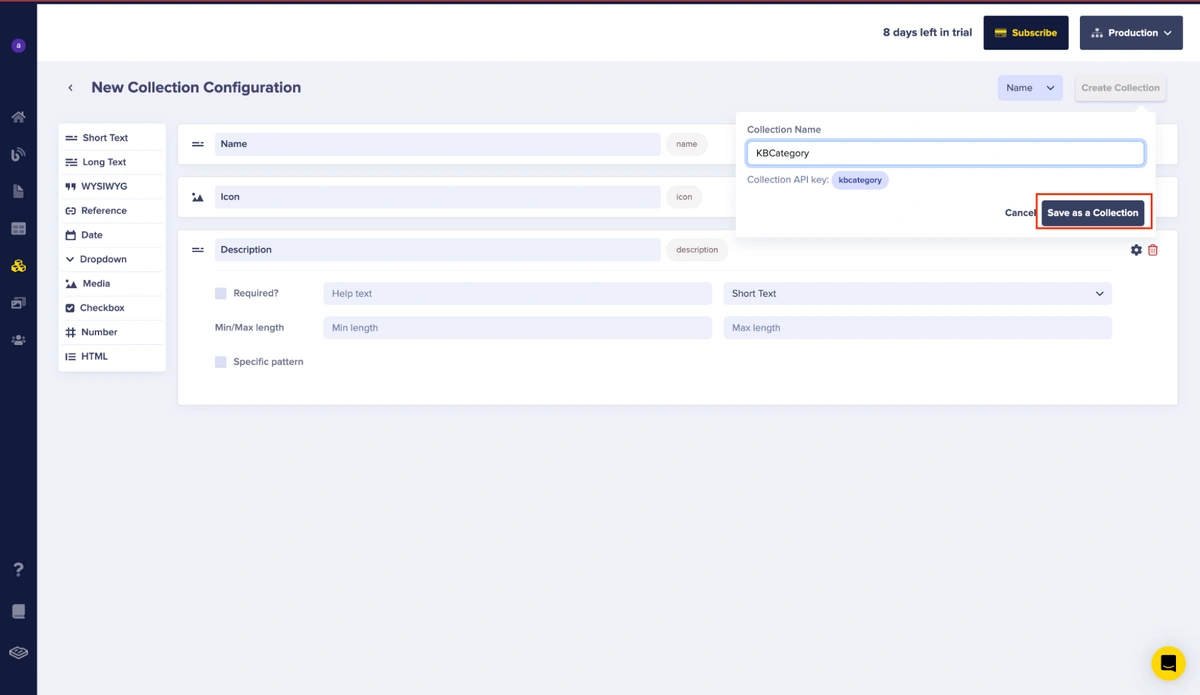
A screenshot showing the Save as a Collection button
Adding the categories
Once that is completed, you can then proceed to add your desired categories.
Navigate to the Collections menu:
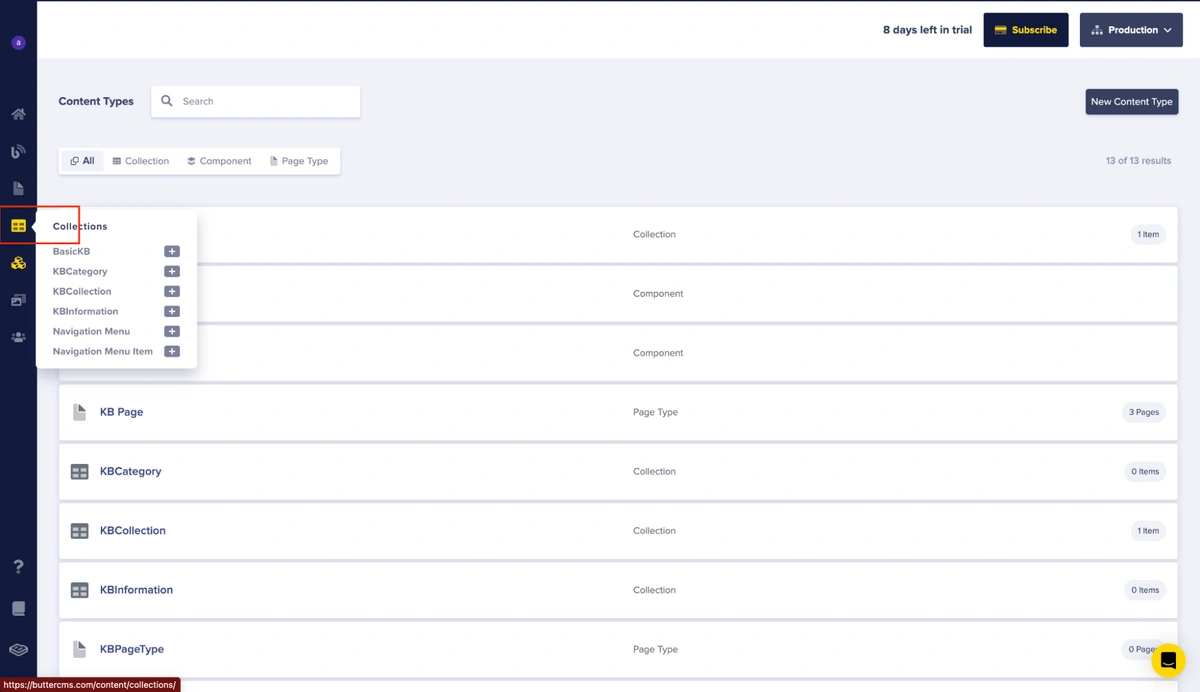
A screenshot showing the Collections menu
Click New Item, and select the KBCategory option.

Then enter the Name, select the desired Icon using the media section input, and enter the Description according to the fields displayed.
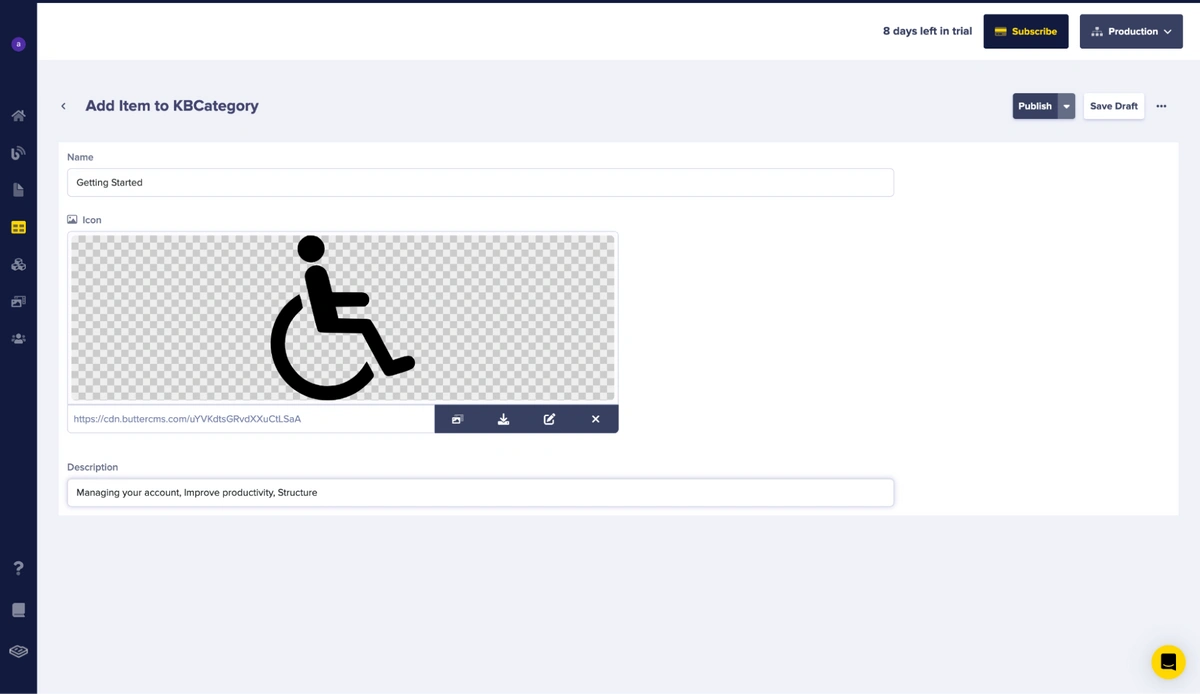
A screenshot showing a KBCategory collection item
After that, click Publish.
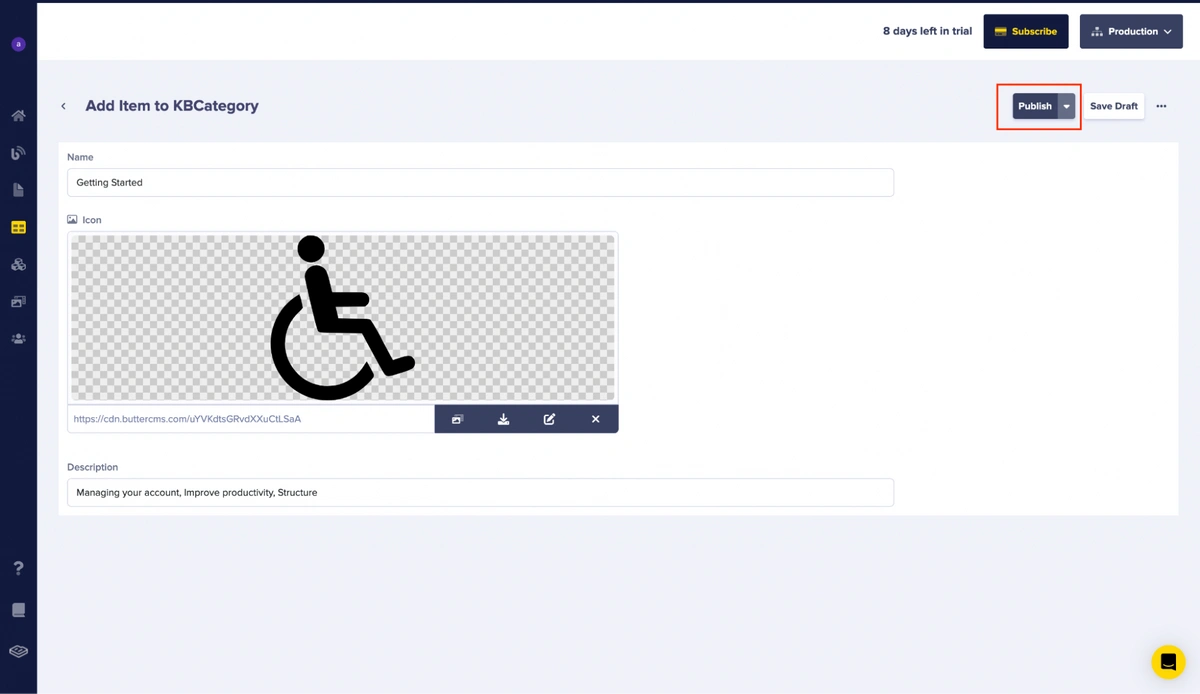
A screenshot showing the Publish button
Repeat these steps to add more categories to your knowledge base.
Creating the knowledge base content page type
Once your categories have been added, You can then proceed to create the page type for your knowledge base content. To do this, click the Content Types menu on the navigation menu.
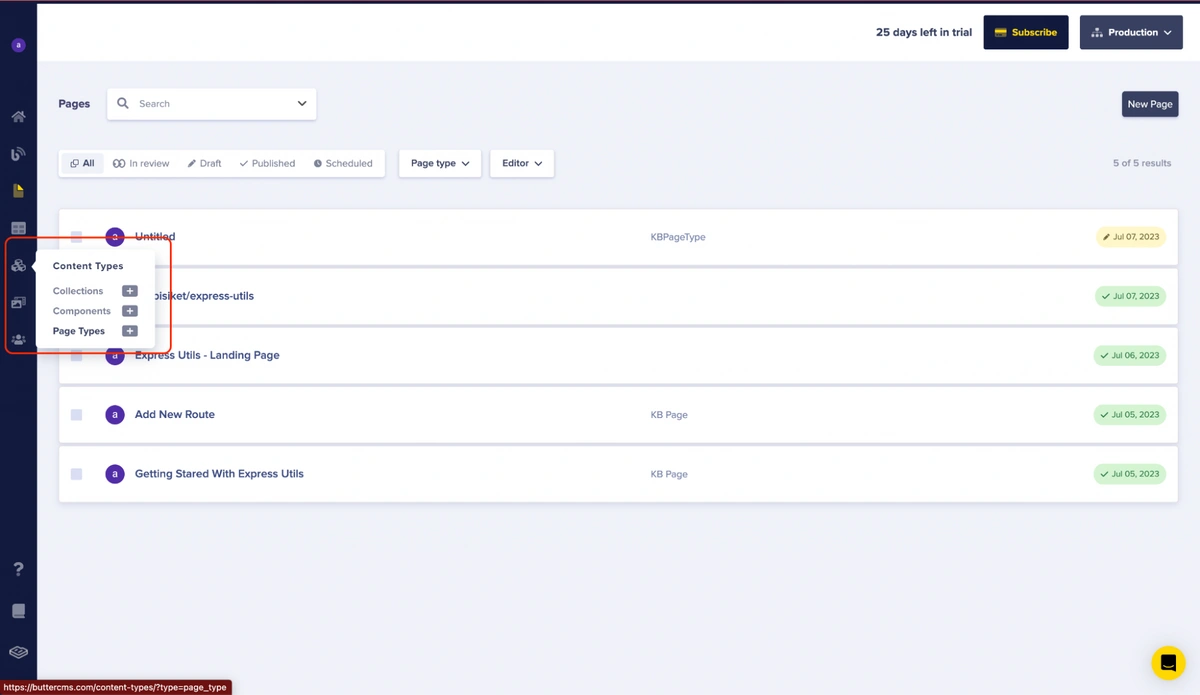
A screenshot showing the Content Types menu
Then, click the New Content Type button and select the Page Types option from the list.

A screenshot showing the New Content Type button and its list of options.
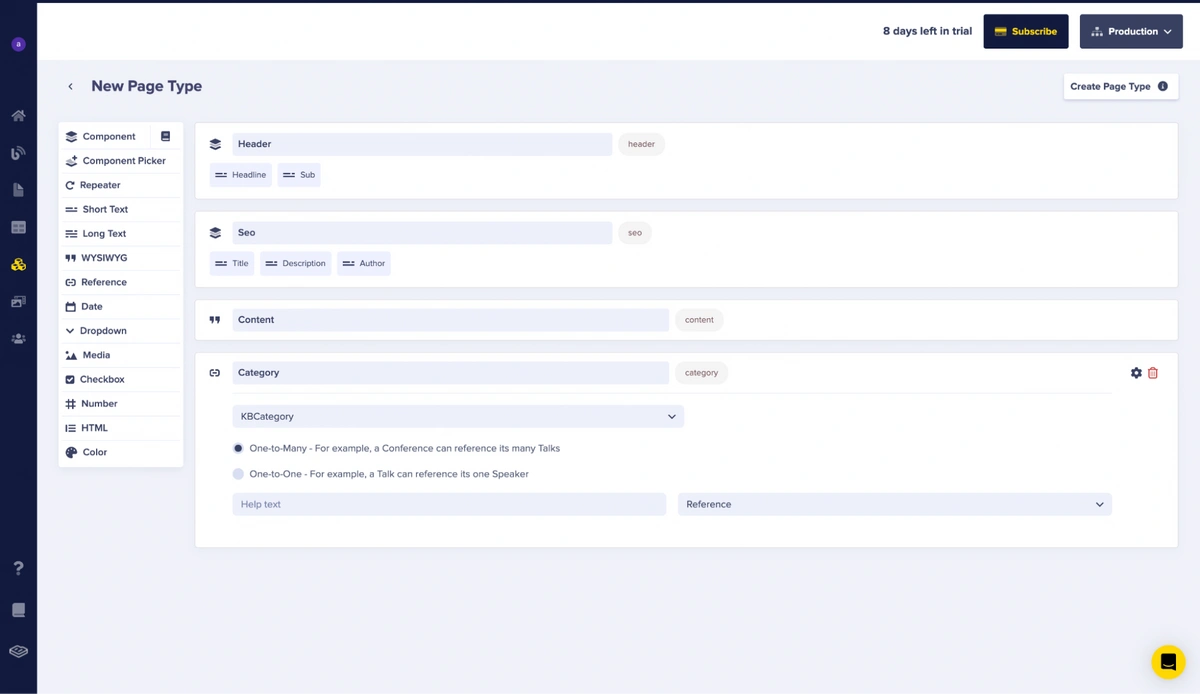
Next, add the following:
-
Header — Component
-
Headline — Short text
-
Sub — Short text
-
-
SEO — Component
-
Title — Short text
-
Description — Short text
-
Author — Short text
-
-
Content — WYSIWYG
-
Category — Reference (KBCategory)
KBPage configuration
After that, click on the Create Page Type button.
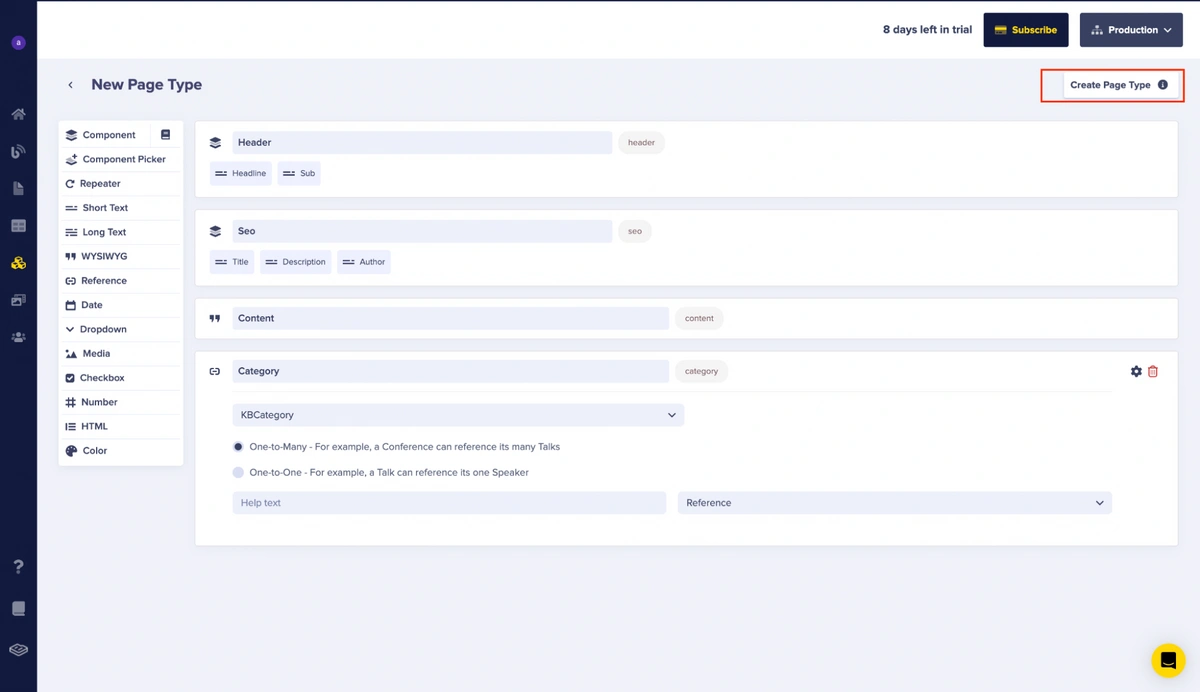
A screenshot showing the Create Page Type button
Enter “KBPage” as the Page Type Name and click on Save as Page Type to continue.

Name and save page type as KBPage
Adding your knowledge base content
Next, you’ll need to enter the data for our knowledge base in this section using the "KBPage" page type. This page type is designed to add article content, ensuring categorization and organization.
Supposing you want to add the article “Getting started with @obisiket/express-utils” to your knowledge base, you’ll first navigate to the Pages menu icon on the ButterCMS navigation bar.
A screenshot showing the navigation bar and the Pages icon
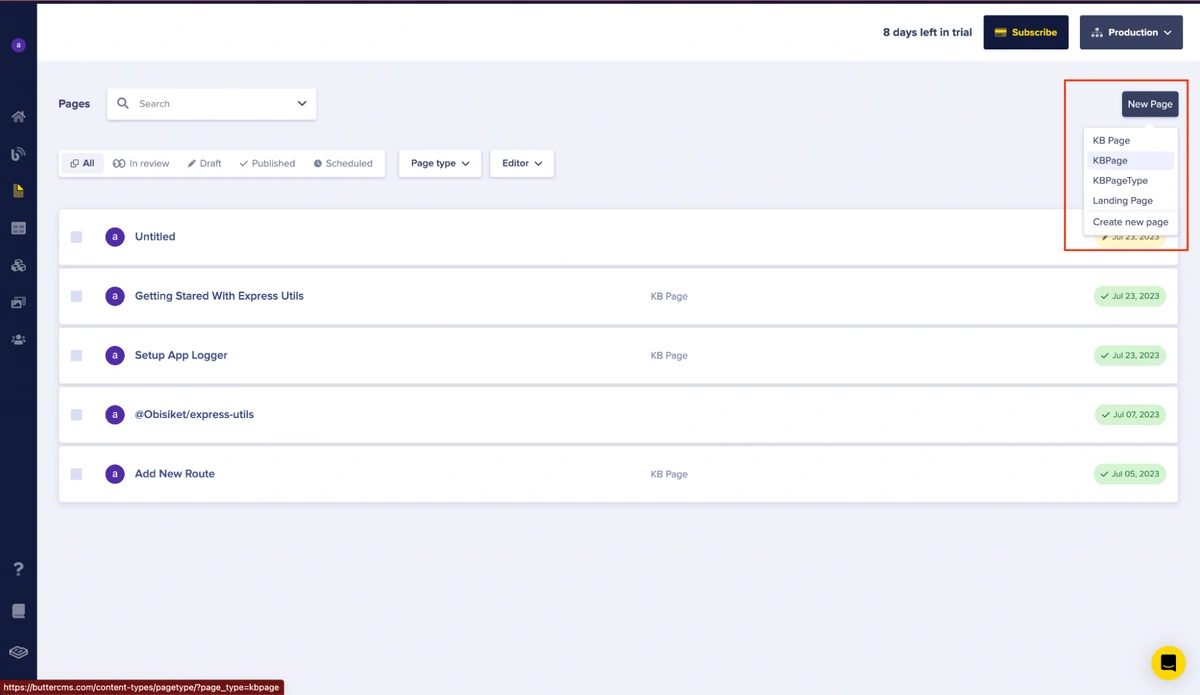
Click on New Page and select the option of KBPage.
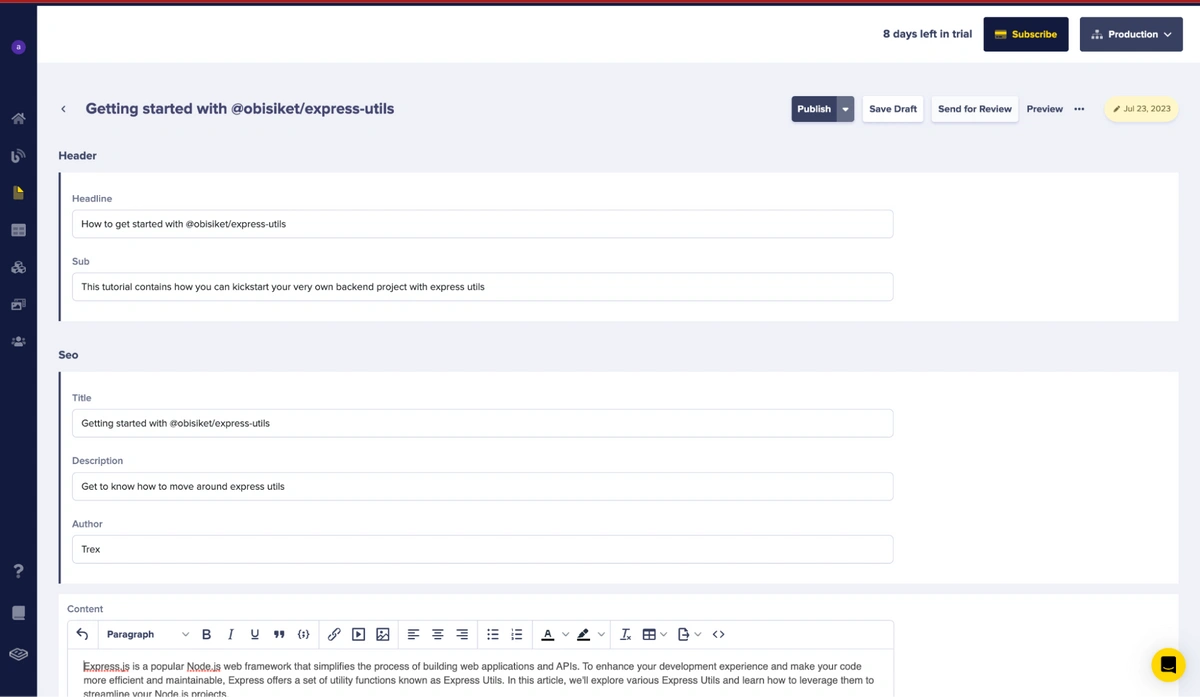
After that, you can now enter your page details. In this case, our page title would be “Getting started with @obisiket/express-utils”.
Next, click Save Page Metadata. Once that is done, you can then proceed to add the data for the Header, SEO, and Content, as indicated in the screenshot below.
After that, enter the category by clicking on the Add Reference button.

A screenshot showing the Add Reference Button
Select the Getting Started category, and click Use Selected.
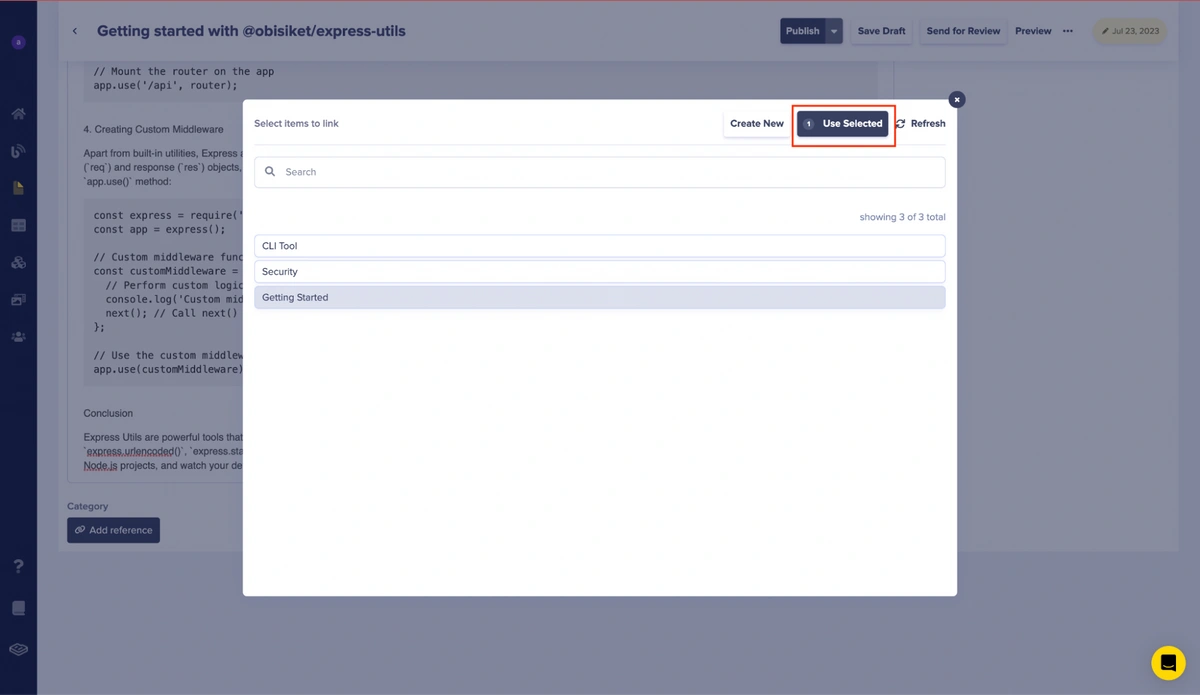
Select the references you want to use
Once complete, click Publish to save and publish the page.

A screenshot showing the Publish button
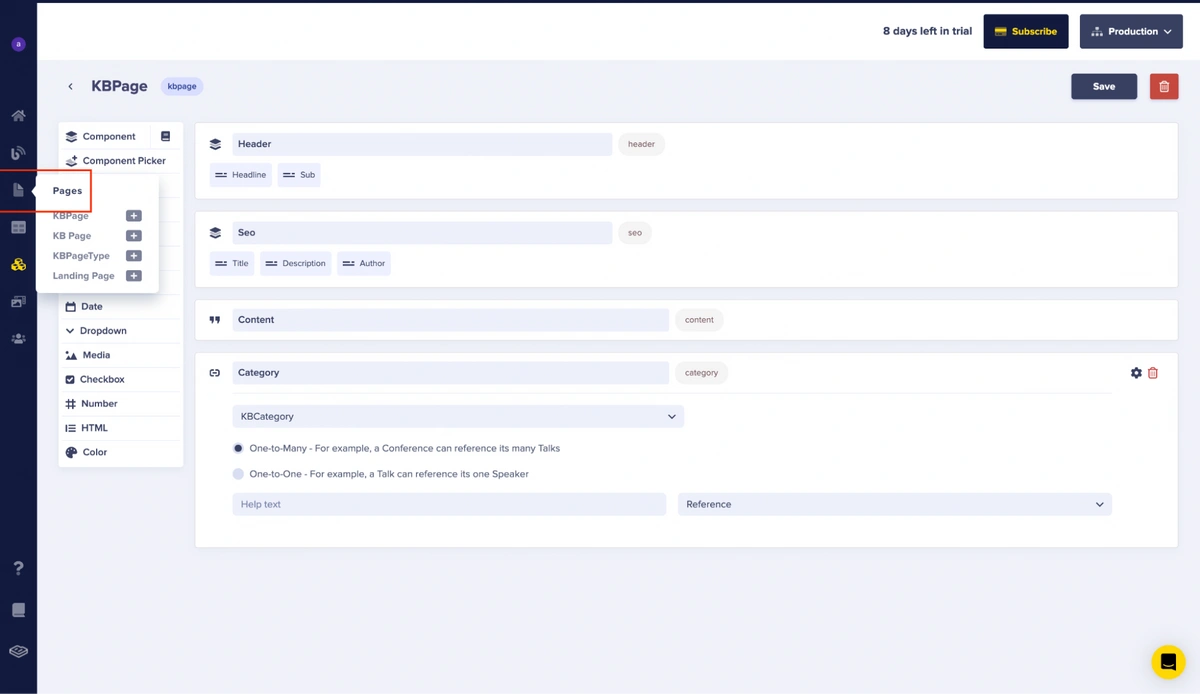
Creating the knowledge base landing page
To build your knowledge base landing page, click on the Pages menu.

Select Pages from the side navigation
After that, click the New Page button, and then click Create New Page.
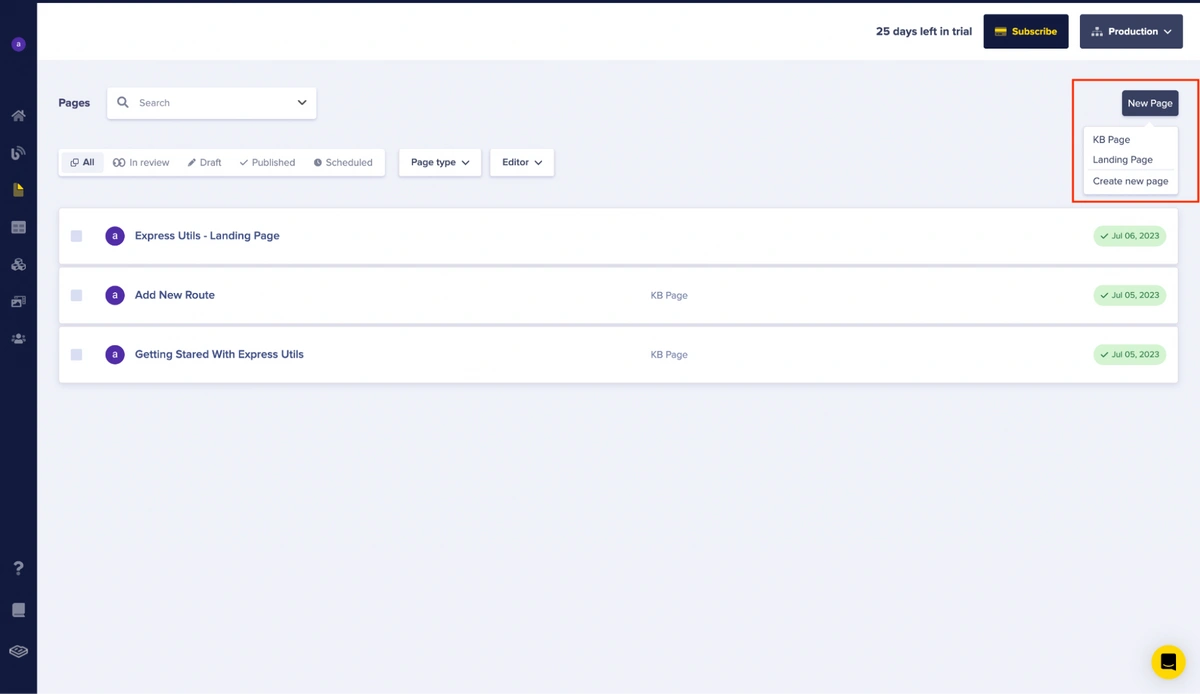
A screenshot showing the New Page and the Create New Page button
Next, you’ll create the following items:
-
Header –- Component
-
Headline — Short text
-
Sub — Short text
-
-
SEO — Component
-
Title — Short text
-
Description — Short text
-
Author — Short text
-
-
Topics — Reference (KbCategory)
-
Featured — Reference (KbPage)
-
Contact — Component
-
Headline — Short text
-
Sub — Short text
-
ContactLink — Short text
-
These fields can be created by using the menu indicated below:
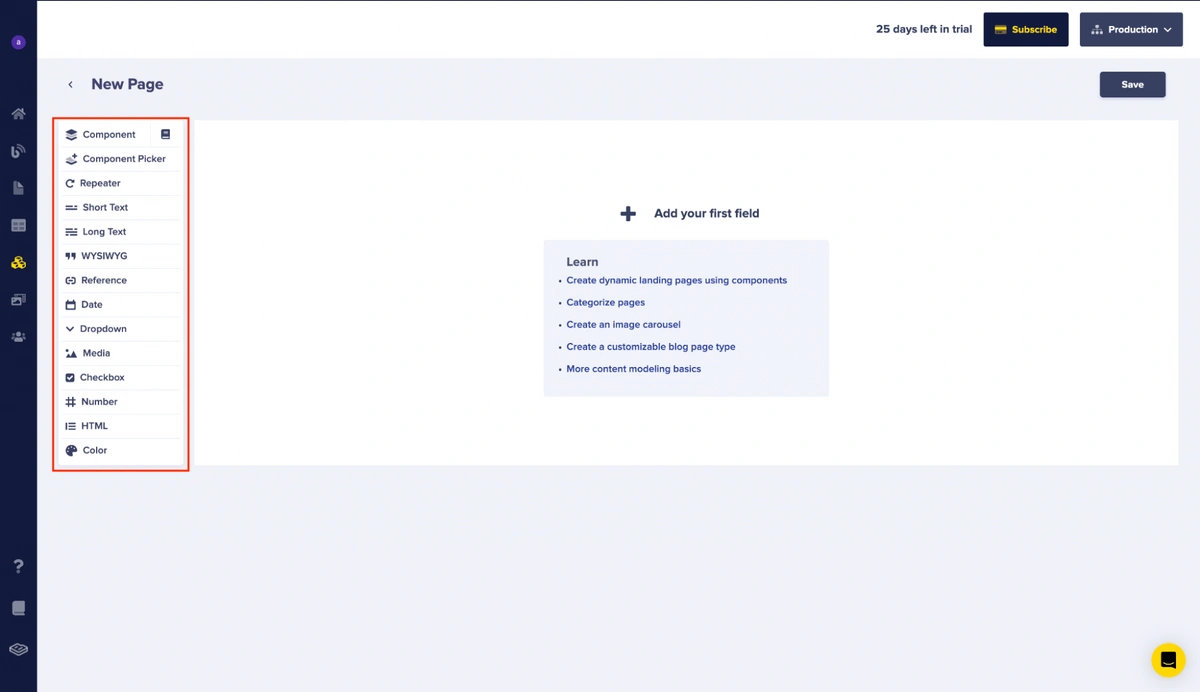
A screenshot showing the content fields menu
For instance, for the Header Component, Select Component, then enter the item’s name as “Header”. After that, you can click Create Component or Add from Library, as indicated below.
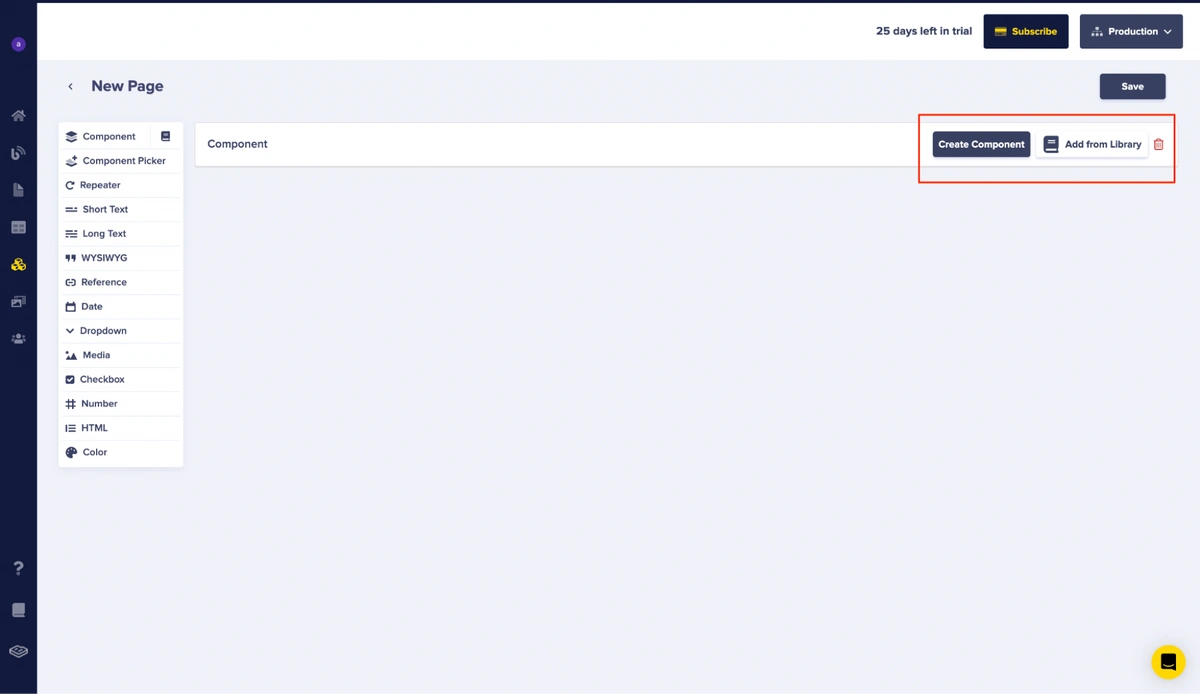
A screenshot showing the Create Component and the Add from Library buttons
In this case, choose Create Component and enter its name as Header. ButterCMS components are composed of fields. Following that, a new menu will appear, enabling you to add the desired fields for the Header — Component.
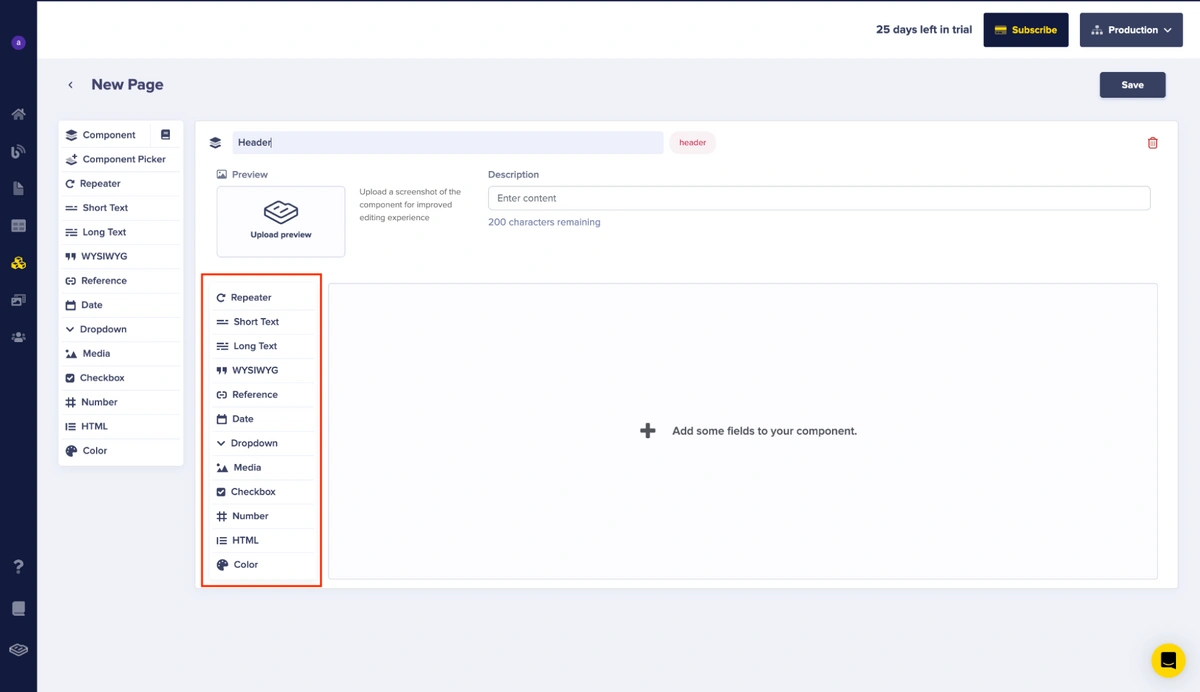
A screenshot showing a component field menu
Next, proceed to add the rest of the items accordingly. As listed above, add the following fields:
-
Headline — Short text
-
Sub — Short text
Ensure you click on Done after adding all the component’s fields.
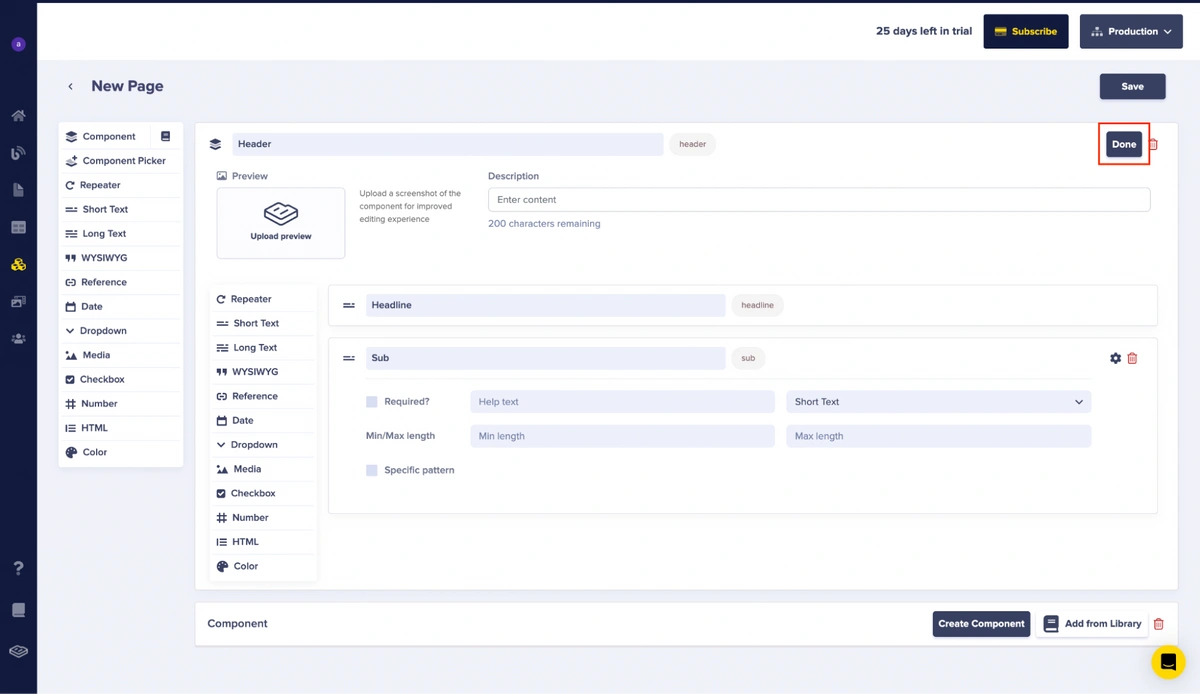
A screenshot showing the Done button
Repeat the same steps for the SEO – Components field and the Contact – Component.
Then for the Topics — Reference (KbCategory), click on the Reference option in the field menu, enter “Topics” as its name, and set “What Will This Reference?” to KbCategory.
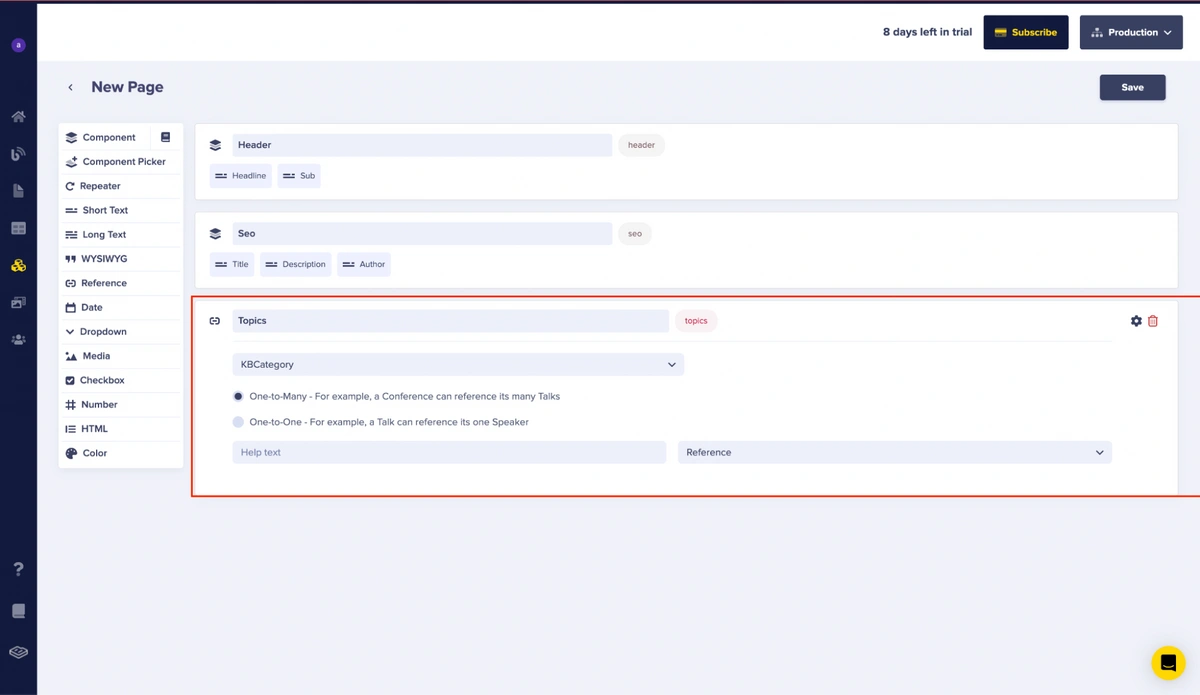
A screenshot showing the Topics reference field
Repeat the same steps for the Features — Reference (KBPage). This will reference individual articles we want to be featured.
Afterward, proceed to create the remaining fields for this landing page. Once done, click Save to save the page schema.

A screenshot showing the Save button
Adding the landing page content
Next, proceed to add the content for the landing page of the knowledge base.
To achieve this, follow the instructions below to enter the content. Start by providing the page metadata information, and then click on Save Page Metadata to save your input.
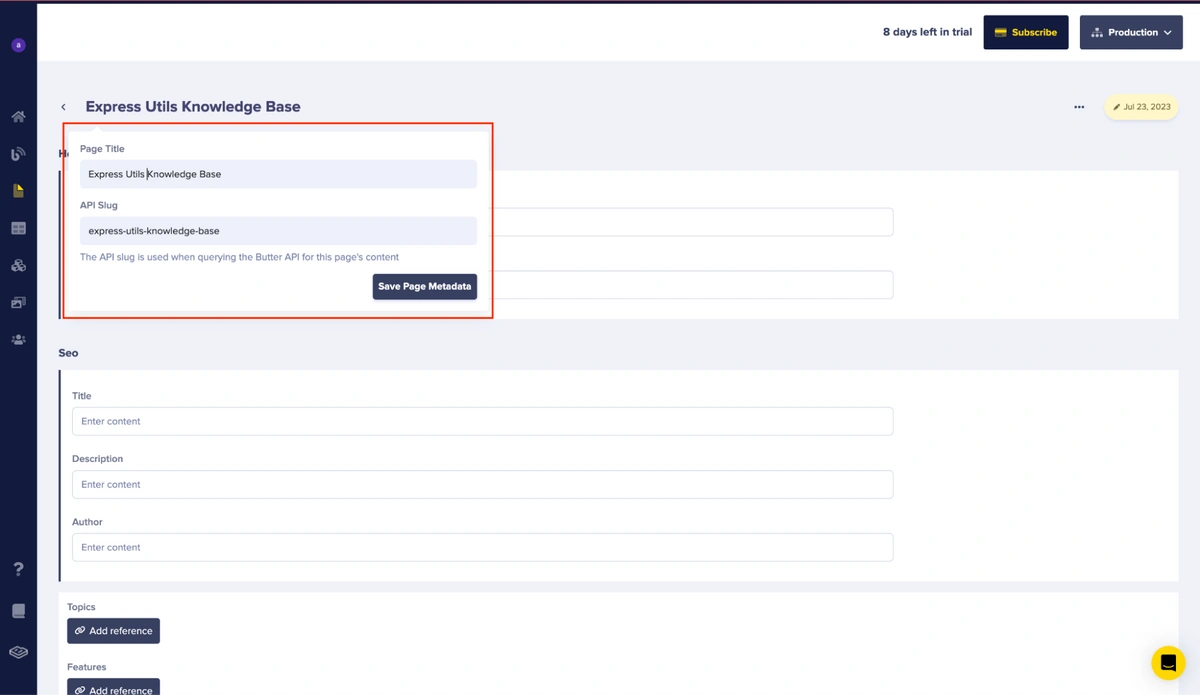
A screenshot showing the section to enter the page metadata
After that, enter information into the Header and the SEO sections, as indicated below.
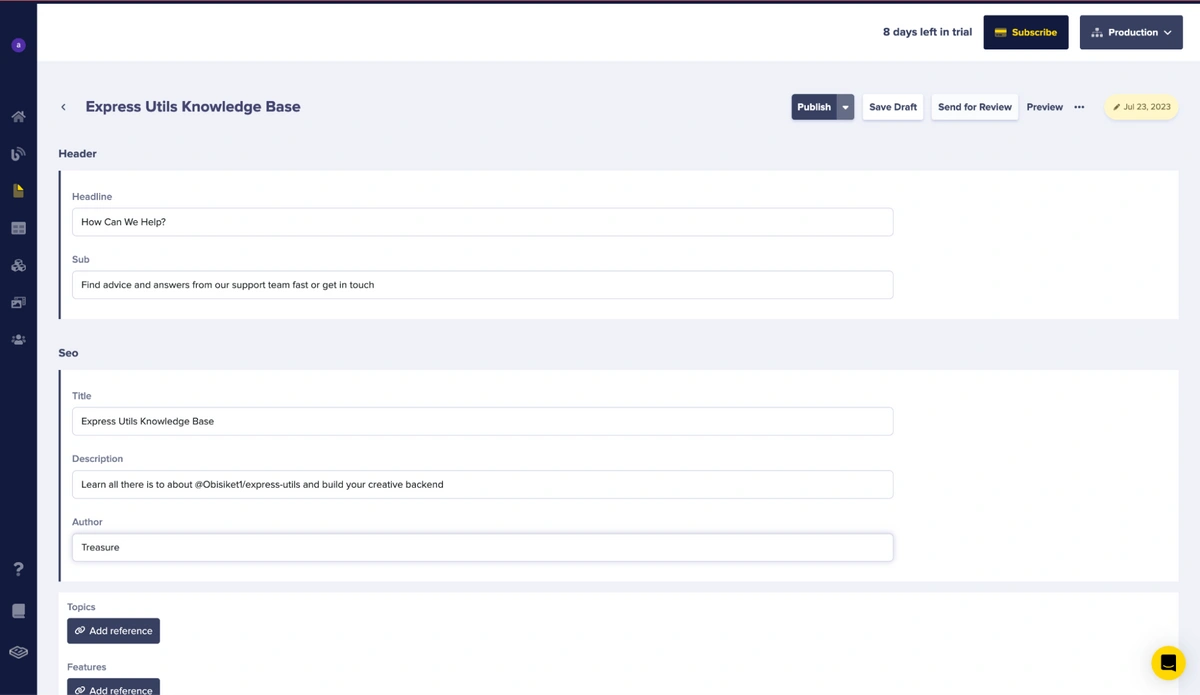
A screenshot showing the filled Header and SEO components
The Header section collects data for the hero section, and the SEO section houses the data for SEO optimization.
Next, select the Topics (basically the categories) by clicking on the Add Reference button.
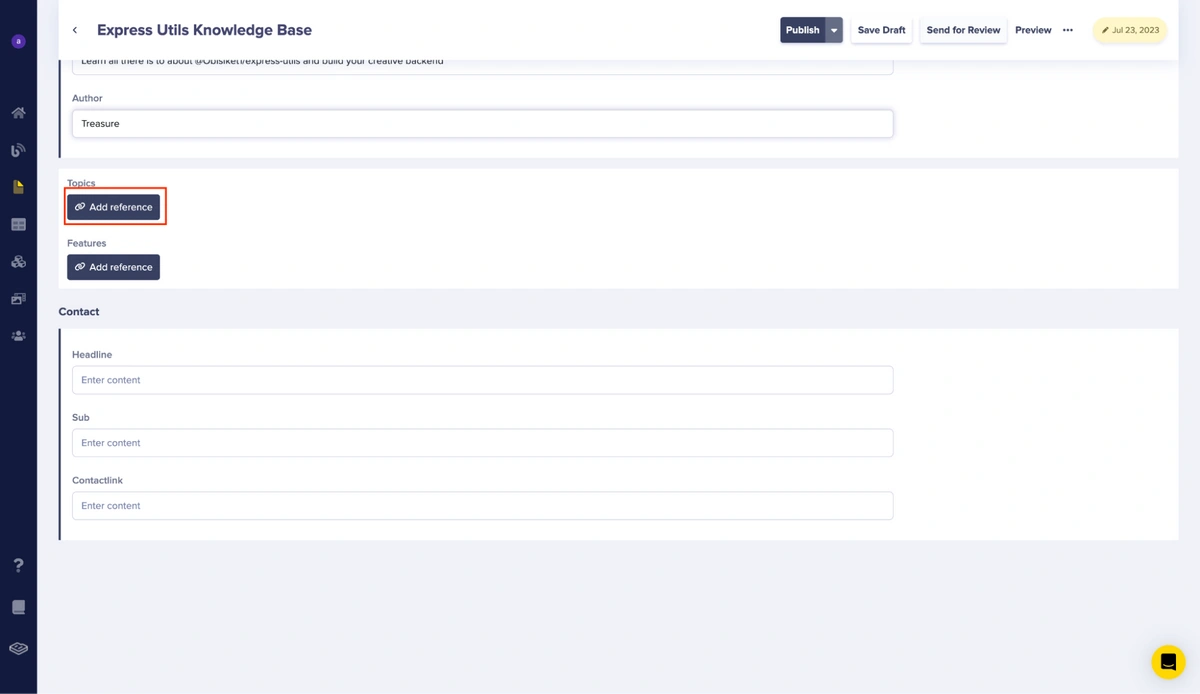
Select Add Reference
Then, select the options and click Use Selected.
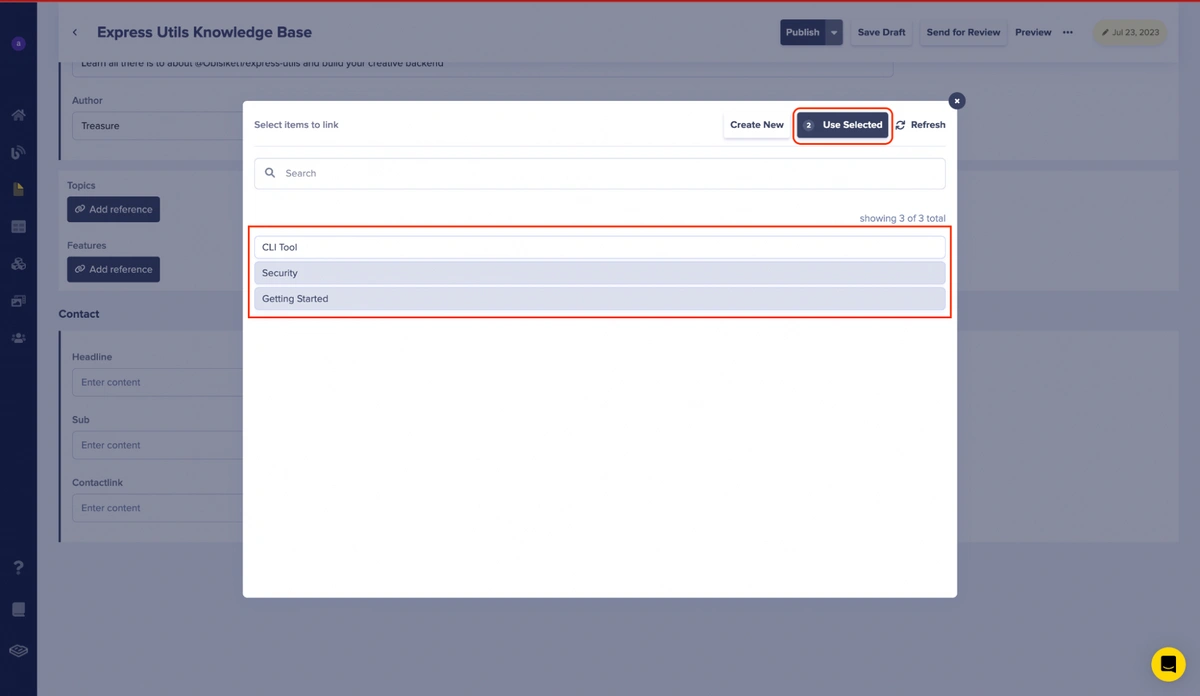
A screenshot showing the selected options and the Use Selected button
Repeat the same steps for the Featured section. For the Featured section, you’ll be referencing the articles you previously created.
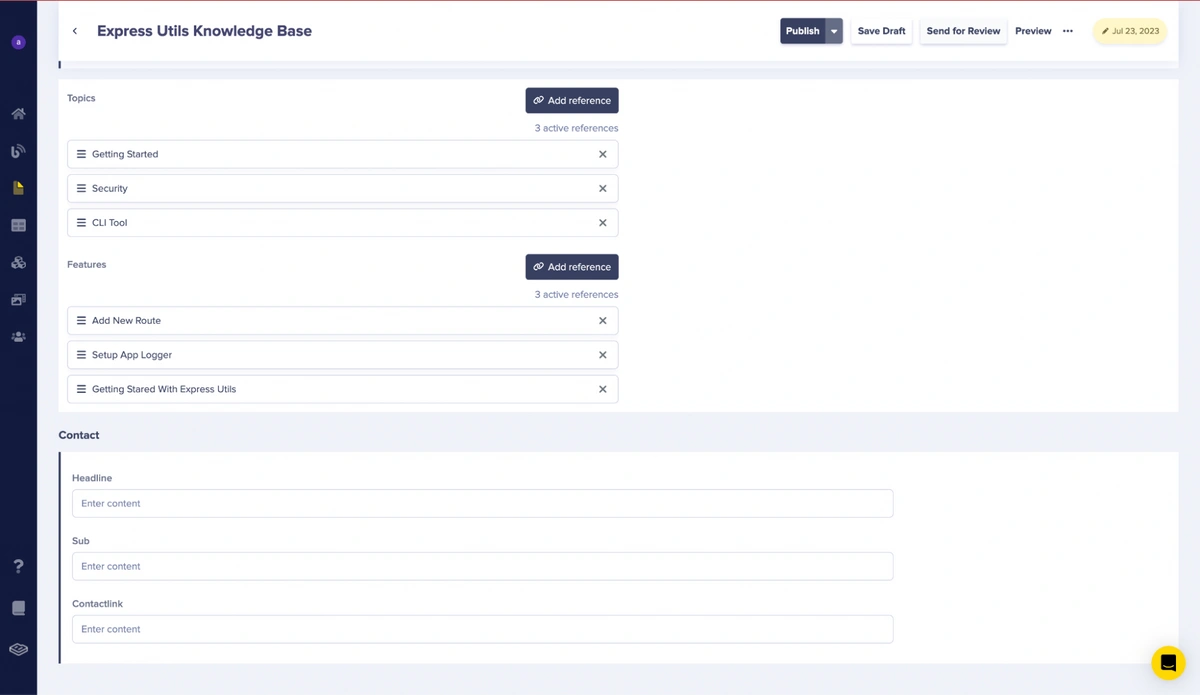
A screenshot showing the added topics and features references
Enter the data for the Contact section.
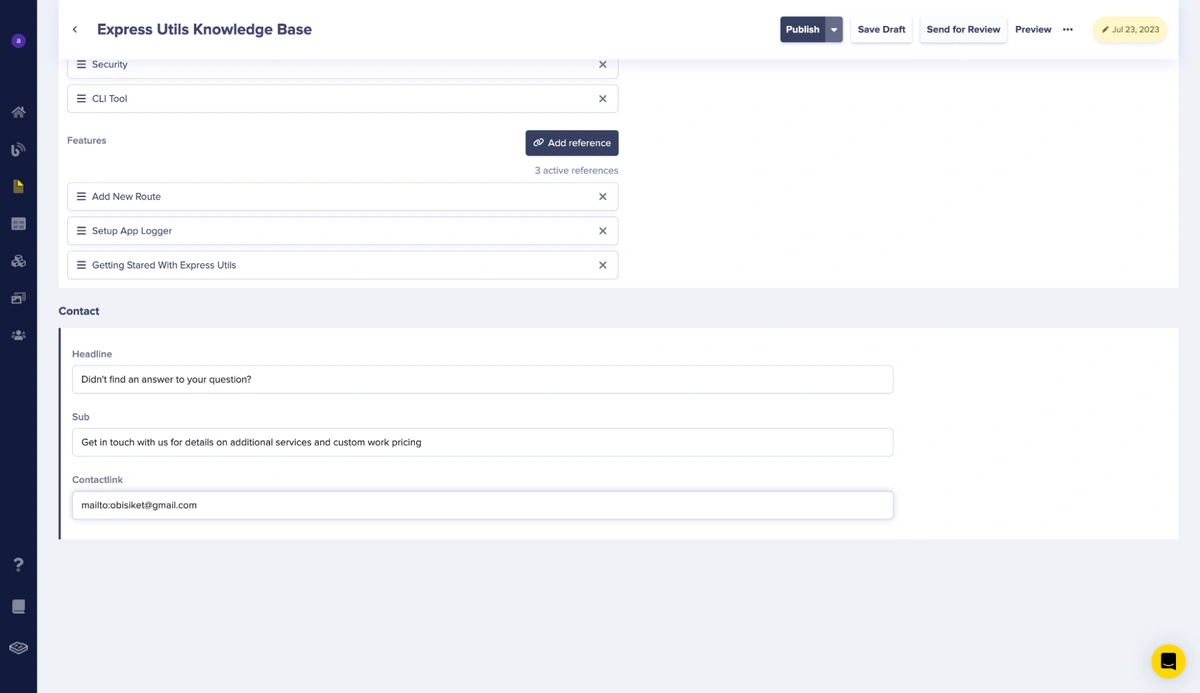
A screenshot showing the Contact section
After that, click Publish to publish the page.
Next, you’ll be creating the ASP.NET project to consume and present your ButterCMS knowledge base content.
Building the knowledge base in ASP.NET
To proceed, you’ll need to:
-
Set up the project and install the dependencies
-
Add the environment variables
-
Add the templates (the pages)
-
Add the search functionality
Setting up the project
To set up the project, begin by running the following command:
dotnet new webapp -o buttercmsknowledgebase --no-https -f net7.0This command will create a folder in the current directory with a template containing all the necessary files to build our project.
Next, open the buttercmsknowledgebase directory using your preferred code editor. If you're using VS Code, we recommend installing the C# extensions to enhance your development experience.
Once you've opened the project directory, install the required dependencies. Start by executing the following command:
dotnet add package ButterCMS
This command will install the ButterCMS SDK, enabling integration with ButterCMS within your project.
Additionally, install the package for handling environment variables by running the command:
dotnet add package DotNetEnv
This package manages environment variables specified in the .env file.
Adding the environment variables
To add environment variables, in Program.cs in the root directory of the project, add the following:
DotNetEnv.Env.Load();This loads up the environment variables stored in the .env file into the project’s global environment variable.
After that, create a .env file in the root directory and add the following:
BUTTER_CMS_KEY=xxxxxxxxxxxxxxxxxxxxxxxxxxxThe key's value is obtained by visiting the ButterCMS dashboard and navigating to Settings.
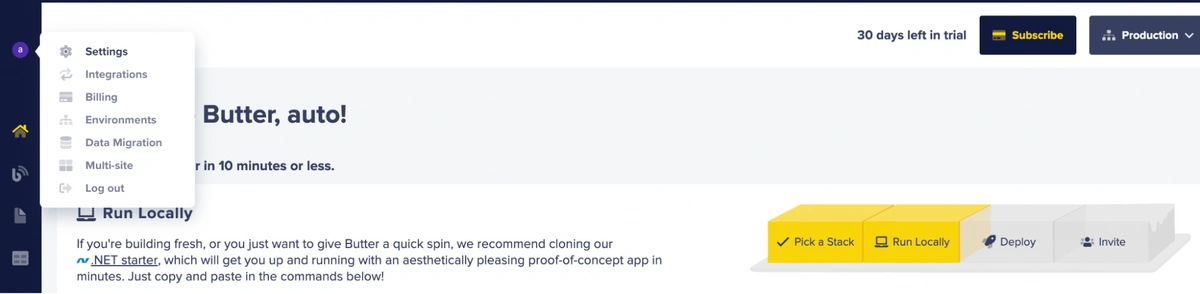
A screenshot showing the Settings location
After navigating to the Settings page, copy the Read API token displayed on the dashboard.
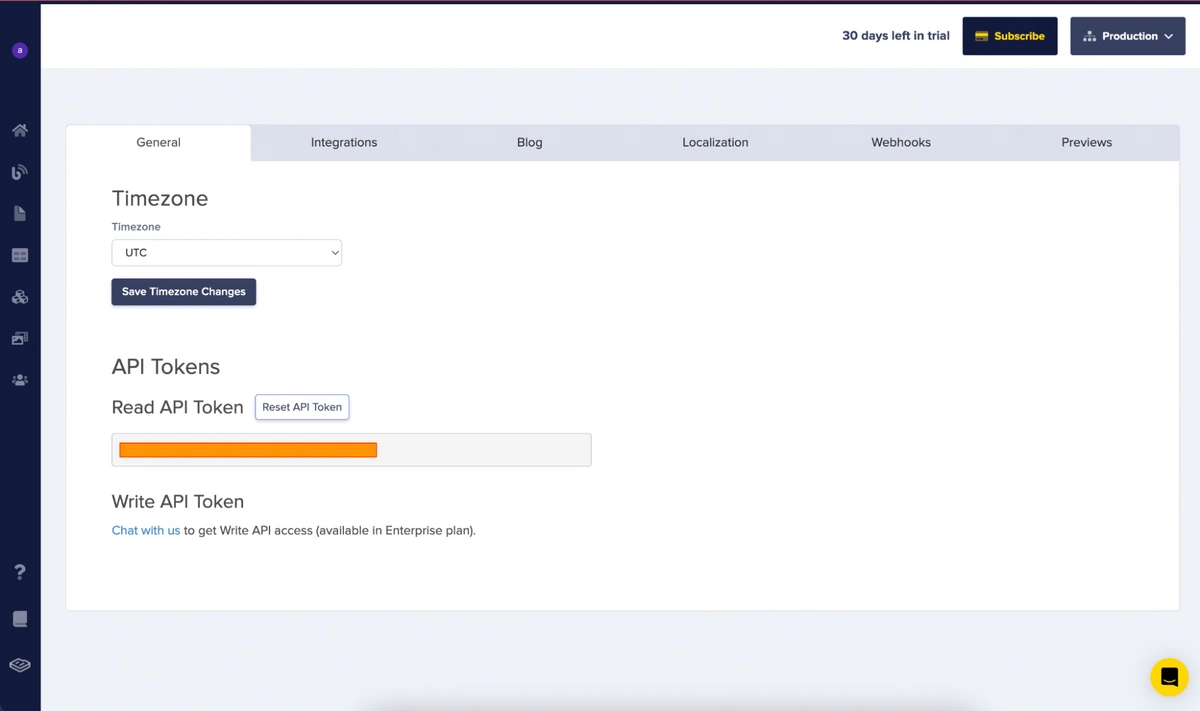
A screenshot showing the Read API token
Then, replace the value of the BUTTER_CMS_KEY in the .env file with the copied Read API key.
Adding the Templates
A few essential templates must be added to ensure the application's proper functioning. However, before proceeding with the templates, you should add the necessary assets to their folders. Copy the assets provided here to the wwwroot folder and ensure the directories match correctly.
...
wwwroot
├── assets
│   └── img
└── css
It is important to create the necessary classes based on the data structure from ButterCMS for accurate type specification. To achieve this, you need to create a folder named Models in the root directory and a file named index.cs in the Models directory. Copy and paste the content provided in this link into the index.cs file. Also,, create a Service folder and a file Index.cs, and add the content of this link. This Service folder houses the Service class containing the utility methods for this project.
Next, update the Layout.cshtml file in the Pages/Shared directory with the following:
<!DOCTYPE html>
<html lang="en">
<head>
  <meta charset="UTF-8">
  <meta name="viewport" content="width=device-width, initial-scale=1.0">
  <title>@ViewData["Title"]</title>
  <meta name="description" content='@ViewData["Description"]'>
  <meta name="author" content='@ViewData["Author"]'>
  <link rel="stylesheet" href="~/css/main.css" />
  <script src="~/js/site.js"> </script>
</head>
<body>
<header>
  <div class="bodify">
    <nav>
      <div> <a href="/"> <img src="/assets/img/logo.svg" alt="logo" /> </a> </div>
      <div id="d-nav">
        <ul>
          <li>
<a href="/"> Home </a> </li><li> <a href="#"> faq </a> </li><li> <a href="#"> contact </a> </li>
        </ul>
      </div>
    </nav>
@RenderBody()
<footer>
  <div class="bodify">
    <div row><a href="/"> HOME </a> <a> Faq </a> <a> Contact </a></div>


    <div> Made by human somewhere  </div>
  </div>
</footer>
</body>
</html>
The snippet above sets up the page layout, covering the content of the footer of the website and the navigation menu. The RenderBody function injects the body from other templates into this template, and then the ViewData dictionary offers a method to dynamically change the title section of our webpage.
Afterward, include the template Index.cshtml by navigating to the Pages directory. If an existing Index.cshtml file is not found, create one alongside an Index.cshtml.cs file.
Next, insert the provided code snippet into these files. Replace the content of the files if they already exist.
For the Index.cshtml, use the following:
@page
@model IndexModel
@{
  ViewData["Title"] = Model.PageData.Data.Fields.Seo.Title;
  ViewData["Description"] = Model.PageData.Data.Fields.Seo.Description;
  ViewData["Author"] = Model.PageData.Data.Fields.Seo.Author;
}
<section>
  <h1>@Model.PageData.Data.Fields.Header.Headline</h1>
  <p>@Model.PageData.Data.Fields.Header.Sub</p>
  <form method="get" action="/Search">
    <input id="search" name="q" type="text" placeholder="Search for answers..." />
    <input type="submit" value="Search" />
  </form>
</section>
</div>
</header>
<main>
  <section id="one">
    <div class="bodify">
      <h2 class="accent">Browse All Topics</h2>
      <div class="features">
        @foreach (var TopicCard in Model.PageData.Data.Fields.Topics) {
          <a class="item" href="/Category/@TopicCard.Name">
            <div class="image-container"><img src="@TopicCard.Icon" alt="card" /></div>
            <h3>@TopicCard.Name</h3>
            <p>@TopicCard.Description</p>
          </a>
        }
      </div>
    </div>
  </section>
  <section id="two">
    <div class="bodify">
      <h2>Featured Article</h2>
      <article>
        @foreach (var Feature in Model.PageData.Data.Fields.Features) {
          <a class="list" href="/Article/@Feature.Slug">
            <span>@Feature.Name</span>
            <div><img src="/assets/img/arrow.svg" /></div>
          </a>
        }
      </article>
      <hr />
    </div>
  </section>
  <section id="three">
    <div class="bodify">
      <h2> @Model.PageData.Data.Fields.Contact.Headline </h2>
      <p> @Model.PageData.Data.Fields.Contact.Sub </p>
      <button onclick="window.open('@Model.PageData.Data.Fields.Contact.ContactLink')"> contact us </button>
    </div>
  </section>
</main>
In the provided snippet, ViewData injects SEO information from ButterCMS onto the layout page. Subsequently, the remaining data from ButterCMS is rendered appropriately. The Model.PageData.Data.Fields.Features data, presented as an array, undergoes iteration to render its content using the enclosed template within the @foreach loop, similar to Model.PageData.Data.Fields.Topics.
Next, proceed by adding the Index.cshtml controller, which corresponds to the Index.cshtml.cs file. Include the following code snippet:
using ButterCMS.Models;
using buttercmsknowledgebase.Models;
using buttercmsknowledgebase.Service;
using Microsoft.AspNetCore.Mvc.RazorPages;
namespace buttercmsknowledgebase.Pages;
public class IndexModel : PageModel
{
    public PageResponse<LandingPage>? PageData;
    public async Task OnGetAsync()
    {
        var butterClient = AppService.GetClient();
        PageData = await butterClient.RetrievePageAsync<LandingPage>("*", "express-utils-knowledge-base");
    }
}
The code above retrieves the express-utils-knowledge-base from ButterCMS and transfers the data to the template via the PageData attribute of the IndexModel. Following that, you'll include the Search page, the platform for displaying the search results.
Adding the search functionality
To proceed, create a Search.cshtml and a Search.cshtml.cs file in the Pages directory and add the following:
In Search.cshtml, add the following:
@page
@model SearchModel
@{
    ViewData["Title"] = "Search Results";
}
<section class="pb-5">
  <h1>Search Results</h1>
  <p>You searched for: <script>query()</script></p>
</section>
</div>
</header>
<main>
  <div class="flex bodify py-3">
    <div class="w-1/3 p-3">
      @Html.Partial("_SideBar", Model.Categories)
    </div>
    <div class="w-full p-3">
      <div class="w-full main p-3 pl-3">
        @foreach (var Article in Model.PageData.Data) {
          <a class="search-result" href="/Article/@Article.Slug">
            <h4>@Article.Fields.Seo.Title</h4>
            <p>@Article.Fields.Seo.Description</p>
            <div class="href">
              <span>click here</span>
            </div>
          </a>
        }
      </div>
    </div>
  </div>
</main>
This template renders the search results from ButterCMS. It renders it using the template enclosed in the foreach loop.
Next, add the controller file, Search.cshtml.cs, and add the following:
using buttercmsknowledgebase.Category;
using buttercmsknowledgebase.SearchModel;
using buttercmsknowledgebase.Service;
using Microsoft.AspNetCore.Mvc.RazorPages;

namespace buttercmsknowledgebase.Pages;

public class SearchModel : PageModel
{
    public SearchResult? PageData;
    public KBCategories? Categories;
    public async Task OnGetAsync()
    {
        Categories = await AppService.GetCategories();
        PageData = await AppService.SearchKBPages(
            HttpContext.Request.Query["q"].FirstOrDefault() ?? "*"
        );
    }
}
In the snippet above, the SearchModel’s OnGetAsync fetches the categories from ButterCMS using the SDK and calls the static method SearchKBPages, which is a method that makes an HTTP request to the pages’ search endpoint and deserializes the data.
In addition, include Article.cshtml and its corresponding controller, Article.cshtml.cs. This template will preview the selected search result from the search page.
To continue, create the files Article.cshtml and Article.cshtml.cs in the Pages directory.
For Article.cshtml, add the following:
@page "/Article/{slug}"
@model ArticleModel
@{
  ViewData["Title"] = Model.PageData.Data.Fields.Seo.Title;
  ViewData["Description"] = Model.PageData.Data.Fields.Seo.Description;
  ViewData["Author"] = Model.PageData.Data.Fields.Seo.Author;
}
  </div>
</header>
<main>
  <div class="flex bodify py-3">
    <div class="w-1/3 p-3">
      @Html.Partial("_SideBar", Model.Categories)
    </div>
    <div class="w-full p-3">
      <div class="w-full main p-3 pl-3">
        <h1> @Model.PageData.Data.Fields.Header.Headline </h1>
        <p> @Model.PageData.Data.Fields.Header.Author </p>
        @Html.Raw(Model.PageData.Data.Fields.Content)
    </div>
  </div>
</main>
In the snippet above, the @page specifies the URL path with the slug params. For this particular page, it injects the SEO details from ButterCMS, and then uses HTML.Raw to render the WYSIWYG content field from ButterCMS.
Next, add to Article.cshtml.cs as follows:
using ButterCMS;
using ButterCMS.Models;
using buttercmsknowledgebase.Models;
using Microsoft.AspNetCore.Mvc.RazorPages;

namespace buttercmsknowledgebase.Pages;

public class ArticleModel : PageModel
{
    public PageResponse<KBPage> PageData;
    public async Task OnGetAsync()
    {
        var Slug = (string)RouteData.Values["slug"];
        var Env = System.Environment.GetEnvironmentVariable("BUTTER_CMS_KEY");
        var butterClient = new ButterCMSClient(Env);
        var parameterDict = new Dictionary<string, string>(){};
        PageData = await butterClient.RetrievePageAsync<KBPage>("*",Slug,parameterDict);
    }
}
In the code above, the slug is extracted from the RouteData, and then RetrievePageAsync is called from an already set up ButterCMS, passing in the extracted slug to get the page required.
Adding the View Category template
Similar to the Search and Article templates, create the Category.cshtml and Category.cshtml.cs files in the Pages directory. For Category.cshtml, add the content of this link. then, add the content of this link, the Category.cshtml.cs.
After all that is done, you can then proceed to run the application.
Our final application
To run our final application, first, open a terminal, ensure the terminal’s current working directory is the root directory of the project, and then run the command:
dotnet runAfter that, you’ll automatically be taken to your browser, where you can visit http://localhost:5013.
A GIF showcasing the knowledge base search functionality
A GIF showing the categories sections
Final thoughts
Congratulations on reaching this far! You've unlocked the incredible advantages of ButterCMS's user-friendly content management system. With ButterCMS, you can effortlessly create and manage content for your knowledge-base website. The seamless integration of ButterCMS with ASP.NET allows you to utilize the full potential of both platforms, resulting in a dynamic, responsive, and content-rich knowledge base website.

