In this tutorial, we will see how to leverage ButterCMS Webhooks to automate your workflows. We will discuss how you can integrate ButterCMS Webhooks with an Email Service Provider (ESP) like Mailchimp.
If you want to jump right into the code, check out the GitHub repo here.
Also, here's a link to the deployed version: https://pipedream.com/@lelouchB/buttercms-mailchimp-v1-p_zACkqza
ESP stands for Email Service Provider, and generally refers to a company or platform that offers email marketing or bulk email services, such as dynamic email content, email automation, A/B testing of email and automation, segmentation, or analytics.
Mailchimp is one of the most popular and commonly used Email Service Providers. Other examples include ActiveCampaign, HubSpot, ConvertKit, and Klaviyo.
In this tutorial, we will use ButterCMS webhooks with Mailchimp, but you can easily integrate it with any other Email Service Provider.
There are so many use cases where you can use ButterCMS webhooks and Mailchimp together, but right now we will create a workflow where an automated email is sent to your blog readers or Mailchimp audience whenever you publish a new blog post on ButterCMS. We will use Pipedream, a production-scale serverless platform, to create this workflow.
There are many benefits to using an Email Service Provider for your email/marketing campaigns:
Webhooks, in short, are automated messages or notifications sent from apps to a specified destination when an event occurs or is triggered. For example, you can use ButterCMS webhooks to notify your audience whenever you publish a new blog post. The messages are generally sent in a POST request with the event information as the request payload. Your app or API receives this POST request, and further actions are executed based on the request's payload.
There are many use cases where integrating ButterCMS with your ESP can help boost your email/marketing campaigns. These include:
Basic knowledge of NodeJS, Webhooks, and APIs
ButterCMS comes with all the possible webhooks that you might need. Some of them are as follows:
For this tutorial, we will use the post.published event that is triggered whenever a new blog post is published. You can check out the complete list of events and their triggers here.
Here is what the payload or the body of the POST request looks like.
```js
{
  "data": {
    "id": "example-page-slug"
    "page_type": "news",
    "locale": "en"
  },
  "webhook": {
    "event": "page.all",
    "target": "<http://yoururl.com/process_webbook>"
  }
}
```
The payload includes the id of the blog post published; you will use this id of the blog post to fetch data from the ButterCMS API. Then this fetched data will be sent to Mailchimp, and a new campaign about the newly published blog post will be sent to your audience.
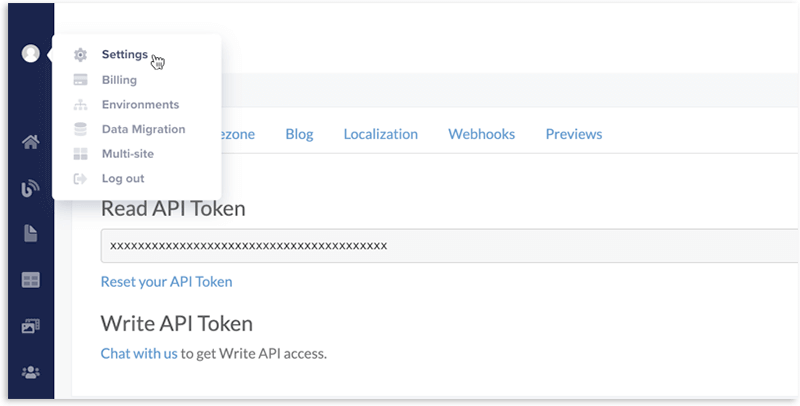
Head over to https://buttercms.com/settings/ in the browser and copy the Read API Token from your ButterCMS Settings. You will use this API Key to fetch the blog post data from using ButterCMS API.
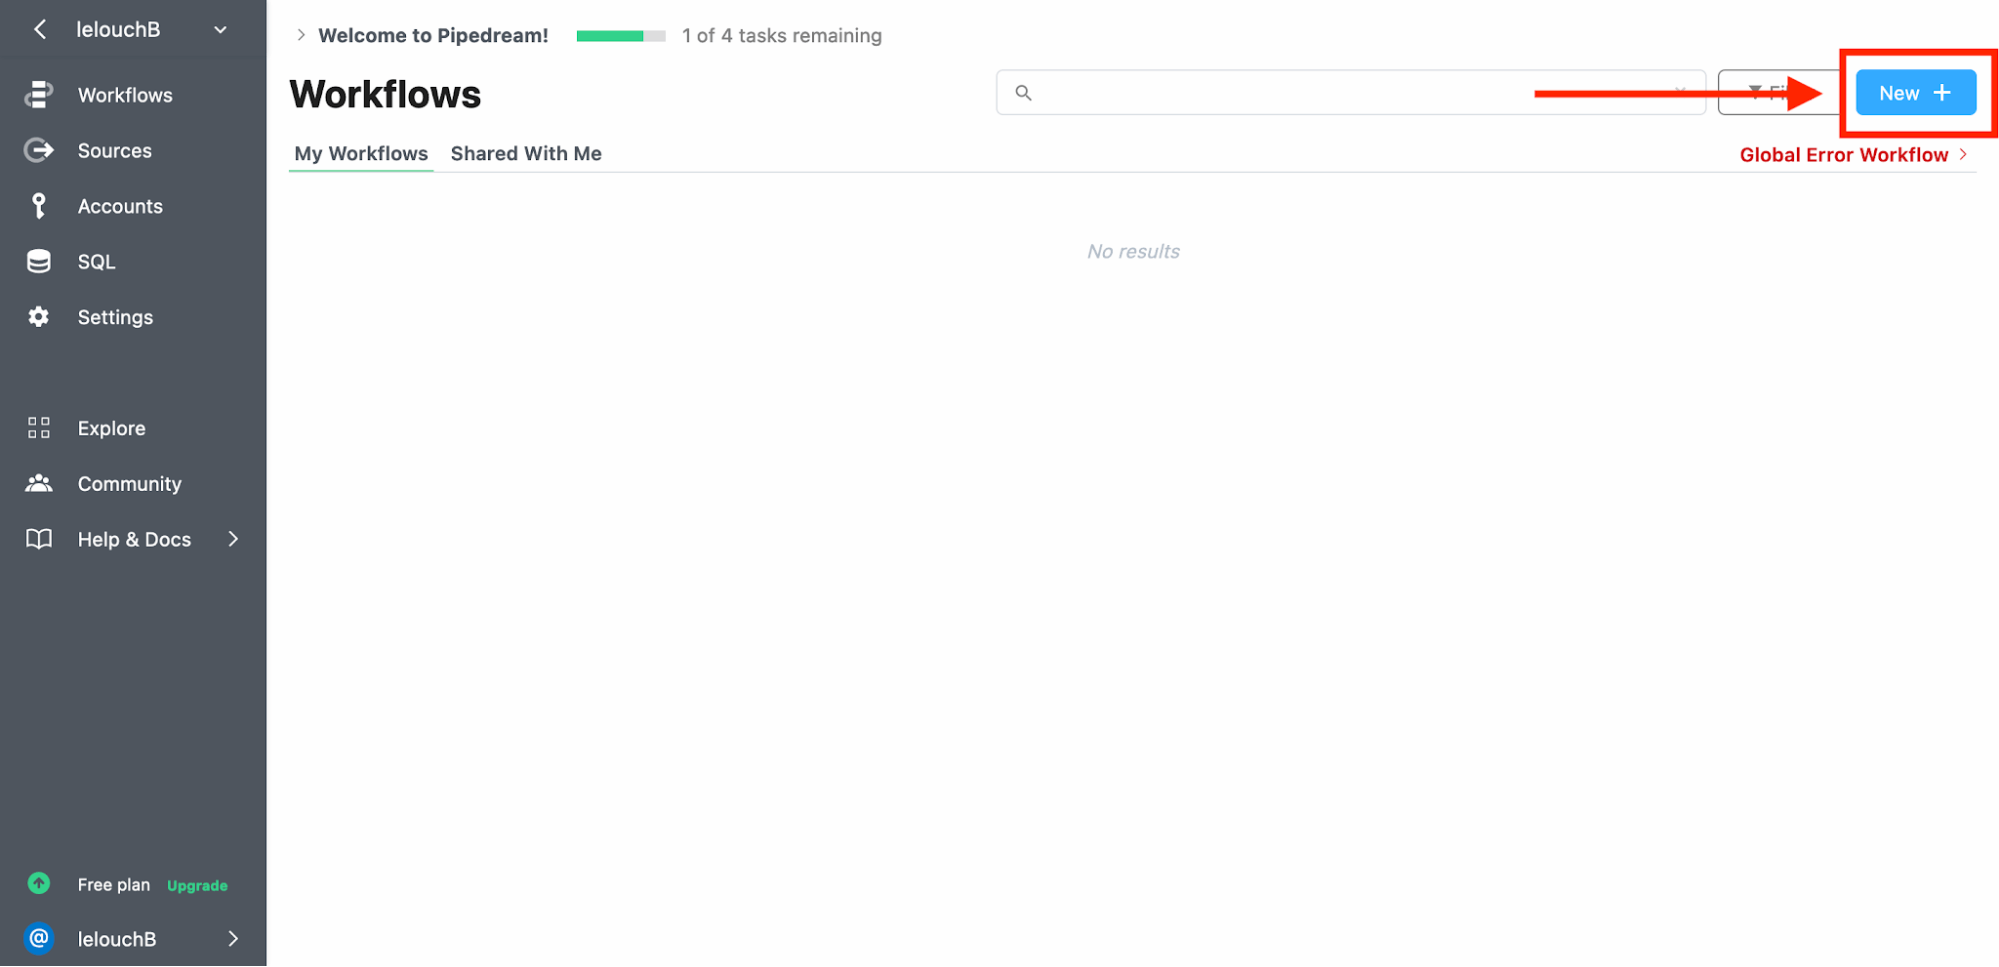
Create a free Pipedream account if you haven't already.
Navigate to https://pipedream.com/workflows and click on the New button to create a new workflow.
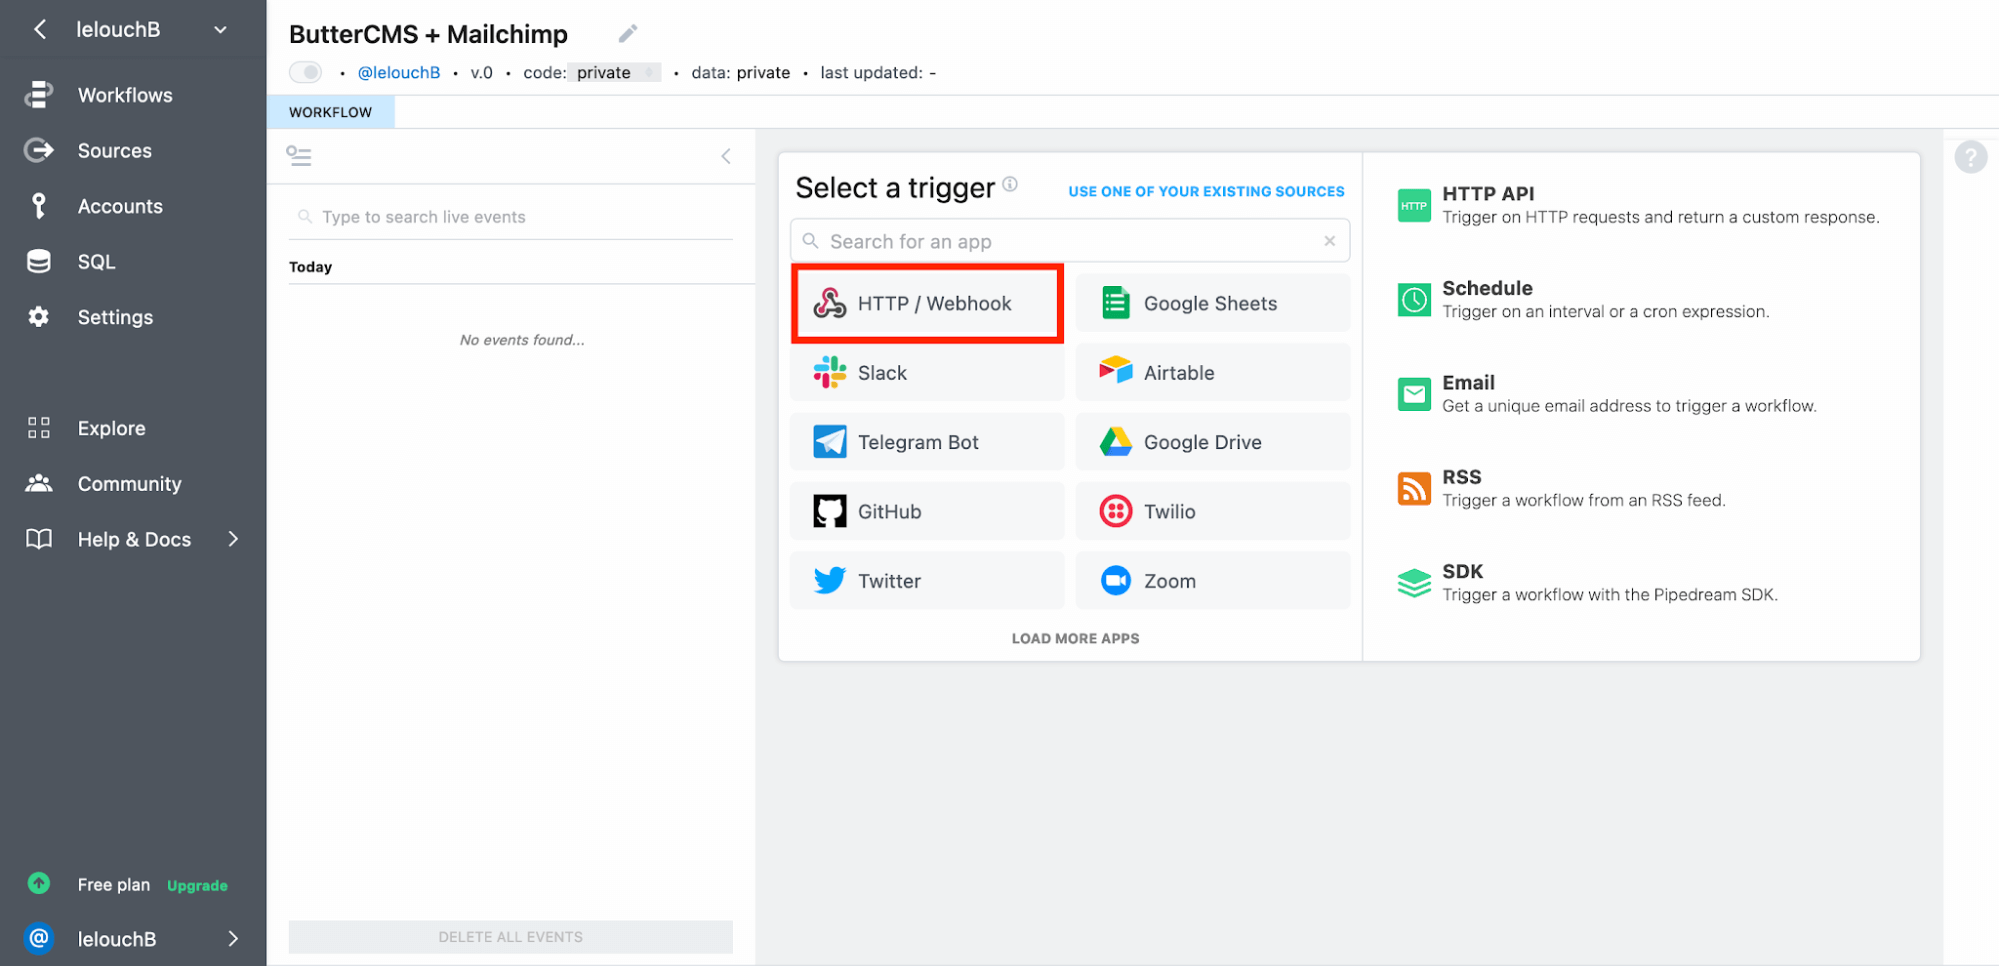
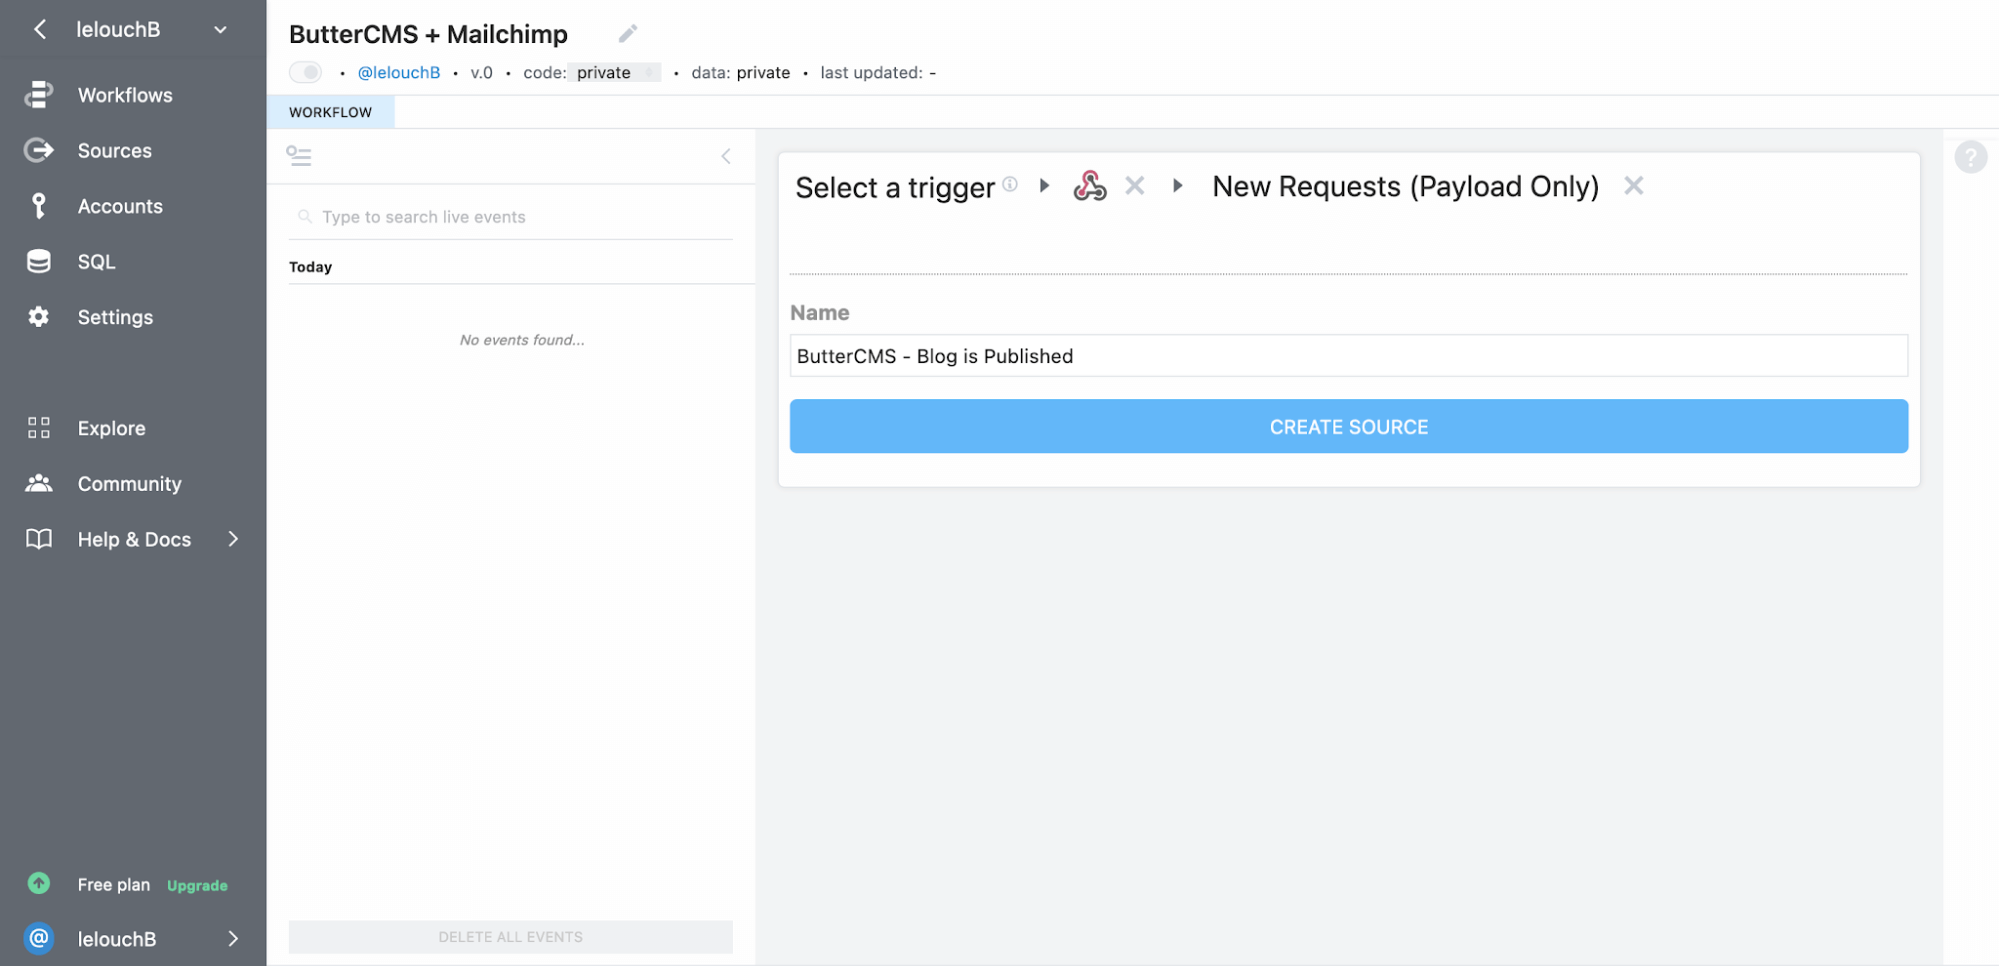
When prompted, click on HTTP/ Webhook on the Pipedream workflow page.
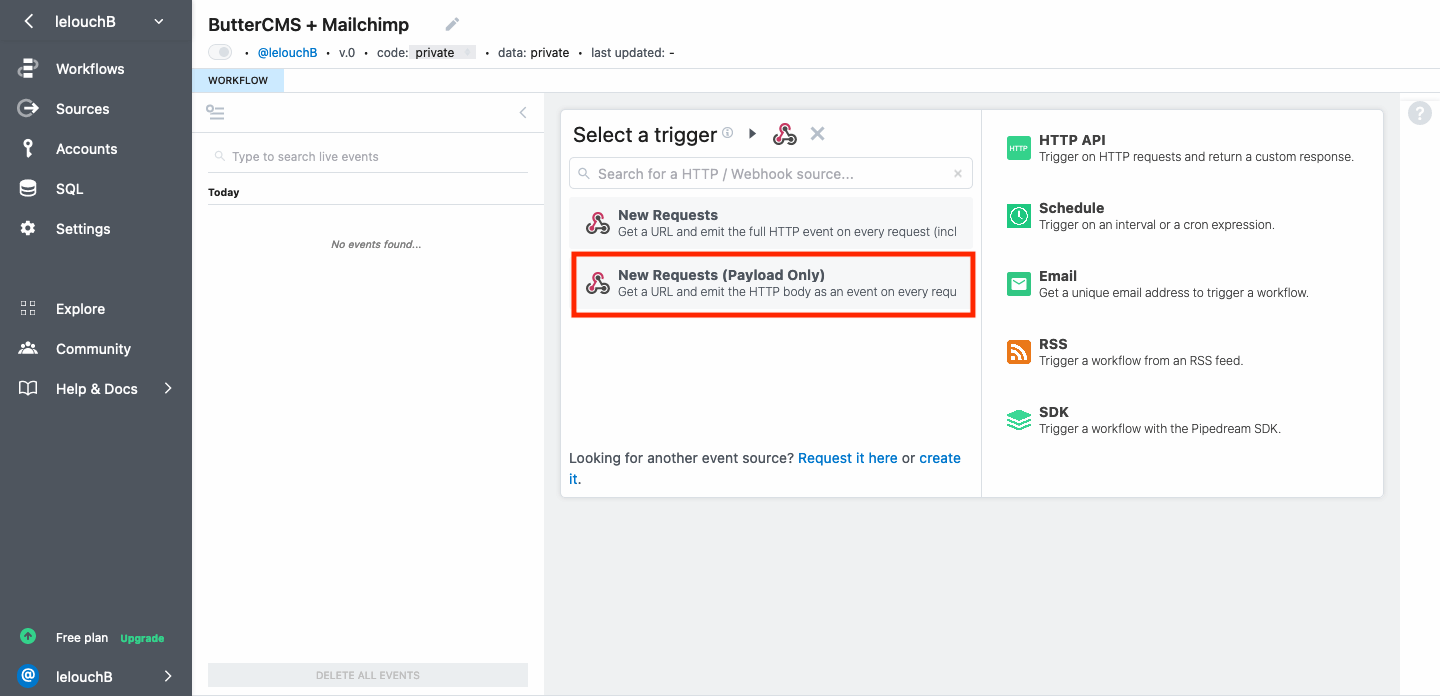
At the next prompt, click on New Requests (Payload Only). This makes sure the workflow is triggered only when a payload is attached to a webhook request.
Give a name to your source, such as ButterCMS - Blog is Published, and click on the Create Source button.
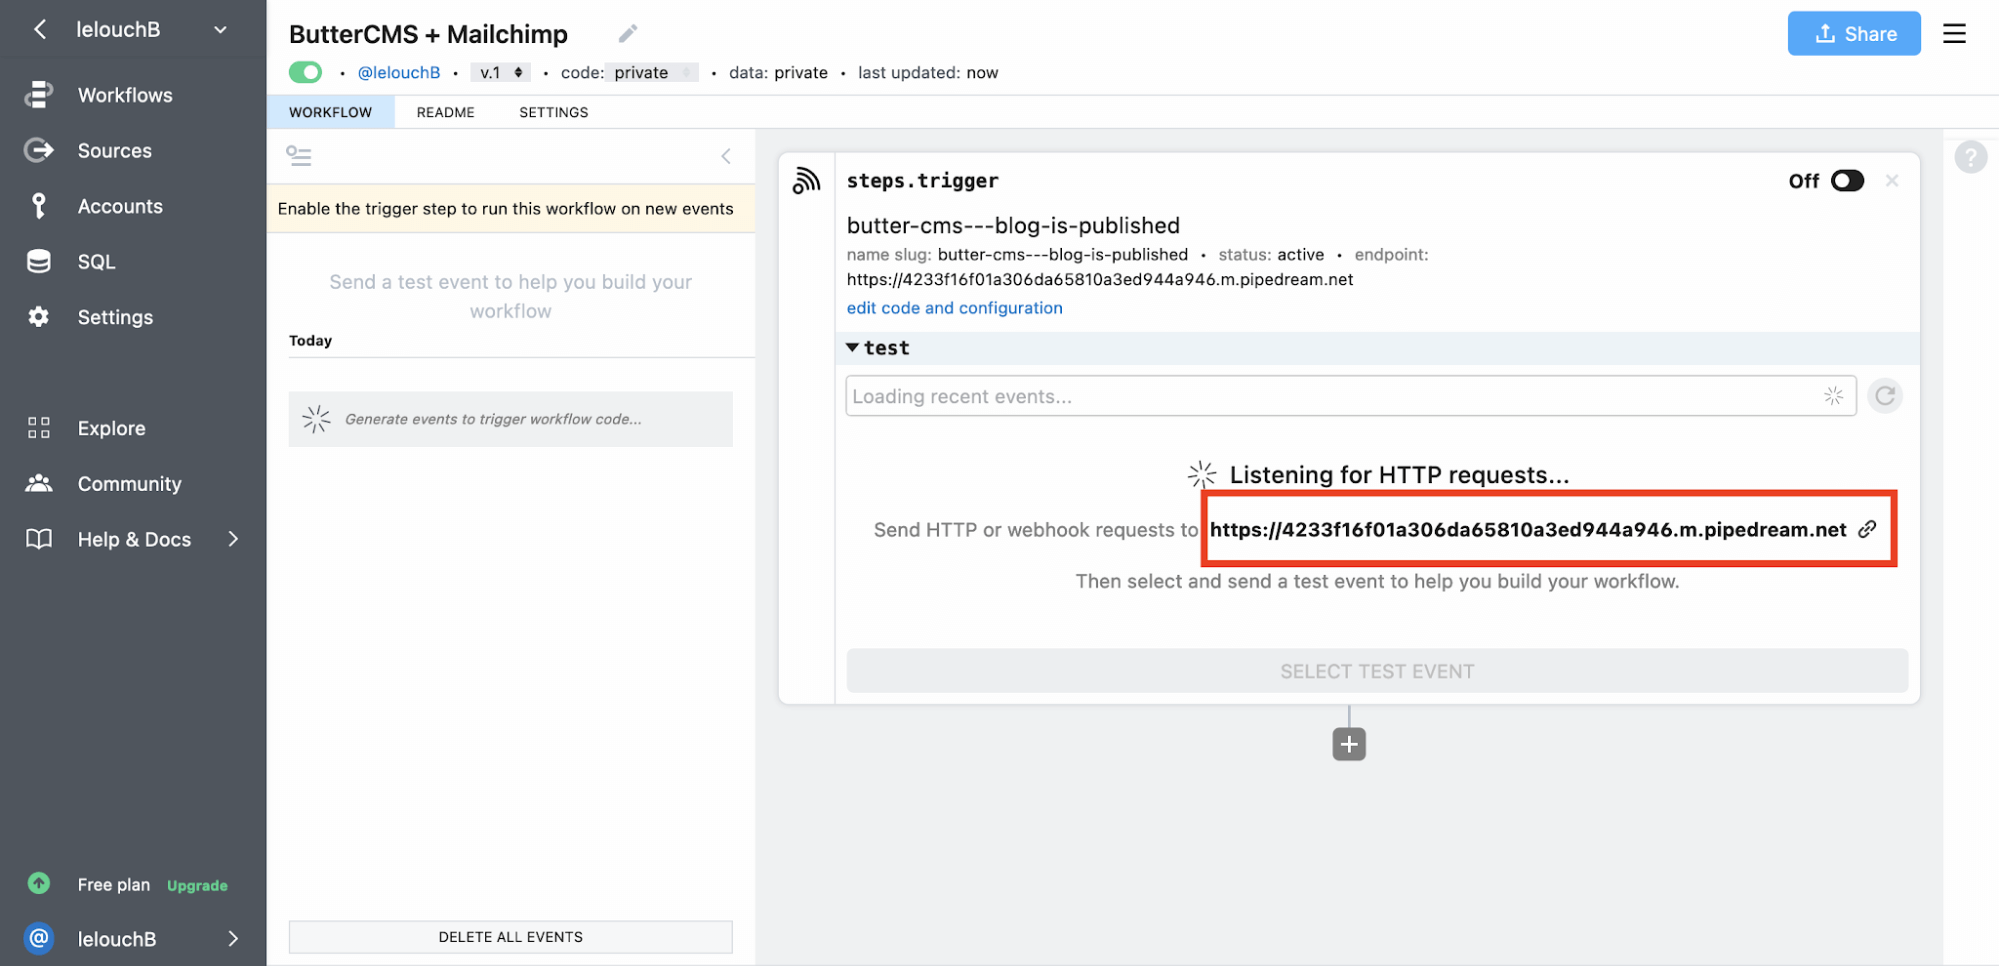
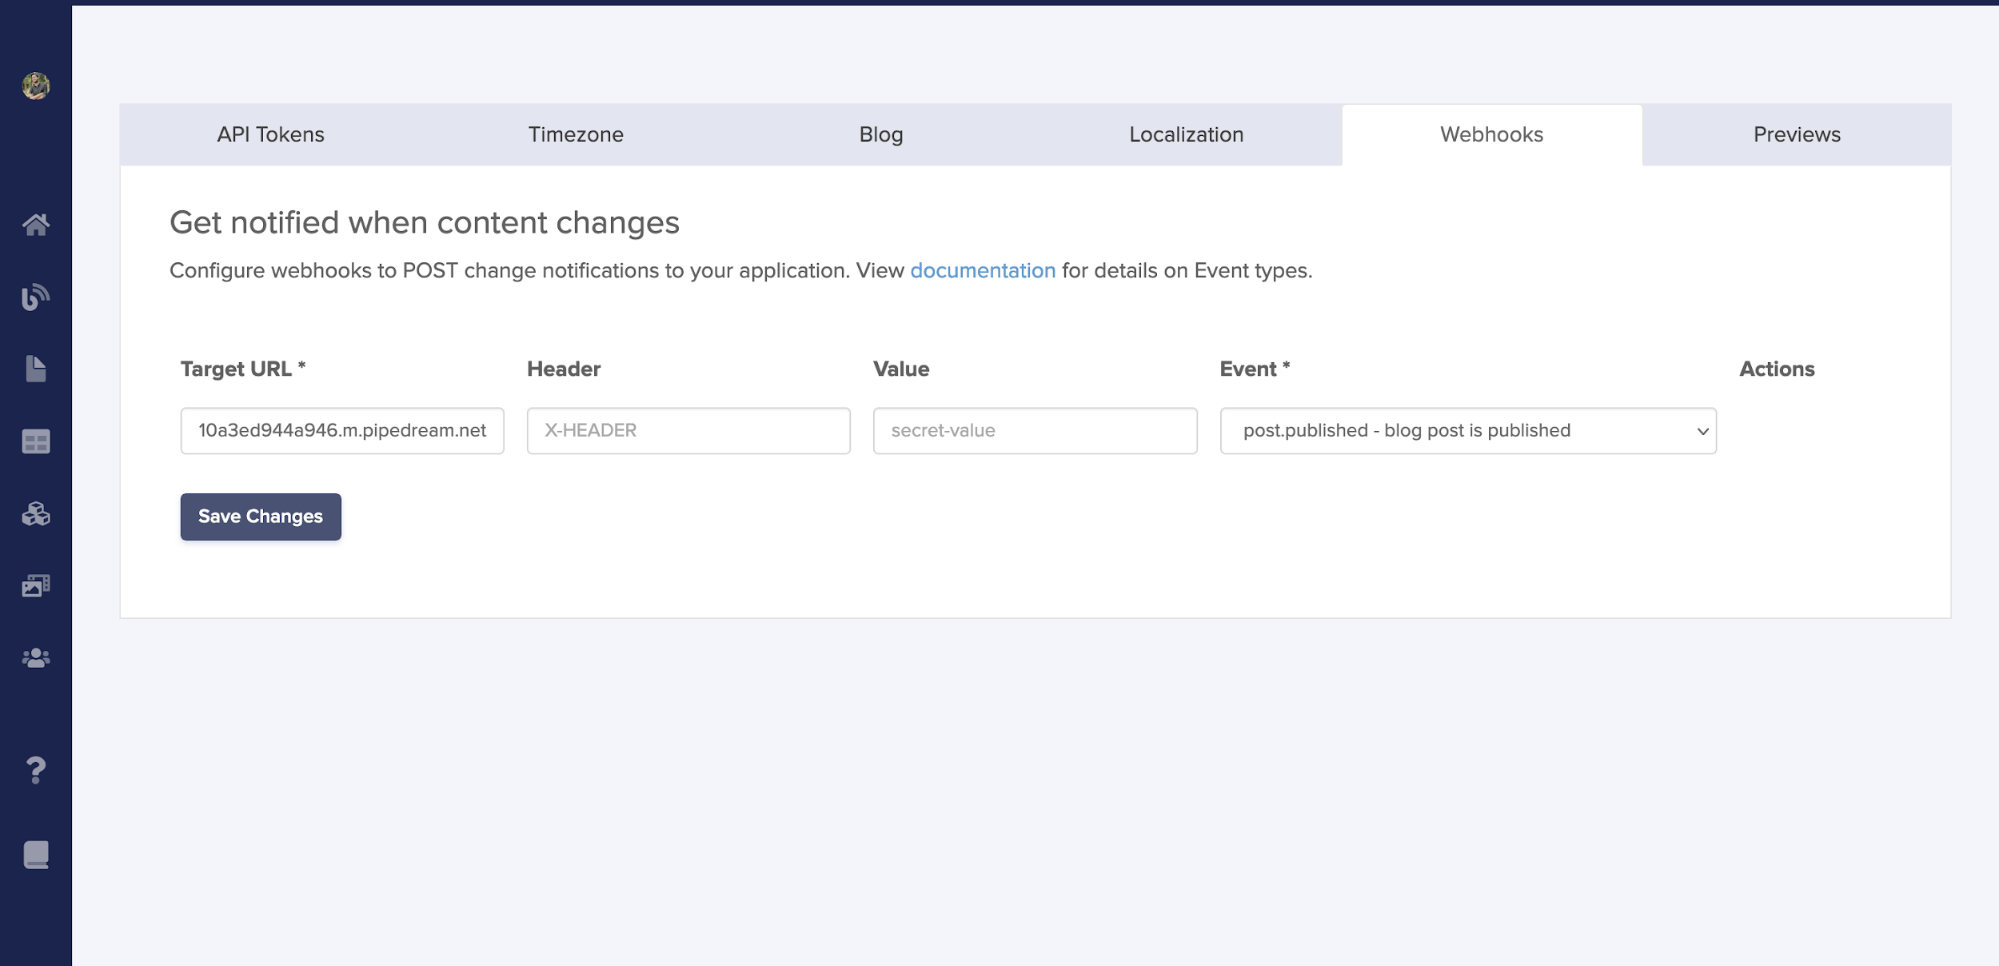
You will be shown a URL on the next page after creating the source. Copy that URL. This is the URL where you can catch the ButterCMS webhook requests.
Head over to https://buttercms.com/webhooks/ in your ButterCMS Settings and paste this URL with the following configurations. Click on the Save Changes button.
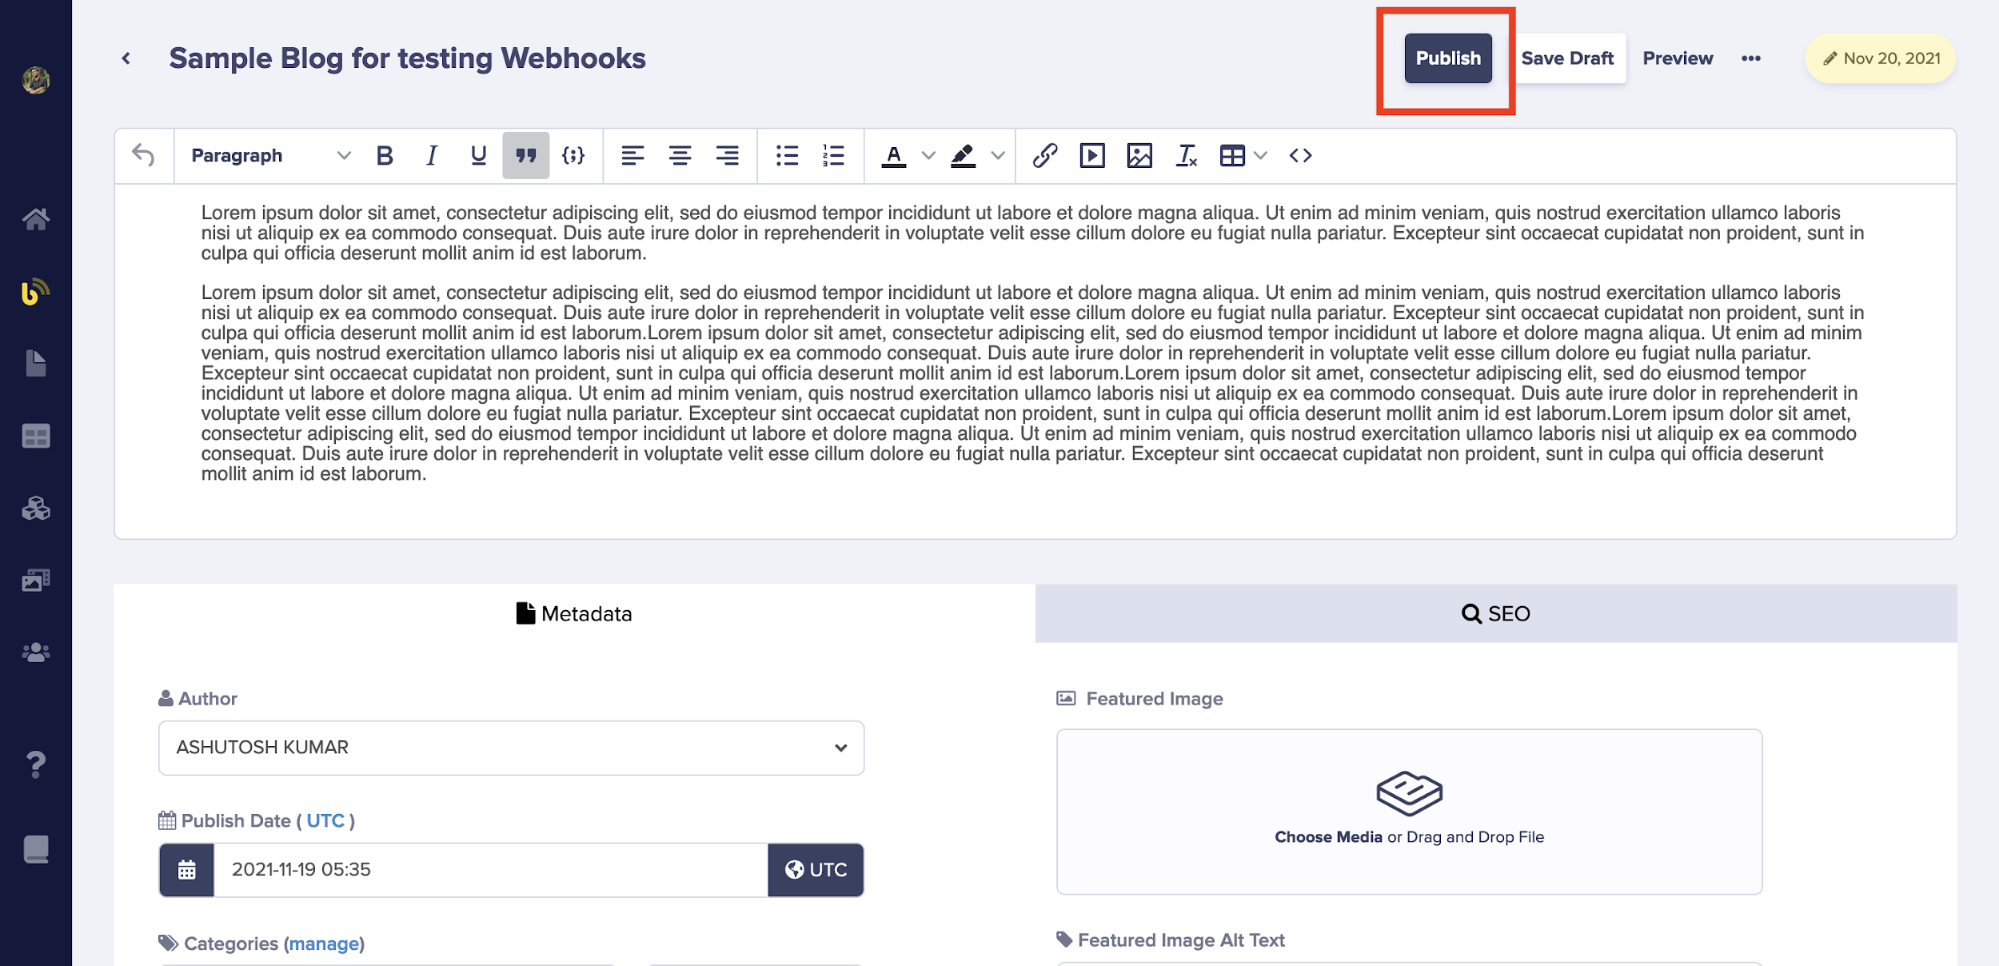
Pipedream will now listen for new events from ButterCMS. To test this, create a new demo blog in your ButterCMS account and publish it.
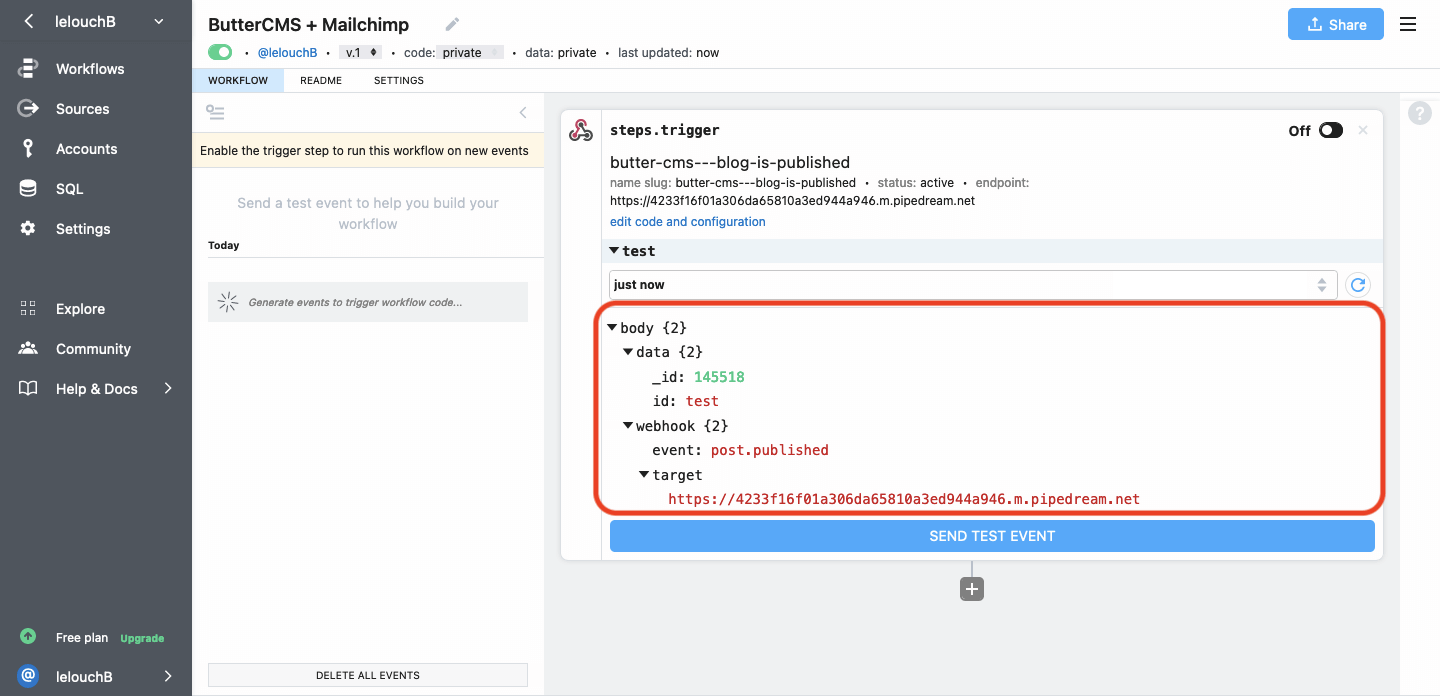
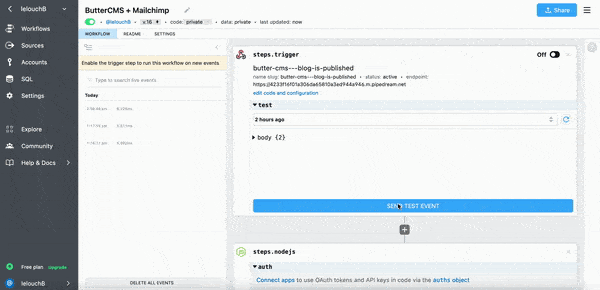
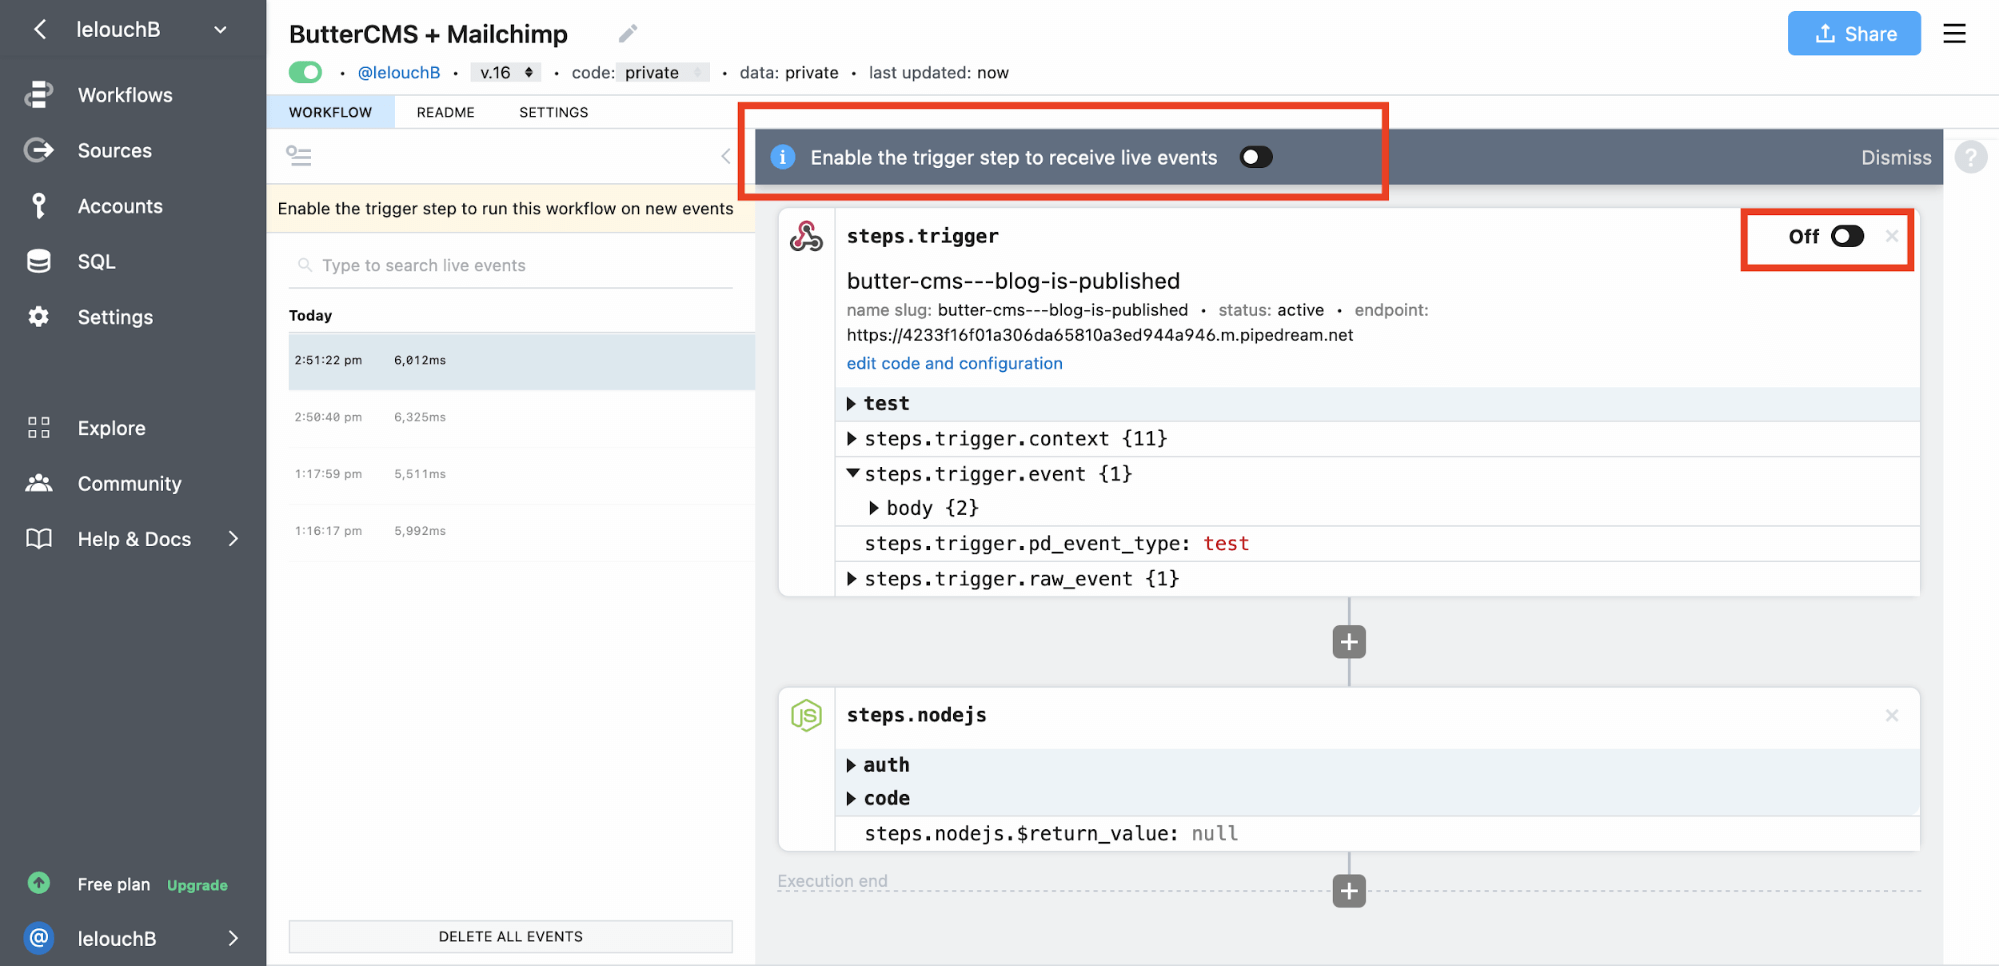
Head over to your Pipedream dashboard, you will see the request sent by the webhook.
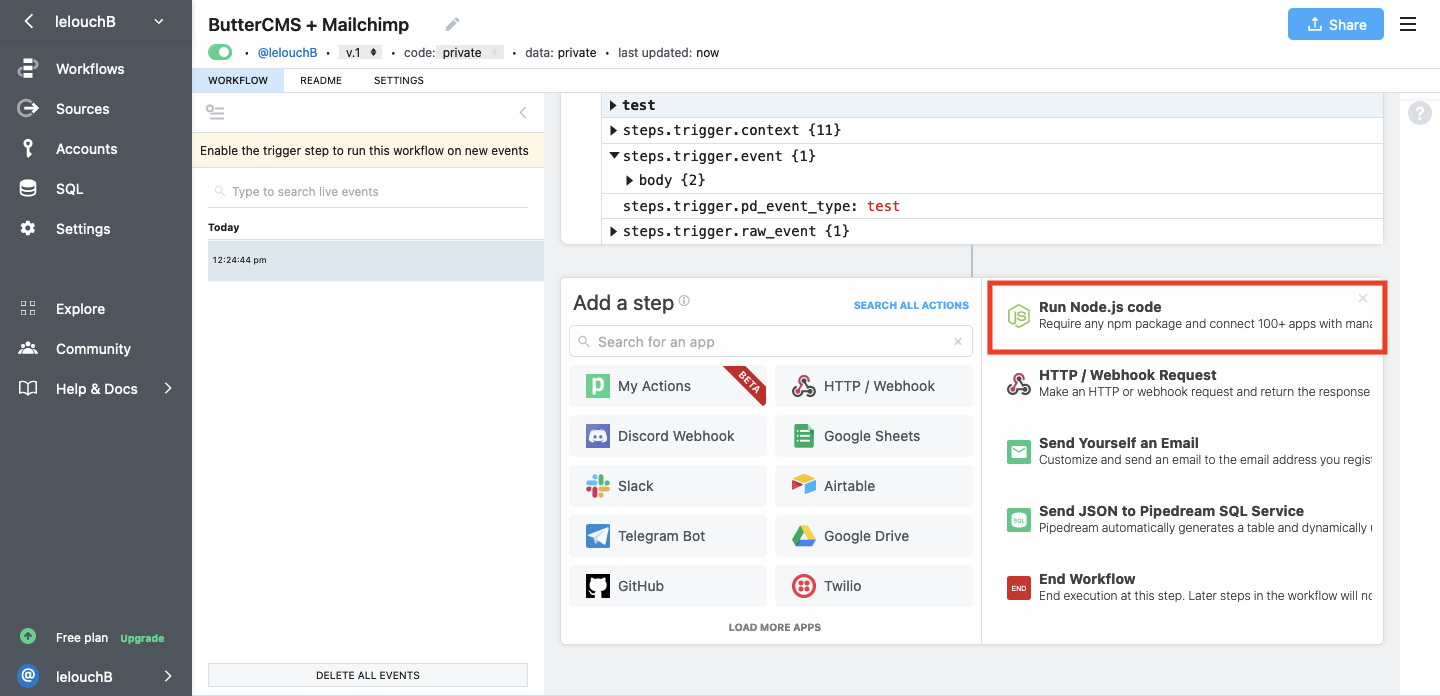
You will use the id of the blog post to fetch the post using the ButterCMS API. Click on the plus icon below the SEND TEST EVENT button and click on the Run Node.js code tab.
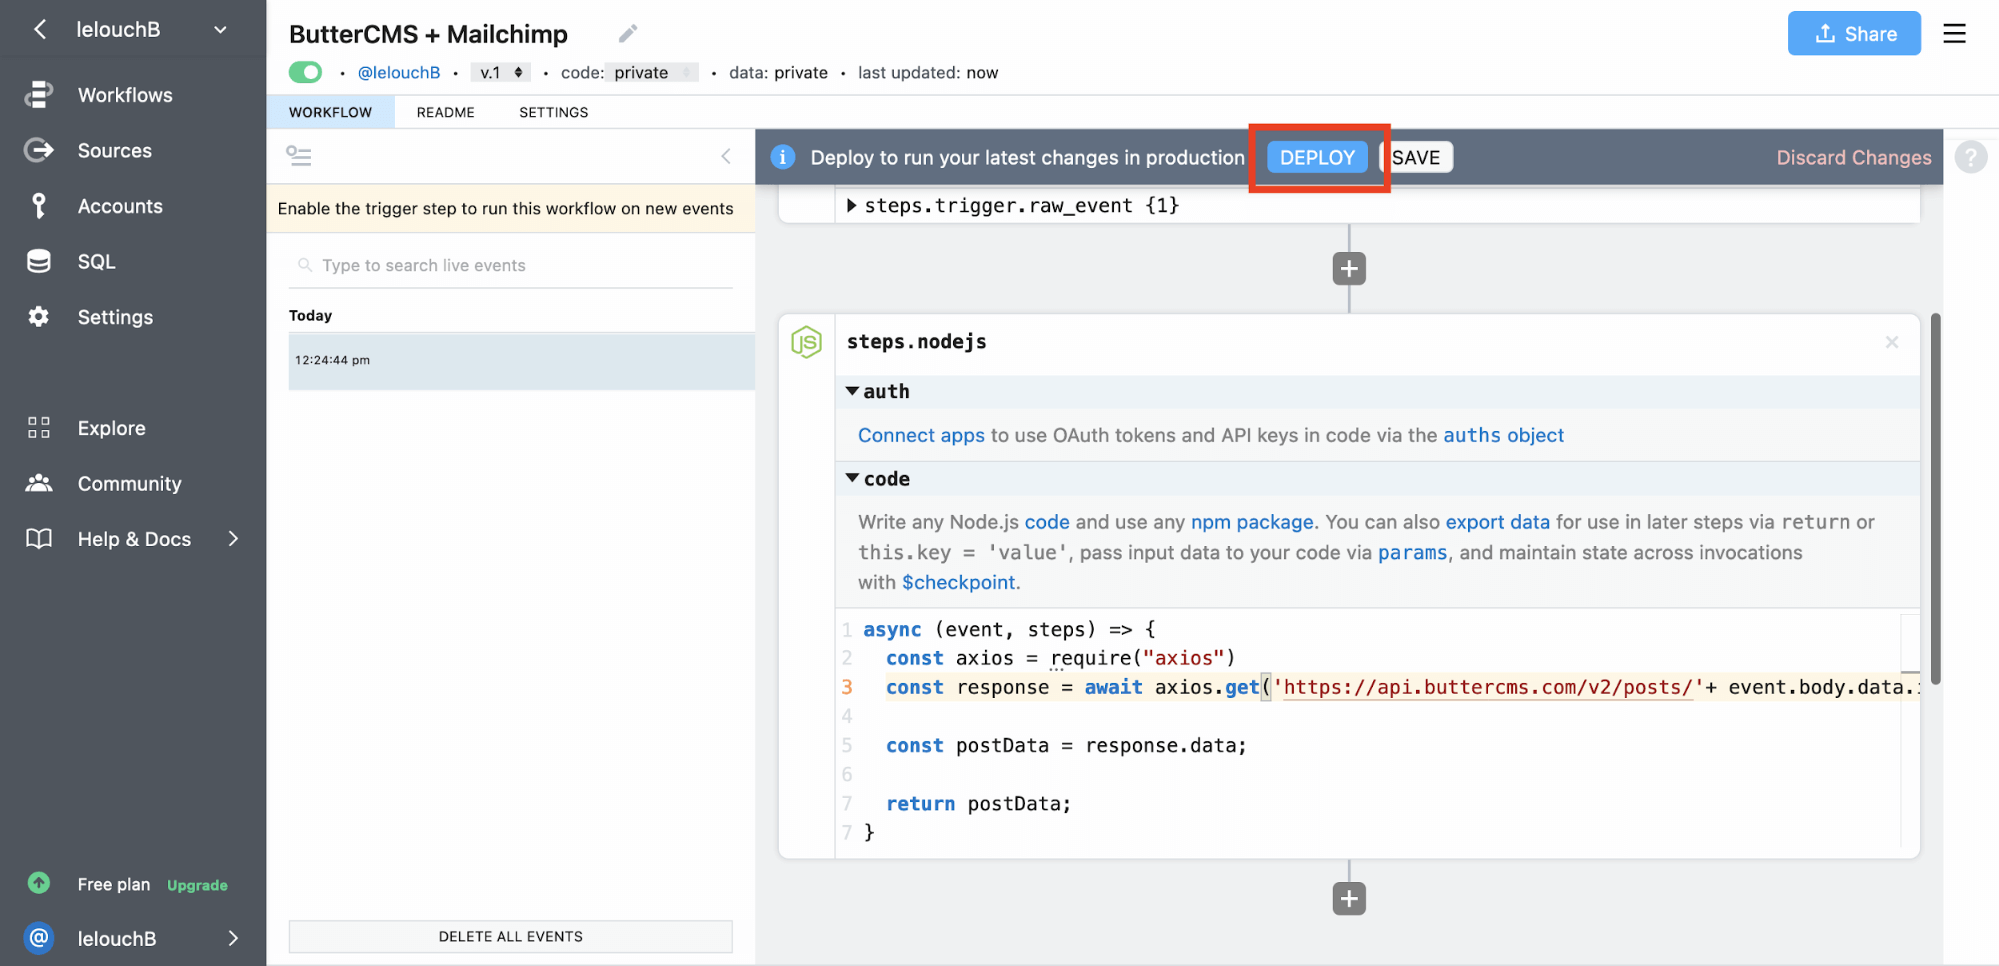
Update the Node.js code block as follows.
Make sure to add your ButterCMS API Key in the auth_token query field.
```js
const axios = require("axios")
const response = await axios.get('<https://api.buttercms.com/v2/posts/>'
+ event.body.data.id+'/?auth_token=<YOUR API KEY>');

const postData = response.data;

return postData;
```
Your Pipedream workflow will look something like this. Click on the DEPLOY button in the headers.
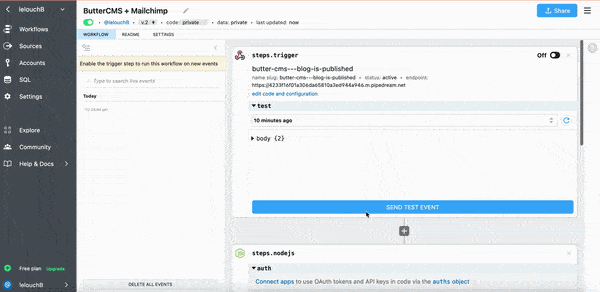
After deploying your workflow, click on the SEND TEST EVENT button to test the workflow.
You have successfully created the workflow to capture the post-published event and fetch the post data based on it. The next step is to create and send a new campaign for the new post using the Mailchimp Marketing API.
Create a draft campaign for a new post published in your Mailchimp account. Make sure to add a link to your blog’s homepage in the campaign email body.
We will replicate this draft campaign, update the subject and other details with the new post's data, and send it to the audience.
Follow the below steps to copy the campaign id of this draft campaign.
You can copy your Campaign ID from the URL on the browser. The URL will look similar to **https://us20.campaign-archive.com/?u=654f0dca6256ee44d4d9b0dd&id=fc076edda4**. The number after id= is the Campaign Id of the draft campaign, fc076edda4 in this case.
The next step is to create and copy a Mailchimp API Key for sending the campaign from Pipedream.
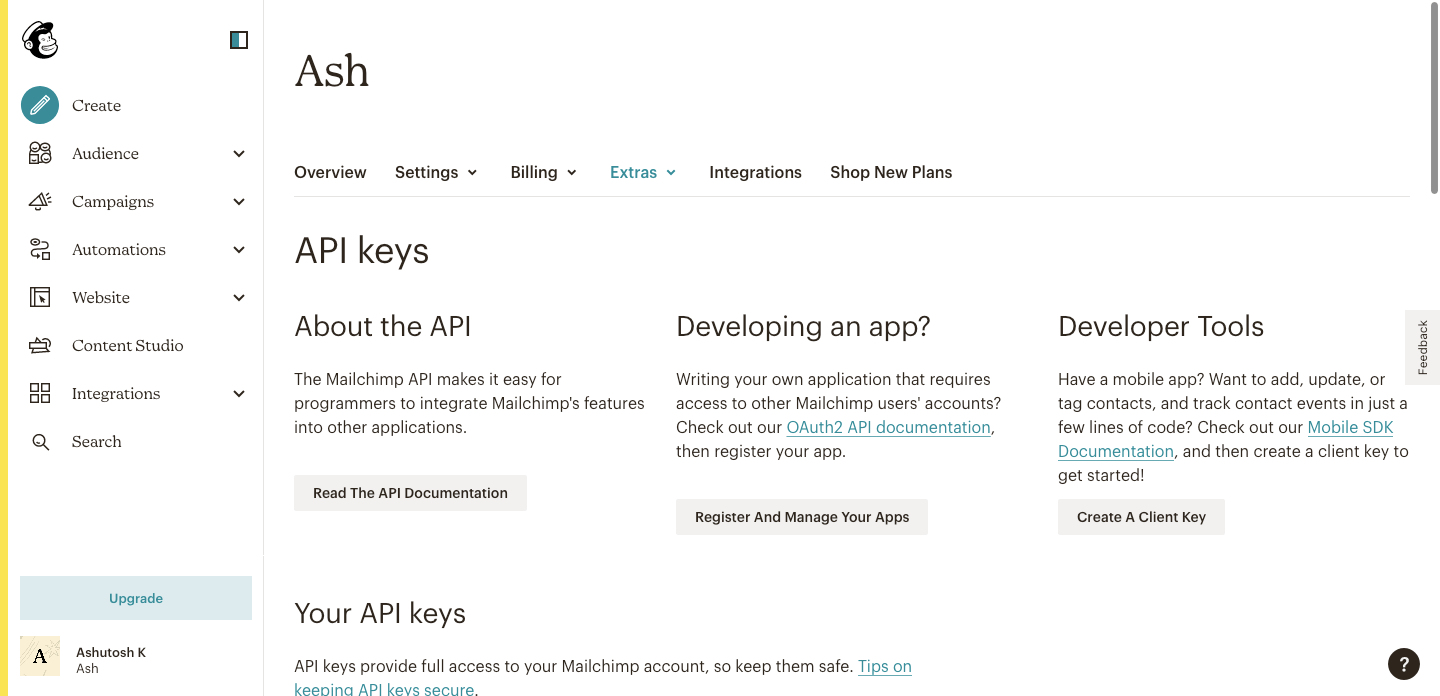
Head over to the API Keys section of your Mailchimp account and create a new API Key.
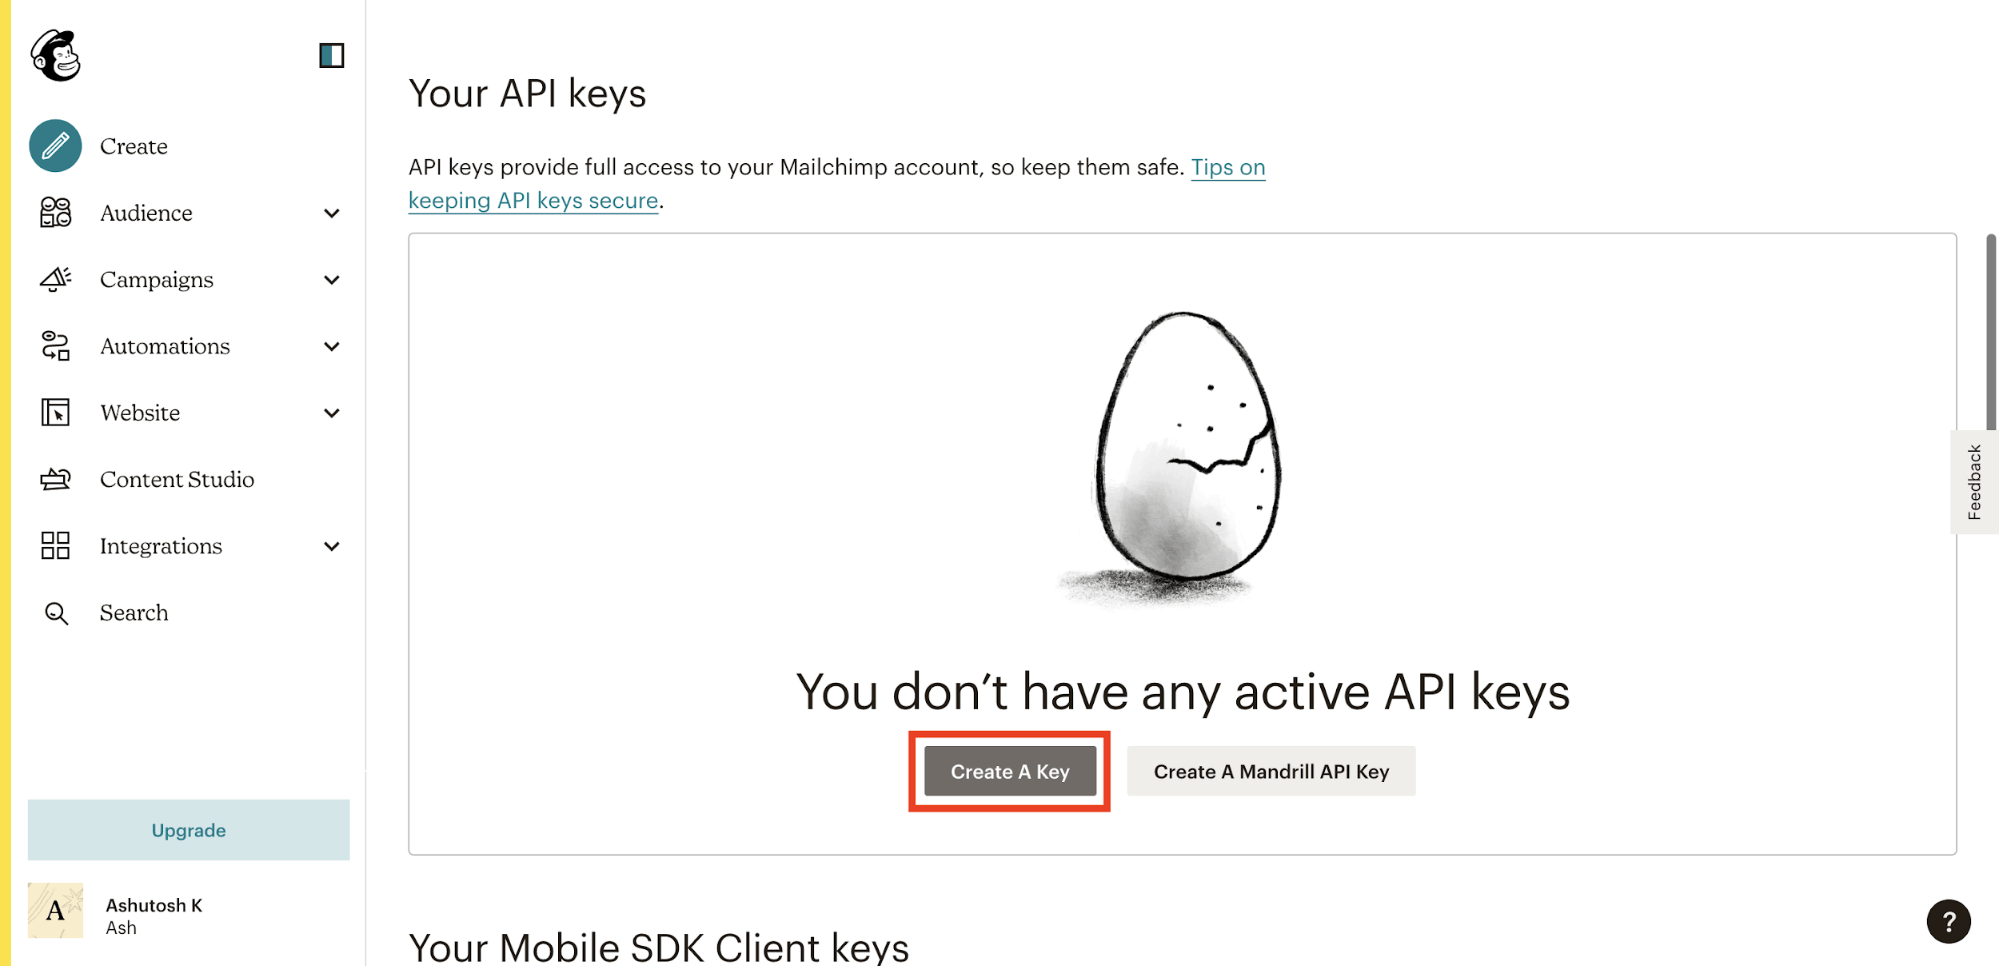
Under the Your API keys section, click on the Create a Key button to create an API Key.
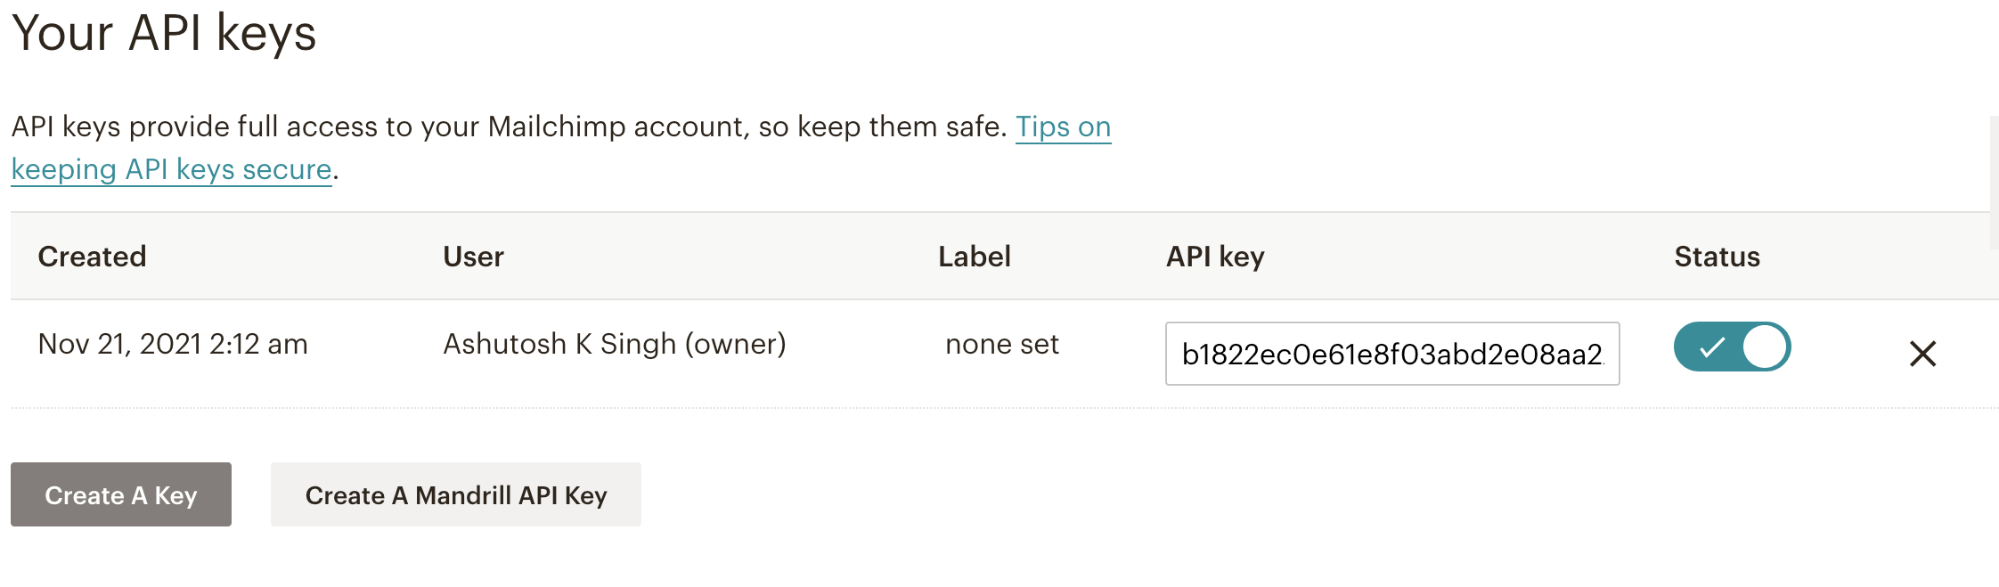
After creating the API Key, you will see a dashboard similar to the one below under the Your API keys section. Copy your Mailchimp API Key.
The next step is to copy your Mailchimp server prefix; you can copy it from your Mailchimp dashboard URL. For example, if your Mailchimp dashboard URL is https://us20.admin.mailchimp.com/, then us20 is your server prefix.
Update the Node.js code block in Pipedream like below. Make sure to replace the apiKey and server fields with your Mailchimp API Key and Server prefix.
```js
const axios = require("axios")
const client = require("@mailchimp/mailchimp_marketing");
client.setConfig({
apiKey: <YOUR-MAILCHIMP-API-KEY>,
server: <YOUR-MAILCHIMP-SERVER-PREFIX>,
});
const response = await axios.get('<https://api.buttercms.com/v2/posts/>'
+ event.body.data.id+'/?auth_token=<YOUR-BUTTERCMS-API-KEY>');
const postData = response.data;
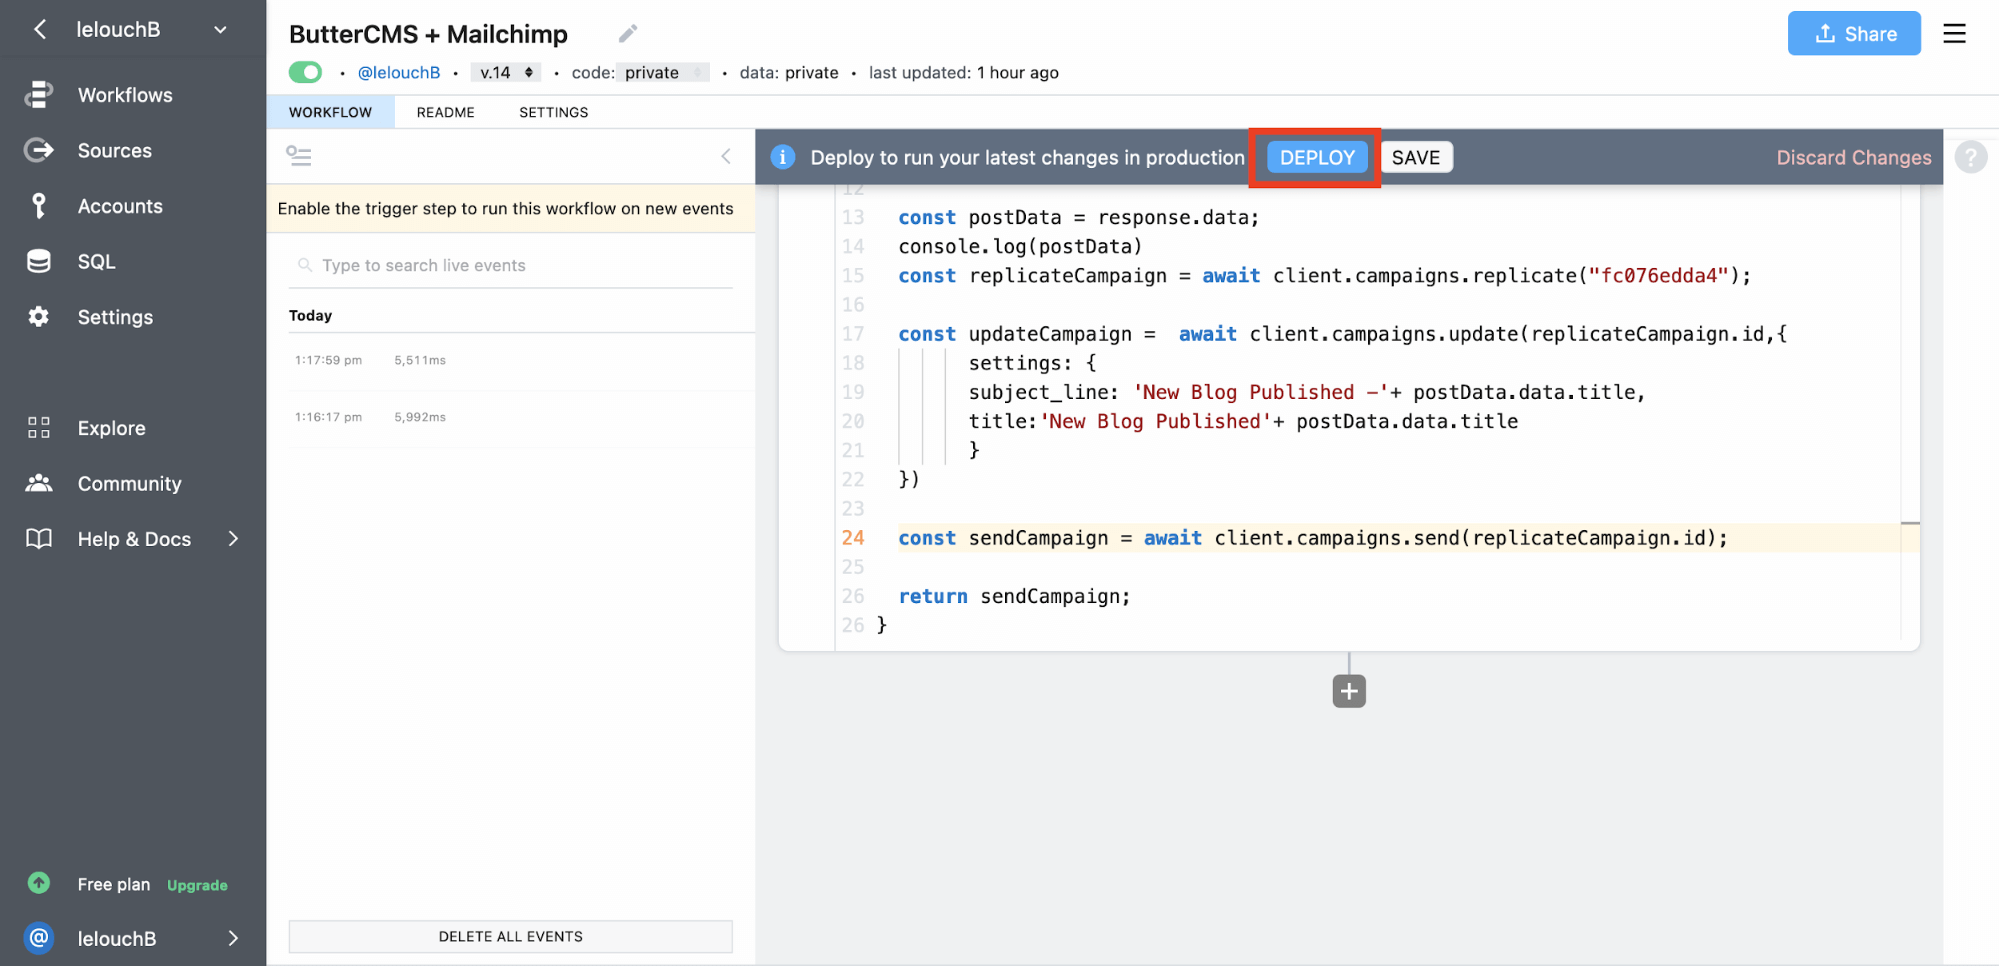
const replicateCampaign = await client.campaigns.replicate(<YOUR-CAMPAIGN-ID>);
const updateCampaign = await client.campaigns.update(replicateCampaign.id,{
settings: {
subject_line: 'New Blog Published -'+ postData.data.title,
title:'New Blog Published'+ postData.data.title
}
})
const sendCampaign = await client.campaigns.send(replicateCampaign.id);
return sendCampaign;
```In the above code snippet, you import the @mailchimp/mailchimp_marketing package and create an instance using your API key and server prefix.
You replicate the draft campaign using the campaigns.replicate() method. Make sure to pass the id of the draft campaign in this method.
Then, update the title and subject of this replicated campaign using the campaigns.update method and pass the id of the replicated draft to it. You can configure the campaign even further by adding more fields in the campaigns.update method. You can see all the possible fields that you can update here.
Finally, you send the campaign using the campaigns.send() method.
Redeploy the above code by clicking on the DEPLOY button in the Pipedream headers.
You can test this workflow by clicking on the SEND TEST EVENT button.
You will see a null return after the workflow is executed, which is expected as the campaigns.send method returns an empty object after successful execution.
The campaign will be sent to the audience as configured in the draft campaign. You can test it by sending it to your personal email first. Here is a screenshot of the mail received with the updated Subject.
You can make the Pipedream workflow live by clicking on the Enable the trigger step to receive live events toggle button.
In this article, we discussed what Email Service Providers are and why they are essential for your marketing strategy. We also discussed what webhooks are and how they can help automate manual grunt work to increase productivity.
We saw how you can integrate ButterCMS Webhooks with Mailchimp using Pipedream to send automated emails whenever a new blog post is published thereby streamlining a crucial part of content workflows.
You can now extend this project to add new features and functionalities to better suit your needs and requirements, like notifying your team whenever a new blog post is published, or when new item is added to your e-commerce app, or if and when a product runs out of stock.
Here are some additional resources that you can use if you're trying to achieve greater functionality: