Most online shops look the same: a homepage, a category tree, product detail pages and that's it. The content is often limited to product descriptions and its quality is mediocre at best.
That's because traditional e-commerce platforms provide catalog oriented features, with limited content management. Their focus is to get customers to browse a product catalog and consider editorial content a second-class citizen.
They say that "content is king" and that's true for e-commerce as well. Instead of just throwing a product catalog online, brands should inspire their customers. They should tell them engaging stories and keep the buying process as smooth as possible. Customers appreciate inspiring content that is reader-oriented, instead of sales-driven. This is especially true for fashion and style brands but still applies to most industries.
If you want to grow your brand, you should invest in content marketing, be authentic and stand out from the competition. Linking content to external product pages means stretching the path to purchase and let potential buyers go away from their shopping momentum. Making your content shoppable, instead, means keeping them engaged and build a unique customer experience.
In this tutorial, we are going to create a shoppable blog, that is a blog with embedded shopping capabilities. Our goal is to provide content editors with a simple, yet powerful tool to publish content and make it shoppable, without any coding required.
For content editors, making any post shoppable will be as easy as tagging it with some SKU codes. Customers will easily buy the products they’re reading about with a few clicks. This ease of use and flexibility will be achieved by using a headless CMS like Butter and headless e-commerce platform like Commerce Layer.
So how do you build a customer experience driven by content that also allows customers to easily purchase the product? The problem with traditional e-commerce platforms is that they make it hard to do this. If you work with an e-commerce CMS like Shopify or Magento you get locked in a templating framework. Building something different from a product catalog is tricky. You can't even use your favorite languages and tools and your project is likely to become a hassle.
The solution? Go headless!
In this article, we will create a simple blog application with Rails and ButterCMS. We will then make it shoppable by integrating Commerce Layer API. Content editors will have the freedom to tell any story through Butter and let their readers buy any product by simply adding some tags to any blog post. Below, you can find the demo application that we are going to build in our step-by-step tutorial:
https://my-shoppable-blog.herokuapp.com
TIP: To place an order, use the test credit card 4111111111111111 with any CVV and future expire date.
Commerce Layer is a headless e-commerce platform. Unlike the traditional platforms, it doesn't provide any content management system or theming framework. Coupled with a headless CMS, like Butter, it lets you build beautiful, content-first ecommerce.
As mentioned before, doing the same with traditional e-commerce platforms would be tricky. Using Shopify buy buttons, for example, would require content editors to generate and paste code snippets into the HTML pages. The risk of breaking the page layout would be high and in the best case, the resulting look & feel would not match the post's one.
With our solution instead, developers get full control of the code and content editors just need to tag any post to make a product available for shopping. Clean and simple for everyone.
Create a new Rails application with the --skip-active-record option to skip ActiveRecord and any database adapter. Our shoppable blog will leverage ButterCMS and Commerce Layer APIs to fetch all content and won't need any model.
rails new my_shoppable_blog --skip-active-record
Open the application's Gemfile and add the required gems:
# Gemfile

gem 'buttercms-ruby'
gem 'commercelayer'
gem 'dotenv-rails', groups: [:development, :test]
gem 'bulma-rails'
Install the gems:
bundle
Create an account for free on ButterCMS and get your API token from your account settings:
Create a .env file in your application's root and add an environment variable with your ButterCMS API token:
<span style="font-weight: 400;"># .env</span><span style="font-weight: 400;"><br></span><span style="font-weight: 400;">BUTTERCMS_TOKEN=c346e**********29e04</span># .gitignore
[...]
.env
In production (e.g., on Heroku) you will need to create an environment variable with the same name and value. Add the .env file to the application's .gitignore to make sure your secret token will not be pushed to any remote repository:
Now create an initializer to load the API token and configure the ButterCMS client:
# config/initializers/buttercms.rb
ButterCMS::api_token = ENV['BUTTERCMS_TOKEN']
Generate a posts controller with an index and show actions:
rails g controller posts index show
Change the routes as follows:
# config/routes.rb

Rails.application.routes.draw do
  root "posts#index"
  get "/blog/:slug" => "posts#show", as: :post
end
In the index action, we fetch the list of posts from ButterCMS and in the show action we fetch a single post:
# app/controllers/posts_controllers.rb

class PostsController < ApplicationController
 def index
   @posts = ButterCMS::Post.all
 end

 def show
   @post = ButterCMS::Post.find(params[:slug])
 end
end
Import Bulma in the assets pipeline:
# app/assets/stylesheets/posts.scss

@import "bulma"
Create the application's layout:
<!-- app/views/layouts/application.html.erb -->

<!DOCTYPE html>
<html>
  <head>
    <meta charset="utf-8">
    <meta name="viewport" content="width=device-width, initial-scale=1">
    <title>My Shoppable Blog</title>
    <%= stylesheet_link_tag    'application', media: 'all', 'data-turbolinks-track': 'reload' %>
    <%= javascript_include_tag 'application', 'data-turbolinks-track': 'reload' %>
    <%= csrf_meta_tags %>
    <%= csp_meta_tag %>
  </head>
  <body>
    <section class="section">
      <div class="container">
        <div class="content">
          <%= yield %>
        </div>
      </div>
    </section>
    <footer class="footer">
      <div class="container">
  <strong>Like this demo?</strong> Read the tutorial on <a href="boost-blog-sales-with-buttercms-and-commerce-layer">ButterCMS Blog</a>.
      </div>
    </footer>
  </body>
</html>
Create the index view:
<!-- app/views/posts/index.html.erb -->

<h1 class="title">My Shoppable Blog</h1>
<p class="subtitle">Powered by ButterCMS and Commerce Layer</p>

<% @posts.each do |post| %>
 <%= render "post", post: post %>
<% end %>
# app/views/posts/_post.html.erb
<div class="box">
<div class="columns">
<div class="column">
<%= link_to post_path(post.slug) do %>
<%= image_tag(post.featured_image) %>
<% end %>
</div>
<div class="column">
<h3><%= post.title %></h3>
<p class="author">
by <%= "#{post.author.first_name} #{post.author.last_name}" %>,
on <%= Time.parse(post.published).strftime('%B %d, %Y') %>
</p>
<p><%= post.summary %></p>
<p><%= link_to "Read more →".html_safe, post_path(post.slug) %></p>
</div>
</div>
</div>
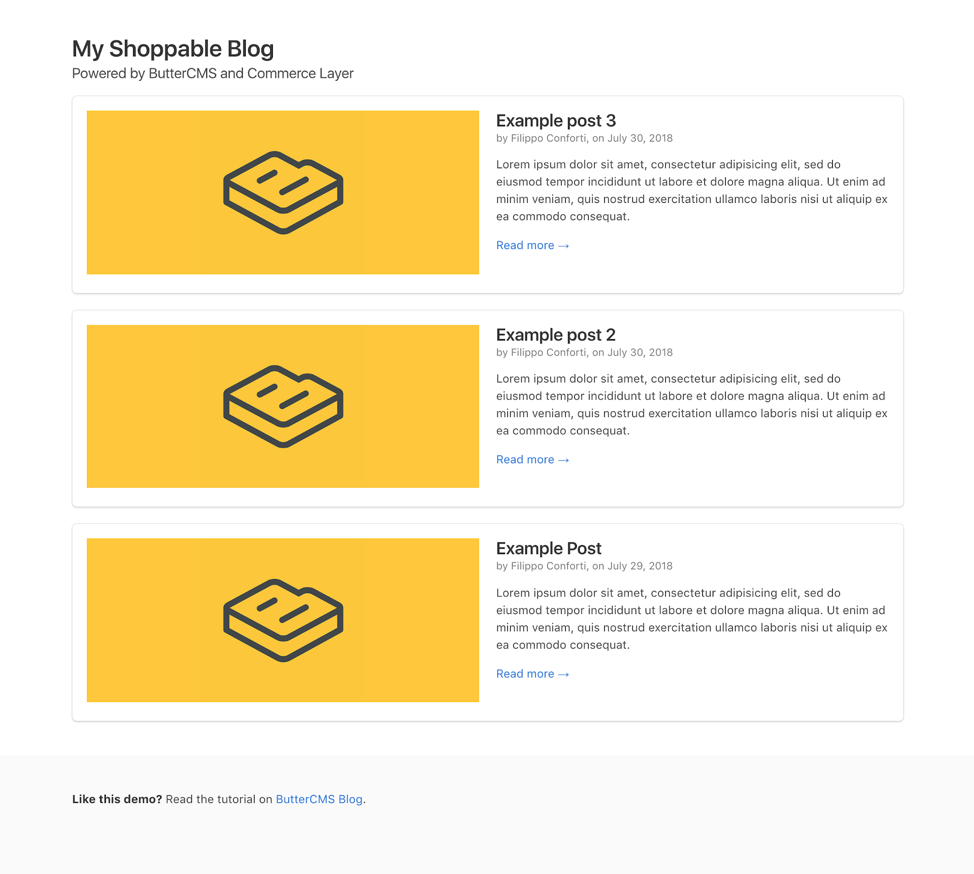
Go to ButterCMS and create some example posts:
Our index page is automatically refreshed with all the published posts:
Now create the show view:
<!-- app/views/posts/show.html.erb -->
<%= link_to "← Back to all posts".html_safe, root_path %>
<h1 class="title"><%= @post.title %></h1>
<p class="subtitle">
by <%= "#{@post.author.first_name} #{@post.author.last_name}" %>,
on <%= Time.parse(@post.published).strftime('%B %d, %Y') %>
</p>
<div class="box">
<%= image_tag(@post.featured_image) %>
</div>
<div class="columns">
<div class="column is-two-thirds">
<div class="post-content">
<%= @post.body.html_safe %>
</div>
</div>
<div class="column">
<div class="post-commerce">
<article class="message is-info">
<div class="message-body">
Shoppable content goes here
</div>
</article>
</div>
</div>
</div>
The resulting page includes the post content and a placeholder for the shoppable data that we are going to fetch from Commerce Layer:
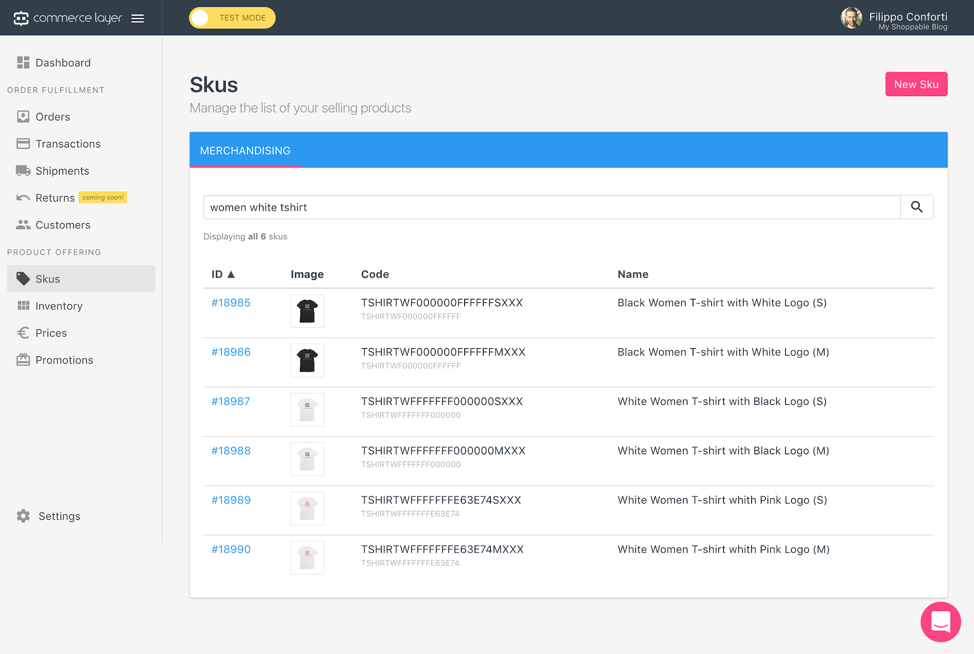
Create a free developer account on Commerce Layer and, when prompted, seed your environment with test data. Our goal is to write an article about Commerce Layer's beautiful women’s t-shirts:
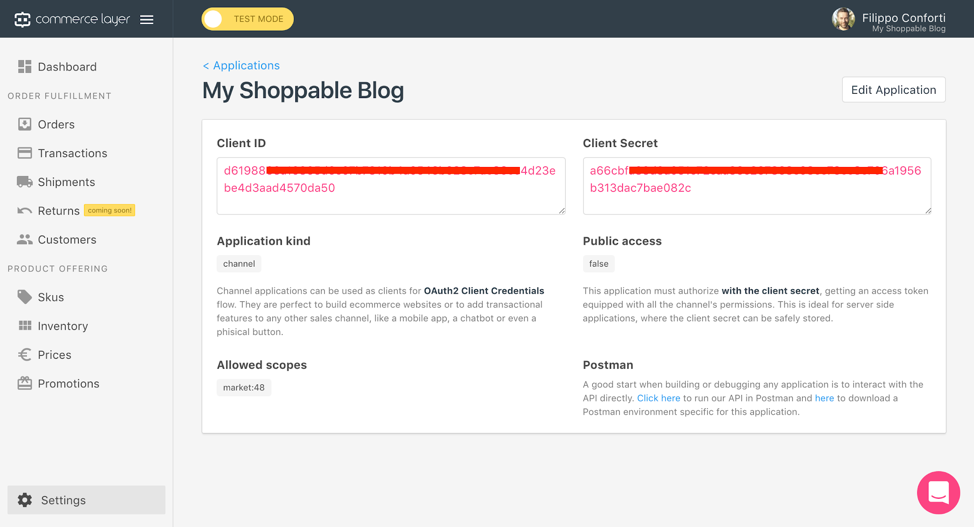
Take note of the SKU codes that you want to sell and get your API credentials from Settings --> Applications:
Add your credentials to the .env file and create an initializer to load them into the application. In production, you will need to create the same environment variables:
# .env

CLAYER_CLIENT_ID=d61988**********70da50
CLAYER_CLIENT_SECRET=a66cbf**********ae082c
CLAYER_SITE=https://my-shoppable-blog.commercelayer.io
CLAYER_SCOPE=market:48
# config/initializers/clayer.rb

CLAYER_CLIENT = Commercelayer::Client.new(
  {
    client_id: ENV['CLAYER_CLIENT_ID'],
    client_secret: ENV['CLAYER_CLIENT_SECRET'],
    site: ENV['CLAYER_SITE'],
    scope: ENV['CLAYER_SCOPE']
  }
)
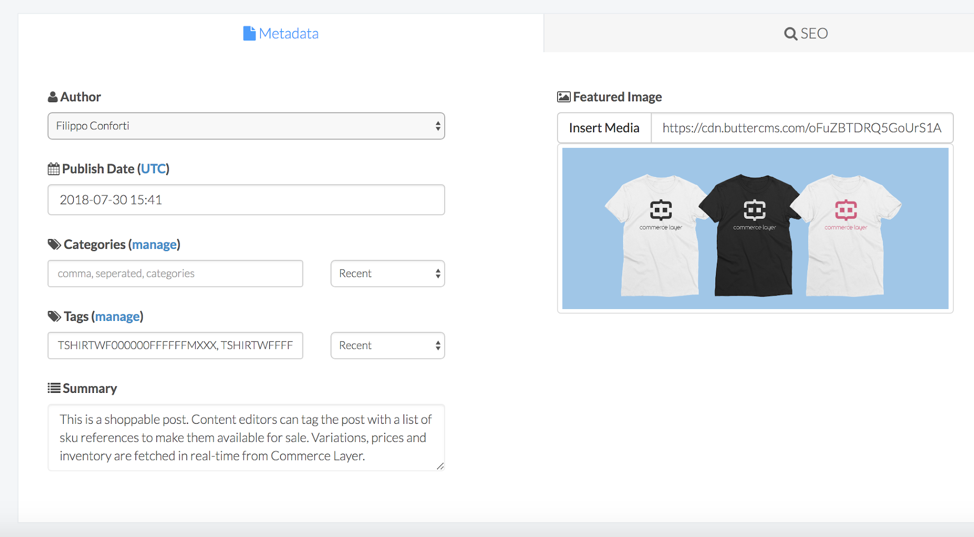
Now create a new post on ButterCMS and tag it with the SKU codes of the products that you want to sell. This is where the magic happens: a content editor will just need to do the same with any blog post. Zero coding required. Moreover, the content editor doesn't need to add any price or inventory information, that is managed on Commerce Layer.
To fetch the SKUs identified by the tags (codes) we need to change the posts controller as follows:
# app/controllers/posts_controllers.rb

class PostsController < ApplicationController


  before_action :authorize!, only: :show

  [...]


  def show
    @post = ButterCMS::Post.find(params[:slug])
    @skus = Commercelayer::Sku.where(codes: sku_codes).includes(:prices, :stock_items).all
  end

  private
  def sku_codes
    @post.tags.map{|tag| tag.name}.join(",")
  end

  def authorize!
    CLAYER_CLIENT.authorize!
  end

end
Then in the show view, we replace the placeholder with the list of SKUs that we fetched:
<!-- app/views/posts/show.html.erb -->


[...]


<div class="post-commerce">
 <h4>In this post</h4>
 <% @skus.each do |sku| %>
   <%= render "sku", sku: sku %>
 <% end %>
</div>

[...]
<!-- app/views/posts/_sku.html.erb -->

<div class="sku columns">
  <div class="column is-one-third">
    <%= image_tag sku.image_url %>
  </div>
  <div class="column">
    <h6><%= sku.name %></h6>
    <div class="offer">
      <div class="offer-price">
        <%= sku.prices.first.formatted_amount %>
        <span class="offer-price-compare"><%= sku.prices.first.formatted_compare_at_amount %></span>
      </div>
      <div class="offer-stock has-text-success">
        <%= sku.stock_items.first.quantity %> in stock
      </div>
    </div>
  </div>
</div>
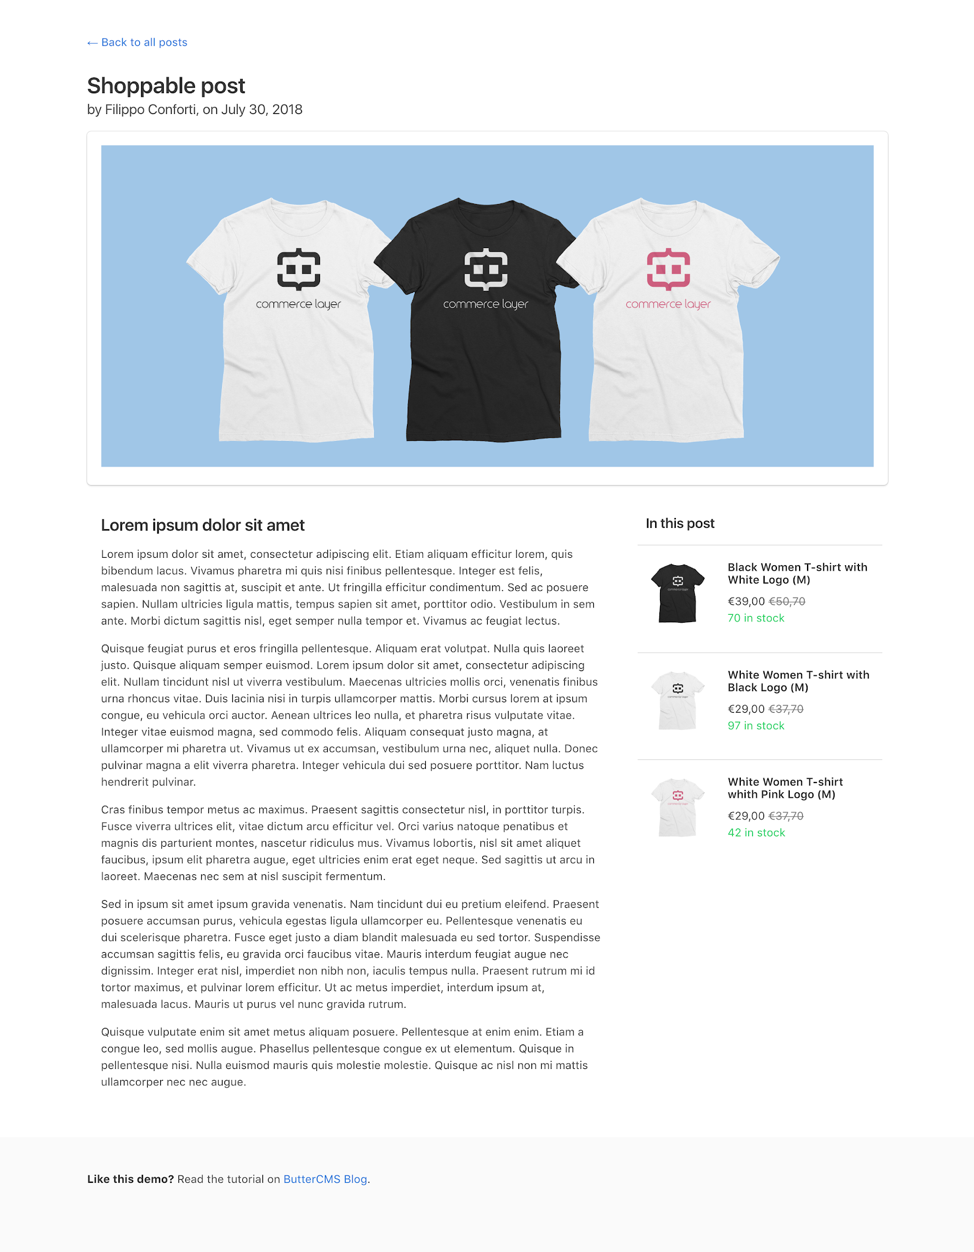
This is how the post looks:
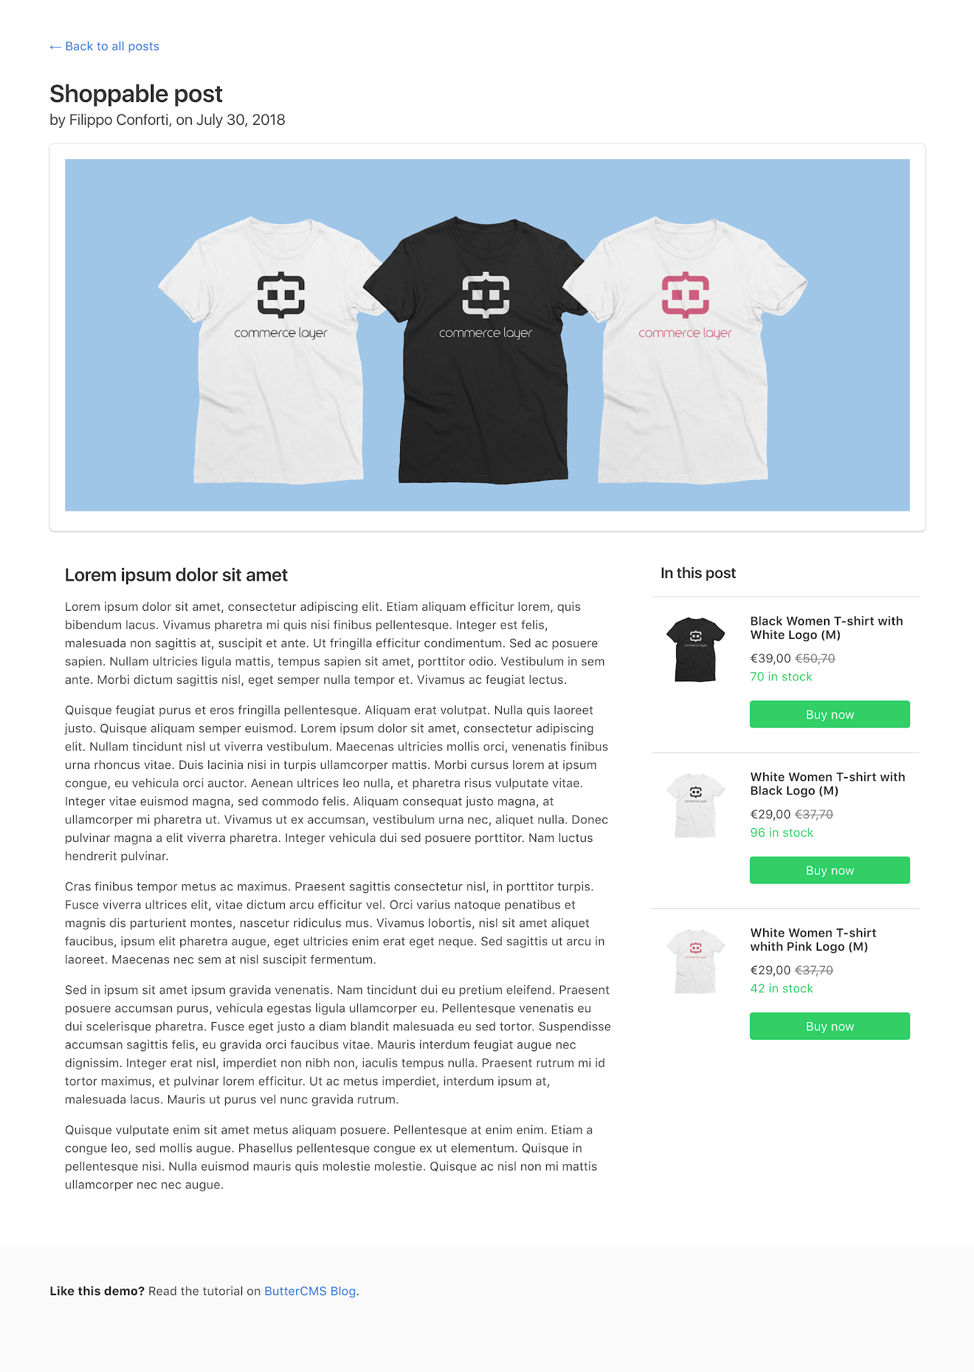
The last step is to add a "Buy now" button for each t-shirt in the sidebar:
<!-- app/views/posts/_sku.html.erb -->


[...]


<%= form_tag purchase_post_path(@post.slug) do %>
  <%= hidden_field_tag :sku_id, sku.id %>
  <%= submit_tag "Buy now", class: "button is-success is-fullwidth" %>
<% end %>

[...]
Add a route for the purchase action:
# config/routes.rb

post "/blog/:slug/purchase" => "posts#purchase", as: :purchase_post
And the purchase action in the posts controller:
# app/controllers/posts_controllers.rb

class PostsController < ApplicationController

  before_action :authorize!, only: [:show, :purchase]

  [...]


  def purchase
    sku = Commercelayer::Sku.find(params[:sku_id]).first
    order = Commercelayer::Order.create({
      cart_url: post_url(params[:slug]),
      return_url: root_url
    })
    line_item = Commercelayer::LineItem.new(quantity: 1)
    line_item.relationships.order = order
    line_item.relationships.item = sku
    line_item.save
    redirect_to order.checkout_url
  end

  [...]

end
And here we go!
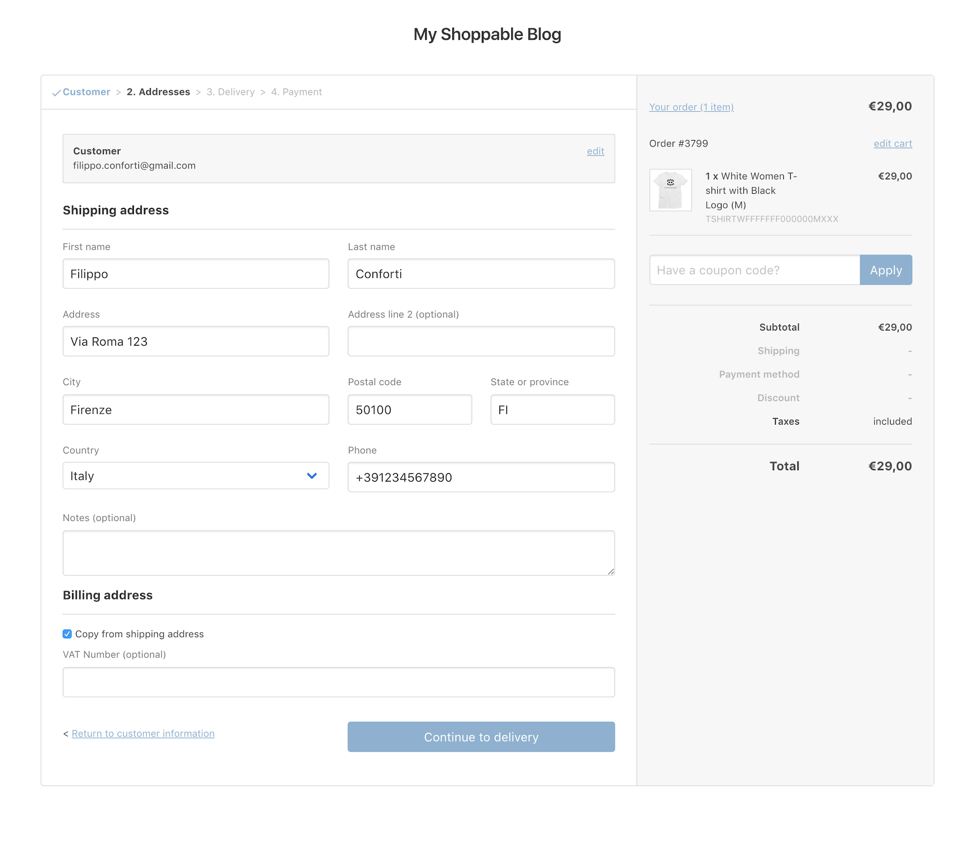
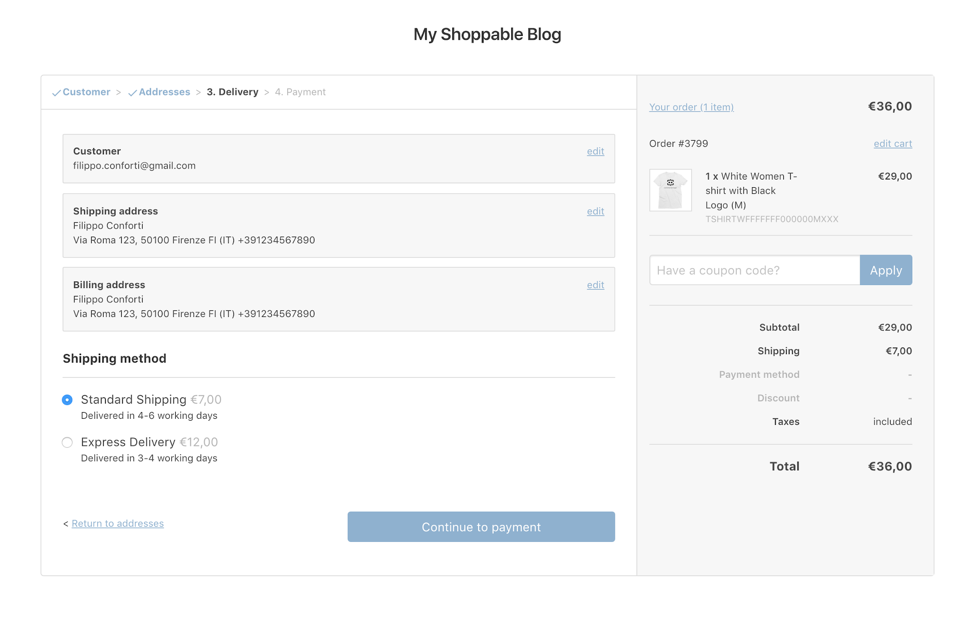
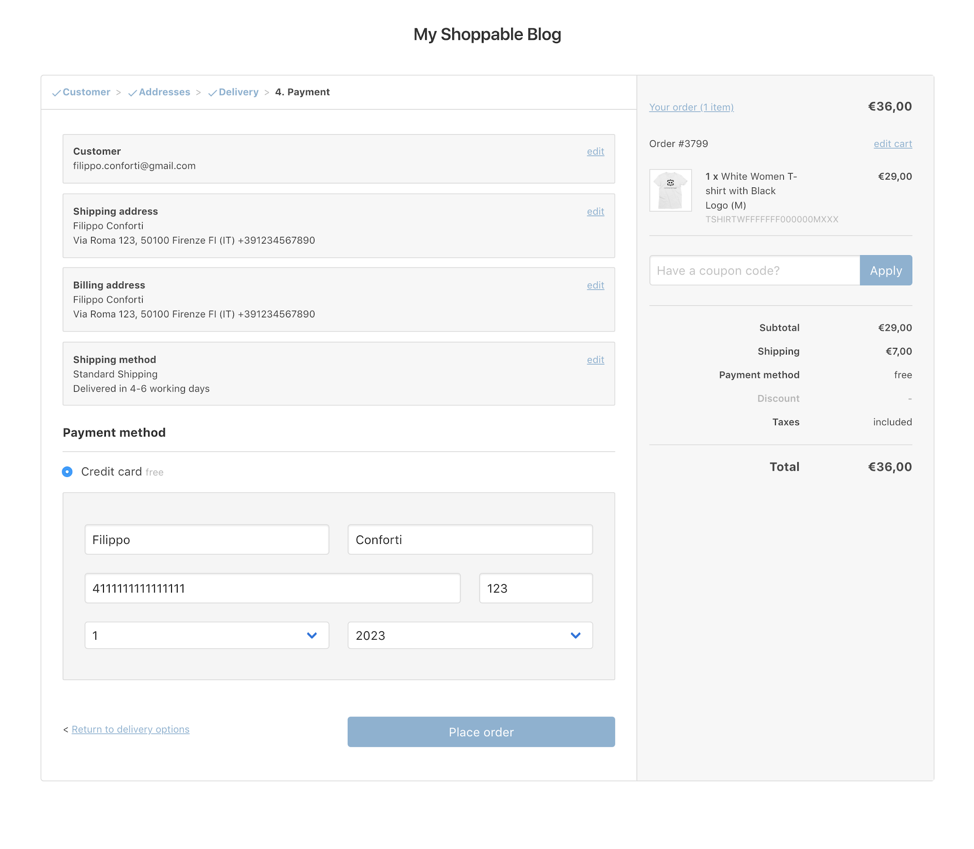
When you click a "Buy now" button, the purchase action creates a new order and adds the SKU to the order. The customer is then redirected to the Commerce Layer's hosted checkout application where they can complete the purchase in a few steps:
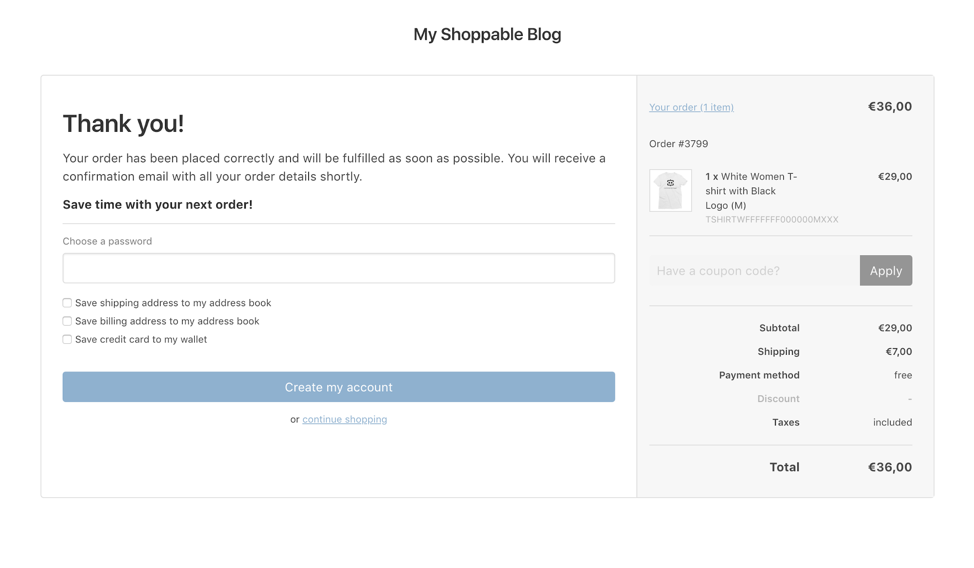
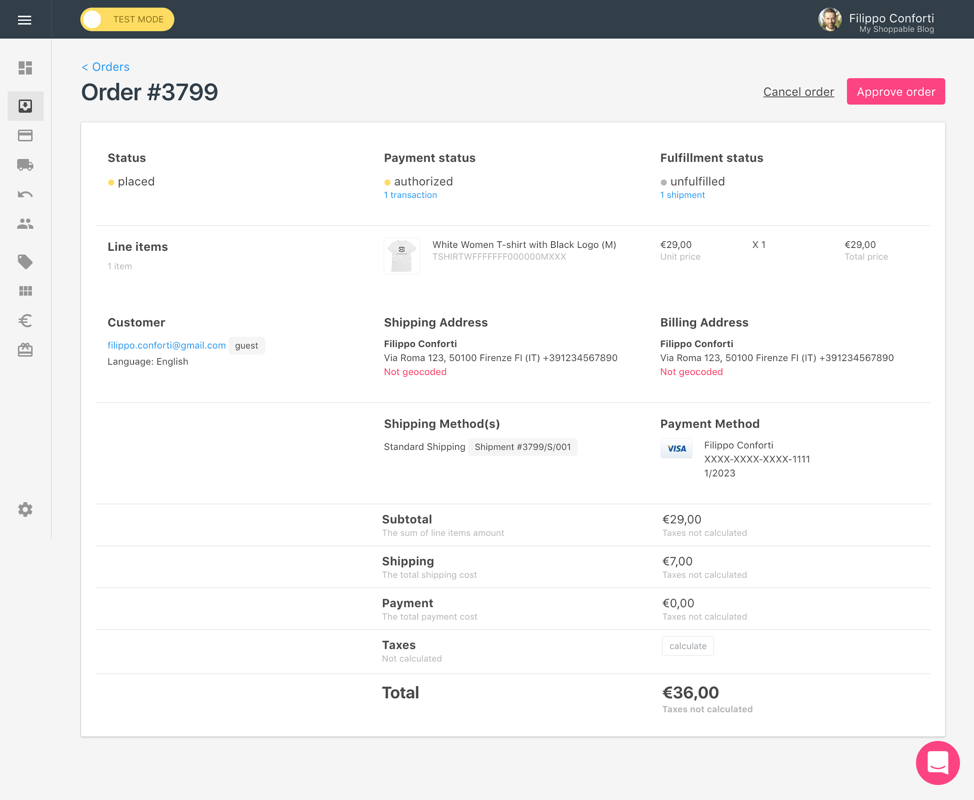
The order is placed and is ready to be fulfilled:
Despite being very simple, this tutorial shows how easy it is to make any content shoppable with a headless CMS like Butter and a headless e-commerce platform like Commerce Layer.
ButterCMS provides a lot of features that we didn't cover in this tutorial, like adding author and category pages to the blog, meaning that your content-driven e-commerce experience can be even richer. Similarly, we just scratched the surface of what you can do with Commerce Layer's API. The possibilities of what you can build are endless. We recommend exploring the API reference for the two platforms if you want to learn more about their capabilities:
And of course feel free to add your comments or ask any questions through the comments below!