- What is a knowledge base?
- Our application structure
- What are the benefits of building a knowledge base with React?
- Why you should power your knowledge base with ButterCMS?
- Tutorial prerequisites
- Building the knowledge base’s frontend
- Building our homepage and header components in ButterCMS
- Building the knowledge base application
- Closing thoughts
It's great to create a product or service that is incredibly beneficial, but it's not good when people find it difficult to use or navigate. A knowledge base can most simply be thought of as a reservoir of information or data that is available to draw from. As of 2018, the usage of knowledge bases increased by 81%. This is because customers no longer want to rely on phone calls to solve routine or typical customer care issues. Rather, people prefer self-service support, which has given rise to the knowledge base to provide customers with an opportunity to resolve their problems on their own.
Although building a knowledge base with React is the primary focus of this article, we will be doing more than that. We will describe in detail what a knowledge base is and go on to describe why it is vital to use React, and how a CMS like Butter is helpful in the development of such applications.
Table of contents
What is a knowledge base?
A knowledge base is a self-service online library or repository of documentation that offers details on a good, service, or subject to assist people in finding solutions on their own. A knowledge base typically contains how-to manuals, how-to guides, and troubleshooting procedures. It is intended to make it simple for people to find solutions to their issues on their own, without needing assistance.
We can however differentiate between two types of knowledge bases: public and personal.
A public knowledge base is a central, self-serve repository for information on products, services, divisions, or topics. Everyone can turn to this type of resource when utilizing an internet service. This article discusses this type of knowledge base.
A personal knowledge base is used to record an individual's knowledge. It consists of several information-containing documents or files, but unlike a library or database, it demonstrates the author's competence.

Our application structure
A knowledge base typically contains a variety of content types, such as:
- Frequently asked questions (FAQ)
- Step-by-step processes
- Introduction pieces
- Video demonstrations
Despite there being many types of knowledge bases, we will focus on the most-used format, which is a FAQ section. React follows a component-based architecture where a large interface is decoupled into individual, self-sustaining pieces called components. To build our knowledge base, we will be creating multiple components, such as bloglist.js, blogitem.js, header.js, searchbar.js, emptylist.js, and homepage.js. The knowledge base will have a homepage, a header, a search function, and articles answering important questions.
What are the benefits of building a knowledge base with React?
In this section, we will look at four of the benefits of React. All of them are for developers, while the last is for both developers and marketers.
React is a JavaScript framework that is used to create a website's user interface. It makes it simple to create dynamic, interactive web pages and applications. For instance, React makes it possible to navigate between pages without having to reload, which improves the user experience. That said, it also offers the following beneficial attributes when building a knowledge base:
SEO-friendly
Who doesn't want their website to appear on Google's first page? To have an SEO-friendly website, businesses not only spend more money, but also make enormous investments.
SEO, or search engine optimization, is crucial for businesses. By improving your SEO and ranking higher on SERPs, you'll increase your website traffic and the exposure of your brand. Utilizing React has the advantage of automatically addressing frequent SEO mistakes. React static web apps are great for SEO because they maintain the required HTML files containing the requested content available for Google bots to easily crawl, index, and rank.
Ease of debugging
This is how React components look on our knowledge base interface:
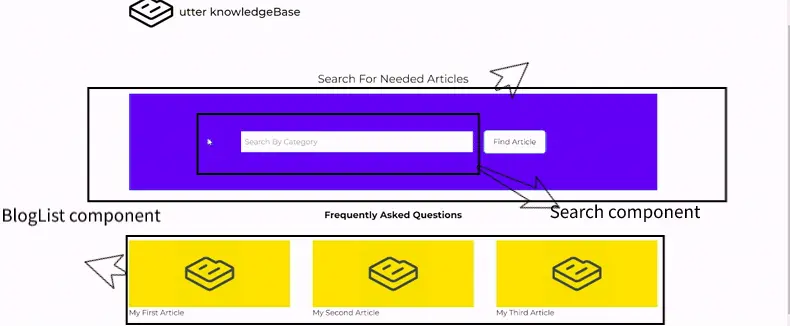
This serves as an illustration of a React component tree. By separating components in this manner, issues are simpler to discover and may be swiftly fixed with the least amount of disruption. This is a feature that developers cannot overlook.
Speed
The ability to make changes to a small part of your site and release a note so fast is made possible with React. The main benefit of React is that it enables developers to use certain components of their applications on both the client side and the server side, which ultimately accelerates the development cycle.
Reusable components
React is built around the beautiful concept of components. You begin with simple things and construct larger ones, which you then employ to create applications. Each component can be reused wherever it is required and has its own logic and rendering control. Your programs will be simpler to create and maintain if you reuse code. They also assist you in giving the entire project a unified look and feel.
Virtual DOM
The virtual DOM is one of React's most innovative features. Normally, you have to carefully examine how your app structure is going to affect speed when you create an app with a lot of user interaction and data updates. Extensive DOM manipulation can be a performance bottleneck and even produce an uncomfortable user experience, even with quick client platforms and JavaScript engines. The DOM is tree-structured, which makes it much worse because little changes made at the top can have a significant impact on the user interface.
React uses a virtual DOM to resolve this. If you have built React code in the last few years, you have probably heard of it. You might not comprehend how it functions or why React uses it, though. As the name suggests, this is a virtual representation of the DOM. Any modifications to a new view are first made to the virtual DOM, which exists in memory rather than on your screen. The modifications made to the virtual DOM are then determined by an effective method to determine the changes that must be made to the real DOM. The best approach to make these changes is then determined, and only those changes are subsequently made to the actual DOM. This ensures a quick update to the real DOM, resulting in better performance and an overall improved user interface. Read this article to obtain a better understanding of what virtual DOM includes.
Why you should power your knowledge base with ButterCMS?
Below, we’ll go over a few key features of the headless CMS, ButterCMS, that make it a great foundation for your knowledge base.
Page types - Users of Butter CMS can manage all of their material through a single dashboard. Through its Page type feature users are able to configure, create, iterate, and reiterate whatever content they might need to establish a multi-channel content experience more quickly. This article explores the Page type feature of Butter heavily.
Seamless integration - Since ButterCMS is an API-based CMS, you can quickly integrate it into any tech stack or project, which sets it apart from other traditional CMS solutions. As a React beginning developer, fetching and rendering will be quite an easy task.
Backing up content - A knowledge base serves as a repository for your information. Since it would be devastating to lose this kind of information, ButterCMS has eliminated the need for manually backing up data by automating its storage. That prevents the tragic loss of your diligent efforts.
Much more - SEO, an approachable administrative interface, uploading visual content, editing meta tags and slugs, tagging and classifying posts—these are things needed to build a functional and performant knowledge base, and we have them available to us to use at our discretion via content types such as pages, collections, and components.
Tutorial prerequisites
You must at least be familiar with JavaScript and React to understand what is described below. You should also be able to retrieve data from an external API.
In this article, we will leverage a few dependencies. We will be using page types from ButterCMS, as everything that will be produced on our site will be seamlessly obtained from ButterCMS. We will also make use of well-known tools like Axios for data retrieval from Butter and React-router-dom for declaring our application's routes.
Building the knowledge base’s frontend
For this tutorial, we will build our application’s frontend using React and TailwindCSS. To create a new React app and install this dependency on your local machine, navigate to a directory of your choice and enter the following commands in the CLI environment:
# Create a new react app
npx create-react-app butter-knowledgebase
# Move into the project directory
cd butter-knowledgebase
# Install other necessary dependencies. React-routers for handling page route chang, Axios for fetching data and Tailwind for styling
npm install react-router-dom axios
npm install -D tailwindcss postcss autoprefixer
# Create a TailwindCSS config file
npx tailwindcss init -p
Application setup
You will need to make a few minor changes to your index.js file in order to access react-router-dom. Your index.js file should resemble the code below:
import React from "react";
import React from "react";
import ReactDOM from "react-dom/client";
import "./index.css";
import App from "./App";
import reportWebVitals from "./reportWebVitals";
import { BrowserRouter } from "react-router-dom";
const root = ReactDOM.createRoot(document.getElementById("root"));
root.render(
 <React.StrictMode>
   <BrowserRouter>
     <App />
   </BrowserRouter>
 </React.StrictMode>
);
reportWebVitals();
Our application routes—the home page, a route to a particular article, and a redirect route back to our home page—are defined in the file mentioned above.
Next, we will add the following to tailwind.config.js to support the language we will be coding in:
/** @type {import('tailwindcss').Config} */
module.exports = {
  content: [
    "./src/**/*.{js,jsx,ts,tsx}",
  ],
  theme: {
    extend: {},
  },
  plugins: [],
}

Also, add the following style directives to index.css:
@tailwind base;
@tailwind components;
@tailwind utilities;
Building our homepage and header components in ButterCMS
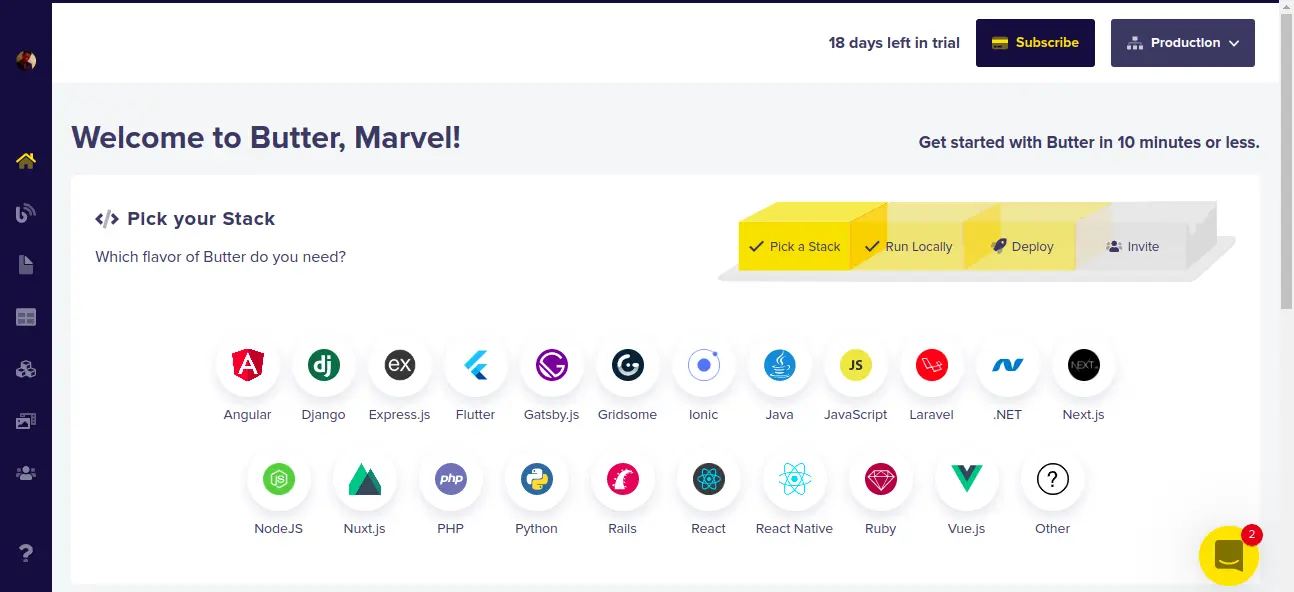
To make use of ButterCMS in our application, we will need a ButterCMS account. If you do not have one, navigate in your browser to the ButterCMS web page and create a new user account. Once authentication is complete, you will be presented with a dashboard similar to the image below:
First, in the Settings tab on the dashboard, we will find and get our authentication key to connect our application to ButterCMS. We will need the read token to fetch content from the CMS. Copy and store this key in a .env file in your project directory.
We will be making use of page types from Butter. To access this feature, you will need to click the page icon from the side menu below. When you do, the image below resembles what you should see:
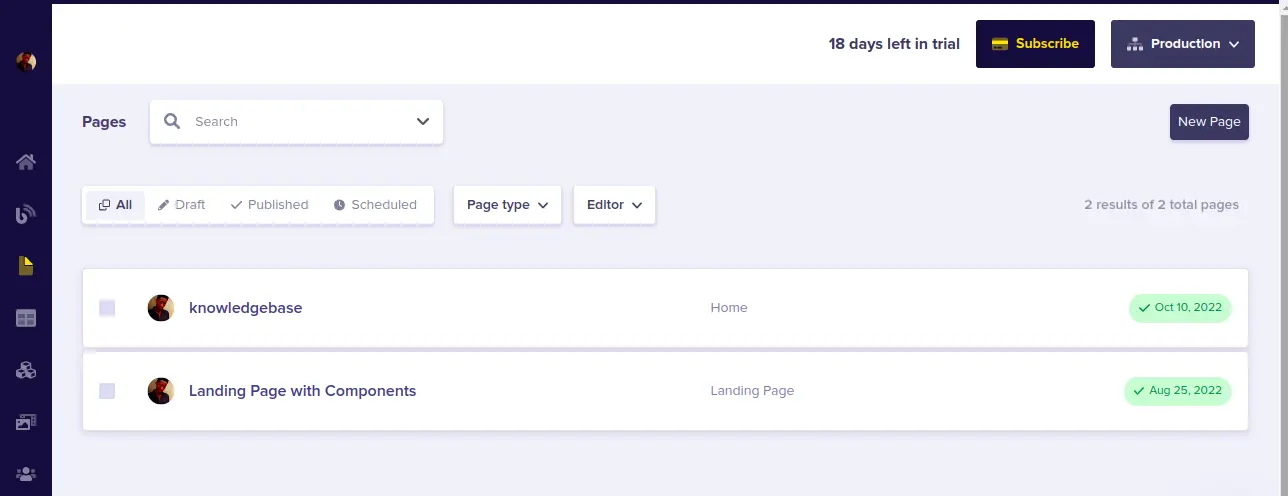
I am sure you can spot the New Page button at the top right corner of your screen above. Go ahead and click it, and you will have the drop-down menu image below:

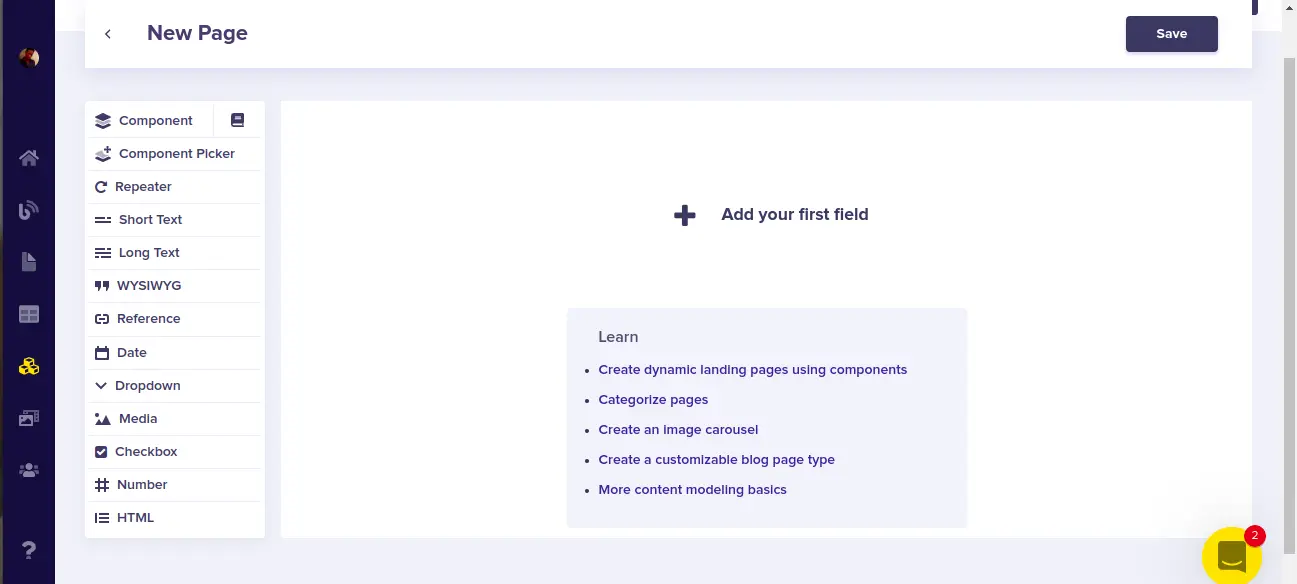
Go ahead and click Create New Page. The image below resembles the result of what you just clicked:
We will select the component picker, enter a name, and select Create a Component to construct our home page.
We can create several components using Butter, therefore each component will need a unique name and description.
We need short text for our header, search header, and article header, and also media for our logo. To handle our article content, we will also add a WYSIWYG field. The image below should resemble the components we have just created:
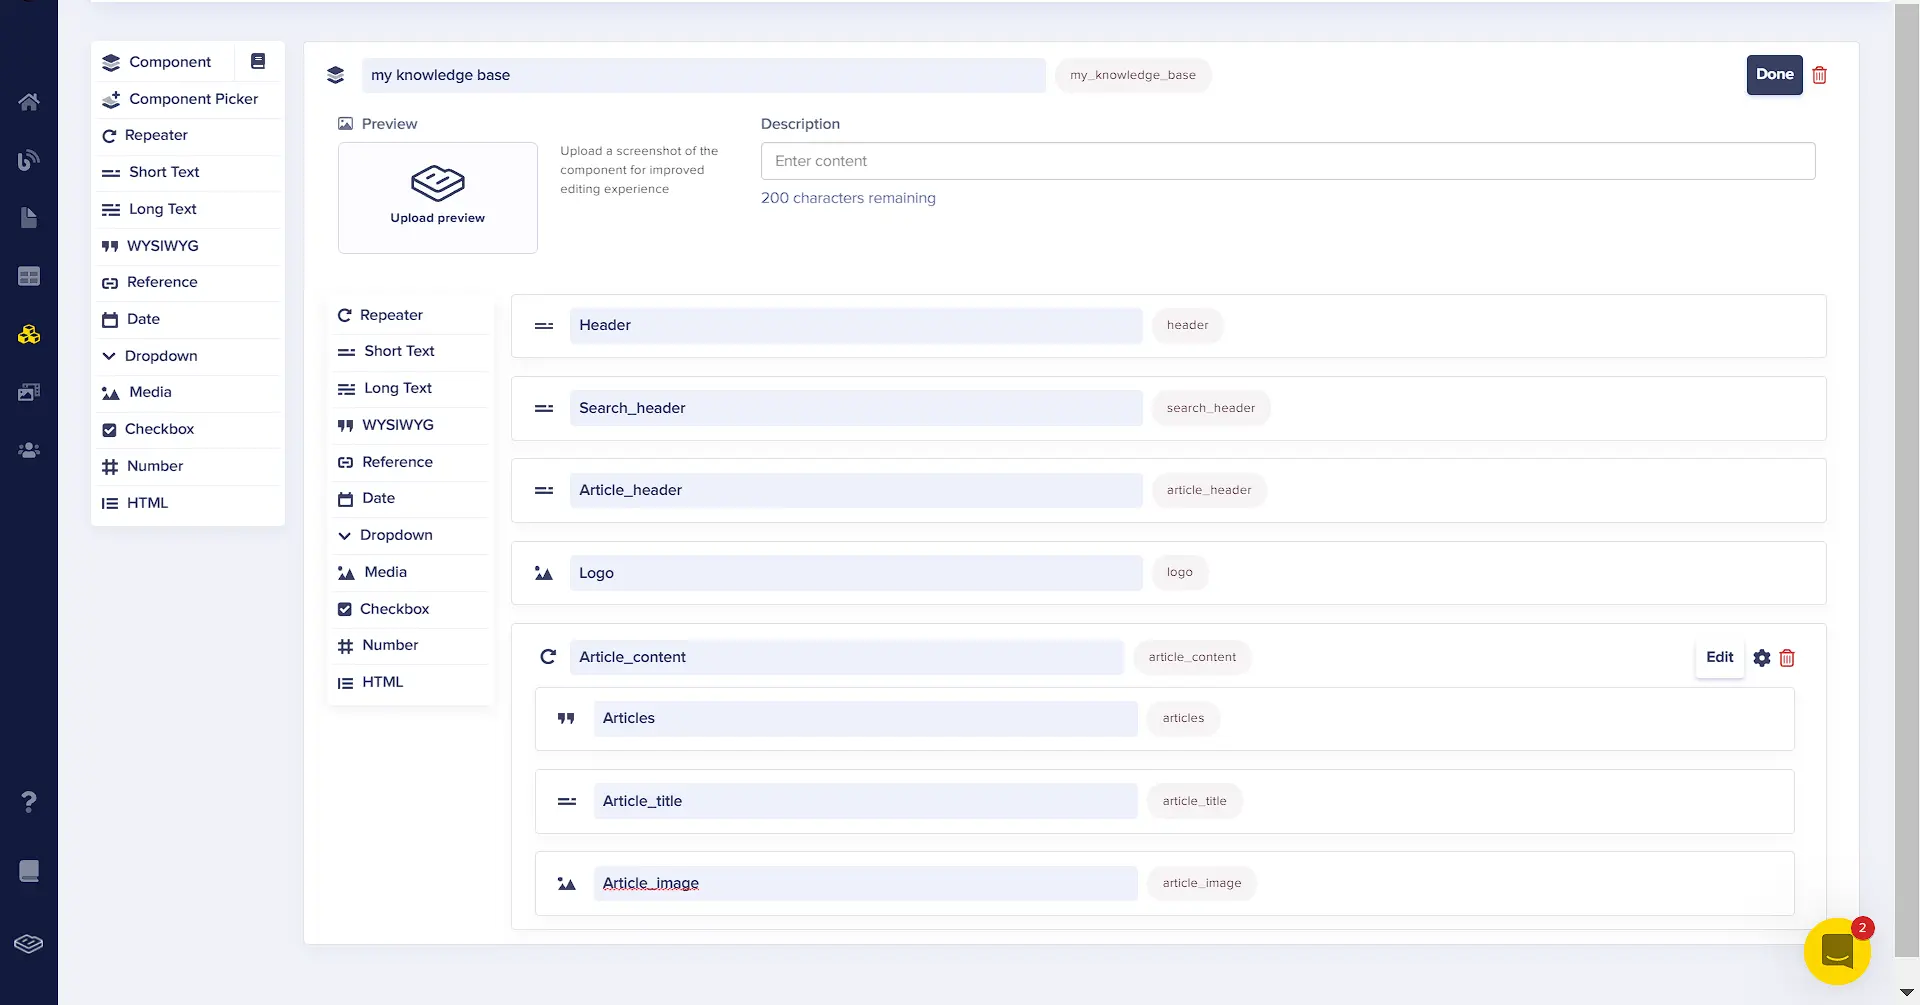
Click on the Done button, then Create Page Type to create the new page. The name of our page will be “buttercms knowledge base”. Next, we will create a new page using the created page type, and fill in the following content:
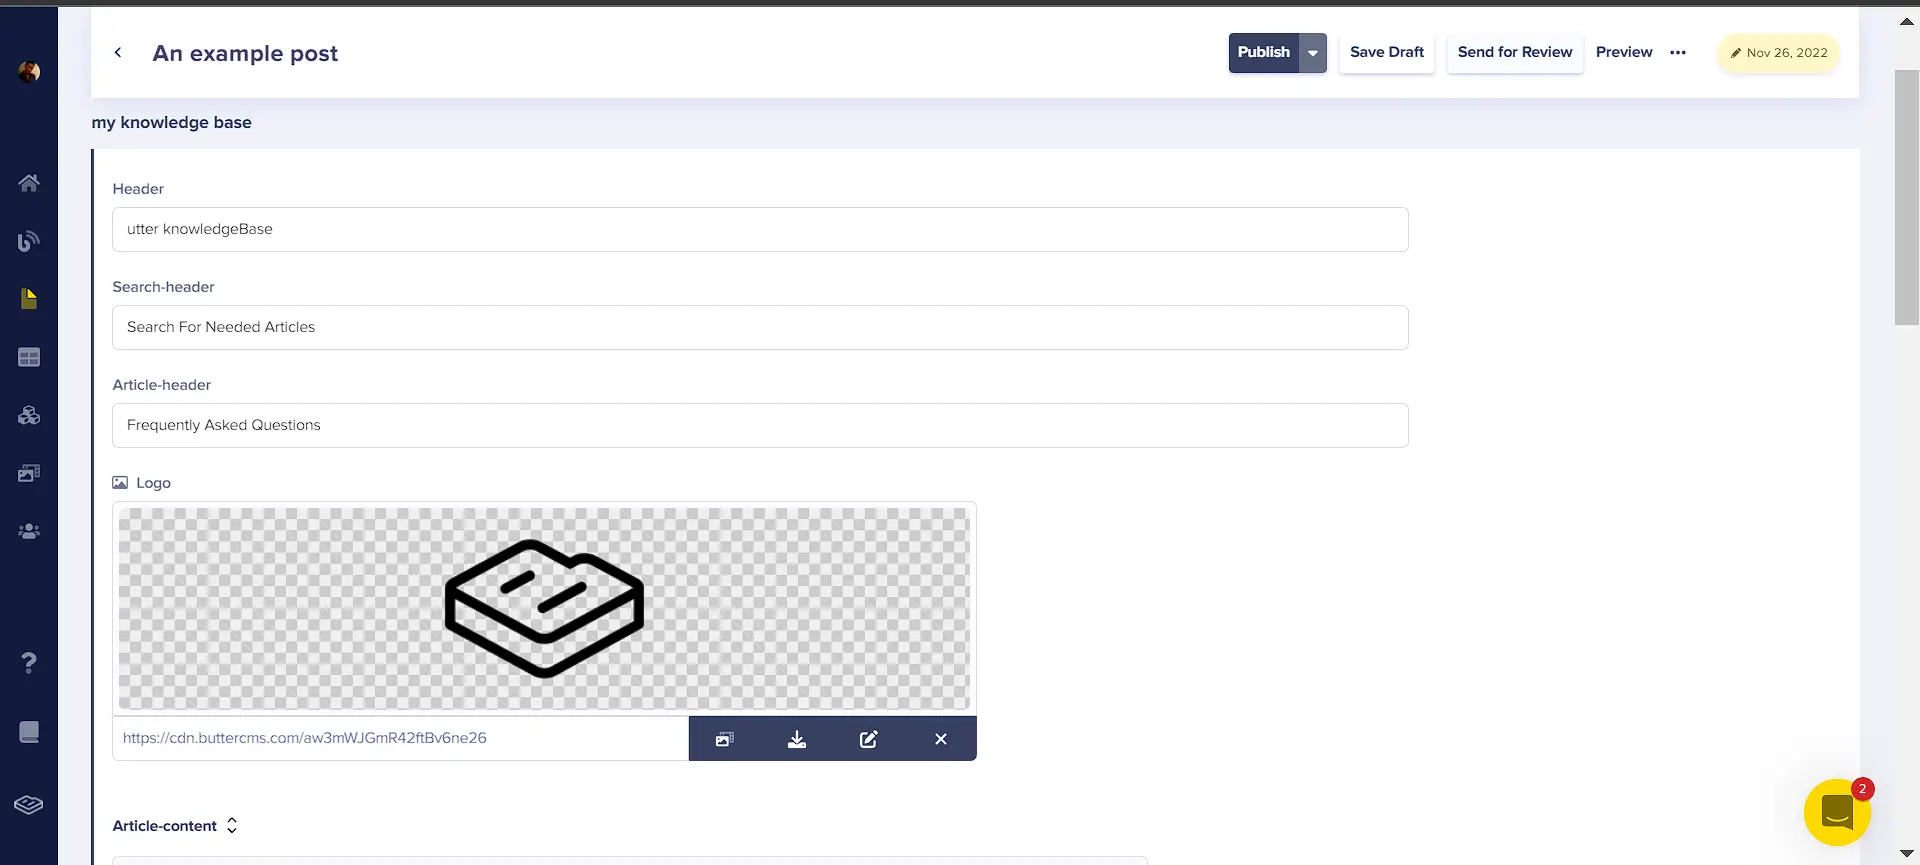
Finally, we will add an article with the WYSIWYG editor:
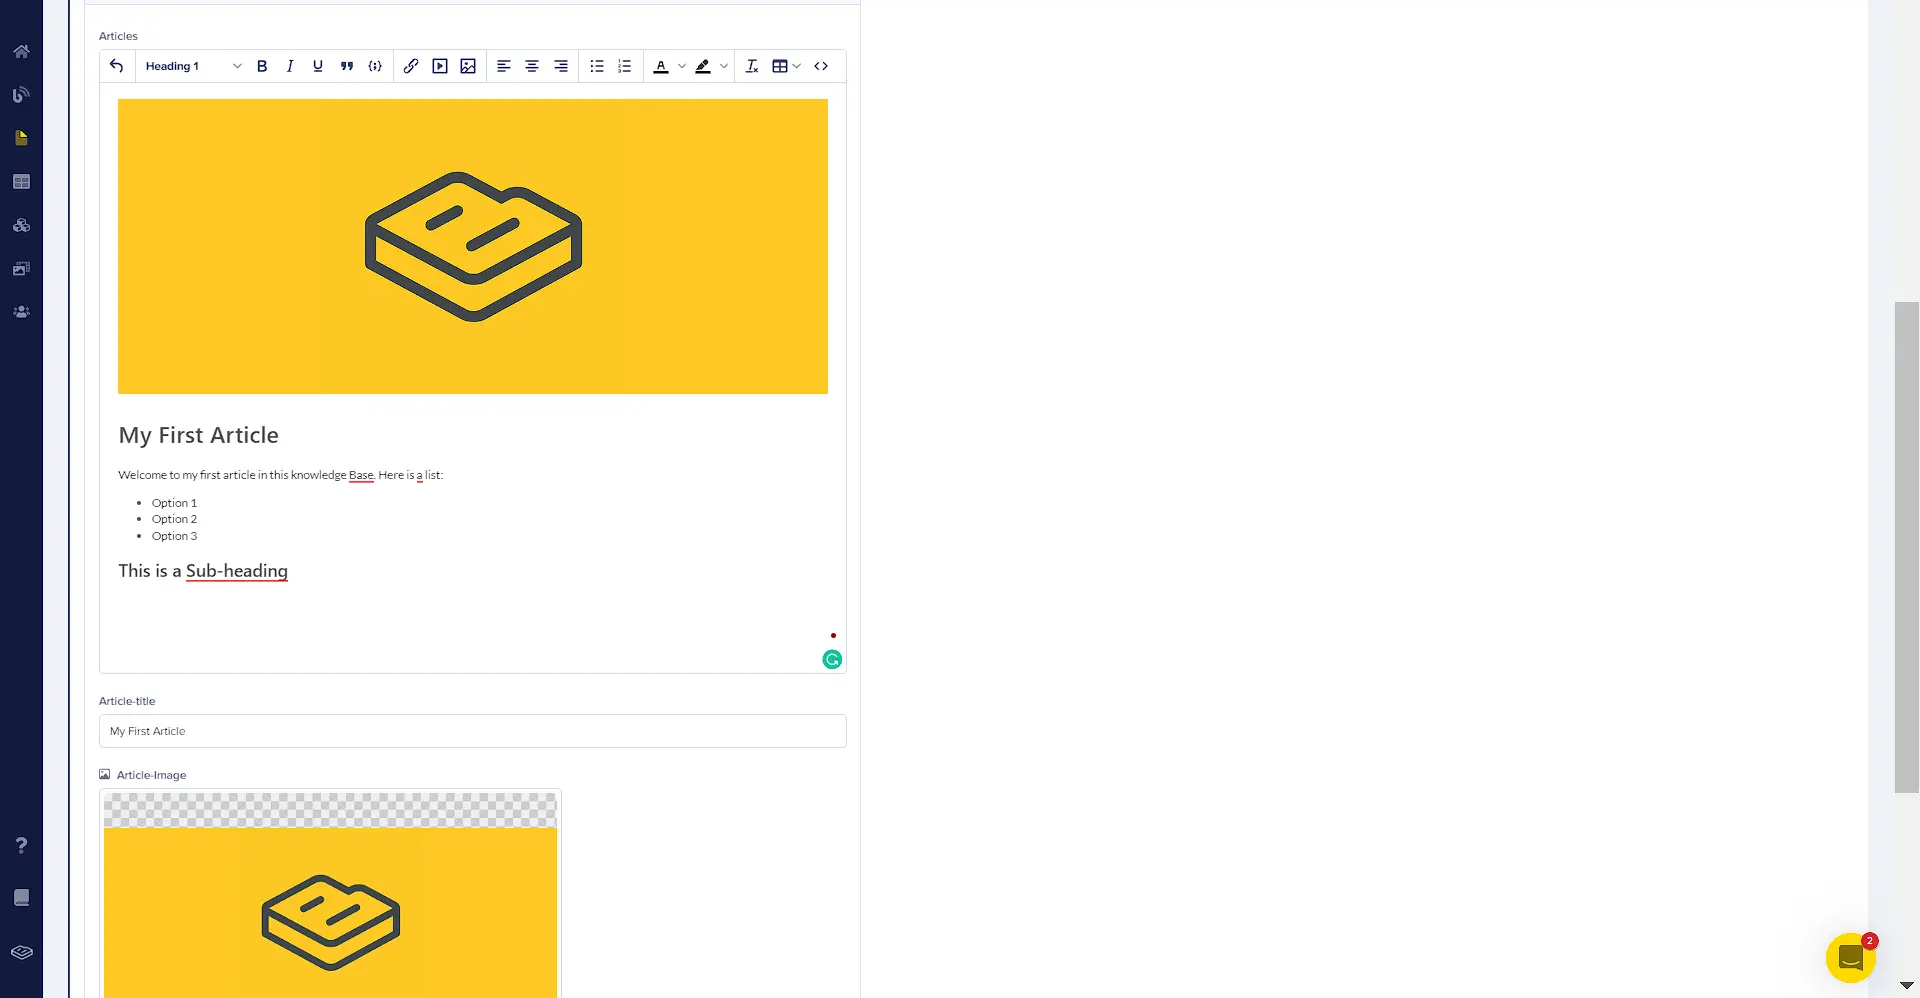
We will create two more articles with similar content, only changing the name to “My second article” and “My third article”, respectively. When you’ve done this, click on the Publish button to finalize the changes.
Building the knowledge base application
To handle the different components that make up the knowledge base application, we will create the following files and folders:
- A
componentfolder with the following files:Blogitem.css,BlogItem.js,BlogList.js,EmptyList.js, andHeader.js. These components will handle the landing page, our knowledge base, the search functionality, and article cards. - In the
pagesfolder, create three files calledBlogPost.js,HomePage.js, andBlogpost.css. The HomePage.js file will be the landing page of our application whileBlogPost.jswill be the second page that displays the content of articles selected on the home page.
In our App.js file, we will perform a fetch request to the ButterCMS page by using the Axios dependency. We will also pass the necessary data to the pages:
import "./App.css";
import { Route, Routes } from "react-router-dom";
import HomePage from "./pages/HomePage";
import BlogPost from "./pages/BlogPost";
import React, { useState, useEffect } from "react";
import axios from "axios";
import Header from "./components/Header";

function App() {
  const [getBlogContent, setGetBlogContent] = useState([]);
  const readToken = "your read token"
  const [data, setData] = useState([]);
  useEffect(() => {
    const fetchtData = async () => {
      axios
        .get(
          `https://api.buttercms.com/v2/pages/buttercms_knowledge_base/an-example-post/?auth_token={readToken}`
        )
        .then((res) => {
          setData(res.data.data.fields.my_knowledge_base);
          console.log(res);
        })
        .catch((err) => {
          console.log(err);
        });
    };
    fetchtData();
  }, []);
  const getData = (blog) => {
    setGetBlogContent(blog);
  };
  return (
    <div>
      <div className="container">
        <Header data={data} />
        <Routes>
          <Route path="/" element={<HomePage data={data} choiceData={getData}/>} />
          <Route path="/blog/:id" element={<BlogPost content={getBlogContent}/>} />
        </Routes>
      </div>
    </div>
  );
}
export default App;
Here, we set up the routes for our home and blog pages, fetched data from the ButterCMS page, and passed it to the corresponding components through the data state. We have a function called getData which we will use to return the content of the selected article from the home page to the blog display page.
In the Header.js component, we have the site logo and title:
import React from 'react';
const Header = ({data}) => (
  <header className=' flex items-center gap-3 '>
  <img src={data.logo} alt="" className=' h-24 w-24 ' />
    <h1 className=' text-2xl font-medium ' >{data.header}</h1>
  </header>
);
export default Header;
In HomePage.js, we have the following:
import { React, useState, useEffect } from "react";
import EmptyList from "../components/EmptyList";
import BlogList from "../components/BlogList";

const HomePage = ({ data, choiceData }) => {
  const [articles, setArticles] = useState();
  const [filteredArticles, setFilteredArticles] = useState([]);
  const [searchKey, setSearchKey] = useState("");

// set filtered article list
  useEffect(() => {
    setArticles(data)
    setFilteredArticles(data.article_content);
  }, [data]);

// check if search field is empty
  useEffect(()=>{
    if(searchKey===""){
      setFilteredArticles(data.article_content)
    }
  },[searchKey])

// Search for blog by category
  const handleSearchResults = () => {
    const filtered = articles.article_content.filter((blog) => {
      return blog.article_title.toLowerCase().includes(searchKey.toLowerCase());
    });
    setFilteredArticles(filtered);
  };

// function to get selected blog content
  const BlogContent = (id) => {
    choiceData(id);
  };

  return (
    <div>
      {/* Page Header */}
      <div className=" text-black text-center text-2xl mt-20 mb-4 ">
        <h2>{data.search_header}</h2>
      </div>
      {/* Search Bar */}
      <div className=" h-52 w-full bg-blue-500 flex justify-center items-center ">
        <input
          type="text"
          placeholder="Search By Category"
          value={searchKey}
          onChange={(e) => setSearchKey(e.target.value)}
          className=" mr-6 h-11 w-[500px] outline-none pl-2 "
        />
        {searchKey && (
          <button
            className=" px-5 py-3 rounded-md bg-white text-black font-normal mr-4 "
            onClick={() => {
              setSearchKey("");
            }}
          >
            Erase search
          </button>
        )}
        <button
          className=" px-5 py-3 rounded-md bg-white text-black font-normal "
          onClick={() => handleSearchResults()}
        >
          Find Article
        </button>
      </div>
      {/* article cards */}
      <div className=" text-xl font-bold mt-10 text-center ">
        <h2>{data.article_header}</h2>
      </div>
      {/* Blog List & Empty View */}
      {filteredArticles&& !filteredArticles.length>0? (
        <EmptyList />
      ) : (
        <BlogList
          blogs={filteredArticles}
          content={BlogContent}
        />
      )}
    </div>
  );
};

export default HomePage;
In the code block above, we have a search field with filtering and search functionalities. To display our article cards, we will do this with BlogList.js and BlogItem.js. In BlogList.js, we have the following:
import React from "react";
import BlogItem from "./BlogItem";
const BlogList = ({ blogs, content }) => {
  return (
    <div className="blogList-wrap">
      {blogs
        ? blogs.map((article) => (
            <BlogItem
              blog={article}
              content={content}
              key={article.article_title}
            />
          ))
        : null}
    </div>
  );
};
export default BlogList;
Here, we have a map function that iterates through the number of articles in our data, and for each data renders the BlogItem component with its respective content. In BlogItem.js, we will display the title and image of the respective content:
import React from "react";
import { Link } from "react-router-dom";
const BlogItem = ({ blog, content }) => {
  return (
    <div className="mt-10" key={blog.article_title}>
      <div className=" hover:translate-y-[-6px] ">
        <Link
          className="blogItem-link"
          to={`/blog/${blog.article_title}`}
          onClick={() => {
            content(blog);
          }}
        >
          <img
            src={blog.article_image}
            alt="cover"
          />
        </Link>
      </div>
      <h3>{blog.article_title}</h3>
    </div>
  );
};
export default BlogItem;
In the code block above, we also have a Link component from react-router-dom that redirects us to the BlogPost component page using the specified route and passes the article title as params to the URL. We are also passing the content of the selected articles, too.
The EmptyList.js component will contain text that will be displayed while data is being fetched from the CMS, or when there are no articles to be displayed. In EmptyList.js, we have the following code:
import React from 'react';
const EmptyList = () => (
<div className='text-center'>
<p>Articles are yet to load...</p>
</div>
);
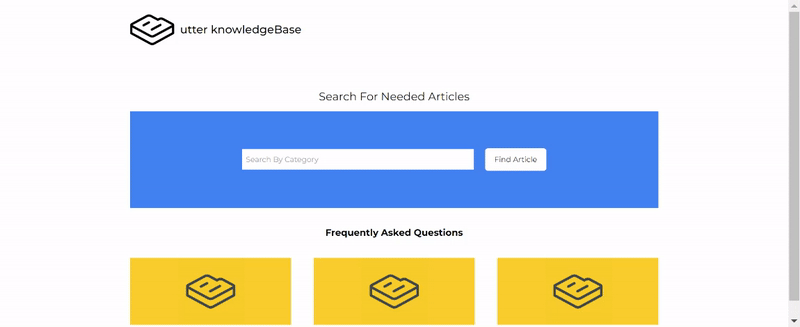
export default EmptyList;Now, if we run our application, we have the following results:
Creating the article display page
To display selected articles from the HomePage component, add the following to BlogPost.js:
import { React } from "react";
import EmptyList from "../components/EmptyList";
import "./Blogpost.css";
import { Link } from "react-router-dom";
const Blog = ({ content }) => {
console.log(content)
return (
<>
<Link className="blog-goBack" to="/">
<span> ←</span> <span>Go Back Home</span>
</Link>
{content ? (
<div className="blog-wrap">
<header>
<Link className="blog-goBack" to="/">
<h1>{content.article_title}</h1>
</Link>
<div className="blog-subCategory"></div>
</header>
<div
className="blog-content"
dangerouslySetInnerHTML={{ __html: content.articles }}
></div>
</div>
) : (
<EmptyList />
)}
</>
);
};
export default Blog;To style the article’s content, add the following to Blogpost.css:
/* BlogPost */
.blog-wrap {
    max-width: 700px;
    margin: 0 auto;
}
.blog-goBack {
    text-decoration: none;
    font-size: 0.8rem;
    color: #a9a9a9;
    font-weight: 500;
    margin-bottom: 2rem;
    display: block;
}
.blog-wrap header {
    text-align: center;
}
.blog-date {
    font-size: 0.8rem;
    color: #a9a9a9;
    font-weight: 500;
}
.blog-wrap img {
    width: 100%;
}
.blog-subCategory {
    display: flex;
    justify-content: center;
}
.blog-subCategory>div {
    margin: 1rem;
}
.blog-desc {
    padding: 1rem;
    margin-top: 1.5rem;
}
.blog-content li{
    list-style-type: disc!important;
}
.blog-content p {
    margin-top: 1.5rem;
}
.blog-content h1,
.blog-content h2,
.blog-content h3,
.blog-content h4,
.blog-content h5,
.blog-content h6 {
    margin-top: 1.5rem;
}
.blog-content h1{
    font-size: 40px;
}
.blog-content h2{
    font-size: 28px;
}
.blog-content img {
    margin: 10px 0;
}
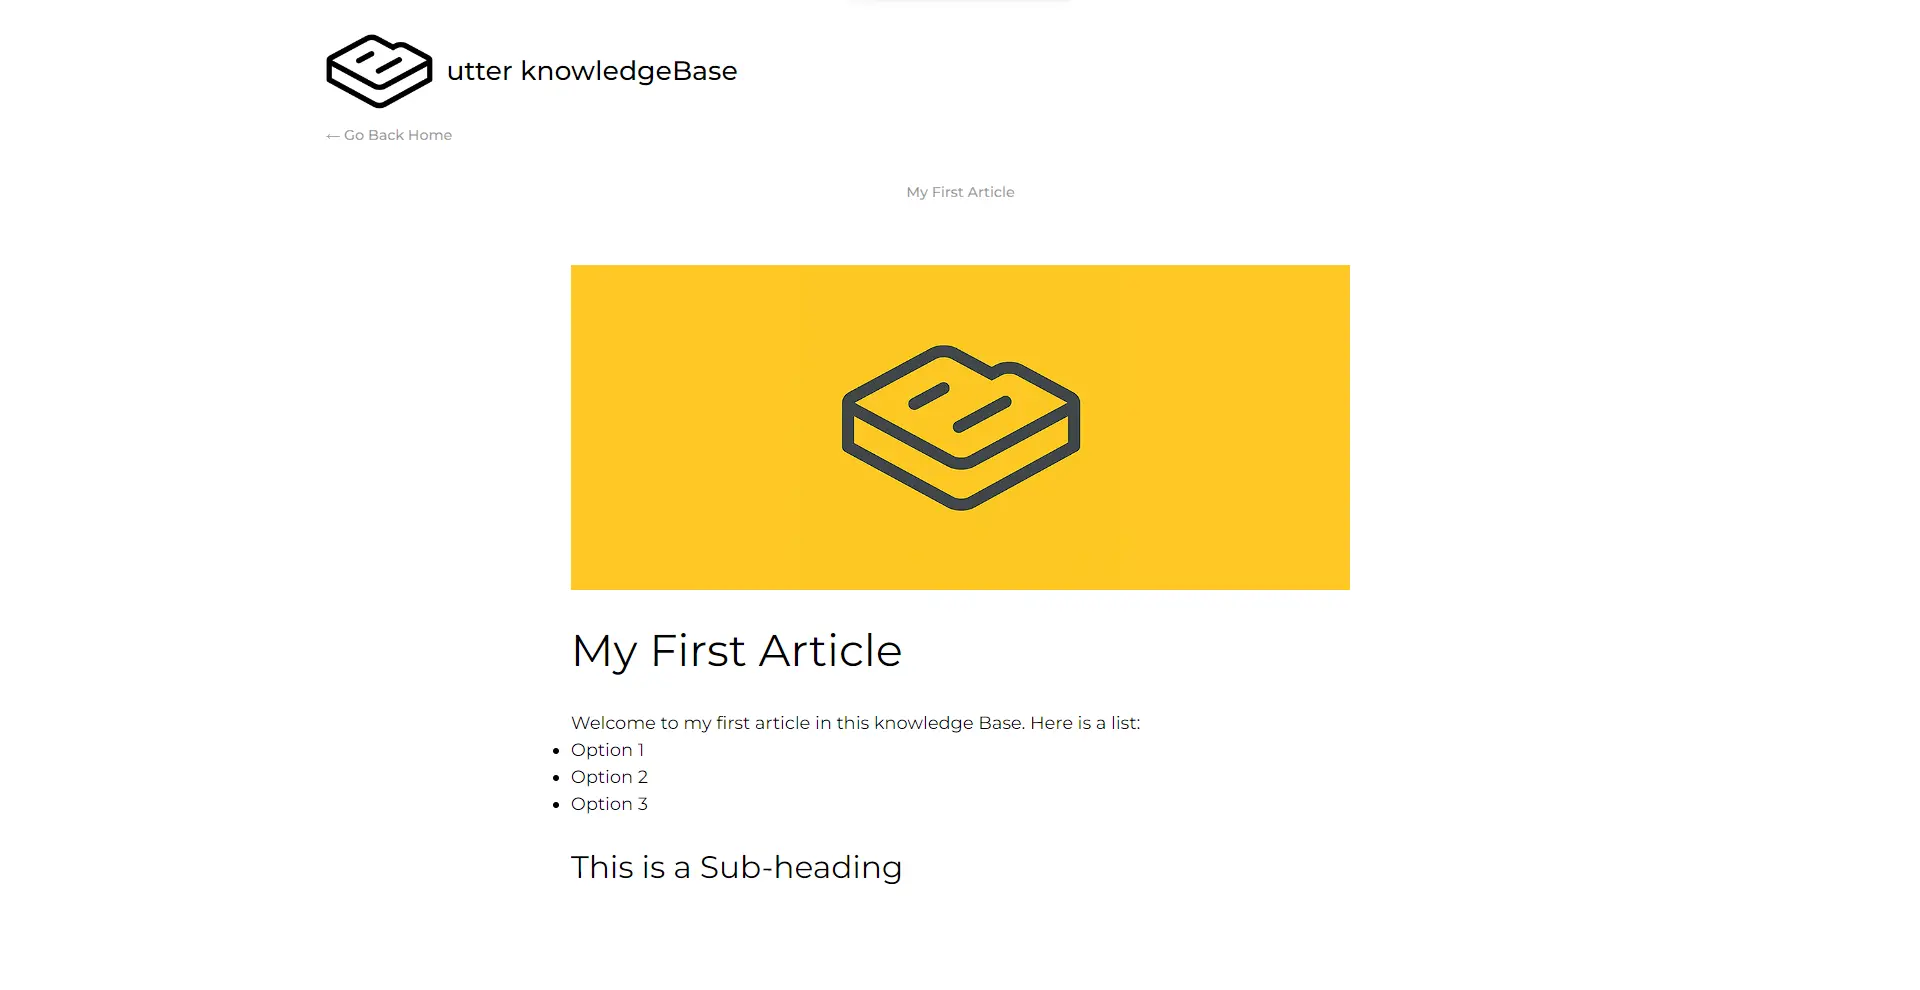
Now, if we open our web page and select an article card, we get the following result on the blog display page:
Closing thoughts
As web developers, the speed and accuracy with which we can learn, build, and launch proofs of concept are of the utmost importance. In this article, we've demonstrated just that by designing a React knowledge base application that employs Butter's page types and components feature appropriately. The only reason we can say this article was created from scratch is because ButterCMS has optimized its service so that what we start with will be some other persons' weeks of hard work. The best outcomes come from the help of others, and ButterCMS is that friend.
Further reading
Thanks for making it this far. I hope this article was very helpful. You can check out the tutorials below to further build your skills with React and ButterCMS: