
Building modern web applications requires significant work due to the large datasets that must be managed and organized to create an accessible application. Setting up a database, configuring API routes, configuring file storage servers, and registering and authenticating users are all examples of such tasks. However, when working with a headless CMS, these tasks are taken off your plate as the headless CMS handles all of this. You can create stand-alone backend applications with a headless CMS without worrying about application setups.
A headless CMS is only concerned with the application’s content. Once content has been created and published, it can be accessed via an application programming interface (API), which allows the user to view and modify the application’s content using these APIs or the platform’s visual dashboard.
This tutorial will teach you how to build and add a landing page in a Node.js application using ButterCMS.
Table of contents
Why use Node.js?
Node.js is a JavaScript runtime environment that is cross-platform, open source, and based on the V8 engine. Node.js allows JavaScript code to be executed outside of a web browser. It’s simple to use as a server-side proxy, allowing it to handle many concurrent connections without being blocked. It’s beneficial for different proxy services with varying response times or for gathering data from multiple sources.
Node.js is especially good at managing multiple connections at once. Because the Internet of Things is based on a network of devices sending small messages that need to be processed quickly, Node. js makes an excellent backend for these applications by providing serverless architecture and real-time communication support.
Why use ButterCMS?
ButterCMS is an API-first headless CMS that allows you to build CMS-powered apps and websites in any programming language quickly. It is an excellent choice for blogs, dynamic pages, and more. Here are some of the core features of ButterCMS that will make creating and publishing your website content easier:
- Flexible content modeling: You can model your content to fit your use case using custom components.
- Page types: You can use page types to create a knowledge base, SEO landing pages, news articles, and other features for your applications.
- Collections: ButterCMS has a robust collection feature that is ideal for eCommerce sites and allows you to add new product information to your online store. Collections can also generate new promotional content like case studies and testimonials, allowing you to create reusable content in Butter and reuse it throughout your app.
- Blog engine: It comes with a pre-built, SEO-optimized, API-first blog engine that allows you to quickly create a functional blog application, freeing up your time to focus on other things.
Prerequisites
To follow the tutorial, ensure you’ve met the following requirements:
- An understanding of JavaScript
- Node.js v14 or later installed
Note: The code for the tutorial below can be found in this GitHub repository.
Getting started
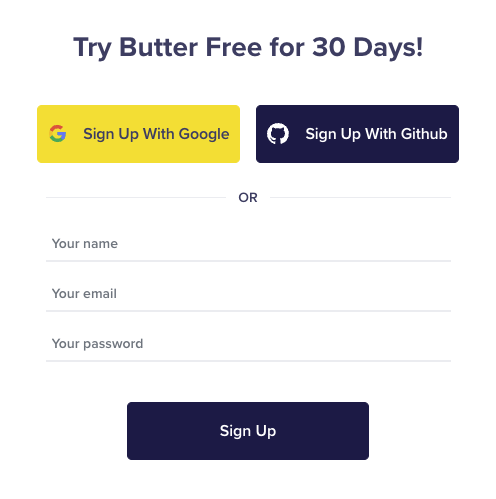
To get started building a headless CMS with ButterCMS, you need to sign up either with your Gmail or GitHub account to log in to your project dashboard.

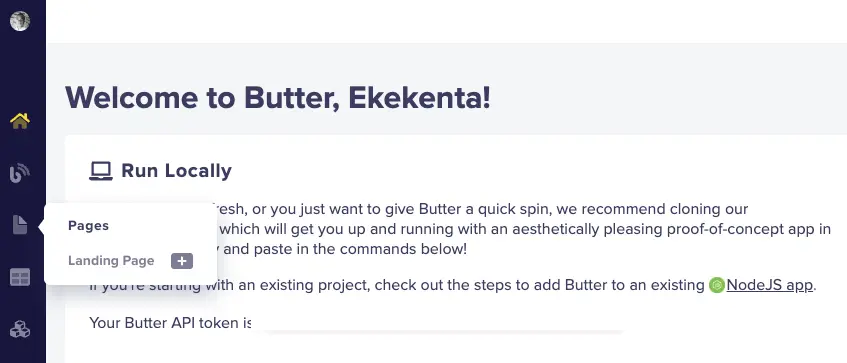
Create a landing page in ButterCMS
Once you’ve signed up, you’ll be redirected to your ButterCMS dashboard, where you can manage your application's content. To create a landing page for your application, on the sidebar of your dashboard, click on the plus sign next to “Landing Page” to create a new page.
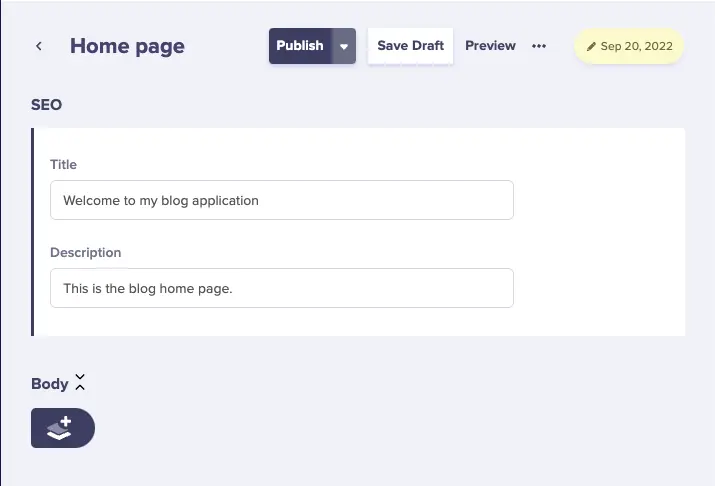
Then, enter the page title and description. For this demonstration, we’ll create the Home page.
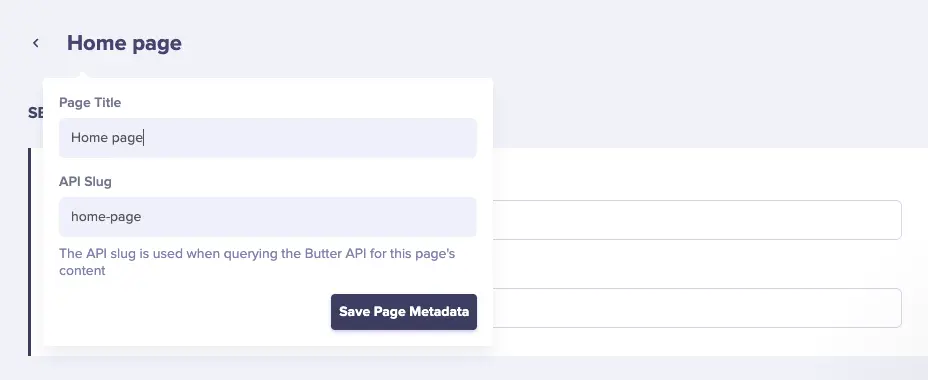
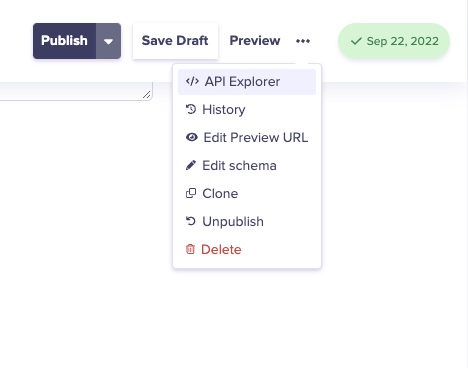
Once you enter the page title, an API Slug will be generated for you, where you can access your page. Now, click on the Save Page Metadata button to save the page. Then enter the SEO Title and SEO Description for the page and click on the Publish button.
Adding components to the page
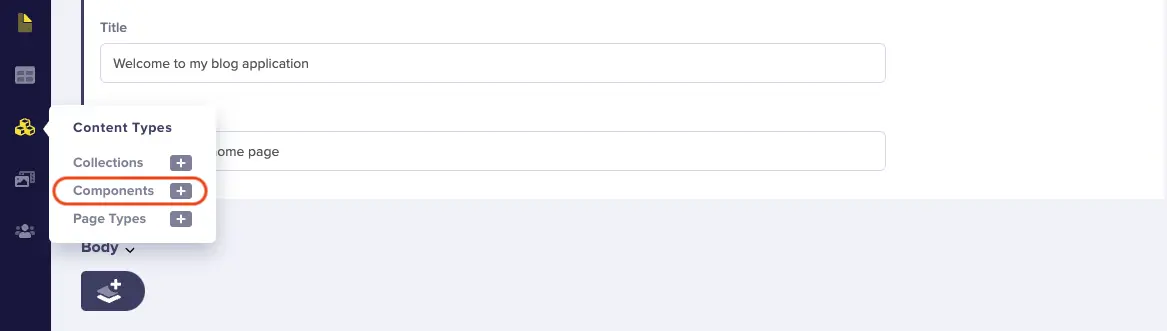
Now, let’s add components to the page we just created. You can add a variety of components, such as Features, Testimonials, Hero, etc, to a ButterCMS landing page. We’ll add a Features component, a Hero component, and a custom collection to the page for this demonstration. Let’s start by creating the Features component by following the steps below:
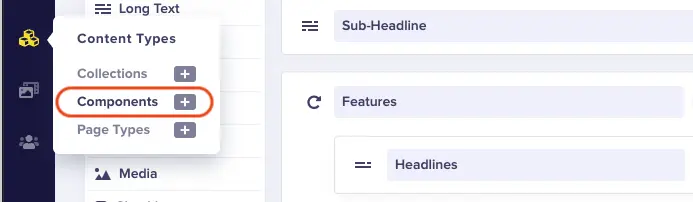
Click on the + icon by Components on the Content Types tab in the sidebar of your dashboard.
Choose the fields for the component. We’ll choose Short Text for the Headline field, Long Text for the Sub-Headline field, Repeater for the Features field, and Short Text for the Scroll anchor ID field. For the Repeater, we’ll choose Short Text for the Headline, Long Text for the Description, and Media for the Icon.
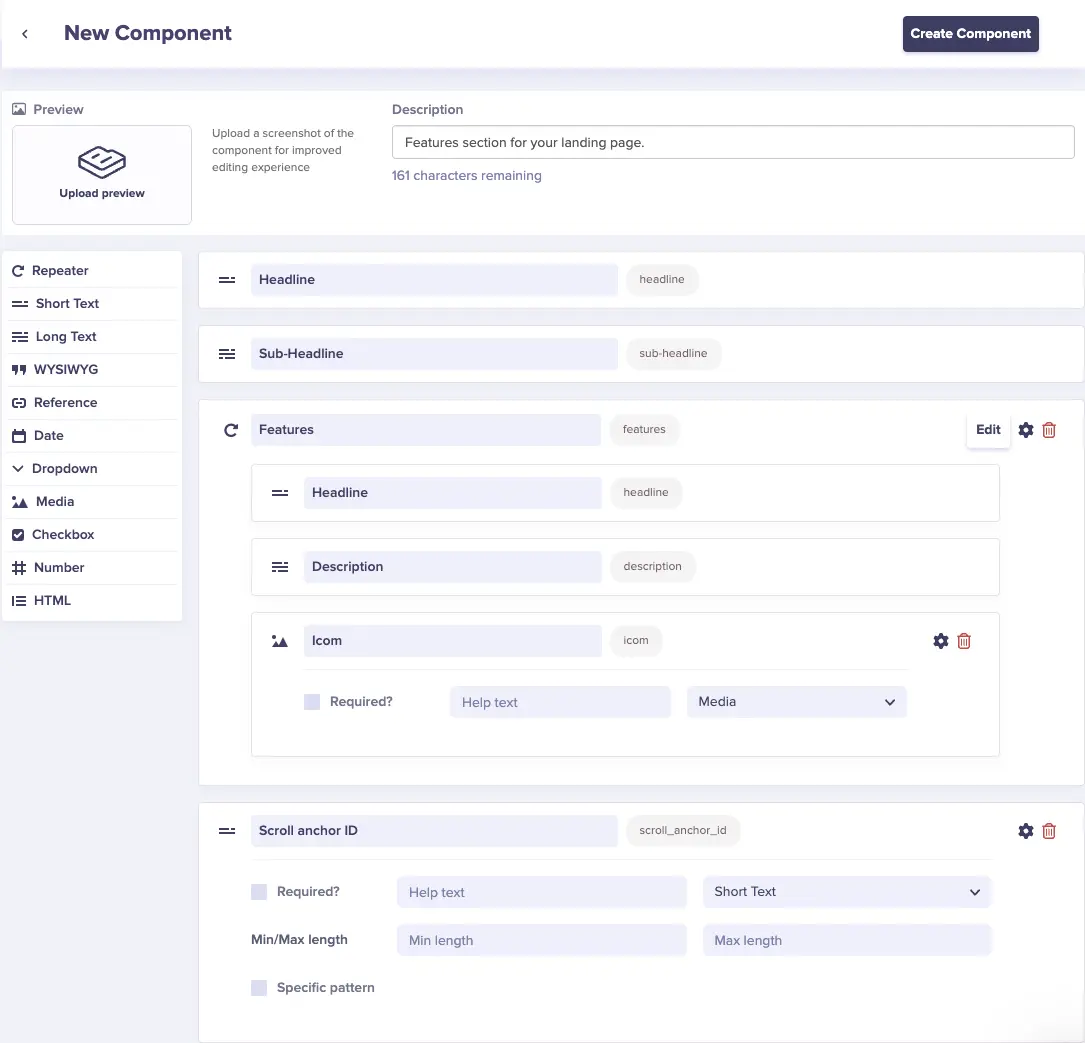
Next, click the Create Component button.
Then, enter the Component Name.
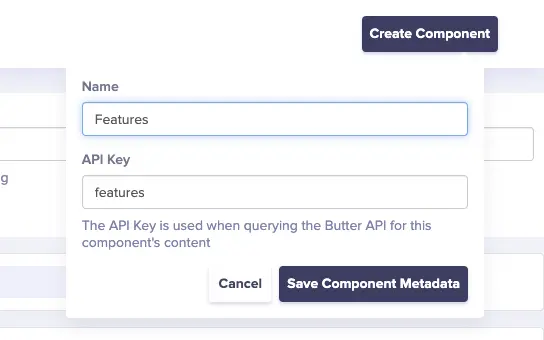
Click the Save Component Metadata button.
Next, create a Hero component by following the steps below:
Click on the + icon next to Components on the Content Types tab in the sidebar of your dashboard.
Select Short Text for Headline, Long Text for the Sub-Headline, Media for the Image, Short Text for the Button Label, Short Text for the Button URL, and Short Text for the Scroll anchor ID.
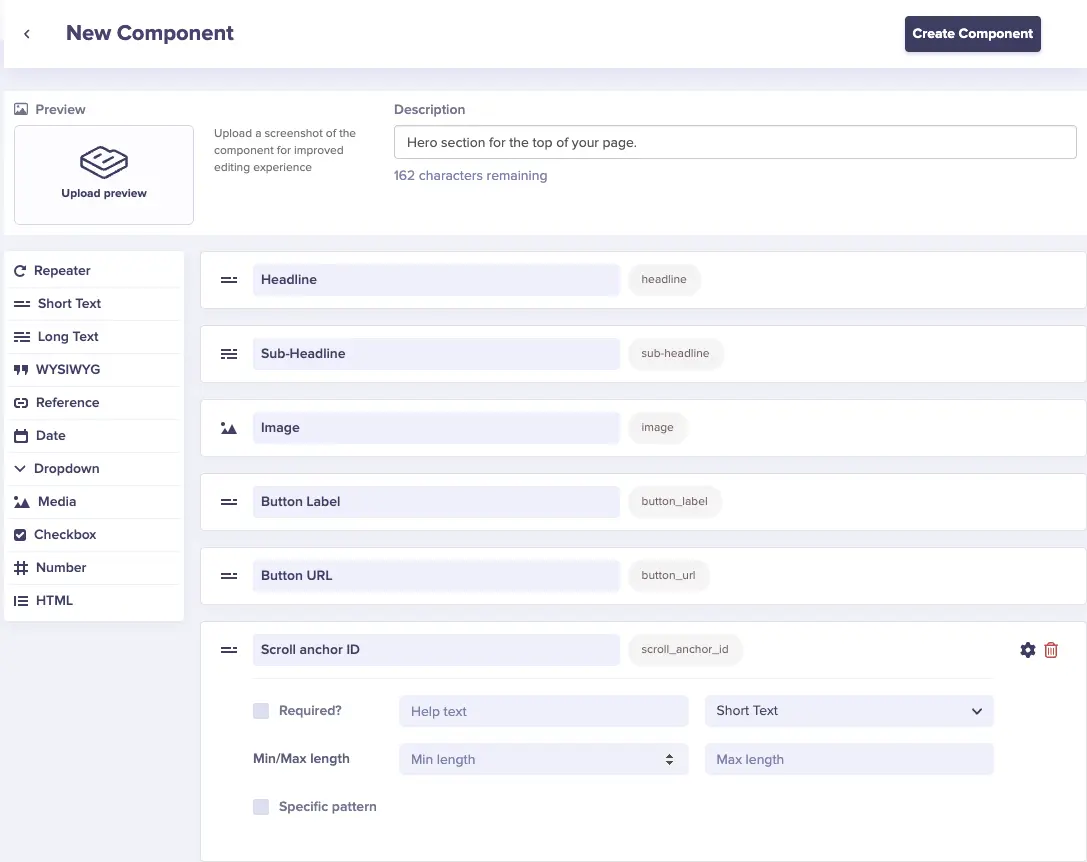
Click the Create Component button.
Enter the Component Name.

Click the Save Component Metadata button.
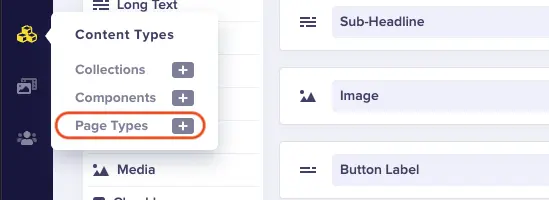
Now, click on Page Types in the Content Types tab.
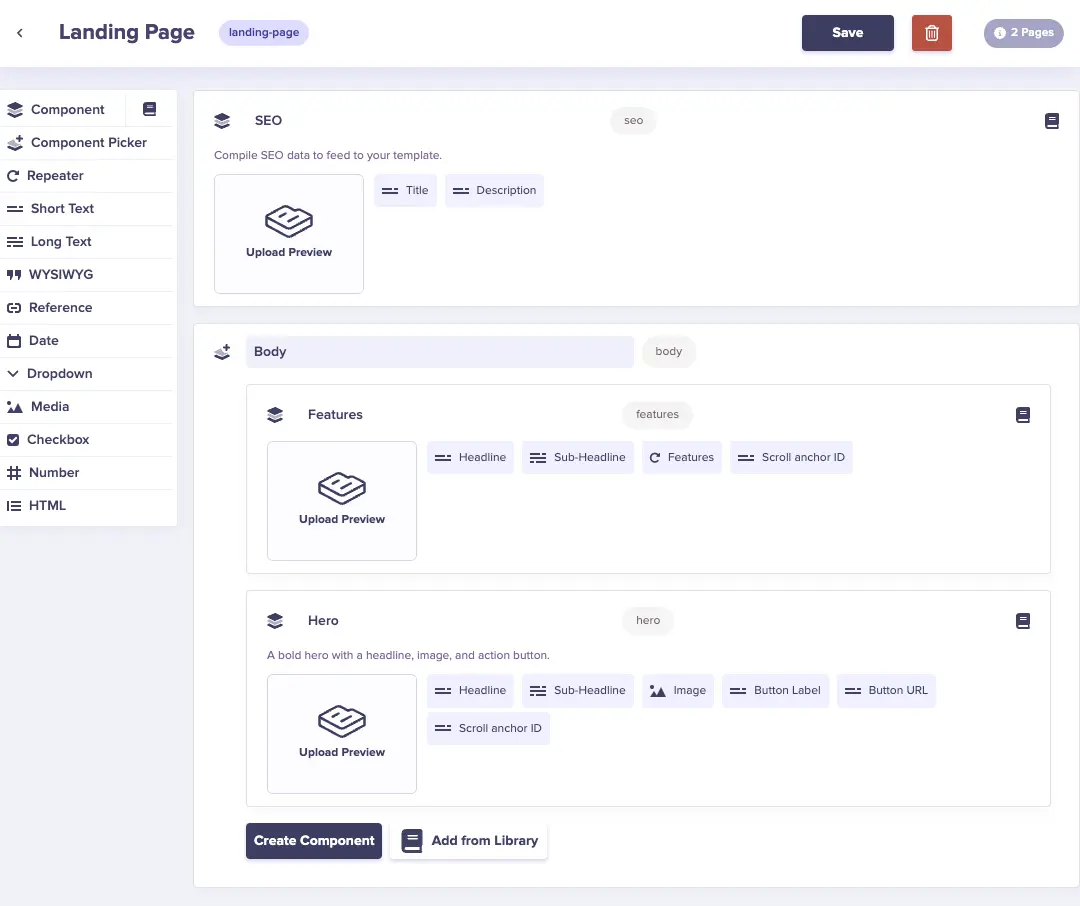
Select the Landing Page page type (This page type is created by default) to add the components you created to the Landing page body. So, click the Add from Library button, select the Features and Hero components we created, and click Save.
Now back at your Home Page, you can find additional components of the page by clicking on the button under the Body tab and accessing the Component Library.
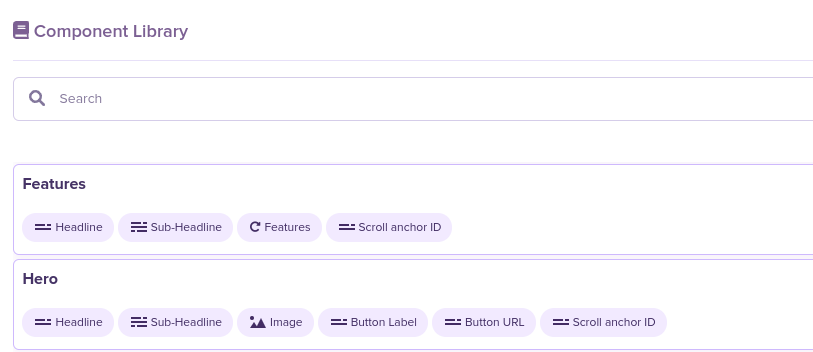
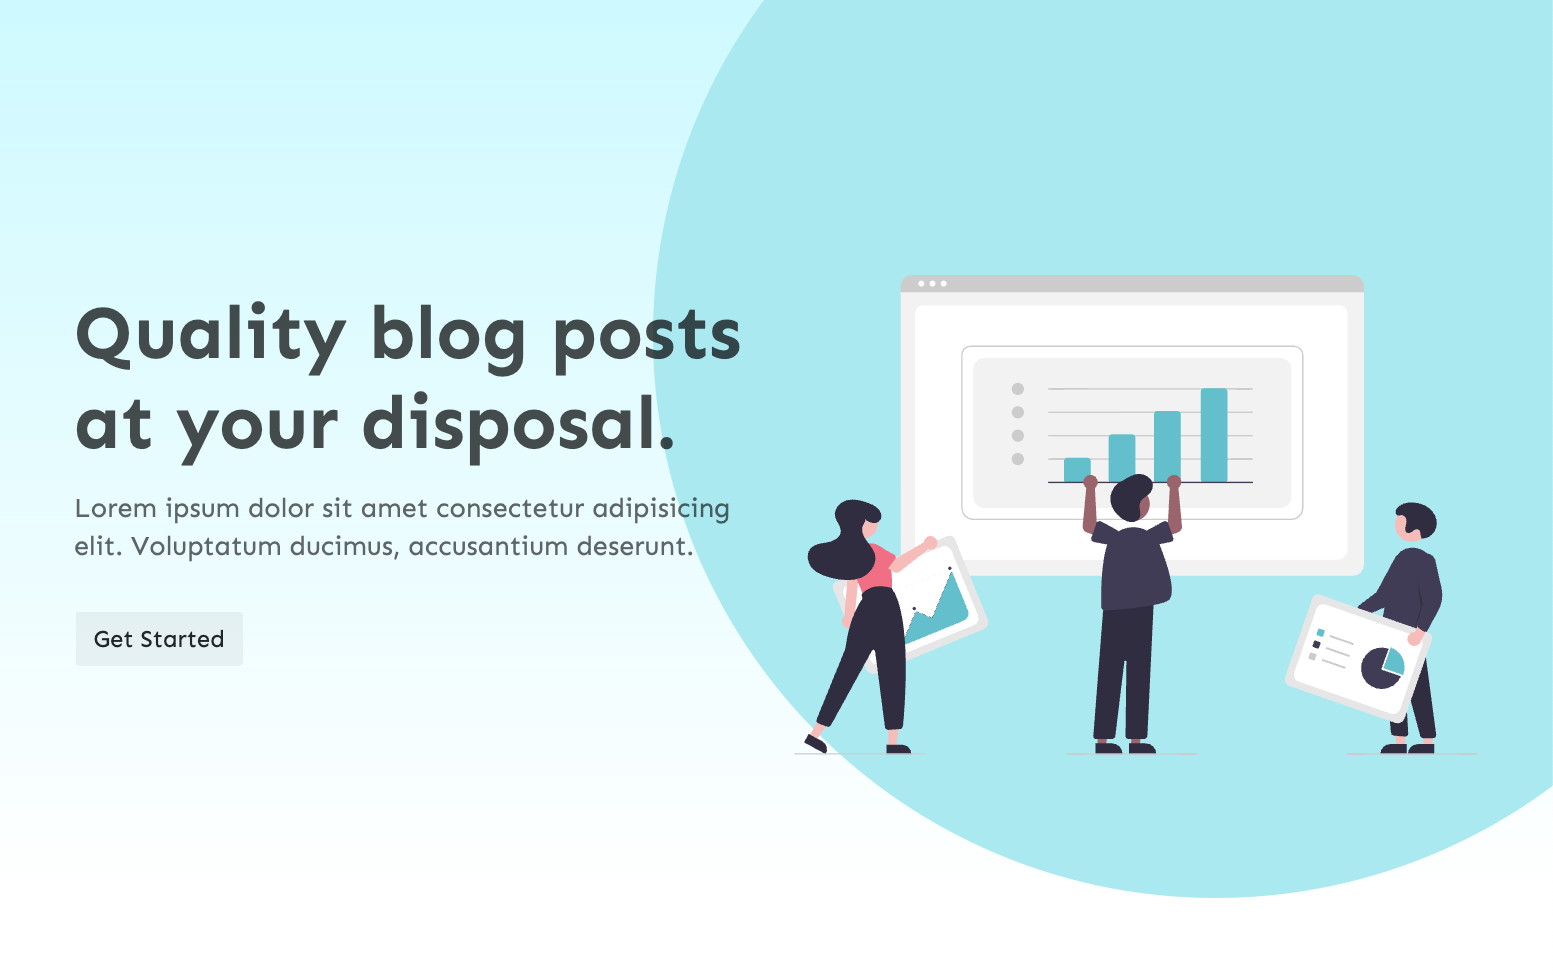
Now, click on the Hero column to add the Hero component with the details in the screenshot below. We have the Headline for the headline text of the Hero component, the Sub-Headline for the sub-headline text of the Hero component, the Image field for the Hero image, the Button Label for the label of the Hero button, and the Button URL for the URL you may want to redirect your page to when clicked.
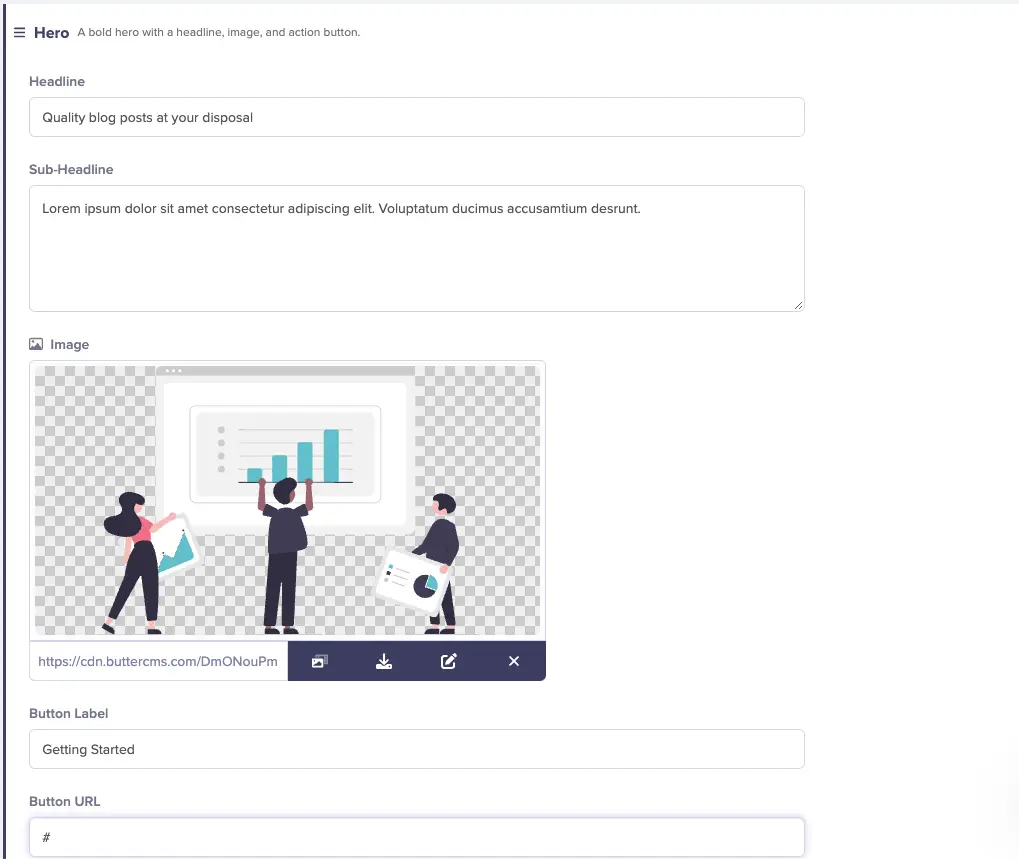
To get the Hero Image, click on it and see the available images provided by ButterCMS. You can also upload and use your custom images. We want to display “Getting Started” for the Button Label, and the Button URL, we used the pound sign (#) since we are not redirecting the button click anywhere.
Next, click on the plus button below the Hero components you just created to add other components from the Component Library. Then, click on the Features column to add the components of the feature to the page. Once a Features component is added to the page, click on it to define the details of the component. For the Features component, enter the details in the screenshot below:

Then, click the Features button and add a list of features you want in your application.

We’ll add a few features as shown in the screenshot below:
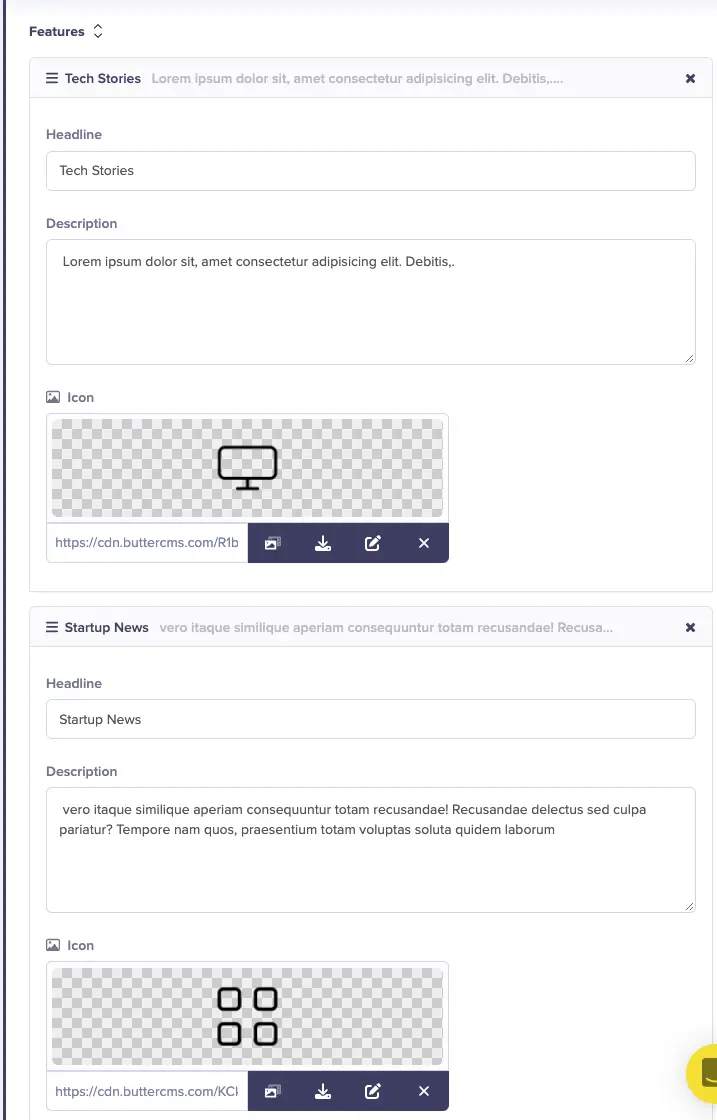
We’ve created and added some features by filling in some fields in the features component. This component has a Short Text field for the Headline, Long Text for the Sub-Headline, a Repeater field, and Short Text for the Scroll anchor ID. The Repeater field has other fields like Short Text (Headline), Long Text (Description)L, and Media (Icon).
Lastly, click the Publish button at the top of the page to save and make the page’s API available.

Using components in Node.js
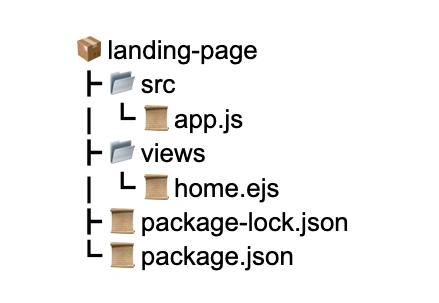
Now you have the Hero and Features components created. Let’s proceed to create and set up a Node.js application. You can save time by using the ButterCMS starter application and modifying it to fit your niche. But for this demonstration, we’ll build our own Node.js application. To start, create a new folder and initialize a Node.js application by running the command below on your terminal, then create the folder below in the project directory:
mkdir landing-page && cd landing-page
npm init -y
Next, install the ButterCMS SDK, Express, and EJS with the command below:
npm install buttercms express ejs --saveOnce the installations are complete, create a Node.js server in the src/app.js file with the code snippet below.
const butter = require('buttercms')('YOUR API KEY');
const express = require('express');

const app = express()

app.set('view engine', 'ejs');

app.listen(3000, ()=>{
    console.log('server running')
})
In the above code snippet, we initialized the ButterCMS SDK, created an Express server, and configured EJS as the view engine to render our templates.
Now, add a route to the home-page page we created in the preview sections with the code snippets below.
/ Routes
app.get('/', async function(req, res) {
  const page = await  butter.page.retrieve("*", "home-page").then(res => res.data.data)
  res.render('home', {
      homepage: page.fields
  });
});
The above code snippet will retrieve the data from our home-page and render it on the home template we’ll be creating shortly.
Next, create a home.ejs file in the views folder and add the markup below:
<html>
 <head>
   <title><%= homepage.seo.title %></title>
   <meta name="description" content="<%= homepage.seo.description%>." />
   <link rel="stylesheet" href="/css/bootstrap.min.css" />
    <link rel="stylesheet" href="/css/lineicons.css" />
    <link rel="stylesheet" href="/css/main.css" />
    <link rel="preload" href="/css/tiny-slider.css" as="style" onload="this.onload=null;this.rel='stylesheet'" />
 </head>
 <body>
</body>
</html>
Then, create a public folder in the project directory and download the css folder from the ButterCMS starter GitHub page into the public folder to add styling to the application.
Now let’s display the components on the home-page in our template. But before that, let’s look at the format of data returned from the home-page API by clicking on the API Explorer tab.
You’ll see the response in the screenshot below:
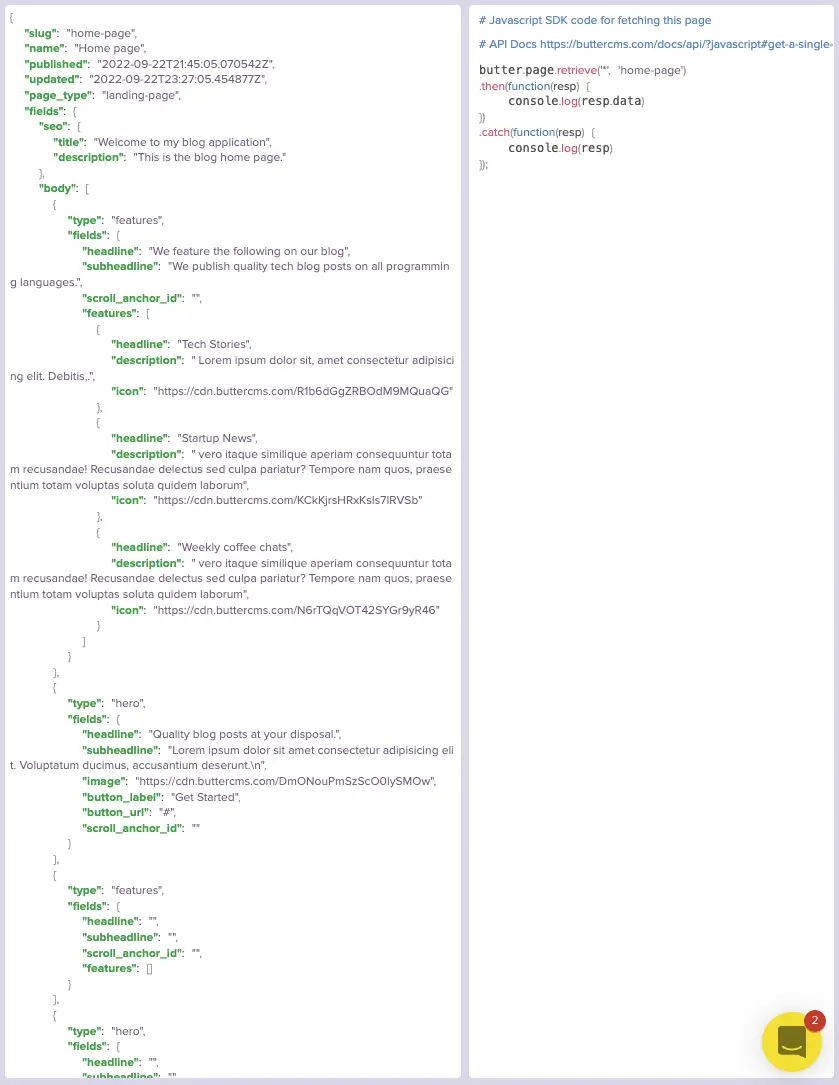
Since we have an idea of the response we expect from the home-page API, Let’s loop through the content in the body of the field. To know what we will display, we’ll use an if statement to check the content type before rendering it. Add the code snippet below to the views/home.ejs file:
 <% homepage.body.forEach(data=>{ %>
     <% if(data.type =="hero"){ %>
      <section id="<%= data.fields.scroll_anchor_id%>" class="hero-section mt-5">
        <div class="container">
          <div class="row align-items-center">
            <div class="col-xl-6 col-lg-6 col-md-10">
              <div class="hero-content">
                <h1><%= data.fields.headline %></h1>
                <p><%= data.fields.subheadline%></p>

                <a
                  href="<%= data.fields.button_url%> "
                  target="_blank"
                  class="btn btn-primary btn-hover"
                >
                  <%= data.fields.button_label %>
                </a>
              </div>
            </div>
            <div class="col-xxl-6 col-xl-6 col-lg-6">
              <div class="hero-image text-center text-lg-end">
                <img src="<%= data.fields.image%> " alt="" />
              </div>
            </div>
          </div>
        </div>
      </section>
      <%}%>
      <% if(data.type == "features"){ %>
        <section id="<%= data.fields.scroll_anchor_id%>" class="feature-section">
          <div class="container">
            <div class="row">
              <div class="col-lg-5 col-md-10">
                <div class="section-title mb-60">
                  <h2 class="mb-20">
                    <%= data.fields.headline%>
                  </h2>
                  <p>
                    <%= data.fields.subheadline%>
                  </p>
                </div>
              </div>
              <div class="col-lg-7">
                <div class="row">
                  <% data.fields.features.forEach(feature => {%>
                  <div class="col-lg-6 col-md-6">
                    <div class="single-feature">
                      <div class="feature-icon">
                        <img src="<%= feature.icon%>" alt="" />
                      </div>
                      <div class="feature-content">
                        <h4>
                          <%= feature.headline%>
                        </h4>
                        <p>
                          <%= feature.description%>
                        </p>
                      </div>
                    </div>
                  </div>
                  <% }) %>
                </div>
              </div>
            </div>
          </div>
        </section>
      <%}%>
 <%})%>
With the above markup, we’ve been able to render the contents in the Features and Hero components. Now update the package.json scripts to add a start script that will allow us to run the application.
"scripts": {
     "start": "nodemon src/app.js"
  },
Then, run the command npm start to start the application and navigate to http://localhost:3000 to view the application.
Adding additional sections with ButterCMS collections
Creating a Navigation Menu
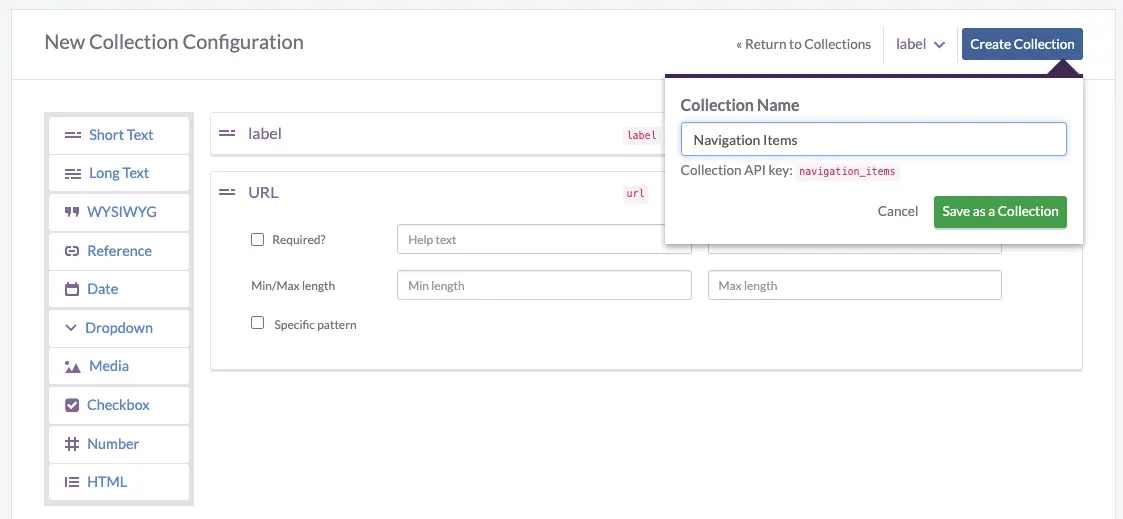
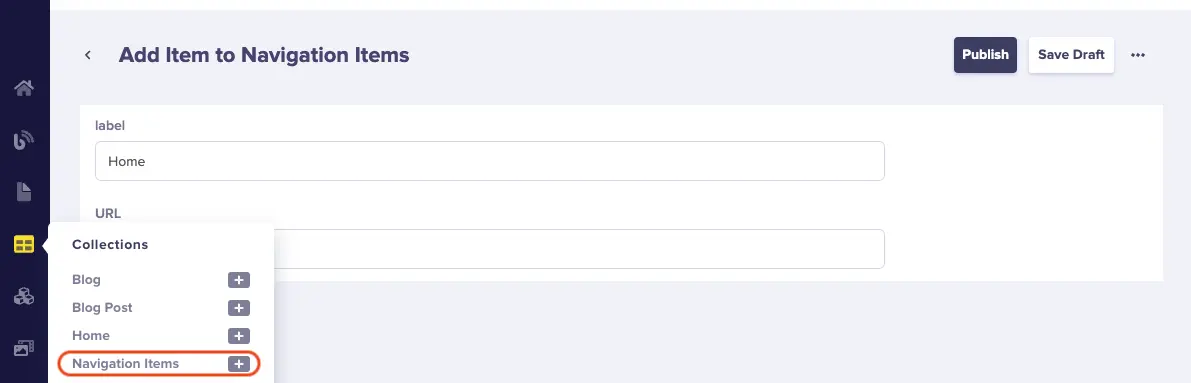
Our landing page is missing a navigation menu and some blog posts, so let’s add a Main Menu collection to handle the page navigation. For this tutorial, we’ll create Navigation Items and Menu collections. Let’s start with the Navigation Items collection. To get started, follow the steps below:
Click on the + icon next to the Collections tab in the sidebar of your dashboard.

Select Short Text for the label and another Short Text for the URL of the Home page.
Click on the Create Collection button.
Enter the Collection name.
Click the Save as a Collection button.
Enter details for the label and URL of the collection.

Click the Publish button.
Then, hover on the collections tab and click the + icon to add more items to the collection. Do this to create items for the About, Features, Try It, Testimonials, and Blog Navigation.
Next, create another collection to group our navigation items together. We’ll name this collection Menu. Please continue with the following steps.
Click on the + icon next to the Collections tab in the sidebar of your dashboard.
Select Short Text for the label and a Reference field to reference the Navigation items collection.
Click on the Create Collection button.
Enter the Collection name.
Click the Save as a Collection button.
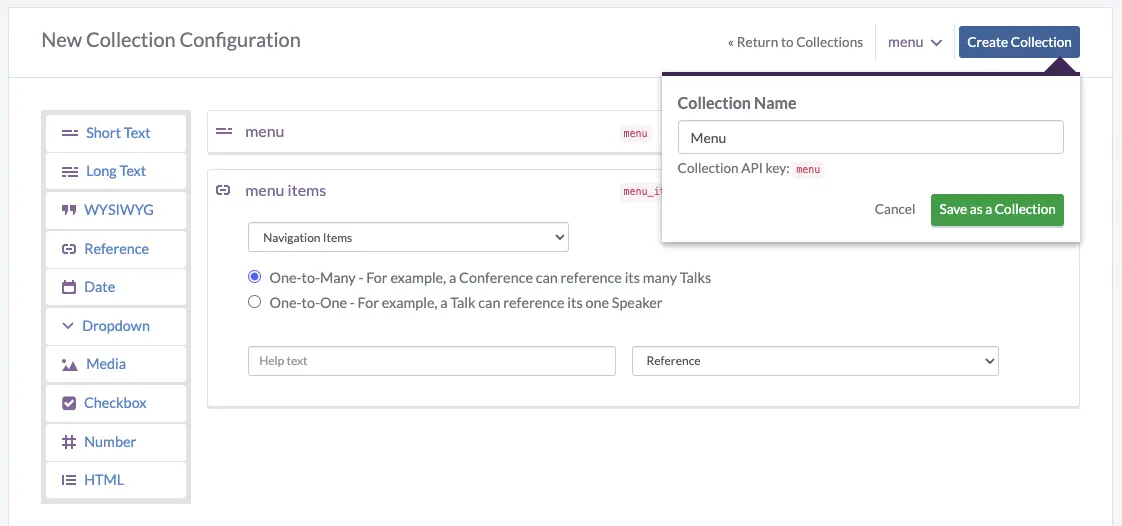
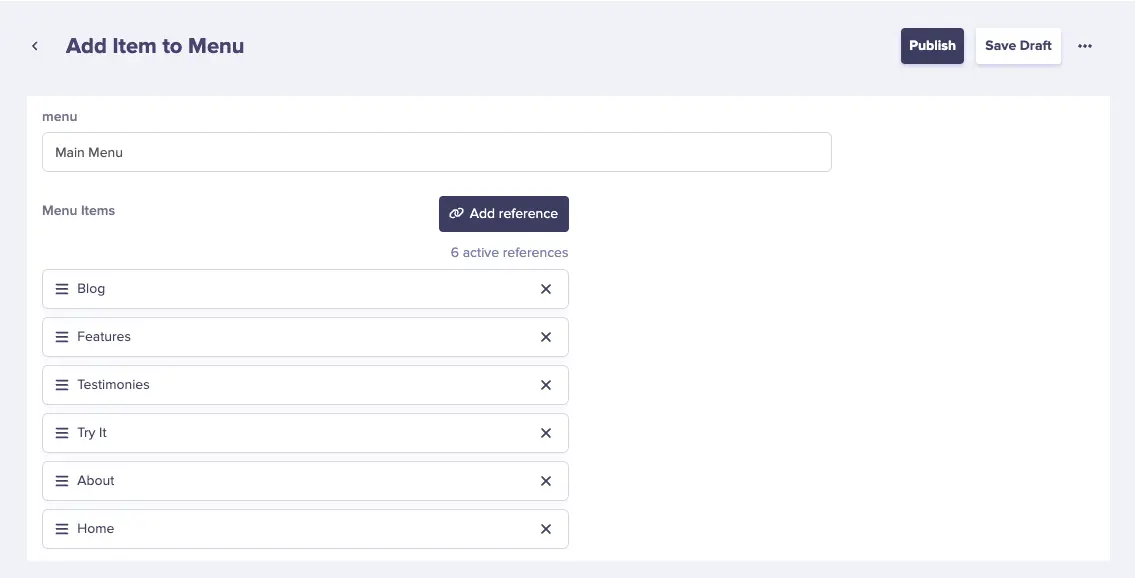
Add the Main Menu item to the Menu collection, click the Add Reference button, and select all the Navigation Items.
Click the Publish button.
Creating a Testimonials Section
Next, let’s create another collection to display testimonials on our landing page To do that, click on the Collection tab.
Then, click on the New Content Type > Collection button.

Now, enter your blog configurations: choose Short Text, Long Text, and Media for the fullname, content, image, and occupation fields. Then enter the collection name and press the Save as a Collection button.
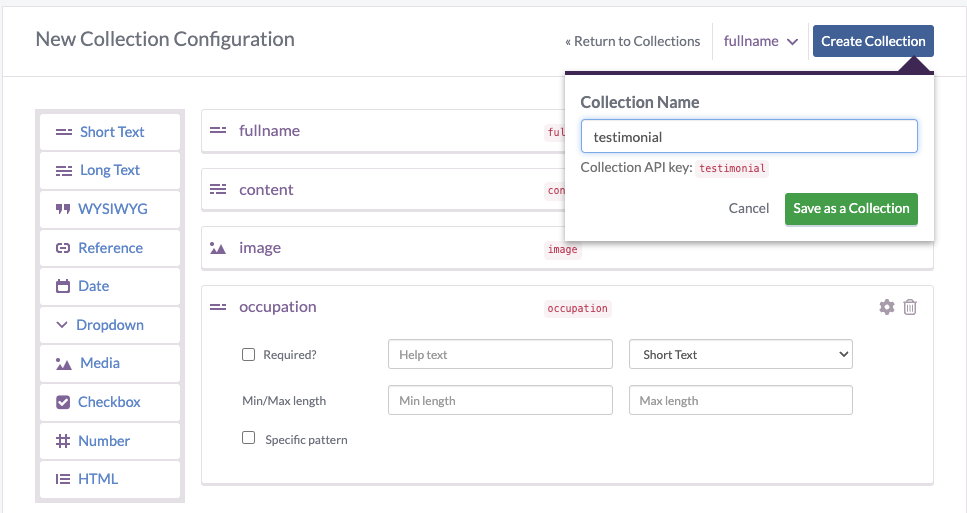
Next, add some dummy testimonials data to the collection.
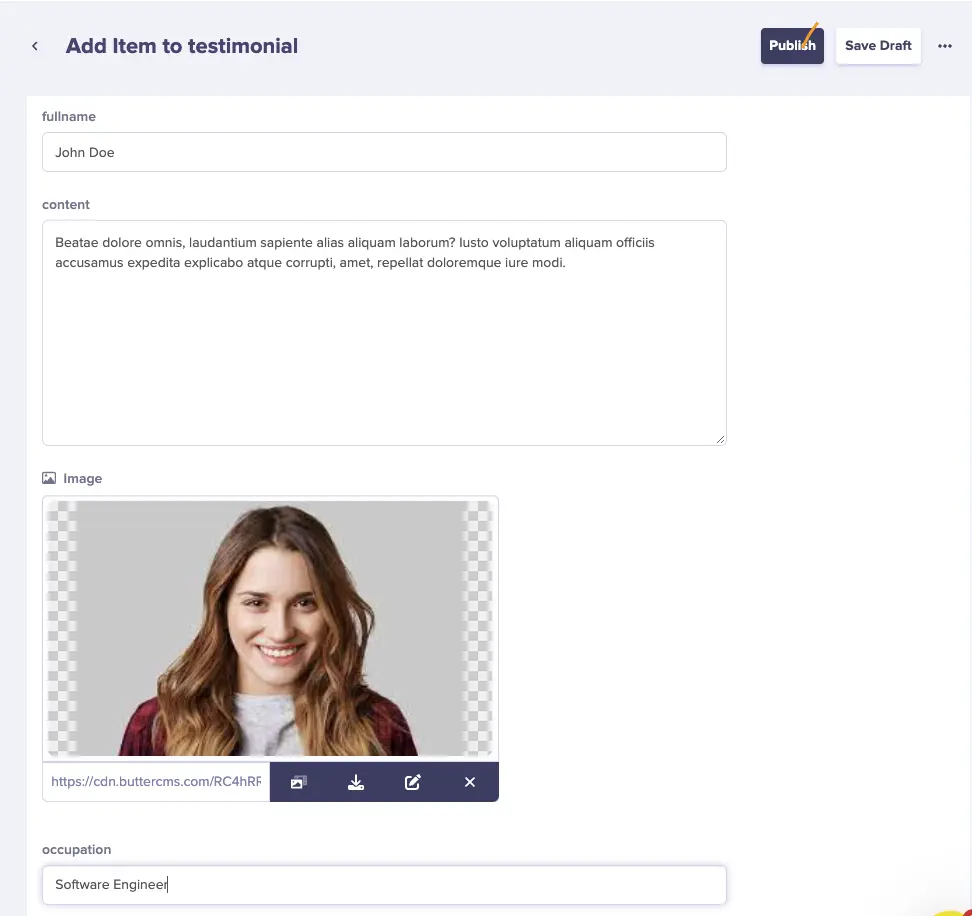
Then, click the Publish button.
Now, let’s update our route to fetch the content of our page and collections with the code snippet below.
app.get('/', async function(req, res) {
const page = await  butter.page.retrieve("*", "home-page").then(res => res.data.data);
  const menuItems = await butter.content.retrieve(['menu']).then(res=>res.data.data);
  const { testimonial } = await butter.content.retrieve(['testimonial']).then(res=>res.data.data);
  res.render('home', {
     menuItems: menuItems.menu[0],
      homepage: page.fields,
      testimonial,
  });
Then in the views/home.ejs file, render the menu items with the code snippet below:
<header class="header">
      <nav class="navbar navbar-expand-lg navbar-light bg-light">
        <div class="container-fluid">
          <a class="navbar-brand" href="#"><%= menuItems.name %></a>
          <button class="navbar-toggler" type="button" data-bs-toggle="collapse" data-bs-target="#navbarScroll" aria-controls="navbarScroll" aria-expanded="false" aria-label="Toggle navigation">
            <span class="navbar-toggler-icon"></span>
          </button>
          <div class="collapse navbar-collapse" id="navbarScroll">
            <ul class="navbar-nav me-auto my-2 my-lg-0 navbar-nav-scroll" style="--bs-scroll-height: 100px;">
              <% menuItems.menu_items.forEach(item => { %>
                <li class="nav-item">
                  <a class="nav-link" href="<%= item.url %>"> <%= item.label %></a>
                </li>
                <% }) %>
            </ul>
         </div>
        </div>
      </nav>
      <!-- navbar area -->
    </header>
After the Feature section, add the code below to display the featured blog posts:
 <section class="featured-section">
        <h4 style="margin: 9px">Testimonials</h4>
        <hr>
            <div class="container">
              <div class="row">
                <% testimonial.forEach(info => {%>
                  <div class="col-4">
                    <div class="card" style="width: 18rem">
                      <p class="card-text"><%- info.content %></p>
                      <div class="card-body">
                        <img src="<%= info.image %>" class="card-img-top" alt="...">
                        <h5 class="card-title"><%= info.fullname %></h5>
                        <h4 class="card-title" style="color:lightgray"><%= info.occupation %></h4>
                      </div>
                    </div>
                  </div>
                <% }) %>
              </div>
            </div>
          </div>
        </div>
      </section>
Use the internal styles below:
<style>
.featured-section {
background: linear-gradient(180deg, #C2FBFF 0%, rgba(255, 255, 255, 0) 93.47%);
padding:20px;
text-align: center;
}
.featured-section .card {
background-color: white;
padding:20px;
}
.featured-section .card img{
width: 100px;
height: 100px;
border-radius: 50%;
margin-top: 20px;
margin-bottom: 20px;
border: 3px solid orangered;
}
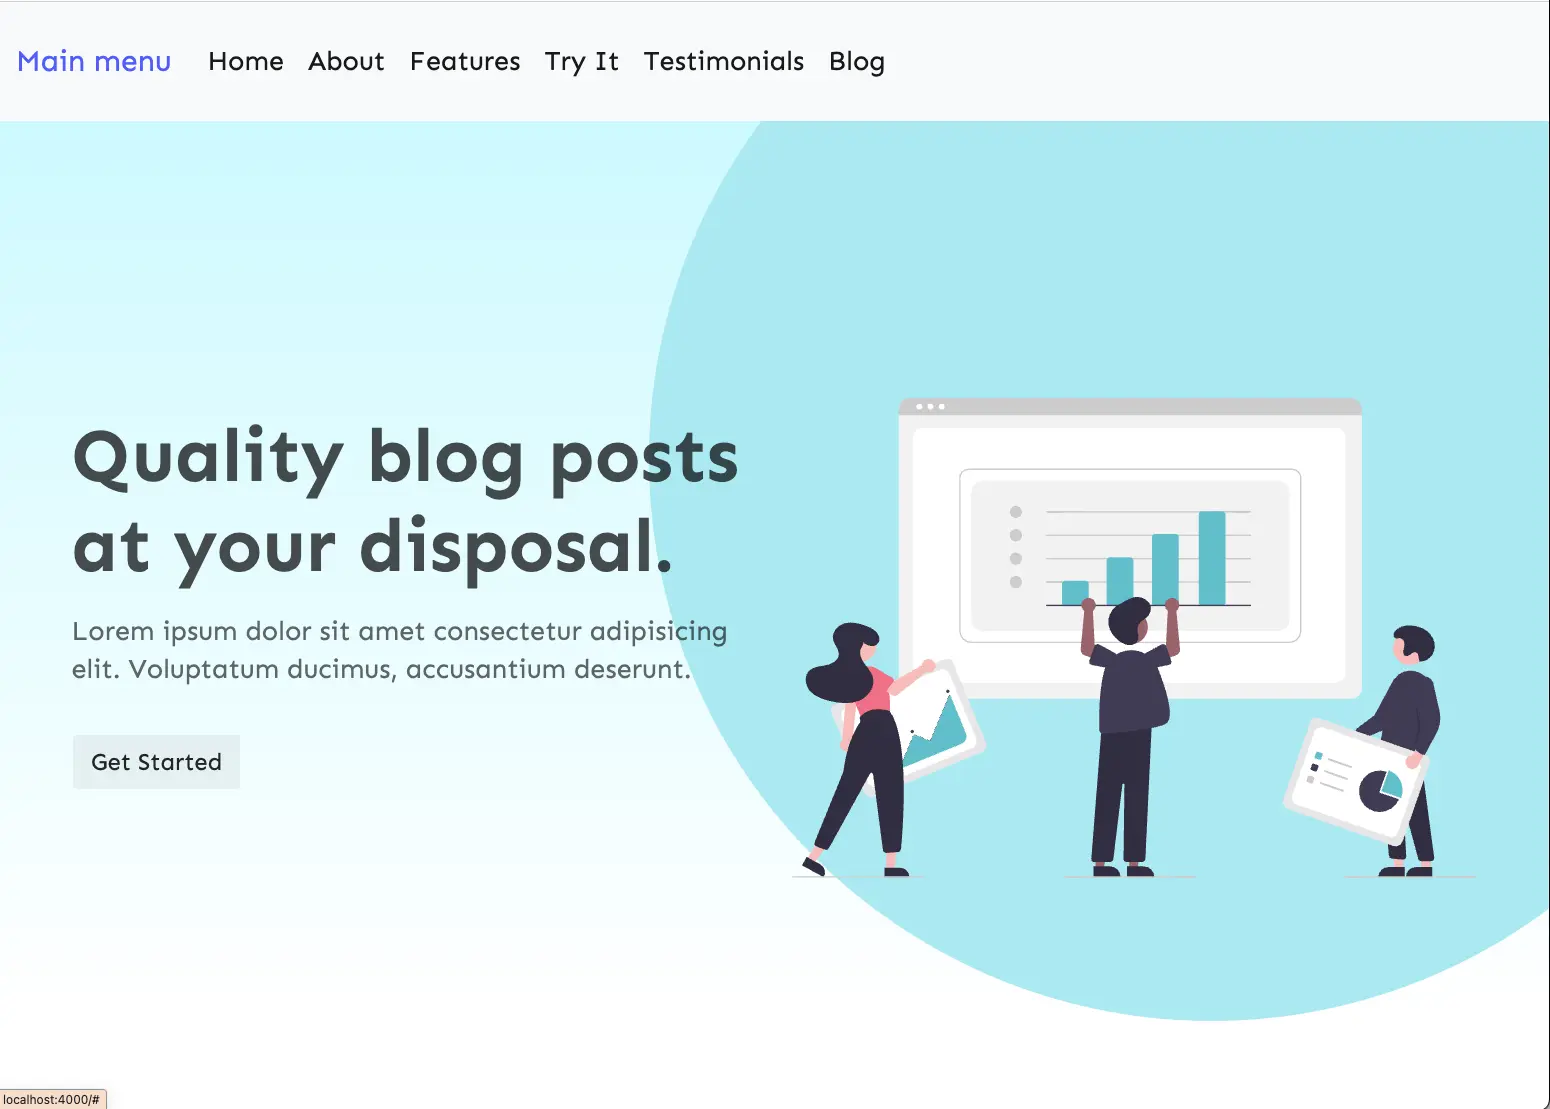
</style>Now, you will see the header with the menu items when you refresh your browser, as shown in the screenshot below:
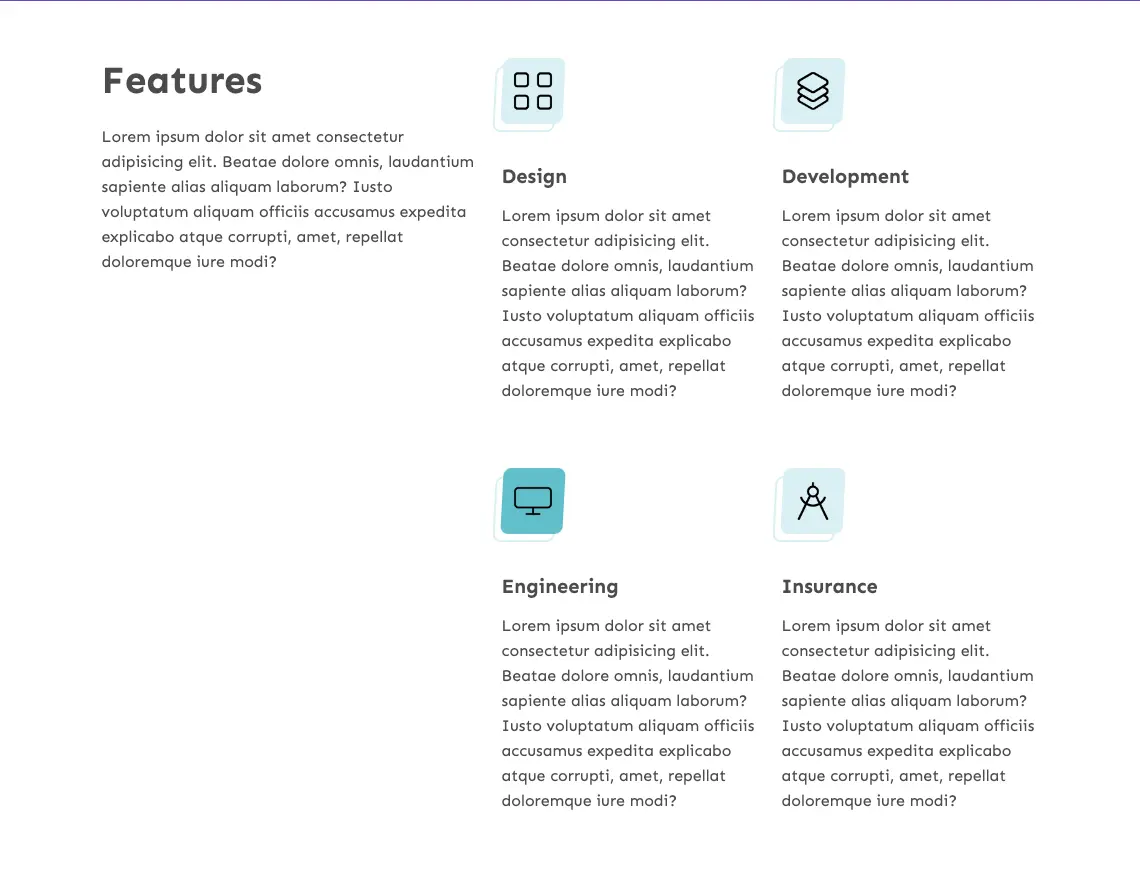
If you scroll down, you’ll see the features section of the page:
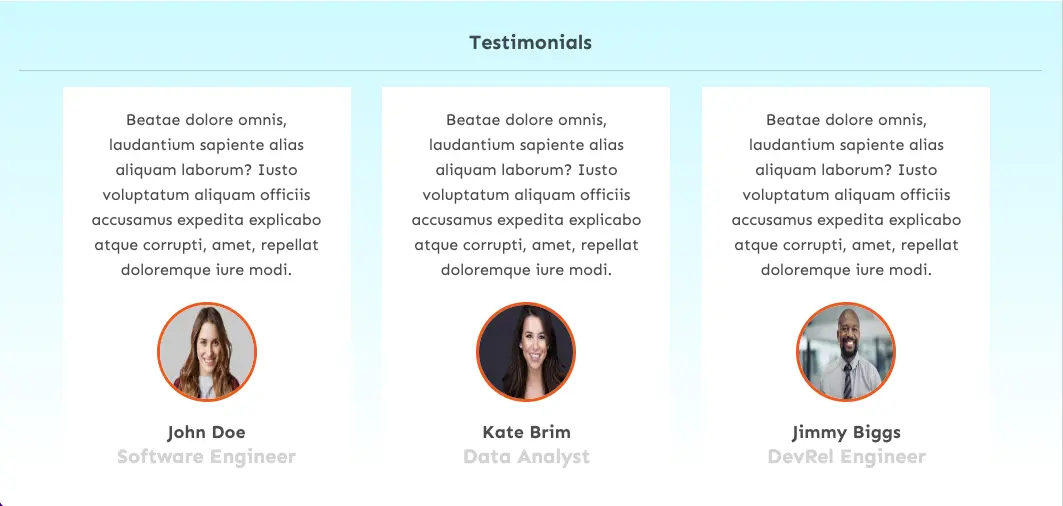
And here is the testimonials section:
Closing thoughts
This tutorial demonstrated how to use ButterCMS to add a landing page to a Node.js application. You now should have a clear understanding of what ButterCMS is and why you should use it as your primary CMS solution. If you followed along with our tutorial you've successfully utilized ButterCMS collections, components, and page-type features to create a highly customizable landing page. With this experience under your belt, the only thing left to ask is how do you use ButterCMS in your next project? I recommend you check out the ButterCMS official documentation to learn more.

