
- What is CRUD in React?
- Tools you need to build CRUD apps with React
- Tutorial prerequisites
- How to build a CRUD app with React and ButterCMS
- Setting up the back-end content structure
- Building the front-end
- Fetching data from the CMS
- Performing create operations
- Editing and deleting operations
- Examples of CRUD apps built with React
- Questions about building a React CRUD application
- Closing thoughts
Modern web applications usually make use of large data sets. This data requires a management mechanism to make it more organized and easily accessible. An example of such a mechanism is the CRUD (Create, Read, Update, and Delete) functionality. CRUD made it possible for end-users of an application to interact and manipulate data from the application, while data could also be changed from the application’s database. Using a CMS (content management system) takes this up a notch.
An example such as a headless CMS, is a content management system built to stand-alone as a back-end (body, where data is created, managed, and stored) separated from the front-end (where the content is to be formatted or displayed), i.e., they are not connected to the presentation layer. A headless CMS deals solely with the application's content. Once content has been created and published, it can be accessed via an Application Programming Interface (API). This provided flexibility and the same content may be used on many devices.
With a CMS, the user can view and change the application’s content from the visual dashboard, CRUD operations can be implemented for different devices, with all making use of the same content.
Table of contents
What is CRUD in React?
CRUD stands for Create, Read, Update and Delete. A React CRUD application refers to a React application that can perform four basic functions in data management:
- Creating data: This is an
insertoperation, and deals with creating new data in a database, or inserting new records into the database to be added to the pre-existing ones. - Reading data: The
Readoperation refers to the capability of the application to handle data fetching from the database. This operation does not alter the data stored in the database, rather it only queries the database for the required information. With this operation, a single data set (based on a search query), or multiple data sets can be fetched at a time. After fetching data, the result of this operation can then be displayed in the application. - Updating data: This operation allows a user to modify pre-existing data in a database, changing or updating its value. With this operation, single or multiple records can be updated at the same time.
- Deleting data: As the name implies, the
deleteoperation is used to remove a record from the database.
Implementing CRUD operations in an application provides the following benefits:
- CRUD operations make an application easier to develop and scale. Even as the application grows and complexity is increased, implementing CRUD is still feasible for whatever aspect of the app that requires it.
- It facilitates user interaction with a database, from the application. With it, end-users can view, create or edit records without actually having to open the database.
Tools you need to build CRUD apps with React
Building a CRUD application requires the following prerequisites to be met: knowledge of a front-end language, knowledge of a back-end language, and knowledge of database operations.
To build a CRUD application with React, the following criteria are involved:
- Knowledge of React.js and Node.js
- An installation of Node.js and React.js on the local machine
- A choice of database to handle the storage of data
CRUD apps are made up of 3 distinct parts: the front-end of the application (could be a webpage, mobile application, or on a specific device), the back-end containing the database, and, finally, a means to interface between the front and back ends: an Application Programming Interface (API).
- The front-end: This aspect deals with the user interface with which the end-users can interact with the database. It could be on the web, or in the form of an application on a specific device. For this tutorial, we will be building the front-end of our web application with the React.js framework.
- Database: This is where the data to be manipulated is stored. The end user can communicate with the database from the application and perform CRUD operations.
- API: This refers to function calls that are used to interact with the database. It serves as a link between the application and the database and informs the database on whatever CRUD operation the user wishes to perform.

Tutorial prerequisites
To follow along properly with this article, you need to meet the following criteria:
- An understanding of JavaScript and its syntax is compulsory
- Basic knowledge of the React.js framework and React hooks
- Background knowledge of APIs and their usage
- Background knowledge of the CLI and its commands
- Should have a version of Node.js installed on the local machine
How to build a CRUD app with React and ButterCMS
The image below represents the application we will be building in this article:
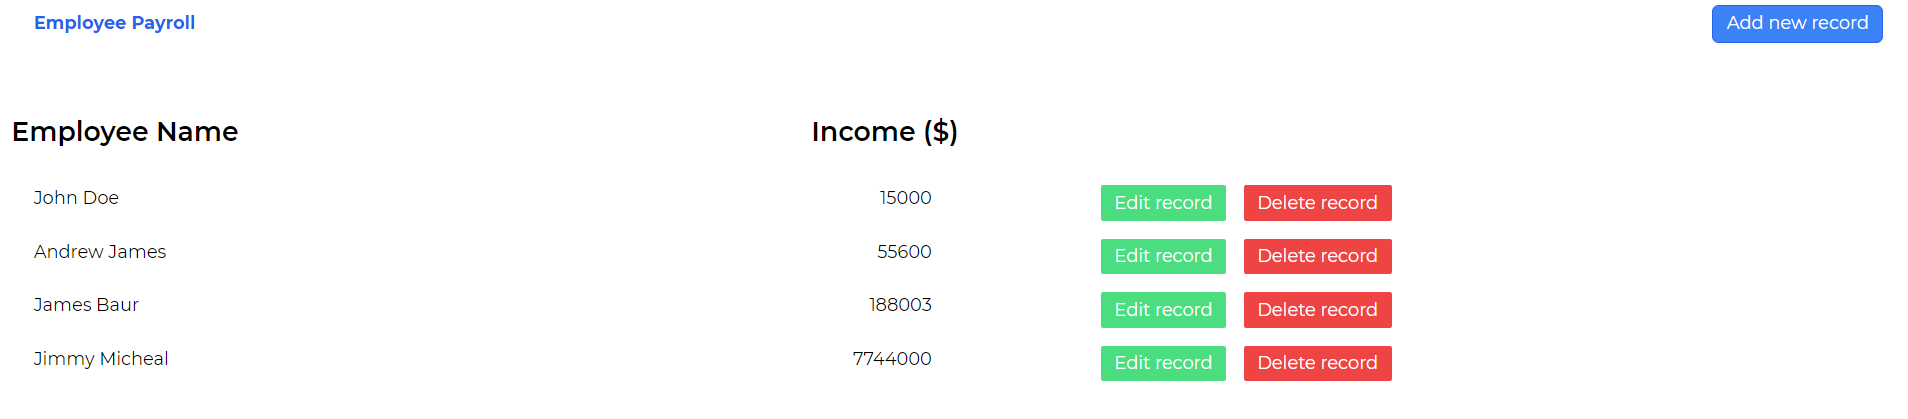
Here, we will build an employee payroll system to perform CRUD operations. In it, we will be able to perform the following functions:
- Create: New details of the employees can be added to the pre-existing records in the database. To perform this operation, we just need to click on the Add new record button, fill up the form on the modal that pops up and click on the Submit button to create the new record. The records to be created will require entries for an employee's name and an expected income to be inputted into the payroll system.
- Read: We will perform fetch operations from our contents in ButterCMS, allowing us to display the data in our React application. Here we will return all data from our CMS, and map through the returned data to render each individual record in our application. The records in the CMS are displayed in a list-style format in our application.
- Update: With this operation, the application would allow the user to modify the existing content, either changing the employee username or modifying the specified salaries. To update a specific record, click on the Edit Record icon on the record you wish to update. A modal pops up containing the pre-existing data of that record. We can modify this data (e.g., change the values of the employee name or income in our CMS) and click on the Update Record button to finalize the changes.
- Delete: Finally, we will be able to delete content from our payroll. To do this, we just need to click on the Delete Record button on the specific record we wish to delete. The corresponding record will be deleted from our CMS.
Setting up the back-end content structure
To manage our application’s data, we will set up a content structure using ButterCMS—an API-based CMS with a user-friendly interface for building and managing content—to fit applications or websites developed using any programming language. With ButterCMS, we will perform CRUD operations in our React application.
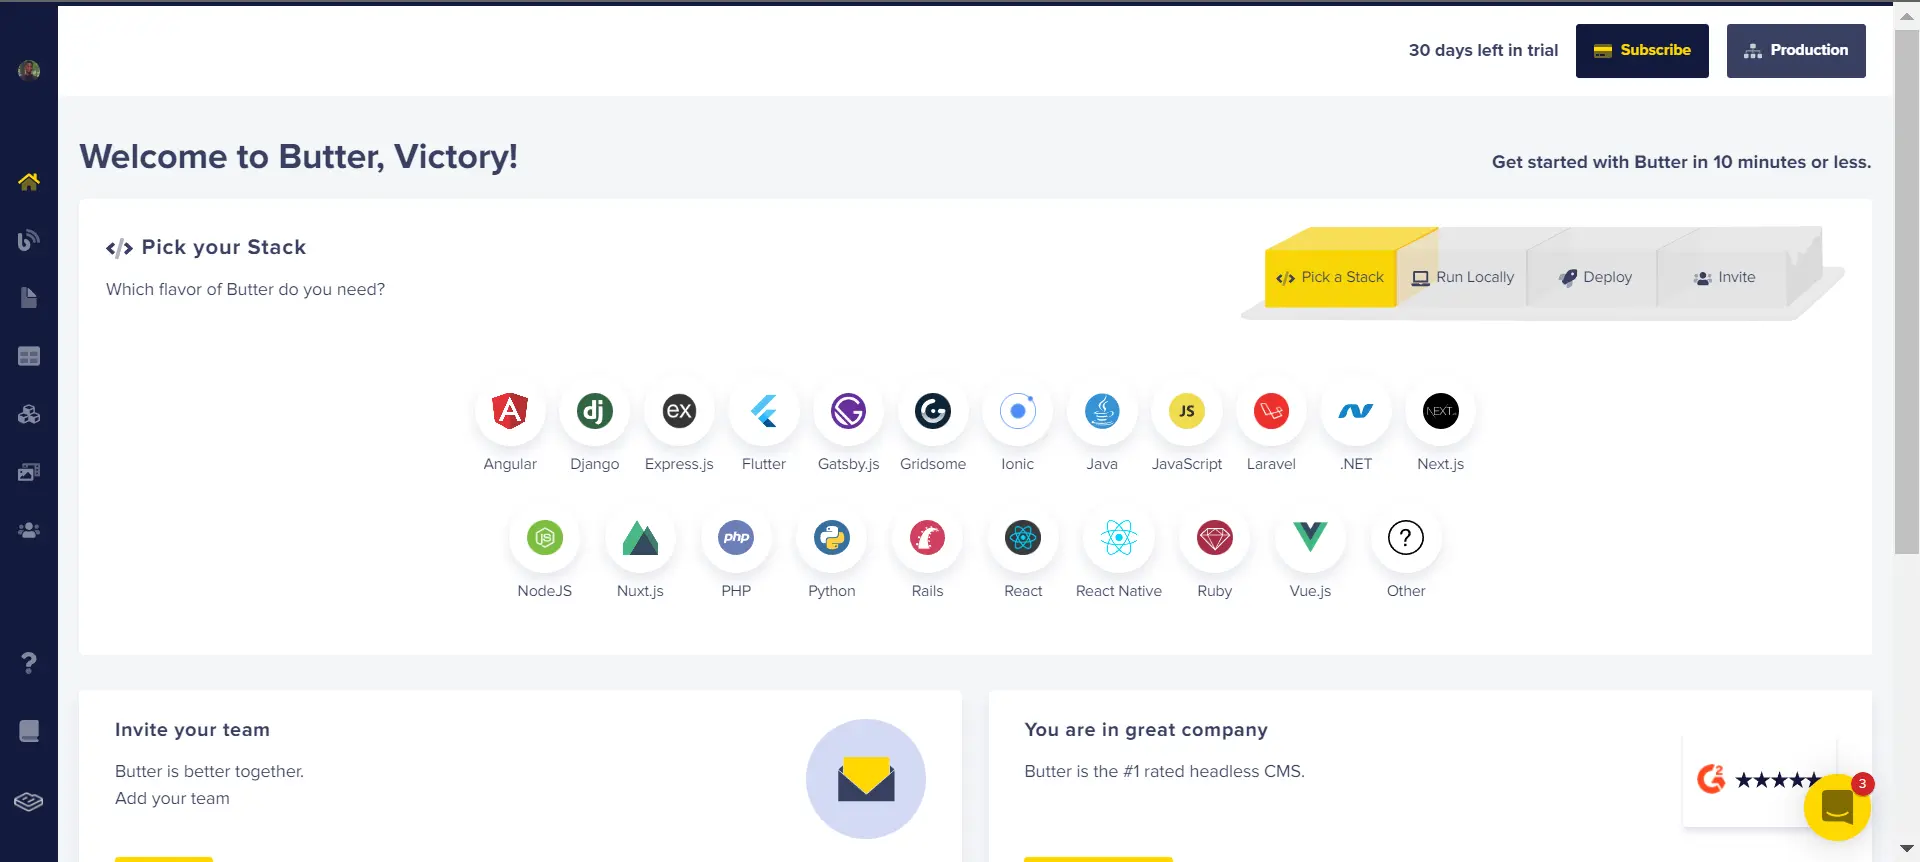
To get started with ButterCMS, you will first need to create a user account. After creating a user account, you will arrive at your user dashboard.
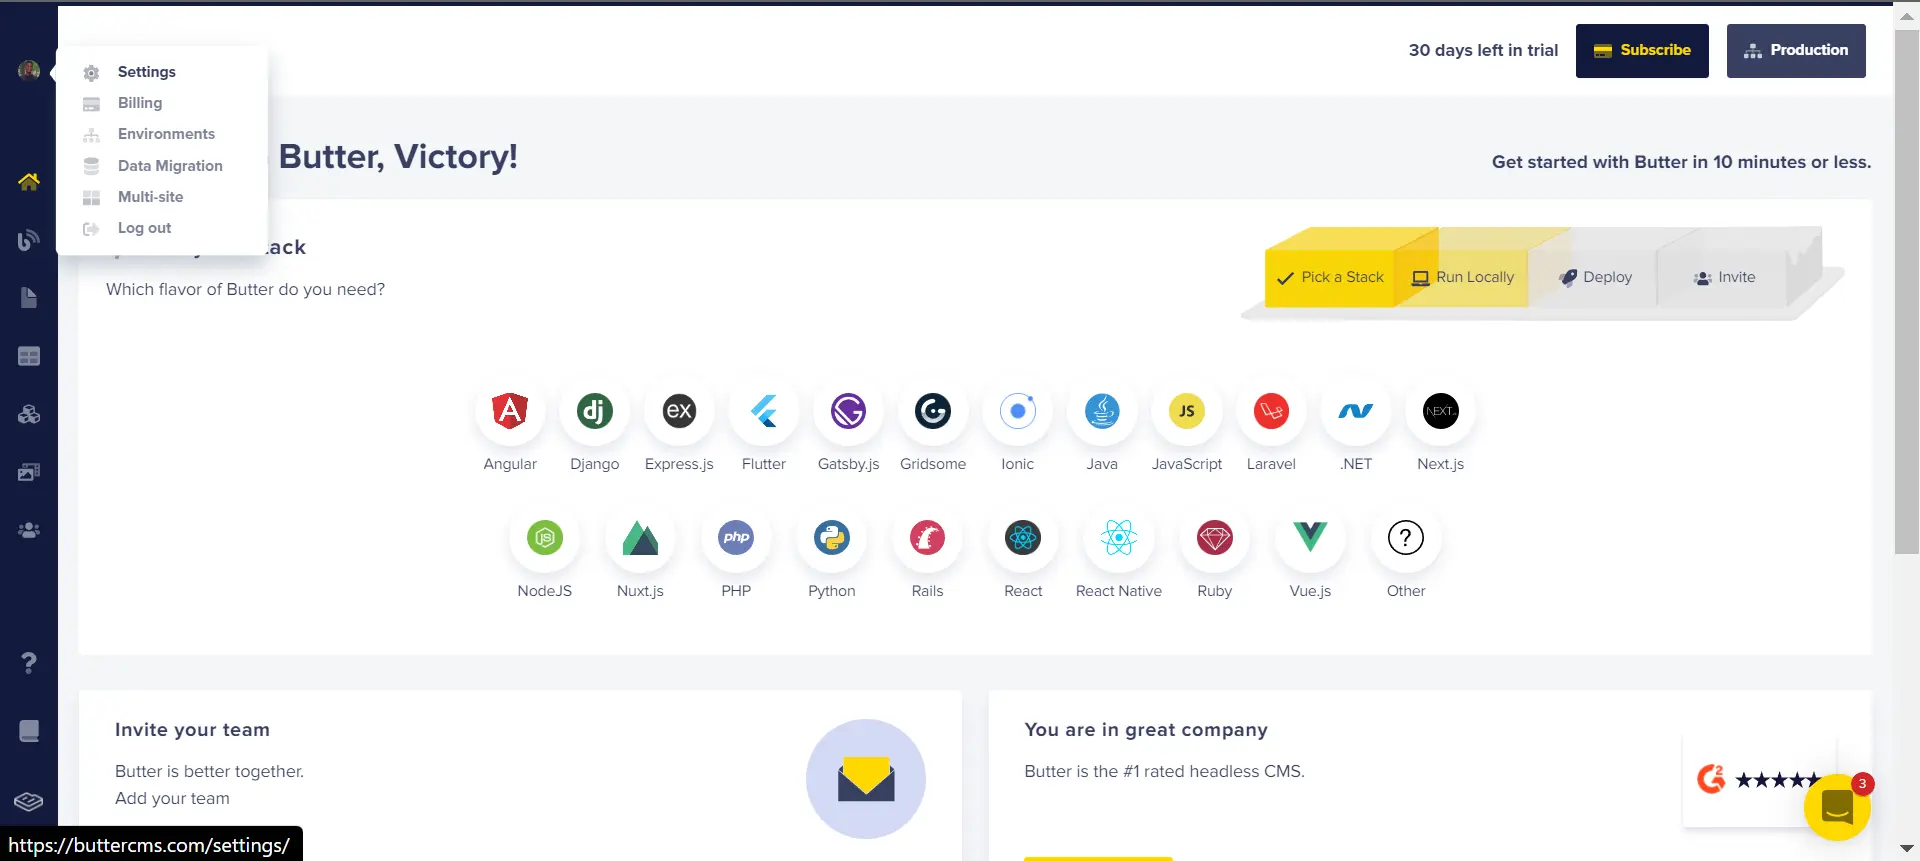
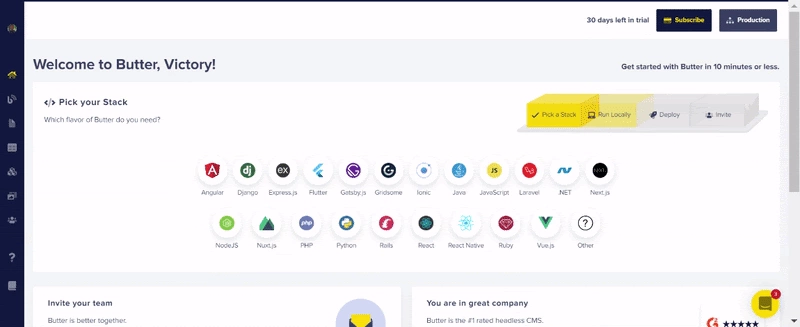
To use our CMS content, we will require an authorization token to access ButterCMS. This can be accessed via the settings window. To see the settings option, hover on the user profile image at the top of the sidebar. Copy the read and write keys as we will be using them in our application:
For our employee payroll application, we will be creating a collection in the content-type option pane to store our application’s content:
Our employee payroll content structure will contain two fields: an employee name field and an income field. For this, in the content creation window, we will add a short-text and number field, respectively, for each of the named fields.
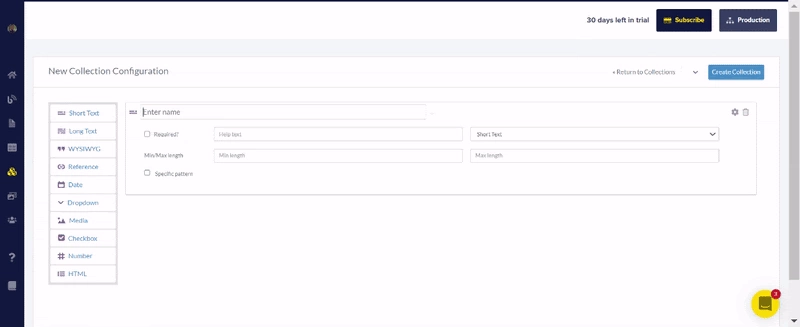
Finally, click on Create Collection, enter payroll system as the name of the collection, and save the collection to create it.
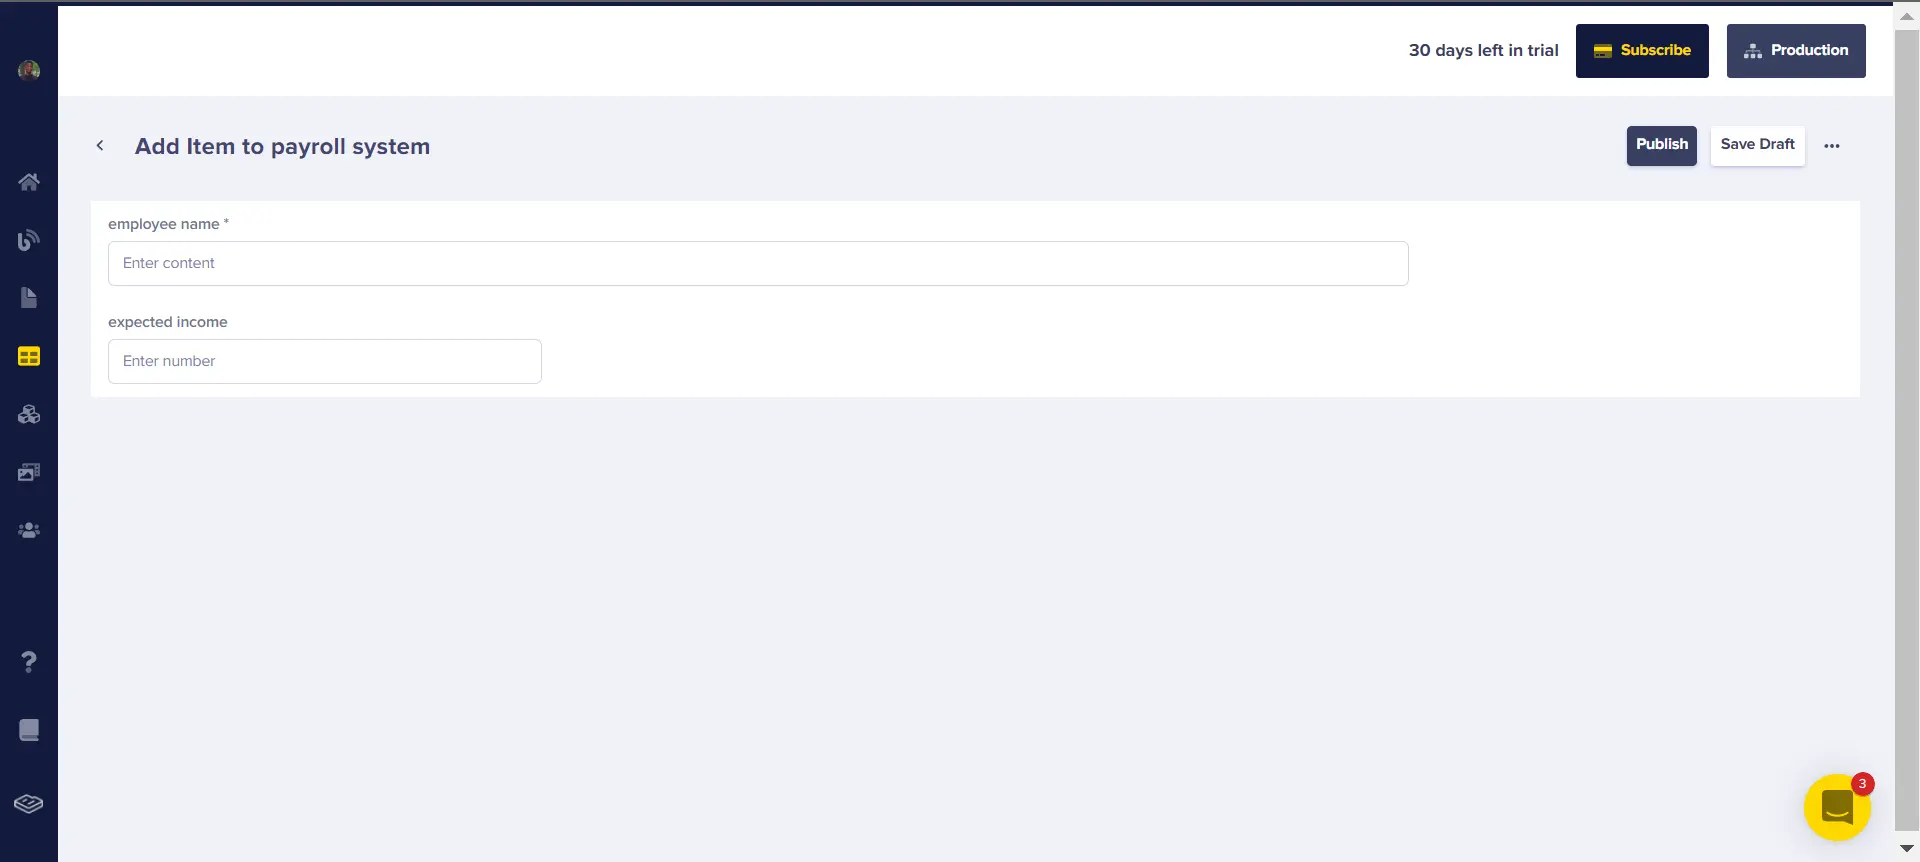
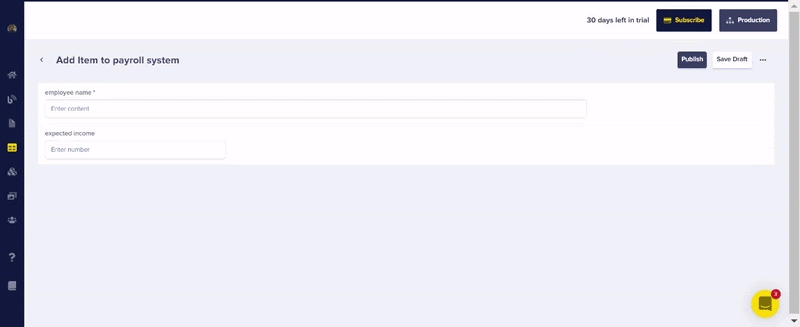
After successfully creating the payroll system collection, we get a new window where we can create a sample record for our collection. To do that, we just fill in the fields for the employee name and expected income, then click on the publish button as shown in the GIF below:
Building the front-end
Installing dependencies
For the front-end of our payroll application, we will be using the React.js framework and TailwindCSS to easily style our application. We can create a React application and install the required dependencies with the following CLI commands:
To create a React application:
npx create-react-app payroll-system
This command creates a React application called “payroll-system” in the current directory. Once the installation is complete, navigate into this directory with the cd payroll-system command and install TailwindCSS with the following bash script:
npm install -D tailwindcss postcss autoprefixer
npx tailwindcss init -p
To handle interactions between our React application and ButterCMS via API requests, we will be using Axios. We can install this as follows:
npm install axios
The next step is to enable TailwindCSS to support JSX elements. To do this, open the project folder in a code editor and modify tailwind.config.js, as shown below:
/** @type {import('tailwindcss').Config} */
module.exports = {
  content: [
    "./src/**/*.{js,jsx,ts,tsx}",
  ],
  theme: {
    extend: {},
  },
  plugins: [],
}
Finally, add the TailwindCSS class directives at the top level of index.css:
@tailwind base;
@tailwind components;
@tailwind utilities;
Building the structure of the payroll system
For our payroll application, we have a list of the CMS contents displayed on the screen (a list of employee names and their corresponding incomes). We also have a modal form to create new entries or edit pre-existing ones.
To get started, we will create a folder called components in the src directory, and within this folder we will create 3 files: Payroll.js, EmployeeList.js, and CreateModal.js. The Payroll.js component will house both the EmployeeList.js and the CreateModal.js components. In EmployeeList.js we will display the names of the employees and their respective incomes from the content stored in our CMS. We will also have a button to enter a new record, and also options to edit or delete existing records. The CreateModal.js file will contain a pop-up form for creating or editing records in our payroll records.
Firstly, in App.js, we will add an import for Payroll.js to render it:
import './App.css';
import Payroll from './components/Payroll';
function App() {
  return (
    <div>
     <Payroll/>
    </div>
  );
}
export default App;
Next, in Payroll.js we will set up the web page structure:
import { React, useState } from "react";
import EmployeeList from "./EmployeeList";
import CreateModal from "./CreateModal";

const Payroll = () => {
  const [show, setShow] = useState(false);
  return (
    <div className=" h-screen w-screen flex justify-center items-center flex-col">
      <div className=" w-full py-2 px-8 flex items-center justify-between">
        <h1 className=" text-blue-600 font-bold">Employee Payroll</h1>
        <div className=" z-40">
          <button
            className=" text-white bg-blue-500 border border-blue-600 rounded-md outline-none px-3 py-1 hover:text-blue-600 hover:bg-white"
            onClick={() => setShow(!show)}
          >
            {show? "close" : "Add new record"}
          </button>
        </div>
      </div>
      <EmployeeList />
      {show ? (
        <div className=" absolute h-full w-full backdrop-blur-md flex justify-center items-center z-10">
          <CreateModal />
        </div>
      ) : null}
    </div>
  );
};
export default Payroll;
In the code block above, we have displayed the EmployeeList and CreateModal components and added a few styles with TailwindCSS classes. Also, we only want to display the modal when the user wishes to create a new record or edit existing ones. Here, we used a useState hook to control the display of the modal window through a boolean variable. The modal will only be displayed when the boolean is true and vice versa.
In EmployeeList.js, we will add our list display for employees in our payroll system, along with the edit and create functionalities.
import React from "react";
const EmployeeList = () => {
  return (
    <div className=" h-full w-full">
      <div className=" mt-14">
        <div className=" font-semibold text-2xl flex w-1/2 justify-between pl-3 mb-8">
          <p>Employee Name</p>
          <p>Income ($)</p>
        </div>
        <div className=" pl-8 w-full flex mb-4">
          <div className=" w-1/2 flex justify-between mr-28 pr-10">
            <h2>Employee name</h2>
            <h2>Employee income</h2>
          </div>
          <span>
            <button className=" bg-green-400 text-white px-3 py-1 rounded-sm mr-4">Edit record</button>
            <button className=" bg-red-500 text-white px-3 py-1 rounded-sm">Delete record</button>
          </span>
        </div>
      </div>
    </div>
  );
};
export default EmployeeList;
The code above defines our payroll page structure. Now, if we run our application with the npm start command in the CLI and open it up in the browser, we get a result similar to the below image:

We have the Employee Name and Income sections, and buttons to edit or delete a specific record. Finally, we will create our form to edit or create new records in the CreateModal.js file:
import {React, useState, useEffect} from "react";
const CreateModal = () => {
  const [Employeename, setEmployeename] = useState("");
  const [Employeeincome, setEmployeeincome] = useState("");
  return (
    <div className=" h-1/2 w-3/4 bg-slate-100 shadow-lg pt-4 flex items-center flex-col">
      <p className=" text-center text-blue-500 text-2xl font-bold mb-10">
        Create new record
      </p>
      <div className="flex justify-center items-center w-4/5 flex-col gap-8">
        <input
          className="w-full border-2 border-blue-500 p-2"
          type="text"
          placeholder="Employee Name"
          value={Employeename}
          onChange={(e) => setEmployeename(e.target.value)}
        />
        <input
          className="w-full border-2 border-blue-500 p-2"
          type="number"
          placeholder="Employee Income ($)"
          value={Employeeincome}
          onChange={(e) => setEmployeeincome(e.target.value)}
        />
      </div>
      <div className=" w-4/5 flex justify-end mt-8">
        <button className=" bg-blue-500 text-white px-3 py-1 rounded-sm">
          Create Record
        </button>
      </div>
    </div>
  );
};
export default CreateModal;
In the code above, we created our form with two input fields and a button to submit the input values. We also handled the input change events with two state variables.
Fetching data from the CMS
To connect our CMS to our application, we will require two tokens which can be retrieved from the Settings tab of our CMS dashboard. A read token to perform fetch operations, and a write token to modify content in our CMS.
copy these two keys and store them in a .env file within your project root directory:
REACT_APP_READ_TOKEN = your read token here
REACT_APP_WRITE_TOKEN = your write token here
To handle all API calls we will make for our CRUD functionalities, we will create a file Api.js in the src directory and add the following code to it:
import React from "react";
import axios from "axios";

const read_token = process.env.REACT_APP_READ_TOKEN;
const write_token = process.env.REACT_APP_WRITE_TOKEN;

export const HandleFetch = async () => {
  const url = `https://api.buttercms.com/v2/content/payroll_system/?auth_token=${read_token}`;
  return axios.get(url).then((res) => {
    return res.data.data.payroll_system;
  });
};
Here, we have an asynchronous function, HandleFetch, which performs a GET request using Axios to request data from our ButterCMS payroll system collection. We can import this function into EmployeeList.js and render our data as shown below:
import { React, useState, useEffect } from "react";
import { HandleFetch } from "../Api";

const EmployeeList = () => {
  const [list, setList] = useState([]);
  useEffect(() => {
    const getList = async () => {
      try {
        await HandleFetch().then((data) => {
          setList(data);
        })
      } catch (err) {
        console.log(err);
      }
    };
    getList();
  }, []);
We added an import for the HandleFetch function, and we are storing the data from the API request in the state setList. Next, we will modify EmployeeList.js to map through the list and return our data:
//...
<div className=" font-semibold text-2xl flex w-1/2 justify-between pl-3 mb-8">
          <p>Employee Name</p>
          <p>Income ($)</p>
        </div>
        {list &&
          list.map((item) => {
            return (
              <div className=" pl-8 w-full flex mb-4">
                <div className=" w-1/2 flex justify-between mr-28 pr-10">
                  <h2>{item.employee_name}</h2>
                  <h2>{item.expected_income}</h2>
                </div>
                <span>
                  <button className=" bg-green-400 text-white px-3 py-1 rounded-sm mr-4">
                    Edit record
                  </button>
                  <button className=" bg-red-500 text-white px-3 py-1 rounded-sm">
                    Delete record
                  </button>
                </span>
              </div>
            );
          })}
In the code block above, we mapped through the list state, and for each individual item in the array, we returned the employee name and the expected income fields data. In our application, we now get a result similar to the below image:

With this, we can READ and display data from the CMS in our application. Next, we will implement the Create functionality to add new records.
Performing create operations
For our application’s Create functionality, we will create a new function called HandleCreate in our Api.js file:
export const HandleCreate = async (name, income) => {
  try {
    return axios
      .post(
        "https://api.buttercms.com/v2/content/",
        {
          key: "payroll_system",
          status: "published",
          fields: [
            {
              employee_name: name,
              expected_income: income,
            },
          ],
        },
        {
          headers: {
            Authorization: `Token ${write_token}`,
            "Content-Type": "application/json",
          },
        }
      )
      .then((json) => {
        return json.data;
      });
  } catch (err) {
    console.log(err);
  }
};
In the code above, we defined a post request to create new content in the payroll system collection. The data for the employee name and expected income fields will be retrieved from the arguments passed when calling the HandleCreate function. Next, we will edit our Create Modal component to call the HandleCreate function when the user wishes to create a new record:
import { HandleCreate } from "../Api";
//...
<button className=" bg-blue-500 text-white px-3 py-1 rounded-sm" onClick={
  () => {
    HandleCreate(Employeename, Employeeincome);
    setEmployeeincome("");
    setEmployeename("");
  }
}>
  Create Record
</button>
Here, we added an import for the HandleCreate function to CreateModal.js and added a function call in the onClick event handler or our Create Record button. The arguments passed to the function (Employeename and Employeeincome) are the values of our input fields. With this in place, we can add new content to our Payroll system collection using our form.
Editing and deleting operations
To handle Edit and Delete operations, we will need to reference the specific record we wish to alter by its id. For this, we will create two new functions in Api.js:
export const HandleUpdate = async (id, name, income) => {
  try {
    return axios
      .put(
        `https://api.buttercms.com/v2/content/payroll_system/${id}`,
        {
          status: "published",
          fields: [
            {
              employee_name: name,
              expected_income: income,
            },
          ],
        },
        {
          headers: {
            Authorization: `Token ${write_token}`,
            "Content-Type": "application/json",
          },
        }
      )
      .then((json) => {
        return json.data;
      });
  } catch (err) {
    console.log(err);
  }
}

export const HandleDelete = async (id) => {
  try {
    return axios
      .delete(`https://api.buttercms.com/v2/content/payroll_system/${id}`, {
        headers: {
          Authorization: `Token ${write_token}`,
          "Content-Type": "application/json",
        },
      })
      .then((json) => {
        return json.data;
      });
  } catch (err) {
    console.log(err);
  }
}
To update existing content, we will need to pass the data from the EmployeeList component to the CreateModal component upon click of the Edit record button. First, we will create a state to handle this and pass it to the EmploymentList component in Payroll.js:
//...
const [edit, getEdit] = useState([]);
  const setVisibility =(dat, editable)=>{
    setShow(dat)
    getEdit(editable)
  }
//...
<EmployeeList toggle={setVisibility}/>
We will store the content of the record we wish to edit in the edit state and also toggle the visibility of the CreateModal component whenever the Edit record button is clicked on. In EmploymentList.js, we can pass the required content to the toggle prop as follows:
const EmployeeList = ({ toggle }) => {
  let editmode = false;
//...
<button
  className=" bg-green-400 text-white px-3 py-1 rounded-sm mr-4"
  onClick={() => {
    toggle(!editmode, [item.meta.id, item.employee_name, item.expected_income]);
    editmode = true;
  }}
>
  Edit record
</button>
In the code above, we passed two arguments to the toggle component: editmode to toggle the visibility of the CreateModal component and an array of the id, employeename, and income of the selected record.
For the final step, we just need to pass this data to our CreateModal component and populate our input fields with it to allow edits. We can do this in our Payroll.js file:
<CreateModal editfile={edit}/>
Then, in CreateModal.js:
const CreateModal = ({editfile}) => {
//...
 useEffect(() => {
    if (editfile.length > 0) {
      setEmployeename(editfile[1]);
      setEmployeeincome(editfile[2]);
    }
  }, [editfile]);
We set the value of our state to the data from the record to be edited if editfile is valid. Also, we added editfile as our callback, so whenever editfile is modified, the useEffect block is executed afresh.
To make the Update request, we will import the HandleUpdate function from Api.js and add a function call for it in the onClick event handler of our button, while also passing the id, employee name, and income as arguments.
import { HandleCreate, HandleUpdate } from "../Api";
//...
<div className=" w-4/5 flex justify-end mt-8">
  <button
    className=" bg-blue-500 text-white px-3 py-1 rounded-sm"
    onClick={() => {
      HandleCreate(Employeename, Employeeincome);
      setEmployeeincome("");
      setEmployeename("");
    }}
  >
    Create Record
  </button>
  <button
    className=" bg-blue-500 text-white px-3 py-1 rounded-sm ml-4"
    onClick={() => {
      HandleUpdate(editfile[0], Employeename, Employeeincome);
      setEmployeeincome("");
      setEmployeename("");
    }}
  >
    Update Record
  </button>
</div>
To handle delete requests, in EmploymentList.js we will import the HandleDelete function from Api.js and call it in the Delete button’s onClick handler:
Examples of CRUD apps built with React
Some examples of CRUD applications that can be built with React.js include:
- Student record management applications
- Food ordering applications
- E-commerce apps
- E-learning apps
- To-do applications, etc.
A variety of end-user applications can be built using CRUD operations, as CRUD makes it possible for users to interact with an application. It’s one of the most crucial aspects of full-stack apps, and can’t really be omitted whenever user interaction is key to the operations of an application.
Questions about building a React CRUD app
What’s the fastest way to implement a React.js CRUD?
Answer: If you are looking to build the front-end of your application with the React framework, and you are also knowledgeable in a back-end programming language, you can set up your back-end and choose a database that works for you to develop your CRUD application. An example of this is using the MERN stack. But, if you are looking to quickly develop a CRUD application without having to go over the rigors of developing a back-end, using a CMS will be the best choice for you.
A CMS lets you define the structure of your CRUD app’s content, allows you to build your front-end freely, and can easily be implemented to perform all CRUD operations through simple API calls. With a CMS, you can also view and modify your application’s content from the CMS’s dashboard.
How long does it take to build and deploy a basic CRUD React app?
Answer: The time frame for building and deploying a basic CRUD application could range from a few minutes for a simple CRUD app, to a few hours for CRUD applications that are large-scale and will require CRUD operations implemented at numerous sections of the application, such as an e-commerce application.
Closing thoughts
In this article, we learned the basics of CRUD operations and how we can perform them on React using the headless ButterCMS. We built a payroll system to illustrate these functionalities while using React as our front-end framework. CRUD operations are particularly beneficial for end-user applications as they give the user the ability to interact with the application, e.g., creating and modifying data pertaining to them. End-users rely heavily on CRUD to perform different tasks such as registering for software or a website, creating a personal collection of saved items in a store, or ordering goods or services from an app. With CRUD operations a vast amount of applications can be built. What application or project would you like to build with CRUD today? Your options are limitless.
To access the full source code used in this article, check this GitHub repository.