Delivering the best user experience to visitors is the most important thing for a website. You need to fiddle with the content to find the best user experience for your website. However, when you change the content of your website, there is a chance that something might go wrong. To solve this issue, you need to perform visual testing whenever you modify your website’s content.
In this article, you will learn about how you can use Storybook along with ButterCMS to test your website visually before deploying changes. We will start by understanding the various issues with visual testing using mock data. Then, we will discuss how to resolve those issues using Storybook and ButterCMS components.
The source code for the application that you will build as a part of this article is hosted on GitHub.
In the past, user interface testing was done mostly via automation. Selenium was used mostly for automating the browser operations and code was written to test the interface.
Testing all the complex procedures manually was also a prevalent form of testing. This type of testing is still done but can be error-prone. This is mostly because testing complex interactions is an intensive task and with the rise of multiple browsers (like Chrome, Firefox, Edge, Safari, and more), this task has become even more difficult.
In certain companies, both manual and automated forms of user interface testing were not uncommon.
Visual testing helps you test and remove bugs in your user interface before you ship it to your customers. Visual testing is different from functional testing as it checks for inconsistencies across all elements that are shown on the browser.
Although Chrome has the largest share of all browsers, visual testing needs to be done for other browsers like Safari, Firefox, Edge, etc. Depending on your product, the number of supported browsers might differ. But, you need to ensure that the user interface of your product is free from inconsistencies across all these browsers.
Visual testing will help you resolve this issue because you can test your application before shipping the new changes.
For any user interface, it is important that you test the changes before deploying. There is a chance that there can be a spelling mistake or layout mismatch. All these issues can be caught beforehand if visual testing is done.
It is possible to test for these changes using mock data. But it might not clearly visualize how the website will look like. Mock data is the data that is hard-coded to your application.
Now, if the data for your website comes from an API via a headless CMS, you won’t be able to visualize how your website will look until it has shipped. This can cause potential issues as you are unable to test the new changes. Storybook is a tool that can help you visualize the new changes before you ship them.
Storybook is an open-source developer tool that lets you test your user interface components and pages separately. The testing can also be done in isolation so that you can check individual components.
We will be using Storybook to render our components and test them. We will build a landing page that will fetch data from the ButterCMS API. The content which will be saved in ButterCMS will be visible in the components rendered inside Storybook.
We will be using Vite to create a new React project. You can use the following command in your terminal to create a new React project:
yarn create vite react-storybook --template react
Next, go inside the directory and install the necessary dependencies using the following command:
cd react-storybook && yarn install
Next, you need to install the Storybook package using the following command:
npx sb init
The above command will install all the dependencies that Storybook requires.
You can check out the Storybook documentation in case you need any additional information.
Next, you can run the Storybook application for your project using the following command:
<span style="font-weight: 400;">yarn storybook</span></code><span style="font-weight: 400;"></span></pre>
<p><span style="font-weight: 400;">The above command will start Storybook on <a href="http://localhost:6006" rel="follow noopener" target="_blank">http://localhost:6006</a>. You should be able to view the following screen:</span></p>
<p><strong><img src="https://cdn.buttercms.com/4kmEdsE0RiaRnw916jVx" alt="Welcome to Storybook page" width="902" height="564" style="display: block; margin-left: auto; margin-right: auto;"></strong></p>
<h3 id="install-and-configure-packages-for-storybook">Install and configure the necessary packages for Storybook</h3>
<p><span style="font-weight: 400;">To fetch data inside Storybook, we will use the <a href="https://www.npmjs.com/package/storybook-addon-headless" rel="follow noopener" target="_blank">storybook-addon-headless</a> package. So, let’s install that by using the following command:</span></p>
<pre><span style="font-weight: 400;"><code>yarn add storybook-addon-headless -D</code></span></pre>
<p><span style="font-weight: 400;">Next, you need to configure Storybook by adding the new package in the .storybook/main.js file:</span></p>
<pre class="language-javascript"><code>// .storybook/main.js
module.exports = {
....
addons: [
// Other addons
"storybook-addon-headless",
],
....
};Next, let’s integrate our React application with ButterCMS. We will use the ButterCMS API to fetch data.
You will need to create an account on ButterCMS. If you don’t have an account, sign up for a free account.
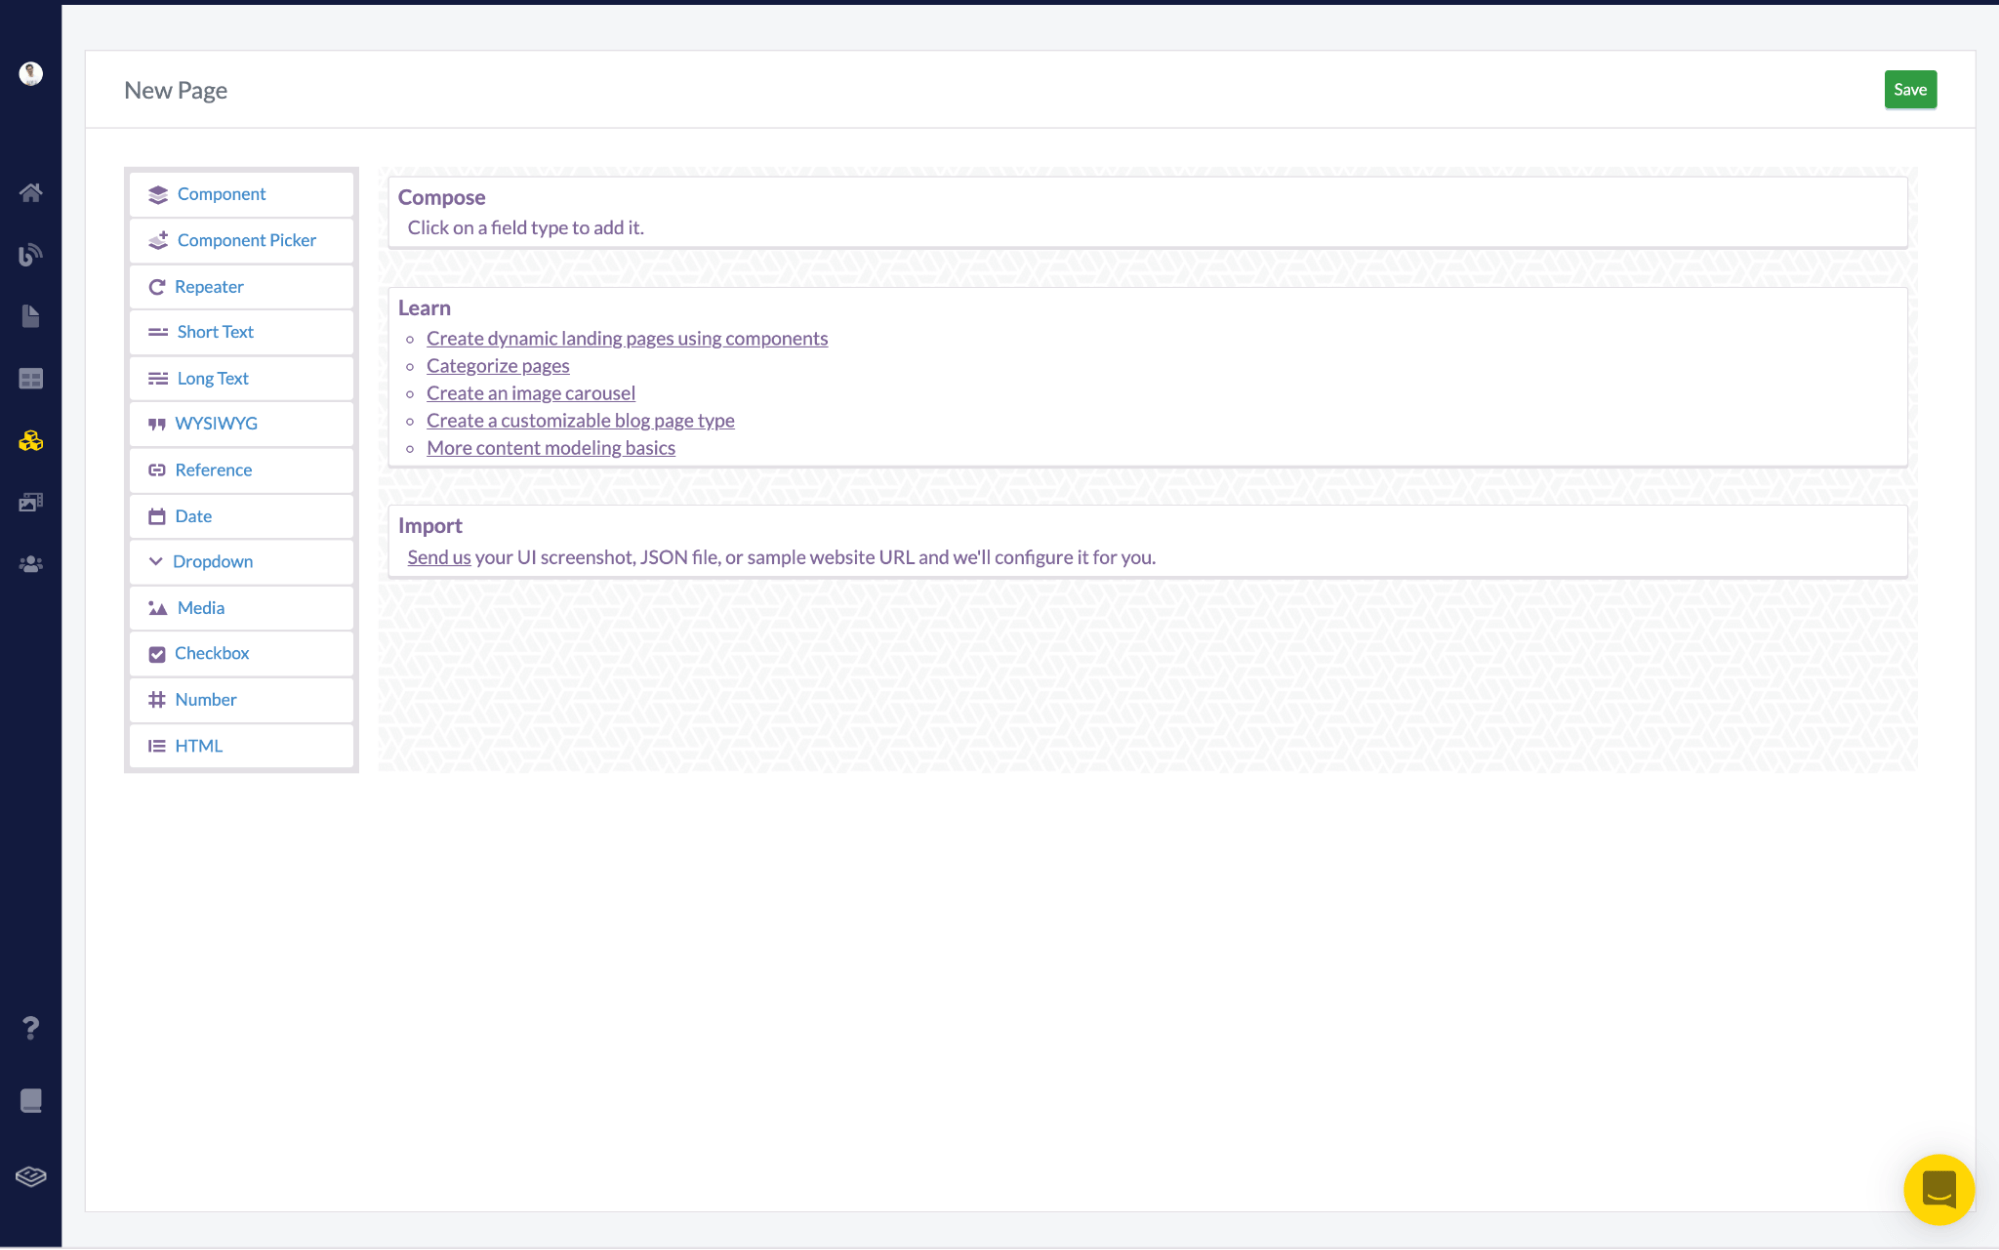
Once you log into your ButterCMS account, you can create a new page via the “Pages” menu on the sidebar. The “New Page” should look like the following:
Let’s add a few ButterCMS components to this blank page. To do that, click on the “Component” tab in the sidebar.
You should be able to view something like the following on the page:
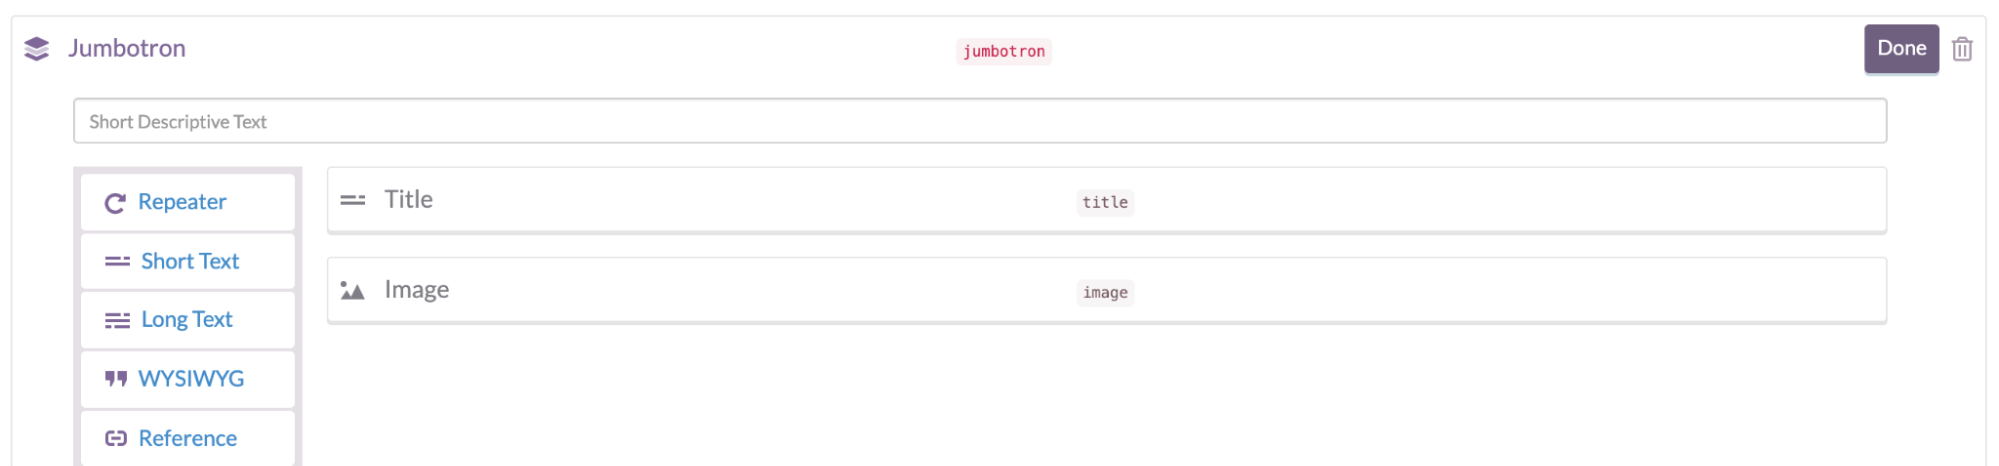
Next, click on the “Create Component” button and add a “Short Text” and “Media” to the component. Let’s name the component “Jumbotron” and click on the “Done” button.
The component should look like the following:
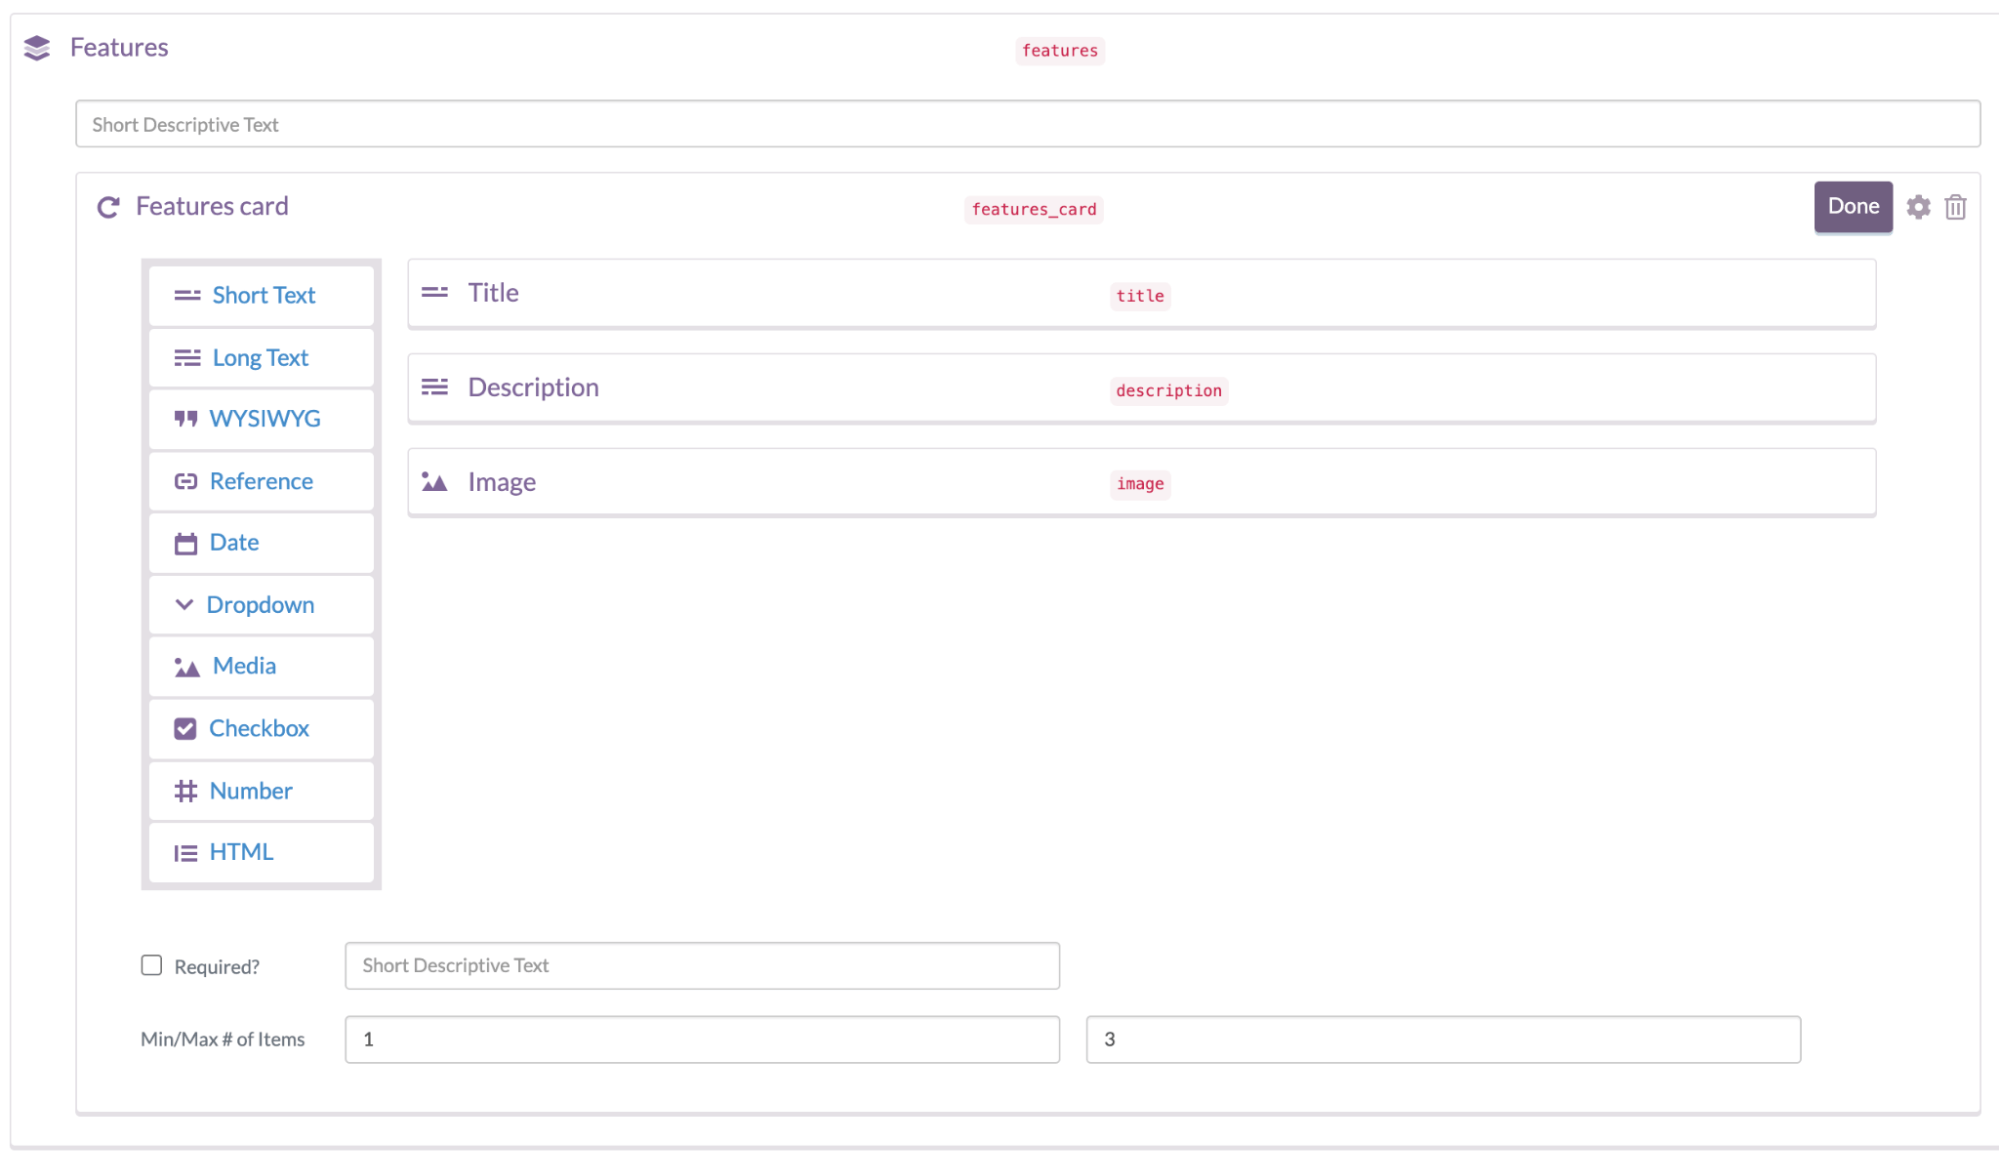
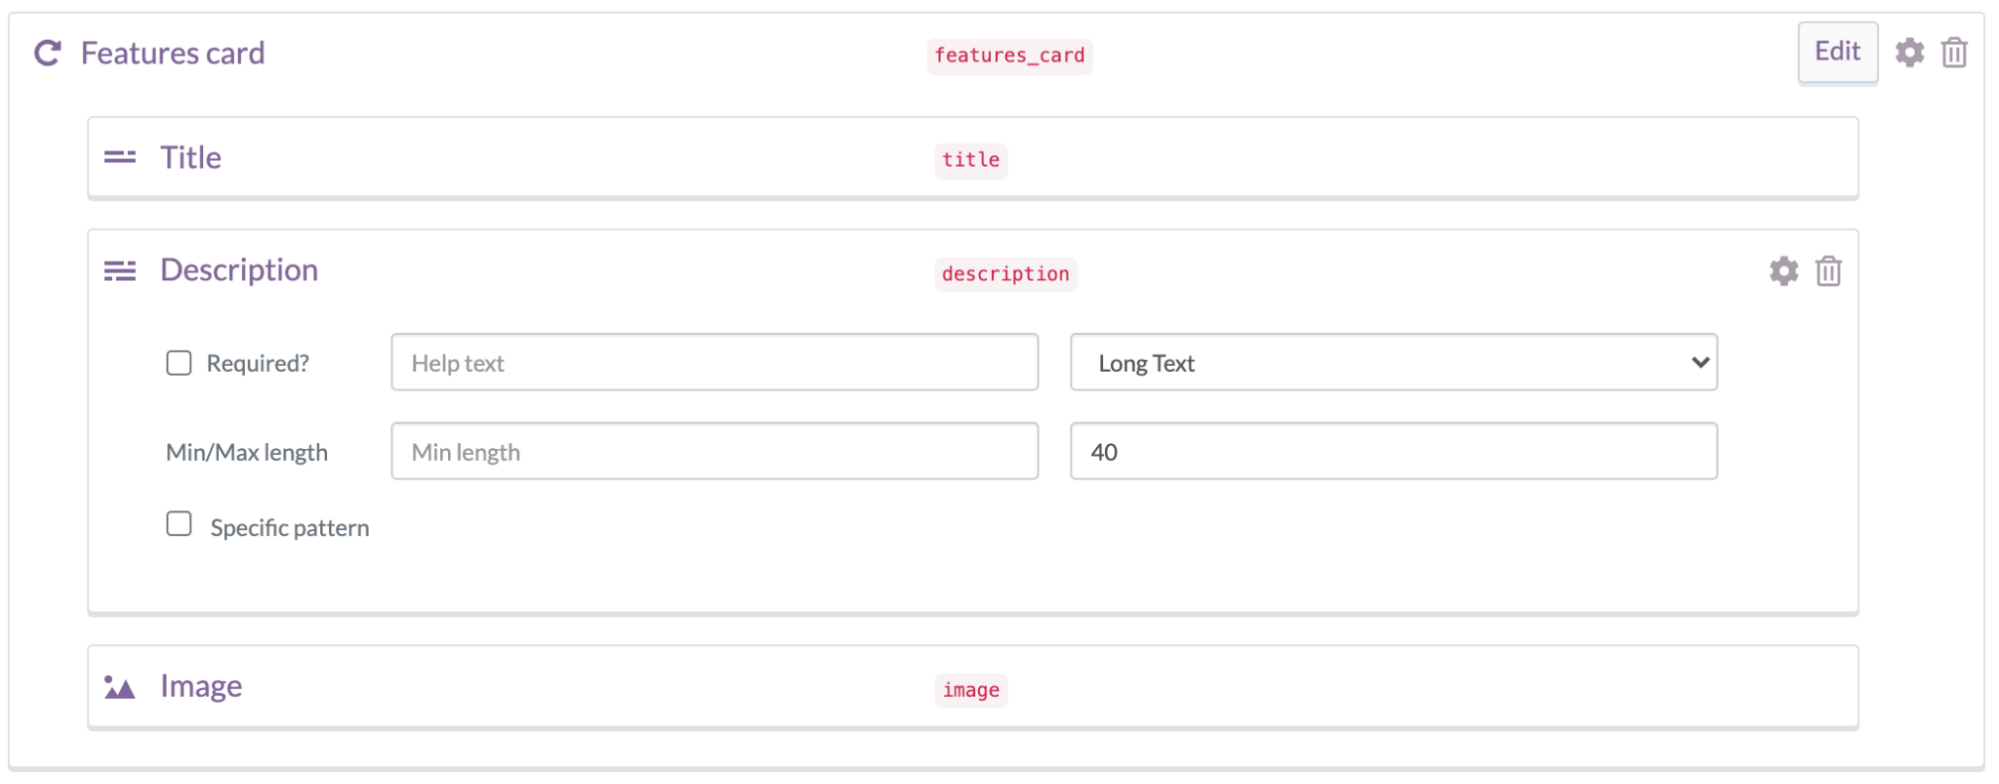
Similarly, add another component and name it “Features”. This component will have a repeater field and we can name it “Features card”. Set the minimum fields to one and maximum fields to three. The repeater will have the “Title” (Short Text), “Description” (Long Text), and “Image” (Media) fields. It should look like the following:
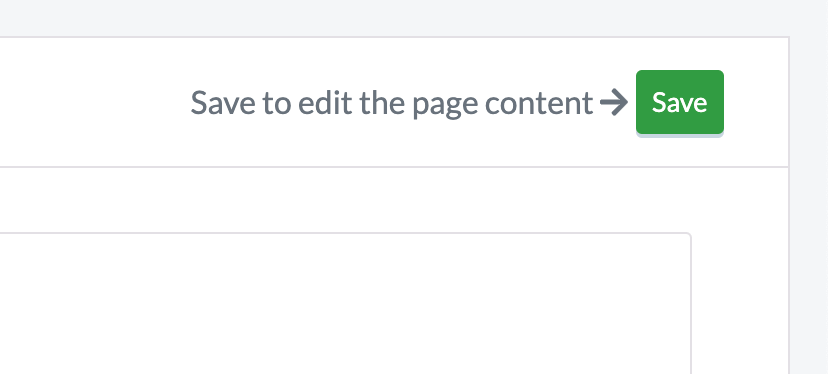
Next, click on the “Done” button to save the schema of the page. Click on the “Save” button to save the content of the page.
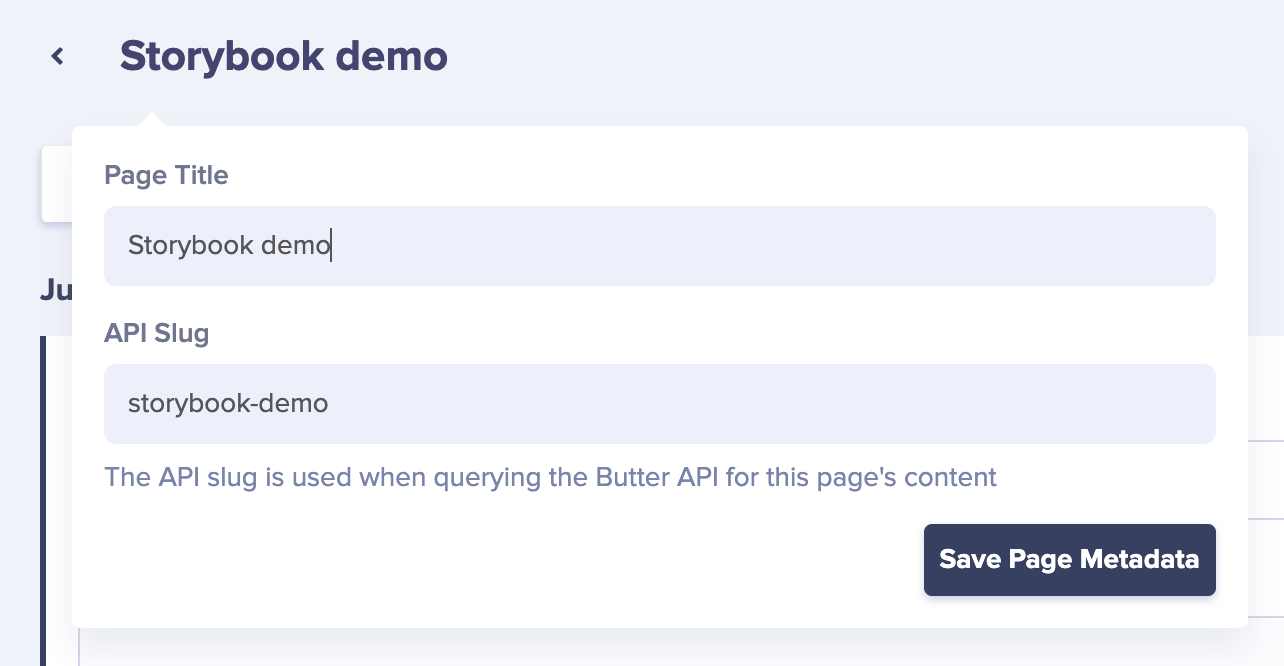
Next, you can add the title of the page as “Storybook demo” and click on the “Save Page Metadata” button.
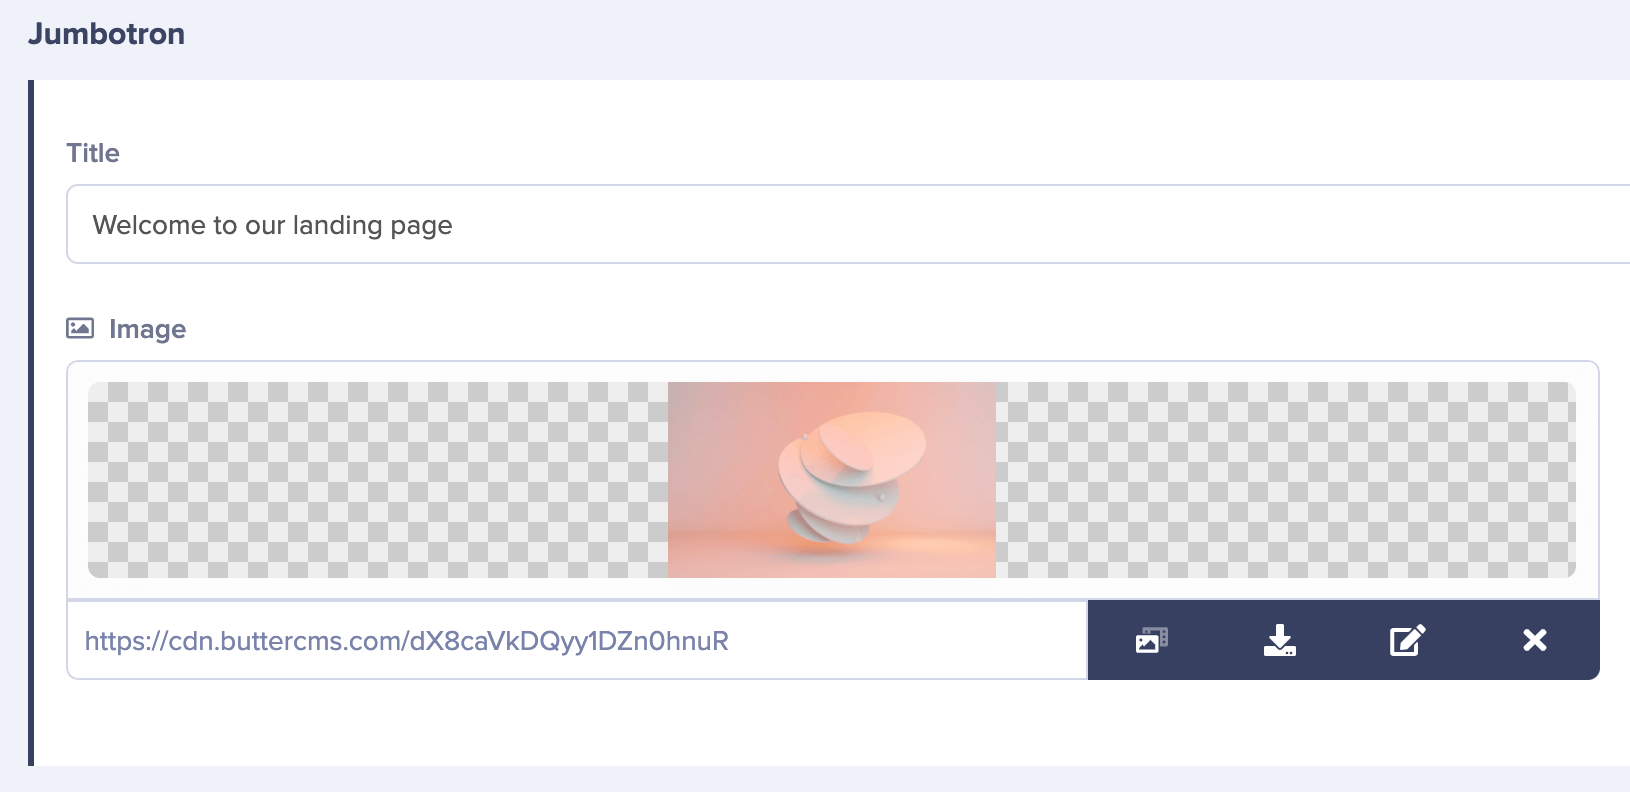
Next, add the “Title” and “Image” for the “Jumbotron” component.
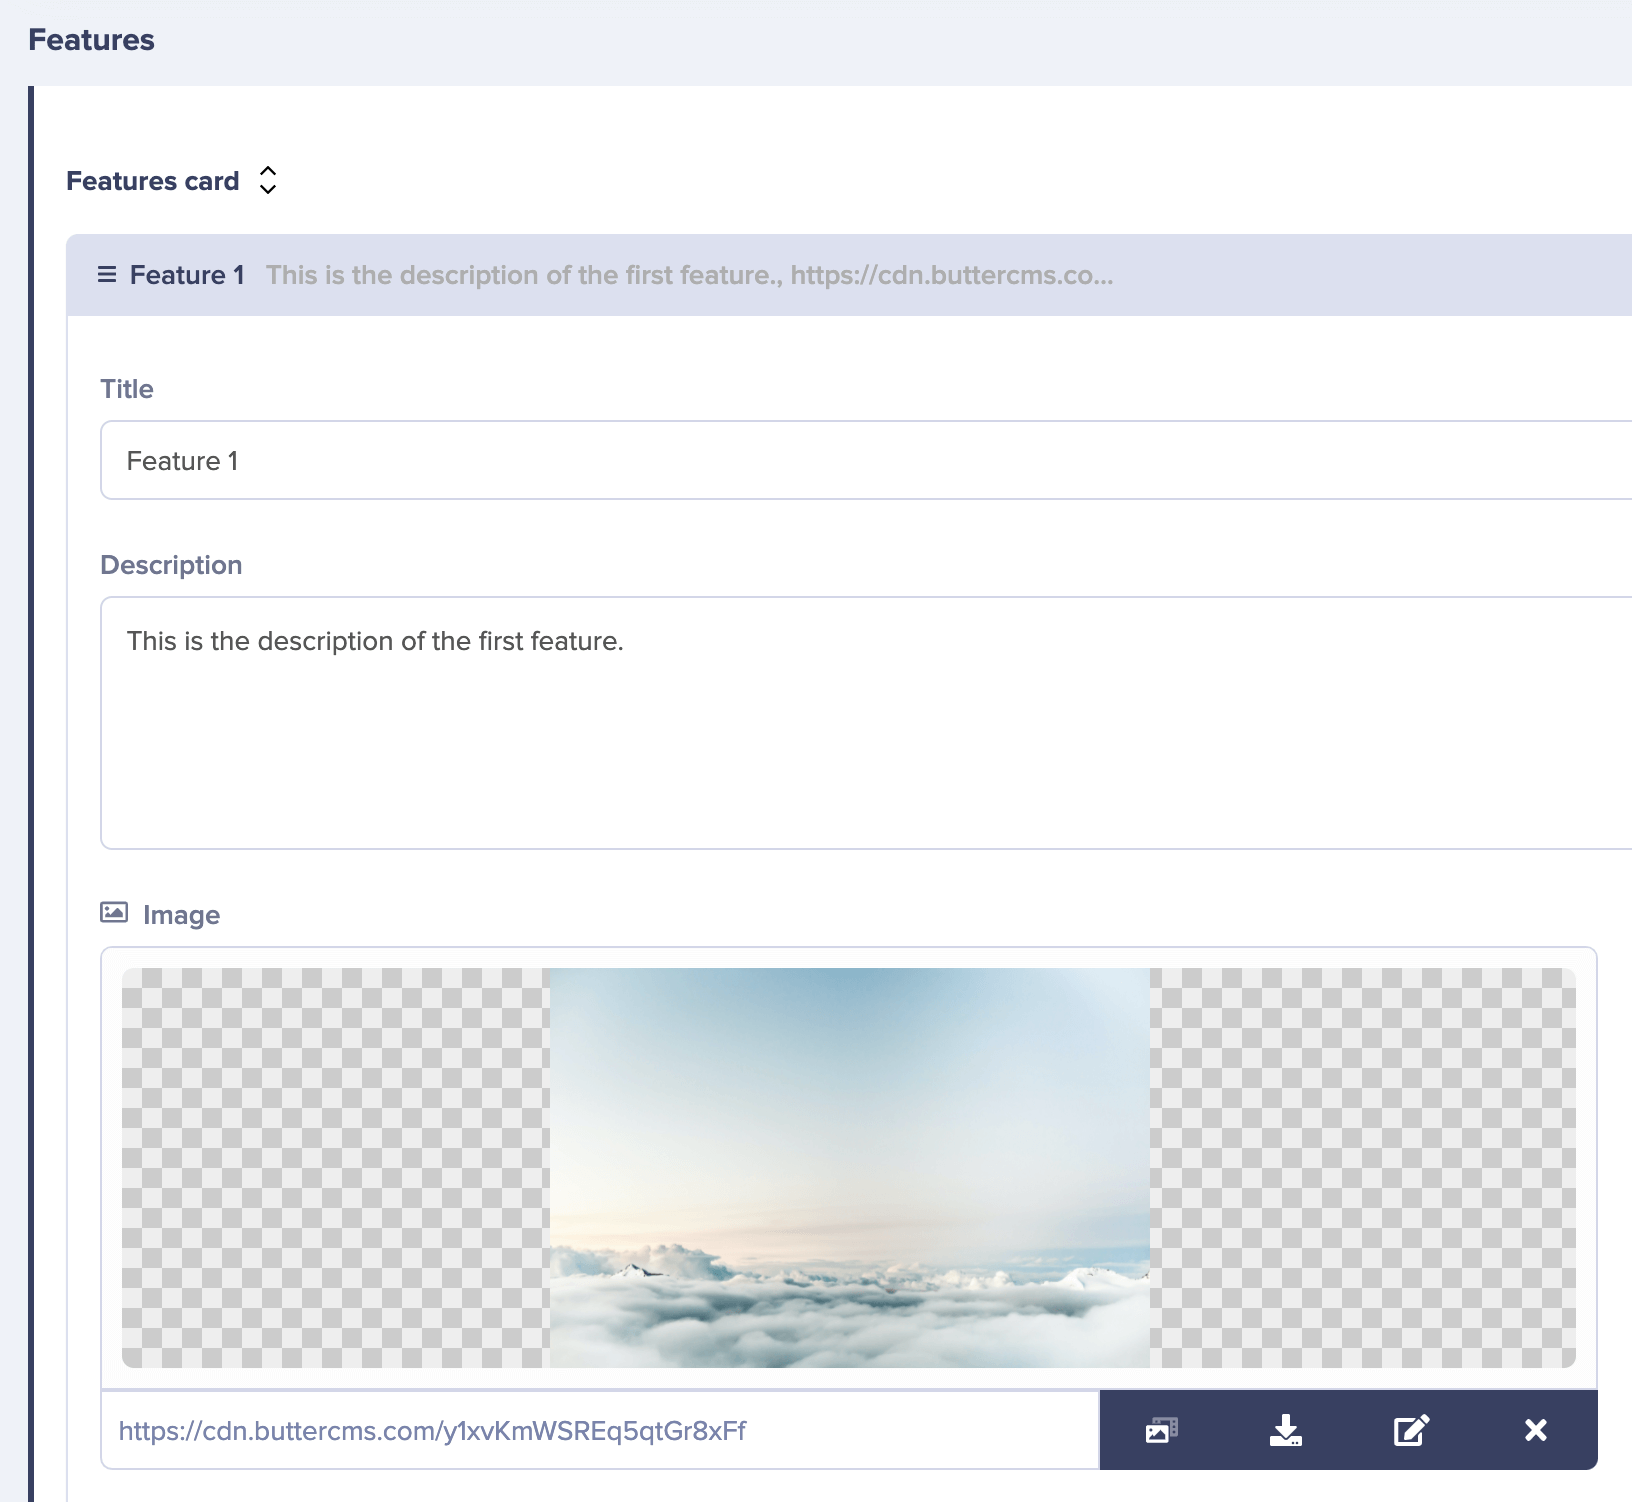
Next, add some content for the “Features” component as well.
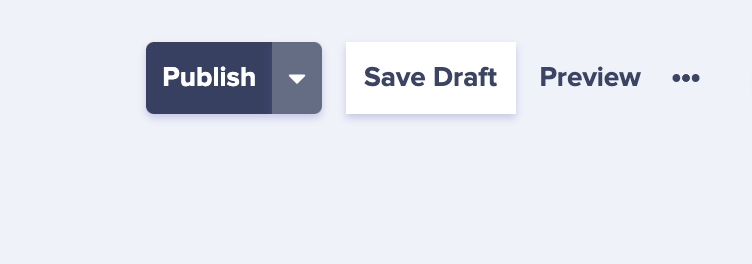
Once you are done, click on the “Save Draft” button at the top.
You can also click on the “Publish” button which will publish the content. However, we first want to test the content inside Storybook. When we are fine with the content, we can click on the “Publish” button.
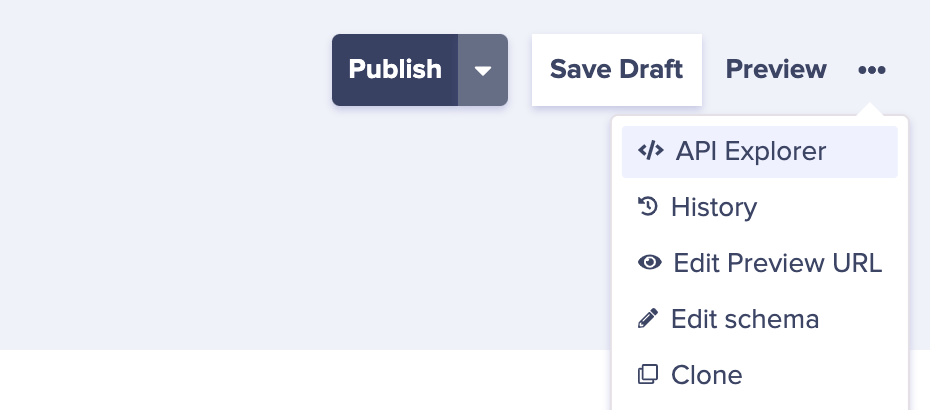
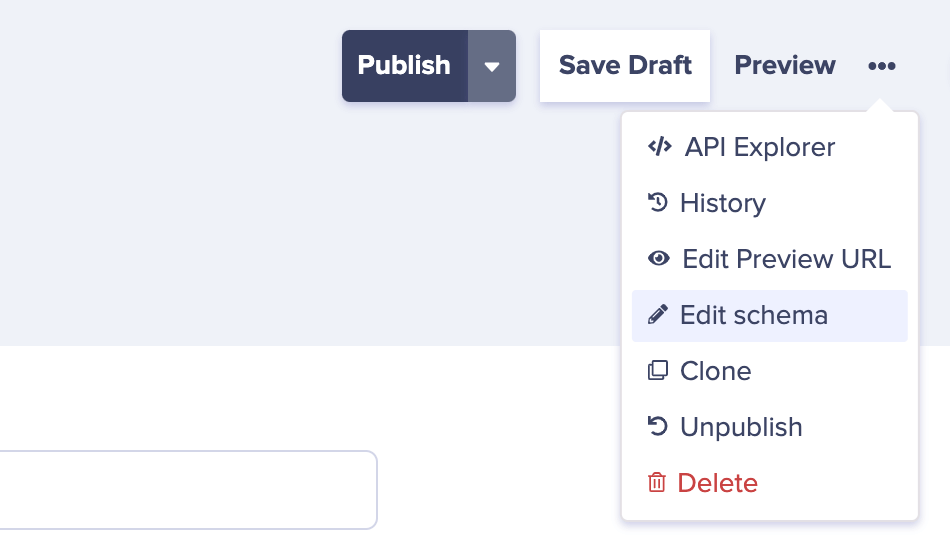
Next, click on the “API Explorer” option inside the three dots menu.
You should be able to view something like the following:
This explorer will show you how the API of your page looks like. If you visit the URL shown in the explorer, you should be able to view the data from the API:
{
"data": {
"slug": "storybook-demo",
"name": "Storybook demo",
"published": null,
"updated": "2021-12-28T21:02:39.281378Z",
"page_type": null,
"fields": {
"jumbotron": {
"title": "Welcome to our landing page",
"image": "https://cdn.buttercms.com/dX8caVkDQyy1DZn0hnuR"
},
"features": {
"features_card": [
{
"title": "Feature 1",
"description": "This is the description of the first feature.",
"image": "https://cdn.buttercms.com/y1xvKmWSREq5qtGr8xFf"
}
]
}
}
}
}Next, update the src/App.js file with the following:
import React, { useEffect, useState } from "react";
import LandingPage from "./pages/landingPage";

function App() {
  const [data, setData] = useState(null);

  useEffect(() => {
    async function fetchData() {
      const response = await fetch(
        "https://api.buttercms.com/v2/pages/landing_page/storybook-demo/?locale=en&preview=1&auth_token=6aa4e6cb6fb959f2dba4323c61710ad900b647d3"
      );
      const data = await response.json();

      setData(data);
    }

    fetchData();
  }, []);

  if (!data) {
    return <div>Loading...</div>;
  }

  return <LandingPage {...data} />;
}

export default App;
The above code fetches the data from the ButterCMS API. You might have to replace the URL with your own.
Next, create another file called “index.jsx” inside a new “src/pages/landingPage” directory with the following:
import React from "react";
import PropTypes from "prop-types";

const LandingPage = ({ data }) => {
  return (
    <>
      <div className="jumbotron">
        <div
          className="jumbotron__image"
          style={{
            backgroundImage: `url(${data.fields.jumbotron.image})`,
          }}
        >
          <div className="jumbotron__title">{data.fields.jumbotron.title}</div>
        </div>
      </div>
      <div className="features">
        {data.fields.features.features_card.map((feature, index) => {
          return (
            <div key={index} className="features__card">
              <img
                src={feature.image}
                alt={feature.title}
                className="features__card__image"
              />
              <h1 className="features__card__title">{feature.title}</h1>
              <p className="features__card__description">
                {feature.description}
              </p>
            </div>
          );
        })}
      </div>
    </>
  );
};

LandingPage.propTypes = {
  name: PropTypes.string,
};

export default LandingPage;
The above file is a simple component that renders a jumbotron component and a set of card components in a grid.
You can then run the React application using the following command:
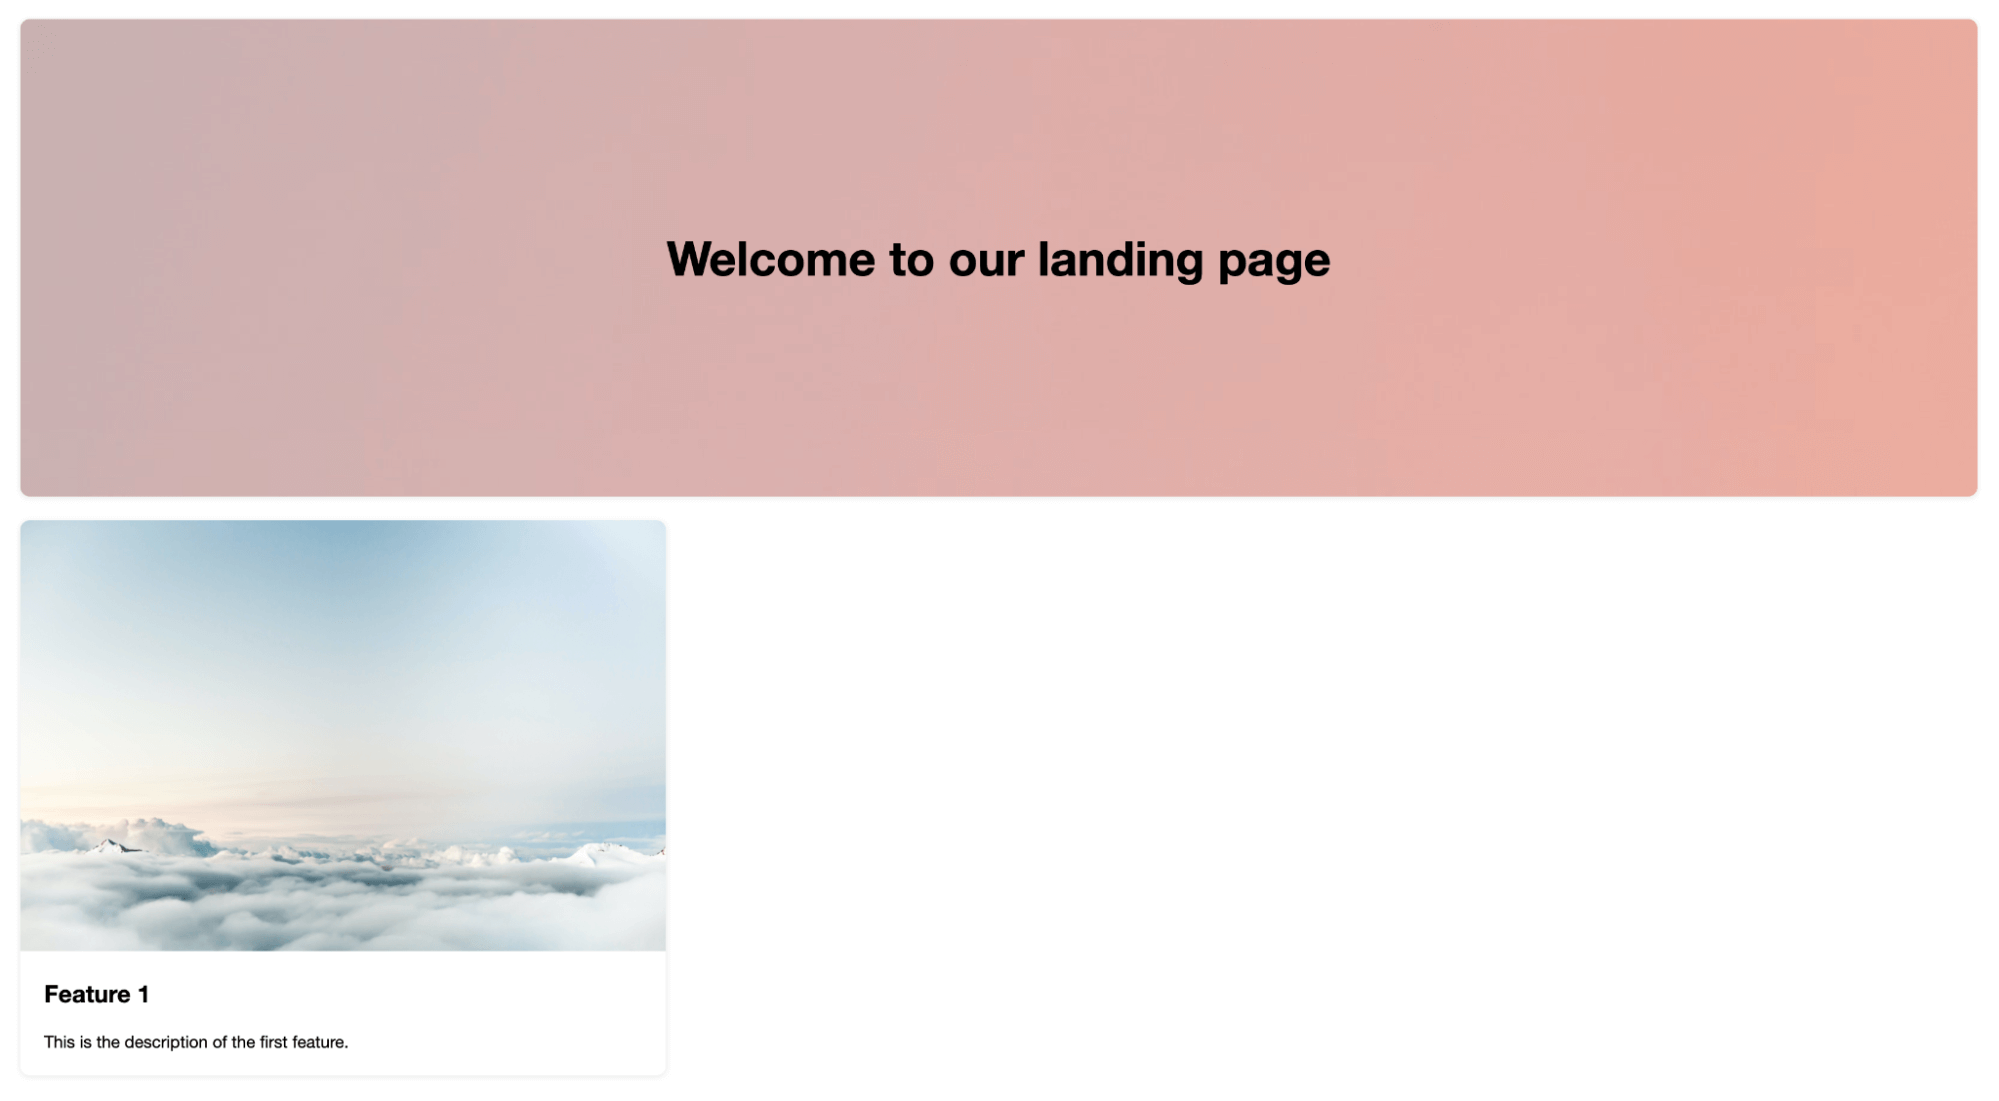
<span style="font-weight: 400;">yarn dev</span>You should be able to view something like the following on http://localhost:3000:
The above image shows that the data which is visible on the page is getting fetched from the ButterCMS API.
Next, let’s define the stories for our landing page. Create a new file called “landingPage.stories.jsx” inside a new “src/stories” directory with the following:
import React from "react";
import {
  FetchStatus,
  Loader,
  Prompt,
  withHeadless,
} from "storybook-addon-headless";
import LandingPage from "../pages/landingPage";


// The code below is the configuration for storybook-addon-headless
export default {
  title: "Example/LandingPage",
  decorators: [
    withHeadless({
      restful: {
        baseURL:
          "https://api.buttercms.com/v2/pages/*/storybook-demo/?locale=en&preview=1&auth_token=6aa4e6cb6fb959f2dba4323c61710ad900b647d3",
      },
    }),
  ],
  parameters: {
    headless: {
      Data: {
        query: "",
        autoFetchOnInit: true,
      },
    },
  },
};


// The code below shows a spinner when the data is getting fetched, a prompt if the request is unsuccessful or the component when the request is successful.
export const Default = (_args, { status, data }) => {
  switch (status?.Data) {
    case FetchStatus.Inactive:
    case FetchStatus.Rejected:
      return <Prompt />;

    case FetchStatus.Loading:
      return <Loader />;

    default:
      return data?.Data ? <LandingPage {...data.Data} /> : null;
  }
};
The above code snippet is responsible for configuring how the storybook-addon-headless package will fetch data. Once the data is fetched, the component will be rendered inside Storybook.
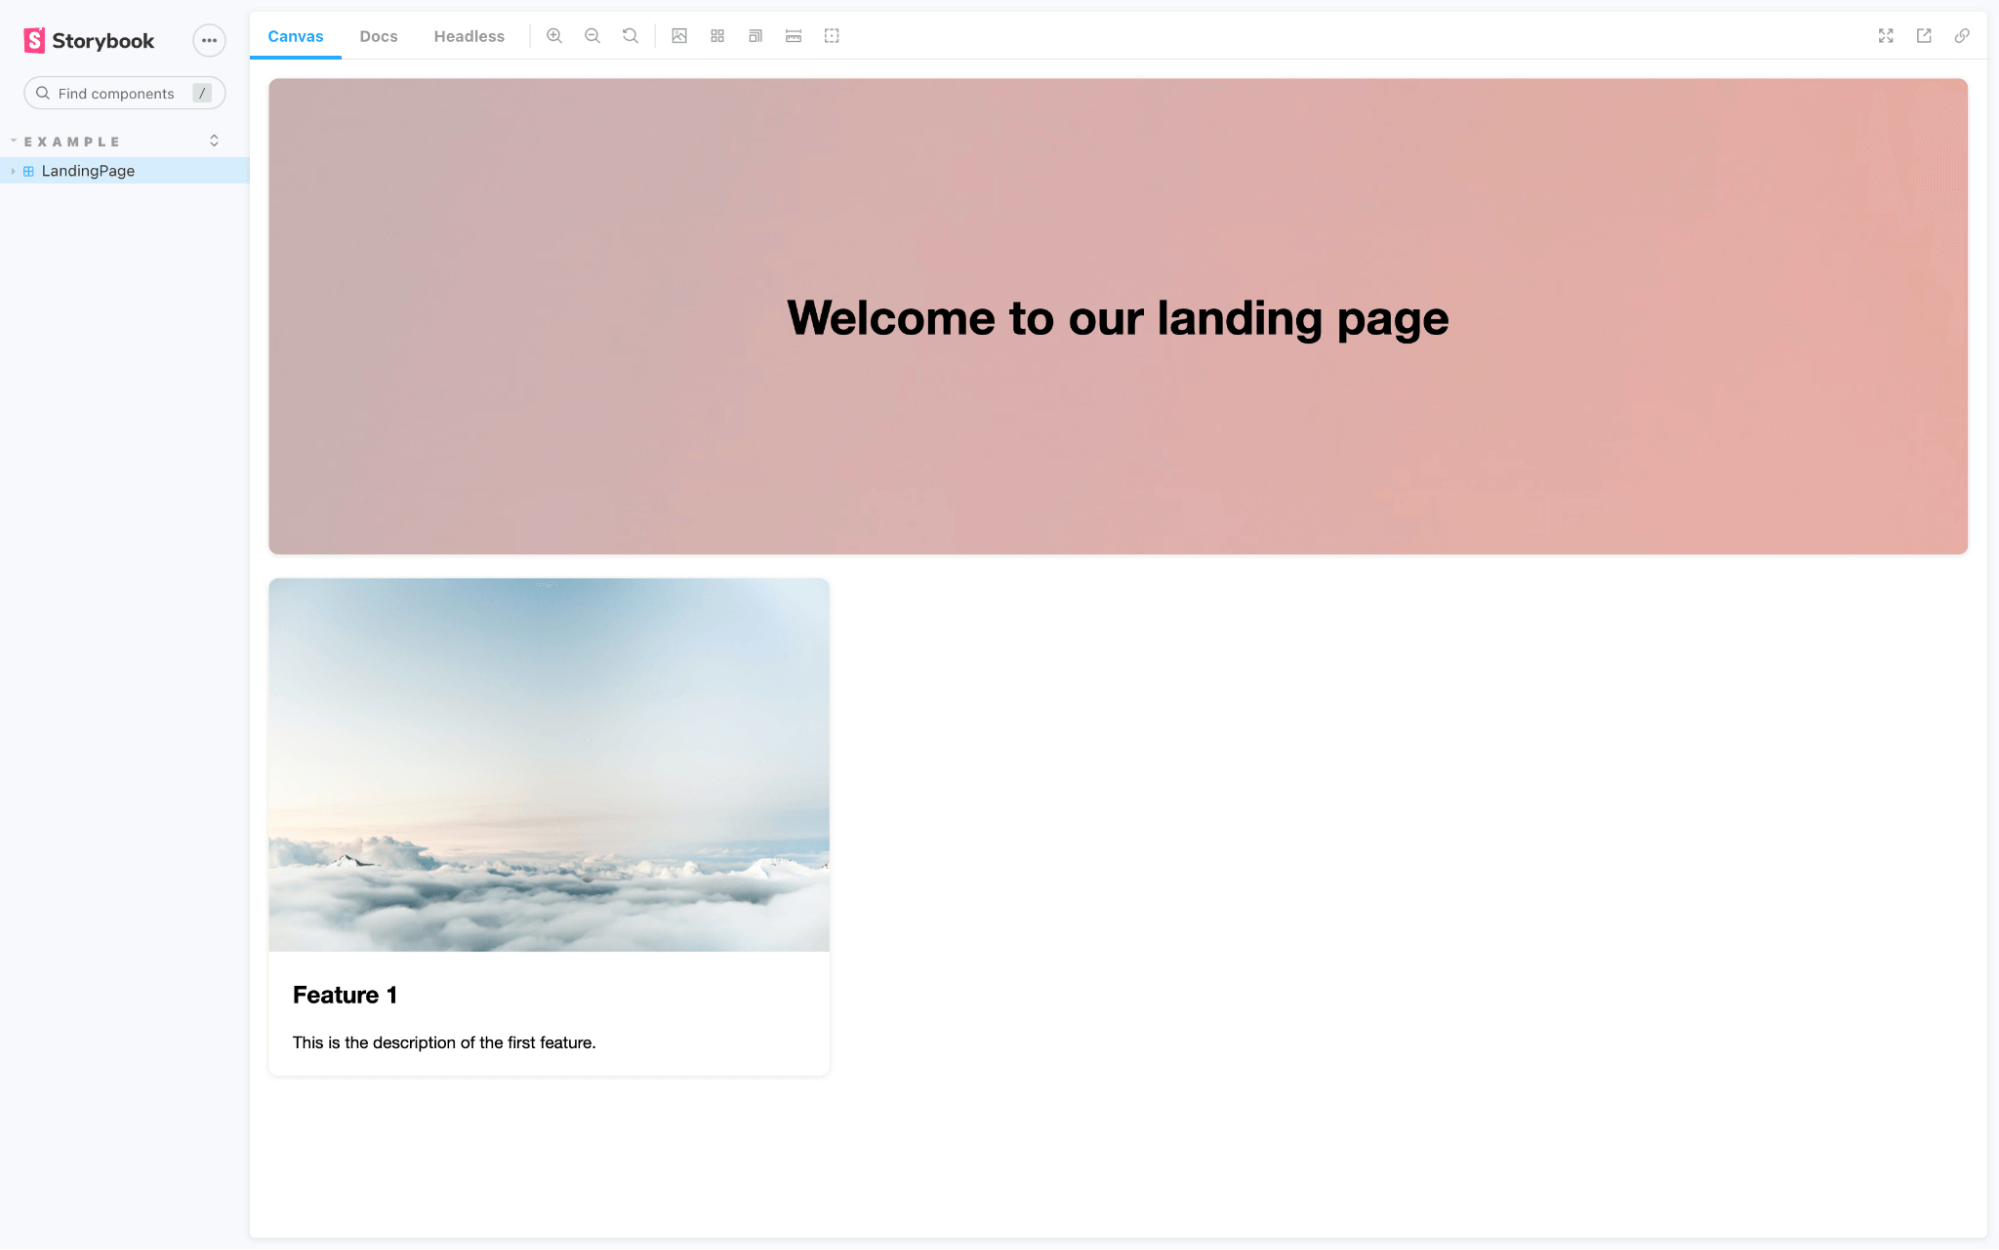
Now, if you run the Storybook application, you should be able to view the following on http://localhost:6006:
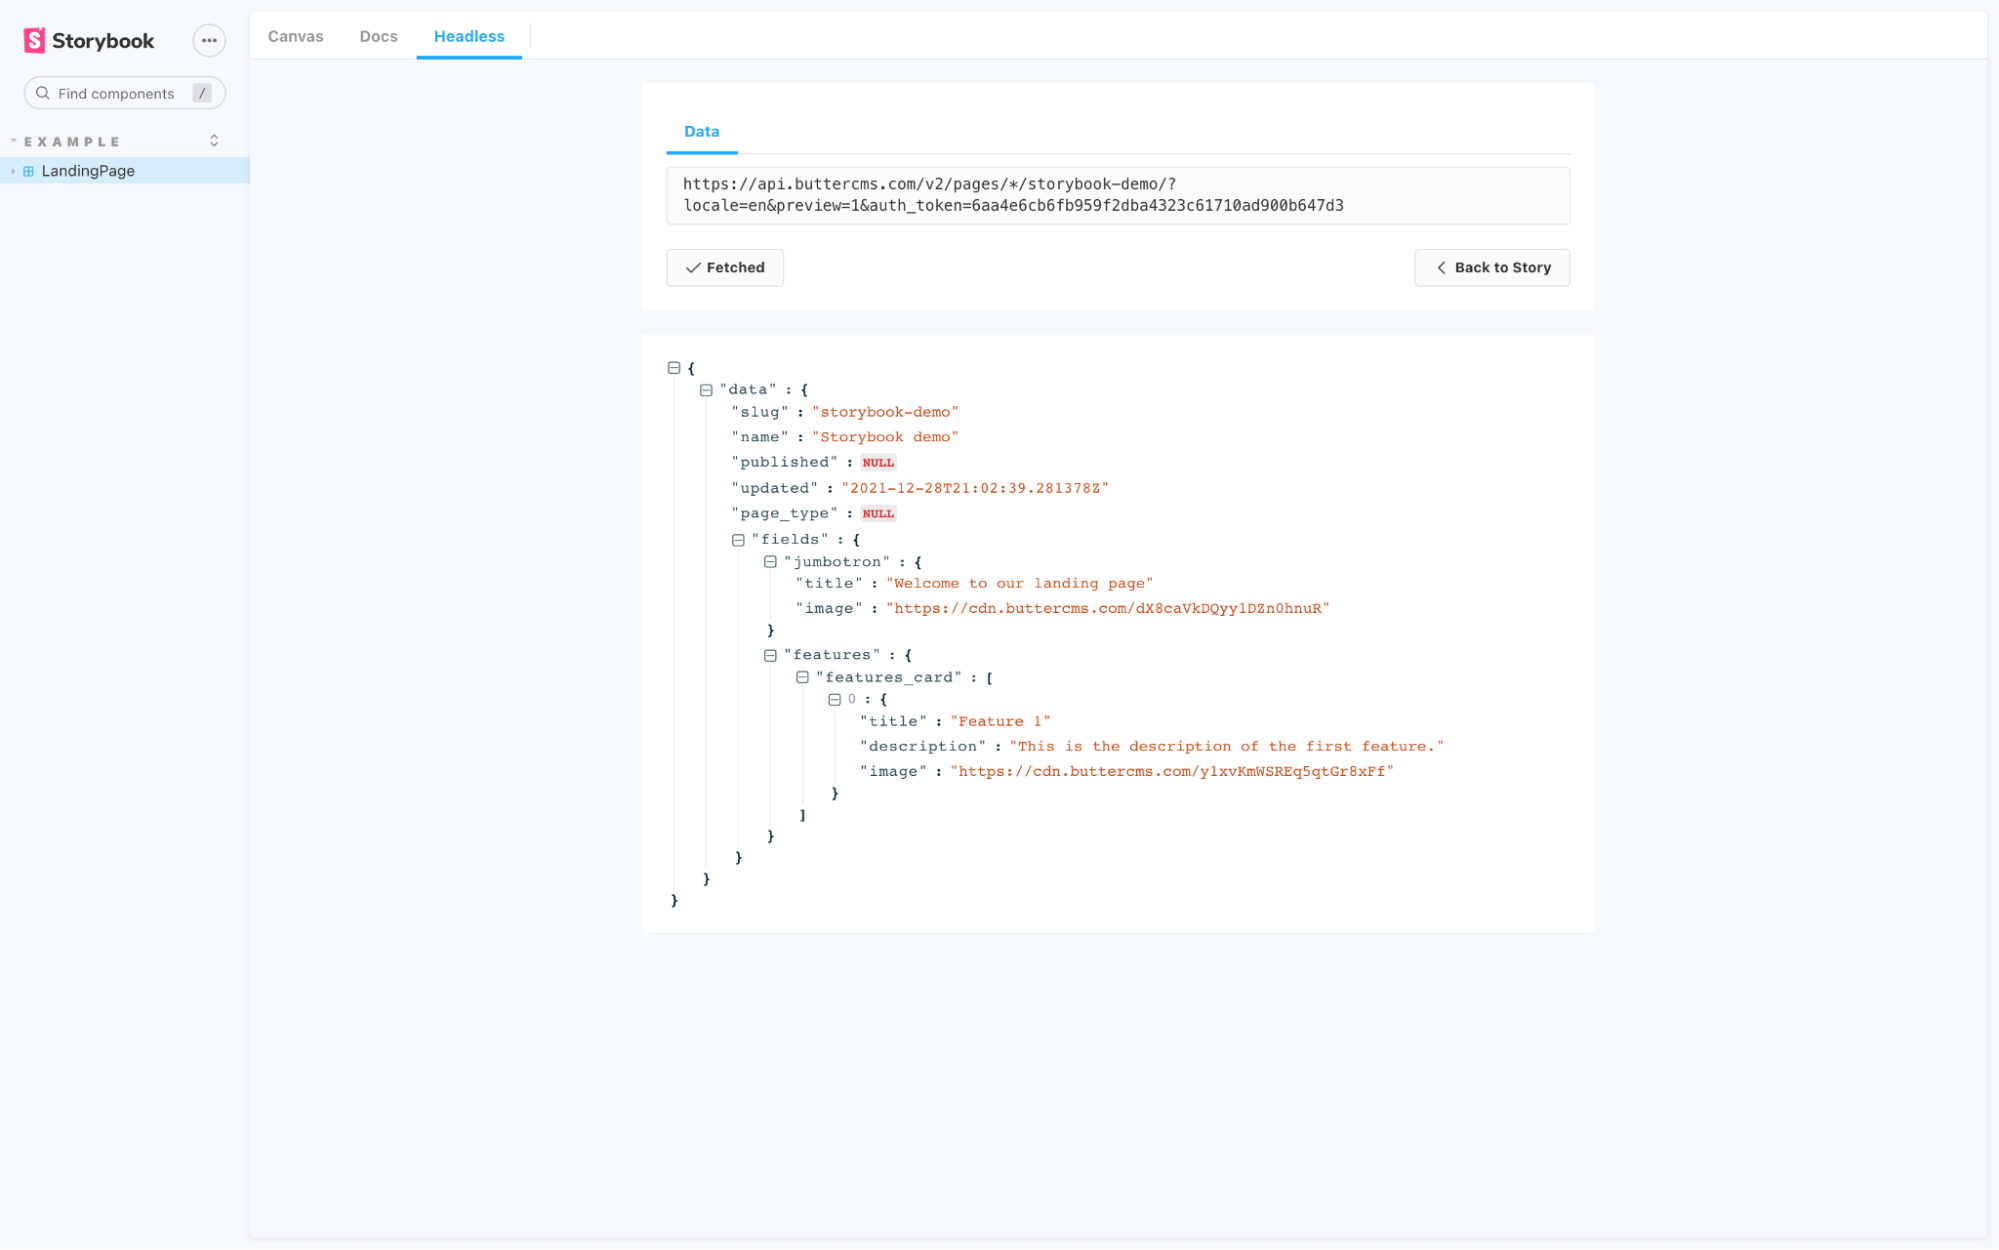
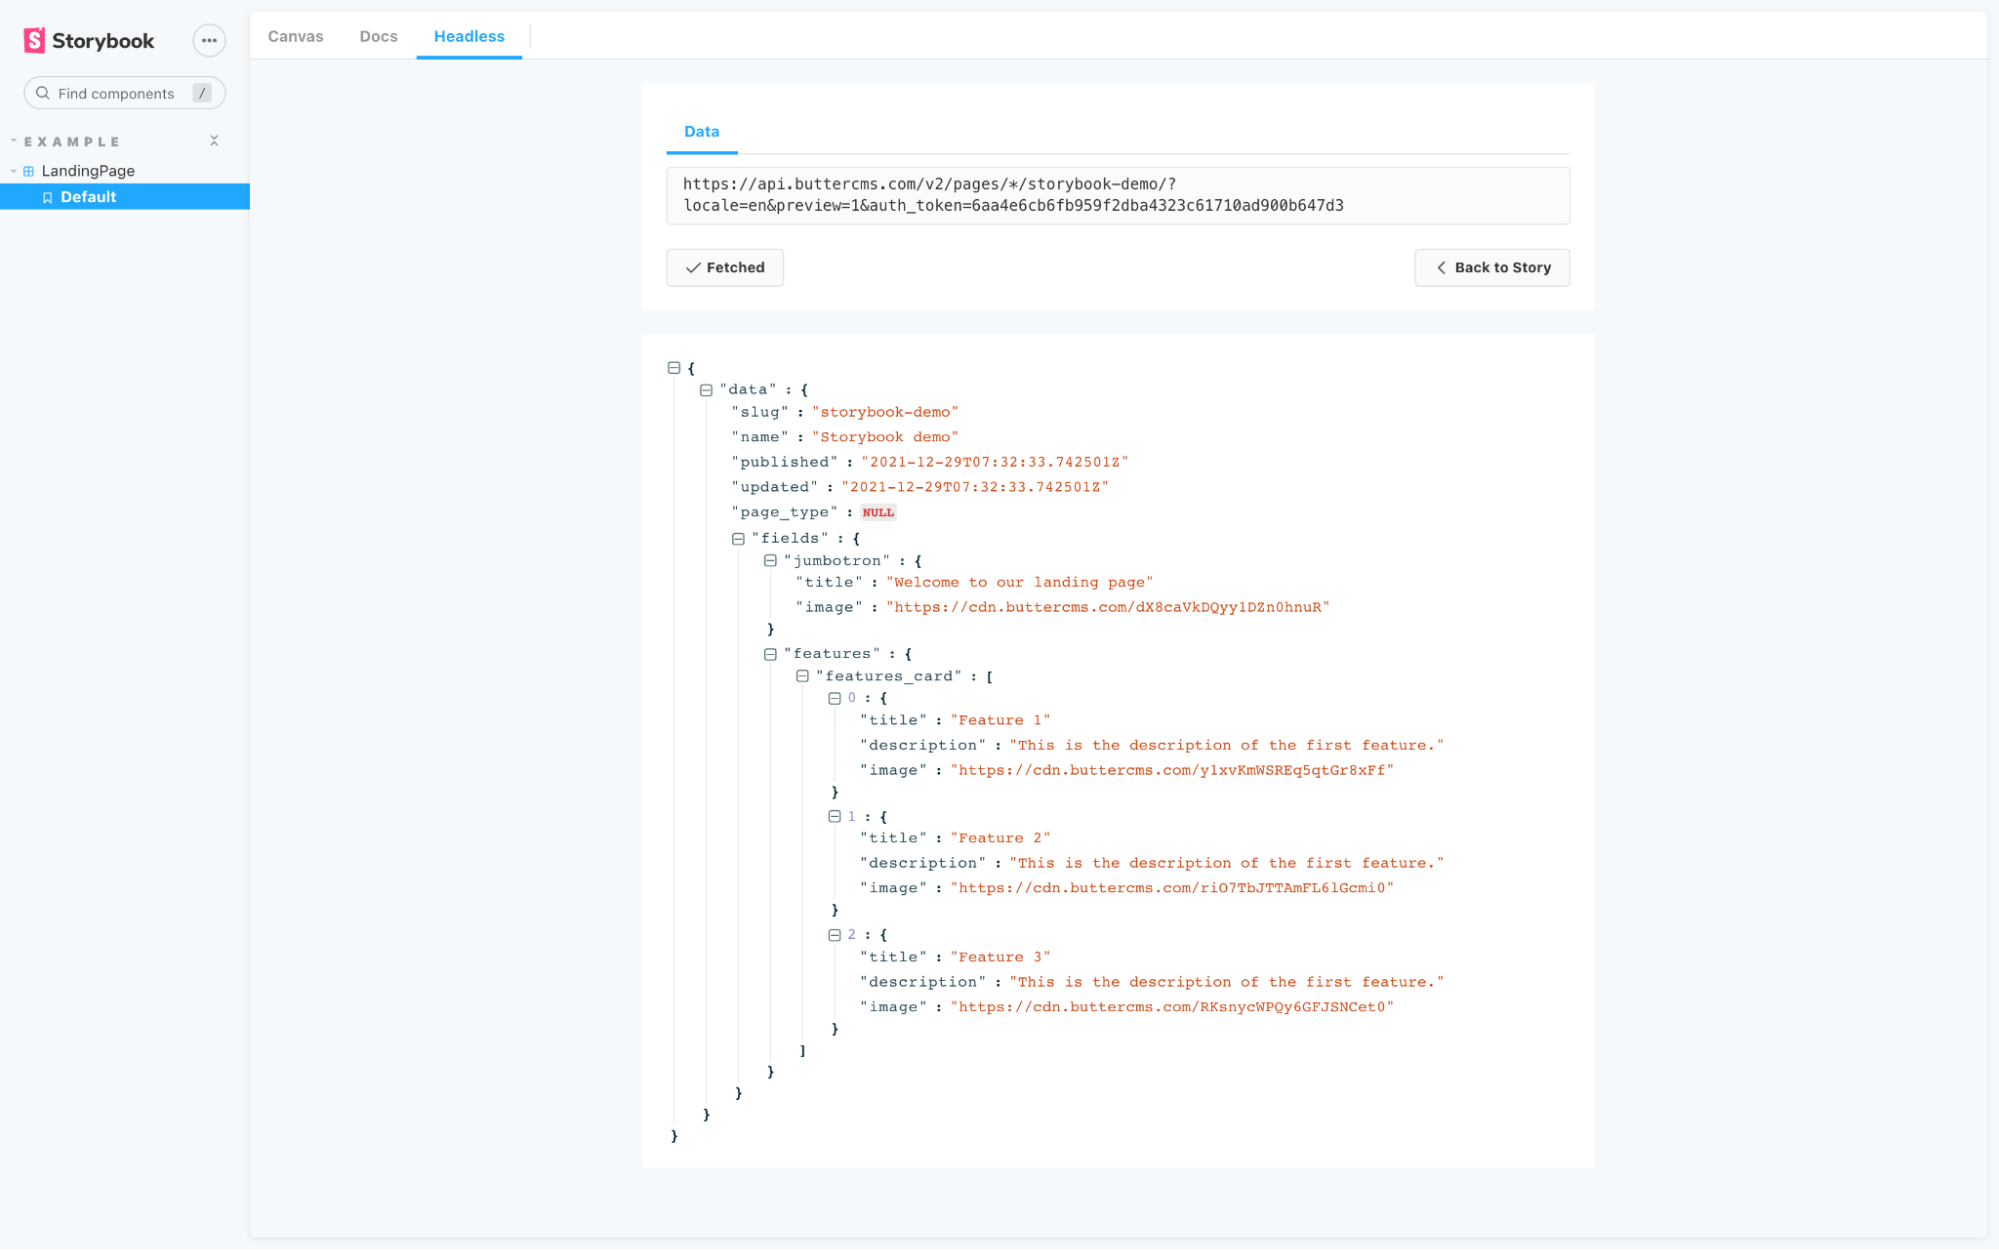
If you visit the “Headless” tab inside Storybook, you will be able to view the data that is getting fetched from the ButterCMS API.
Now, add a few more “Feature Cards” in ButterCMS and save those changes by clicking the “Save Draft” button at the top.
Next, visit the “Headless” tab inside Storybook and click on the “Fetched” button. This will fetch the data again from the ButterCMS API.
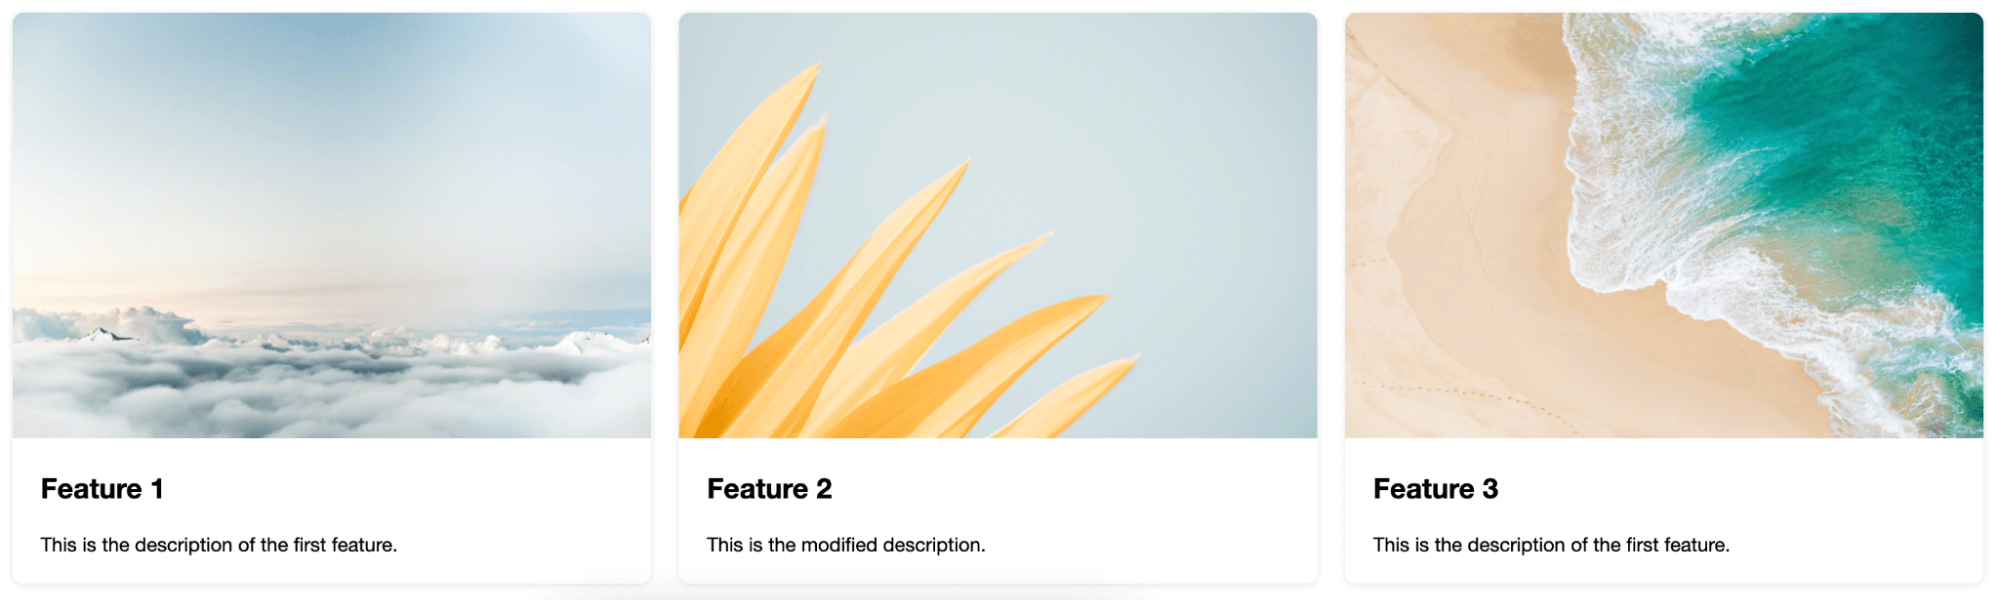
For one of the cards, I have added a big description. As a result, the layout of the cards doesn’t look good.
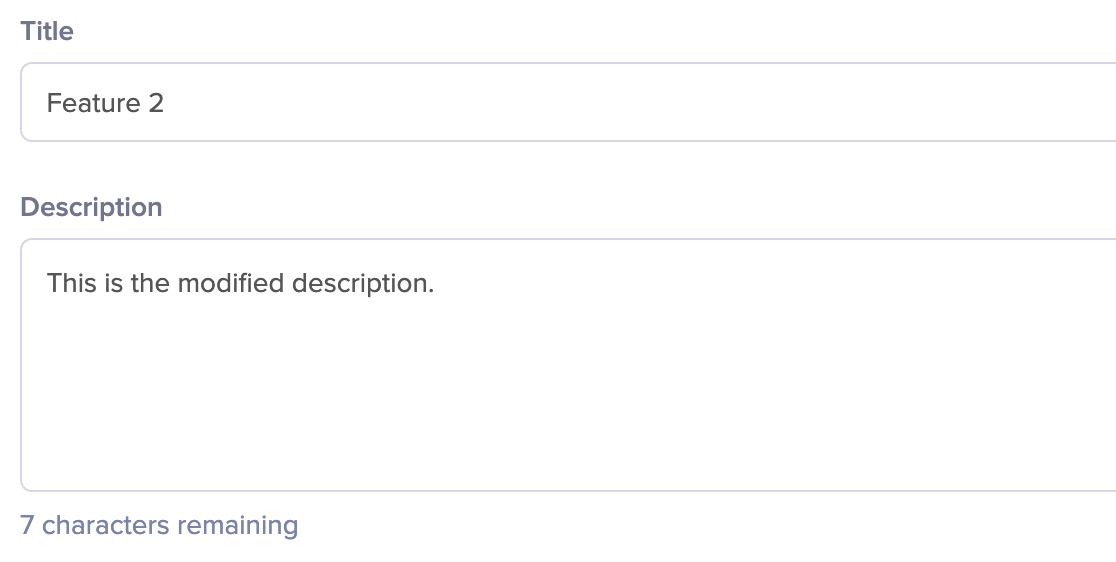
It would be good if we could change the description of the second card to a single line. Let’s do that from ButterCMS by visiting the ButterCMS page editor and clicking on the “Edit schema” option from the dropdown at the top right.
Next, click on the “Edit” button for the “Features” component and set the “max-length” of the “Description” field to 40 characters.
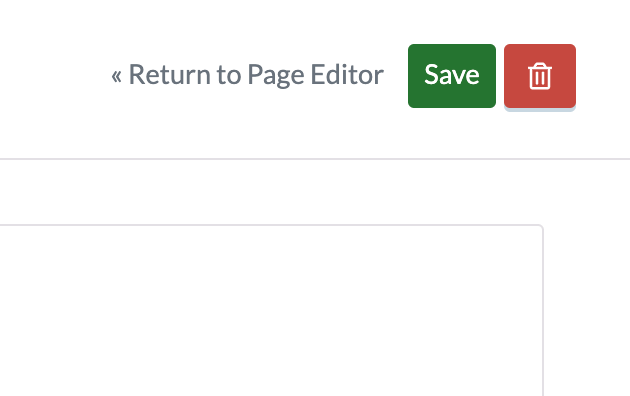
Next, click on the “Save” button at the top right of the page. Then, click on the “Return to Page Editor” link.
Next, update the “Description” field for the “Feature 2” card. You should be able to view the “40 characters remaining” dialogue below the “Description” text-area.
Next, save the data again by clicking on the “Save Draft” button at the top.
Next, visit the “Headless” tab inside Storybook and click on the “Fetched” button to fetch the data again.
The layout of the cards is looking much better now. Because we are testing with real data, we are able to figure out this issue even before our changes are shipped to end-users. This is one of the biggest benefits of visual testing using real data.
Now, you can publish the changes from ButterCMS by clicking the “Publish” button at the top. Again, visit the “Headless” tab inside Storybook and click on the “Fetched” button to fetch the updated data from the ButterCMS API.
The component will look like the following inside Storybook:
In this article, you learned about how to fetch data from ButterCMS inside Storybook and test changes before you ship them to your users.
Testing is a crucial part of any product. If you are developing features that are buggy, the experience of your end-users will suffer and they might not want to use your product. Testing can solve this issue. For any feature, big or small, test cases should be written and followed.
Once again, the source code for the application that you built as a part of this application is hosted on GitHub.