
- What are we building?
- Why a location-based application?
- Working with a location-based services library
- Step 1: Setting up a Gatsby starter Leaflet project
- Step 2: Learning the basics about maps
- Step 3: Working with ButterCMS
- Step 4: Building the components
- Step 5: Querying location data with Gatsby and GraphQL from ButterCMS
- The website you should end up with
- Closing thoughts
Table of contents
What are we building?
In this article, we're going to build a location-based website using Gatsby, ButterCMS, TailwindCSS, and LeafletJS. This will be a website that shows every React 2022 conference on a map.
Before diving into the technical (coding) part, we're going to explain in more detail about mapping applications in order to help you get the fundamentals of location-based web applications. We’ll see what they are and why we should use location services in our apps.
In the coding part, we'll start by setting up a Gatsby project using a starter project that utilizes many interesting plugins. These include gatsby-plugin-google-analytics for website analytics and gatsby-plugin-image (for adding responsive images to your site while maintaining high-performance scores. That can be difficult to do manually, but the Gatsby image plugin handles the hard parts of producing images in multiple sizes and formats for you. It also includes many other powerful plugins like gatsby-plugin-manifest, gatsby-plugin-offline, gatsby-plugin-postcss, gatsby-plugin-purgecss, gatsby-plugin-react-helmet, gatsby-plugin-sharp, gatsby-source-filesystem, gatsby-transformer-sharp, and TailwindCSS.
Then, we'll get to install the mapping library to handle the location features and a CMS where the data will come from. The CMS will be connected to the gatsby project.
Using VS Code as our text editor (you can use whatever text editor you prefer), we'll work on components (in React) to build the whole web app page which will contain the map with items (different conference locations).
More details about the tech stack:
- Gatsby: a free and open-source framework based on React that helps developers build blazing-fast websites and apps. Gatsby allows developers to make a site using React and work with any data source (CMSs, Markdown, etc) of their choice.
- TailwindCSS: a utility-first CSS framework for rapidly building custom user interfaces. It is a highly customizable, low-level CSS framework that gives you all of the building blocks you need to build bespoke designs without any annoying opinionated styles you have to fight to override.
- LeafletJS: a JavaScript library used to create maps. The library also supports many plugins which include base map providers, search and popups, and layer switching controls. We'll use its React version.
- ButterCMS: an API-first headless CMS for rapidly building CMS-powered apps and websites in any programming language. Great for blogs, dynamic pages, and more.
- Netlify: a hosting platform that is one the best solutions for hosting JAMStack projects. Hosting static web pages has never been easier.
Why a location-based application?
According to Wikipedia, a location-based service (LBS) is a general term for software services that use geographic data and information-providing services. It is used in various contexts, such as health, entertainment, personal life, social networking, advertising, and tracking.
So, location-based applications are apps built on top of location-based services in order to help businesses and companies offer customized services based on where the user is or where they are going.
With a compound annual growth rate of 20.0% (CAGR), the location-based services market is going to hit $66.6 billion by 2023. These days, building location-based apps makes a lot more sense. Due to the growing popularity of on-demand economy services, we see applications like Lyft, Facebook, Tinder, Airbnb, Uber, and Deliveroo using geolocation for their own business purposes.
Using location-based services, there are hundreds of applications we could develop. Among these apps, we have:
- Apps for recommending social events in a city
- Apps for requesting the nearest business or service, such as an ATM, restaurant, or retail store
- Social networks
- Marketplaces
- Navigation apps
- Etc.
If you have a business and want your customers to get the benefits of your services or products based on their location, then this type of solution is right for your business growth.
In our case, we're helping developers find and view all the React conferences on a map in order for them to get the nearest conference based on their location.
Working with a location-based services library
While working with any location service library (not only LeafletJS) with any React framework, if the map is not displayed correctly, it is most likely because you haven't followed all the prerequisites, such as:
- Making sure all dependencies are installed and using supported versions properly to avoid package version conflicts
- Making sure the CSS library is installed, imported, and loaded to get the styling from the library's docs
- Making sure all the library's main components are set properly in order to avoid the conflict between parent and child components while wrapping them together inside your main page's component
- Making sure you have all the position properties required for your determined locations
Step 1: Setting up a Gatsby starter Leaflet project
We'll be working on a Gatsby starter that makes things easier to get started. This helps us save time and only focus on the things that matter.
Create a new Gatsby app with Gatsby TailwindCSS starter:
To get started, navigate to where you want to create your new app and run this command:
npx gatsby new react-conferences-buttercms https://github.com/kosvrouvas/gatsby-tailwindcss-starter
For more details, check on the official Gatsby Starters Page
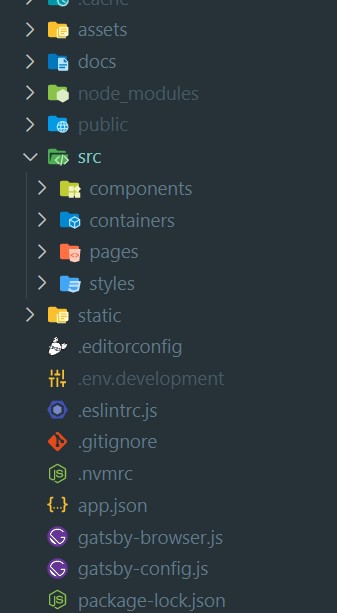
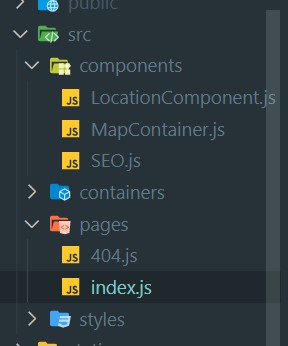
The Project Structure:
Install React-leaflet
- Install the packages:
npm i --save gatsby-plugin-react-leaflet react-leaflet leaflet
- Add the plugin to your Gatsby configuration:
module.exports = {
  plugins: [
     // ...
    {
      resolve: 'gatsby-plugin-react-leaflet',
      options: {
        linkStyles: true // (default: true) Enable/disable loading stylesheets via CDN
      }
    }
  ]
}
We'll be using an online tool to get location data for the cities (conference locations): gps-coordinates
Adding Tailwind CSS to our project
If you're working with a different Gatsby starter that doesn't use Tailwind CSS, you can add Tailwind CSS to your Gatsby project by following these steps (otherwise, you can skip this part):
- Using npm, install tailwindcss and its peer dependencies, as well as
gatsby-plugin-postcss, and then run the init command to generate bothtailwind.config.jsandpostcss.config.js:
npm install -D tailwindcss postcss autoprefixer gatsby-plugin-postcss

npx tailwindcss init -p
- Enable the Gatsby PostCSS plugin in your
gatsby-config.jsfile by enabling thegatsby-plugin-postcss:
module.exports = {
  plugins: [
    'gatsby-plugin-postcss',
    // ...
  ],
}- Configure your template paths by adding the paths to all of your template files in your
tailwind.config.jsfile:
module.exports = {
  content: [
    "./src/**/*.{js,jsx,ts,tsx}",
  ],
  theme: {
    extend: {},
  },
  plugins: [],
}- If you don't have a CSS file (or in your main CSS file), add the Tailwind directives to your CSS by creating a
./src/styles/global.cssfile and add the @tailwind directives for each of Tailwind’s layers:
@tailwind base;
@tailwind components;
@tailwind utilities;- Import the CSS file by creating a
gatsby-browser.jsfile at the root of your project if it doesn’t already exist, and import your newly-created./src/styles/global.cssfile:
import './src/styles/global.css'That's it!

Step 2: Learning the basics about maps
What is a map?
A map is a symbolic representation of selected characteristics of a place, usually drawn on a flat surface. Maps present information about the world in a simple, visual way. They teach about the world by showing the sizes and shapes of countries, locations of features, and distances between places. Maps can show distributions of things over Earth, such as settlement patterns. They can show the exact locations of houses and streets in a city neighborhood. (National Geographic)
A map displays geographical data in your app or on your website. It has various features such as zooming, panning, and rotation. It also includes annotations and overlays, shows routing information, and is configured to show a standard map, satellite imagery, or both.
What are the different categories of maps?
In general, maps are grouped in two categories:
- Reference maps: focus on the location of spatial phenomena such as countries, cities, rivers, and so on. Most of the apps we use daily are reference maps, like Google Maps, that help us get locations of things we are looking for, or landscape maps, such as topographic maps or maps of national parks.
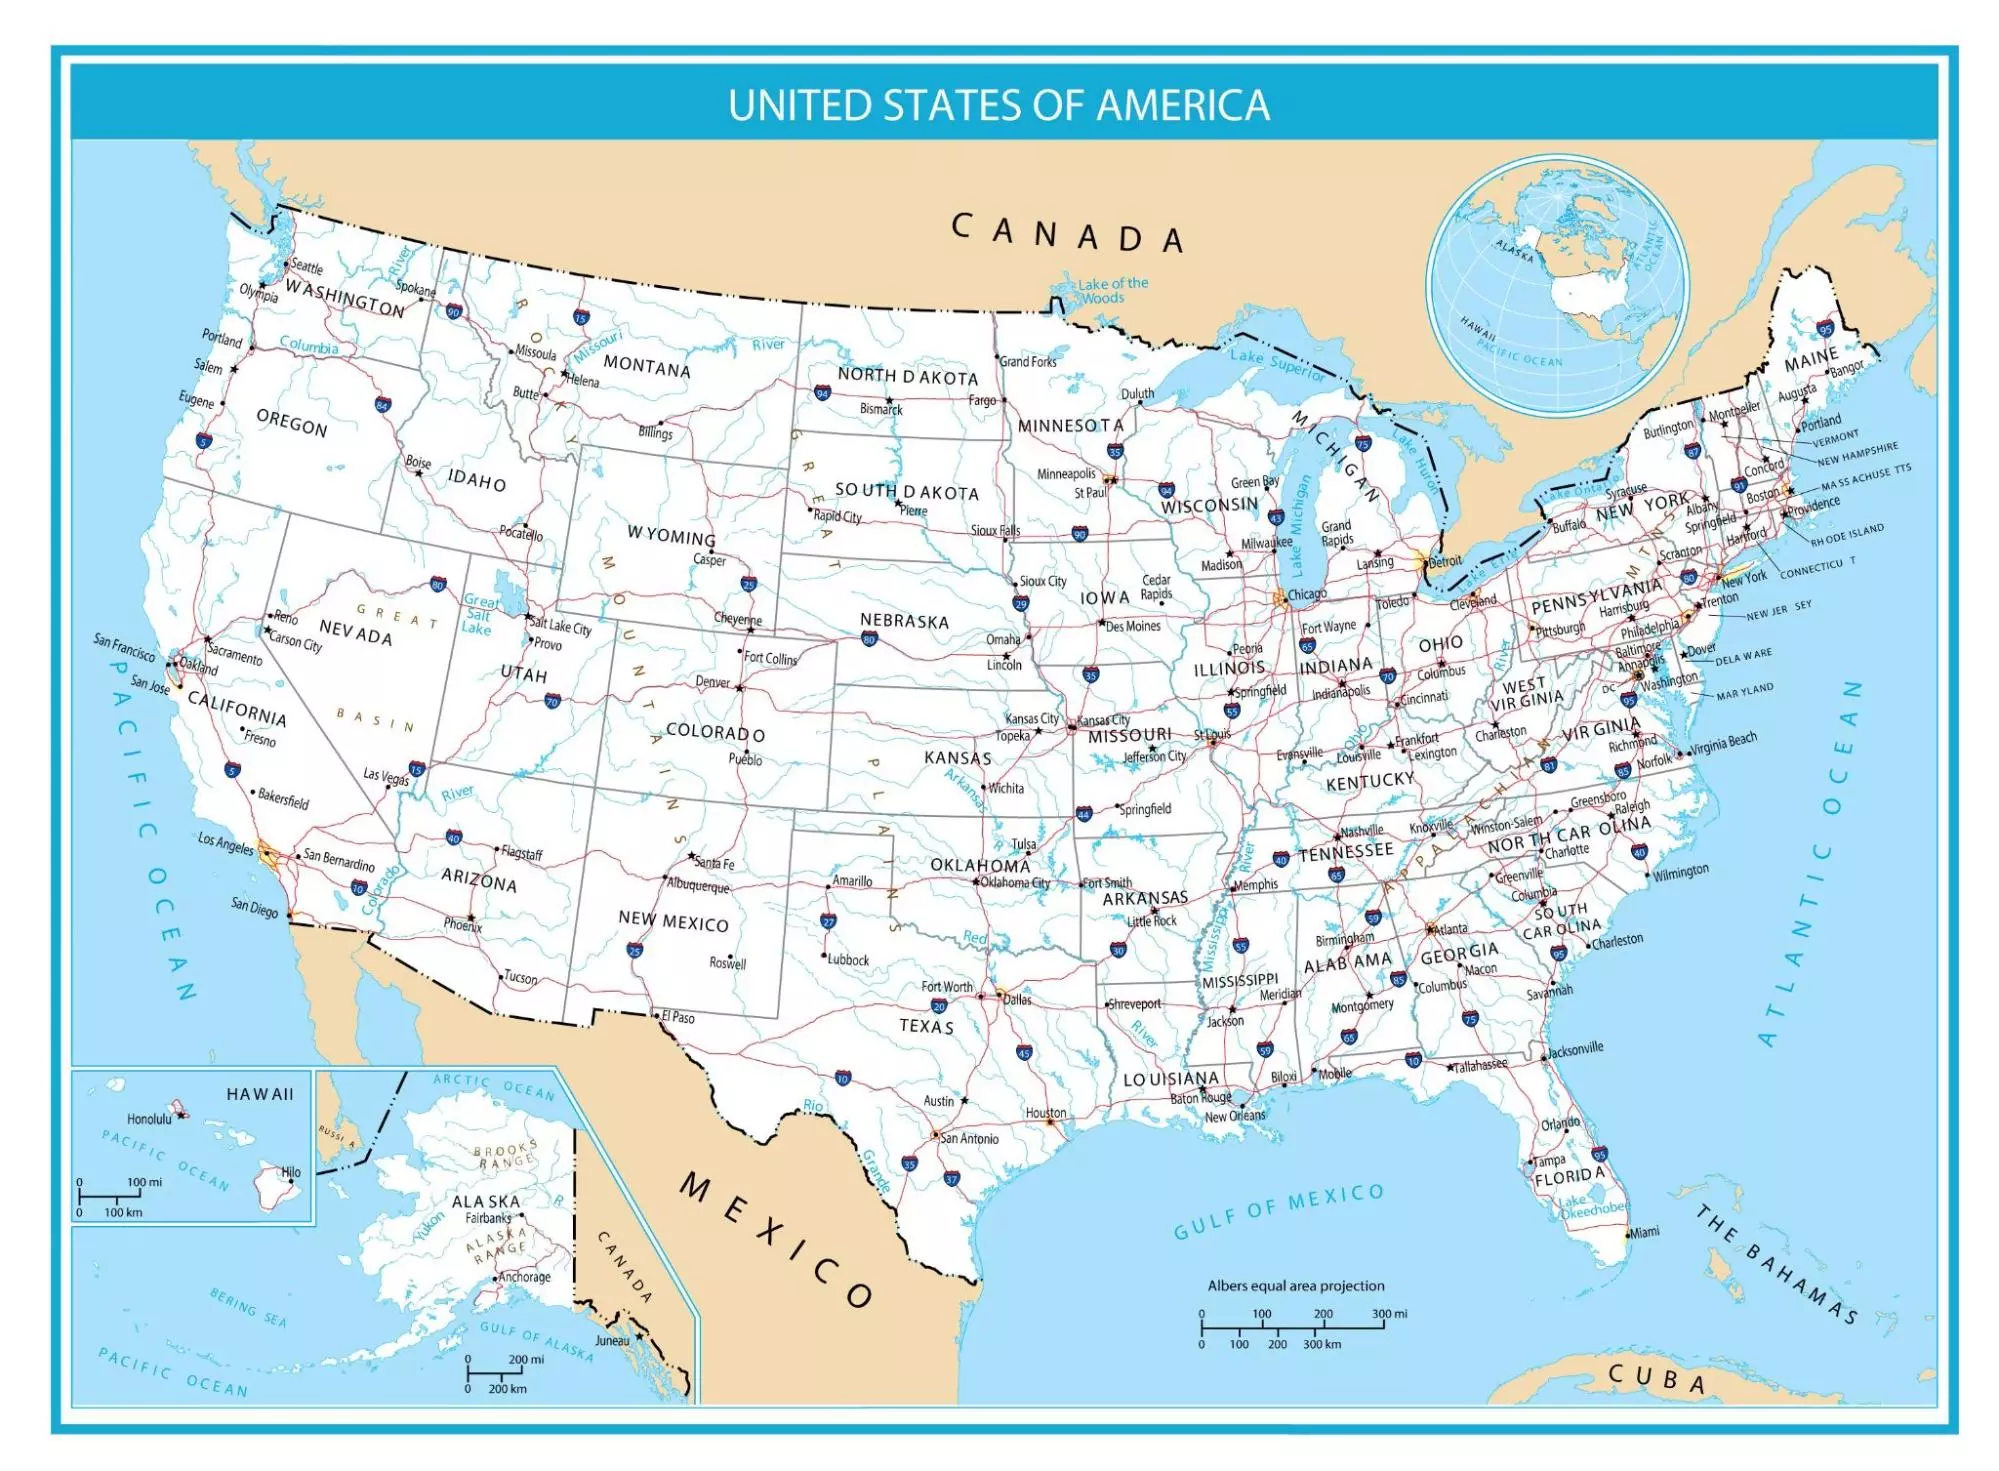
Source: Gisgeography
- Thematic maps: emphasize the spatial pattern of geographic attributes or statistics about places and relationships between places.
While a reference map might show the locations of states, a thematic map can show the population of those states. A reference map might show hospital locations, while a thematic map might show the distribution of health data in an area. This category of map shows more than a location: it represents a location’s data.
Map for our apps
Location-based apps allow businesses and companies to offer customers and users services and to advertise or sell products near their immediate geographical location.
This helps developers to offer a better user experience to their users and also to target the right customers.
Today, everybody has a device (computer, mobile phone, tablet), and location-based websites/apps are a necessary tool that speeds up the task of providing services that are available and near to customers.
The location details for these apps are transferred through Wi-Fi, cell tower data, and satellite/GPS. All smart devices (such as smartphones, and computers) have built-in GPS, and we can make that GPS signal better using Wi-Fi or a mobile network.
In this process of developing a location-based website, you must use location services’ APIs and Maps. In our case, we'll use a Headless CMS (location data coming from the CMS). For our app, we'll basically need only need these elements to be defined from the CMS:
- A latitude
- A longitude
Step 3: Working with ButterCMS
What is ButterCMS and why use it?
ButterCMS is an API-first headless CMS and blogging platform. It makes setting up your CMS and company blog insanely easy—no matter the tech stack your developers want. Even if you’re new to the realm of headless CMSs, it is easy because it comes with a bunch of starter projects already up and running. This allows you to focus on the things that really matter, such as your content, articles, and so on. Also, developers can use a headless CMS for rapidly building CMS-powered apps and websites in any programming language.
Using ButterCMS as a source of our location data, we'll create a data model for conferences.
Now let's jump back into the tutorial
Create a ButterCMS account by clicking on the “Get Started” button on the website navbar.
After creating your account, you'll see the Welcome Page:
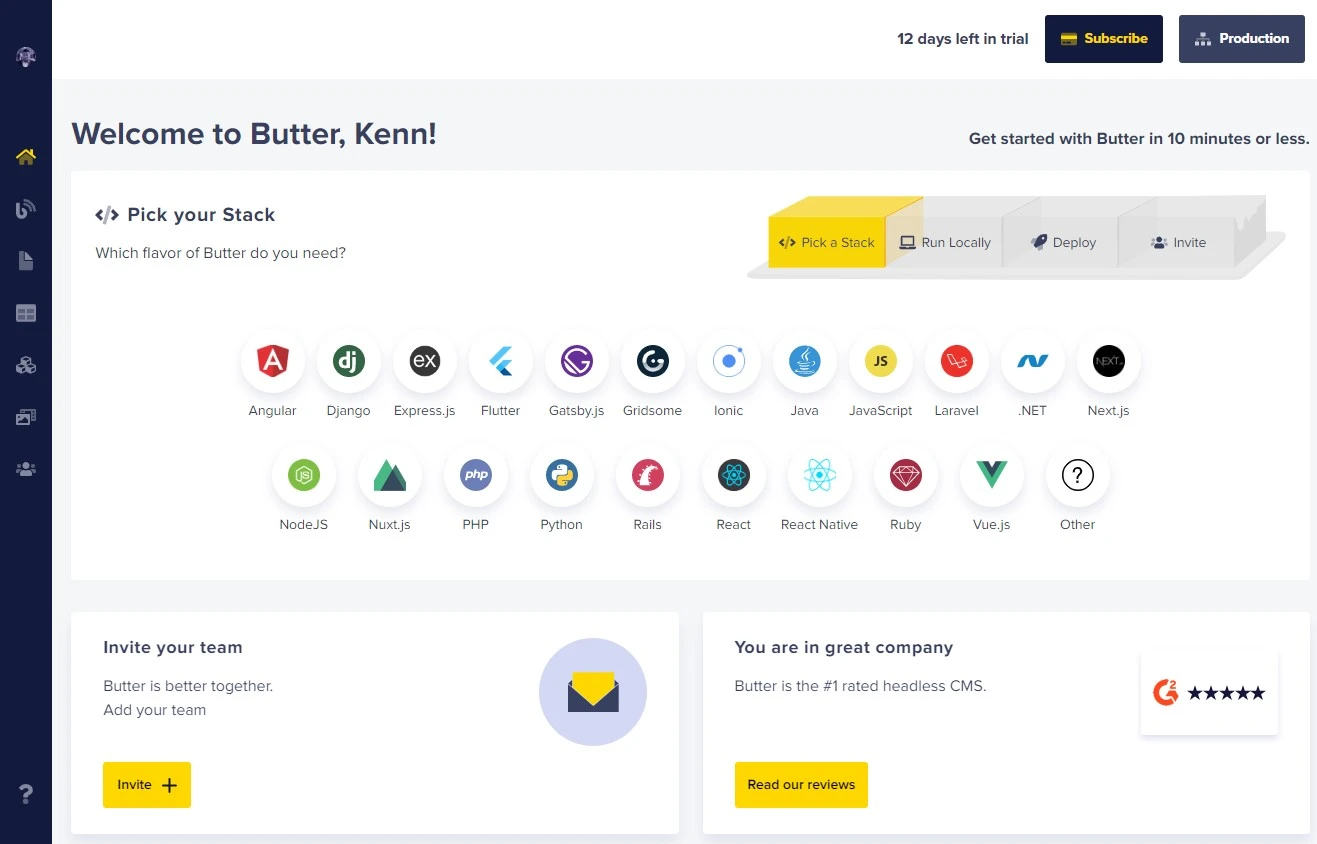
Don't worry, we're only creating the content model here.
Creating and managing a list of conference details and locations with ButterCMS
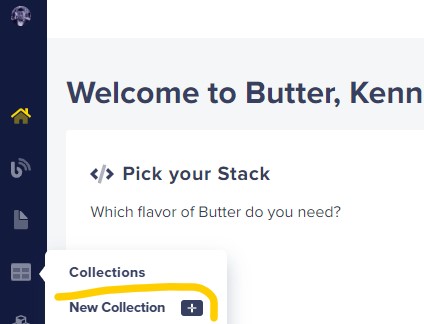
Once done, let's create a content model for conferences:
(1) Create
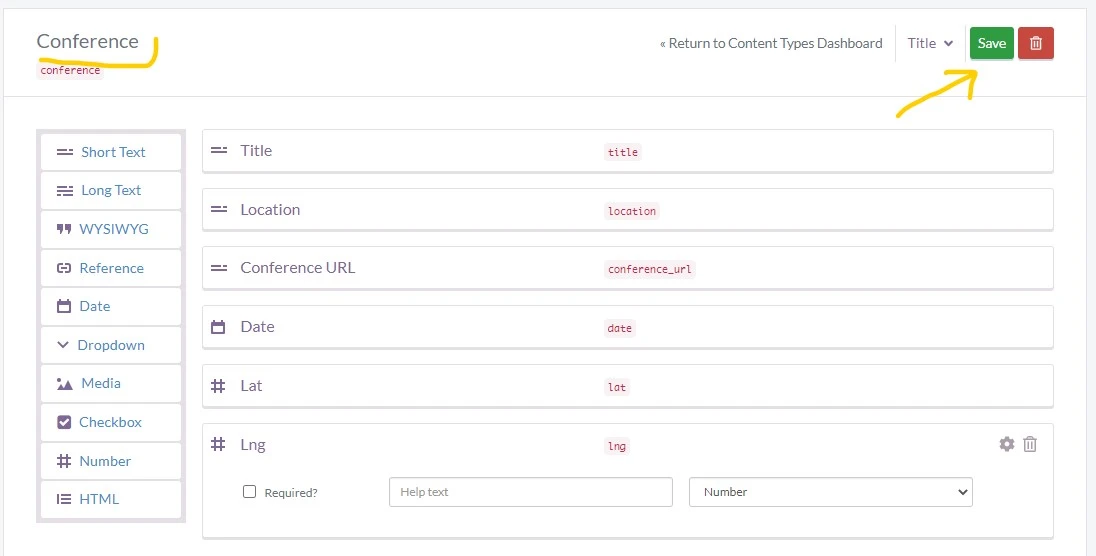
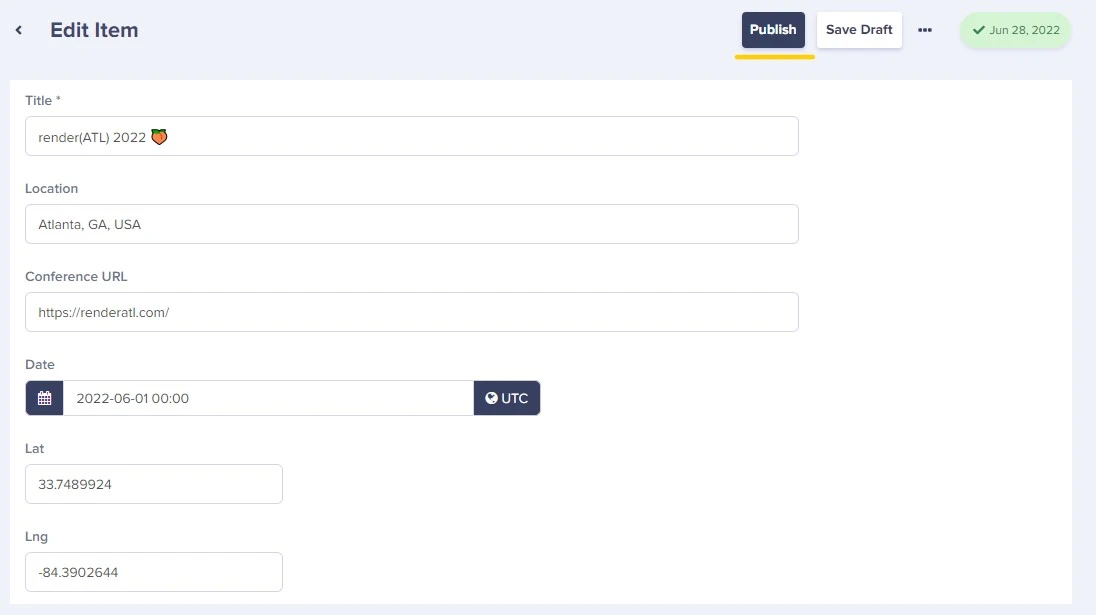
(2) Add fields: title, location, conference URL, date, latitude (lat), longitude (lng):

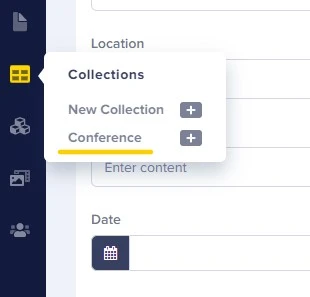
(3) Give the name “Conference” for this collection and save:
(4) Add conferences details - from the official React website:
Choosing the "conferences" collection
Adding conference details one by one
After filling in all the conference details, here is the conferences list:
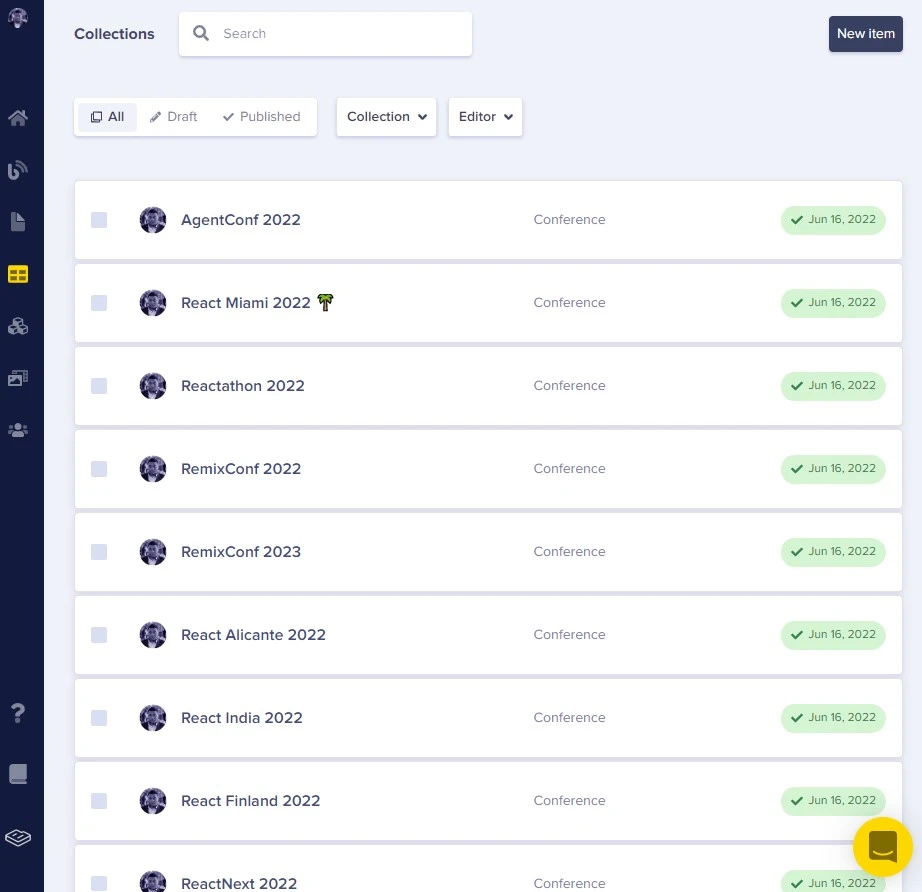
We've used an online tool to get location data for the cities (conference locations): gps-coordinates
(5) Let's connect the CMS with our Gatsby project
- Install the
gatsby-source-buttercmsplugin:
npm install --save gatsby-source-buttercms- Add this snippet at the top of the
`gatsby-config.js`(in the file):
require("dotenv").config({
  path: `.env.${process.env.NODE_ENV}`,
});

const previewMode = !(
  process.env.GATSBY_BUTTER_CMS_PREVIEW === "false" ||
  process.env.GATSBY_BUTTER_CMS_PREVIEW === "0"
)
  ? 1
  : 0;
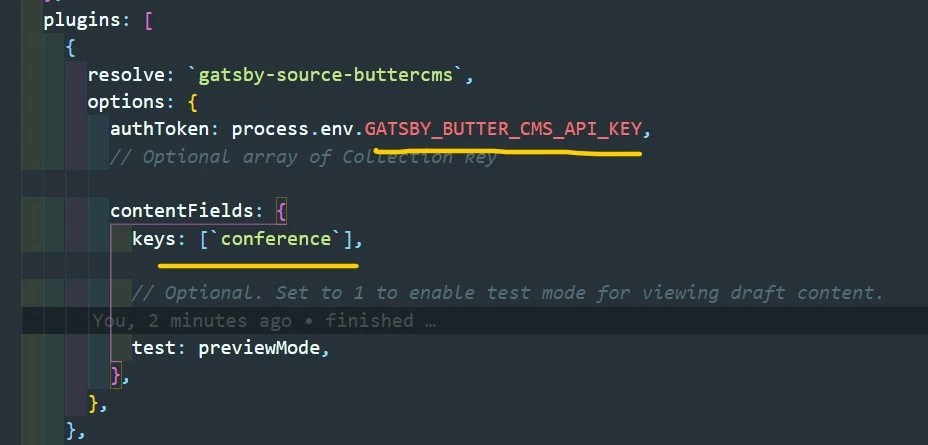
- Add
gatsby-source-buttercmsplugin in ourgatsby-config.js:
 plugins: [
    // ...
    {
      resolve: `gatsby-source-buttercms`,
      options: {
        authToken: process.env.GATSBY_BUTTER_CMS_API_KEY,
        // Optional array of Collection key

        contentFields: {
          keys: [`conference`],

          // Optional. Set to 1 to enable test mode for viewing draft content.

          test: previewMode,
        },
      },
    },

   // ...
]
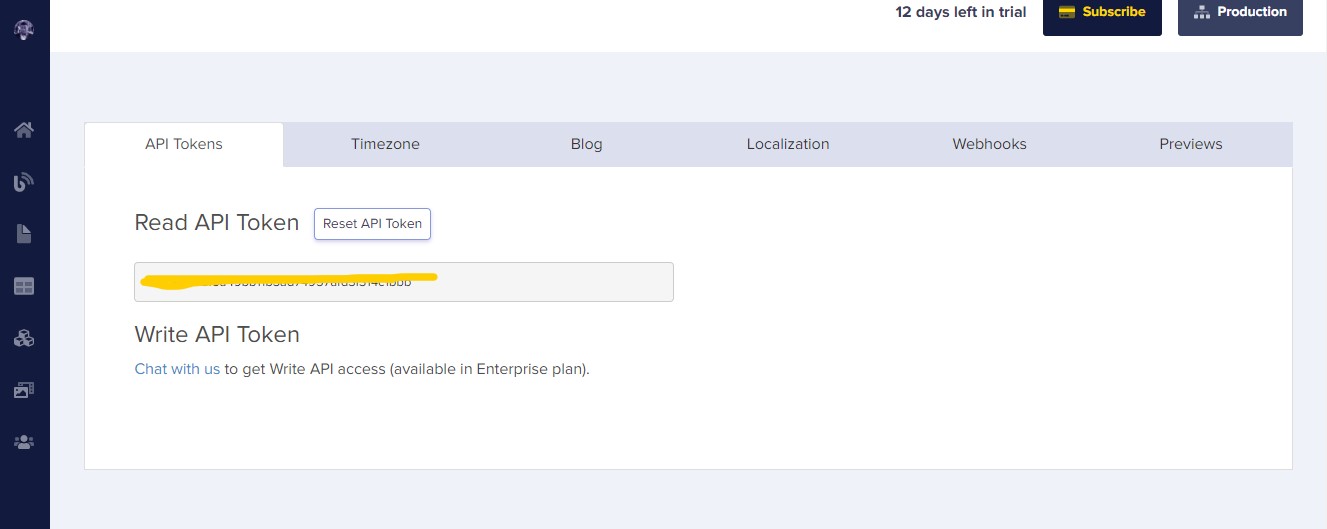
- Copy the API key from your ButterCMS dashboard:
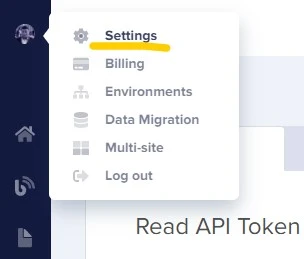
Copy the API key value
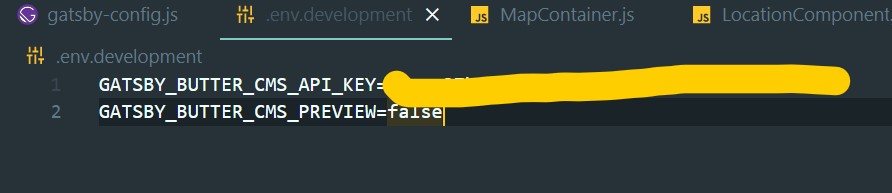
- Add the API key to the environment variable file (create a `.env.development` file first):
GATSBY_BUTTER_CMS_API_KEY=************************************
GATSBY_BUTTER_CMS_PREVIEW=false
Step 4: Building the components
The location component
(1) Create the LocationComponent.js file inside the components folder:
(2) Create the constants.js file and add this snippet to get the icon working:
import L from "leaflet";

export default typeof window !== "undefined"
  ? L.icon({
      iconSize: [25, 41],
      iconAnchor: [10, 41],
      popupAnchor: [2, -40],
      iconUrl: "https://unpkg.com/leaflet@1.6/dist/images/marker-icon.png",
      shadowUrl: "https://unpkg.com/leaflet@1.6/dist/images/marker-shadow.png",
    })
  : null;
⚠ Note that we've wrapped the code inside export default typeof window !== "undefined" ? ... : null in order to prevent an error and detect whether the code is running in a typical browser environment (e.g. an environment with a browser DOM) or in some other JS environment. This is because the window object exists in a typical browser JS, but does not exist in something like node.js or even a webWorker in a browser*. (More details at Stackoverflow.)
(3) Create the React component:
Start by creating the LocationComponent.js file and in the file add this:
import { Icon } from "leaflet";
import { Marker, Popup, useMap } from "react-leaflet";
import "leaflet/dist/leaflet.css";
import L from "leaflet";
import "leaflet/dist/images/marker-shadow.png";
import icon from "./constants";

const LocationComponent = ({ conference }) => {

  const LOCATION = {
    lat: conference.lat,
    lng: conference.lng,
  };
  return (
    <Marker position={[LOCATION.lat, LOCATION.lng]} icon={icon}>
      <Popup>
        <h1>{conference.title}</h1>

        <h5>{conference.location}</h5>
        <h6> {conference.date} </h6>

        <a href={conference.conference_url} target="_blank" rel="noreferrer">
          Discover
        </a>
      </Popup>
    </Marker>
  );
};

export default LocationComponent;
Let's explain the code
The import statements:
import { Marker, Popup, useMap } from "react-leaflet";
import "leaflet/dist/leaflet.css";
import L from "leaflet";
import "leaflet/dist/images/marker-shadow.png";
import icon from "./constants";
This is used for the react-leaflet and leaflet libraries that help us add the location icon and styling.
<span style="font-weight: 400;">import icon from "./constants";</span>This statement is used for the icon handling coming from the constants.js file we just created. Without this, we won't be able to manipulate the map properly (at least the icon part).
The LocationComponent part is for rendering the component:
const LocationComponent = ({ conference }) => {}
We get the conference props that will receive data from the parent component we'll create in a couple of seconds:
const LOCATION = {
    lat: conference.lat,
    lng: conference.lng,
  };
We want a better way to receive the location data, such as the latitude and the longitude, in a LOCATION object:
const LocationComponent = ({ conference }) => {
  // The return statement:
  return (
    <Marker position={[LOCATION.lat, LOCATION.lng]} icon={icon}>
      <Popup>
        <h1>{conference.title}</h1>

        <h5>{conference.location}</h5>
        <h6> {conference.date} </h6>

        <a href={conference.conference_url} target="_blank" rel="noreferrer">
          Discover
        </a>
      </Popup>
    </Marker>
  );
};

export default LocationComponent;
The return statement is rendering a react-leaflet library component Marker that is used for showing the located item.
As we're receiving data within the conference props, we render and add them to the Marker component's props position that receives an array of [latitude, longitude] and the icon props that receives the icon.
And we have the Popup component from the react-leaflet library to show the location item's details upon click. In our case, we'll be showing the conference's name, date, location, and link when the user clicks on the location icon.
The user's location component
Start by creating the CurrentLocation.js file and creating the component inside the file:
- The component:
import React, { useEffect, useState } from "react";
import { Marker, Popup, useMap } from "react-leaflet";
import "leaflet/dist/leaflet.css";
import L from "leaflet";
import "leaflet/dist/images/marker-shadow.png";

import icon from "./constants";

function CurrentLocation() {
  const [position, setPosition] = useState(null);
  const [bbox, setBbox] = useState([]);

  const map = useMap();

  useEffect(() => {
    map.locate().on("locationfound", function (e) {
      setPosition(e.latlng);
      map.flyTo(e.latlng, map.getZoom());
      const radius = e.accuracy;
      const circle = L.circle(e.latlng, radius);
      circle.addTo(map);
      setBbox(e.bounds.toBBoxString().split(","));
    });
  }, [map]);

  return position === null ? null : (
    <Marker position={position} icon={icon}>
      <Popup>
        You are here 👋

        Map bbox:

        <b>Southwest lng</b>: {bbox[0]}

        <b>Southwest lat</b>: {bbox[1]}

        <b>Northeast lng</b>: {bbox[2]}

        <b>Northeast lat</b>: {bbox[3]}
      </Popup>
    </Marker>
  );
}

export default CurrentLocation;
Notice that it is the same component as the LocationComponent.js file, but with more specific lines of code:
import React, { useEffect, useState } from "react";This line is for the normal React Import with Hooks (useState to save states & useEffect to manipulate the async code).
const [position, setPosition] = useState(null);
  const [bbox, setBbox] = useState([]);

  const map = useMap();

  useEffect(() => {
    map.locate().on("locationfound", function (e) {
      setPosition(e.latlng);
      map.flyTo(e.latlng, map.getZoom());
      const radius = e.accuracy;
      const circle = L.circle(e.latlng, radius);
      circle.addTo(map);
      setBbox(e.bounds.toBBoxString().split(","));
    });
  }, [map]);
This part is used to initialize our map component (position, and location details) for the user to get their current location.
All the other parts are explicit and clear:
     <Popup>
        You are here 👋

        Map bbox:

        <b>Southwest lng</b>: {bbox[0]}

        <b>Southwest lat</b>: {bbox[1]}

        <b>Northeast lng</b>: {bbox[2]}

        <b>Northeast lat</b>: {bbox[3]}
      </Popup>
In the Popup component, we render some specific data such as the Southwest latitude and longitude and the Northeast latitude and longitude.
The locations list component
After creating the MapContainer.js file, create the component inside the file.
- The component:
import React from "react";
import { MapContainer, TileLayer } from "react-leaflet";
import "leaflet/dist/leaflet.css";
import "leaflet/dist/images/marker-shadow.png";
import LocationComponent from "./LocationComponent";
import CurrentLocation from "./CurrentLocation";

const MapContainerComponent = () => {

  const conferences = []

  if (typeof window !== "undefined") {
    return (
      <div>
        // ...
      </div>
    );
  }
  return null;
};

export default MapContainerComponent;
As we did in the Location Component, we just wrapped our map component in a condition to handle the error by adding the if (typeof window !== "undefined") {...} scope.
- Our first look at the map component being rendered on the web page
In the main component, we add this:
<MapContainer
style={{ height: "800px", width: "100%" }}
center={[12.97, 77.59]}
zoom={3}
scrollWheelZoom={false}
>
<TileLayer
attribution='© <a href="https://www.openstreetmap.org/copyright">OpenStreetMap</a> contributors'
url="https://{s}.tile.openstreetmap.org/{z}/{x}/{y}.png"
/>
// ...
})}
<CurrentLocation />
</MapContainer>Rendering the map on the page
- Create a
layout component(I'm using a template layout, but you can create whatever you want, it's not very important for our project):
import React, { useEffect, useState } from "react";
import { Helmet } from "react-helmet";
import Header from "./Header";


const Layout = ({ children, menuItems }) => {
  const [activeLink, setActiveLink] = useState("");

  useEffect(() => {
    const onScroll = () => {
      const sections = document.querySelectorAll(".page-scroll");
      const scrollPos =
        window.pageYOffset ||
        document.documentElement.scrollTop ||
        document.body.scrollTop;

      for (let i = 0; i < sections.length; i++) {
        const currLink = sections[i];
        const currLinkHref = currLink.getAttribute("href");
        const val = currLinkHref.replace("/", "");

        const refElement = document.querySelector(val);
        const scrollTopMinus = scrollPos + 73;

        if (
          refElement &&
          refElement.offsetTop <= scrollTopMinus &&
          refElement.offsetTop + refElement.offsetHeight > scrollTopMinus
        ) {
          setActiveLink(currLinkHref);
        }
      }
    };

    window.document.addEventListener("scroll", onScroll, { passive: true });
    return () => window.document.removeEventListener("scroll", onScroll);
  }, []);

  return (
    <>
      <Helmet>
        <meta
          http-equiv="Content-Security-Policy"
          content="frame-ancestors 'self' https://buttercms.com;"
        />
      </Helmet>

      <Header menuItems={menuItems} activeLink={activeLink} />


      <main>{children}</main>

    </>
  );
};

export default Layout;
- In the
pagesfolder, let's add this code to theindex.jscomponent (create the file if it doesn't exist):

import React from "react";
import Layout from "../containers/Layout";
import MapContainerComponent from "../components/MapContainer";
const IndexPage = () => {
return (
<Layout menuItems={[]}>
<div className="w-full min-h-min">
<h1 className="text-5xl font-bold my-6 text-center">
React Conferences
</h1>
<MapContainerComponent />
</div>
</Layout>
);
};
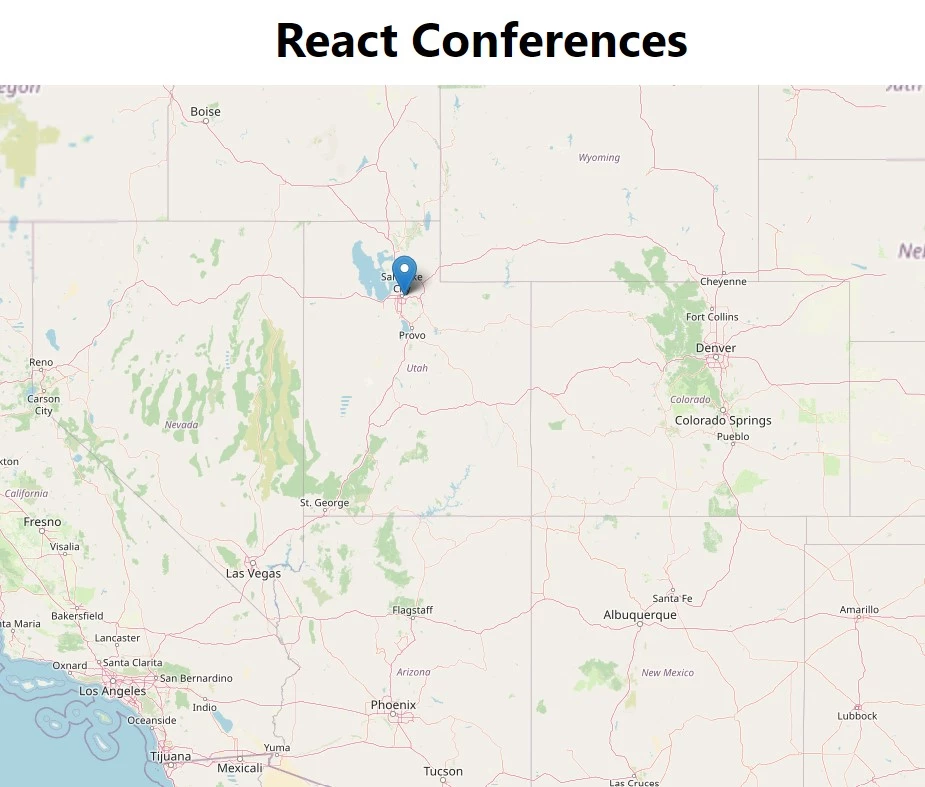
export default IndexPage;Without creating this component and rendering the MapContainerComponent from the MapContainer.js file, nothing will be shown on the page. So, that's why we created this first page.
For experimental purposes, after running npm run develop, we will have something like this (in the http://localhost:8000/ address):
Step 5: Querying location data with Gatsby and GraphQL from ButterCMS
Using Gatsby, we'll most likely be working with GraphQL. In our case, we'll be calling data from ButterCMS.
Gatsby GraphQL Playground
Let's go to the browser and see if ButterCMS is serving the data we asked for.
Type http://localhost:8000/___graphql. We get:

Wait! let's explain :)
We've got the conferences data and queried the data we're interested in:
- The query
query {
      allButterCollection {
        edges {
          node {
            value {
              title
              location
              lat
              lng
              date(fromNow: true)
              conference_url
            }
          }
        }
      }
}- The Output (the GraphQL Playground provided by Gatsby)
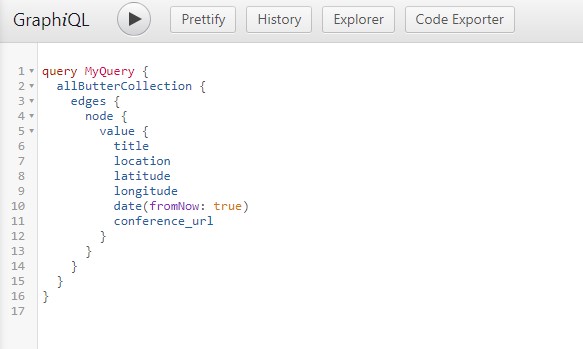
Here is the result from the ButterCMS API:

- Back to our code and let's now work on rendering these data on the map
In the MapContainer.js file, let's change the code to:
import React from "react";
import { graphql, useStaticQuery } from "gatsby";
import { MapContainer, TileLayer } from "react-leaflet";
import "leaflet/dist/leaflet.css";
import "leaflet/dist/images/marker-shadow.png";
const MapContainerComponent = () => {
const data = useStaticQuery(graphql`
    query {
      allButterCollection {
        edges {
          node {
            value {
              title
              location
              lat
              lng
              date(fromNow: true)
              conference_url
            }
          }
        }
      }
    }
  `);

  const conferences = data.allButterCollection.edges[0].node.value;
  console.log(conferences);
if (typeof window !== "undefined") {
return (
<div>
<MapContainer
style={{ height: "800px", width: "100%" }}
center={[conferences[0].lat, conferences[0].lng]}
zoom={3}
scrollWheelZoom={false}
>
<TileLayer
attribution='© <a href="https://www.openstreetmap.org/copyright">OpenStreetMap</a> contributors'
url="https://{s}.tile.openstreetmap.org/{z}/{x}/{y}.png"
/>
// ...
<CurrentLocation />
</MapContainer>
</div>
);
}
return null;
};
export default MapContainerComponent;In order to handle the query, we've added the import statement:
import { graphql, useStaticQuery } from "gatsby";
And inside the main component, we have:
const data = useStaticQuery(graphql`
query {
allButterCollection {
edges {
node {
value {
title
location
lat
lng
date(fromNow: true)
conference_url
}
}
}
}
}
`);
const conferences = data.allButterCollection.edges[0].node.value;
console.log(conferences);- Let's reload the server by running
npm run develop, and go tohttp://localhost:8000/to check the console:
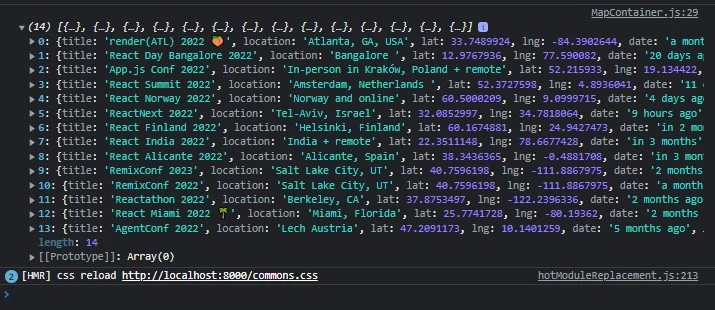
Well done 👏
Fetching the conferences list
- Let's now update the whole component:
import React from "react";
import { graphql, useStaticQuery } from "gatsby";
import { MapContainer, TileLayer } from "react-leaflet";
import "leaflet/dist/leaflet.css";
import "leaflet/dist/images/marker-shadow.png";
import LocationComponent from "./LocationComponent";
const MapContainerComponent = () => {
const data = useStaticQuery(graphql`
query {
allButterCollection {
edges {
node {
value {
title
location
lat
lng
date(fromNow: true)
conference_url
}
}
}
}
}
`);
const conferences = data.allButterCollection.edges[0].node.value;
console.log(conferences);
if (typeof window !== "undefined") {
return (
<div>
<MapContainer
style={{ height: "800px", width: "100%" }}
center={[conferences[0].lat, conferences[0].lng]}
zoom={3}
scrollWheelZoom={false}
>
<TileLayer
attribution='© <a href="https://www.openstreetmap.org/copyright">OpenStreetMap</a> contributors'
url="https://{s}.tile.openstreetmap.org/{z}/{x}/{y}.png"
/>
  {conferences.map((conference, index) => {
            return (
              <div key={index}>
                <LocationComponent conference={conference} />
              </div>
            );
          })}
</MapContainer>
</div>
);
}
return null;
};
export default MapContainerComponent;
- Let's explain the code
In order to work with the location component, we just added the import statement:
import LocationComponent from "./LocationComponent";
Inside the component we're mapping the conferences array we created and rendering each specific location that's being passed through the LocationComponent props conference:
{conferences.map((conference, index) => {
return (
<div key={index}>
<LocationComponent conference={conference} />
</div>
);
})}- The output:
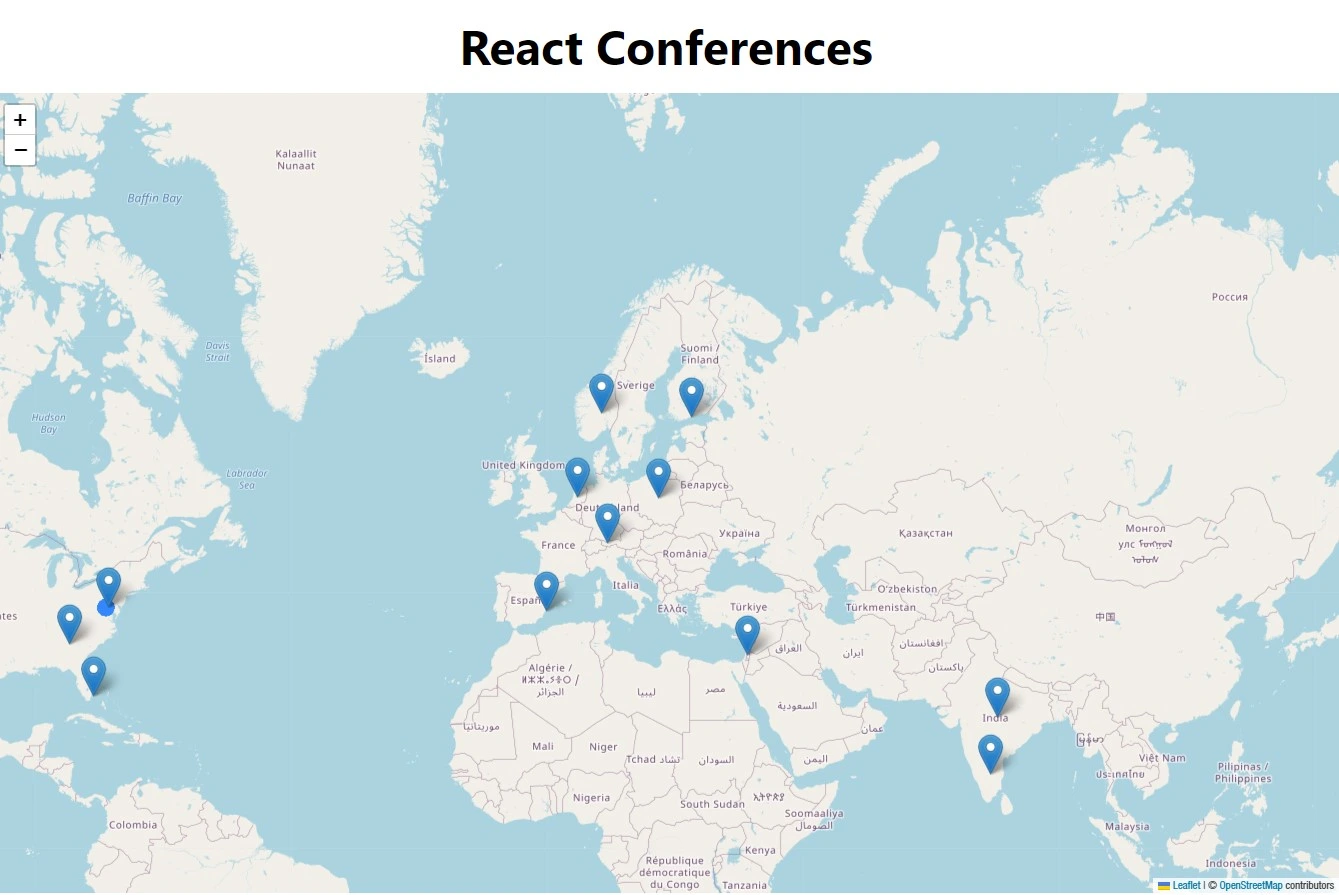
- When the user clicks on a location, we have:
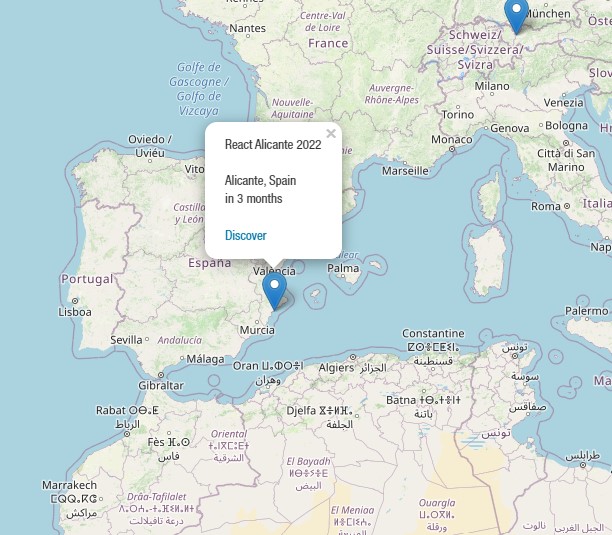
Calling a user's current location components
- In the end, let's now call the CurrentLocation Component (we created above) inside the main component:
import React from "react";
import { graphql, useStaticQuery } from "gatsby";
import { MapContainer, TileLayer } from "react-leaflet";
import "leaflet/dist/leaflet.css";
import "leaflet/dist/images/marker-shadow.png";
import LocationComponent from "./LocationComponent";
import CurrentLocation from "./CurrentLocation";
const MapContainerComponent = () => {
// ...
if (typeof window !== "undefined") {
return (
<div>
<MapContainer
style={{ height: "800px", width: "100%" }}
center={[conferences[0].lat, conferences[0].lng]}
zoom={3}
scrollWheelZoom={false}
>
<TileLayer
attribution='© <a href="https://www.openstreetmap.org/copyright">OpenStreetMap</a> contributors'
url="https://{s}.tile.openstreetmap.org/{z}/{x}/{y}.png"
/>
{conferences.map((conference, index) => {
return (
<div key={index}>
<LocationComponent conference={conference} />
</div>
);
})}
// Here it is:
<CurrentLocation />
</MapContainer>
</div>
);
}
return null;
};
export default MapContainerComponent;Call it from the import statement:
import CurrentLocation from "./CurrentLocation";
Note: This component has already been declared above.
- After reloading (running the server) with
npm run develop, we have a location permission pop-up like this:
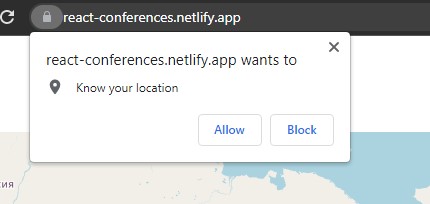
- After importing the component and running the server, we allow the location permission to get our current location. We have this:
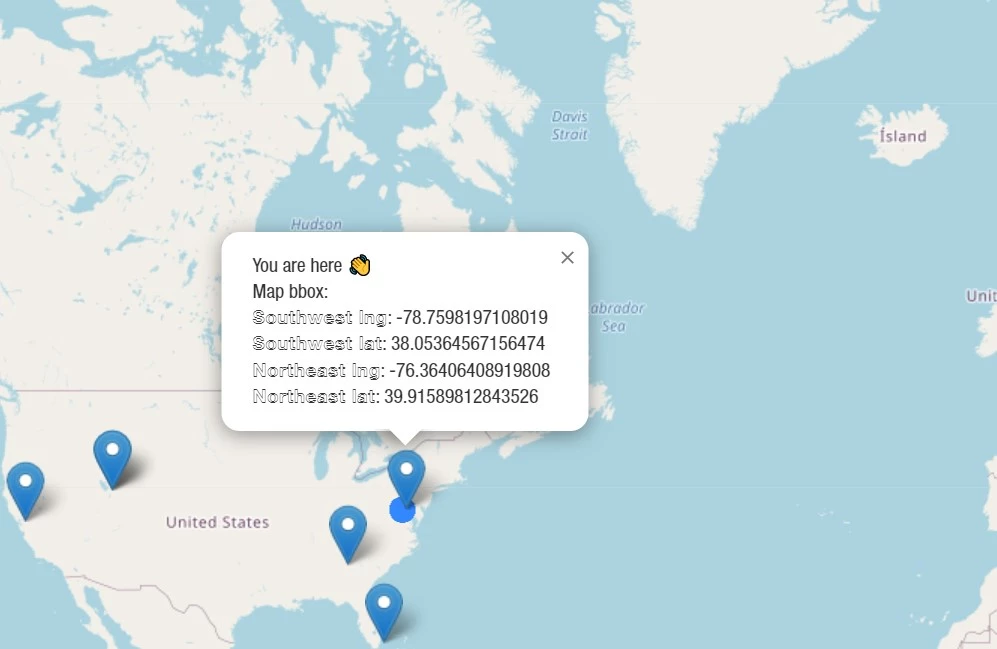
Here we have the user's location data. Bravo 👏
The website you should end up with
Closing thoughts
Did you notice that using a headless CMS solves a lot of problems? As developers, we don't care about where to store our location data anymore. In this article, we saw how to manipulate a mapping library with React, built a website that shows all the React conferences on a map using ButterCMS as the CMS that simplifies our location details, used Gatsby as our React framework that handles the API manipulation and user interfaces, and utilized the React-leaflet library for the map.
Using this type of library (like Leaflet), we can add more functionalities such as a browser and feature detection if we have some features that don’t work for a certain kind of browser or only should be displayed on mobile devices for example, we can detect these features with the help of L.Browser (leaflet js browser detector) or we can build many others interesting projects like visualizing restaurants in your town, some hospitals or even taxi cars, using real-time availability data from a source like a government data. So, keep exploring.

