
- Why use PHP?
- Why use ButterCMS?
- Tutorial prerequisites
- Setting up the development environment
- Building the landing page in ButterCMS
- Creating components for the landing page
- Adding the components to the landing page
- Adding content to the landing page
- Incorporating the components in PHP
- Create and add a Navigation Menu and Features section with ButterCMS collections
- Our resulting landing page
- Closing thoughts
Building a website is one of the best ways to create an online presence for your business or as an individual. However, if you're looking to generate more leads, referrals, and sales, creating an optimized landing page is the best option.
Landing pages are standalone websites designed specifically to serve as the first impression of your business or services, thereby converting visitors towards conversion for sales. It’s a vital tool for businesses and entrepreneurs looking to generate more leads.
In this PHP landing page tutorial, we will demonstrate how to set up and quickly build a landing page with PHP and manage the content using ButterCMS. You will learn how to set the development environment for PHP and ButterCMS, how to manage your content, how to fetch data from ButterCMS, and how to render it in your application.
Table of contents
Why use PHP?
The acronym PHP stands for Hypertext Preprocessor. It’s an open-source general-purpose scripting language widely used for building web backend architecture. It was developed in 1994 by Rasmus Lerdorf. PHP is the backbone of nearly all the internet, as almost 78% of websites are developed using PHP.
The most important advantage of PHP is that it is easy to understand and implement. It gives web developers more control, as well. It also has cross-platform compatibility with all major operating systems from Windows to MacOS and most web servers (Apache, Microsoft, IIS, Netscape).
PHP improves loading speed, so if you're looking to build a landing page that loads faster, PHP is the ideal choice. Using PHP also gives you access to cheaper hosting services because most of the hosting platform has a default configuration for hosting PHP websites.
Why use ButterCMS?
ButterCMS is an API-first headless CMS that enables you to easily develop CMS-powered applications and websites using any programming language of your choice. This is one of the most powerful headless CMSs on the market—whether you're building a new application or integrating it with an existing one.
In this tutorial, we will utilize some ButterCMS core features. The first we will be using is the page type feature. This powerful feature allows users to create pages that utilize the same general structure with different content. Using this feature you only have to configure the page once and use it as many times as you need.
The second feature is components. Components in ButterCMS enable us to compose dynamic pages. We will use this feature to create different sections of the landing page, such as the Hero section and two other sections.
Then, we have collections. Collections are tables of data that pages can reference. We will use this feature to create the Navigation section and the Feature section of the landing page.
ButterCMS is one of the best headless CMSs for creating landing pages due to its flexible content modeling features. You can easily customize the content of your landing page according to your needs. It's an easy-to-use tool that allows you to launch your landing page faster and with less code.
Take Control of Your Landing Page Content with ButterCMS
Start free trialTutorial prerequisites
Below are the main requirements you need to follow along with this tutorial:
-
A ButterCMS trial account
-
A code editor such as Visual Studio Code or Sublime
-
Basic knowledge of PHP
Setting up the development environment
To get started, clone the repository for this tutorial here to follow along.
Then, navigate into the tutorial folder and install the dependencies:
cd php-buttercms-landingpage
composer install
After that, open the .env file in the root of your project and add your api token as an environment variable:
LARAVEL_APP_BUTTER_CMS_API_KEY="<Your API Token>"
Building the landing page in ButterCMS
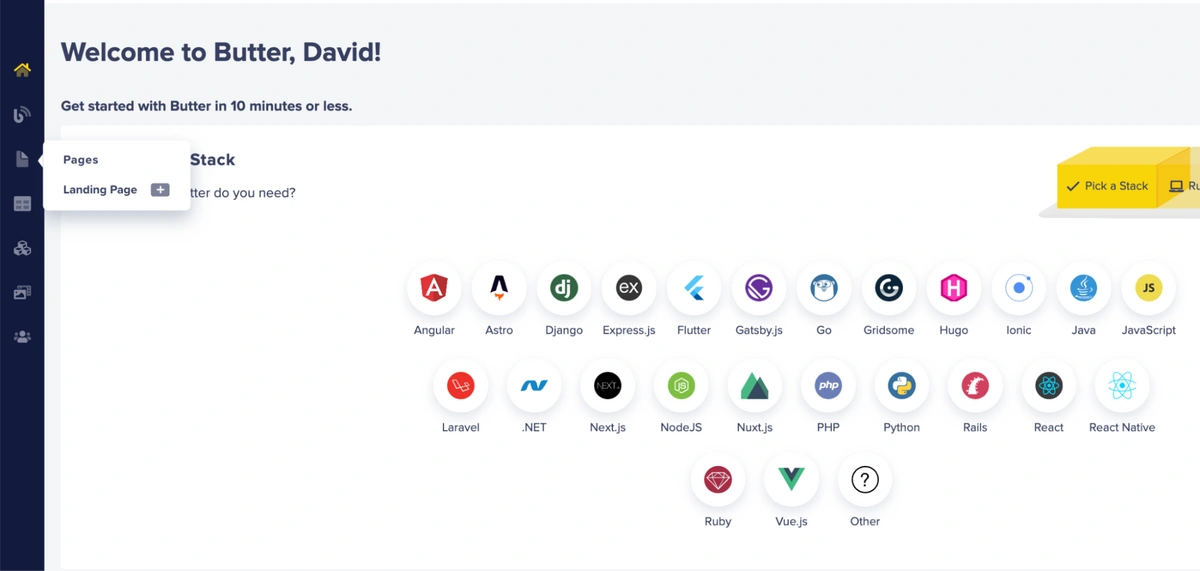
You will need to sign up and create a user account to start building a landing page with ButterCMS. Then, log in to your dashboard on the ButterCMS website. After signing up, you will be redirected to the ButterCMS dashboard, where you'll be able to manage the content of your application.
To create a landing page for your website, navigate to the Pages tab on the sidebar of your dashboard, and click on the + icon next to Landing Page to create a new page, Landing Page is a pre-built Page Type provided by ButterCMS.
Then, enter the page title and description. We’ll create the Home page and call it Whelp. Here, we are mimicking the whelp.co landing page.
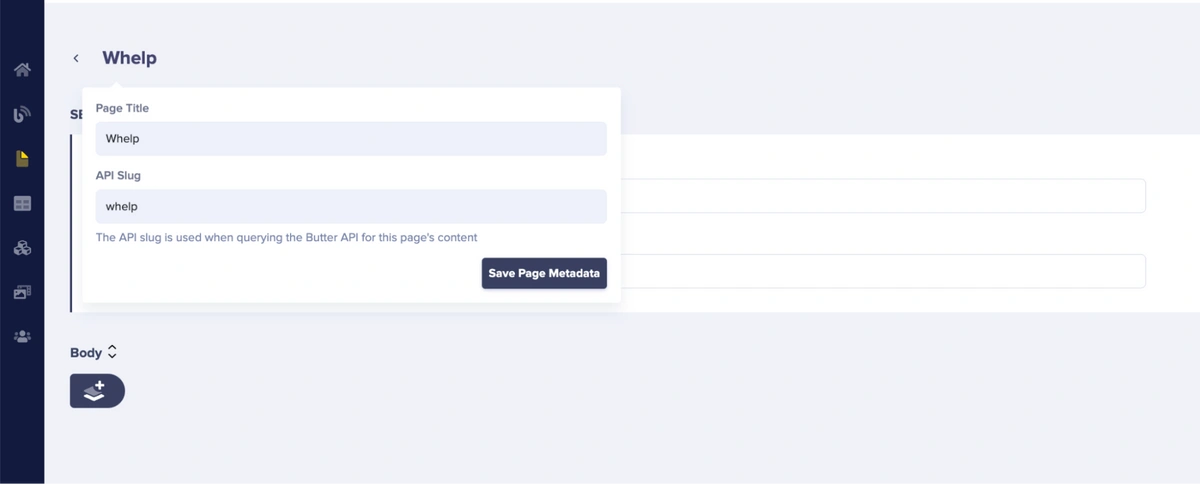
After entering the page title, it will automatically generate an API slug for you where you can access your page. Click on the Save Page Metadata button to save the page. After that, enter the SEO Title and Description for the page and click on the Publish button.

Creating components for the landing page
In this section, we will create several different components, such as the Hero, Section1 & Section2 (the two sections just beneath the Hero component which both hold a headline, subheadline, an image, and a button) components.
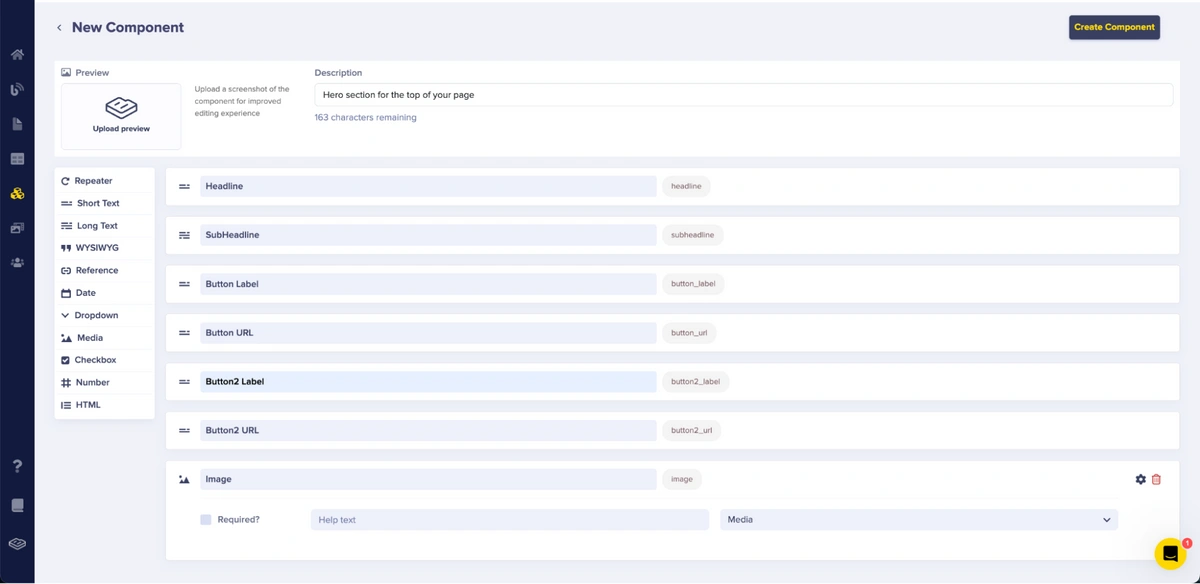
So, let’s start by creating the Hero component by following the steps below.
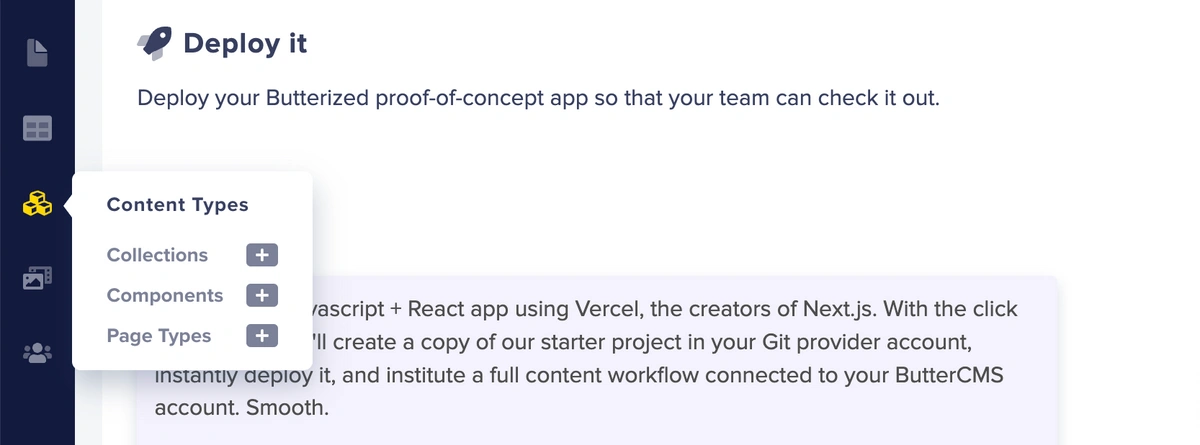
Hover over the Content Types icon tab in the sidebar of your dashboard, then click on the + icon next to Components to begin configuring your components.

You will land on the configuration page:
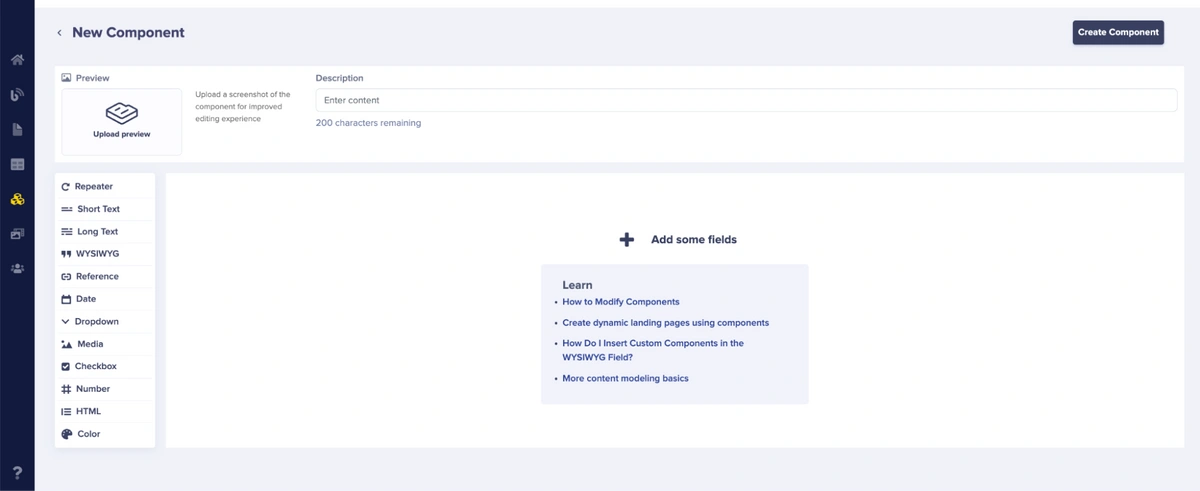
Now, we will define the component with the following fields:
-
Short text for Headline
-
Long text for Sub-Headline
-
Short text for Button Label
-
Short text for Button URL
-
Short text for Button2 Label
-
Short text for Button2 URL
-
Media for Hero Image
Then, click the Create Component button and enter the component name. Here, we’ve named the component Hero.
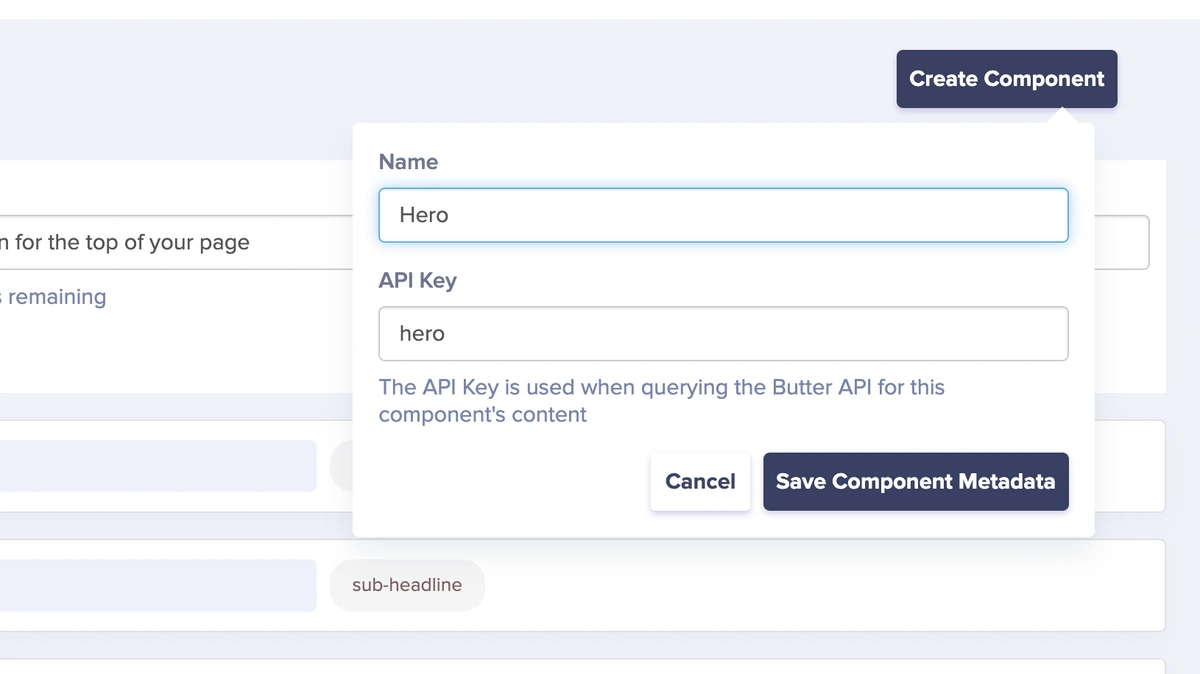
Click the Save Component Metadata button.
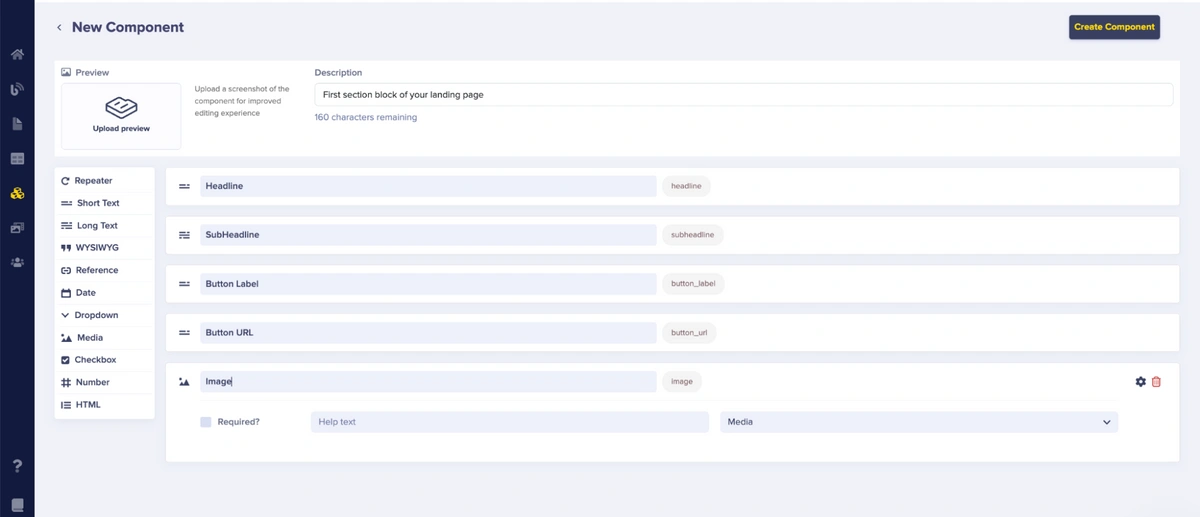
Next, create the Section1 component by following the steps below.
Click on the + icon next to Components on the Content Types tab in the sidebar of your dashboard.
After that, choose the fields for the component. We’ll select:
-
Short text for Headline
-
Long text for Sub-Headline
-
Short text for Button Label
-
Short text for Button URL
-
Media for Section Image
Then, click the Create Component button and enter the component name. Here, we’ve named the component Section1.
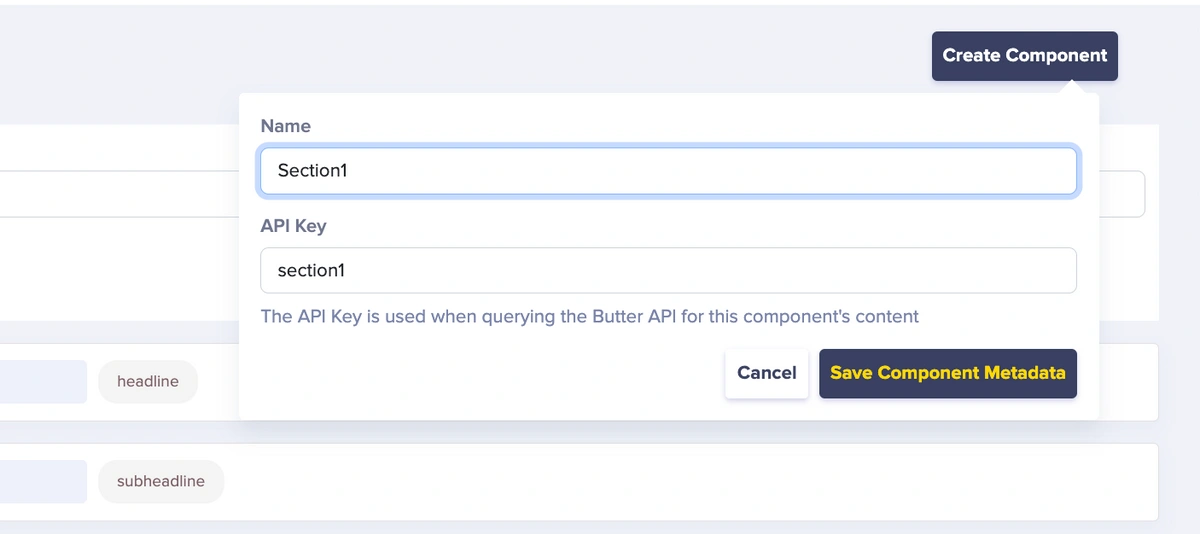
Click the Save Component Metadata button.
Next, create the Section2 component by following the steps below:
Click on the + icon next to Components on the Content Types tab in the sidebar of your dashboard.
After that, choose the fields for the component. We’ll select:
-
Short text for Headline
-
Long text for Sub-Headline
-
Short text for Button Label
-
Short text for Button URL
-
Media for Section Image
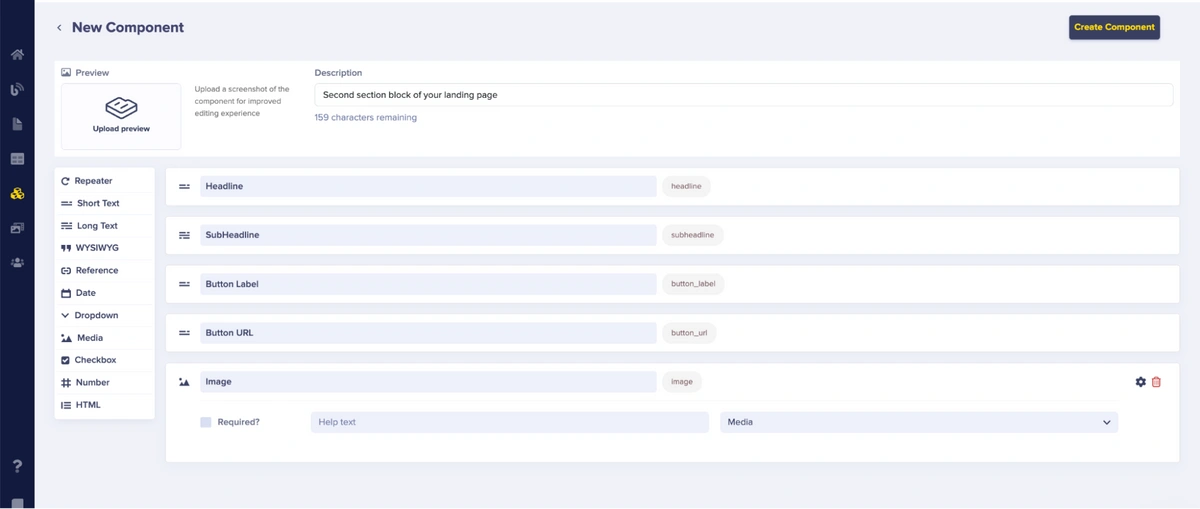
Then, click the Create Component button and enter the component name. Here, we’ve named the component Section2.
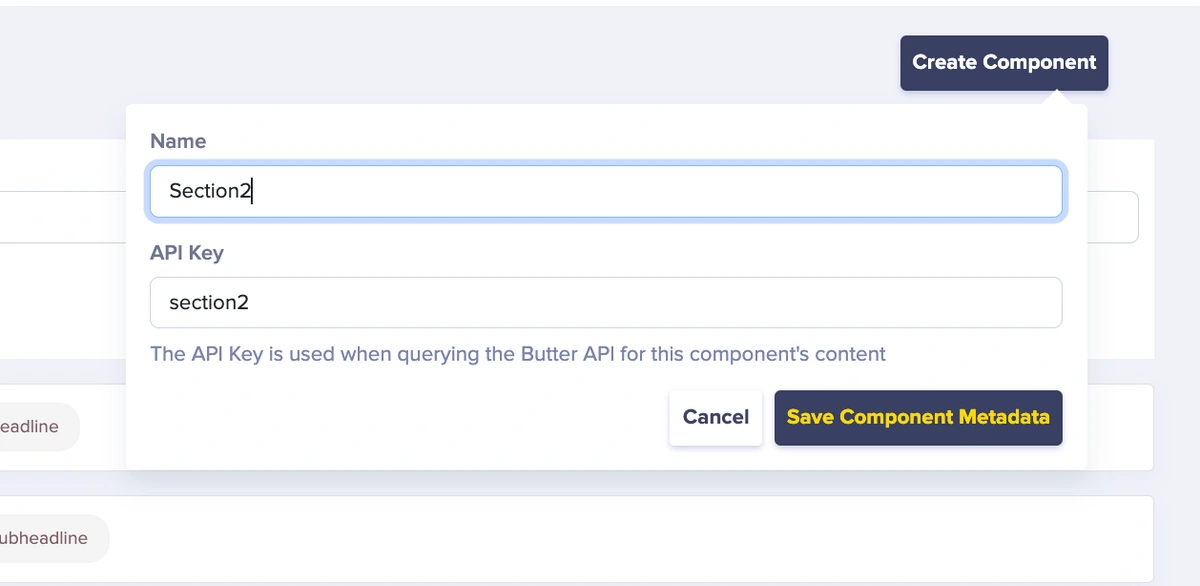
Click the Save Component Metadata button.
Adding the components to the landing page
In this section, we are going to be adding the components we created above to the schema of our landing page.
So, click on Landing Page in the Pages tab then select the Whelp landing page.

Next, select the Whelp landing page from the list of landing pages on the page to modify the schema and add the components you created to the Landing Page body. Adding these components to the page schema will enable you to access and add them to the landing page created earlier.
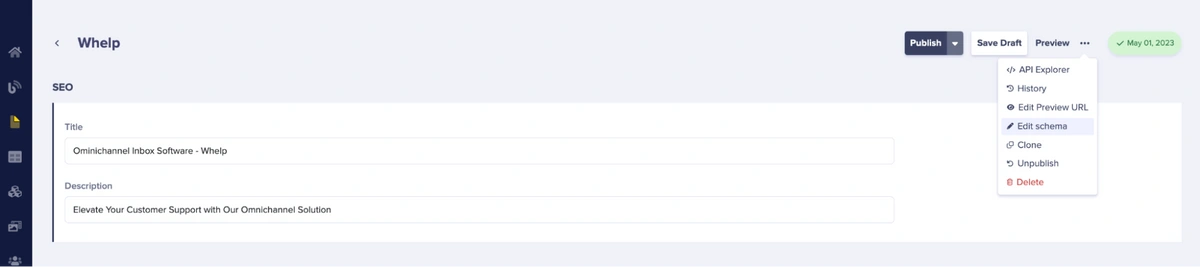
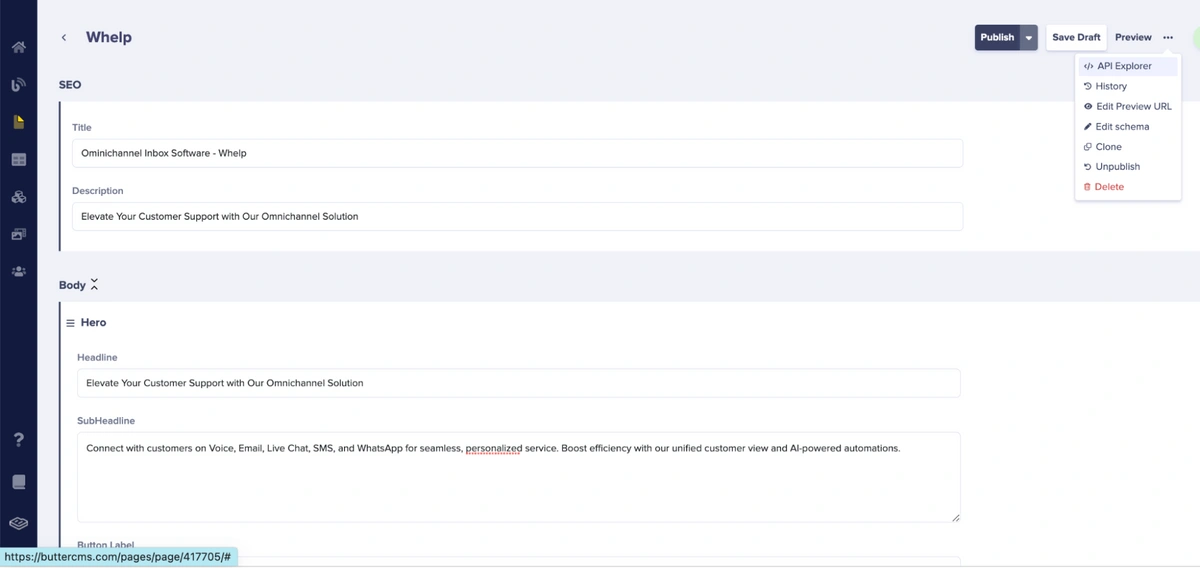
After selecting the Whelp page from the list you will land on the page where you can add content. To edit the schema, you have to select the three dots in the top right corner of the page and select Edit Schema:
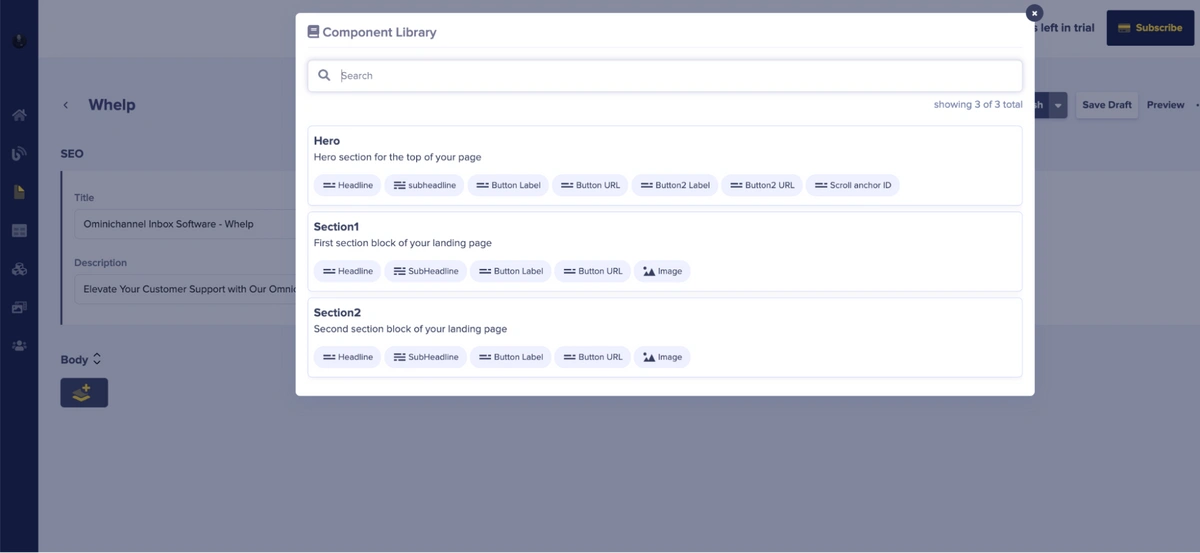
Then, add the Component Picker and add components to that picker. Select the Hero, Section1, and Section2 components that we just created and click Save:
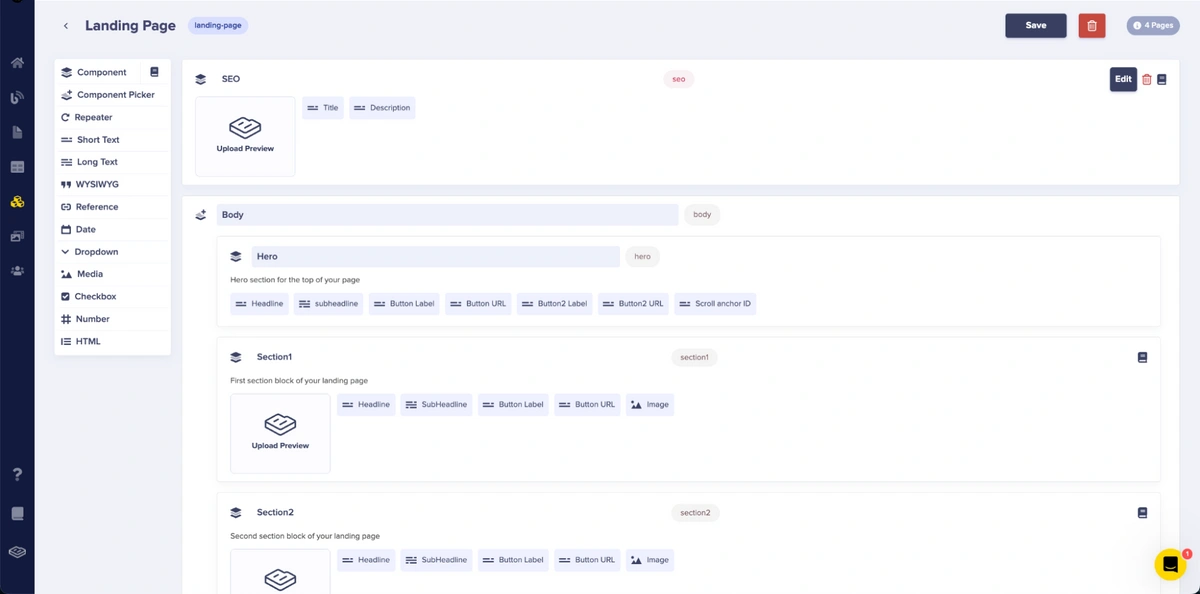
Now let’s go back to the Whelp page and select the three components that were created and add them to the page. To do that, click on the Body Component Picker icon to add the components.
Adding content to the landing page
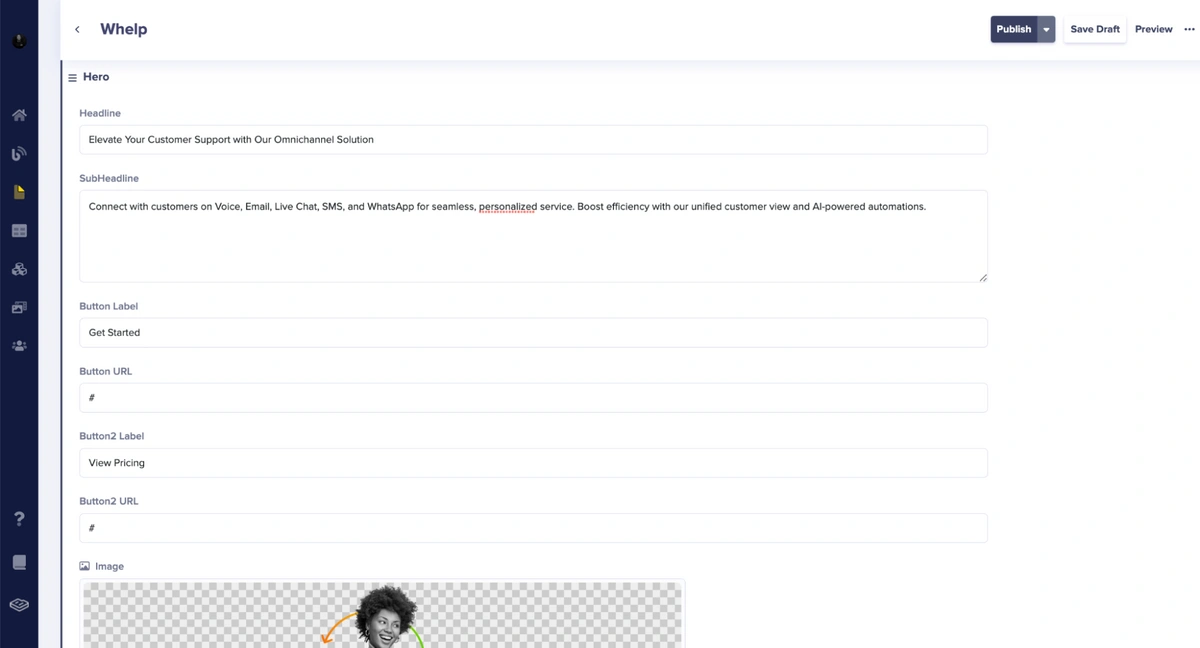
Now, click on the Hero component to add the Hero component to the page. Next, input the details of the Headline and Subheadline fields, then add the hero image (you can upload and use your custom images to the ButterCMS CDN or choose from the available images provided by ButterCMS). Then, add details for the Button Label and the Button URL. You can use the pound sign (#) since we are not redirecting the button click anywhere.
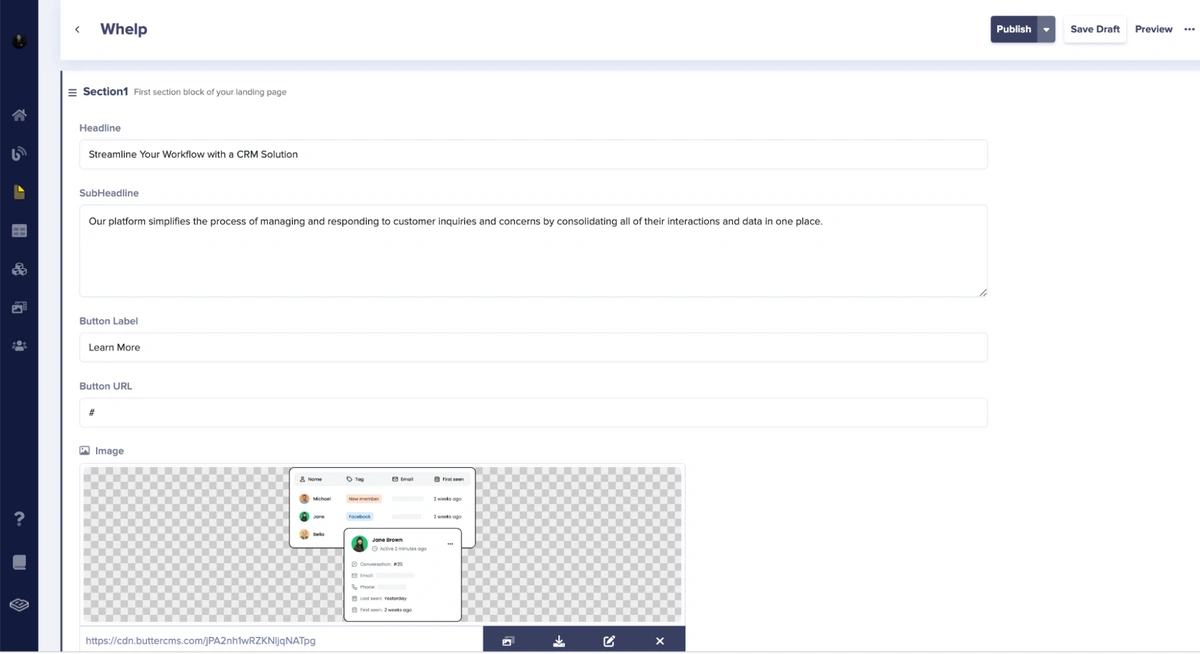
Then, add the details for the Section1 component.
Next, let’s add the details for Section2 component :
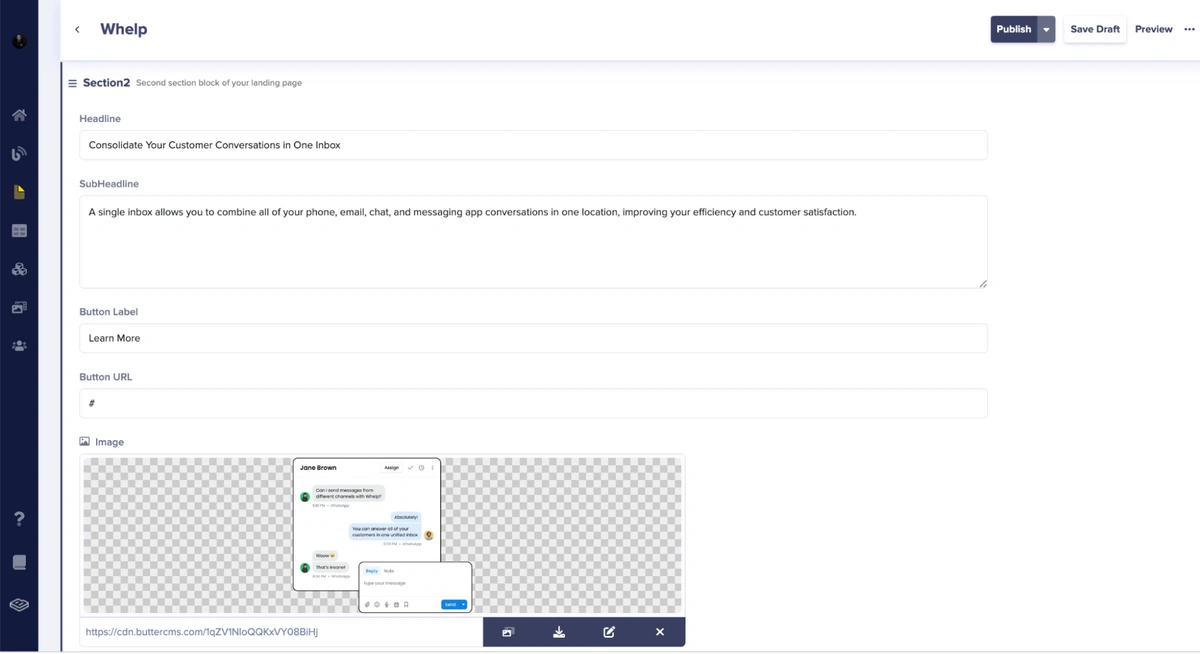
Then click Publish.
Incorporating the components in PHP
Now, we have three components set up—the Hero, Section1, and Section2 components. Let’s proceed to fetch the component into our landing page. Before that, open app/Http/Controllers/PageController.php and add the following code:
<?php

namespace App\Http\Controllers;

use ButterCMS\ButterCMS;
use Illuminate\Http\Request;
use Illuminate\Support\Facades\Config;
use Illuminate\View\View;

class PageController extends Controller
{
   public function __construct(
       private ButterCMS $butterCMS
   ) {
   }

   public function showPage(string $type, string $pageSlug): View
   {
       $page = $this->butterCMS->fetchPage($type, $pageSlug, [
           'preview' => app('isPreview')
       ]);

       return view('page', [
           'pageSeo' => $page->getFields()['seo'],
           'pageBody' => $page->getFields()['body'],
       ]);
   }

   public function showLandingPage(): View
   {
       return $this->showPage('landing-page', 'whelp');
   }

   public function showLandingPageSlug(string $pageSlug): View
   {
       return $this->showPage('landing-page', $pageSlug);
   }
}
In the code snippet above, we created a function that displays our pages. After that, open resource/views/components/butter-cms-fields/hero.blade.php and add the following code:
<section id="" class="hero-section">
   <div class="container">
       <div class="row align-items-center">
           <div class="col-xl-6 col-lg-6 col-md-10">
               <div class="hero-content">
                   <h1>{{$pageFields['headline']}}</h1>
                   <p>{{$pageFields['subheadline']}}</p>

                   <a href="{{$pageFields['button_url']}}" target="_blank" class="main-btn btn-hover">{{$pageFields['button_label']}}</a>
                   <a href="{{$pageFields['button2_url']}}" target="_blank" class="main-btn1 btn-hover">{{$pageFields['button2_label']}}</a>
               </div>
           </div>

           <div class="col-xxl-6 col-xl-6 col-lg-6">
               <div class="hero-image text-center text-lg-end">
                   <img src="{{$pageFields['image']}}" alt="">
               </div>
           </div>
       </div>
   </div>
</section>
The code snippet above creates the page structure of our hero component.
Then, open resource/views/components/butter-cms-fields/section1.blade.php and add the following code:
<section id="{}" class="cta-section">
   <div class="container">
       <div class="row">
           <div class="col-lg-6">
               <div class="cta-content-wrapper">
                   <div class="section-title">
                       <h2 class="mb-20">{{$pageFields['headline']}}</h2>
                       <p>{!! $pageFields['subheadline'] !!}</p>
                       <a href="{{$pageFields['button_url']}}" class="main-btn1 btn-hover border-btn mt-30" target="_blank" >{{$pageFields['button_label']}}</a>
                   </div>
               </div>
           </div>

           <div class="col-lg-6 order-last">
               <div class="cta-image">
                   <img src="{{$pageFields['image']}}" alt="">
               </div>
           </div>
       </div>
   </div>
</section>
The code snippet above creates the page structure of our Section1 component.
After that, open resource/views/components/butter-cms-fields/section2.blade.php and add the following code:
<section id="{}" class="cta-section">
<div class="container">
<div class="row">
<div class="col-lg-6">
<div class="cta-content-wrapper cta-content-wrapper2">
<div class="section-title">
<h2 class="mb-20">{{$pageFields['headline']}}</h2>
<p>{!! $pageFields['subheadline'] !!}</p>
<a href="{{$pageFields['button_url']}}" class="main-btn1 btn-hover border-btn mt-30" target="_blank" >{{$pageFields['button_label']}}</a>
</div>
</div>
</div>
<div class="col-lg-6 order-last order-lg-first">
<div class="cta-image">
<img src="{{$pageFields['image']}}" alt="">
</div>
</div>
</div>
</div>
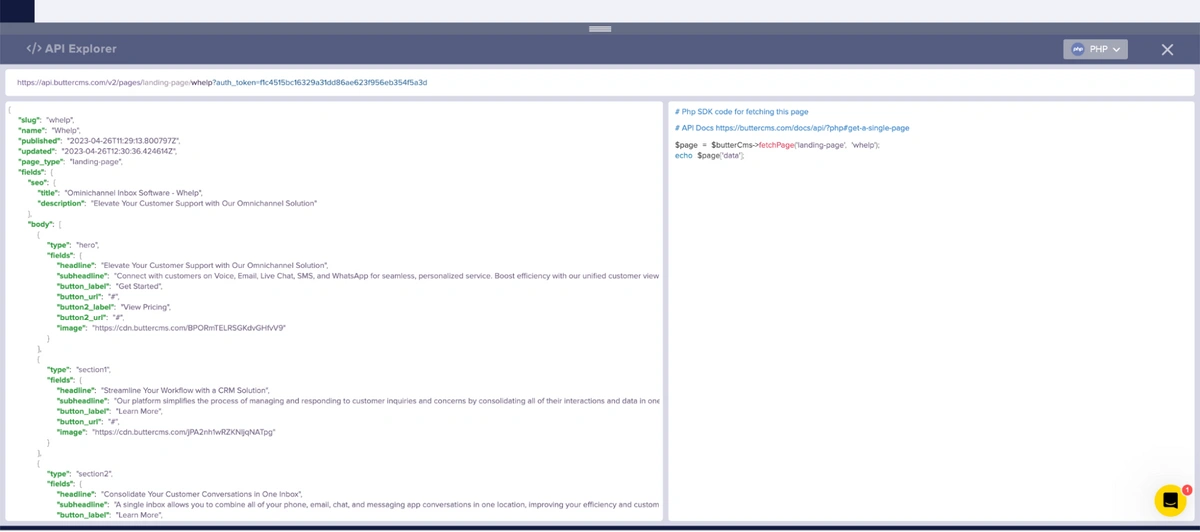
</section>Before we run the app on the browser, let's first look at the format of the data returned from the Whelp landing-page API by clicking on the API Explorer tab.
You will see a response like in the screenshot below:
To view the landing page on the web browser, you will need to run the local development server with the command below:
$ php artisan serve
Then, navigate to http://localhost:8000/ to view the application:
Create and add a Navigation Menu and Features section with ButterCMS collections
ButterCMS collections are tables of data that pages can reference. We will use this feature to implement the Navigation section and the Features section of the landing page.
Take Control of Your Landing Page Content with ButterCMS
Start free trialImplementing the navigation menu
To add a navigation menu to the landing page, we will create both Navigation Menu and Navigation Menu Items collections to handle the page navigation. We will create the navigation menu items collection first. Follow the steps below to do that:
Hover over the Content Types icon in the sidebar of your dashboard, and then click the + icon next to Collections:
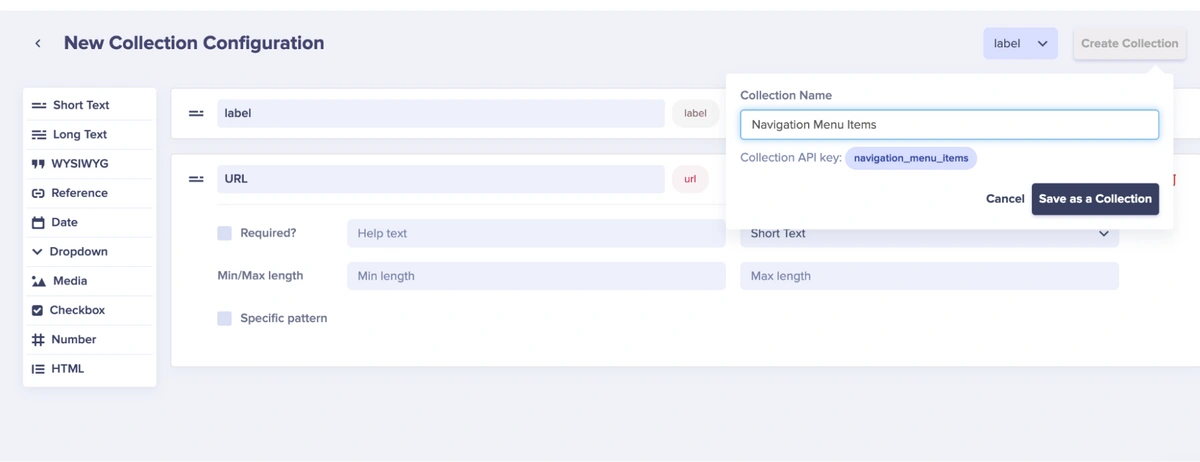
Then, you will land on a New Collection Configuration page. Then, select the following fields:
-
Short text for the label
-
Short text for the URL of the home page
Click on the Create Collection button. Enter the collection name, which in this case will be Navigation Menu Items. Click the Save as a Collection button.
Enter details for the Label and URL of the collection item. For the label, type in Product, while for the URL, type in #product.
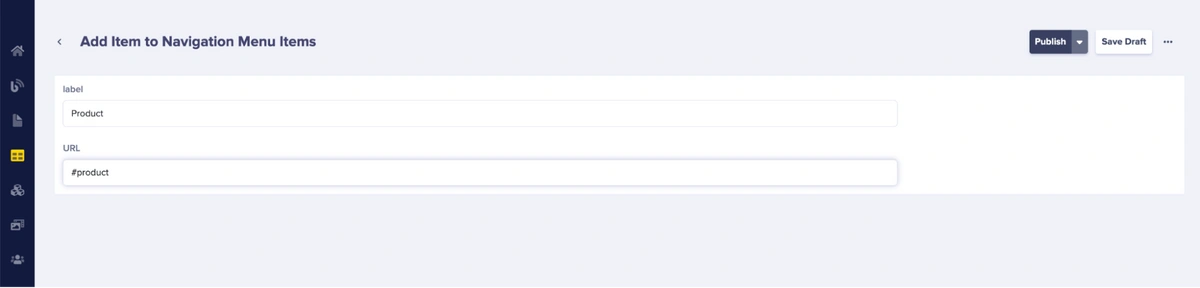
Click the Publish button.
After that, hover on the Collections tab and click the + icon next to Navigation Menu Items to add more items to the collection. Follow the same step above to create the items Resources, Pricing, Company, and Request Demo.
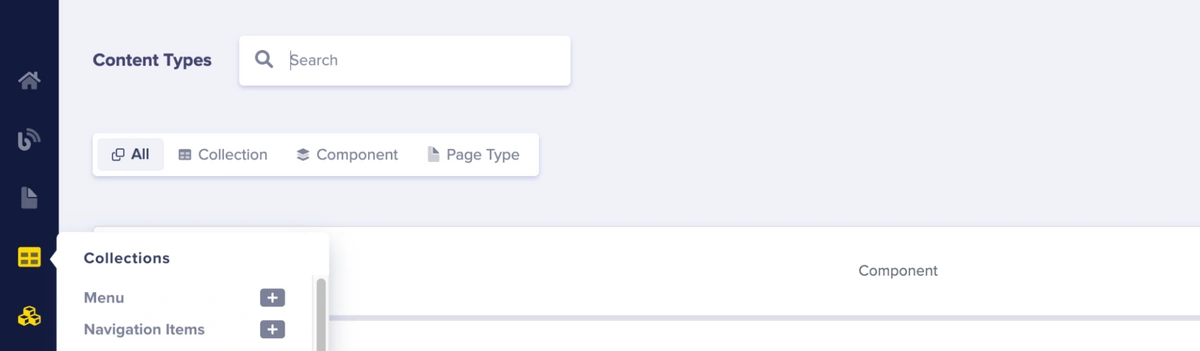
After that, we’re going to create another collection to group the Navigation Items Menu collection. In this case, we will name this collection Navigation Menu. To do that, continue with the following steps.
Click on the + icon next to the Collections tab in the sidebar of your dashboard and it will take you to the New Collection Configuration page.

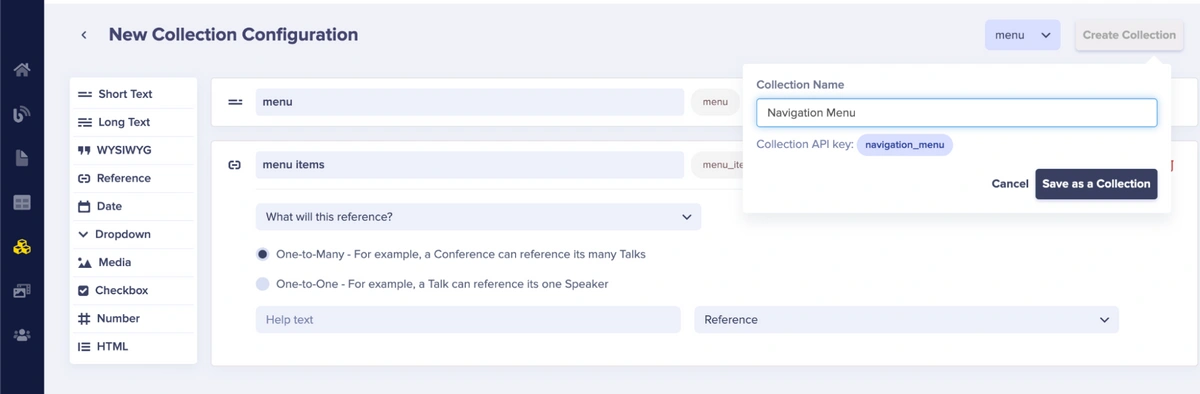
Then, select the following fields:
-
Short text for the label
-
Reference to reference the Navigation Menu Items collection
Click on the Create Collection button. Enter the collection name as Navigation Menu. Click the Save as Collection button.
Type Whelp in the menu label, then click the Add Reference button and select all the navigation menu items.

Click the Publish button.
Next, open your Views/Components/Header.php file and add the following code:
<?php

namespace App\View\Components;

use Illuminate\View\Component;

class Header extends Component
{
      public function __construct(
       private bool $includeMenu = true
   ) {
   }

      public function render()
   {
       return view('components.header', [
           'includeMenu' => $this->includeMenu
       ]);
   }
}
The code snippet above creates a new component instance and gets the view and contents representing the component.
Then, open Views/Components/Menu.php and add the following code:
<?php

namespace App\View\Components;

use ButterCMS\ButterCMS;
use Illuminate\View\Component;

class Menu extends Component
{
    public function render()
    {
        return view('components.menu');
    }
}
Next, open Views/Components/MenuItems.php and add the following code:
<?php

namespace App\View\Components;

use ButterCMS\ButterCMS;
use Illuminate\View\Component;

class MenuItems extends Component
{
      public function __construct(
       private ButterCMS $butterCMS
   ) {
   }

      public function render()
   {
       $response = $this->butterCMS->fetchContentFields([
           'navigation_menu'
       ], [
           'preview' => app('isPreview'),
       ]);
       return view('components.menu-items', [
           'menuItems' => $response['navigation_menu'][0]['menu_items']
       ]);
   }
}
The code snippet above creates a new component instance and gets the view and contents representing the component.
Then, open resource/views/components/butter-cms-fields/header.blade.php and add the following code:
<header class="header">
   <div class="navbar-area">
       <div class="container">
           <div class="row align-items-center">
               <div class="col-lg-12">
                   <nav class="navbar navbar-expand-lg">
                      <h3>Whelp</h3>
                       <button class="navbar-toggler" type="button" data-bs-toggle="collapse" data-bs-target="#navbarSupportedContent" aria-controls="navbarSupportedContent" aria-expanded="false" aria-label="Toggle navigation">
                           <span class="toggler-icon"></span>
                           <span class="toggler-icon"></span>
                           <span class="toggler-icon"></span>
                       </button>

                       <div class="collapse navbar-collapse sub-menu-bar" id="navbarSupportedContent">
                           <div class="ms-auto">
                               @if (!isset($includeMenu) || $includeMenu === true)
                                   <x-menu />
                               @endif
                           </div>
                       </div>
                   </nav>
               </div>
           </div>
       </div>
   </div>
</header>
The code snippet above created the structure of our menu collection:

Implementing the Features section
After that, let’s create our second collection called Features. Hover over the Content Types icon in the sidebar of your dashboard and then click the + icon next to Collections:
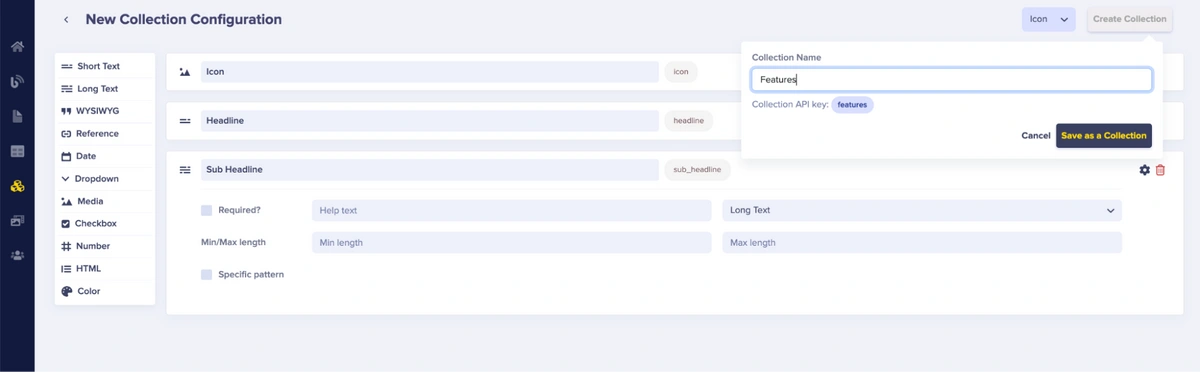
Then, you will land on a new page where we will create the collection:
Then, to enter your Features collection configuration, select the following fields:
-
Short text for Headline
-
Long text for the SubHeadline
-
Media for the Icon
Then, enter the collection name, Features, and press the Save as a Collection button.
Next, add details to your first feature collection item.
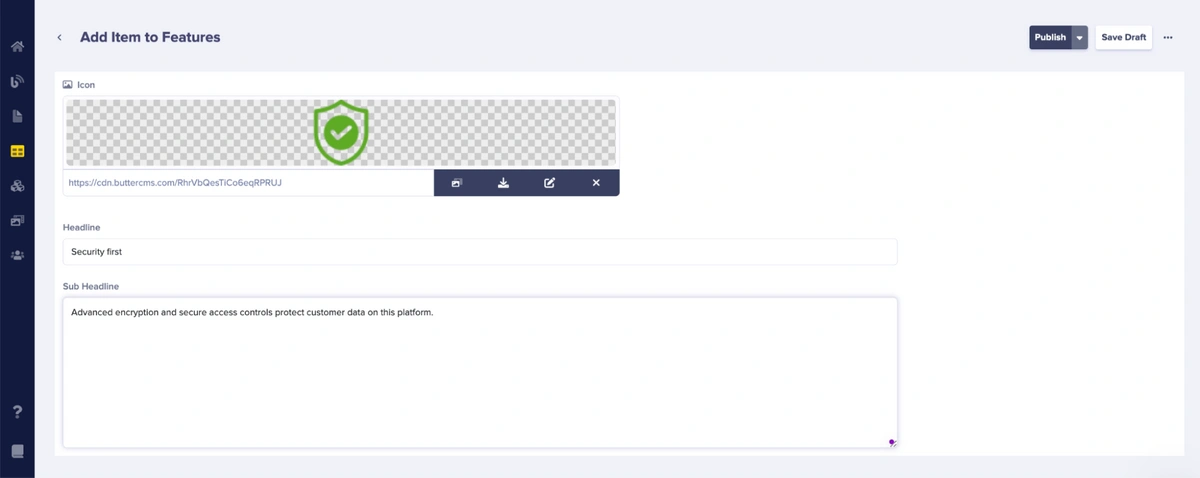
You will also need to add five more features. Now, let's update our codebase to fetch the content of our landing page.
Open resource/views/components/butter-cms-fields/features.blade.php and add the following code:
<section id="{{$pageFields['scroll_anchor_id']}}" class="feature-section">
   <div class="container">
       <div class="col-lg-11 col-md-11 text-center">
           <div class="section-title mb-60">
               <h2 class="mb-20">{{$pageFields['headline']}}</h2>
               <p>{{$pageFields['subheadline']}}</p>
           </div>
       </div>
       <div class="row justify-content-center">
           <div class="col-lg-11">
               <div class="row">
                   @foreach($pageFields['features'] as $feature)
                       <div class="col-lg-4 col-md-4">
                           <div class="single-feature">
                               <div class="feature-icon">
                                   <img src="{{$feature['icon']}}" alt="" />
                               </div>
                               <div class="feature-content">
                                   <h4>{{$feature['headline']}}</h4>
                                   <p>{{$feature['description']}}</p>
                               </div>
                           </div>
                       </div>
                   @endforeach
               </div>
           </div>
       </div>
   </div>
</section>
The Features section looks like this below:
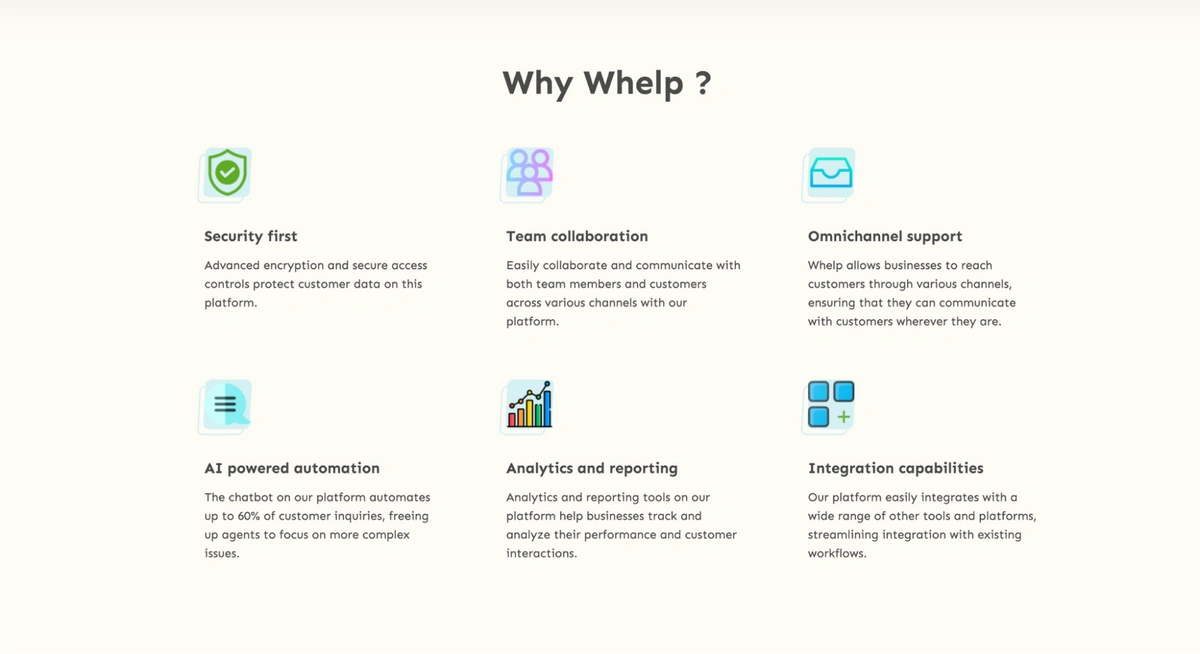
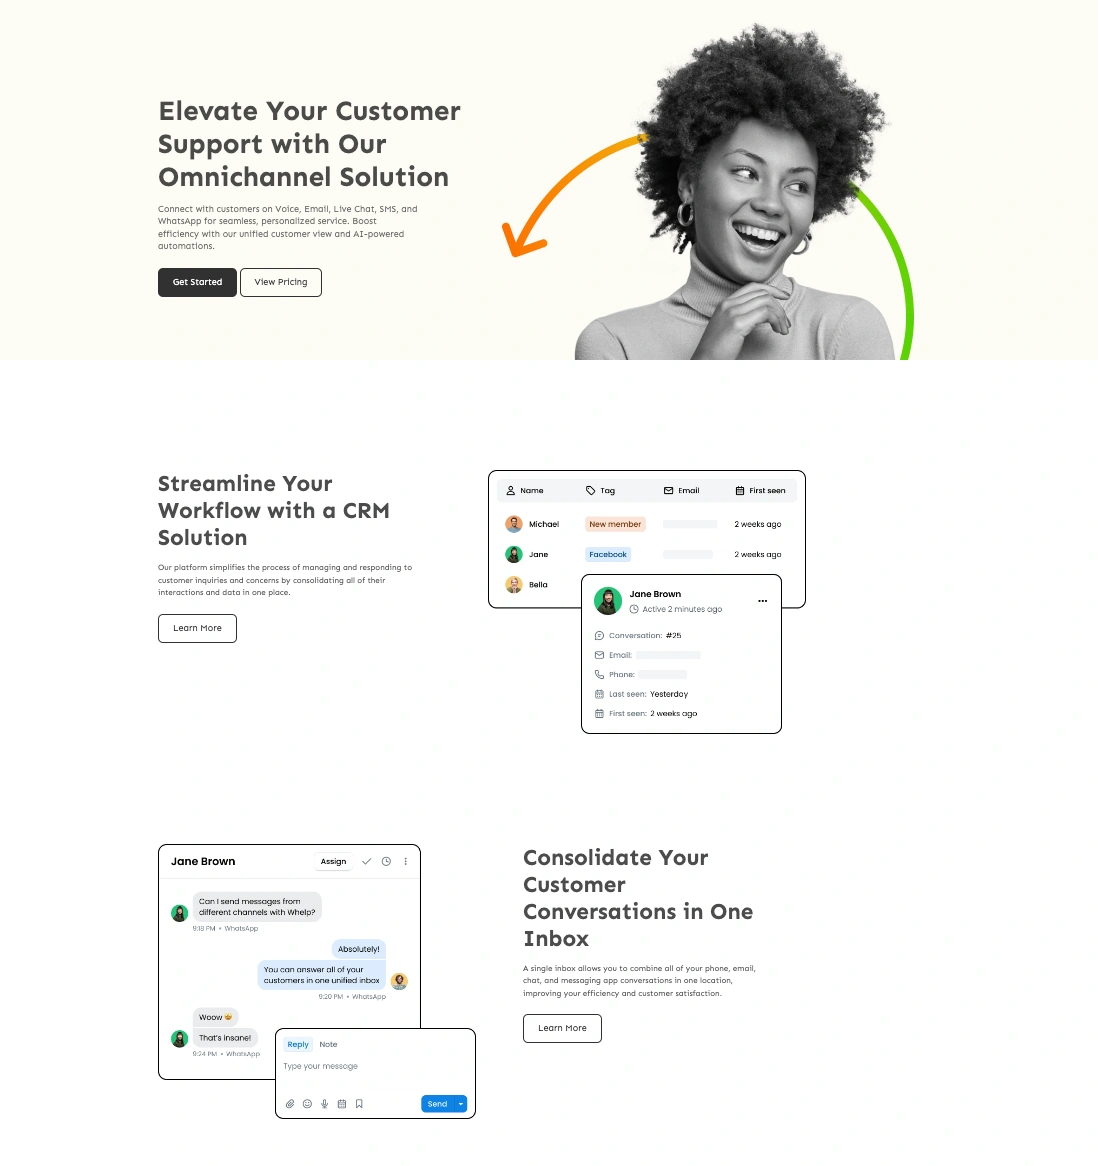
Our resulting landing page
After integrating all the sections of our landing page using both components and collections, this is what the final result of our landing page looks like:
Closing thoughts
I hope you enjoyed working through this tutorial. We have demonstrated how to easily build a simple landing page with PHP and ButterCMS. We explore the power of ButterCMS and how to use its components, collections, and page-type features to create a highly customizable landing page. Creating landing pages is an essential tool for businesses and entrepreneurs who want to generate more leads and seamlessly promote their products or services. It is more likely that visitors will convert if you create a well-crafted landing page.
In order to further customize this PHP landing page or your own landing page, you can add more components to the layout by using the components feature. Aside from that, you can use the collections feature to create a testimonial section. I’m looking forward to seeing the amazing projects you build with ButterCMS.

