Online shopping has become the king of retail, with global sales projected to surge to $7.4 trillion by 2025. This explosive growth is driven by convenience, wider audience reach, and, as 2020 showed, the ability to adapt during unforeseen circumstances.
To succeed in this rapidly evolving and highly competitive landscape, you need a dynamic ecommerce application that is feature-rich, offers an engaging user experience, and can scale as needed. This post explores how to use React, everyone's favorite frontend library, along with a headless React CMS, to build such an application.
The component-based architecture and performance-focused design of React make it ideal for building smooth shopping experiences. Meanwhile, a headless Reactjs ecommerce CMS gives you the flexibility to extend these experiences across channels and devices, ensuring engagement at every touchpoint.
Table of contents
Importance of dynamic content for e-commerce
Today's consumers have high expectations, a universe of choices at their fingertips, and attention spans that can flit away faster than a click. To capture their interest, convert them into customers, and keep them coming back, your e-commerce application needs to be more than just a static storefront. It needs to be a dynamic, ever-evolving experience that feels fresh and engaging with every visit.
Here are a few compelling reasons why you should consider building dynamic ecommerce with React:
-
Increased engagement times: Static content can quickly become stale, leading to customer boredom and disengagement. Dynamic content, however, keeps customers engaged by presenting them with fresh, relevant information, like targeted promotions and real-time inventory updates.
-
More targeted personalization: With dynamic content, you have the ability to personalize the shopping journey at the customer level. By leveraging data on browsing behavior, purchase history, and user preferences, you can tailor product suggestions, content recommendations, and promotions on the fly. This hyper-personalized touch can improve both customer satisfaction and conversion rates.
-
Better SEO: Websites with dynamically updated content rank higher in search engine results pages (SERPs) due to their freshness and relevance. This is because search engines like Google prioritize websites that consistently provide updated and relevant content to users.
-
Improved searching features: Dynamic content can even enhance in-platform search functionality by delivering personalized and contextually relevant results. This may involve dynamically filtering results based on user preferences.
-
Easier A/B testing and optimization: Dynamic content allows you to take a data-driven approach to A/B testing. You can compare different versions of product listings, layouts, and CTAs to identify what resonates most with your target audience and continuously optimize your React e-commerce platform for better conversions.
Which aspects of e-commerce web apps should be dynamic?
Products page
An e-commerce's primary focus should be to display products. You want your users to be able to view your products, make a purchase, and return to repeat the same process. React makes it easy to build dynamic product listings through reusable components.
Single product page
You also want them to be informed about the products they want to purchase, like showing them descriptive information on products and discount offers. With React for ecommerce website, product descriptions, including technical specs, reviews, and high-resolution images, can be fetched and displayed on the fly using native state management features.
Images
Images are very important because they are a preview of your product. When images take longer to load or don’t load at all, it leads to a bad user experience and chases customers away. Saving your images on a content delivery network optimizes images, causing them to load faster. React once again proves handy as it seamlessly integrates with CDNs.
Shopping cart and checkout
The shopping cart and checkout section play an instrumental role in the conversion funnel. Dynamic content is a must here as it can improve the user experience by updating carts in real time, suggesting complementary products based on selected items, and providing immediate feedback on the validity of discount codes. You can implement all of these dynamic features easily with React ecommerce.
Why is React useful for dynamic e-commerce?
React is a popular JavaScript library created by the Facebook team to build user interfaces. It is mostly used in creating dynamic apps because of the following:
- Reusable components: React breaks your website down into reusable components—an update on one component updates all the other pages they are in. Imagine updating product information or promotion banners just once, and it reflects across your entire store.
- React support: React is easy to maintain and update as it has a large support community. Should you encounter any challenges with your e-commerce stack, solutions and advice are readily available. Plus, since React’s open-source, you can also extend or adapt it as needed.
- Server-side rendering: React supports Server-side rendering (SSR) which ensures faster page loads for your ecommerce React site, crucial for capturing visitor attention.
- State management: React can handle continuously changing data and large interfaces due to its ability to handle and manage state. Product inventory, shopping cart contents, user logins – React allows you to update everything in real-time, ensuring that your e-commerce platform stays fresh and responsive
- Optimization: React's virtual Document Object Model (DOM) minimizes unnecessary re-renders, optimizing rendering time and boosting overall site performance. This translates to a faster and crisper user experience for your e-commerce shoppers.
Later in this article, we will use React to build our dynamic React ecommerce app.

Why we're using a headless CMS
There are a lot of reasons why a headless CMS surpasses a traditional CMS
- Multi-channel: A headless CMS allows you to use one centralized repository to serve content across any platform or channel, be it your website, mobile app, social media, or even in-store kiosks. This omnichannel ease ensures a consistently engaging brand experience for shoppers, wherever they choose to shop.
- Customizable: Our ecommerce using Reactjs platform requires flexibility and customization, which a headless CMS provides. Developers can tailor the storefront experience exactly to your vision, while marketers can define and modify content types and data models to perfectly match your specific product offerings.
- Separation of concerns: With a headless CMS, content management is separated from the technical aspects of your e-commerce application. This means that your non-technical colleagues get complete control over product descriptions, promotions, and blog posts etc. without needing coding expertise.
- API integration: A headless ecommerce CMS exposes APIs that can be called from any frontend app, including one built with React, to fetch content. This means that your developers have the luxury to choose different frontend technologies for different application frontends. It also means that you can integrate (via APIs) any third-party service into your e-commerce stack.
ButterCMS is a headless CMS that allows you to set up content for your application in minutes. It's popular amongst developers and non-developers alike because of its excellent user interface. It has a great user experience and on-screen tutorials that help you navigate the platform. And the best part? It melts into any tech stack.
This article will use ButterCMS to create a hero slider, upload new products, modify products, and delete products. We will also allow users to view a single product page, add a product to the cart, remove a product from the cart, and see the total cost of products in the cart.
Let's get started.
Tutorial: Building a dynamic React ecommerce application
Turning to the business end of this piece, we will now share a step-by-step guide to build an ecommerce website from scratch with React and ButterCMS.
Tutorial prerequisites
- ButterCMS account - create an account here or login
- Basic knowledge of JavaScript and React
- Basic understanding of Redux
- Code editor / IDE (this tutorial uses VS Code, but any IDE will work)
- NPM or yarn installed (this tutorial uses yarn)
- Basic understanding of Tailwind CSS (not necessary to have)
Setting up
Let’s start by initializing and configuring our project for an ecommerce website using Reactjs.
React setup
We use the CLI to create a new React app for our project.
yarn create react-app butter-ecommerceDelete some of the startup files from our project folder, leaving just index.js, app.js, and index.css in our src folder.
In the app.js file, we clear out the template code and insert a simple hello world to ensure our app is still working.
import React from 'react'
const app = () => {
    return(
         <>
        <p>Hello world!</p>
         </>
          )
    }
export default App
Now, we can install the other tools we need for this project.
We install react-router for handling all page routing.
yarn add react-router-domTailwind configuration
We will style our app with Tailwind CSS. Tailwind CSS is a convenient CSS utility-based framework that requires us to write little or no CSS.
We install Tailwind CSS using postcss. You can read more about it in the documentation.
We add the -D flag to our command to install Tailwind CSS as a development dependency.
yarn add tailwindcss postcss autoprefixer -D
We then initialize tailwind by running npx tailwindcss init. This spawns a tailwind.config.js file in our root folder.
In the tailwind.config.js file, we replace the existing code with this:
module.exports = {
  content: ["./src/**/*.{html,js}"],
  theme: {
    extend: {},
  },
  plugins: [],
}
We also create a postcss.config.js file in the root folder and add the following:
module.exports = {
  plugins: {
    tailwindcss: {},
    autoprefixer: {},
  }
}
Lastly, in our index.css file, we add this:
@tailwind base;
@tailwind components;
@tailwind utilities;
We have completed the tailwind configuration and can now test it out.
In app.js, add some tailwind classes to our hello world text.
import React from 'react'
const app = () => {
    return(
         <>
        <p className='text-xl font-bold'>Hello world!</p>
         </>
          )
    }
export default App
Then run yarn start on our terminal.
Our app opens up on http://localhost:3000/, and we can see a boldly written Hello world!
ButterCMS configuration
We install our ButterCMS dependency and log in to our ButterCMS account to retrieve our API key:
yarn add ButterCMS
You can create one here if you don't have an account. Signing up is easy and straightforward, and you get a 30-day free trial with no credit cards required.

Select the stack we are developing with—React—on the Butter dashboard.
The API token is displayed, and we copy it to our react app.
We create a .env file in our root folder and paste our API token into this environmental variable to protect our token.
REACT_APP_BUTTER_CMS_API_KEY = 'enteryourapitoken'
We add /env to our .gitignore file, so it doesn't get pushed to GitHub, making our API token safe from the public eye.
In the src folder, we create a butter-client.js file, then we import Butter and pass our API token to it, saving it in a variable called butter.
We use the butter variable to retrieve content from ButterCMS into different components on our app. We will use this later in the tutorial.
import Butter from 'ButterCMS';

const apikey = process.env.REACT_APP_BUTTER_CMS_API_KEY;
const butter = Butter(apikey);
export default butter;
Now we are done with some basic setup. I’ll explain the different components we will build-out.
What we’ll be building

Our e-commerce app will have the following:
- Navigation component: This can be hardcoded or served using ButterCMS and shown on all pages.
- Hero component: This component can be a static image or a dynamic slider
- Products component: This will list all our products with their prices and a button to view a single product.
- Single product component: This will display an individual product, a description of that product, and a button to add the product to the cart.
- Cart component: This is where we can see all added items, modify them by increasing or reducing their quantities, and see the total price for all products added to the cart.
Content types
The two main content types we’ll be focusing on are Page Types and Collections.
Page Type is a page builder that defines the structure of our pages. It has some powerful tools like the components, component picker, and repeater.
- Components allow us to create a group of fields reused on different pages.
- A component picker enables us to have more than one component grouped on a page.
- A repeater is used to group one or more content fields that need to be repeated multiple times, just like our slider.
According to the ButterCMS documentation, Collections are tables of data to be referenced by Pages, extending the use cases that you can achieve with ButterCMS. Collections are reusable components, making them perfect for creating our navigation and products page. We’ll see them in action later on.
Creating the navigation component
In the following sections, we will be setting up a navigation collection on ButterCMS and fetching that inside our React ecommerce app to create a navigation bar.
Setting up navigation collections on ButterCMS
As I mentioned earlier, this component can either be hardcoded or served using ButterCMS. I’ll be using ButterCMS to set up our navigation component.
The Navigation collection will contain our nav names and the links they will be routed to, and we can access this navigation content through the Butter API.
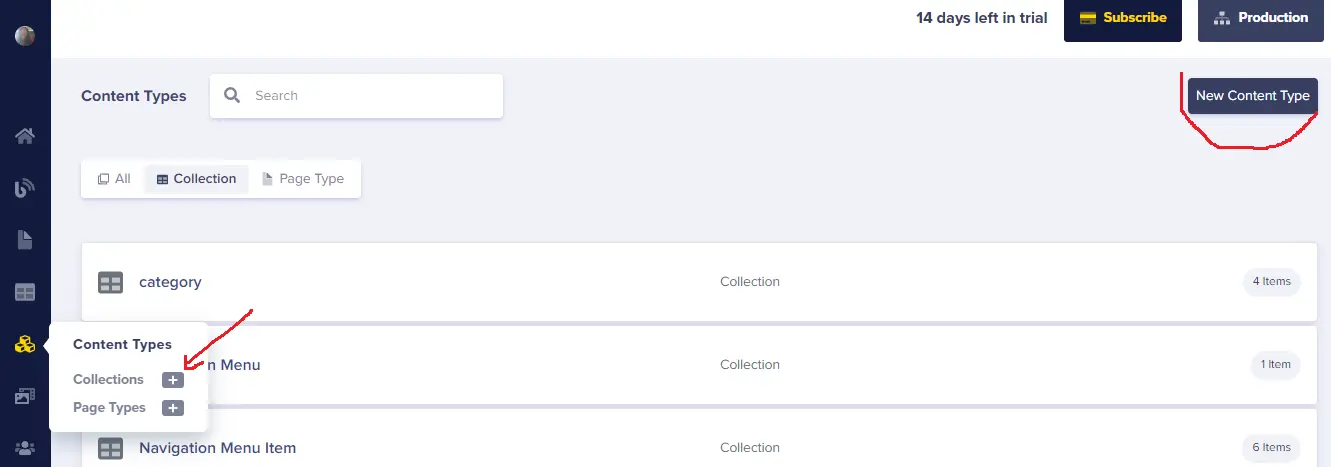
One of the ways to create a collection from our ButterCMS dashboard is by:
- Clicking on the content type icon
- Click new content type
- Select collection from the dropdown menu.
A second way is by clicking directly on the plus sign on collections from the content type drop-down menu, as shown in the image below.
ButterCMS is great because it provides a brief description and examples of what each collection content field is used for when you hover around their names.
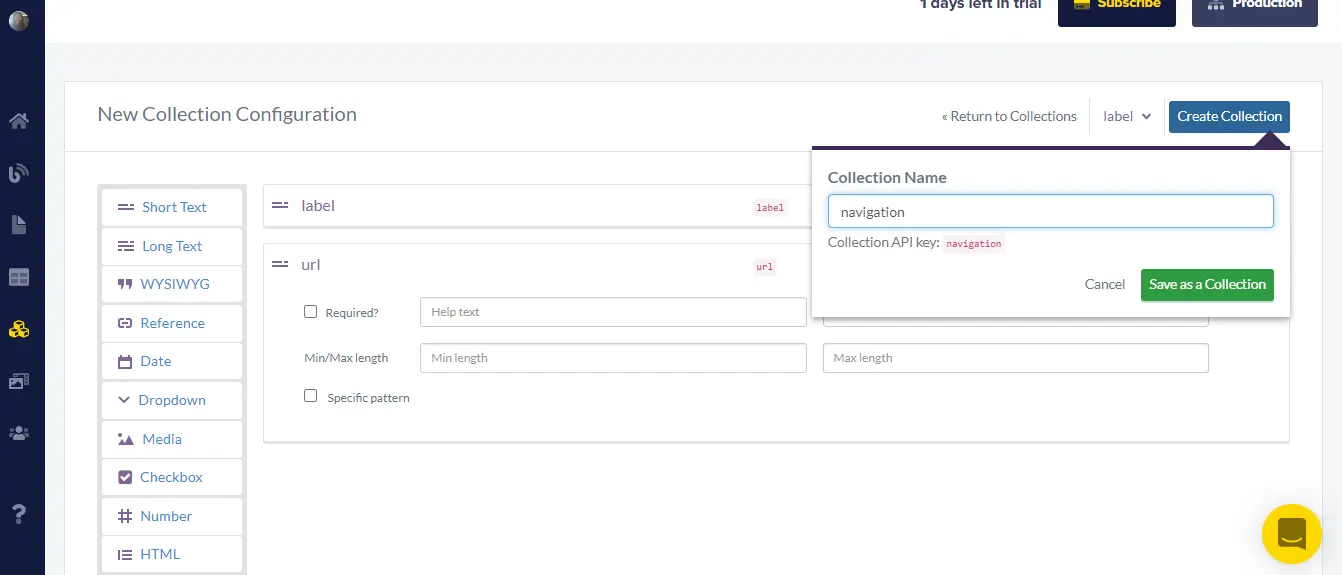
We create a nav menu name and a nav URL field on our new collections page
- Add a
short textcontent field and save the name aslabel - Add another
short textcontent field and save the name asurl - Then save the collection name as
navigation
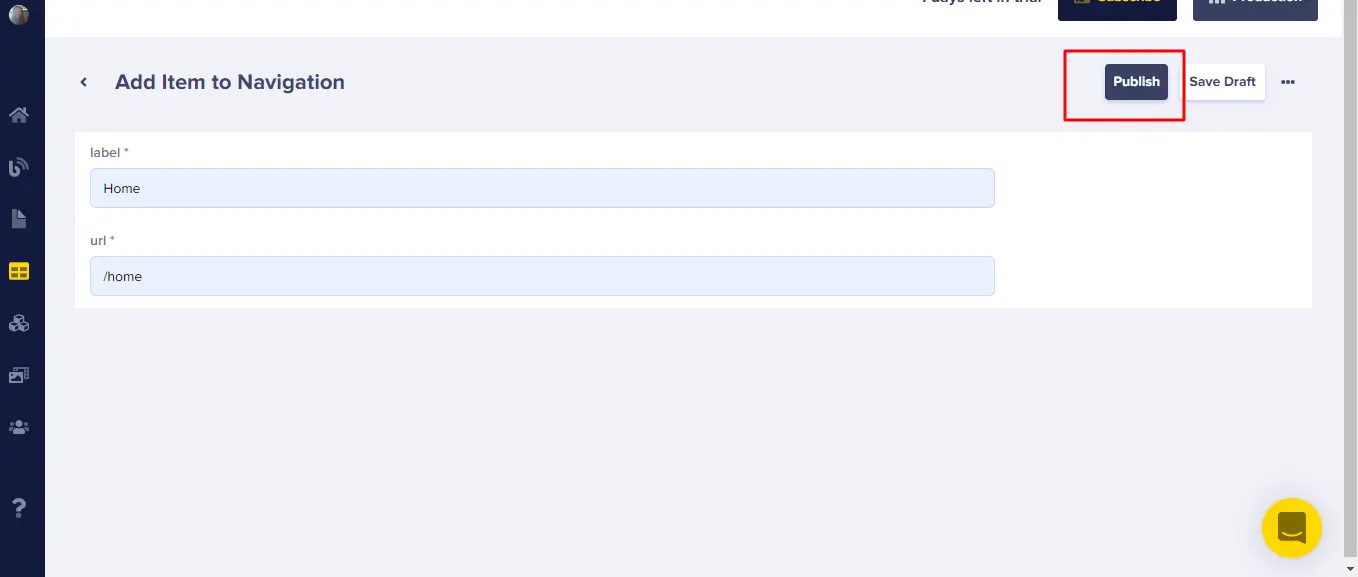
Now, we can click on collections and add our first nav menu Home and URL /home and then hit publish.
We can create the remaining nav menus:
- Click on
collections - Click
new item - Select the
Navigationcollection from the drop-down menu.
You can add any menu label or URL you want. Don’t forget to hit publish when you are done.
We will use three menus for this tutorial: Home, About, and Products.
After publishing these menus, we need to import them to our e-commerce app.
Click on the three dots in the upper right on our navigation collection and select API Explorer from the dropdown menu.
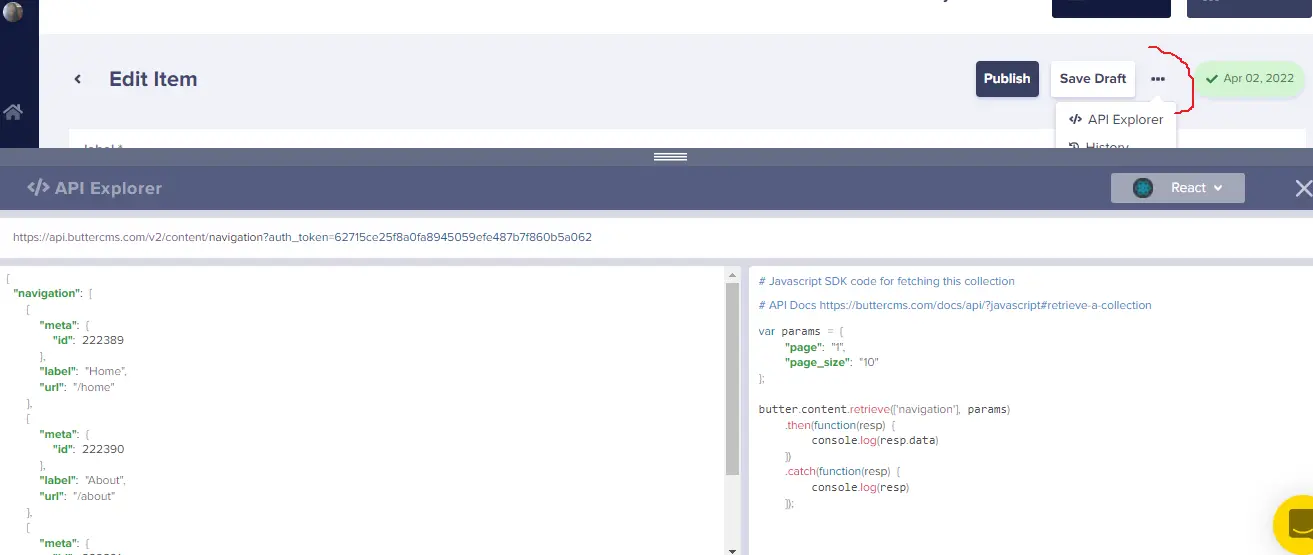
Our navigation collection can be seen in JSON format in the API explorer and can be integrated into our app. ButterCMS makes it easy for us by providing a code we can copy and paste into our app.
var params = {
    "page": "1",
    "page_size": "10"
};
butter.content.retrieve(['navigation'], params)
    .then(function(resp) {
        console.log(resp.data)
    })
    .catch(function(resp) {
        console.log(resp)
    });
Now we can create our navbar component to insert this code inside.
Integrating ButterCMS to the React app
Create a folder called components in the src folder and add a file called Navbar.js.
In Navbar.js, we import React, useEffect, and useState.
The UseEffect hook is used to perform side effects inside a react component. An example of a side effect is fetching data from the API.
useState is used to hold and set data used in the component. We will use this later.
We also import butter from the butter-client.js file we created earlier and insert the ButterCMS generated code retrieved from our API explorer inside the useEffect hook.
import React, { useEffect, useState } from 'react';
import butter from '../butter-client';

const Navbar = () => {
  useEffect(() => {
    var params = {
      page: '1',
      page_size: '10',
    };
    butter.content
      .retrieve(['navigation'], params)
      .then(function (resp) {
        console.log(resp.data);
      })
      .catch(function (resp) {
        console.log(resp);
      });
  }, []);
  return <></>;
};

export default Navbar;
To see our data in our console, we have to import the Navbar component into App.js:
import Navbar from './components/Navbar';

const App = () => {
  return (
    <>
      <Navbar />
    </>
  );
};
export default App;
On windows hold ctrl + shift + J or on Mac hold Command + Option + J to open the console.
Now we can see our API response on our console.
{meta: {...}, data: {...}}
data:
navigation: Array(3)
0: {meta: {...}, nav-label: 'Home', nav-url: '/home'}
1: {meta: {...}, nav-label: 'About', nav-url: '/about'}
2: {meta: {...}, nav-label: 'Products', nav-url: '/products'}
length: 3
[[Prototype]]: Array(0)
[[Prototype]]: Object
meta: {count: 3, next_page: null, previous_page: null}
[[Prototype]]: Object
Creating state
On Navbar.js, we create a navList state to hold our API data.
When we console.log(navList), we still see all our data retrieved from ButterCMS intact.
import React, { useEffect, useState } from 'react';
import butter from '../butter-client';

const Navbar = () => {
  const [navList, setNavList] = useState([]);
  useEffect(() => {
    var params = {
      page: '1',
      page_size: '10',
    };

    butter.content
      .retrieve(['navigation'], params)
      .then((res) => {
        setNav(res.data.data.navigation);
      })
      .catch((err) => err.message);
  }, []);
  console.log(navList);
  return <></>;
};

export default Navbar;
Now, we can map through our navList data to display the nav on our application.
return (
<>
{navList.map((nav) => nav.label)}
</>
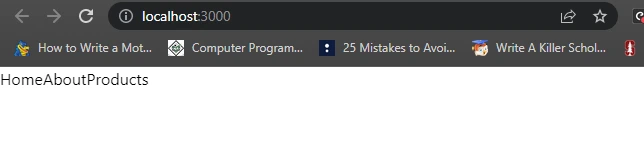
)The nav list displays successfully!
Styling nav with Tailwind CSS
Now, let’s style it up a little using tailwindcss, which we already installed.
return (
    <>
      <div className='container px-36'>
        <nav className='bg-white border-gray-200 px-2 sm:px-4 py-6 rounded'>
          <div className=' flex justify-between items-center flex-wrap mx-auto '>
            <p className='text-3xl font-bold text-teal-700'>NetFashion</p>
            <div className='flex w-5/12 justify-between items-center
            flex-col mt-4 md:flex-row md:space-x-8 md:mt-0
            md:text-base md:font-medium'>
              {navList.map((nav) => (
                <p className=' py-2 pr-4 pl-3 text-gray-700 border-b
                  border-gray-100 hover:bg-gray-50
                  md:hover:bg-transparent md:border-0
                  md:hover:text-teal-700 md:p-0
                  '>
                 {nav.label}
                </p>
              ))}
            </div>
          </div>
        </nav>
      </div>
    </>
  );
We have a nice-looking navbar for our application.

We can also add more nav options. All we have to do is go back to our ButterCMS collection dashboard and add a new item, and it automatically updates in our application.
Add routing
Our nav links are p tags, so they don’t route anywhere. We change that by wrapping our App in BrowserRouter in index.js:
import React from 'react';
import ReactDOM from 'react-dom/client';
import { BrowserRouter } from 'react-router-dom';
import './index.css';
import App from './App';

const container = document.getElementById('root');
const root = ReactDOM.createRoot(container);
root.render(
  <BrowserRouter>
    <App />
  </BrowserRouter>
);
Don’t be alarmed if my index.js is different from yours; I’m simply using the React 18 new root API.
The legacy rootAPI still works fine, so you can do this:
import React from 'react';
import ReactDOM from 'react-dom';
import './index.css';
import App from './App';
import { BrowserRouter } from 'react-router-dom';

ReactDOM.render(
  <BrowserRouter>
      <App />
  </BrowserRouter>,
  document.getElementById('root')
);
Back in the Navbar.js file, we import NavLink and replace the p tags with NavLink:
   {navList.map((nav) => (
                <NavLink
                  key={nav.meta.id}
                  to={nav.url}
                  className=' py-2 pr-4 pl-3 text-gray-700
                  border-b border-gray-100
                 hover:bg-gray-50 md:hover:bg-transparent
                  md:border-0 md:hover:text-teal-700 md:p-0'
                >
                  {nav.label}
                </NavLink>
              ))}
When we click on a menu, we see the URL change to the URL that was added in our navigation collection in ButterCMS.
Creating the hero section
The hero section is significant in an e-commerce app because it showcases new arrivals, discounts, and products that the customer might not be aware of.
For this section, we will create an image slider using Swiper.js and, of course, we will serve content from ButterCMS.
Earlier, we talked about Page types and how they define the structure of a page. We also talked about the repeater field.
We will create a page type content type and use the repeater content field to create our slider component.
Creating a repeater
Let’s go back to our Butter dashboard.
- Click on the content type icon
- Click on the + sign beside page type from the dropdown menu.
- Select the
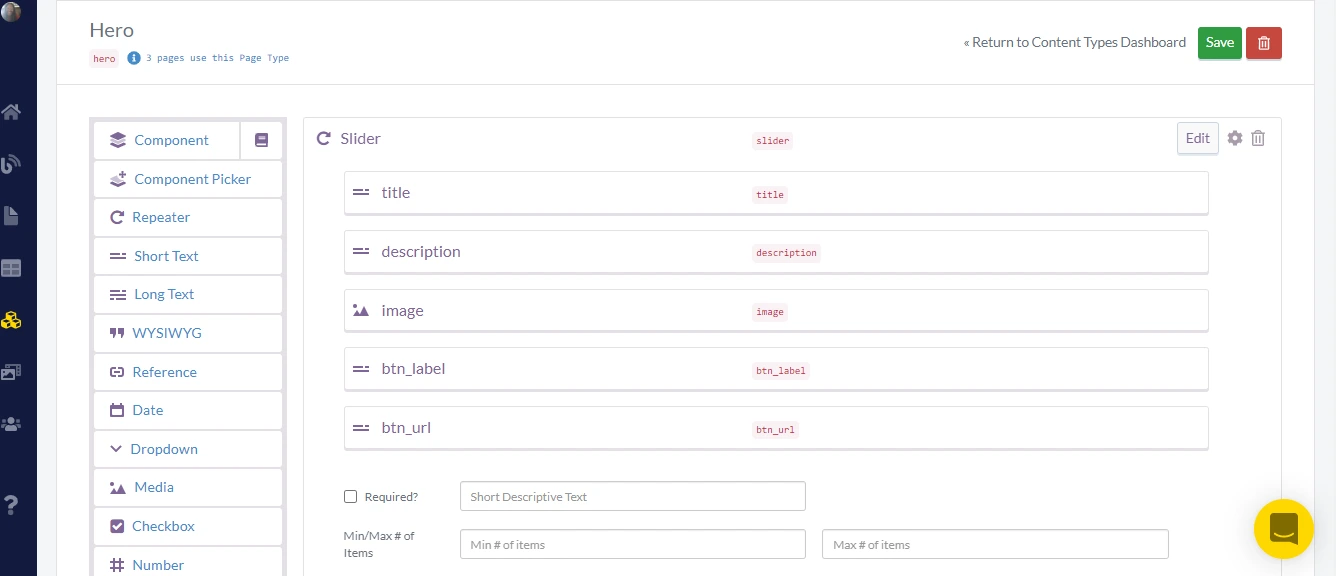
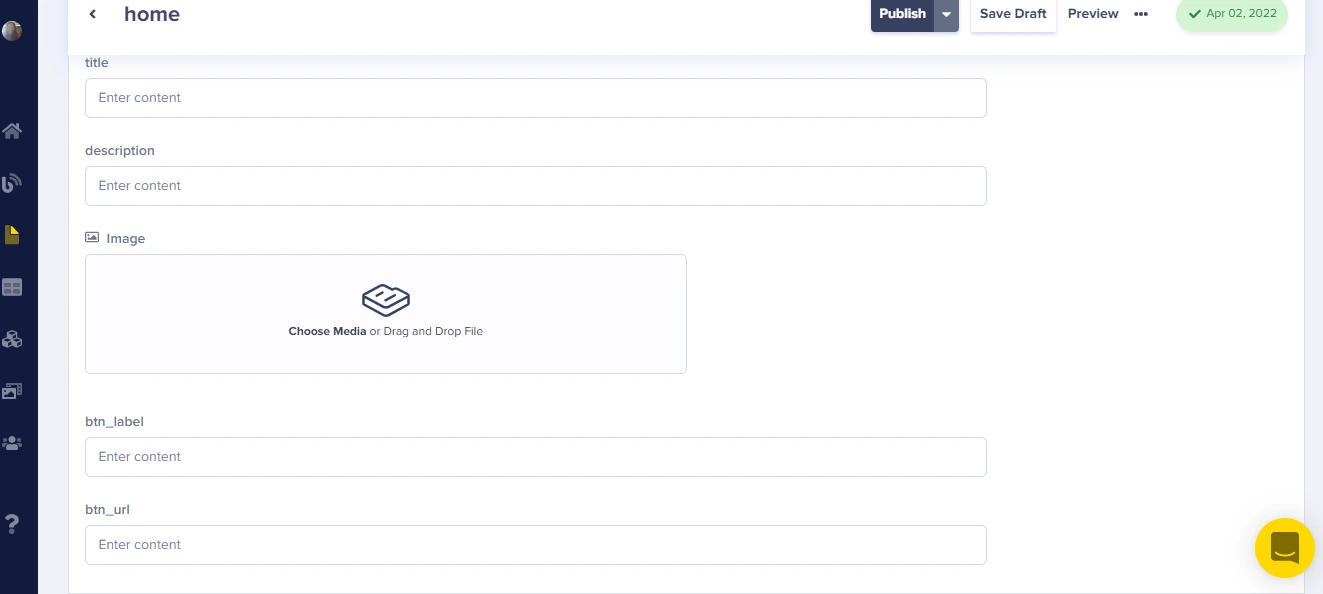
repeatercontent field on the new page type and name itSlider - Fill in the content fields we need for Slider
The content fields include:
- A short text for the title
- An image field
- A short text for button label
- A short text for button URL
- A short text for description (long text could work here too)
Now that our Hero page type has been created, we can populate it with images for our Hero slider.
- Select the Hero page type on the Page icon
- Name the page
home - Click on the slider icon
This brings out the content fields we created earlier to populate, as shown in the image below:
After publishing, we can hit the slider icon many times to add more slides. This is why the repeater is so valuable. I’ll go ahead and add two more slides to my slider.
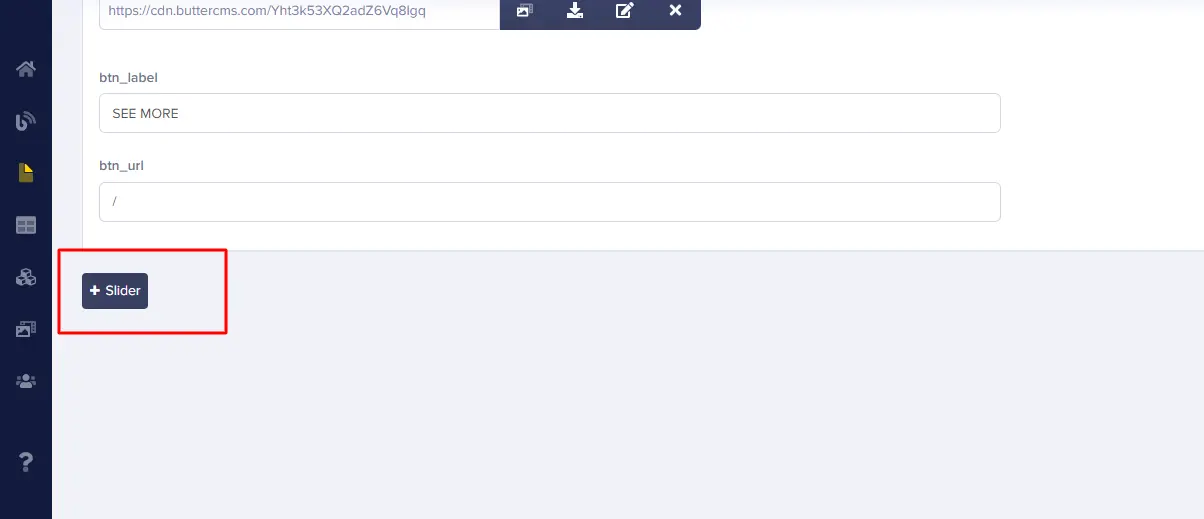
Now, we can copy our generated Butter API code from the API explorer just like we did with the Nav links and integrate it with our app.
Creating a hero slider using Swiper.js
We create a Hero.js component in our components folder and import react, useEffect, useState, and butter from butter-client.js.
We plug our butter-generated API code into our app using useEffect to receive our slider data. We also create a state called hero and set the data from butter to this state.
import React, { useEffect, useState } from 'react';
import butter from '../butter-client';

const Hero = () => {
  const [hero, setHero] = useState([]);
  useEffect(() => {
    butter.page
      .retrieve('*', 'home')
      .then(function (resp) {
        setHero(resp.data.data.fields.hero.slider);
      })
      .catch(function (resp) {
        console.log(resp);
      });
  }, []);
  console.log(hero);
When we console.log(hero) we can see all the content of our slides in an array on the console.
Now, let’s install Swiper for our Slider.
Swiper is a JavaScript library used for creating responsive sliders and carousels.
yarn add swiper
We import swiper and the dependencies needed for our slide to function:
import 'swiper/css/bundle';
import 'swiper/css';
import 'swiper/css/pagination';
import { Autoplay, Pagination, Navigation } from 'swiper';
import { Swiper, SwiperSlide } from 'swiper/react';
We create the Swiper component and then map through our Hero state to return each slide.
return (
    <>
      <Swiper>
        {hero.map((x) => (
          <SwiperSlide>
            <div className='flex flex-row'>
              <div className='border border-gray-200 shadow-md
                dark:bg-gray-800  dark:border-gray-700 relative '>
                <img className='w-full ' src={x.image} alt='' />

                <div className='p-5 absolute top-10 right-10 pr-20'>
                  <a href='#f'>
                    <h5 className='mb-2 lg:text-6xl font-bold
                      tracking-tight text-gray-900 dark:text-white '>
                      {x.title}
                    </h5>
                  </a>
                  <p className='mb-3 mt-5 font-normal
                   text-gray-700 dark:text-gray-400'>
                    {x.description}
                  </p>
                  <a
                    href='#f'
                    className='inline-flex items-center py-2 px-3
                    text-sm font-medium text-center text-white
                    bg-rose-700 rounded-lg hover:bg-rose-800
                   focus:ring-4 focus:ring-rose-300 mt-3 transition-all
                   ease-in duration-400'
                  >
                    {x.btn_label}
                    <svg
                      className='ml-2 -mr-1 w-4 h-4'
                      fill='currentColor'
                      viewBox='0 0 20 20'
                      xmlns='http://www.w3.org/2000/svg'
                    >
                      <path
                        fillRule='evenodd'
                        d='M10.293 3.293a1 1 0 011.414 0l6 6a1 1 0 010
                        1.414l-6 6a1 1 0 01-1.414-1.414L14.586 11H3a1
                        1 0 110-2h11.586l-4.293-4.293a1 1 0 010-1.414z'
                        clipRule='evenodd'
                      ></path>
                    </svg>
                  </a>
                </div>
              </div>
            </div>
          </SwiperSlide>
        ))}
      </Swiper>
    </>
  );
Swiper is pretty easy to use and requires little setup to get your slide running. You can configure your Swiper based on your needs.
      <Swiper
        slidesPerView={1}
        loop={true}
        slideNextClass='swiper-slide-next'
        slidePrevClass='swiper-slide-prev'
        autoplay={{
          delay: 2500,
          disableOnInteraction: false,
          pauseOnMouseEnter: true,
        }}
        pagination={{
          clickable: true,
        }}
        modules={[Autoplay, Pagination, Navigation]}
        className='mySwiper'
      >
For more information, check out the Swiper documentation.
After adding more slides, our site can be seen in the image below:

You can add more slides through your ButterCMS dashboard and see results instantly in the app. The best part is that no other form of coding is required for continuous updates.
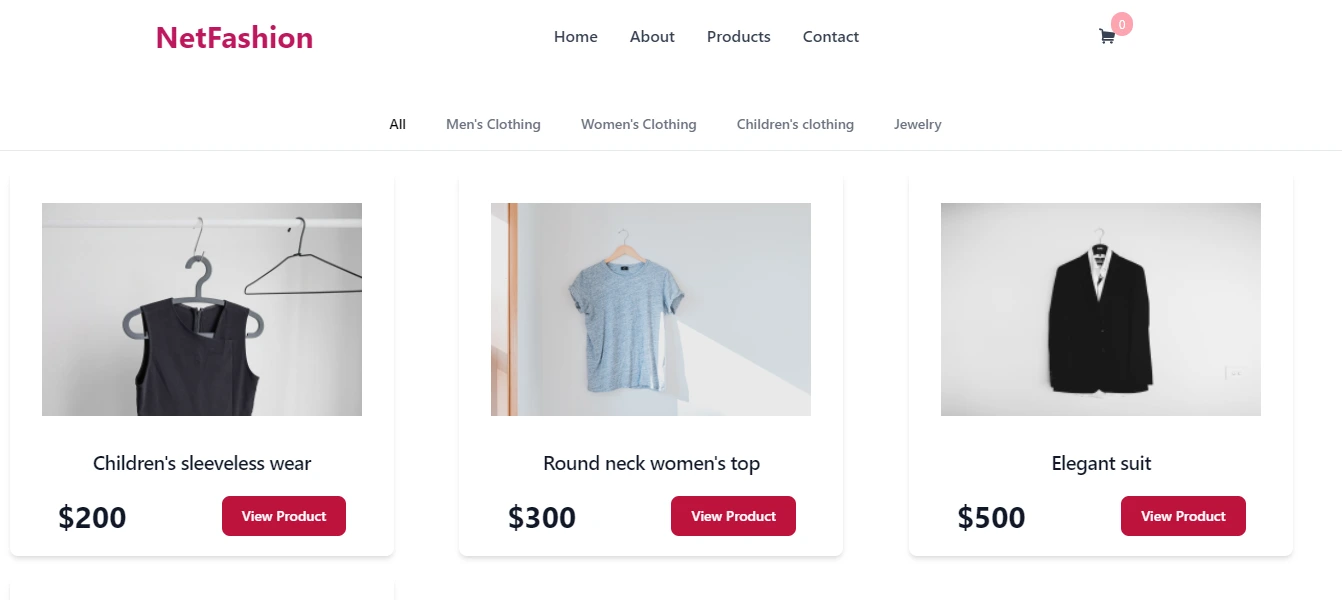
Products page
The essence of having an e-commerce app is to showcase products and ease the process of buying and selling. An e-commerce app should be user-friendly so as not to chase potential customers away.
Our products can be grouped in categories to aid users in easily locating a product.
We’ll create simple tabs to filter our product categories. We’ll also create a button that will view an individual product and enable us to add the product to the cart.
To start with, we’ll head back to our ButterCMS dashboard to create a collection of categories and products.
Collection of categories
On our ButterCMS dashboard:
- Click on content type and create new collections
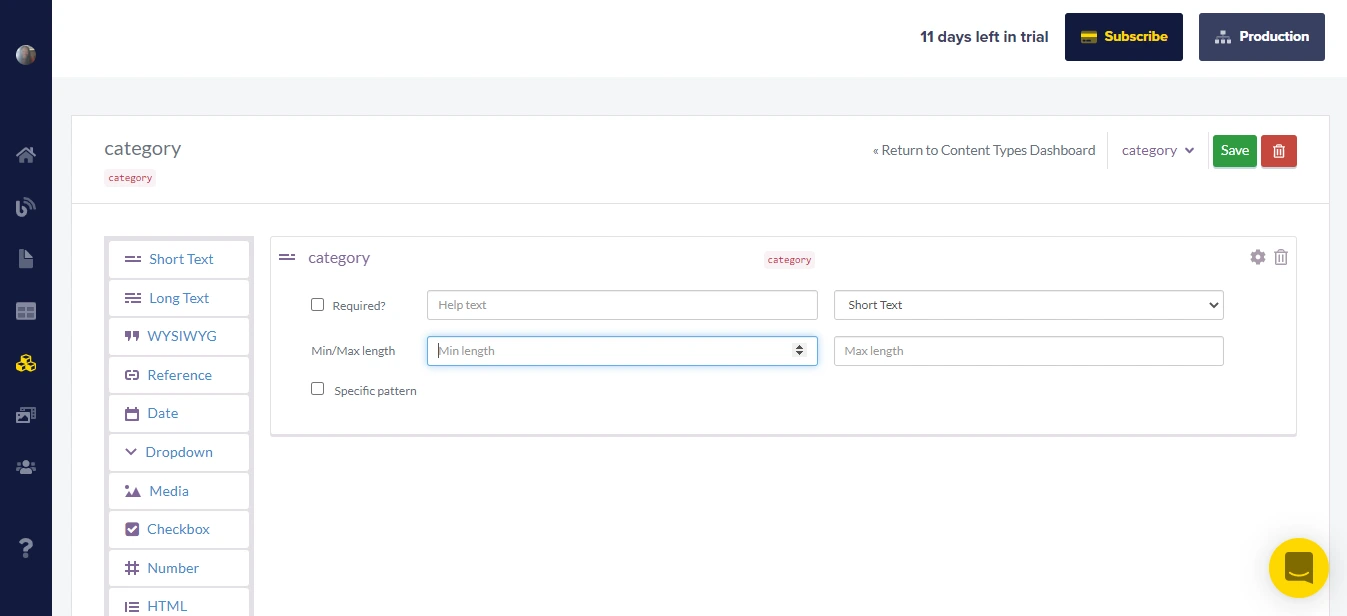
- Add a
short textcontent field on the collections page and name itcategory Also name the collection category and click save.
Now we can add the different categories we want.
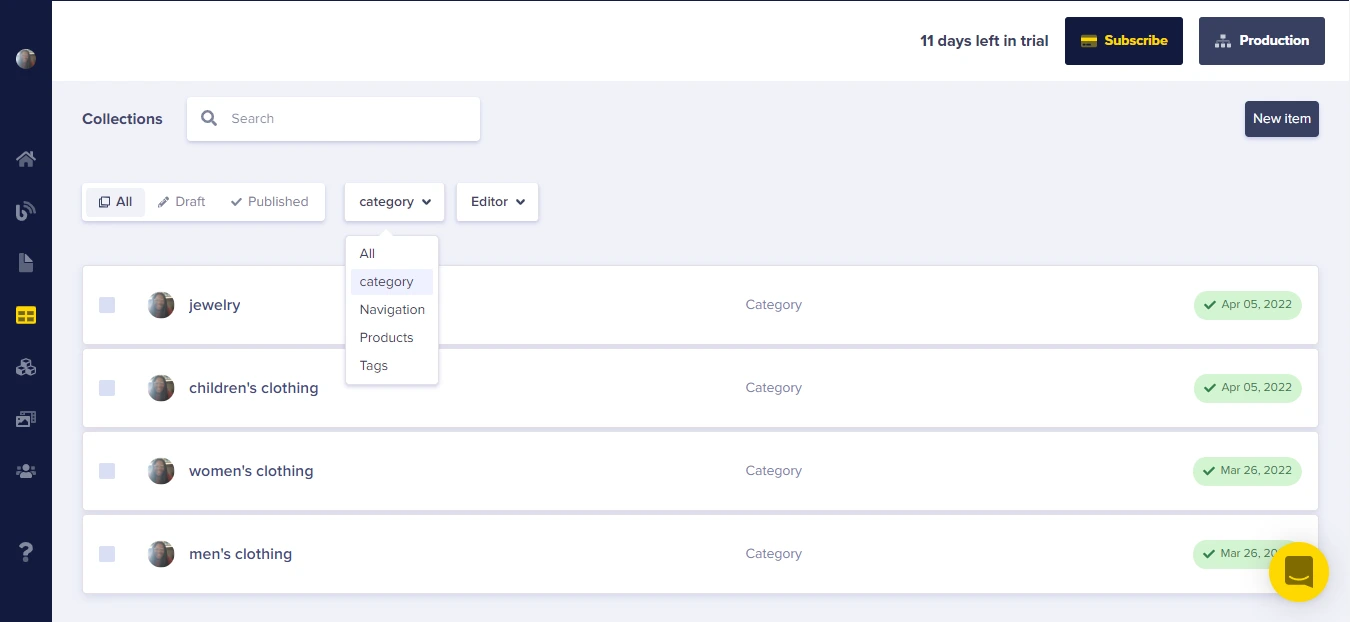
This article will use four categories: Men’s clothing, Women’s clothing, Children’s clothing, and Jewelry.
We can see our four created categories when filtering and selecting category on our collection dashboard.
These categories are to be referenced in each of our products. I’ll show you how we can achieve this.
Now let’s create our products collection.
Collection of products
Still on our dashboard, we create another collection content type called products.
The products collection will have several content fields:
- Image: Image content field
- Title: short text content field
- Description: short or long content field
- Price: Number content field
- Product ID: Number field (This is not necessary, and I'll explain why)
- Category: Reference content field.
The product id is not required because ButterCMS generates an id for each collection. So we don’t have to worry about generating an id.
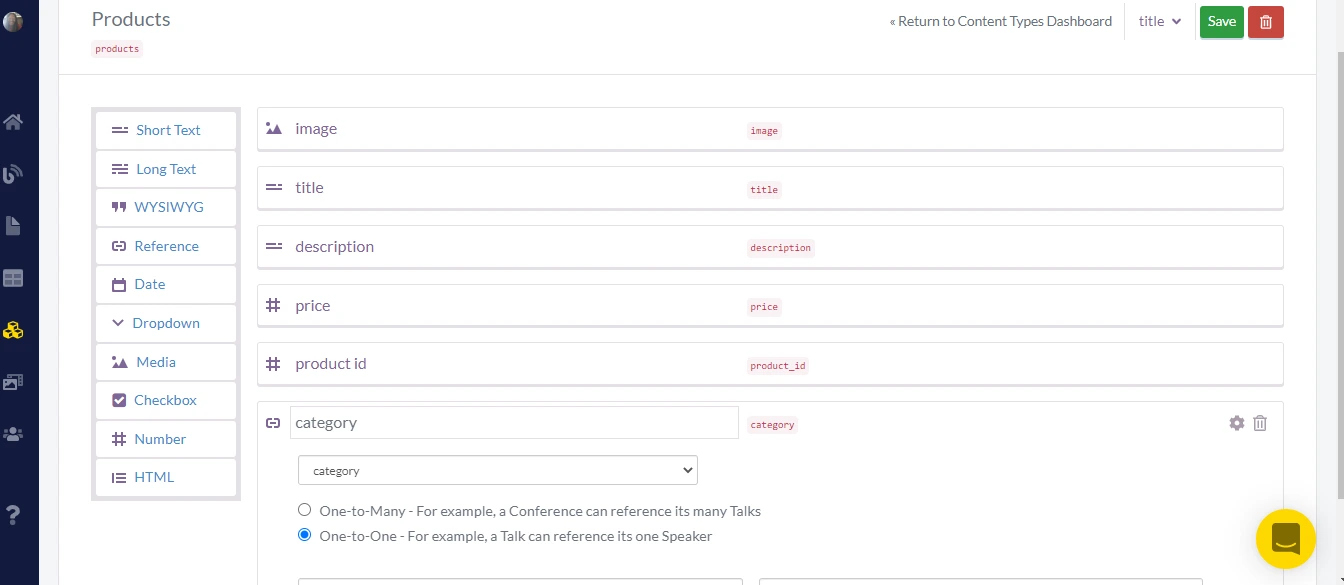
We select category from the dropdown in the reference content field and choose a method for linking it.
There are two methods for connecting references:
- One-to-Many: linking multiple categories to one product.
- One-to-One: for linking one category to one product.
Since each product can have only one category, we select One-to-One.
Now that we have created this collection schema, we can upload our products.
Uploading products
- Click the collections icon
- Select Products

- Populate the provided fields
- Select the category, and hit publish
I’ll go ahead and add more products to my collection.
After uploading a few starter products, we can copy our ButterCMS- generated code from the API explorer as we have done before. Then we’ll integrate it into our app.
Integrating Products API to app
Let’s create a products component.
We import react, useEffect, useState, and butter into the component.
In useEffect, we create a function to get our products from ButterCMS. This function is passed in as a callback function to useEffect.
We define a state that would hold the data we get from ButterCMS.
We also define another state—Loading—that would monitor when our data from the API has loaded. This is set to false by default.
This Loading will be used later when we want to implement something called Skeleton loading.
import React, { useEffect, useState } from 'react';
import butter from '../butter-client';

const Products = () => {
  const [data, setData] = useState([]);
  const [loading, setLoading] = useState(false);

  useEffect(() => {
    const getProducts = async () => {
      setLoading(true);
      var params = {
        page: '1',
        page_size: '10',
      };
      const res = await butter.content.retrieve(['products'], params);
      setData(await res.data.data.Products);
      setLoading(false);
    };
    getProducts();
  }, []);

  return <></>;
};

export default Products;
The Product component can be added inside the Hero component but to adhere to best practices, let’s create a Home component and import Hero and Products. Then in app.js, we’ll replace the Hero component with the Home component.
import React from 'react';
import Hero from './Hero';
import Products from './Products';

const Home = () => {
  return (
    <>
      <Hero />
      <Products />
    </>
  );
};

export default Home;
Remember we already have a link set for /products in our navbar so we also create and set a route for it in app.js:
import Navbar from './components/Navbar';
import Home from './components/Home';
import { Route, Routes } from 'react-router-dom';
import Products from './components/Products';

const App = () => {
  return (
    <>
      <Navbar />
      <Routes>
        <Route path='/' element={<Home />} />
        <Route path='/products' element={<Products/>}/>
      </Routes>
    </>
  );
};

export default App;
Back to the Products component, if we console.log(data) we can see all the products we created on the ButterCMS dashboard.
We can map through data and return products to our app.
return (
    <>
      <div className='flex flex-wrap flex-row justify-center mx-auto'>
        {data.map((product) => (
          <div
            className='max-w-sm mr-9 mb-5 bg-white rounded-lg
              shadow-md dark:bg-gray-800 dark:border-gray-700'
            key={product.meta.id}
          >
            <img
              className='p-8 rounded-t-lg w-full'
              src={product.image}
              alt={product.name}
            />
            <div className='px-5 pb-5 text-center'>
              <h5 className='text-xl font-semibold tracking-tight
             text-gray-900 dark:text-white'>
                {product.title}
              </h5>
            </div>
            <div className='flex justify-around pb-5 items-center'>
              <span className='text-3xl font-bold text-gray-900 dark:text-white'>
                ${product.price}
              </span>
              <button className='text-white bg-rose-700
                 hover:bg-rose-800 focus:ring-4 focus:ring-rose-300
                  font-medium rounded-lg text-sm px-5 py-2.5 text-center '>
                View Product
              </button>
            </div>
          </div>
        ))}
      </div>
    </>
  );
Add a tab component
We can see our products on our page. Let's create a Tabs component that will filter all products based on their category.
We create a new state called filter. We’ll use the filter array method to filter product categories and then save the result to this filter state.
 const [filter, setFilter] = useState([]);

  const filterProducts = (pr) => {
    const filterProduct = data.filter((product) => product.category.category
           === pr);
    setFilter(filterProduct);
  };
This function above will accept the categories as a parameter, then compare it with the products category and return when it matches.
We import the Tabs component and pass this function as props. We also pass in data and setfilter as we will use that later on the Tabs component file.
<Tabs filterProduct={filterProducts} data={data} setFilter={setFilter}/>
This is not the best way to get access to these props. Context API is a much better approach to use but, for the purpose of this tutorial, we will use this approach.
Earlier, we mapped through data to return our products. For the filter to work, we have to map through filter instead.
{filter.map((product) => (
          <div
            className='max-w-sm mr-9 mb-5 bg-white rounded-lg
            shadow-md dark:bg-gray-800 dark:border-gray-700'
            key={product.meta.id}
          >
            <img
              className='p-8 rounded-t-lg w-full'
              src={product.image}
              alt={product.name}
            />
            <div className='px-5 pb-5 text-center'>
              <h5 className='text-xl font-semibold tracking-tight
                 text-gray-900 dark:text-white'>
                {product.title}
              </h5>
            </div>
            <div className='flex justify-around pb-5 items-center'>
              <span className='text-3xl font-bold text-gray-900 dark:text-white'>
                ${product.price}
              </span>
              <button className='text-white bg-rose-700
              hover:bg-rose-800 focus:ring-4 focus:ring-rose-300
              font-medium rounded-lg text-sm px-5 py-2.5 text-center '>
                View Product
              </button>
            </div>
          </div>
        ))}
The filter state is an empty array, so the products section will be blank.
To fix this, let's also set the filter state to use data retrieved from ButterCMS inside our useEffect:
<span style="font-weight: 400;">setFilter(await res.data.data.products);</span>Now, we can see our products.
In the Tabs component file, we destructure filterProducts, data, and setFilter, and create buttons for each Tab category.
The All category will display all products, so we set the filter to data when we click on this tab.
The category name is passed into the filterProducts function as an argument when we click on the remaining category tabs.
<div className='flex flex-wrap mt-5 border-b
          border-gray-200 dark:border-gray-700 justify-center'>
        <button
          className='mr-2 inline-block py-4 px-4 text-sm font-medium
              text-center  hover:text-teal-600 hover:bg-gray-50'
          onClick={() => setFilter(data)}
        >
          All
        </button>

        <button
          className='mr-2 inline-block py-4 px-4 text-sm font-medium
           text-center text-gray-500 rounded-t-lg
              hover:text-teal-600 hover:bg-gray-50'
          onClick={() => {
            filterProducts("men's clothing");
          }}
        >
          Men's Clothing
        </button>
        <button
          className='mr-2 inline-block py-4 px-4 text-sm font-medium
           text-center text-gray-500 rounded-t-lg
           hover:text-teal-600 hover:bg-gray-50 '
          onClick={() => {
            filterProducts("women's clothing");
          }}
        >
          Women's Clothing
        </button>
        <button
          className='mr-2 inline-block py-4 px-4 text-sm font-medium
          text-center text-gray-500 rounded-t-lg
          hover:text-teal-600 hover:bg-gray-50 '
          onClick={() => {
            filterProducts("children's clothing");
          }}
        >
          Children's clothing
        </button>
        <button
          className=’mr-2 inline-block py-4 px-4 text-sm font-medium
            text-center text-gray-500 rounded-t-lg
          hover:text-teal-600 hover:bg-gray-5’
          onClick={() => {
            filterProducts('jewelry');
          }}
        >
          Jewelry
        </button>
      </div>
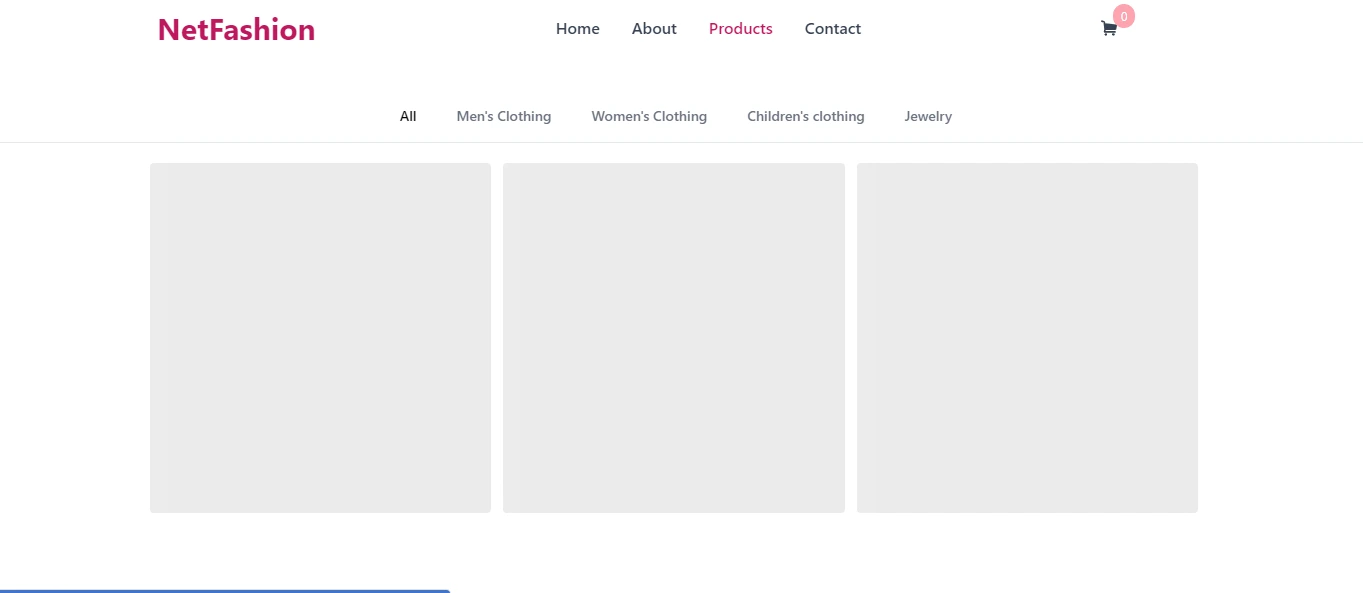
Add skeleton loading
Skeleton loading is a good user experience feature that lets your users know that data is being fetched from the server.
Let’s install react-loading-skeleton:
yarn add react-loading-skeleton
Create a component called Loading and import Skeleton and its necessary dependencies.
import React from 'react'
import Skeleton from 'react-loading-skeleton';
import 'react-loading-skeleton/dist/skeleton.css';

const Loading=()=> {
  return (
    <>
    <div className='flex flex-wrap justify-center mx-auto mt-4 '>
          <div className=' w-3/12 mr-3 '>
            <Skeleton height={350} />
          </div>
          <div className='  w-3/12 mr-3 '>
            <Skeleton height={350} />
          </div>
          <div className='w-3/12 mr-3'>
            <Skeleton height={350} />
          </div>
        </div>
    </>
  )
}

export default Loading
We import this Loading component into our Products.js, remember that our loading state is set to false by default, updates to true inside useEffect, and sets back to false after data has been loaded.
We’ll use conditional rendering to render our Loading component when loading is true.
{loading ? (
        <Loading />
      ) : (
        <div className='flex flex-wrap flex-row justify-center mx-auto'>
          {filter.map((product) => (
            <div
              className='max-w-sm mr-9 mb-5 bg-white
          rounded-lg shadow-md dark:bg-gray-800 dark:border-gray-700'
              key={product.meta.id}
            >
              <img
                className='p-8 rounded-t-lg w-full'
                src={product.image}
                alt={product.name}
              />
              <div className='px-5 pb-5 text-center'>
                <h5 className='text-xl font-semibold tracking-tight
                  text-gray-900 dark:text-white'>
                  {product.title}
                </h5>
              </div>
              <div className='flex justify-around pb-5 items-center'>
                <span className='text-3xl font-bold
                    text-gray-900 dark:text-white'>
                  ${product.price}
                </span>
                <button className='text-white bg-rose-700
               hover:bg-rose-800 focus:ring-4 focus:ring-rose-300
               font-medium rounded-lg text-sm px-5 py-2.5 text-center '>
                  View Product
                </button>
              </div>
            </div>
          ))}
        </div>
      )}
This simply means that if loading is true, it will render skeleton loading. Otherwise, it will display products.
Now when our page loads, we see a nice skeletal interface that lets the user know data is being loaded.
Creating a single product page
Next, we'll be finalizing the layout, design, and route for the single product page of our React ecommerce app.
Adding single product route
A single product page will have product descriptions, a price, and action buttons.
Before we build out our single products page, let's add a Navlink to our product card, so that when users click on the card it takes them to the single product page.
In the Products component, import Navlink from react-router and wrap our product with Navlink.
Navlink uses a to attribute which points to a URL which will contain our product ID.
<NavLink to={`/products/${product.meta.id}`}>
              <div
                className='max-w-sm mr-9 mb-5 bg-white
            rounded-lg shadow-md dark:bg-gray-800 dark:border-gray-700'
                key={product.meta.id}
              >
                <img
                  className='p-8 rounded-t-lg w-full'
                  src={product.image}
                  alt={product.name}
                />
                <div className='px-5 pb-5 text-center'>
                  <h5 className='text-xl font-semibold
               tracking-tight text-gray-900 dark:text-white'>
                    {product.title}
                  </h5>
                </div>
                <div className='flex justify-around pb-5
                   items-center'>
                  <span className='text-3xl font-bold
                           text-gray-900 dark:text-white'>
                    ${product.price}
                  </span>
                  <button className='text-white bg-rose-700
                   hover:bg-rose-800 focus:ring-4 focus:ring-rose-300
                 font-medium rounded-lg text-sm px-5 py-2.5 text-center '>
                    View Product
                  </button>
                </div>
              </div>
            </NavLink>
When we click on any product, it takes us to a URL with the product ID at the end. This will be the route for our single product page.
Let’s create a product component.
Single product component
We import react, useEffect, useState, and butter.
We’ll still use our butter generated API code in useEffect to retrieve data.
Create a product state and loading state—I still intend on using Skeleton loading—and pass the data retrieved into our product state.
The React router uses useParams to access URL parameters. We’ll use that to get our URL id.
import React, { useEffect, useState } from 'react';
import butter from '../butter-client';
import { useParams } from 'react-router-dom';

const Product = () => {
  const { id } = useParams();
  const [product, setProduct] = useState([]);
  const [loading, setLoading] = useState(false);

  useEffect(() => {
    const getProduct = async () => {
      setLoading(true);
      var params = {
        page: '1',
        page_size: '10',
      };
      const res = await butter.content.retrieve(['products'], params);
      setProduct(res.data.data.products);
      setLoading(false);
    };
    getProduct();
  }, []);
  return <div>Product</div>;
};

export default Product;
We also need to create a route for Product in app.js
<Route path='/products/:id' element={<Product/>}/>
Back in Product.js we can filter through products and return only the individual product whose id matches our URL id.
const singleProduct = product.filter((pro) => pro.meta.id === Number(id));
If we console.log(singleProduct), we’ll see our single product.
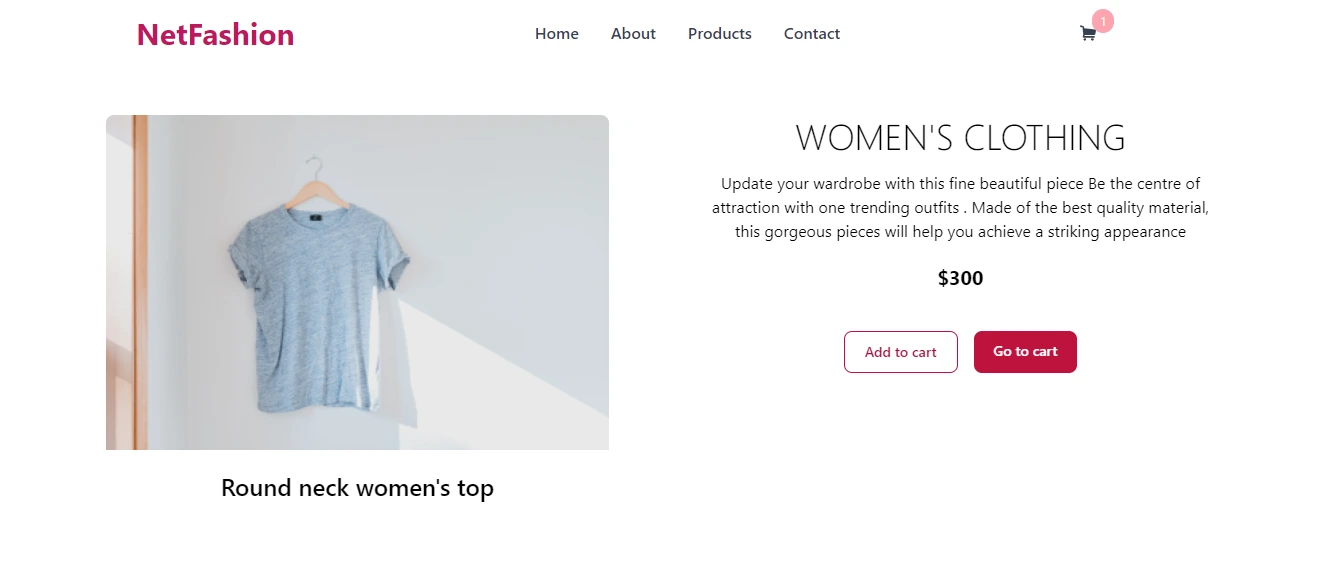
Now, we can map through singleProduct and render the content to our app.
return (
<>
{singleProduct.map((prod) => (
<div key={prod.meta.id} className='mx-auto'>
{console.log(prod)}
<div className='flex flex-col md:flex-row justify-center
text-center md:justify-around px-20 py-10'>
<img
src={prod.image}
alt='product'
className='p-8 rounded-t-lg md:w-4/12'
/>
<div className='md:w-5/12'>
<h1 className='uppercase text-4xl font-light'>
{prod.category && prod.category.category}
</h1>
<p className='mt-4'>{prod.description}</p>
<p className='font-bold text-xl mt-5 mb-5'>${prod.price}</p>
<button className='mt-5 text-teal-800 border
border-teal-700 hover:bg-teal-800 hover:text-white
transition-all ease-in duration-300 focus:ring-4
focus:ring-teal-300 font-medium rounded-lg text-sm px-5
py-2.5 text-center mr-4'>
Add to cart
</button>
<button className='mt-5 text-white bg-teal-700
hover:bg-teal-800 focus:ring-4 focus:ring-teal-300
font-medium transition-all ease-in duration-300
rounded-lg text-sm px-5 py-2.5 text-center '>
Go to cart
</button>
</div>
</div>
<div className='px-24 text-center md:text-left'>
<h1 className=' font-semibold text-2xl'>{prod.title}</h1>
</div>
</div>
))}
</>
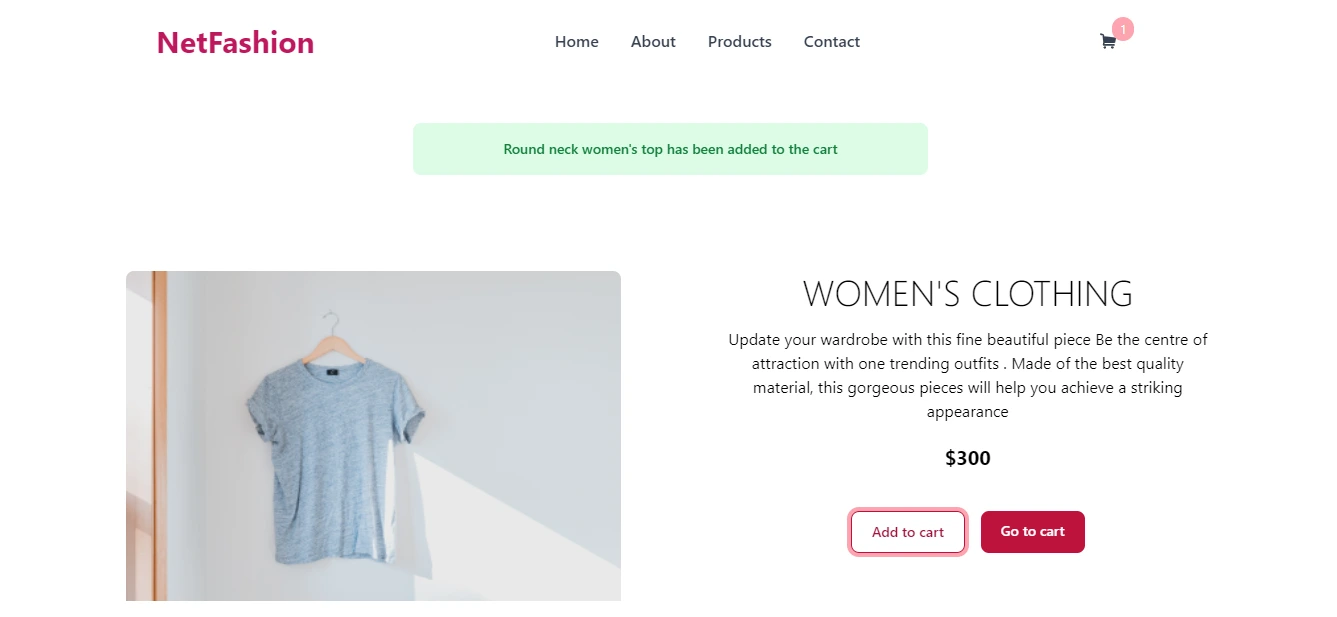
);The rendered product is displayed in our app. We have the category, description, and price. We also have two buttons: one to add the product to the cart and the other to go to the cart.
Let’s import Navlink to replace our go to cart button.
   <NavLink
                to='/cart'
                className='mt-5 text-white bg-teal-700
             hover:bg-teal-800 focus:ring-4 focus:ring-teal-300
             font-medium transition-all ease-in duration-300
              rounded-lg text-sm px-5 py-2.5 text-center '
              >
                Go to cart
           </NavLink>
Now we can create a cart component and properly route to our cart. We’ll come back later for the add to cart functionality.
In app.js, we route our cart component. For now, we have nothing on the component, so it displays a blank page. We’ll populate it later.
<Route path='/cart' element={<Cart/>}/>
A good thing to have would be a cart icon on the navbar, so let’s create that.
I’ll use iconify to import icons:
yarn add @iconify/react -D
In Navbar.js, import iconify:
import { Icon } from '@iconify/react';
We wrap it in a Navlink and place it after our Navlist:
<NavLink to='/cart' className='cursor-pointer'>
    <Icon icon='el:shopping-cart' className='text-gray-700 ' />
  </NavLink>
Now when we click on the cart icon, it also takes us to our cart component.
Let’s build the add-to-cart feature.
Adding and deleting products from cart
In the upcoming sections, we will put everything in place for cart management.
Redux configuration
Redux is a state management tool used for precisely managing states. It saves our state in a store that is accessed from any component.
We’ll use Redux to handle adding and deleting items from the cart and also increasing and decreasing the quantity of added items.
We will install redux and react-redux:
yarn add redux react-redux
Let’s create a folder called redux in our src folder.
Then we add an action and reducers folder in the redux folder.
Actions are JavaScript objects with key-value fields. They have a type field that describes the action to be performed—to add or delete products—and a payload field that holds the data—product—passed in as a parameter.
We create an index.js file in the actions folder and add the code below:
 export const addProduct = (product) => {
    return {
      type: 'ADDITEM',
      payload: product,
    };
  };

  export const delProduct = (product) => {
    return {
      type: 'DELITEM',
      payload: product,
    };
  };
Let’s also create a reducer.
Reducers are pure functions used to update an application's state using actions. Pure functions mean they have no side effects and will have the same result if the same arguments are passed over again.
In our reducers folder, let’s create a file called handleCart.js. Here we will write the function that will handle adding and removing products.
Add product reducer:
const cart = [];

const handleCart = (state = cart, action) => {
  const product = action.payload;
  switch (action.type) {
    case 'ADDITEM':
      //    check if item exist
      const checkItem = state.find((item) => item.meta.id === product.meta.id);
      if (checkItem) {
        return state.map((item) =>
          item.meta.id === product.meta.id
            ? { ...item, qty: item.qty + 1, newPrice: item.price * (item.qty + 1)
            }
            : item
        );
      } else {
        return [
          ...state,
          {
            ...product,
            qty: 1,
            newPrice: product.price,

          },
        ];
      }
      break;
  }
};

export default handleCart;
The Reducer function accepts two parameters: state and action.
To break down the above code, we assign an empty array to cart. This is where we are going to push every added product. This cart is also assigned to our state.
const cart = [];
const handleCart = (state = cart, action)
action.payload is the product that gets added to the cart.
<span style="font-weight: 400;">const</span><span style="font-weight: 400;"> </span><span style="font-weight: 400;">product</span><span style="font-weight: 400;"> </span><span style="font-weight: 400;">=</span><span style="font-weight: 400;"> </span><span style="font-weight: 400;">action</span><span style="font-weight: 400;">.</span><span style="font-weight: 400;">payload</span><span style="font-weight: 400;">;</span>When a product gets added to the cart, we check if the action.type is ADDITEM:
switch (action.type) {
    case 'ADDITEM':
If that's the type, we check through the cart to see if the product already exists.
const checkItem = state.find((item) => item.meta.id === product.meta.id);
If the product exists, we map through the state and find the id that corresponds to that of the product being added, then we add a qty property to it and increment it by 1. We also multiply the product price by the qty and assign it to a new property called newPrice. This would increase our price as qty increases.
If id doesn’t match, we just return the product:
if (checkItem) {
        return state.map((item) =>
          item.meta.id === product.meta.id
            ? { ...item, qty: item.qty + 1, newPrice: item.price * (item.qty + 1)
             }
            : item
        );
If product doesn’t exist in cart, we return the state and add the new product with a qty property set to 1. We also set the product price to newPrice:
return [
          ...state,
          {
            ...product,
            qty: 1,
            newPrice: product.price,

          },
        ];
Delete product reducer
Removing a product from the cart is also similar to adding one.
case 'DELITEM':
      const checkDelItem = state.find(
        (item) => item.meta.id === product.meta.id
      );
      if (checkDelItem.qty === 1) {
        return state.filter((item) => item.meta.id !== product.meta.id);
      } else {
        return state.map((item) =>
          item.meta.id === product.meta.id
            ? { ...item, qty: item.qty - 1, newPrice: item.price * (item.qty - 1)
               }
            : item
        );
      }
      break;
    default:
      return state;
      break;
We check the cart for the product to be deleted:
const checkDelItem = state.find(
        (item) => item.meta.id === product.meta.id
      );
If the qty of the product is equal to 1, we delete the product:
if (checkDelItem.qty === 1) {
        return state.filter((item) => item.meta.id !== product.meta.id);
      }
If the qty is more than 1 then we can subtract the qty by 1 until it gets to 1 and gets deleted. The price is also reduced.
state.map((item) =>
          item.meta.id === product.meta.id
            ? { ...item, qty: item.qty - 1, newPrice: item.price * (item.qty - 1)
           }
            : item
        );
We also add a default case as is standard and return state:
 default:
      return state;
      Break;
Combining reducers
Since we have two reducers in one file, we can combine them using combineReducers.
In the reducer folder, let’s create an index.js file and pass handleCart to combineReducers, saving it in a variable called rootReducers:
import handleCart from './handleCart';
import { combineReducers } from 'redux';

const rootReducers = combineReducers({ handleCart });

export default rootReducers;
Now we can import rootReducers to our store.
In the redux root folder, let’s create store.js, import creatStore from redux, and pass our rootReducers to createStore.
import { createStore } from 'redux';
import rootReducers from './reducers';

const store = createStore(rootReducers);

export default store;
We can import our store to use in our root index.js file.
import { Provider } from 'react-redux';

import store from './redux/store';

  <BrowserRouter>
     <Provider store={store}>
    <App />
    </Provider>
  </BrowserRouter>
The provider component makes the store available to any component that needs it.
Now, let’s dispatch our actions and add/delete items from the cart.
Dispatching actions
The Redux method dispatch is the only way state can be updated in Redux. We use dispatch to carry out actions.
In product.js, we import useDispatch. We also import the addProduct action from our action file.
import { useDispatch } from 'react-redux';
import { addProduct } from './../redux/action';

 const dispatch = useDispatch();

 const addCart = (product) => {
    dispatch(addProduct(product));

  };
Now, we can add our product to this addCart function when the add to cart button gets clicked.
<button onClick={()=>addCart(prod)}>Add to cart </button>
We can add a console.log(product) in the handleCart reducer just to see if the code works.
Another thing we can do is make our cart icon display the number of products in the cart.
We use useSelector to reference our state on any component.
Import useSelector in Navbar:
import { useSelector } from 'react-redux';

const state = useSelector((state) => state.handleCart);
Now we can access our state and also check the length. We can insert this in a p tag and use absolute positioning to place it above the cart icon.
<NavLink to='/cart' className='cursor-pointer relative'>
              <Icon icon='el:shopping-cart' className='text-gray-700 ' />
              <p className='text-xs absolute -top-2 left-3'>{state.length}</p>
            </NavLink>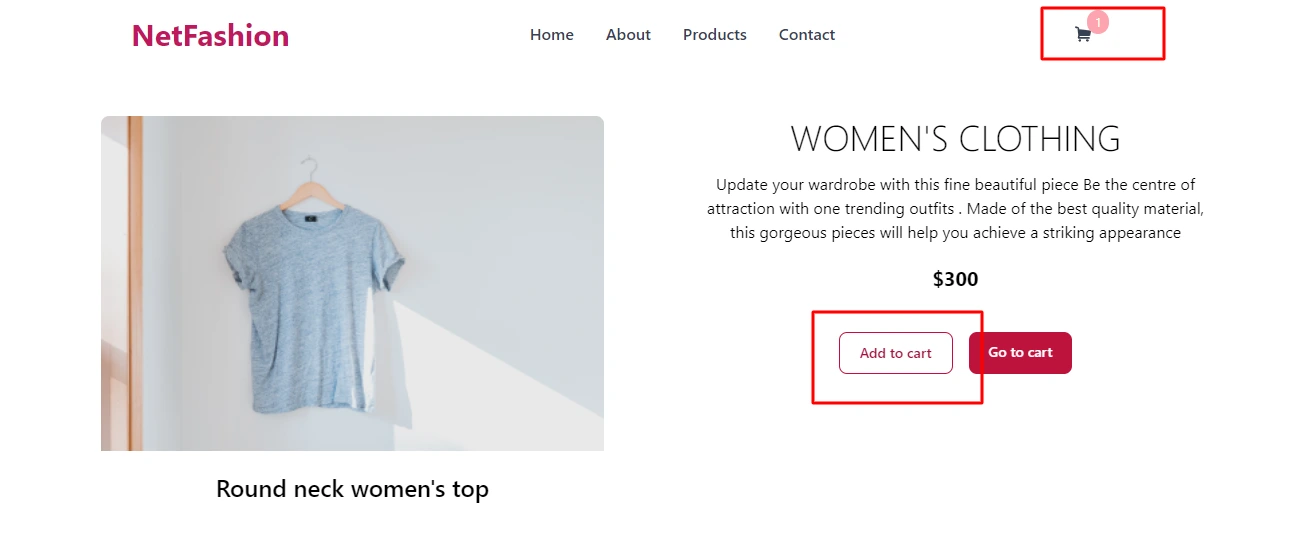
Populate cart component
We already created a cart component and routed it, now let's populate it with our products.
import React from 'react';
import { useSelector } from 'react-redux';
import { useDispatch } from 'react-redux';
import { delProduct } from '../redux/action/index.js';
import { NavLink } from 'react-router-dom';
import { addProduct } from '../redux/action/index.js';
import { Icon } from '@iconify/react';

const Cart = () => {
  const state = useSelector((state) => state.handleCart);
  const dispatch = useDispatch();

  const delCart = (product) => {
    dispatch(delProduct(product));
  };

  return (
    <>
     <div>
      {state.map((cartItem) => (
        <div className='px-20 py-10' key={cartItem.meta.id}>
          <div className='flex justify-center relative  '>
            <div className='absolute right-56 cursor-pointer'>
              <Icon icon='bi:x-lg' onClick={() => delCart(cartItem)} />
            </div>
            <div className='w-2/12 mr-10'>
              <img src={cartItem.image} alt='cart' className='' />
            </div>
            <div className='ml-10 items-center'>
              <h3 className='text-2xl font-semibold'>{cartItem.title}</h3>
              <div className='flex'>
                <p className='text-xl font-bold mr-4'>Qty: {cartItem.qty}</p>
                {console.log(cartItem.qty)}
                <p className='text-xl font-bold'>${cartItem.newPrice}</p>
              </div>

              <div>
                <button className='text-3xl mr-5'>-</button>
                <button className='text-3xl'>+</button>
              </div>
            </div>
          </div>
        </div>
      ))}
         <div className='px-20 text-center mx-auto'>
          <NavLink
            to='/cart'>
            Proceed to checkout
          </NavLink>
        </div>

      </div>
    </>
  );
};

export default Cart;
In the above code, we reference the state using useSelector just like we did before and also import delProduct from actions.
Then we map through our state and return products in the cart.
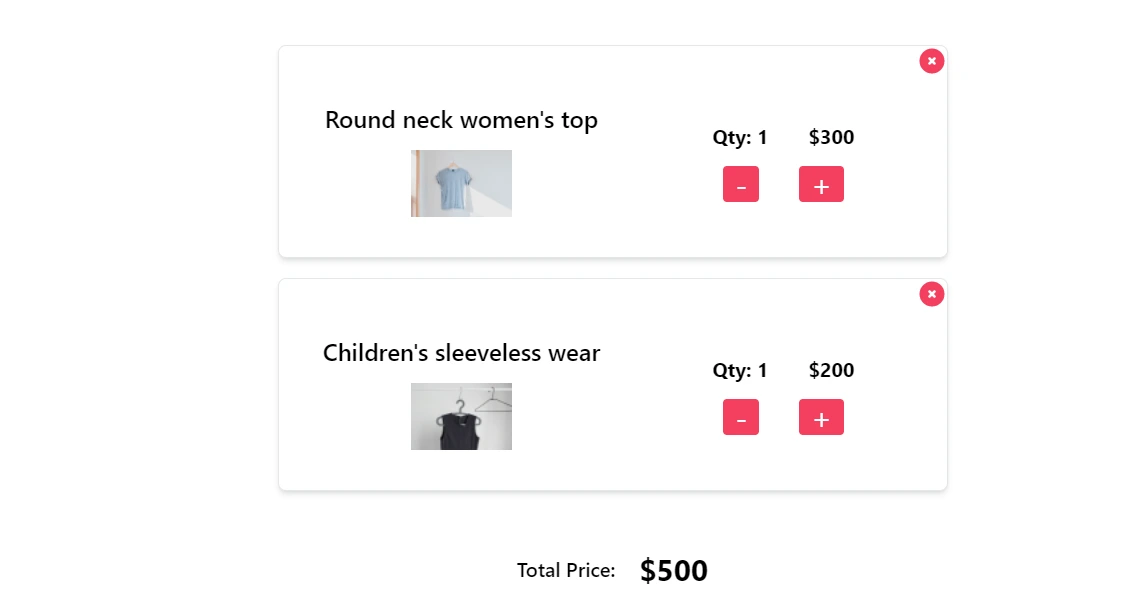
Increasing and decreasing product quantity
We also added plus and minus buttons we can use to increase or decrease product quantity.
Let’s write a function to implement that:
 const increaseItem = (product) => {
    dispatch(addProduct(product));
  };
To decrease product qty we can use the delCart function we previously wrote and just pass our product to it.
              <button
                  onClick={() => delCart(cartItem)}
                  className='text-3xl mr-5'
                >
                  -
                </button>
                <button
                  onClick={() => increaseItem(cartItem)}
                  className='text-3xl'
                >
                  +
                </button>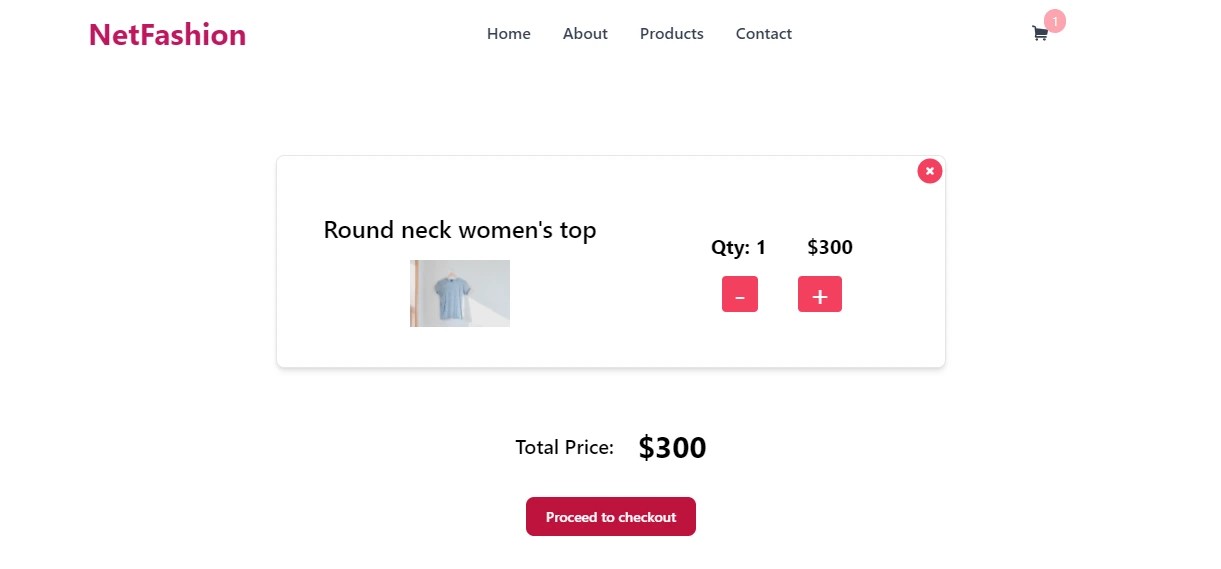
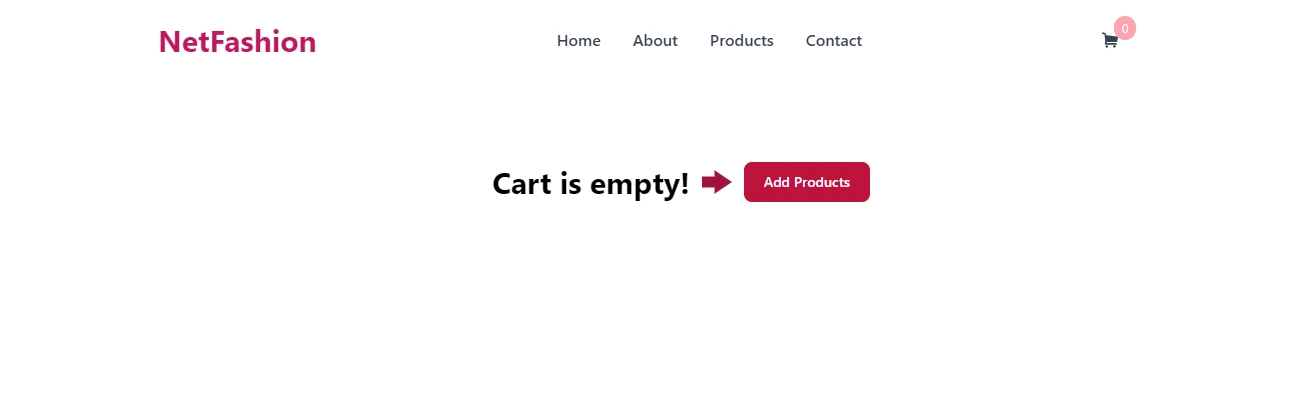
Empty cart
We want the users to know when the cart is empty, so let’s create a component called EmptyCart.
import React from 'react';
import { Link } from 'react-router-dom';
const EmptyCart = () => {
  return (
    <>
      <div className='px-20 py-20 text-center'>
        <h1 className='text-3xl font-bold'>
          CART IS EMPTY..{' '}
          <Link
            to='/products'>
            Go to Products
          </Link>
        </h1>
      </div>
    </>
  );
};

export default EmptyCart;
You can customize it to your preference.
Back in cart.js, we call EmptyCart when the state is empty.
{state.length === 0 && <EmptyCart/>}
Total price
It would be great if users could see the total cost of items in their cart. We’ll write a function to display this.
const totalPrice = state.reduce((acc, curr) => {
    return acc + curr.newPrice;
  }, 0);
This totalPrice function can be added below the product list in the cart component.
         <div className=' flex px-20 py-10 justify-center items-center'>
            <h3 className='text-xl font-semibold mr-3'>Total Price:</h3>
            <h1 className='font-bold ml-3 text-3xl'>${totalPrice}</h1>
          </div>
We can also add a button that leads us to checkout.
         <NavLink
              to='/checkout'
              className=''
            >
              Proceed to checkout
            </NavLink>
We won’t be creating a checkout feature in this article, but there are awesome 3rd party checkout services you can check out—Stripe is a great example.

Adding cart notifications
Before we conclude, let’s add a notification that pops up when a product gets added to the cart.
In product.js, create a notifyMessage state:
const [notifyMessage, setNotifyMessage] = useState(null)
In our addCart function, we set a notification message and save it in the notifyMessage state:
   const addCart = (product) => {
    dispatch(addProduct(product));
    setNotifyMessage(`${product.title} has been added to the cart`);
  };
Now we can place this notification message at the top of our page:
       {notifyMessage != null && (
            <div className='px-20 py-10 text-center w-6/12 mx-auto'>
              <p class='  p-4 mb-4 font-medium text-sm
                  text-green-700 bg-green-100 rounded-lg'>
                {notifyMessage}
              </p>
            </div>
          )}
We set a condition to only render it when notifyMessage is not null.
And that’s it. We’ve built an e-commerce app from scratch showcasing our products.
Quick recap
This article discussed why dynamic web apps are important. We also discussed why an e-commerce app should be dynamic.
We created a React e-commerce site and hosted products and images in a headless content management system—ButterCMS.
We built our hero slider section using Swiper.js and retrieved all images used in the slider from ButterCMS. Without opening the codebase, we can add more images to our slider from the ButterCMS dashboard.
We also built out the products page and retrieved all our product details from ButterCMS. We grouped our products into categories and created a tab that filtered our products. Like with the hero component, we can add or remove new products from the ButterCMS dashboard.
We created a single product page that displayed individual product details with an action button to add products to the cart.We also created a cart component that showed all products on the cart with their total price and an option to increase or decrease the product quantity.
If we wanted to, we could add more features like a search feature, an advanced filter feature, a related products section, an about us page, and a contact page. We can also add a rating feature, completely build out the checkout feature, and improve the styling—the possibilities are endless.
Final thoughts
These days, a dynamic website is no longer a nice-to-have, but an imperative. Modern technologies like React and ButterCMS simplify the process of incorporating dynamism across your entire ecommerce stack; from websites and smartphone apps to kiosks and conversational interfaces. In this comprehensive guide, we shared everything you need to get started with React and ButterCMS for e-commerce, from dynamic product management to cart customization and notifications; we hope you find it useful
Here’s a live link of the React ecommerce app we built: https://ButterCMS-ecommerce.vercel.app/
You can also access all the source code from this GitHub repository.
Post updates May 2024 by Maab Saleem.