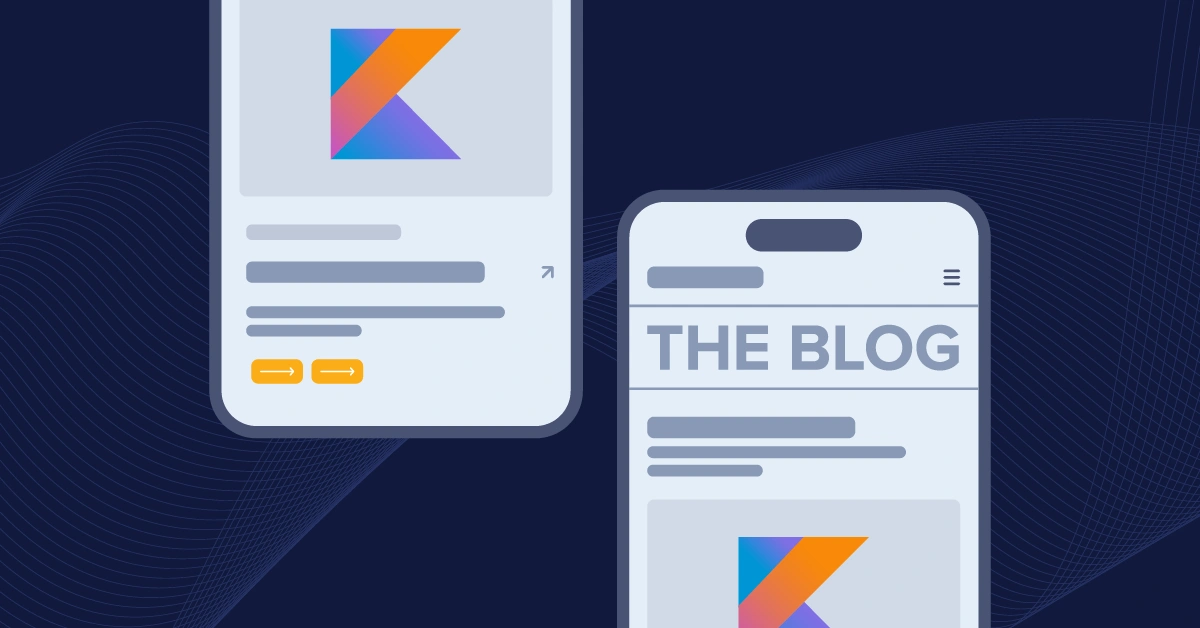
Have you ever considered the intricate art of crafting dynamic, cross-platform blog applications? Your search ends here, as we invite you to embark on a thrilling and all-encompassing journey that will not only fulfill your curiosity but also lead you to discover the exciting realm of creating cross-platform blogs using the potent combination of Kotlin and the versatile ButterCMS content management system. This in-depth tutorial will guide you through each process step, from setting up the project to seamlessly integrating ButterCMS, culminating in creating a captivating and responsive cross-platform blog app that transcends boundaries.
Table of contents
Why use Kotlin?
Here are some compelling points that shed light on the advantages of adopting Kotlin, especially for bloggers and website creators:
-
Concise and Expressive: Kotlin's design prioritizes clarity and brevity, making your code more readable and compact. This succinct nature proves invaluable when embedding code snippets within your blog posts, ensuring your content remains engaging and accessible.
-
Interoperability with Java: Kotlin's compatibility with Java opens doors to a wealth of libraries and tools for those venturing into the blogosphere. This compatibility enables you to seamlessly integrate Java code, expanding your creative possibilities without constraints.
-
Enhanced Developer Productivity: By minimizing boilerplate code, Kotlin empowers you to channel your energy into crafting compelling content. This optimization of developer effort translates to more time spent curating quality posts that resonate with your readers.
-
Robust Type Inference: Kotlin's robust type inference system ensures your code remains sturdy and bug-free. This stability contributes to a seamless user experience on your blog, creating an environment where readers can explore your content without encountering technical glitches.
-
Null Safety: Nothing disrupts user engagement like crashes due to null pointer exceptions. Kotlin's integration of null safety features mitigates this risk, ensuring that your blog visitors navigate your content without unexpected interruptions.
-
Extension Functions: Elevate the interactive aspect of your blog by harnessing Kotlin's extension functions. These functions enable you to add dynamic elements that captivate your readers, encouraging them to immerse themselves further in your blog's offerings.
-
User Experience Excellence: Ultimately, the success of your blog hinges on user experience. With Kotlin, you can create a seamless, engaging, and reliable platform that resonates with your readers, fostering a loyal and growing audience.
Incorporating Kotlin into your blogging toolkit introduces a new dimension of efficiency, innovation, and user-centric design. Whether you're an aspiring blogger or a seasoned content creator, Kotlin's virtues align perfectly with your goals of delivering impactful content in a technologically enhanced manner.
Why ButterCMS rocks:
ButterCMS is a versatile and innovative headless content management system (CMS), particularly when delivering powerful blog experiences. With its developer-friendly approach and seamless API integration, ButterCMS empowers developers to create, manage, and deliver captivating blog content to websites and applications. Unlike traditional CMS platforms, ButterCMS's emphasis on APIs allows developers to design and shape their front-end experiences according to their vision without being restricted by predefined content presentation layers.
The Blog Engine Advantage
At the heart of ButterCMS's capabilities lies its advanced blog engine. Crafted to cater to the unique needs of bloggers, content creators, and developers, this blog engine offers many features designed to streamline creating, managing, and showcasing blog content.
-
Effortless Content Management: Bloggers and content creators can rejoice as ButterCMS simplifies content management. Its user-friendly interface makes adding, editing, and organizing blog posts a breeze. No coding knowledge is required, meaning that content creators can focus solely on what they do best – creating compelling blog posts.
-
Seamless API Integration: The backbone of ButterCMS's blog engine is its robust API integration. Developers can seamlessly integrate blog content into their websites and applications, enabling them to design tailor-made user experiences that align with their brand's identity. By decoupling the content from the presentation layer, developers gain the flexibility to experiment with various layouts, styles, and interactive elements to create truly captivating blogs.
-
Tailor-Made Blog Experiences: With ButterCMS, developers are no longer constrained by rigid templates. The blog engine's API-first approach allows for complete creative freedom. Developers can mold blog posts to fit their website or app's desired look and feel, resulting in a cohesive and engaging user experience.
-
Performance and Scalability: Beyond its creative freedom, ButterCMS excels in performance and scalability. Blogs powered by ButterCMS load quickly and efficiently, enhancing the overall user experience. The system scales effortlessly as traffic grows, ensuring your blog remains accessible and responsive to a growing audience.
-
SEO Optimization: A blog's success often hinges on its search engine visibility. ButterCMS understands this and equips bloggers and developers with powerful SEO optimization tools. From customizable meta tags to clean and crawlable code, your blog is primed to rank well in search engine results, driving more organic traffic to your content.
-
Key Features of ButterCMS Blog Engine: The Blog Engine includes a range of editing and formatting tools to customize the appearance of blog posts, including text styles, images, and multimedia elements. It allows you to preview posts before publishing to ensure they look as desired. Additionally, the engine offers SEO features such as meta descriptions and tags to enhance visibility on search engines. It may also provide analytics and insights, offering metrics like page views and engagement to track post performance.
In the world of dynamic blog experiences, ButterCMS emerges as a game-changer. Combining effortless content management for bloggers, creative freedom for developers, and a range of optimization features, the ButterCMS blog engine empowers you to craft a blog that resonates with your audience and stands out in today's digital landscape. Say goodbye to content presentation constraints and hello to a new era of immersive, personalized, and seamlessly integrated blog experiences powered by ButterCMS.
Benefits of Using Kotlin and ButterCMS Together for Building a Blog App:
1. Developer Productivity: Kotlin's concise syntax and modern features help developers write clean and maintainable code. This, combined with ButterCMS's intuitive API-driven approach, streamlines the development process and allows developers to focus on building engaging content and user experiences.
2. Interoperability: Kotlin is fully interoperable with Java, enabling it to leverage existing Java libraries and tools. This can be beneficial when integrating ButterCMS APIs or other third-party services.
3. Strong Typing and Null Safety: Kotlin's type system helps catch errors at compile time, reducing the likelihood of runtime crashes. This aligns well with the reliable content delivery from ButterCMS APIs.
4. Extension Functions: Kotlin's extension functions enable developers to add new functionality to existing classes without modifying their source code. This can be helpful when working with ButterCMS responses, allowing for custom data transformations.
5. API-Driven Content Management: ButterCMS's headless CMS approach enables seamless content management while offering flexibility in content presentation. It allows developers to create custom layouts and designs without being constrained by a monolithic CMS's front end.
Tutorial Prerequisites
Before starting the tutorial, you should have the following:
-
Familiarity with Kotlin programming language fundamentals and Retrofit
-
An understanding of API concepts, such as HTTP requests, responses, and RESTful APIs
-
Have a ButterCMS account. Sign up on ButterCMS if you don’t have an account
-
Local installation of Kotlin and Android Studio
By combining the strengths of Kotlin's programming capabilities and ButterCMS's content management features, you can create a dynamic and efficient blog with a user-friendly backend and a customizable frontend. All the code for this tutorial can be found in this GitHub repo.
Building a Blog App with Kotlin and the ButterCMS Blog Engine
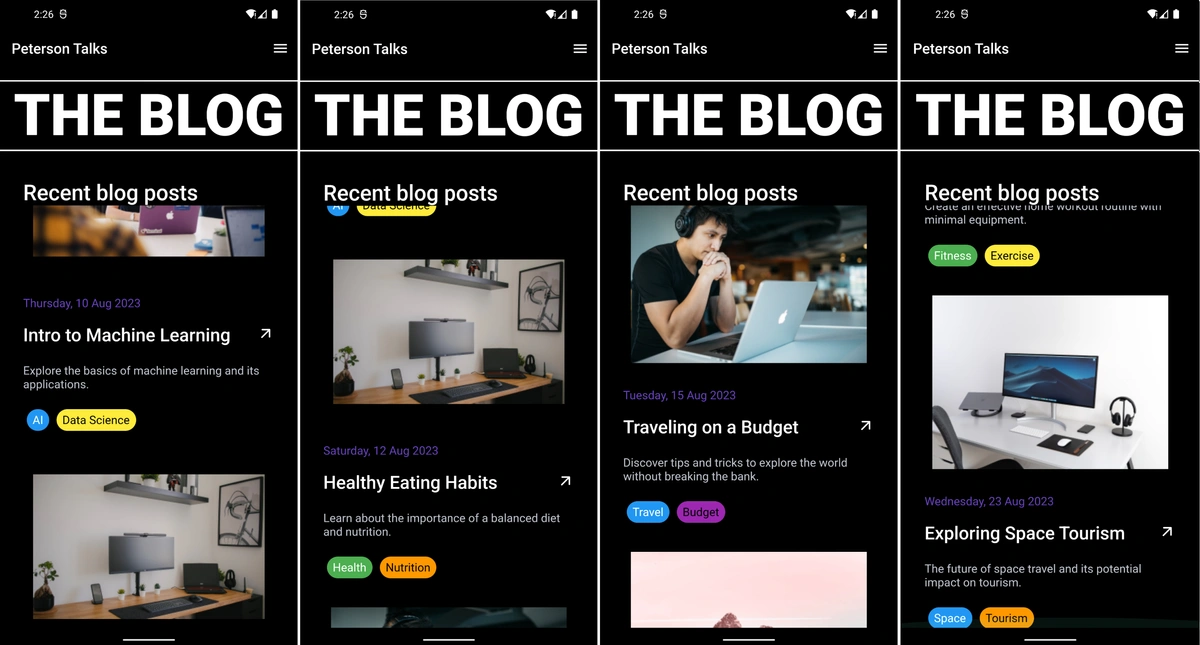
In this tutorial, we will harness the capabilities of Kotlin in conjunction with ButterCMS to craft a native mobile app. Let's glimpse the exciting outcome we're set to achieve:
Establishing the ButterCMS Blog Engine
The ButterCMS Blog Engine is a powerful tool that allows you to easily create and manage a blog on your website. It provides a user-friendly interface and a range of features to streamline the process of publishing and organizing your blog content.
ButterCMS Blog Engine serves as a comprehensive tool that empowers you to create, manage, and optimize your blog content with ease. It simplifies the entire process, allowing you to focus on creating high-quality content that resonates with your audience. Whether you're a seasoned blogger or just starting out, this engine provides the tools you need to make your blog a success!
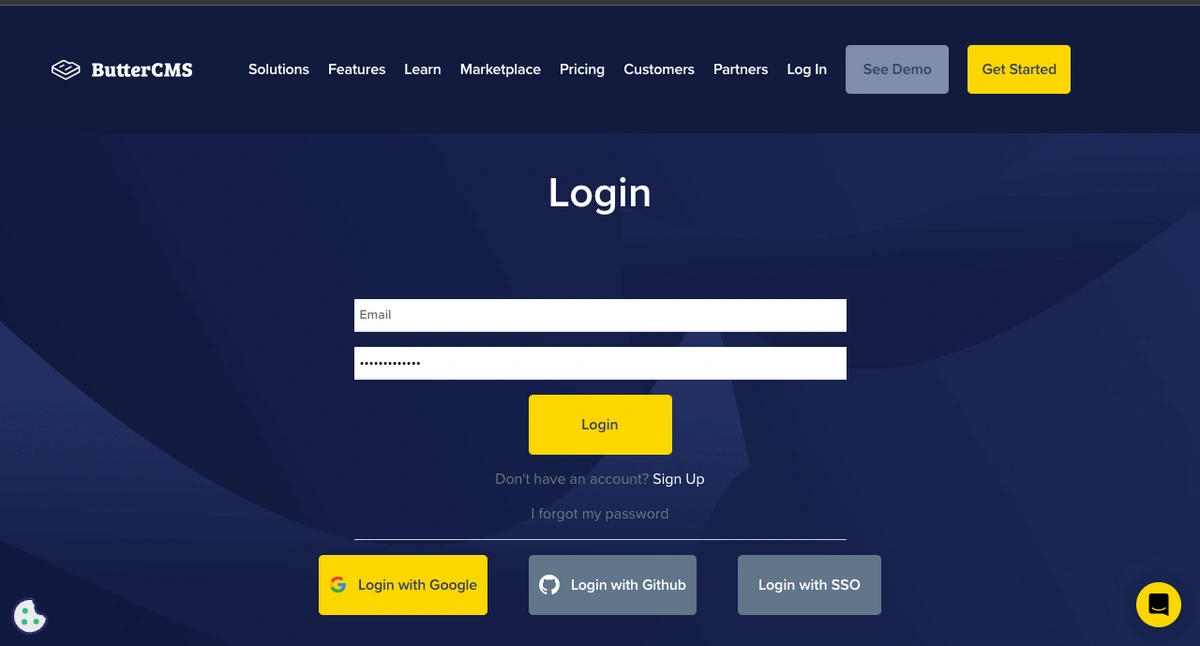
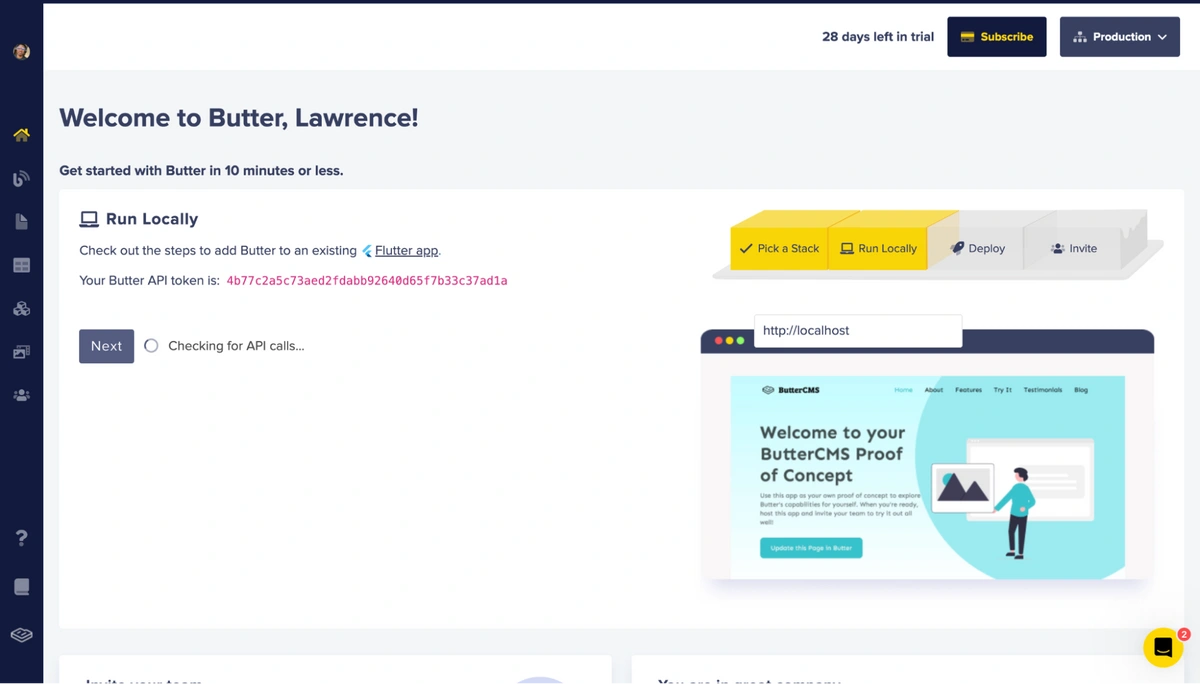
To access ButterCMS, you need to login. Then you will land on the Home dashboard of your Butter account.
Once logged in, you'll be directed to your Dashboard.
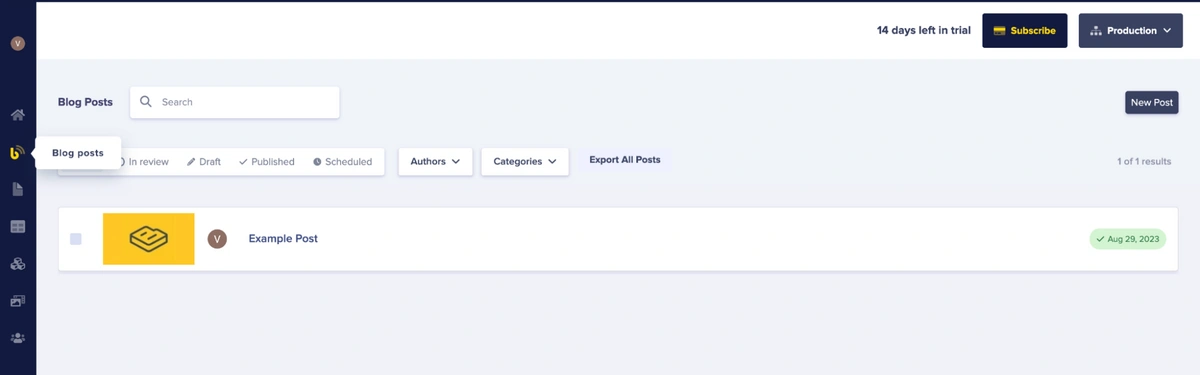
From the Dashboard, you can reach the Blog Engine by selecting the Blog posts icon in the sidebar. Upon clicking the "Blog posts" option, we will be directed to the Blog Post Dashboard
To add a blog post, simply select the "New Post" button in the page's upper-right corner. On the Blog Engine Dashboard, input the post's title, compose the blog content utilizing the WYSIWYG editor for the content body, the author field for the content author, a summary for a quick description, and tags you can use three words related to the content.
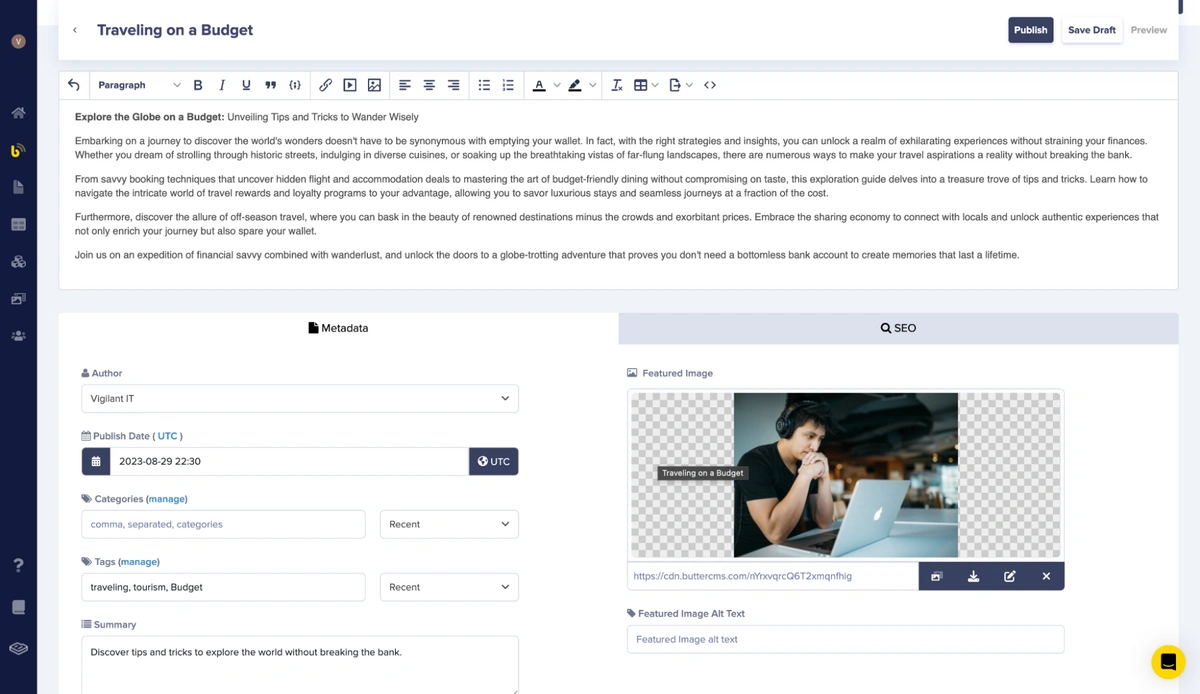
To optimize the blog post for SEO, you can proceed to the integrated SEO segment and complete the SEO Title and Media data sections.
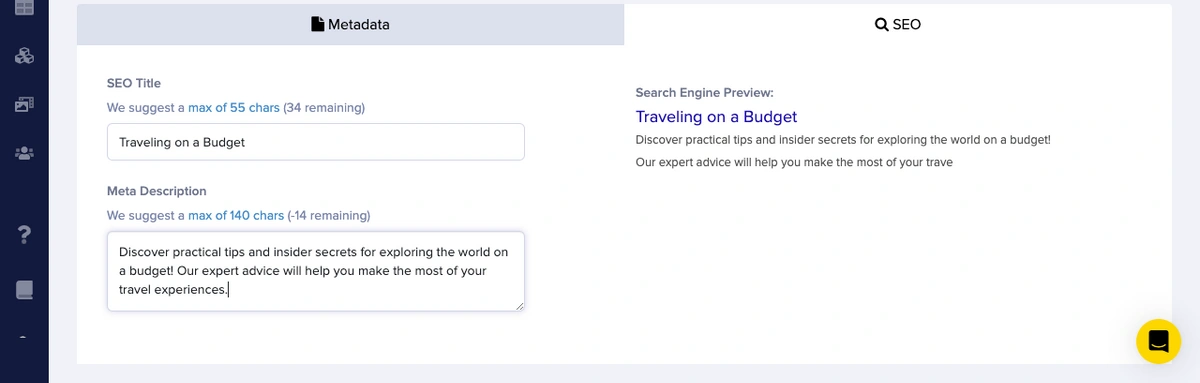
The ButterCMS blog engine provides robust features that enhance content management, SEO optimization, and customization. With the blog engine, you can add author information and category tags for efficient content organization and discovery.
The SEO-focused system offers customizable metadata fields like meta titles, descriptions, and SEO-friendly URLs to elevate your search engine rankings and attract a wider readership. Another note-worthy feature is the Concierge Blog Migration, which provides users with a seamless and guided process for migrating their existing blogs from other platforms.
Kotlin Integration with ButterCMS
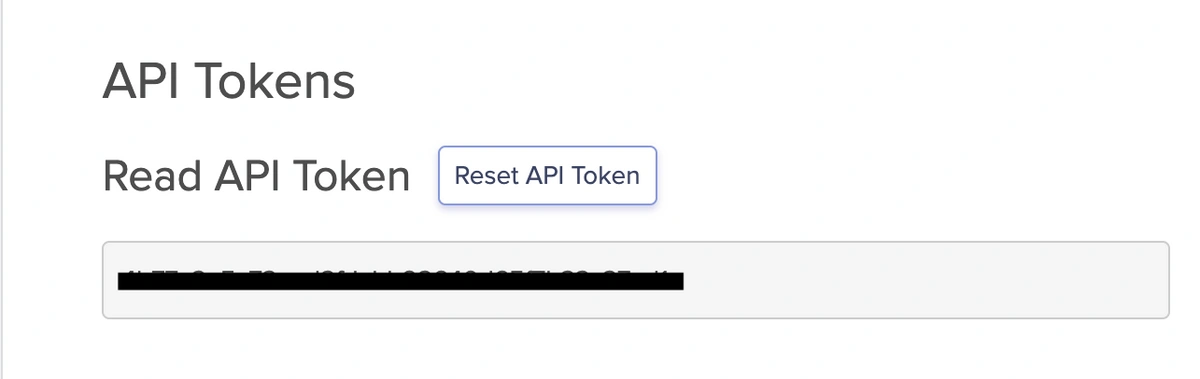
Now, it's time to integrate Kotlin with ButterCMS seamlessly. Begin by launching Android Studio (or your preferred code editor) and initiating the creation of a new Kotlin application. To successfully integrate ButterCMS into your Kotlin application, you'll need a secret key, which can be obtained from the ButterCMS dashboard.
Now, make a copy of the secret key. This key will be used to retrieve data from ButterCMS.
Retrieving Data from ButterCMS
To initiate an API call to ButterCMS via Retrofit, we will proceed as outlined below: Incorporate Retrofit and Dependencies. Include Retrofit along with its requisite dependencies by integrating the provided code snippet into the 'build.gradle' file of your application.
dependencies 'com.squareup.retrofit2:retrofit:2.9.0'
dependencies 'com.squareup.retrofit2:converter-gson:2.9.0
Define the data structure corresponding to the API response we expect from ButterCMS, like so:
data class BlogPost (
    val id: string,
    val blogTitle: string,
    val blogDesc: string,
    val blogImageUrl: string,
    val blogDate: string,
    val keyWords: string,


)
Create an interface that represents the API endpoint. Define the requirements for receiving data from ButterCMS like so:
interface ButterCmsApiService {
    @GET(“-YOUR ENDPOINT-”)
    suspend fun getBlogPosts(
      @Query("auth_token") authToken: String,
      ): Response <List<BlogPost>>
}
Configure a Retrofit instance with the ButterCMS base URL.
val authToken = "your_auth_token"
val retrofit = Retrofit.Builder()
    .baseUrl("https://api.buttercms.com/v2/")
    .addConverterFactory(GsonConverterFactory.create())
    .construire()

val butterCmsApiService = rénovation. créer (ButterCmsApiService :: class. java)
Make the API call using the defined methods in the 'ButterCmsApiService' interface. Retrofit supports operations, allowing the 'suspend' function for asynchronous requests. For example, take the blog post:
try power {
    Response value = ButterCmsApiService.getBlogPosts(authToken)
    if (response. isSuccessful) {
        val blogPosts = field. body()
        // manage blog posts
    } other {
        // handle API errors
    }
} catch (e: exception) {
    // touch network or other exceptions
}
Implement the appropriate error and data handling logic based on your application code.
Incorporate the suitable logic for handling errors and data in alignment with your application's code structure. Additionally, ensure the inclusion of an API key within the ButterCMS file to facilitate authentication when accessing the ButterCMS API.
PS: It's essential to be mindful of your JSON serialization and deserialization choices. If you opt for an alternative JSON converter library or format, substitute 'GsonConverterFactory.create()' with the appropriate converter factory.
Setting up the Blog page
Setting up the Blog page involves creating a Composable Function in Kotlin. To get started, follow these steps:
-
Create a new Kotlin file named BlogScreen.kt.
-
In this file, we’d add the Jetpack Compose code that should encompass all the necessary composable functions, including the BlogScreen composable. This will form the foundation of your Blog page.
Integrate into Main Activity:
In your MainActivity class, override the onCreate method and set up the Composable UI using the setContent method.
Here's how you can do it:
import android.os.Bundle
import androidx.activity.ComponentActivity
import androidx.activity.compose.setContent
import androidx.compose.ui.ExperimentalComposeUiApi
import com.application.settings.SettingsController
import kotlinx.coroutines.ExperimentalCoroutinesApi

@ExperimentalCoroutinesApi
@ExperimentalComposeUiApi
class MainActivity : ComponentActivity() {
    private val settingsController = SettingsController()

    override fun onCreate(savedInstanceState: Bundle?) {
        super.onCreate(savedInstanceState)
        setContent {
            BlogScreen(controller = settingsController)
        }
    }
}
Make sure you replace BlogScreen(controller = settingsController) with the appropriate import if the BlogScreen composable is located in a different package.
Note that the provided code assumes you have the required imports, including the necessary imports for Jetpack Compose and your package structure. Ensure you have the required dependencies and Jetpack Compose version in your project.
This code sets the BlogScreen composable as the content of the MainActivity using Jetpack Compose's setContent function, ensuring that the UI defined in the BlogScreen composable is displayed when the app starts.
Let’s get into building out our Blog App
Here are steps to building out our blog app:
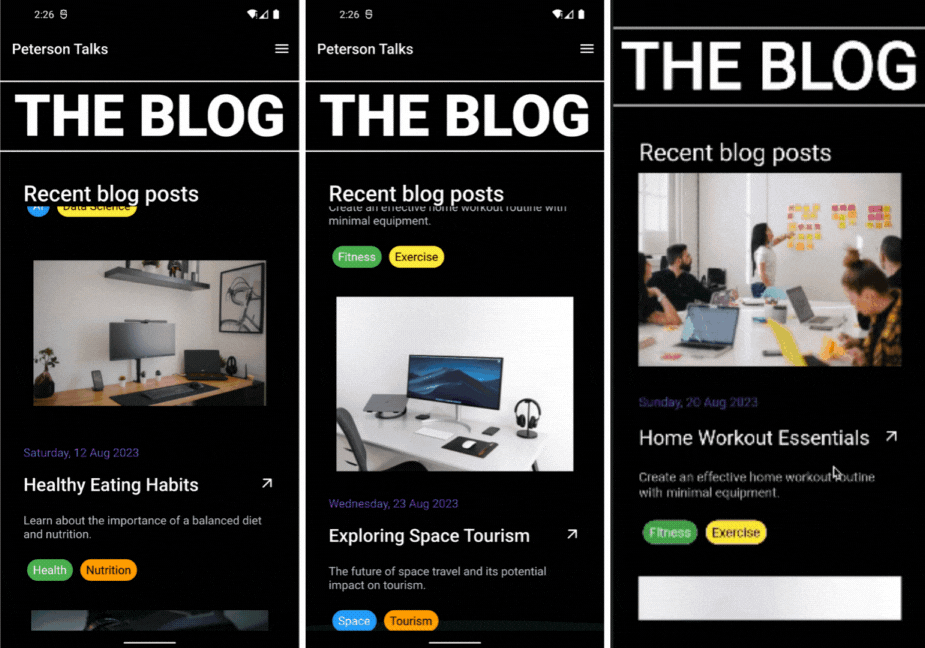
BlogScreen: The BlogScreen composable represents the main screen of the blog application. It displays a list of blog posts fetched from the API using Retrofit and organized using Jetpack Compose components. The screen consists of a TopAppBar titled "Peterson Talks," a list of blog posts, and an end drawer that allows users to toggle between light and dark themes.
import androidx.compose.foundation.Image
import androidx.compose.foundation.background
import androidx.compose.foundation.clickable
import androidx.compose.foundation.layout.*
import androidx.compose.foundation.lazy.LazyColumn
import androidx.compose.material.*
import androidx.compose.runtime.*
import androidx.compose.ui.Alignment
import androidx.compose.ui.Modifier
import androidx.compose.ui.graphics.Color
import androidx.compose.ui.layout.ContentScale
import androidx.compose.ui.platform.LocalContext
import androidx.compose.ui.res.painterResource
import androidx.compose.ui.text.font.FontWeight
import androidx.compose.ui.unit.dp
import androidx.compose.ui.unit.sp
import coil.compose.rememberImagePainter
import com.example.data.Blog
import com.example.data.blogList
import java.text.DateFormat

@Composable
fun BlogScreen(controller: SettingsController) {
    val formattedDate: (DateTime) -> String = { dateTime ->
        DateFormat("EEEE, d MMM y").format(dateTime)
    }

    Scaffold(
        topBar = {
            TopAppBar(
                backgroundColor = Color.Black,
                title = { Text("Peterson Talks") }
            )
        },
        content = {
            Column(
                modifier = Modifier
                    .padding(top = 16.dp)
                    .verticalScroll(rememberScrollState())
            ) {
                Header()
                Spacer(modifier = Modifier.height(40.dp))
                LazyColumn {
                    items(blogList) { blog ->
                        Content(blog)
                    }
                }
            }
        },
        backgroundColor = Color.Black,
        drawerContent = {
            EndDrawer(controller)
        }
    )
}
Header: The Header composable represents the visually impactful header section of the blog screen. It contains a series of UI elements, including dividers, a large title, "THE BLOG," and a subheading, "Recent blog posts." These elements are styled using Jetpack Compose's typography and layout components to create an engaging visual experience for users.
@Composable
fun Header() {
    Column(
        horizontalAlignment = Alignment.CenterHorizontally,
        verticalArrangement = Arrangement.spacedBy(16.dp
        )
    ) {
        Divider(
            color = Color.White,
            thickness = 2.dp,
            modifier = Modifier.fillMaxWidth()
        )
        Text(
            text = "THE BLOG",
            color = Color.White,
            fontSize = 80.sp,
            fontWeight = FontWeight.Bold,
            textAlign = TextAlign.Center,
            modifier = Modifier.fillMaxWidth()
        )
        Divider(
            color = Color.White,
            thickness = 2.dp,
            modifier = Modifier.fillMaxWidth()
        )
        Spacer(modifier = Modifier.padding(bottom = 40.dp))
        Text(
            text = "Recent blog posts",
            fontSize = 30.sp,
            color = Color.White,
            modifier = Modifier.padding(horizontal = 32.dp)
        )
    }
}
Content: The Content composable is responsible for displaying the detailed content of an individual blog post. It takes a BlogPost object as a parameter and renders its components, including the blog post's title, image, date, description, and associated tags. This composable showcases Jetpack Compose's ability to efficiently structure and render dynamic content based on the input data.
@Composable
fun Content(blog: Blog) {
    Column(
        modifier = Modifier
            .padding(horizontal = 32.dp)
            .padding(bottom = 25.dp)
    ) {
        Spacer(modifier = Modifier.height(35.dp))
        Image(
            painter = rememberImagePainter(data = blog.img),
            contentDescription = null,
            contentScale = ContentScale.Crop,
            modifier = Modifier.fillMaxWidth().height(250.dp)
        )
        Spacer(modifier = Modifier.height(30.dp))
        Text(
            text = formattedDate(blog.date),
            color = Color(255, 105, 65, 198),
            fontSize = 16.sp
        )
        Spacer(modifier = Modifier.height(20.dp))
        3(blog.title, addArrow = true)
        Spacer(modifier = Modifier.height(25.dp))
        DescText(blog.desc)
        Spacer(modifier = Modifier.height(25.dp))
        ChipRow(keyWords = blog.keyWords)
    }
}
TitleText: The TitleText composable generates a stylized title for a blog post. It accepts the title text as a parameter and a boolean flag to determine whether to display an arrow icon. The title's appearance is customized using Jetpack Compose's typography settings, allowing for consistent and visually appealing title rendering across various blog posts.
@Composable
fun TitleText(txt: String, addArrow: Boolean) {
    Row(
        horizontalArrangement = Arrangement.SpaceBetween,
        verticalAlignment = Alignment.Top
    ) {
        Text(
            text = txt,
            fontSize = if (addArrow) 25.sp else 30.sp,
            color = Color.White,
            fontWeight = FontWeight.Normal,
            modifier = Modifier.fillMaxWidth().padding(end = 16.dp)
        )
        if (addArrow) {
            Icon(
                painter = painterResource(id = R.drawable.ic_arrow),
                contentDescription = null,
                tint = Color.White,
                modifier = Modifier.size(24.dp)
            )
        }
    }
}
DescText: The DescText composable is responsible for displaying the description text of a blog post. It takes the description text as a parameter and applies Jetpack Compose's typography settings to ensure legibility and visual consistency. This composable illustrates the straightforward integration of text content within the blog post UI.
@Composable
fun DescText(txt: String) {
    Text(
        text = txt,
        fontSize = 16.sp,
        color = Color(255, 192, 197, 208)
    )
}
ChipRow: The ChipRow composable creates a horizontal row of chip components, each representing a tag or additional information related to a blog post. It takes a list of TextChips objects as a parameter and generates a sequence of chips using Jetpack Compose's LazyRow component. This feature-rich component allows for the dynamic rendering of multiple chips in a compact and visually appealing manner.
@Composable
fun ChipRow(keyWords: List<TextChips>) {
    LazyRow(
        horizontalArrangement = Arrangement.spacedBy(8.dp),
        contentPadding = PaddingValues(end = 16.dp)
    ) {
        items(keyWords) { keyWords ->
            Chip(text = keyWords.txt, textColor = keyWords.textColor, bgColor = keyWords.bgColor)
        }
    }
}
Chip: The Chip composable generates an individual chip component within the chip row. It takes the chip's text, text color, and background color as parameters and applies Jetpack Compose's layout and styling settings to create a compact and informative UI element. The chip's appearance can be customized based on the provided colors, demonstrating Jetpack Compose's flexibility in accommodating design choices.
@Composable
fun Chip(text: String, textColor: Color?, bgColor: Color?) {
    Box(
        modifier = Modifier
            .background(color = bgColor ?: Color.Blue, shape = MaterialTheme.shapes.medium)
            .padding(horizontal = 8.dp, vertical = 2.dp)
            .clickable { /* Handle chip click here */ }
    ) {
        Text(
            text = text,
            color = textColor ?: Color.White,
            fontSize = 16.sp
        )
    }
}
EndDrawer: The EndDrawer composable represents the end drawer section of the blog screen, accessible through a swipe gesture. It includes UI elements for toggling between light and dark themes and a close button for dismissing the drawer. This composable showcases the integration of UI interactions and state management within Jetpack Compose, enabling users to customize the app's appearance.
@Composable
fun EndDrawer(controller: SettingsController) {
    var switchValue by remember { mutableStateOf(false) }
    val context = LocalContext.current

    Column(
        modifier = Modifier
            .fillMaxSize()
            .background(Color.Black)
            .padding(bottom = 32.dp),
        horizontalAlignment = Alignment.CenterHorizontally
    ) {
        Spacer(modifier = Modifier.weight(1f))
        Switch(
            checked = switchValue,
            onCheckedChange = { newVal ->
                switchValue = newVal
                when (newVal) {
                    true -> controller.updateThemeMode(ThemeMode.Dark)
                    false -> controller.updateThemeMode(ThemeMode.Light)
                }
            }
        )
        Spacer(modifier = Modifier.height(32.dp))
        IconButton(
            onClick = { },
            modifier = Modifier.clickable { },
        ) {
            Icon(
                painter = painterResource(id = R.drawable.ic_clear),
                contentDescription = "Close",
                tint = Color.White,
                modifier = Modifier.size(40.dp)
            )
        }
    }
}
Now, the final UI:
Here’s a firsthand look at the UI we've crafted, made possible by the dynamic duo of Kotlin and ButterCMS blog engine:
That concludes the process!
Should you desire additional content, it's necessary to return to your ButterCMS dashboard and generate more pages encompassing diverse scopes.
A hearty congratulations on reaching this point!
Concluding Remarks
The combination of Kotlin and ButterCMS offers formidable tools for constructing contemporary and dynamic applications. This tutorial has effectively demonstrated their collaborative potential in establishing a streamlined content management experience. By capitalizing on the strengths of Kotlin and ButterCMS, you can fashion user-friendly applications to construct, uphold, and expand.
To emphasize, this tutorial has only scratched the surface of the capabilities inherent in Kotlin and ButterCMS. We encourage you to further your knowledge in both domains and explore how they can synergistically produce influential and dynamic applications.
Here are some valuable resources to aid you:
-
The official Kotlin documentation
-
The ButterCMS documentation and API reference
-
The official Android documentation
-
The ButterCMS blog offers many articles spanning various content management topics.