WordPress has been the go-to content management system (CMS) for decades. Even today, it’s a top choice for building simple websites with basic content management needs. But for growing businesses that want to scale at the pace of the market, some of its architectural constraints can be limiting.
WordPress is a monolithic CMS. Its backend and frontend modules are cohesively bundled together. This means that you can’t have full control over your site’s design. It also means that adding too many plugins will cause your website to slow down. Moreover, you are restricted to a single channel, as the WordPress backend can’t serve content to multiple digital touchpoints.
All the inherent flaws of monolithic CMSs can be solved by going headless. A headless CMS is a backend-only content delivery platform that can connect with any frontend. This increases your website’s performance, gives you absolute control over its presentation, and enables you to deliver content across multiple channels.
In the following article, we will share a guide to transition from WordPress to a headless setup, powered by ButterCMS and Angular.
Table of contents
The pitfalls of using WordPress
Forward-thinking developers and businesses are finding it increasingly hard to work with WordPress. It limits your ability to innovate and personalize. Neither does it offer the flexibility to work with modern frontend technologies, nor does it allow you to create a unified content repository for all your touchpoints.
Let’s look at some of the main pitfalls of WordPress in more detail:
Theming
The main way to customize your WordPress website’s design is via themes. Even though there are thousands of free and paid themes available, it’s hard to find one that matches your brand identity. Customizing the theme would require editing the PHP and/or CSS files, which is considered a bad practice for the following reasons:
- Any changes you make to a third-party theme (paid or free) will be lost as soon as you update it. And it’s crucial to keep the theme updated to avoid any vulnerabilities or bugs.
- If you make a mistake while editing the files, it will break your website. As there’s no version control, you will not be able to revert.
- You will have to maintain separate code repositories of all your personalized themes indefinitely. This means that if you ever make a change to your main website, you will have to copy and paste the change to all the theme code repositories.

URL routing
Unlike other CMSs and platforms, WordPress doesn’t have a built-in routing system. It doesn’t map URLs to routes, it maps them to database queries. To generate a query from a URL, WordPress loads rewrite rules from the database and applies the matching one to the URL.
These rules are regular expressions that transform an ugly URL (e.g. http://sample.com/?pagename=test-page) to a pretty URL (e.g. http://sample.com/test-page/). Any query variables stored in the matched rule are combined with any variables present in the URL to generate the arguments of the database query.
In the absence of a route-based routing system, implementing custom URL routing in WordPress can be painstakingly hard. There is no way to map a URL to an action or a controller. You must rely on rewrite rules which transform a URL to another URL.
Hosting and scaling
Choosing the right host for your WordPress website can be challenging, especially with every vendor claiming to be #1. There are several factors to consider, including security, speed, technical support, uptime, past reviews, ease-of-use, and pricing.
The performance, availability, and scalability of your website is directly dependent on the robustness and reliability of the hosting platform. It’s a high-stakes decision that you absolutely must get right. Conversely, if you use a SAAS based CMS, like ButterCMS, the platform handles all aspects of hosting and scaling for you.
Performance
The WordPress architecture bundles the backend and frontend into a giant monolith. This means that the same application that performs all the resource-intensive server-side functions, also renders the page on the client’s screen. As visitors grow, the backend processing becomes more time-consuming, which leads to increased page load times. The extra code from all the plugins and themes bloat the monolith even further.
There can be other factors for bad performance, including unreliable hosting, outdated plugins, themes, or core, unnecessary CSS, unoptimized images, and not using a CDN.
Security
Most WordPress hosts only provide basic server-level security. The onus of hardening your website falls upon you. As WordPress is open-source, cybercriminals are always looking for exploitable vulnerabilities and/or bugs in the source code. Moreover, any installed third-party plugins or themes can be exploited to gain unauthorized access to your system.
Program only in PHP
A survey by Stack Overflow revealed that 67% of developers hate working with WordPress. A big reason for that is PHP, the core language of WordPress. PHP is an old-fashioned language that has a poor design with many inconsistencies. It’s not developer-friendly, at-least not in the modern sense of the word, which makes it harder to tweak WordPress code. Developers prefer frameworks like Angular, Vue.js, and React, because they are more intuitive, efficient, and easier to use.
Mitigate all the pains of WordPress with a headless CMS
Headless CMSs were introduced to fix the common problems of traditional CMSs, at the architectural level. The decoupling of frontend and backend modules allows businesses to be more agile, efficient, and future-proof. Here’s how ButterCMS, a popular headless CMS, solves all the pitfalls we discussed in the last section:
Theming
Unlike WordPress, ButterCMS doesn’t shackle you to a theme. It doesn’t even require one. Design and customize your frontend without any boundaries or limitations. Use the developer-friendly content API to fetch content from the backend, and render it however you want. You can also use APIs to integrate your existing frontend application with the headless backend.
Use technologies you know and love
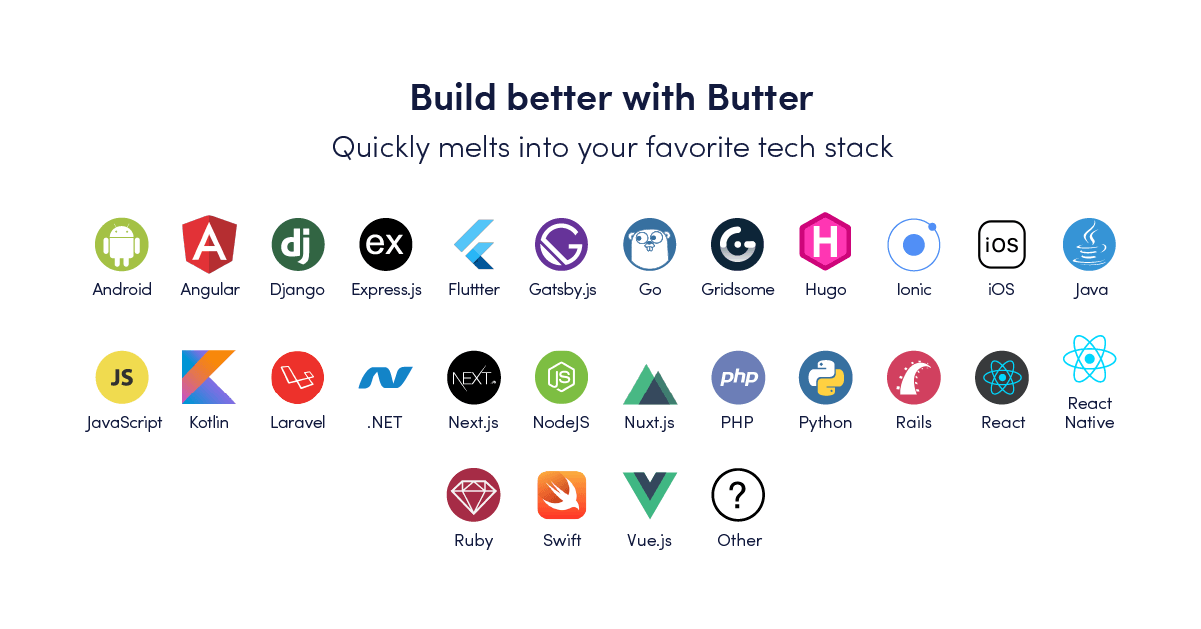
ButterCMS is a backend-only CMS that can be used to power frontends written in any technology. This gives you the ultimate freedom to choose frameworks or programming languages that you know and love. Furthermore, the ButterCMS documentation offers starter guides and SDKs for all the top tech stacks, including Angular, Express.js, React, Flutter, and Java.
URL routing
All the top frontend technologies, including Angular, React, and Next.js, have robust routing systems that allow you to optimize your URLs for users and search engines.. E.g. Angular allows you to define all your routes in an array, with each route mapping a path to a component.
const routes: myRoutes = [
  { path: 'first-page', component: FirstPageComponent },
  { path: 'second-page, component: SecondPageComponent },
  {path: 'partner', component: PartnerListingComponent},
  {path: 'partner/:slug', component: PartnerDetailsComponent},
];
Developers can append slugs to the end of the URLs to fetch the desired content from ButterCMS. A slug is a unique identifier, which ButterCMS uses to fetch the appropriate page. e.g. If we consider the code snippet above, the partner/:slug route can be used to fetch the details of a particular partner.
Hosting and scaling
ButterCMS handles hosting and scaling for you. The infrastructure runs on the reliable platforms of Amazon Web Services (AWS) and Heroku. State-of-the-art fault tolerance and load balancing features are used to maximize uptime. The globally cached API and content empowers you to achieve high levels of scalability, performance, and availability. As you grow, the platform grows with you. ButterCMS has served more than a billion requests.
Performance
The decoupling of the frontend from the heavy backend makes ButterCMS inherently faster than WordPress. The content API traffic is served through Fastly, a reliable and quick content delivery platform (CDN). Your media assets are stored and delivered via Amazon CloudFront, a low-latency CDN.
Security
ButterCMS handles all aspects of security for you. The data centers used for storing and delivering your content are all ISO-27001 compliant. Your data is encrypted at rest using AES-256, and in transit using TLS v1.2. Modern security controls, including web application firewalls, AWS security groups, HTTP Strict Transport Protection, single sign-on (SSO), and rate limits for brute-force protection are used to protect your systems and data from unauthorized access.
Why choose Angular over WordPress for building modern web apps?
Angular is an open-source typescript-based framework. Let’s look at some reasons why it’s a top choice for building dynamic and performant web applications.
Build progressive web applications (PWAs)
Angular packs all the modern features you need to develop PWAs that offer native-app-like experiences. Visitors love PWAs because they load quickly, offer app-like features including push notifications and offline mode, and perform well even in low-bandwidth.
Automatic code splitting
The component router enables Angular apps to load quicker through automatic code splitting. Code splitting is a technique that ensures that only the necessary code is loaded for each request. You can achieve both component-level and route-level code splitting in Angular.
The Angular CLI
The Angular CLI is a powerful tool to initialize, structure, and scaffold Angular projects, directly from the command line. The following three commands create a new Angular project, and spin up a server on your localhost:
ng new test-project
cd test-project
ng serve
There are several actions that you can perform using the CLI, e.g. creating a workspace, configuring your project, adding a third-party library, compiling an app, running end-to-end tests, and updating your workspace and its dependencies.
The powerful template syntax
The template syntax lets you go beyond HTML while defining the views for your components. It allows you to control how HTML is rendered for the user, based on data and logic. You can use data binding to dynamically get and set values in the Document Object Model (DOM). Pipes allow you to transform data before displaying it to the user, and template statements enable you to handle and respond to user events.
Server-side rendering (SSR)
Angular Universal allows you to implement server-side rendering (SSR) using a few lines of code. SSR is an approach that renders some of a page’s HTML on the server, before sending it to the client. It has the following benefits:
- Increase your website’s SEO by making it easy for web crawlers to index it.
- Allow your website to work on devices that don’t support JavaScript.
- Load the first page quickly, even in low bandwidth.
Built for performance
Angular has several built-in features to improve your website’s performance. Lazy loading and preloading techniques optimize how content is rendered on the user’s screen. Using Onpush change detection, you can reduce the number of components that are checked in response to a change, which improves overall performance. Ahead-of-time (AOT) compilation enables you to compile your code during the build process, which leads to faster page rendering.
Migrating from WordPress to ButterCMS: A step-by-step overview
In the following sections, we will outline all the steps that you must follow to seamlessly migrate from WordPress to a headless setup, powered by ButterCMS and Angular.
Before you begin…evaluate the WordPress plugins that need to be replicated
Plugins are a staple of most-if-not-all WordPress installations. Before you begin the transition, think about all the plugin-driven functionalities that you will have to replicate in the new setup. You can divide your plugins into two broad categories: backend-specific and frontend-specific.
For the backend-specific plugins, you will find that Butter provides a lot of similar functionalities out-of-the-box. E.g. it has built-in support for SEO, scheduling, localization, and reviewing history; all features that typically require plugins in WordPress. Moreover, you also don’t need to replicate your caching, security, or backup plugins; Butter will take care of all that.
To replace the frontend-specific plugins, you will have to write code. Ensure that the chosen frontend technology has the built-in features that enable your developers to replicate these plugin functionalities without any hassle.
For your backend
Start the migration by replacing your WordPress backend with ButterCMS.
Step # 1 – Migrate blog content
The first step is to transfer your content from WordPress into the new system. The ButterCMS team can do this for you. Export your blog data using the official WP export guide, and email it to support@buttercms.com. The migration should be done within 2-3 business days.
Step # 2 – Setting up custom pages and collections
Butter’s blog engine comes with several built-in fields that are commonly used to create and optimize blog pages, including fields for SEO, categories, tags, and metadata. However, you can also configure additional fields. Simply create a new page, choose the fields you want to add, and then populate its content.
If you wish to create a group of pages, you can use the Page Types feature to define the page structure, and then reuse it across several pages. E.g. you may want to add a section for press releases on your site. Each press release will have different content, but the same structure. All you have to do is create a new page, and then generate a page type from that page. The page type will allow you to reuse the structure across different pages. You can learn more about structured content in this article.
Collections are tables of data that you can create and reference in your pages, page types, and collections. They enable you to build relationships between your content assets. E.g. If you are building a website that tracks soccer stats, you may create collections for players, coaches, clubs, and national teams. Or you may want to create a collection of testimonials that’s referenced across multiple pages.
You can create, clone, update, and delete a collection from the main menu or via the API.
Step # 3 – Using the write API to map WordPress content onto ButterCMS
The next step is to map existing WordPress content onto the new content models in Butter. You can use the Write API to do so. It’s a powerful tool that will allow you to extract, transform, and load data from WordPress to ButterCMS.
During the mapping process, you will have to reimagine your pages such that they align with the content types in Butter. E.g. Suppose you want to migrate all the posts of a WordPress category to ButterCMS. The first thing you’d do is identify and create the corresponding content type in Butter, which in this case would be a page type. Then, you will use the Wordpress REST API to fetch the metadata, content, and images from WordPress. Finally, you will generate an input payload from the fetched data, as per the API documentation, and post it.
You can create a new post by sending an HTTP POST request to the /v2/posts/ endpoint. The /v2/pages/ endpoint allows you to create a new, or update an existing page. You can also manipulate collection items using the /v2/content/ endpoint.
If you need any technical assistance while mapping content, feel free to contact the ButterCMS support team.
Step # 4 – Programmatically import additional data via the write API
The Write API allows you to build a unified content management system, which pipes in data from multiple sources. E.g. you can fetch and store data from your database, e-commerce catalog, lead form submissions, or any third-party data source.
It’s also possible to set up automated workflows for content and data creation using the write API. E.g. Suppose you use the data from a third-party database to create a collection for music artists. To keep the collection in sync with the database, you can write a simple script that sends a POST request to update your collection, every time an artist is added to the database.
Enterprise customer considerations with large data sets
ButterCMS is an ideal fit for organizations of all sizes. If you are an enterprise customer with a large data set, we recommend releasing changes in small increments. This will reduce the chances of any issues related to migration or data integrity.
To make the transition process more seamless, Butter enables you to set up a staging environment where you can manage content that needs testing, before migrating to the production environment. You can switch between environments from the main menu, with a single click.
If you have more than one domain, fret not; Butter supports multiple websites, allowing you to easily port all the multisite content into your new CMS. You can manage all your sites by accessing the Multisite dashboard from the main menu.
For your frontend
With our headless backend now ready to serve content, it’s time to start building the frontend.
Step # 1 – Host your frontend app
Choose a reliable hosting provider for deploying your Angular-based frontend application. Consider the following factors while making the decision:
- The speed and performance benchmarks of the host.
- The security-consciousness of the host. Are they compliant with leading security standards and frameworks?
- Are there any uptime and availability guarantees? What policies and techniques does the host use to minimize downtime? Do they have a robust recovery plan?
- Does the host offer 24/7 technical support?
- Are the servers finetuned to run Angular applications?
- Does the host allow you to scale at will? What if you want to upgrade your hosting plan in the future?
Step # 2 – Connect app to butter with the Angular SDK
If you are building from scratch, use the Angular + ButterCMS starter kit to get started quickly. The kit integrates with sample dynamic content stored on ButterCMS, and comes with built-in search functionality and a custom theme. Follow these steps to install the starter kit:
- Clone the repository and install all the dependencies.
- Get your Butter API token from the settings page, and store it as an environment variable.
- Start the server, or open the code in your favorite editor to build on top of the existing functionalities.
To connect your existing app to ButterCMS, you can install the Angular SDK by following these steps:
- Get your Butter API token from the settings page, and store it as an environment variable.
- Install the SDK.
- Import the Butter module, get the API token from the environment variable, and start making authorized API calls!
Step # 3 – Integrate Angular components with ButterCMS
Components are the primary building blocks of an Angular application. Now that your Angular development environment is set up, you can define components and map them to pages, page types, components, and collections on ButterCMS. For example, if you have a website for soccer statistics, you may create the following components:
- Player-listing-component which fetches player info from the corresponding collection stored in ButterCMS.
- Player-stats-component which fetches the player detail page.
- Faq-component which reads from your FAQs page type.
- Home-component for your homepage.
- Blog-post-listing-component and Blog-post-details-component for managing your blog.
…and more.
Closing thoughts
Migrating from WordPress to ButterCMS + Angular will give your developers more freedom, allow your marketers to work independently of developers, revitalize your tech stack, and empower your business to scale at the speed of the market. Ready to get started? Sign up for a free ButterCMS trial today!
FAQs
How to export WordPress to an Angular CMS?
You can use the export tool on WordPress to export all your site’s content to an XML file. The file will contain your pages, posts, categories, tags, comments, and image links. The design elements, plugins, and themes aren’t exported, but since you’d be building your frontend from scratch, you don’t need them anyway. Follow these steps to export:
- From the WordPress admin dashboard, select Tools -> Export.
- Choose whether you want to cherry-pick items to export, or export everything. Then, click the Download Export file button.
- Wait for the export process to complete, and then either click the Download button that appears, or find a download link in your email.
- The downloaded file will be a .zip archive that contains one or more XML export files.
- Most popular CMSs, like ButterCMS, support XML files for importing content. To import WordPress content to ButterCMS, drop an email to support@buttercms.com. The ButterCMS team will handle the migration process for you.
How to import WordPress export XML file into Angular CMS?
To import your WordPress export XML to ButterCMS, send an email to support@buttercms.com. The Butter support team will perform a full data import for you. The next step would be to map the existing WordPress content to the new content schema that you define on Butter.
As we discussed above, you’d have to rethink the structuring and definition of content. Find Butter alternatives for all your content types on WordPress, including posts, pages, and categories. Once the new content schema is ready, use the write API to fetch existing data, transform it such that it complies with the API payload, and post it to Butter. Repeat until all content is migrated and mapped.
The ButterCMS team also offers migration assistance for enterprise customers.
How to make a WordPress theme match my Angular app?
WordPress offers thousands of free and paid themes, but it’s impossible to find one that matches your custom branding. To align a WordPress theme with your Angular app’s design, you will have to navigate the WP source code, find the right PHP and CSS Files, and migrate all your styling and design elements from the Angular codebase to WordPress. And repeat this process every time you make a change to your main website.
This will include custom font families, buttons and their properties, background colors, and any other elements you use to build your footers, headers, navigation bars, menu bars, and everything else. For instance, if you change the layout of a button on your Angular website, you will have to copy paste the change to the relevant file on WordPress. As you can imagine, this is a tedious process, with high chances of error.
There is a better approach to add a CMS to your Angular app: using a headless CMS, like ButterCMS. A headless CMS is backend-only, i.e. it doesn’t have a frontend. Unlike WordPress, you won’t be dealing with a theme, or maintaining multiple codebases. All you will need to do is call the headless CMS APIs from your existing Angular app, and start serving CMS-driven content on it!