

In today's digital age, having a blog on your website is crucial for building a strong online presence and driving traffic to your site. Not only does it provide valuable content to your audience, but it also helps to establish your brand as a thought leader in your industry.
This tutorial will discuss how to add a blog to your existing Node.js website using ButterCMS. By the end of this tutorial, you will have a fully functional blog ready to be populated with content and shared with your audience.
Table of contents
Why use Node.js?
Node.js is a Javascript open-source run-time environment that executes or runs Javascript code outside the web browser and is commonly used for the development of server-side web applications and networking applications. Node.js is lightweight and efficient because it uses an event-driven, non-blocking I/O model. It is based on Chrome V8 Javascript Engine, which can quickly execute Javascript code.
Additionally, Node.js has a large active community that has brought to life many libraries and frameworks to help build robust and efficient web applications. It is also highly scalable and ideal for developing large-scale, real-time web applications. This makes it an excellent choice for creating a blog application. Node.js also makes for an excellent backend for these applications, providing serverless architecture and real-time communication support.
Why use ButterCMS?
ButterCMS is an API-first headless content management system that allows developers and marketers alike to build CMS-powered apps and websites in any programming language quickly. It is an excellent choice for blogs, dynamic pages, and more. It provides a simple and user-friendly interface for content creators to manage and publish their blog posts as well as a robust API for developers to access and display the content on their websites
Some of the core features that make creating and publishing your website content easier include, but aren't limited to, the following:
- It has flexible content modeling: you can structure and model content to fit your unique use case with the help of components.
- Pages Types: You can use the page types to define and create reusable pages to save you time and developer resources.
- Blog Engine: It comes with a pre-built, SEO-optimized, API-first blog engine that allows you to quickly create a functional blog application, freeing up your time to focus on other things. This is the feature we will highlight in this tutorial.
Tutorial prerequisites
To follow the tutorial, ensure you’ve met the following requirements.
- An understanding of JavaScript
- Node.js v14 or later is installed.
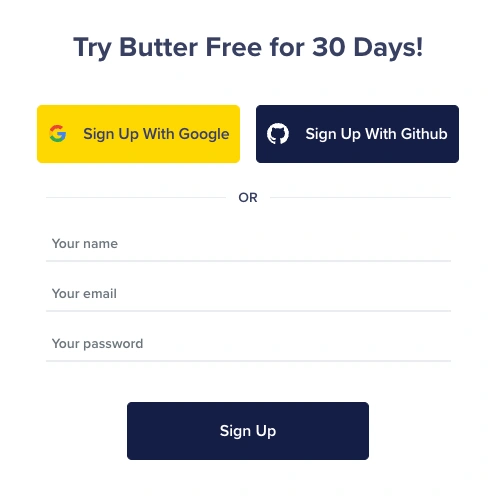
To start building headless CMS with ButterCMS, you must sign up with your Gmail or GitHub account to log in to your project dashboard.
Please note that this tutorial will be using the ButterCMS Node.js blog engine, which comes with hard-coded fields for MetaData, SEO, Categories, and Tags. If you need other fields included in your blog, however, you can just as easily configure custom blog pages using the Pages and Page Types features.
Building our blog
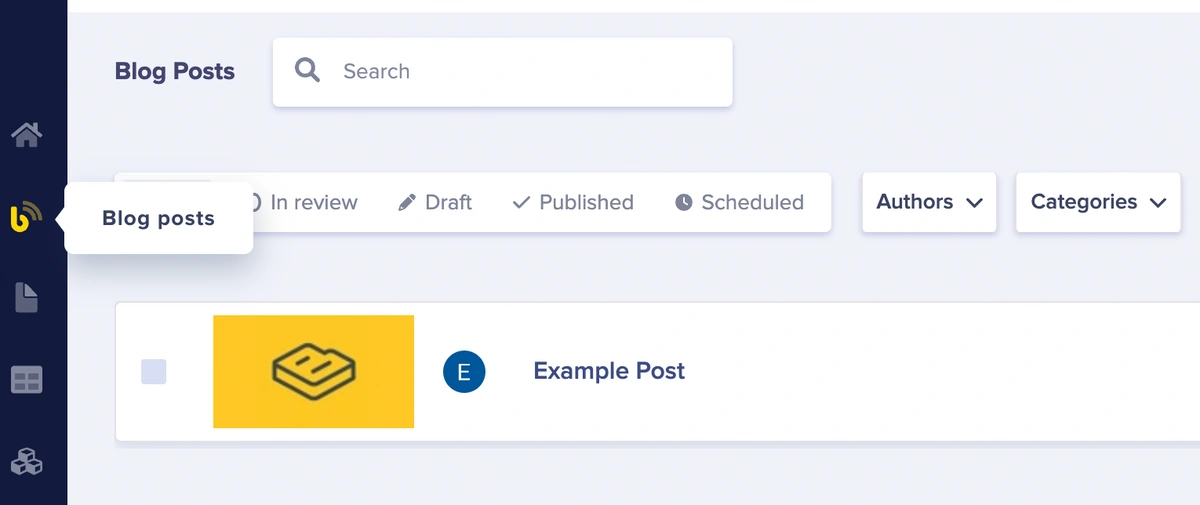
Once you have signed up, you can access the ButterCMS Blog Engine on the left-hand side of the sidebars, which is called Blog Post.
Creating Data
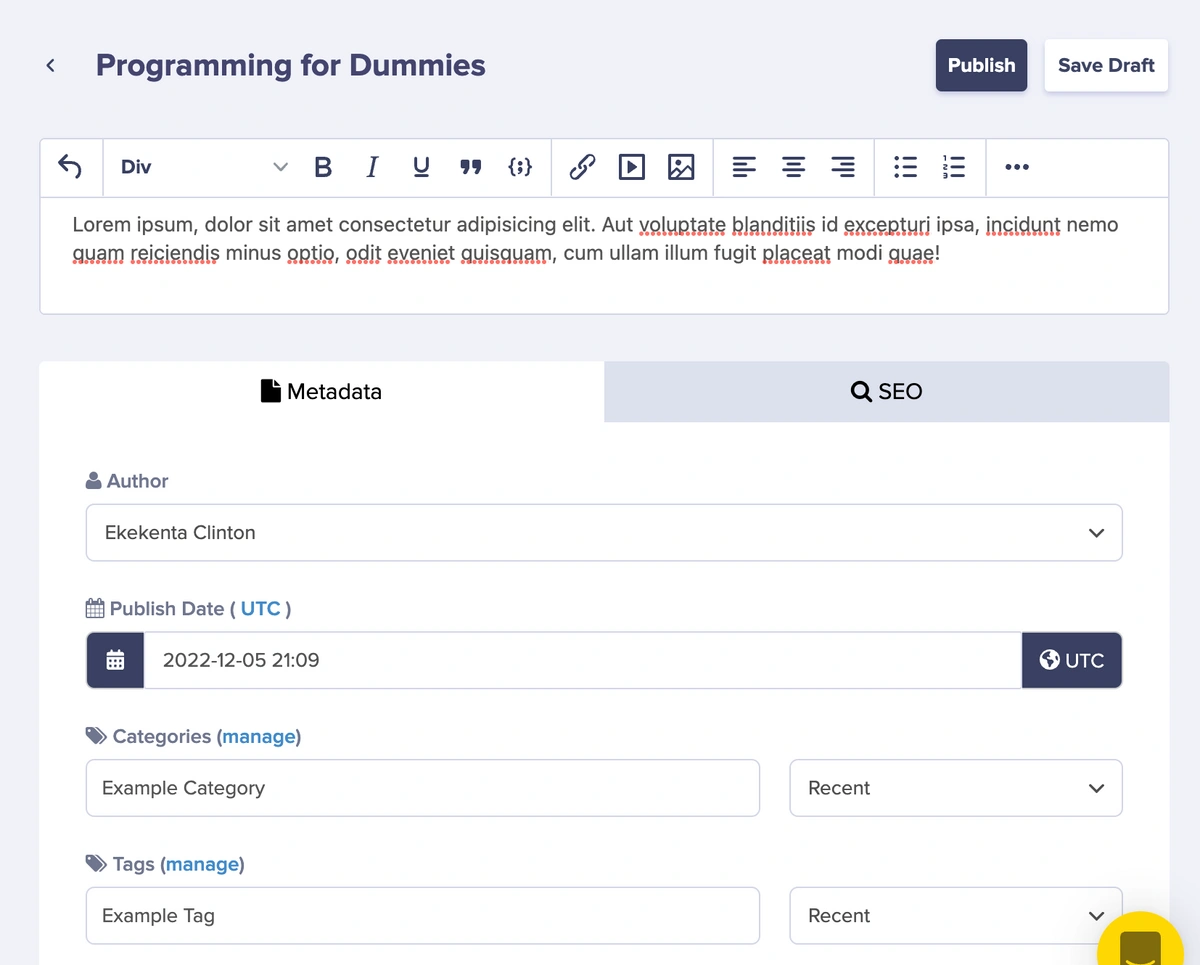
The Blog Engine has the fields required to add blog posts to your applications set up for you. Let’s add some blog posts to the Blog Engine. Follow the steps below:
- Click on Blog Posts on the sidebar
- Enter the value for values for blog content (Title, Body), Metadata, and SEO.
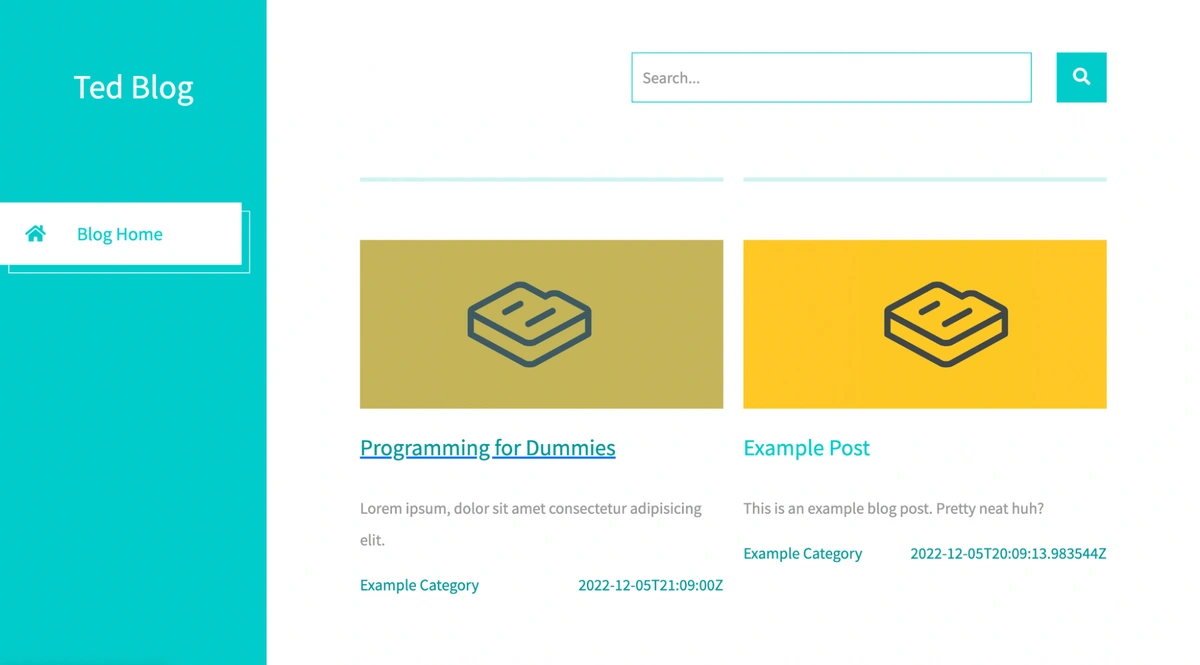
You can save the Blog posts as a Draft or Publish them. If you save it as a Draft, the users in your application will not have access to it, and it will look like the screenshot below:
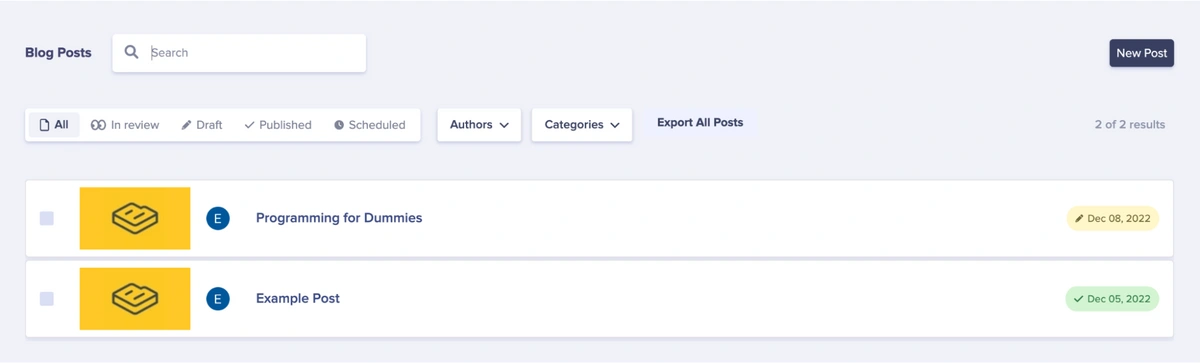
The above image shows that a yellow label was used for the date because it’s still a draft. Once the content gets published, the label will change to blue, like the second post.
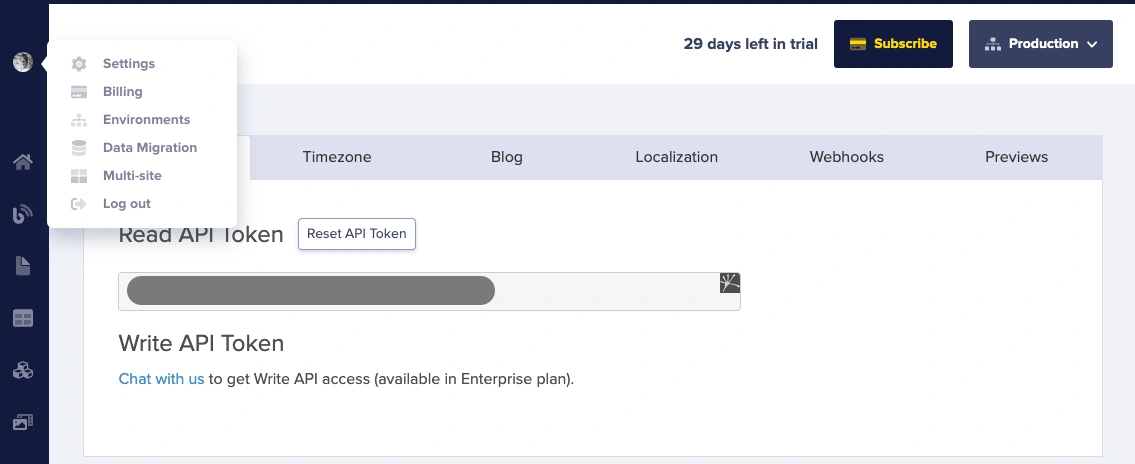
Get API Secret
To allow your Node.js application to interact with headless ButterCMS content, ButterCMS provides you with two API Tokens that authenticate and grant your application access to read or modify content. They are Read API Token and Write API Token. " The Read API is generated by default when you sign up, while you’ll contact ButterCMS to get the Write Token. To get the tokens, click on Settings -> API Tokens on the dashboard, and copy the “Read API Token” to save space.
Setup a Node.js application
Let’s go ahead and create a Node.js application to interact with our content structure created using ButterCMS. First, create a new folder and initialize a Node.js project by running the command below.
mkdir buttercms-blog && cd buttercms-blog
npm init -y
Then Install express, dotenv and ejs by running the command below:
npm install express dotenv ejs
Next, create the following folder structure below
📦buttercms-blog
 ┣ 📂views
 ┃ ┗ 📜index.ejs
 ┣ 📜.env
 ┣ 📜index.js
 ┣ 📜package-lock.json
 ┗ 📜package.json
In the Index.js file, add the code snippets below to setup and Express server and configure the required middlewares:
const express = require("express");
const ejs = require("ejs");
require("dotenv").config();

const app = express();
app.set("view engine", "ejs");
app.use(express.json());
app.use('/static', express.static('public'))


app.listen(process.env.PORT, () => {
 console.log(`Server is running at ${process.env.PORT}`);
});
In the above code snippets, we created an Express server for our application and configured the middleware to lead our environment variables and view engine.
Fetching data
There are two ways you can fetch data from ButterCMS: the content API or ButterCMS SDK. For this tutorial, we’ll use ButterCMS SDK to fetch the blog posts from the Blog Engine. To get started, install the ButterCMS SDK with the command below:
npm install buttercms
Then update the code in the index.js file to create a route to fetch data from the Blog Engine with the code snippets below:
const butter = require('buttercms')(process.env.READ_API_TOKEN);
...
app.get("blog", (req, res) => {
 butter.post
   .list()
   .then(function (resp) {
     res.render("index.ejs", resp.data);
   })
   .catch(function (resp) {
     console.log(resp);
   });
});

app.get("/blog/:slug", renderPost);
function renderPost(req, res) {
 var slug = req.params.slug;
 butter.post.retrieve(slug).then(function (resp) {
   res.render("post.ejs", resp.data);
 });
}
...
In the above code snippet, we imported the ButterCMS SDK passing in our READ_API_TOKEN, which we generated in the previous section. Then we defined two routes and used the post.list and post.retireve methods to fetch all individual blogs in the Blog Engine.
Now add the code snippets below to the views/index.ejs file to render the blog posts:
    <%- include('./header.ejs') %>
   <div class="container-fluid">
       <main class="tm-main">
           <!-- Search form -->
           <div class="row tm-row">
               <div class="col-12">
                   <form method="GET" class="form-inline tm-mb-80 tm-search-form">
                       <input class="form-control tm-search-input" name="query" type="text" placeholder="Search..." aria-label="Search">
                       <button class="tm-search-button" type="submit">
                           <i class="fas fa-search tm-search-icon" aria-hidden="true"></i>
                       </button>
                   </form>
               </div>
           </div>
           <div class="row tm-row">
             <% data.forEach(blog =>{ %>
               <article class="col-12 col-md-6 tm-post">
                   <hr class="tm-hr-primary">
                   <a href="/blog/<%= blog.slug %>" class="effect-lily tm-post-link tm-pt-60">
                       <div class="tm-post-link-inner">
                           <img src="<%= blog.featured_image %>" alt="<%= blog.featured_image_alt %>" class="img-fluid">
                       </div>
                       <h2 class="tm-pt-30 tm-color-primary tm-post-title"><%= blog.title %></h2>
                   </a>
                   <p class="tm-pt-30">
                      <%= blog.summary %>
                   </p>
                   <div class="d-flex justify-content-between">
                       <span class="tm-color-primary"><%= blog.categories[0].name %></span>
                       <span class="tm-color-primary"><%= blog.published %></span>
                   </div>
               </article>
            <%}) %>
           </div>
       </main>
   </div>
   <script src="js/jquery.min.js"></script>
   <script src="js/templatemo-script.js"></script>
</body>
</html>
Then create a header.ejs file in the views directory and add the header part of the application with code snippets below:
<!DOCTYPE html>
<html lang="en">
<head>
   <meta charset="UTF-8">
   <meta name="viewport" content="width=device-width, initial-scale=1.0">
   <title>Xtra Blog</title>
   <link rel="stylesheet" href="/static/fontawesome/css/all.min.css"> <!-- https://fontawesome.com/ -->
   <link href="https://fonts.googleapis.com/css2?family=Source+Sans+Pro&display=swap" rel="stylesheet"> <!-- https://fonts.google.com/ -->
   <link href="https://cdn.jsdelivr.net/npm/bootstrap@5.0.2/dist/css/bootstrap.min.css" rel="stylesheet">
   <link href="/static/styles/style.css" rel="stylesheet">

</head>
<body>
   <header class="tm-header" id="tm-header">
       <div class="tm-header-wrapper">
           <button class="navbar-toggler" type="button" aria-label="Toggle navigation">
               <i class="fas fa-bars"></i>
           </button>
           <div class="tm-site-header">
               <h1 class="text-center">Ted Blog</h1>
           </div>
           <nav class="tm-nav" id="tm-nav">
               <ul>
                   <li class="tm-nav-item active"><a href="index.html" class="tm-nav-link">
                       <i class="fas fa-home"></i>
                       Blog Home
                   </a></li>
               </ul>
           </nav>
   </header>
Next, create a public folder in your project's root directory. Download the CSS and Javascript files from this repo into the public folder to style and add interactivity to the application.
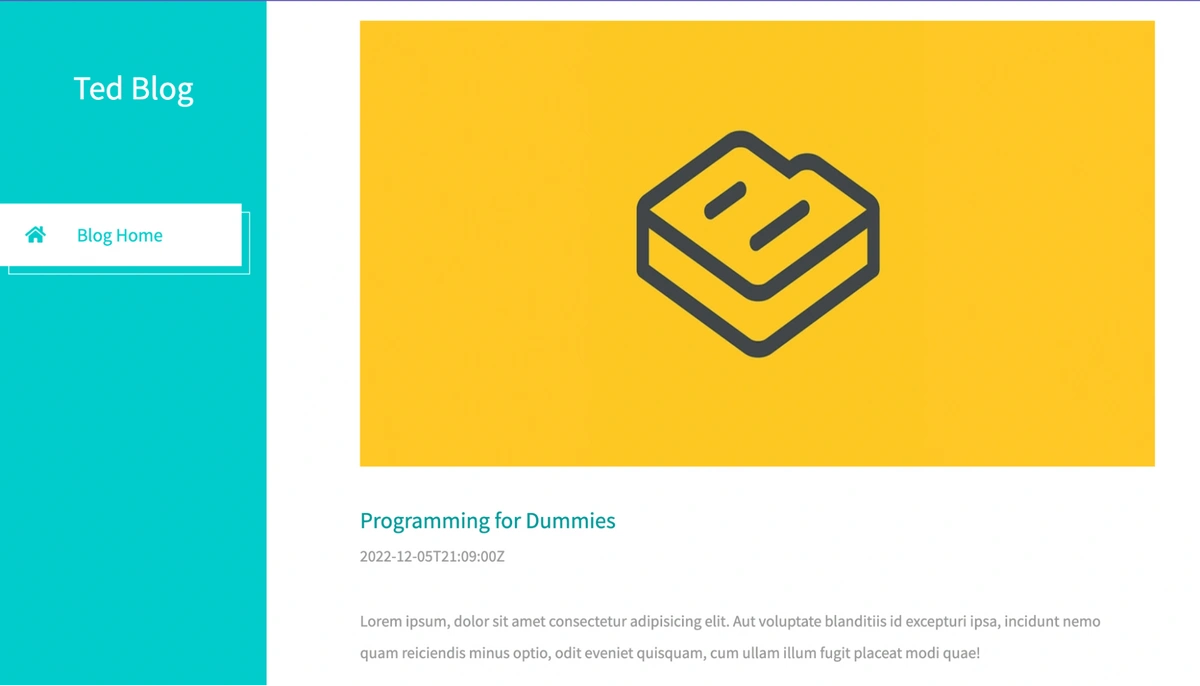
Lastly, create a post.ejs file in the views folder and add the code snippets below to display the individual blog data.
<%- include('./header.ejs') %>
   <div class="container-fluid">
       <main class="tm-main">
           <div class="row tm-row">
               <div class="col-12">

                   <img width="954" height="535" class="tm-mb-40" src="<%= data.featured_image %>">
                   </img>

                   <div class="mb-4">
                       <h2 class="pt-2 tm-color-primary tm-post-title"><%= data.title %></h2>
                       <p class="tm-mb-40"><%= data.published %></p>
                       <p>
                           <%- data.body %>
                       </p>
                   </div>
               </div>
           </div>
       </main>
   </div>
   <script src="js/jquery.min.js"></script>
   <script src="js/templatemo-script.js"></script>
</body>
</html>
Node.js blog tutorial: Final thoughts
Congrats! You've made it through the end of this tutorial. If you've been following along with us throughout this tutorial, you should have your very own blog application powered by Node.js and ButterCMS. Now that you’ve learned about ButterCMS, how would you build your next Node.js web application? Check out some other incredible tutorials featuring Node.js.
You can find the code for this tutorial in this GitHub repo.

