
We've all experienced it. You're browsing your favorite social media platform and stumble upon an advertisement for the ideal product. Intrigued, you click on it, only to be directed to a poorly designed, painfully slow website. Then, without a second thought, you exit the site, worried about the risk of malware. Unfortunately, this is exactly what happens to your potential customers if you don't invest in the effort to create an attractive and efficient landing page.
This Ruby app tutorial will demonstrate how to efficiently create and construct a landing page using the Ruby programming language with a lightweight application framework called Sinatra powered by ButterCMS. We’ll be building a landing page for a fictional Puppy training business.
Table of contents
Why use Ruby?
Ruby is a high-level, dynamic, open-source, and object-oriented programming language. It was created in the mid-1990s by Yukihiro "Matz" Matsumoto. It is a popular language for building web applications, data analysis, and automation and is known for its simplicity and productivity. Below, let's discuss why we'd use Ruby.
Simplicity
Simple syntax is a characteristic of Ruby, which makes it simple to read and write code. As a result, building and maintaining landing pages can be made simpler due to time savings and less risk of errors. Simple syntax reduces errors by providing clarity, consistency, and readability, making it easier to understand and write accurate code.
Scalability
Ruby is a scalable language that handles high traffic and data quantities. It is suitable for creating landing pages that scale (creating and managing more content) as the business expands. In terms of scalability, Ruby provides several technical features that make it an attractive option for developing large-scale, high-performance systems. These qualities consist of:
-
Dynamic typing: Variable types are defined at runtime rather than during compilation. As a result, it might be simpler to write and adapt code fast.
-
Object-oriented architecture: As Ruby is a fully object-oriented language, everything in it is an object. This design pattern can make code more maintainable and modular, which is crucial when developing complicated applications.
-
Support for multi-threading: Ruby offers multi-threading, allowing programmers to run several code threads simultaneously. This enables more effective resource management and may enhance application performance.
Integration
Ruby offers several integrations with other apps and services, such as content management systems like ButterCMS, cloud platforms, and database systems. That makes creating landing pages and improving processes easier.
Why use ButterCMS?
For web developers creating content-rich apps, ButterCMS, a headless CMS, offers a variety of features and advantages that may be appealing. Its support for multiple content types, easy migration, localization, collaboration tools, and user support can assist developers in swiftly and effectively building apps while ensuring that content is correct, accurate, and well-optimized for search engines.
Collections: Collections gather similar content, such as blog entries, items, or events. Setting a collection's fields—the discrete pieces of data that make up each item—allows you to specify the collection's structure.
Pages: In ButterCMS, page types let you create pages with a consistent layout but different information. This makes it easy to create multiple pages with similar designs but different content, such as articles, knowledge bases, or SEO landing pages.

Tutorial prerequisites
-
Basic knowledge of Ruby
-
An active ButterCMS account
-
A code editor (VS Code, preferably)
-
Knowledge of Sinatra
The code for this tutorial can be found in this repo. Here's a preview of what we will build:
Setting up the development environment
Sinatra is a lightweight web application framework written in the Ruby programming language. It is designed to make creating web applications and APIs easy and quick with minimal overhead and simple syntax.
To install Sinatra, copy and paste the following code into the command line:
gem install sinatra
Once Sintra is installed, let's create this folder structure and these files in our newly created folder.
📦RubyButterCMS
 ┣ 📂public
 ┃ ┣ 📂assets
 ┃ ┃ ┣ 📜Bonding.png
 ┃ ┃ ┣ 📜BoneFeatures.png
 ┃ ┃ ┣ 📜HeartFeatures.png
 ┃ ┃ ┣ 📜HeroImage.png
 ┃ ┃ ┣ 📜HomeFeatures.png
 ┃ ┃ ┣ 📜Jake.png
 ┃ ┃ ┣ 📜Skating.png
 ┃ ┃ ┣ 📜TVFeature.png
 ┃ ┃ ┗ 📜logo.png
 ┃ ┗ 📜style.css
 ┣ 📂views
 ┃ ┗ 📜index.erb
 ┗ 📜app.rb
Building our landing page in ButterCMS
Let's head over to ButterCMS and create an account to get started. After creating an account, we'll be automatically directed to the ButterCMS dashboard.
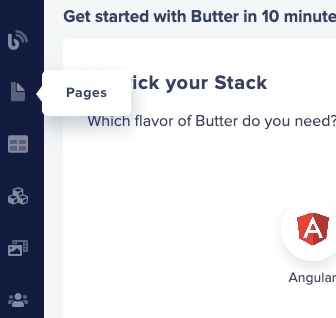
On the dashboard's sidebar, let's access the Pages feature, one of the services Butter offers.
To create a new page, click the New Page button at the top right of the screen and click the Create New Page button.

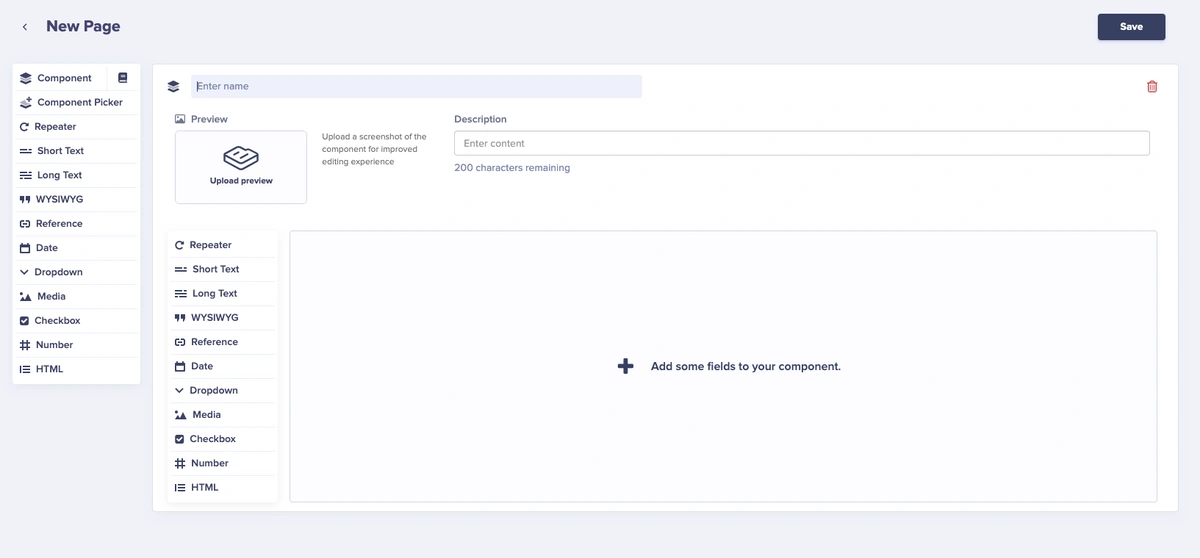
We’ll be directed to the screen where we define the schema configuration of our landing page application.

Here, we'll build our components so that we can add them to our landing page schema configuration.
To create our new components, click on the Component field.

Next, click on the Create Component button:

In this section, we define the different components we need for our landing page with various fields.
Let’s begin with creating the Hero section.
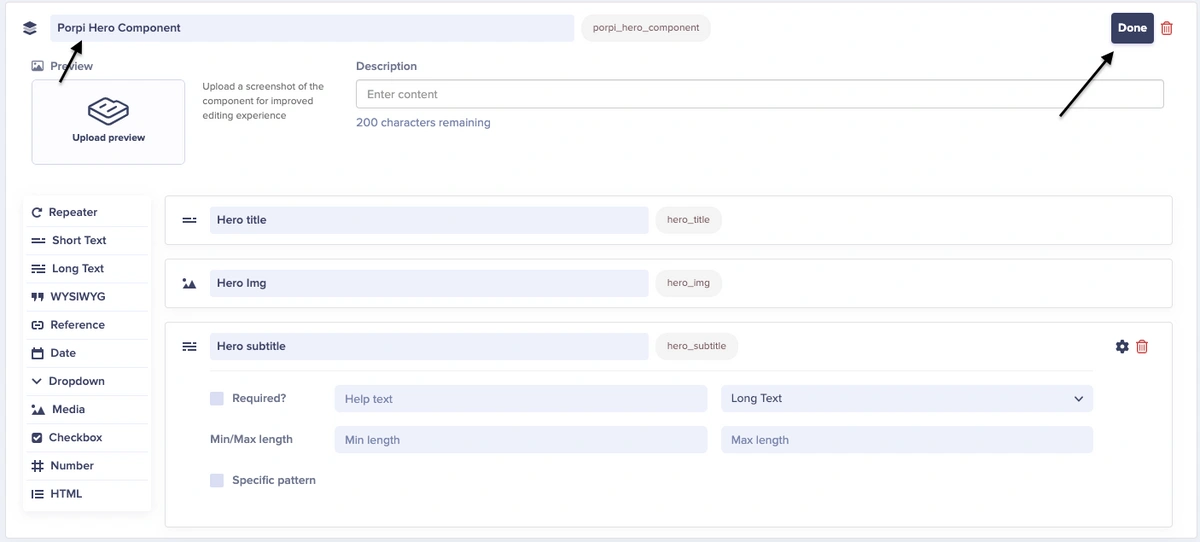
Configuring the Hero component
On our landing page, our hero section comprises a hero title, a paragraph, and an image on the right. To configure that in ButterCMS, let’s add the following as fields in our hero component:
-
Short text ⇢ hero_title
-
Longtext ⇢ hero_subtitle
-
Media ⇢ hero_img
Here’s what it looks like:

After configuring the Hero component, let’s name our component Porpi Hero Component and click the Done button located at the top right of this section.
Configuring the Services section
This section comprises four different items, each with the same structure (an image, a title, and a subtitle). Due to each item having the same structure, we will utilize the ButterCMS collection feature. We can configure this in Butter.
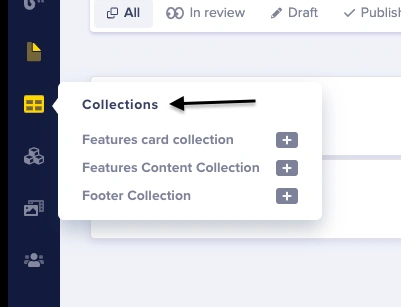
Let’s head over to the collection page by clicking the Collections tab on the left-hand side of the dashboard.
Next, we’ll create a new collection by clicking on the New Item button at the top right corner of the page and then clicking on Create New Collection.

Next, on the Collection Configuration page, add the following fields to the collection:
-
Media ⇢ transform_img
-
Short text ⇢ transform_header
-
Long text ⇢ transform_subtitle
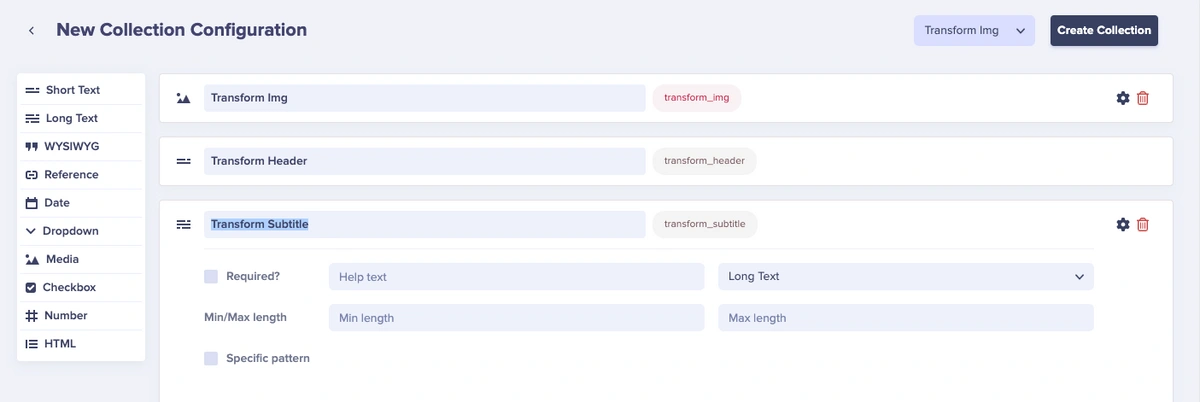
Next, we click on the Create Collection button at the top right corner of the page.

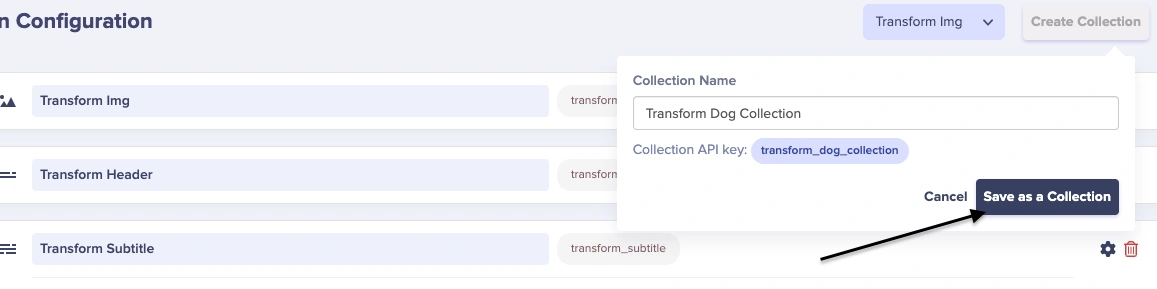
Save the collection as Transform Dog Collection and click the Save as Collection button.
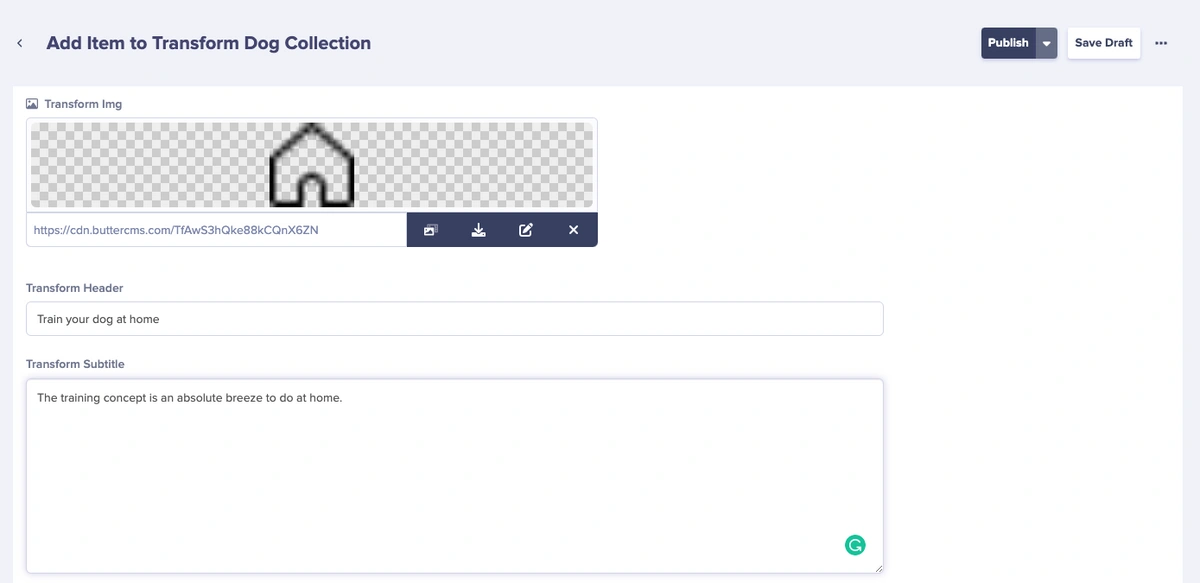
After clicking the button, we’ll be directed to a new page to create an item that belongs to the collection.
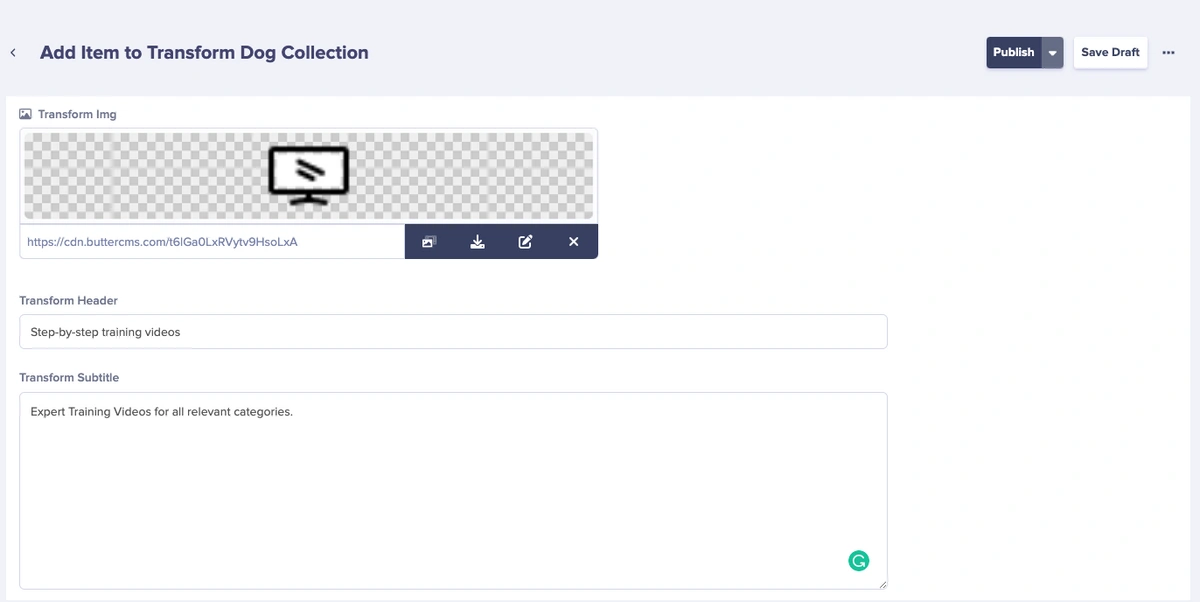
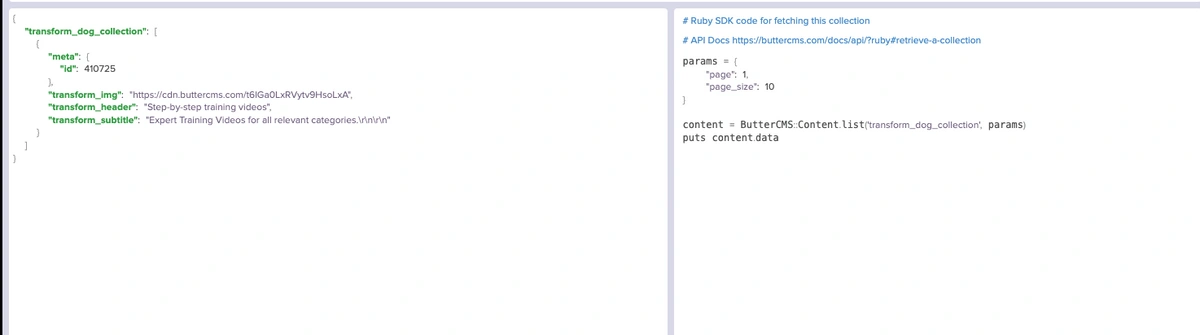
After that, press the Publish button as soon as you're done. Then, visit the API Explorer to see the data.
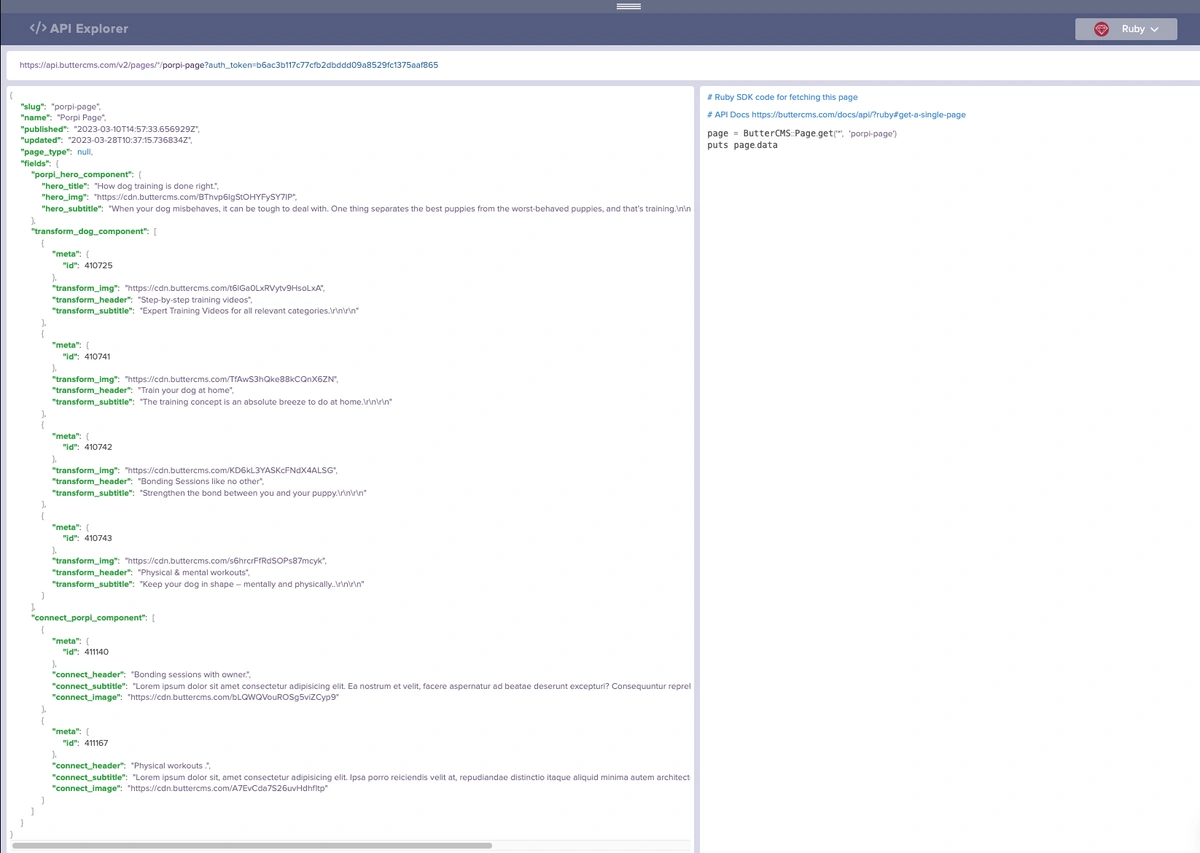
Here’s a preview of the API Explorer:
Add more items to the Transform Dog Collection
On our landing page, there are four items that comprise the Transform Your Dog's Life section. We added one. Let’s add three more pieces of data to populate the section.
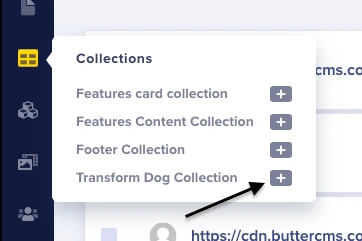
To add a new item, click the Collections tab from the menu on the left side, then click the + symbol by the Transform Dog Collection.
Next, let’s populate the data for our 2nd collection item.
After that, click the Publish button and repeat the steps for the 3rd and 4th items.
Add the Transform Dog Collection to the landing page
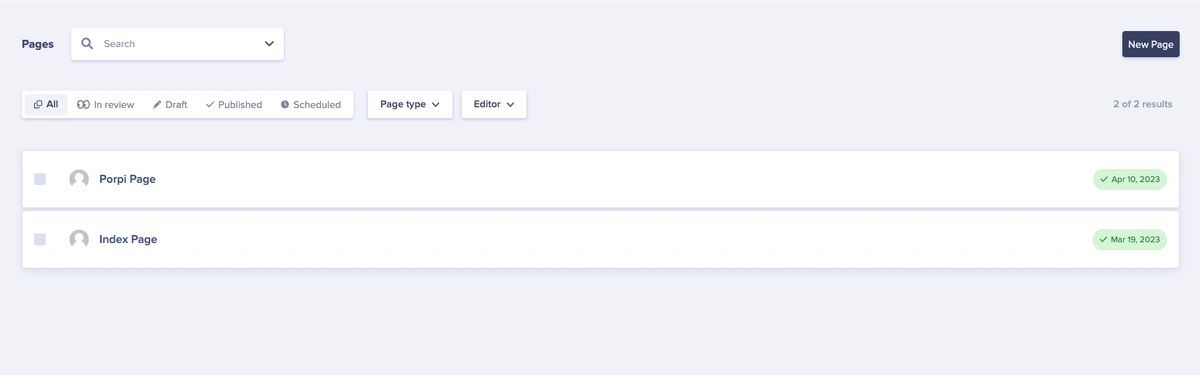
Next, we’ll have to add the Transform Dog Collection to our page in ButterCMS by clicking on the Pages tab on the left side of the dashboard.
We’ll be directed to a page listing all our pages within Butter. Then, click on the Porpi Page.
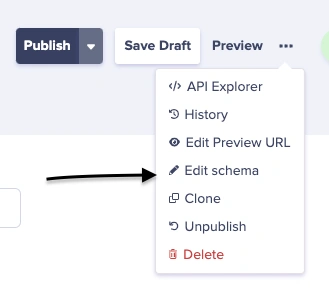
Next, click on the three-dotted icon located at the top of the page and select the Edit Schema option which will direct us to our page configuration schema.
To add our collection to our page, we’ll select a reference field and add it to our page.
-
Reference ⇢ transform_dog_component
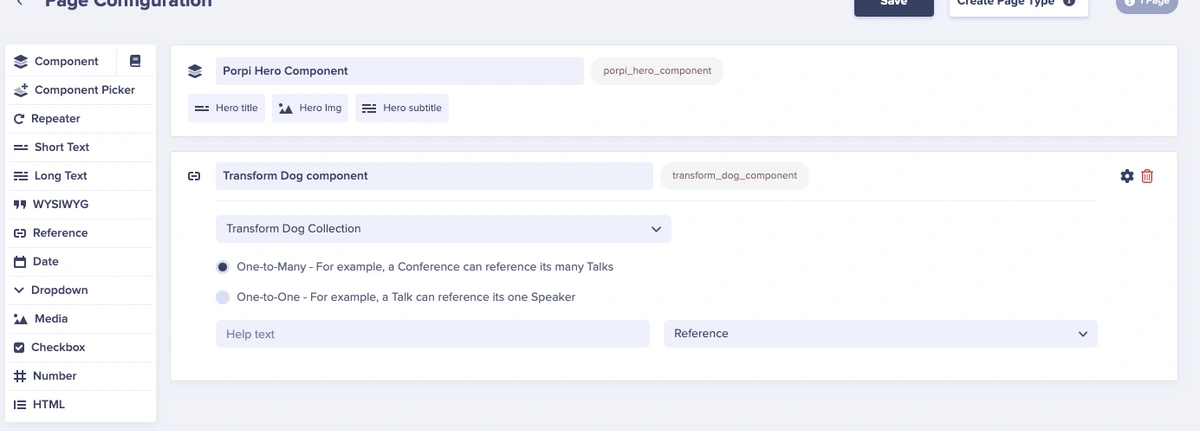
Next, click the Save button.

Configuring the Connect Porpi collection
This section comprises four different items, each with the same structure (an image, a header, and a subtitle). Due to each item having the same structure, we will also utilize the ButterCMS Collections feature. The collection we build will be for the Connect with Your Porpi section seen in the GIF at the beginning of this tutorial.
Next, we’ll create a new collection by clicking on the New Item button at the top right corner of the page and clicking on Create New Collection.
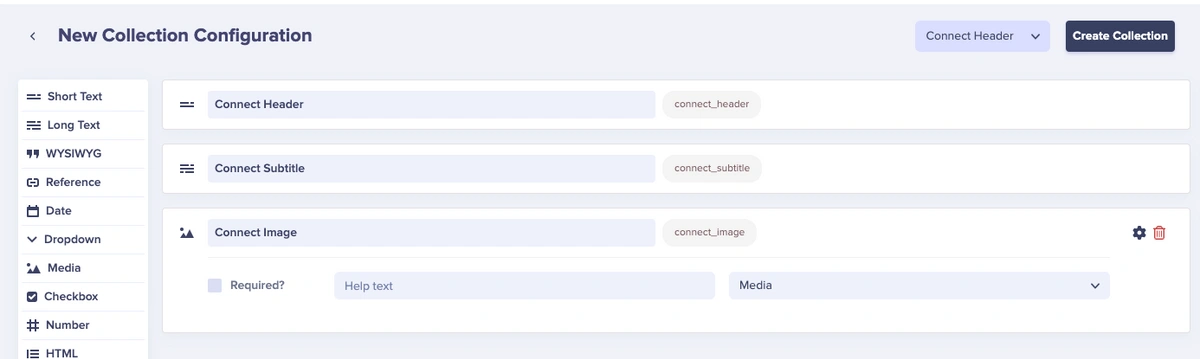
Next, on the Collection Configuration page, add the following fields to the collection:
-
Short text ⇢ connect_header
-
Long text ⇢ connect_subtitle
-
Media ⇢ connect_image
Next, we click on the Create Collection button at the top right corner of the page.
Then save the collection as Connect Porpi Collection.
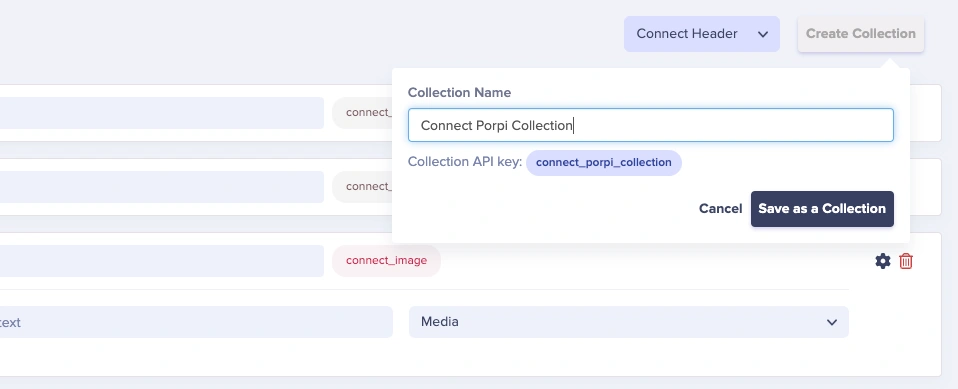
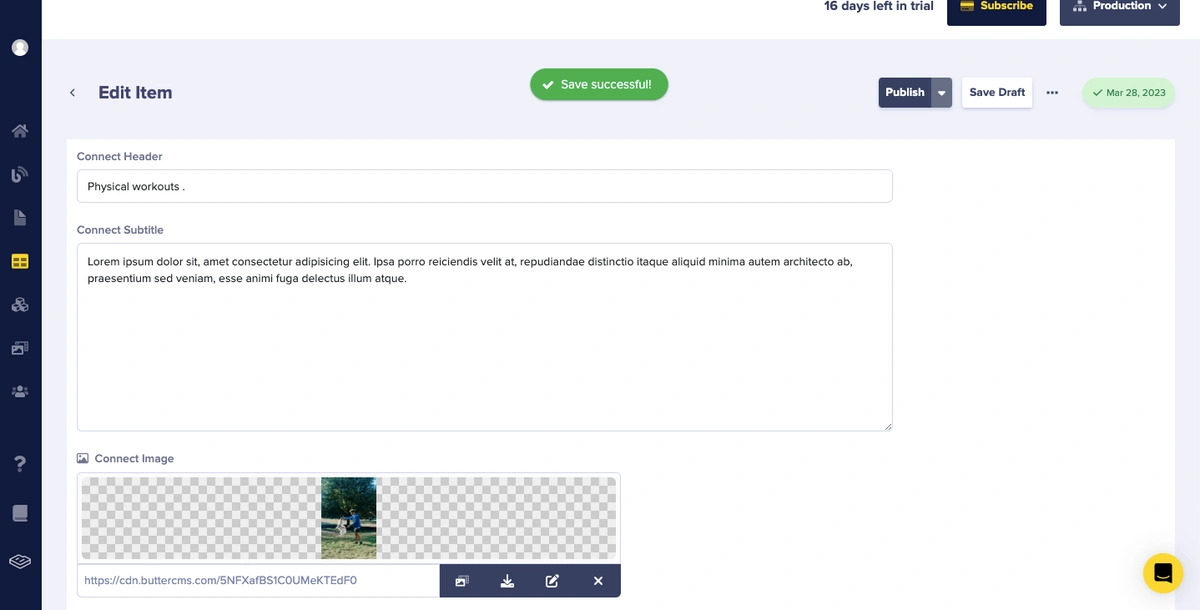
After clicking the button, we’ll be directed to a new page to create a new item for the collection.
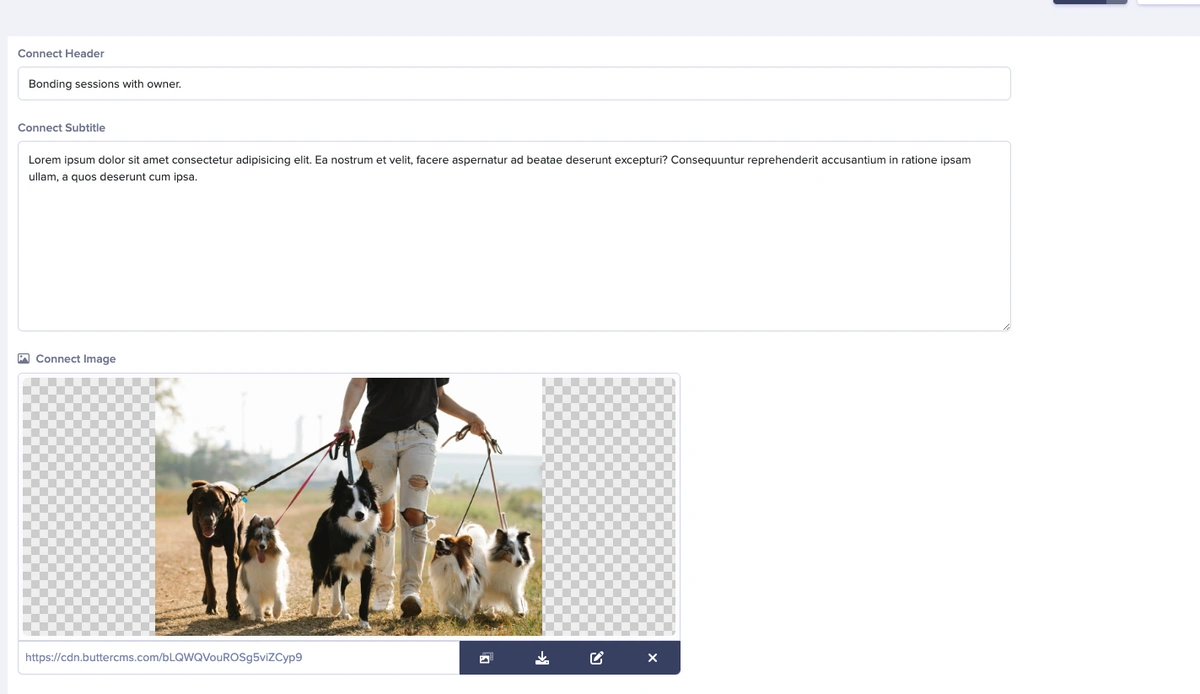
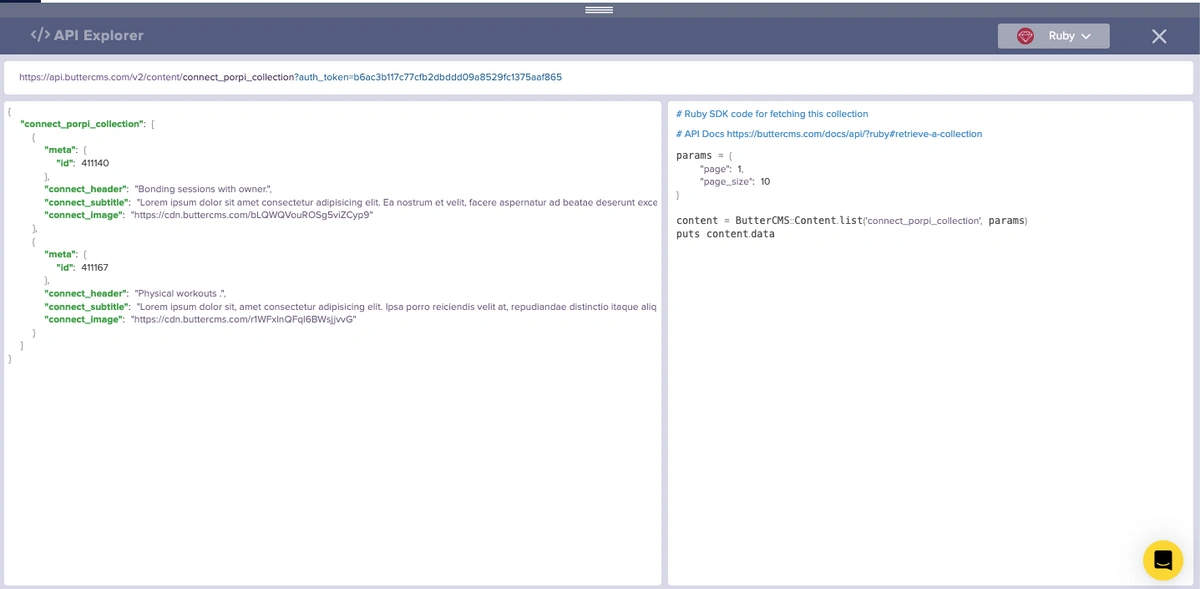
After that, press the Publish button as soon as you're done. Then, visit the API Explorer to see the data.
Here’s a preview of the API Explorer:
On our landing page, there are two items in this section. We added one. Let’s add another item to the collection.
To add another item, click the Collections tab from the menu on the left side, then click the + icon by the Connect Porpi Collection.
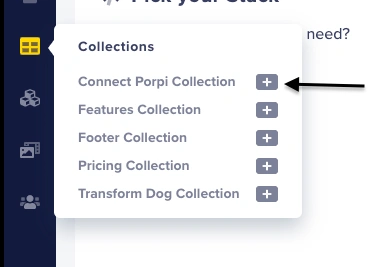
Next, let’s populate the data for our second collection.
After that, click the Publish button.
Add the Connect Porpi Collection to our page
Next, we’ll have to add the Connect Porpi Collection to our page in ButterCMS by clicking on the Pages tab on the left side of the dashboard.
We’ll be directed to a page listing all our pages within Butter. Then, click on Porpi Page.
Next, click on the three-dotted icon located at the top of the page and select the Edit Schema option, which will direct us to our page configuration schema.
Just like we added the previous collection to our page, let’s add the Connect Porpi Collection by selecting the reference field and adding it to our page.
-
Reference ⇢ connect_porpi_component
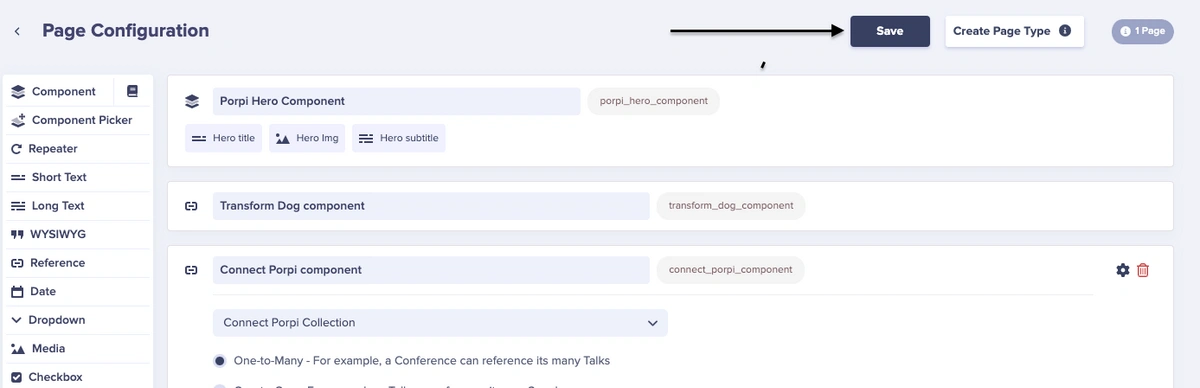
Then, we’ll click on the Save button.
Adding content to our landing page
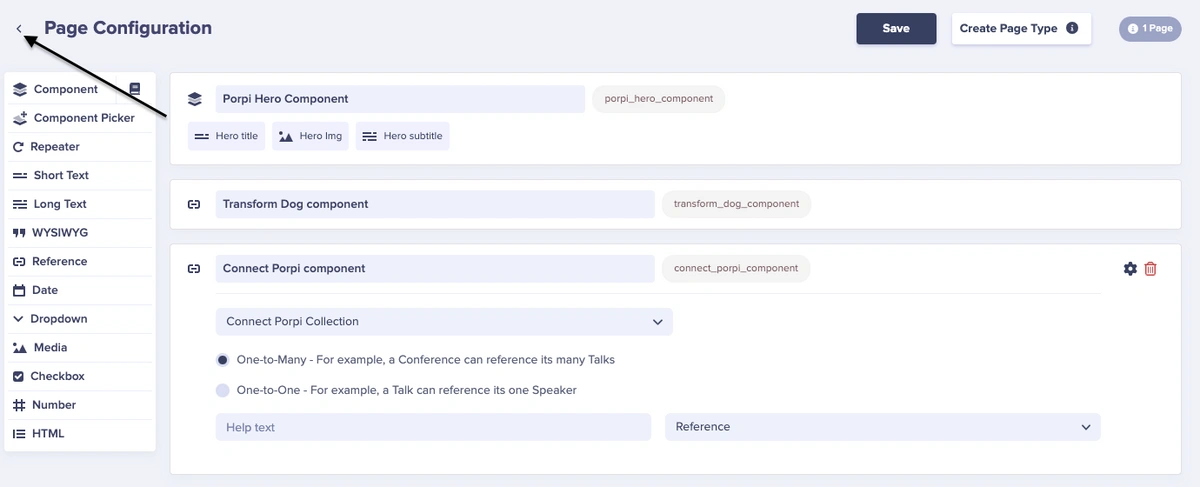
We’ve added all of the created sections to our page. Now, let's add our content.
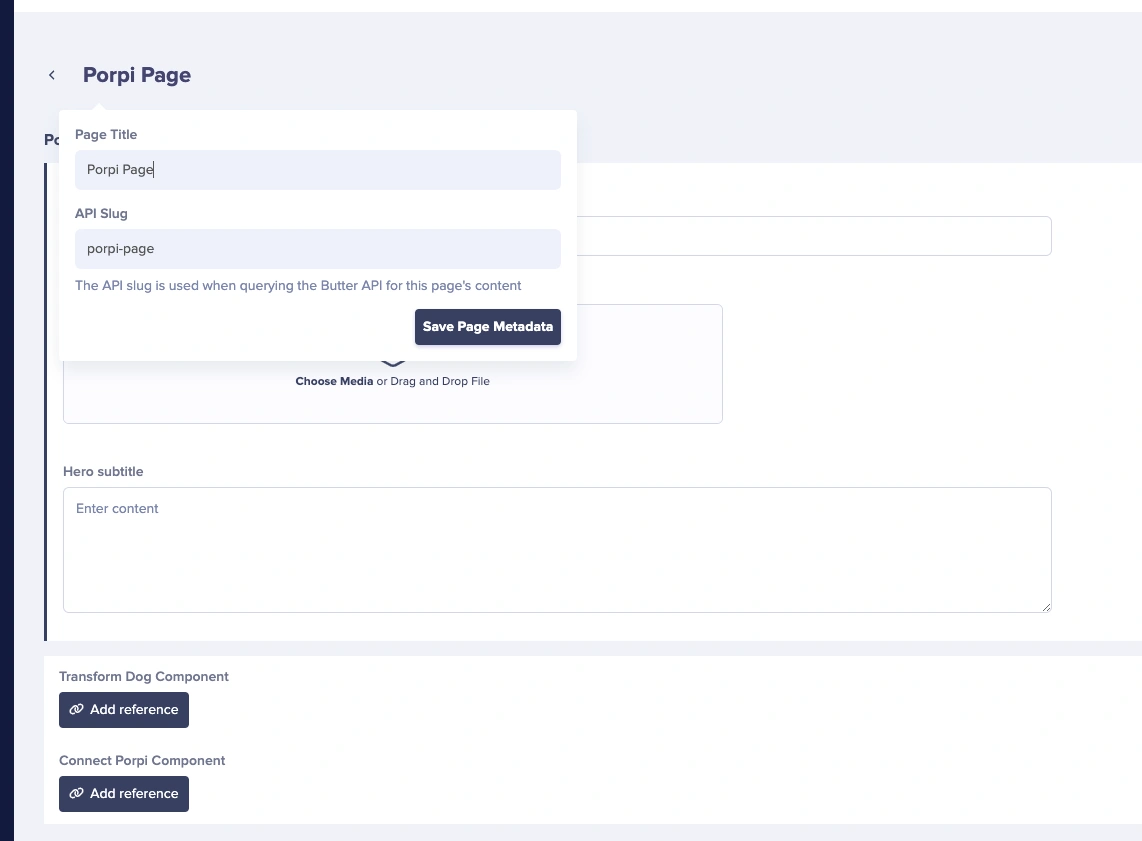
To do this, click on the back arrow at the top left of the page, and we’ll be directed to where we can add our content.
Then, enter the page title and description, which we'll name as Porpi Page, and click Save Page Metadata.
First, enter content to your Hero component fields.
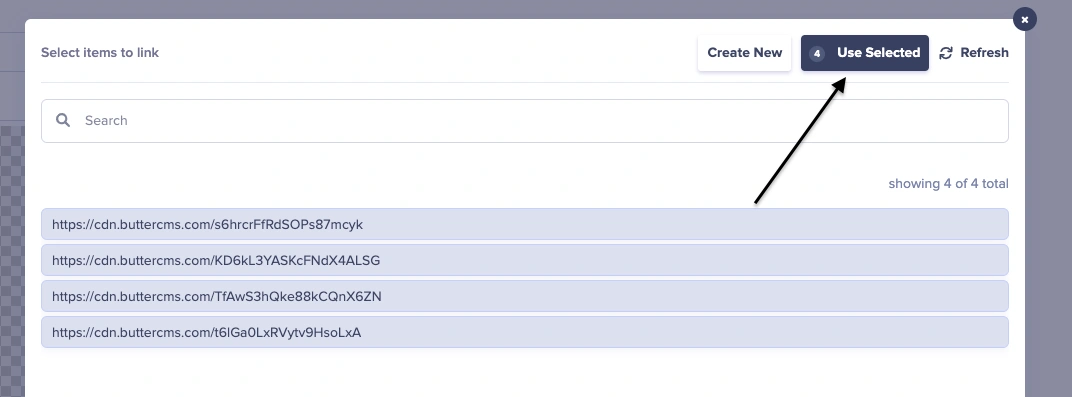
Next, to add items from our collections, we click on the Add Reference buttons. Please do this for both the Transform Dog and Connect Porpi components:

Next, we select all the collection items we’ll be using and click the Use Selected button.
When we're done, click on the Publish button and visit the API Explorer to preview.
Integrating ButterCMS with Ruby
Since we created our folders and files earlier, let's return to our code editor and connect ButterCMS to our Ruby application.
To do that, we need to have a secret key which we can find on the Settings page of the ButterCMS website.
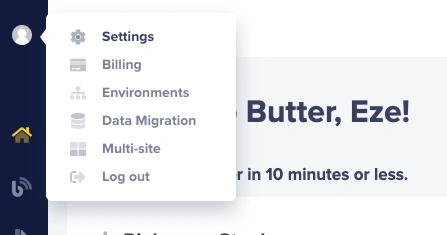
Let's copy our secret key, which we’d use to fetch our data from ButterCMS.
In our code editor, let's head over to our app.rb file and copy and paste the following code:
require 'sinatra'
require 'json'
require 'net/http'

set :public_folder, File.join(File.dirname(__FILE__), 'public')

get '/' do
 uri = URI('YOUR API_KEY') # Replace with your API endpoint
 response = Net::HTTP.get(uri)
 data = JSON.parse(response)

 # Render the data in an HTML template

 puts data['data']['fields']['porpi_hero_component']
 erb :index, locals: { data: data['data']['fields']}

end
The code above uses the Sinatra web framework, which we will use for this project to create a route for the homepage (/). When a user visits the homepage, the code fetches some data from a remote API using the Net::HTTP library and parses it as JSON using the JSON library.
The fetched data is rendered in an HTML template using the ERB templating engine. The locals option of the ERB method is used to pass the fetched data as a local variable named “data” to the HTML template.
The set method is used to specify the location of the public folder, which serves static files like CSS, JavaScript, and images. The File.join and File.dirname(__FILE__) methods are used to construct a file path to the public folder based on the current file's location.
The Navbar section
Our navigation bar component consists of using a div element. The navigation bar contains two sections: a logo container and a link container.
The logo container contains an image and a heading. The image is specified using the img tag and the src attribute, which points to an image file named logo.png in the assets folder. The heading uses the h1 tag and contains the text "Porpi".
The link container contains three links, each specified using the p tag with the class nav_links. The links are labeled "Blog," "About us," and "Contact."
We can also add our navbar to ButterCMS, and you can do so by following this tutorial in the ButterCMS Knowledge Base. ButterCMS provides a simple and efficient way to build and manage navigation menus, allowing you to focus on creating great content for your website.
 <!-- //nav bar -->
   <div class="nav_container">
     <div class="logo_container">
       <img src="assets/logo.png" alt="" class="logoImg" />
       <h1 class="logo">Porpi</h1>
     </div>
     <div class="link_container">
       <p class="nav_links">Blog</p>
       <p class="nav_links">About us</p>
       <p class="nav_links">Contact</p>
     </div>
   </div>
Here’s the styling for our navbar:
a {
 cursor: pointer;
}

.logo {
 font-size: 2rem;
 margin-left: 10px;
}

.logoImg {
 width: 50px;
}

.logo_container {
 display: flex;
 align-items: center;
}

.nav_container {
 display: flex;
 align-items: center;
 justify-content: space-between;
 position: sticky;
 top: 0;
 background-color: #fff;
}

.link_container {
 display: flex;
 align-items: center;
}

.nav_links {
 margin-left: 30px;
}
The Hero section
The code below creates a hero section for our web page with dynamic content using the div element. The section consists of a hero content container with a heading, a paragraph, and an image container with an image.
The content is dynamically populated using data fetched from ButterCMS using the Sinatra route and injected into the HTML using ERB syntax. The Hero section is a prominent section at the top of our web page designed to catch the user's attention and provide an introduction to the page's content.
<div class="hero_container">
     <div class="hero_content">
       <h1>  <%= data['porpi_hero_component']['hero_title'] %></h1>
       <p>
       <%= data['porpi_hero_component']['hero_subtitle'] %>
      </p>
     </div>
     <div class="img_container">
       <img src=  <%= data['porpi_hero_component']['hero_img'] %>
       class="hero_img" />
     </div>
   </div>
Here’s the styling for our hero section:
.hero_container {
 display: flex;
 align-items: center;
 justify-content: center;
}

.hero_content h1 {
 font-weight: 500;
 font-size: 3rem;
}

.hero_content p {
 font-weight: 400;
 font-size: 18px;
 line-height: 26px;
 text-decoration: none;
 color: rgb(116, 116, 118);
}
.img_container {
 width: 100%;
 text-align: end;
}
.hero_img {
 width: 400px;
}
The Transform Your Dog's Life section
This section specifies the heading using the h2 tag and contains the static text "Transform your dog's life". Next, the feature boxes are specified using a loop that iterates through the transform_dog_component field in the data and creates a feature box for each item. Each feature box contains an avatar image, a title, and a subtitle, which are populated using dynamic data from the current item in the loop.
<!-- Tranform section -->

   <h2> Transform your dogs life</h2>
   <div class="feature_container">

   <% data['transform_dog_component'].each do |item|%>
     <div class="features_box">
     <div class="feature_avatar avatar_2">
       <img src=<%= item['transform_img']%>
       />
     </div>
     <h3 class="features_title"><%= item['transform_header']%></h3>
     <p><%= item['transform_subtitle']%></p>
   </div>

   <% end %>

   </div>
Here’s the styling for this section:
/* feeatures */

.feature_container {
 display: flex;
 margin-top: 3rem;
}

.features_box {
 margin-right: 30px;
}

.feature_avatar {
 width: 100px;
 height: 100px;
 border-radius: 50px;
 display: flex;
 align-items: center;
 justify-content: center;
}

.feature_avatar img {
 width: 30px;
 height: 30px;
 object-fit: cover;
}

.avatar_1 {
 background-color: #ffbd2e;
}
The Connect with Your Porpi section
This section generates a dynamic component with one or more "care containers", each containing a heading, subheading, paragraph, and image. The dynamic content is fetched from ButterCMS. The data variable passed from the Sinatra route is injected into the HTML using ERB syntax.
<div class="care_section">


   <% data['connect_porpi_component'].each do |item|%>
     <div class="care_container">
     <div class="care_content">

       <h2><%= item['connect_header']%></h2>
       <p>
       <%= item['connect_subtitle']%>
       </p>
     </div>
     <div class="img_container">
       <img src=<%= item['connect_image']%> class="care_img" />
     </div>
   </div>
   <% end %>
   </div>
Here’s the styling for this section:
.care_section {
 margin: 3rem 0;
}

.care_container {
 display: flex;
 align-items: center;
 margin-top: 2rem;
}

.care_content h1 {
 font-weight: 500;
 font-size: 3rem;
}

.care_content p {
 font-weight: 400;
 font-size: 18px;
 line-height: 26px;
 text-decoration: none;
 color: rgb(116, 116, 118);
}

.care_img {
 width: 400px;
 border-radius: 25px;
}
The Footer section
The footer consists of four columns, each containing a header and one or more links. The first column contains the Porpi logo and a copyright notice. The second and third columns contain links to the homepage, blog, and information about the company. Finally, the fourth column contains links to legal information, such as the terms of use and privacy policy.
   <footer>
     <div>
       <div class="logo_container">
         <img src="assets/logo.png" alt="" class="logoImg" />
         <h1 class="logo">Porpi</h1>
       </div>
       <p>(c) 2023 All rights reserved.</p>
     </div>

     <div>
       <p class="footer_header">Porpi</p>
       <p><a>Home</a></p>
       <p><a>Blog</a></p>
     </div>

     <div>
       <p class="footer_header">Company</p>
       <p><a>About us</a></p>
       <p><a>Contact</a></p>
     </div>

     <div>
       <p class="footer_header">Legal</p>
       <p><a>Terms of Use</a></p>
       <p><a>Privacy Policy</a></p>
     </div>
   </footer>
Here’s the styling for this section:
footer h3 {
 margin: 5px 0;
 width: fit-content;
}

footer {
 display: flex;
 justify-content: space-between;
 height: 300px;
 align-items: center;
}

.footer_header {
 color: grey;
}
Now, let’s render our landing page after fetching all our content from ButterCMS:
Closing thoughts
Ruby developers can build scalable, maintainable websites and applications by utilizing ButterCMS's powerful features such as collections, pages, and components. When combined, ButterCMS and Ruby offer the tools and functionality you need to provide compelling, personalized, and engaging web experiences to your users, whether you're developing a blog or a landing page.
To learn more about ButterCMS and its features, head over to the official ButterCMS knowledge base. A job well done, now you can build a landing page powered by ButterCMS with Ruby. If you'd like to know more about how you can use ButterCMS with Ruby, check out the following tutorials:

