
Landing pages are unique web pages that users visit through promotional and marketing campaign links in order to access the promoted offer and/or product information. Users typically encounter this page first after clicking on a promotion or advertisement on third-party sites, therefore it’s safe to assume that in many cases this landing page will heavily influence the first impression a visitor has of your brand.
In this tutorial, we will broaden your horizons on what is possible when you create and add landing pages to your Vue application using ButterCMS. Throughout this tutorial, you will learn how to leverage the power of ButterCMS to quickly create, design, and publish dynamic landing pages that seamlessly integrate with your Vue application.
Table of contents
Why use Vue?
Vue is an open-source, lightweight, and progressive JavaScript framework that can be used to construct any user interface. Because of its familiar templating syntax and component use, integrating and moving existing applications to Vue is fast and smooth.
The idea behind Vue was to build a custom and easily integrable tool with a low learning curve—making it easy for anyone with an understanding of JavaScript to pick it up quickly. Other benefits of using Vue include its component-based architecture, reusability, high performance, and great community. The data binding and data-driven technique of interfacing with an HTML-based Document Object Model (DOM) is favored over working directly with the DOM.
Why use ButterCMS?
ButterCMS is a headless content management system (CMS) that comprises a dashboard and content API. It is simple and easy to integrate into any application or framework. Additionally, it comes with a robust library of website components (including the ability to create custom components) to help eliminate the stress of complex configurations, if you choose to use them.
With the dashboard, users can access and utilize a graphical and structural representation of the schemas they want to build and then, with the endpoints or APIs, deliver the content to whatever channel they intend once that content is published. This simplicity allows complex logic to be easily implemented within a few minutes.
Here are a few reasons you might consider using ButterCMS to power your landing page:
-
Content modeling: ButterCMS's user-friendly interface allows users to specify the structure and relationships of their content through content modeling.
-
Content types: When building a landing page, users can leverage ButterCMS content types to create models for each landing page section. Using page types, collections, components, and pages.
-
Easy-to-use plugin: ButterCMS's API enables users to access CMS content, which can be integrated into any programming language or framework.
-
WYSIWYG editor: Content creators can use the WYSIWYG editor provided by ButterCMS to add and format text, images, videos, and other media in their articles. The editor supports various formats, such as markdown and HTML.

Tutorial prerequisites
To follow along with this tutorial, the following requirements are needed:
-
Knowledge of Vue and the optional API
-
Knowledge of Git and GitHub
-
ButterCMS account
-
NodeJS installed in your system
Without any further ado, let’s get started!!!
Tutorial objective
In this tutorial, we’ll set up Butter’s dynamic landing page content and populate our landing page with the content from our dashboard. To get started, clone the starter file from GitHub.
Next, install and run the necessary dependencies needed for the project using the command below.
yarn && yarn dev
With all this done, you should see your landing page as shown below.
Setting up ButterCMS
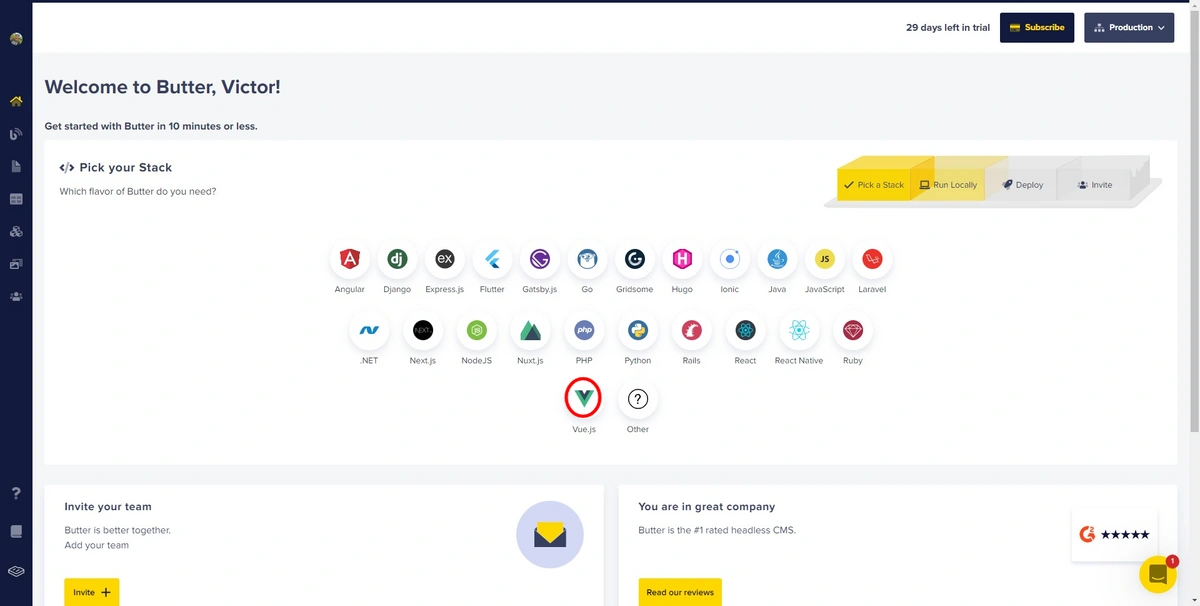
With our project running, let’s set up and populate our ButterCMS project with data that we’ll be using later on in our Vue app. Click here to create a ButterCMS account if you don't have one.
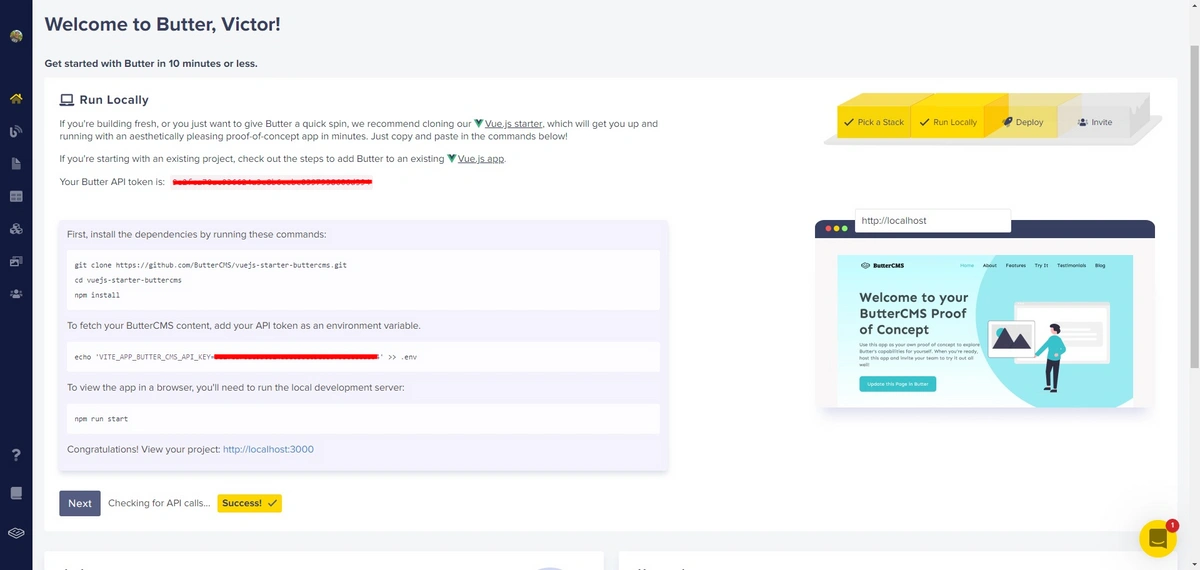
You’ll be redirected to the ButterCMS dashboard when your account is successfully created. Choose the Vue.js framework from your ButterCMS dashboard to reveal your API_KEY.
Next, copy the API_KEY from your dashboard to your project.
Finally, create a .env.local file in your root directory and add the code block below to it.
VITE_BUTTER_API_KEY="YOUR_BUTTERCMS_API_KEY"
Project structure
Before taking a big dive into creating our ButterCMS data, it’s best we understand our project structure to give a better understanding of how to go about our data creation.
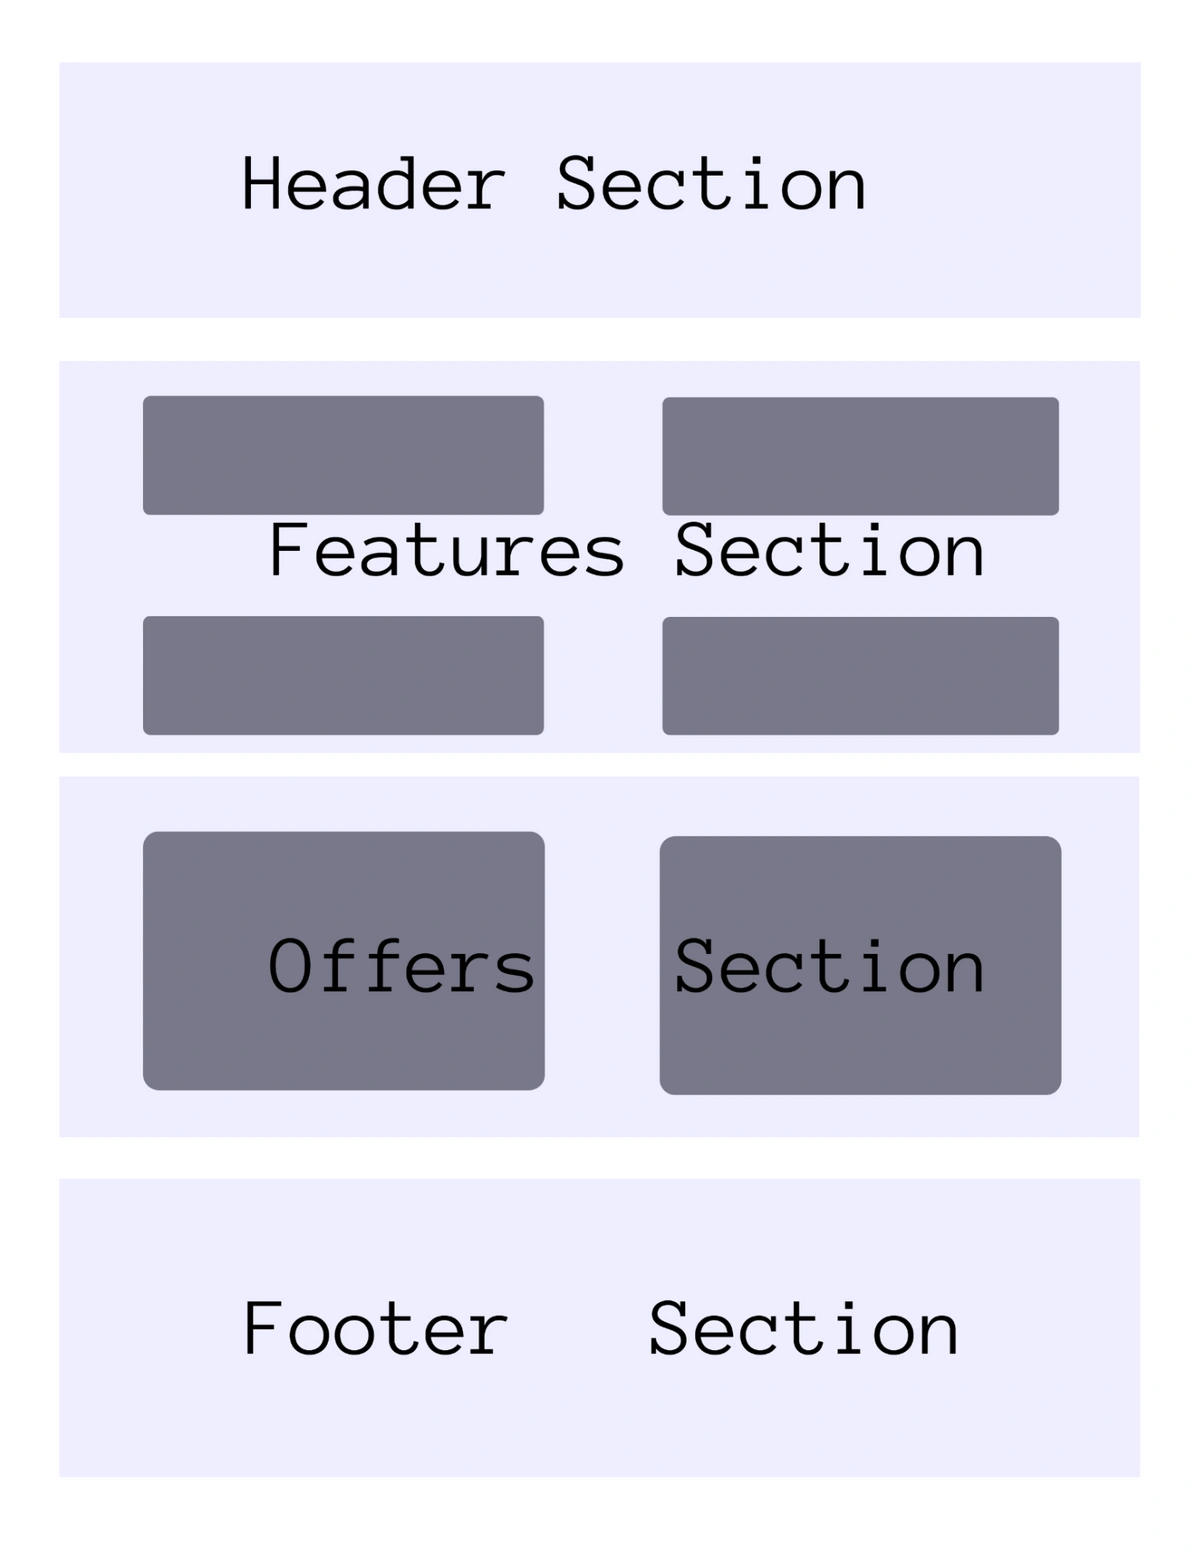
As seen in the diagram above, our application is divided into four sections, namely the Header, Features, Offers, and Footer sections. The Header and Footer sections will contain basic images and text, while the Features and Offers sections will contain reusable components.
Building our landing page in ButterCMS
Let’s start by using ButterCMS to create our landing page for our Vue application.
Creating the Header and Footer components
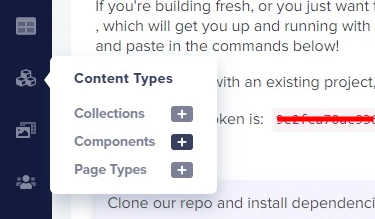
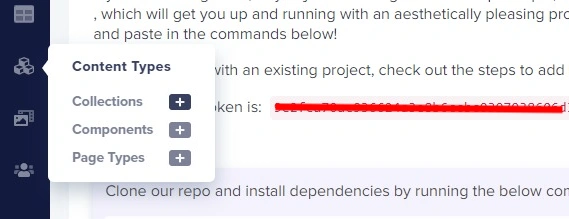
To create our Header component, navigate to the Components configurator by clicking on the plus (+) symbol next to Components in the Content Types menu tab.
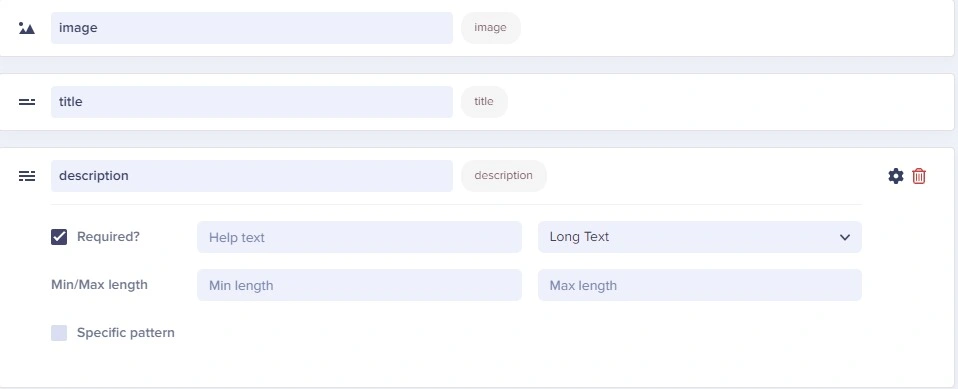
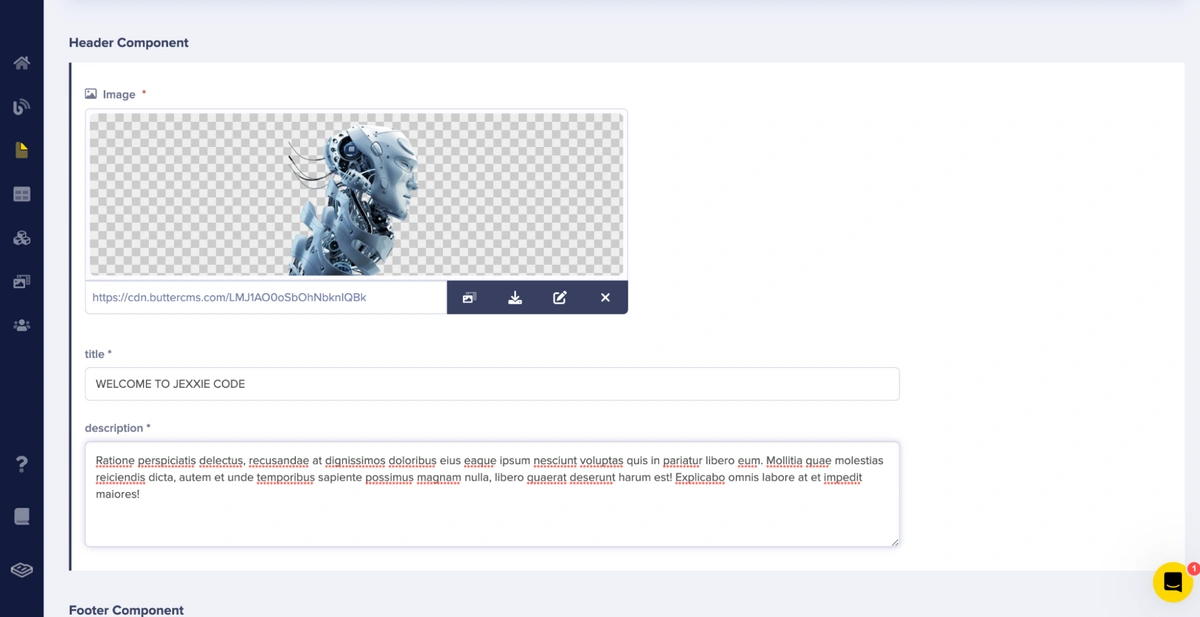
In the Components configuration editor, add the following fields:
-
Mediafor image -
Short textfor title -
Long textfor description
Click on the Create Component button at the top of the page and give it a name in the popup modal to save the changes. Here, we’ve named it “Header Component”.

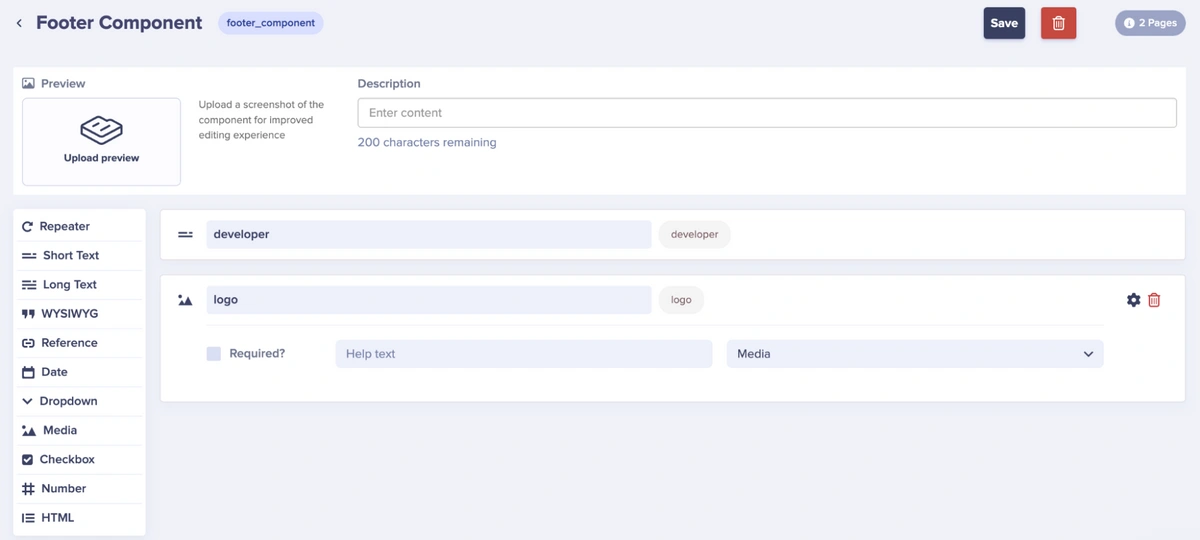
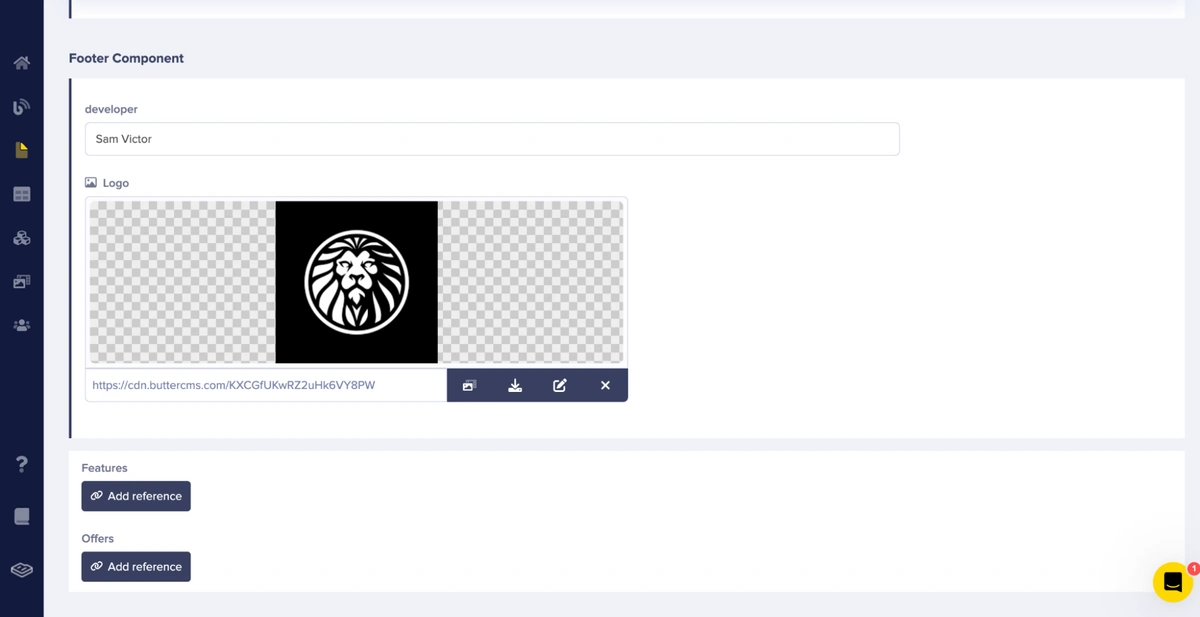
Repeat the same process for the Footer component using the schema below in the component configurator.
-
Mediafor logo -
Short textfor developer
After creating the Footer component, save it as Footer Component.
Creating the Features and Offers collections
In the previous section, we used components to render our header and footer. This is because they don't contain any content that would be referenced on multiple pages (though some may choose to do so with a footer). This is unlike the Features and Offers sections, where each entry has the same field configuration and will most likely be referenced on multiple pages and sections, such as a dedicated features page, offers page, or even other landing pages.
Collections are reusable data tables that multiple pages can reference. There are many use cases for collections in ButterCMS, which are discussed in their knowledge base.
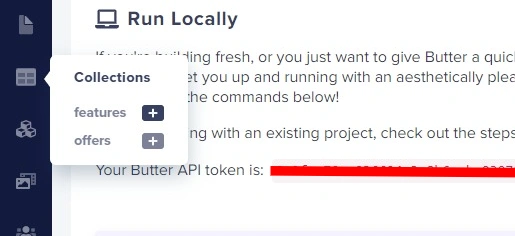
Let’s start creating our collection for the Features section. Head to the collections editor by clicking the plus icon next to the Collections option in the Content Types tab menu.
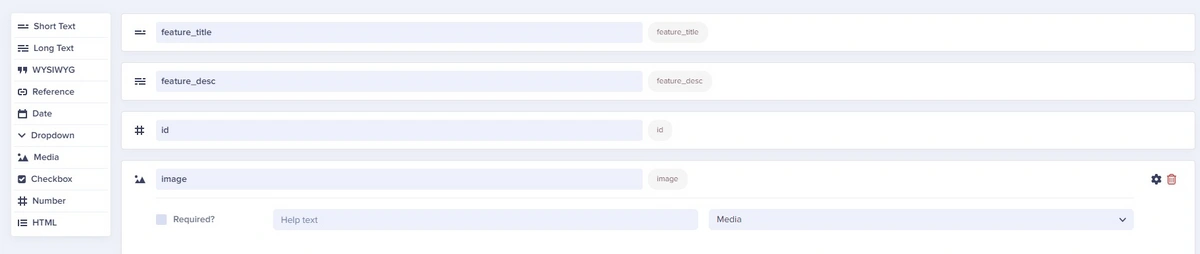
Next, configure your collection to have the following fields below:
-
Short textfor feature_title -
Long textfor feature_desc -
Numberfor id -
Mediafor image
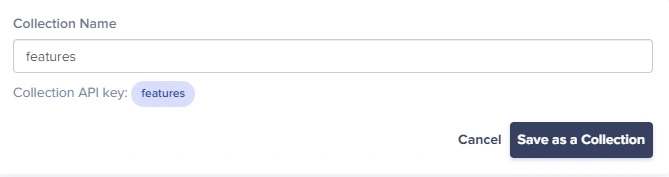
Finally, provide a name for the collection and save it. In this tutorial, we’ll name the collection “features”.
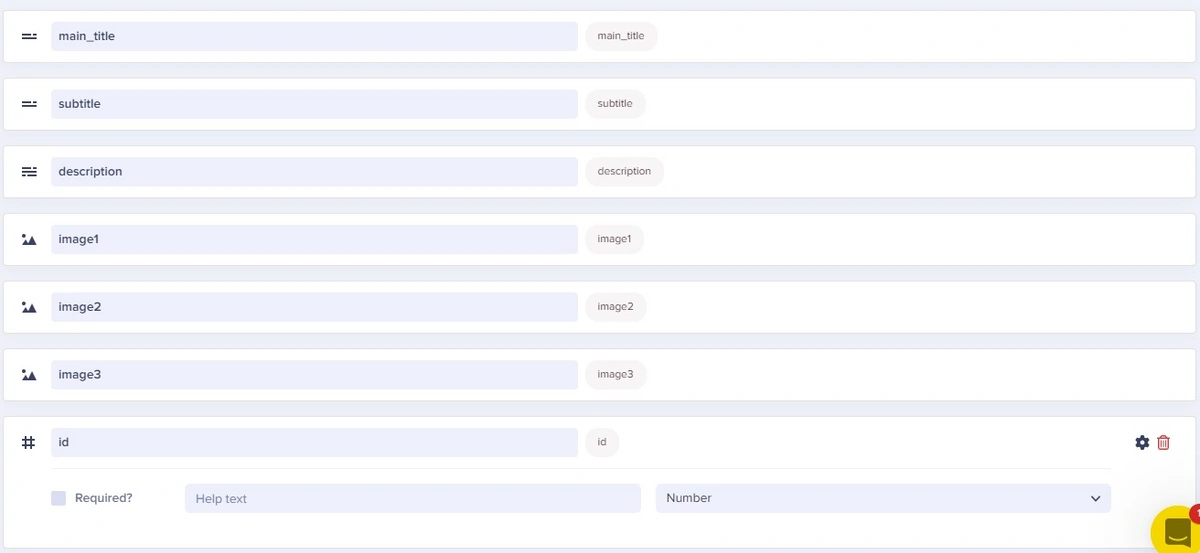
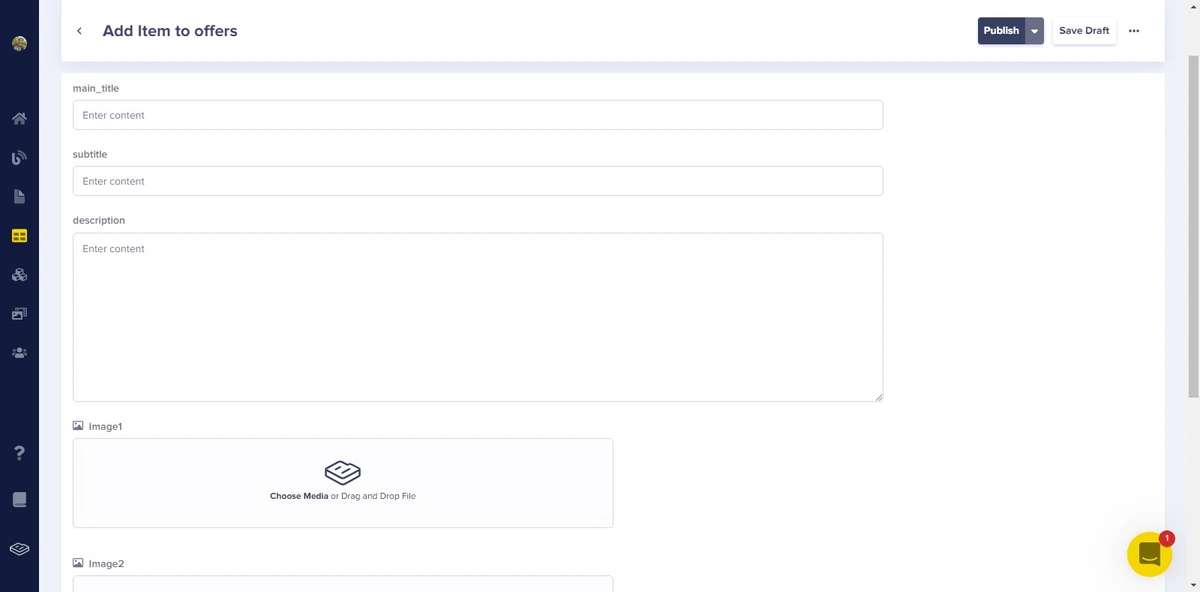
Repeat the same process discussed in this section for the Offers collection using the schema below and click the Save as a Collection button:
-
Short textfor main_title -
Short textfor subtitle -
Long textfor description -
Mediafor image1 -
Mediafor image2 -
Mediafor image3 -
Numberfor id
Below is what the configuration should look like:
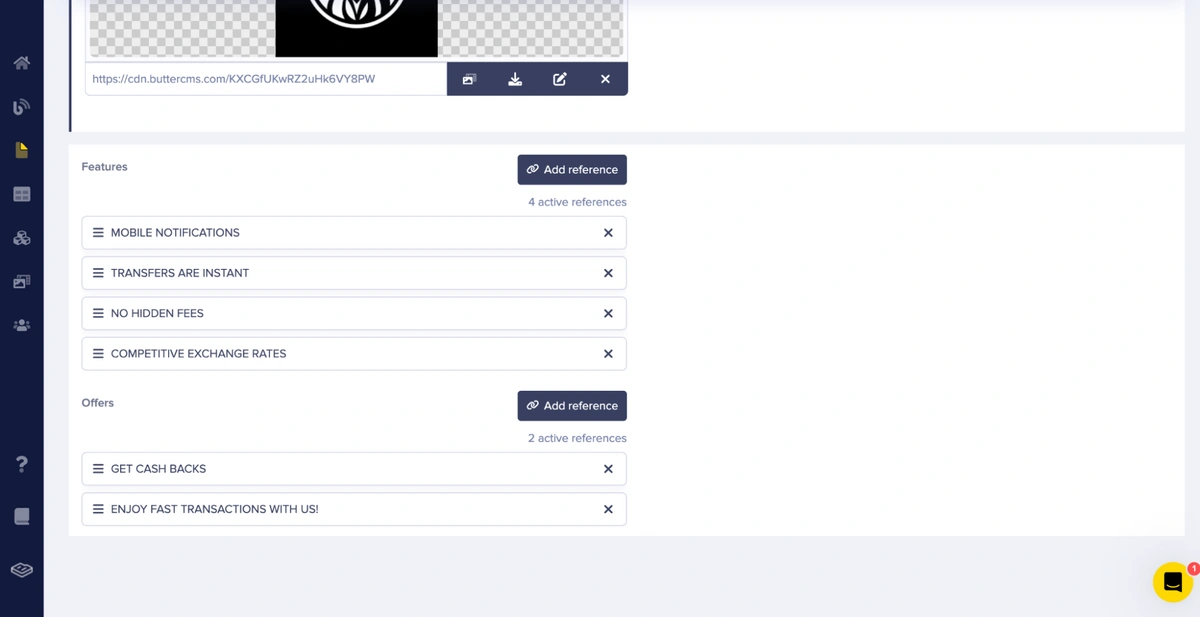
Having completed the process above, navigate to the Collections section and click on the newly created features collection.
Next, add content to the fields in the collection item. Use the assets from our Vue project. Then, click the Publish button.
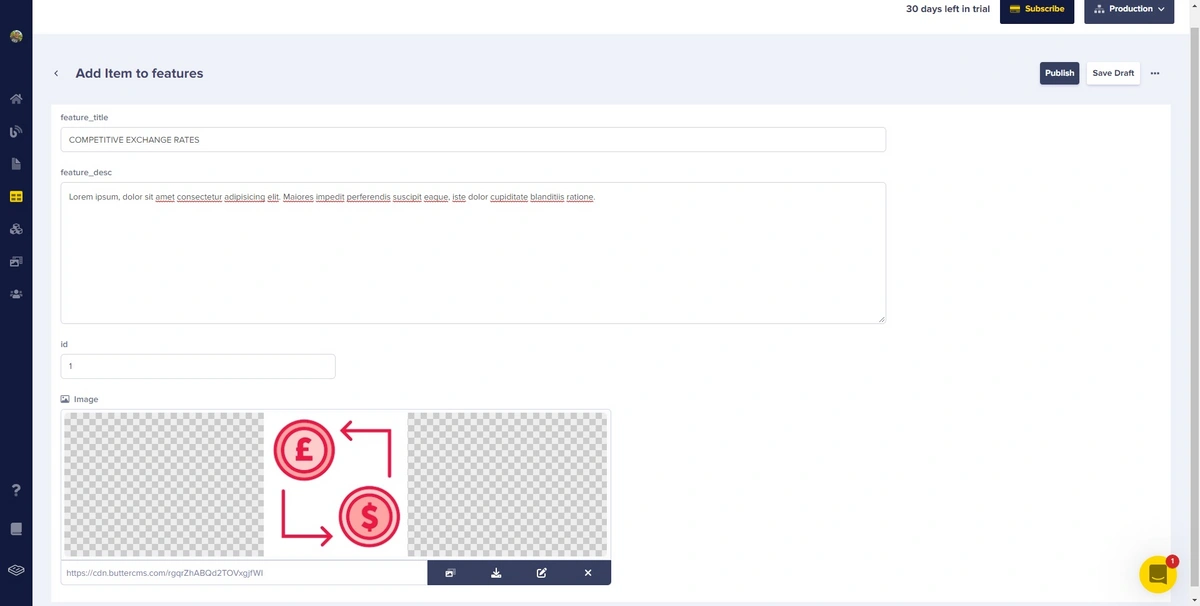
Add as many feature collection items as you want. We’ll add four feature collection items for this project. After adding the data, remember to click the Publish button to save the changes.
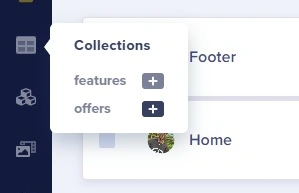
We’ll be repeating the same process for the Offers collections. Click the plus (+) button beside the offers collection.
Next, add content to the collection item using the assets from our Vue project. In this tutorial, we’ll be creating two offers.
Creating our landing page
Finally, let’s put all the data together into a page in ButterCMS. Let’s head over to Pages by clicking on the Pages tab, then click on New Page at the top right corner.
In the Pages configuration editor, we’ll be adding the following fields.
-
The Header component (select this from the components library)
-
The Footer component (select this from the components library)
-
A
Referencenamed feature (this references the feature collection) -
A
Referencenamed offers (this references the offers collection)
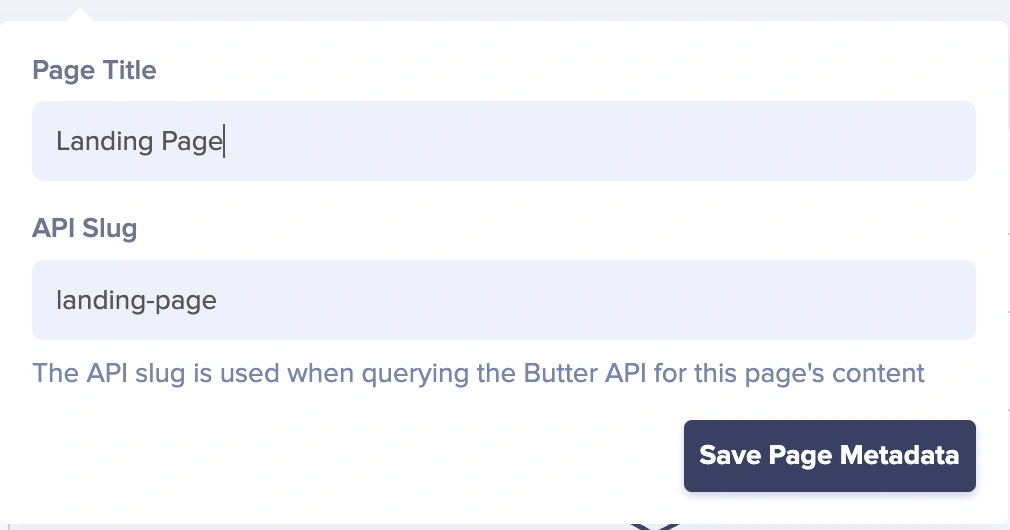
After adding the above fields, click on the Save button and provide a page title and API slug. In this tutorial, we’ll be saving the page as Landing Page.
After saving, we’ll be filling in the Home and Footer components with content from our cloned Vue application.
Finally, click the Add Reference button, select all the collection items created earlier, and click the Publish button.
Populating our Vue landing page with ButterCMS data
With our ButterCMS dashboard filled with our data, let’s populate our landing page with this data.
Before retrieving the data, let’s install the ButterCMS API client into our project. Head to your code editor and run the command below in your terminal to install the ButterCMS API client.
yarn add buttercms
Retrieving data from ButterCMS
In this section, we’ll be retrieving our data from ButterCMS and then passing the data as props to the components that depend on them. Head over to the Apps.vue file and update the file with the code block below.
<script setup>
import Header from "./components/HeaderSection.vue";
import Features from "./components/FeaturesSection.vue";
import Offers from "./components/OffersSection.vue";
import Footer from "./components/FooterSection.vue";
import { ref, onMounted } from "vue";
import Butter from "buttercms";


const headerComponent = ref(null);
const footerComponent = ref(null);
const offersContent = ref([]);
const featuresContents = ref(null);


onMounted(() => {
 const butter = Butter(import.meta.env.VITE_BUTTER_API_KEY);


 butter.page
   .retrieve("*", "landing-page")
   .then((resp) => {
     const { offers, header_component, footer_component, features } = resp.data.data.fields;


     headerComponent.value = header_component;
     footerComponent.value = footer_component;
     featuresContents.value = features;
     offersContent.value = offers;
   })
   .catch(function (resp) {
     console.log(resp);
   });


});
</script>


<template>
 <div class="relative">
   <Header v-if="headerComponent != null" :headerComponent="headerComponent" />
   <Features v-if="featuresContents != 0" :featuresContents="featuresContents" />
   <Offers v-if="offersContent.value != 0" :offersContent="offersContent" />
   <Footer v-if="footerComponent != null" :footerComponent="footerComponent" />
 </div>
</template>
In the code block above, we’re fetching data from the ButterCMS API using the Butter client library, which is imported at the beginning of the script. We’re also importing several Vue components that render different landing page sections.
We’ve also created reactive variables using the ref function from Vue. These variables are used to store data retrieved from the API. The onMounted lifecycle hook is used to fetch data from the API when the component is mounted. The data is then stored in the reactive variables created earlier.
The fetched data is then used to conditionally render the imported components in the template using the v-if directive. If the data for a particular section has not yet been loaded or is null, that section will not be rendered. This prevents any errors from occurring due to missing data.
Populating the Header component
In this section, we’ll populate the HeaderSection component with the data passed down as props from the Apps.vue file.
<script>
export default {
 name: "Header",
 props: ["headerComponent"],
};
</script>
In the code block above, we’re using the headerComponent prop to pass in the data from the App.vue file, which will be used in our template.
Next, let’s add the data to our template. Copy the code below and update the <template> tag.
<template>
<section class="bg-white">
<img :src="headerComponent.image" alt="image" srcset="" />
<!-- added this -->
<div class="isolate h-85 flex items-center justify-center pt-20">
<main>
<div class="relative px-6 lg:px-8 pl-20 container">
<div class="mx-auto max-w-3xl pt-8 pb-32 sm:pt-24 sm:pb-40">
<div>
<div>
<h1
class="heading-secondary text-5xl font-bold tracking-tight sm:text-center sm:text-6xl text-gray-400 uppercase pb-8">
{{ headerComponent.title }}
<!-- added this -->
</h1>
<p class="mt-6 text-lg leading-8 text-gray-600 sm:text-center">
{{ headerComponent.description }}
<!-- added this -->
</p>
<div class="mt-8 flex gap-x-4 sm:justify-center">
<a href="#"
class="inline-block rounded-lg bg-green-600 px-4 py-1.5 text-base font-semibold leading-7 text-white shadow-sm ring-1 ring-green-600 hover:bg-green-700 hover:ring-green-700">
Explore now
<span class="text-indigo-200" aria-hidden="true">→</span>
</a>
<a href="#"
class="inline-block rounded-lg px-4 py-1.5 text-base font-semibold leading-7 text-gray-900 ring-1 ring-gray-900/10 hover:ring-gray-900/20">
Check out our Sessions
<span class="text-gray-400" aria-hidden="true">→</span>
</a>
</div>
</div>
</div>
</div>
</div>
</main>
</div>
</section>
</template>
<script>In the code block above, we added the image, title, and description to our template.
Retrieving data for the Footer section
To retrieve data for the Footer section, head over to the FooterSection.vue file located in the src/components folder and paste the code block below into it.
<script>

export default {
 name: "Footer",

 props: ["footerComponent"],

};
</script>
In the code block above, we’re using the footerComponent prop to pass in the data from the App.vue file, which will be used in our template.
Next, let’s render the data into our template.
<template>
<div>
<footer class="footer flex flex-col bg-grey-800 pt-14 pb-24">
<div class="flex justify-center mb-12">
<img :src="footerComponent.logo" alt="Logo" class="w-32 h-32 rounded-circle" />
<!-- added logo -->
</div>
<div class="flex flex-col md:flex-row text-xl justify-center text-white/90">
<section class="w-full md:w-1/3 flex justify-center flex-col px-8 mb-12">
<h3 class="font-bold uppercase mb-2 underline underline-offset-4 inline-block">
Company
</h3>
<ul>
<li>
<a href="#" class="pb-2 hover:underline inline-block underline-offset-4 transition-all">About us</a>
</li>
<li>
<a href="#" class="pb-2 hover:underline inline-block underline-offset-4 transition-all">Contact us</a>
</li>
</ul>
</section>
<section class="flex flex-col justify-center items-center px-4">
<h1 class="text-xl text-gray-100 uppercase font-bold mb-4 text-center">
Subscribe to our newsletter
</h1>
<p class="text-lg italic text-center">
Get the latest news and updates from us
</p>
<div class="flex flex-col justify-center items-center mt-10">
<input class="border-2 border-green-600 rounded-md p-2 w-80 md:mb-0 md:mr-4" type="email"
placeholder="Enter your email" />
<button
class="bg-green-500 text-white rounded-md mt-8 p-1.5 w-32 m-auto hover:-translate-y-1 transition-all duration-300">
Subscribe
</button>
</div>
<div class="mt-12">
<h2 class="text-xl text-slate-400">
Want to know more about us?
<a href="#" class="ml-2 italic underline text-green-700 text-md">
Click here
</a>
</h2>
</div>
</section>
</div>
<div class="flex justify-center items-center text-white/90 py-8">
<p class="text-sm">
© 2022 All rights reserved • {{ footerComponent.developer }}
<!-- added developer -->
</p>
</div>
</footer>
</div>
</template>In the code block above, we’re rendering the logo and developer data from our props to our template.
Retrieving Data for the Features section
To retrieve data for the Footer section, head over to the FeaturesSection.vue file in the src/components folder and paste the code block below into it.
<script>
export default {
 name: "Features",

 props: ["featuresContents"],
};
</script>
In the code block above, we’re retrieving data from the features collection, then storing the response in the res variable.
Next, we will populate the Features section with the data received from the props. Copy and replace the entire template tag with the code block below.
<template>
 <div>
   <div class="bg-gray-800 py-24 sm:py-32 lg:py-40">
     <div class="mx-auto max-w-7xl px-6 lg:px-8">
       <div class="sm:text-center">
         <p class="heading-secondary font-bold inline-block text-3xl md:text-5xl uppercase transition-all">
           A better way to send money
         </p>
         <p class="mx-auto mt-6 max-w-2xl text-lg leading-8 text-slate-100">
           Lorem ipsum dolor sit amet consect adipisicing elit. Possimus magnam
           voluptatum cupiditate veritatis in accusamus quisquam.
         </p>
       </div>


       <div class="mt-20 max-w-lg sm:mx-auto md:max-w-none">
         <div class="grid grid-cols-1 gap-y-16 md:grid-cols-2 md:gap-x-12 md:gap-y-16">
           <!-- looping through the response array -->
           <div v-for="data in featuresContents">
             <div class="relative flex flex-col gap-6 sm:flex-row md:flex-col lg:flex-row">
               <div class="flex h-40 w-40 items-center justify-center rounded-xl text-white sm:shrink-0">
                 <img :src="data.image" :alt="data.image" />
                 <!-- added image -->
               </div>
               <div class="sm:min-w-0 sm:flex-1">
                 <p class="text-lg font-semibold leading-8 uppercase text-emerald-500">
                   {{ data.feature_title }}
                   <!-- added title -->
                 </p>
                 <p class="mt-2 text-base leading-7 text-slate-100">
                   {{ data.feature_desc }}
                   <!-- added description -->
                 </p>
               </div>
             </div>
           </div>
         </div>
       </div>
     </div>
   </div>
 </div>
</template>
Based on our props data, in the code block above we’re looping through an array of objects using the v-for attribute to populate the Features section with our data.
Retrieving data for the Offers section
To retrieve data for the Offers section, head to the OffersSection.vue file in the src/components folder and paste the code block below.
export default {
 name: "Offers",

 props: ["offersContent"],
};
</script>
Just like in the Features section, we also retrieve a list of offers from our prop.
Finally, let’s populate our Offers section with offersContent.
<template>
<main class="flex justify-center bg-white/90 pb-16 md:pb-0 pl-20 pr-20 h-100vh">
<!-- Looping through the Offers list -->
<div v-for="data in offersContent">
<section class="pb-24 px-4 md:px-8 pt-20">
<div class="text-center mb-14 md:mb-28">
<h2 class="heading-secondary font-bold inline-block text-4xl md:text-5xl uppercase transition-all">
{{ data.main_title }}
<!-- added main title -->
</h2>
</div>
<div class="flex flex-col md:flex-row">
<div class="w-full md:w-1/2 mb-12">
<h3 class="text-2xl md:text-2xl font-bold uppercase mb-4 text-slate-600">
{{ data.subtitle }}
<!-- added subtitle -->
</h3>
<p class="text-lg mb-8 text-emerald-700">
{{ data.description }}
<!-- added description -->
</p>
<a href="#"
class="btn-text text-lg inline-block text-gray-700 no-underline border-b border-gray-700 p-2 transition-all hover:bg-green-500 hover:text-gray-800 hover:shadow-lg hover:-translate-y-2 active:shadow-md active:translate-y-0">Learn
more →</a>
</div>
<!-- added 3 images -->
<div class="md:w-1/2 md:pl-12">
<div class="relative flex">
<img :src="data.image1" alt="Photo 1"
class="w-5/12 shadow-lg absolute z-10 transition-all duration-300 outline-offset-8 hover:scale-110 hover:-translate-y-2 hover:shadow-md hover:z-20 left-0 md:left-12 md:-top-8" />
<img :src="data.image2" alt="Photo 2"
class="w-5/12 shadow-lg absolute md:z-10 transition-all duration-300 outline-offset-8 hover:scale-110 hover:-translate-y-2 hover:shadow-md z-30 hover:z-20 md:right-28 md:top-8 left-1/4" />
<img :src="data.image3" alt="Photo 3"
class="w-5/12 shadow-lg absolute z-10 transition-all duration-300 outline-offset-8 hover:scale-110 hover:-translate-y-2 hover:shadow-md hover:z-20 md:top-20 right-14" />
</div>
</div>
</div>
</section>
</div>
</main>
</template>
<script>
Based on our response, in the code block above we’re looping through an array of offers using the v-for attribute to populate the Offers section with our data from offersContent.
Congratulations on getting to this point! Below is a GIF showing us our final result.
Closing thoughts
In this article, we’ve covered how to add landing pages to a Vue application using ButterCMS, a powerful content management system with great speed and performance. We’ve also learned the setup and use cases of ButterCMS pages, components, and collections.
To top it all off, we also used one of the most famous JavaScript frameworks, Vue—a lightweight, simple-to-learn, open-source, and progressive JavaScript framework that can be used to create any user interface.
Congratulations on finishing this tutorial!

