
With over 3 billion people currently connected to the internet, and over 600 million blogs on the internet, blogging has become an integral component of the modern web. Currently, more than 3/4 of all websites are either a blog or contain a blog. Blogs are regularly updated websites or web pages designed to share relevant pieces of information or provide essential insight on a particular topic. They have also served as great marketing tools for businesses and individuals.
Due to the large amounts of data that needs to be organized and managed, creating a modern blog from scratch requires considerable effort, hence why a headless content management system (CMS) is an ideal solution. In simple terms, a headless CMS is a content repository system designed solely for the purpose of managing application content. It provides a streamlined way to access content via an application programming interface (API) and modify the content via the headless CMS platform's visual dashboard.
Table of contents
In this article, we will demonstrate how to set up and quickly build a blog with vanilla JavaScript and manage its content using ButterCMS. We will cover:
- How to setup the development environment for vanilla javascript and ButterCMS
- How to fetch data from ButterCMS and render it in your application
- How to create dynamic routing
Why use JavaScript?
Over the years now, JavaScript has gained a lot of popularity. From being one of the most overlooked programming languages, it has gone on to become the most popular language in the world today. One way or another, every software engineer writes JavaScript or uses its libraries. JavaScript and its ecosystem are becoming bigger year after year, with diverse frameworks and libraries. JavaScript is one of the core technologies of the World Wide Web, and it's the best choice for building content-heavy, simple applications like blogs. Compared to its frontend frameworks with several layers of extensive abstraction, all you really need to create a simple blog website from scratch is just vanilla JavaScript, HTML, CSS, and a headless CMS.
Why use ButterCMS?
ButterCMS is an API-first headless CMS that enables you to build CMS-powered applications and websites with any programming language you want. It is one of the best headless CMSs that will melt into your heart just as easily as it will integrate into any new or existing application. Here are some of the distinguishing features that make ButterCMS a good choice for creating a blog:
- Flexible content modeling: Blog pages and their content can be easily adjusted with custom components, allowing you to customize it for your use case.
- Page Types: It is a powerful tool that can be used anytime you want to create different pages with the same structure but different content. With the ButterCMS Page Type feature, you can build a custom blog page rather than use the default blog engine out of the box in addition to building any other page configuration you might need.
- Collections: This is another nice feature from ButterCMS. Basically, collections are tables of data that can be referenced by pages. There are many use cases for collections, one of which is using collections as facets (filterable properties for your pages). For instance, if your blog posts have different categories, you can add category collections to better organize your blog pages for your users.
- Blog engine: ButterCMS comes with a pre-built API-first blog engine that is SEO-optimized out-of-the-box, which allows you to quickly scaffold and integrate a functional blog system for your application.
- Developer-friendly: ButterCMS was built from the ground up with developers in mind. The entire ecosystem of the headless CMS is developer-friendly, and it gives you the freedom to use your favorite tech stack and launch your blog faster with less code.
In this tutorial, we will be using the ButterCMS blog engine which will allow us to quickly add a functional blog to our Javascript application. If you need your blog to have extra content or additional functionality you can always configure a custom blog post page type with ButterCMS's Page Type feature.
Tutorial prerequisites
Below are the main requirements you need to follow along with this tutorial:
- A ButterCMS trial account
- A code editor such as Visual Studio Code or Sublime
- Basic knowledge of JavaScript
- Node.js installed on your system
Setting up the development environment
To get started, create a new folder and initialize Node.js project by running the commands below:
mkdir buttercms-javascriptblog
cd buttercms-javascriptblog
npm init
After that, we need to install Parcel as our build tool. The Parcel is a zero-combination build tool that combines an incredible out-of-the-box development experience with a scalable architecture that can take your project from just getting started to a massive production application.
Run the following command to install Parcel as a dev dependency:
npm install --save-dev parcel
Update your package.json to have a source field to have your entries in a single place, like this: "src/index.html"
    {
  "name": "buttercms-javascriptblog",
  "version": "1.0.0",
  "description": "A demo on how to build a blog with ButterCms and JavaScript",
  "source": "src/index.html",
  "scripts": {
    "start": "parcel",
    "build": "parcel build"
  },

  "devDependencies": {
    "parcel": "^2.7.0"
  }
}
Then, create this folder structure and these files in your buttercms-javascriptblog directory:
- src
- css
- main.css
- js
- api.js
- main.js
- index.html
- css
Installing dependencies:
Next, install the ButterCMS SDK and dotenv as dependencies by running the command below:
`npm install buttercms dotenv --save`
Then, install @babel/core as a dev-dependency with the command below:
`npm install --save-dev @babel/core`
Setting up ButterCMS
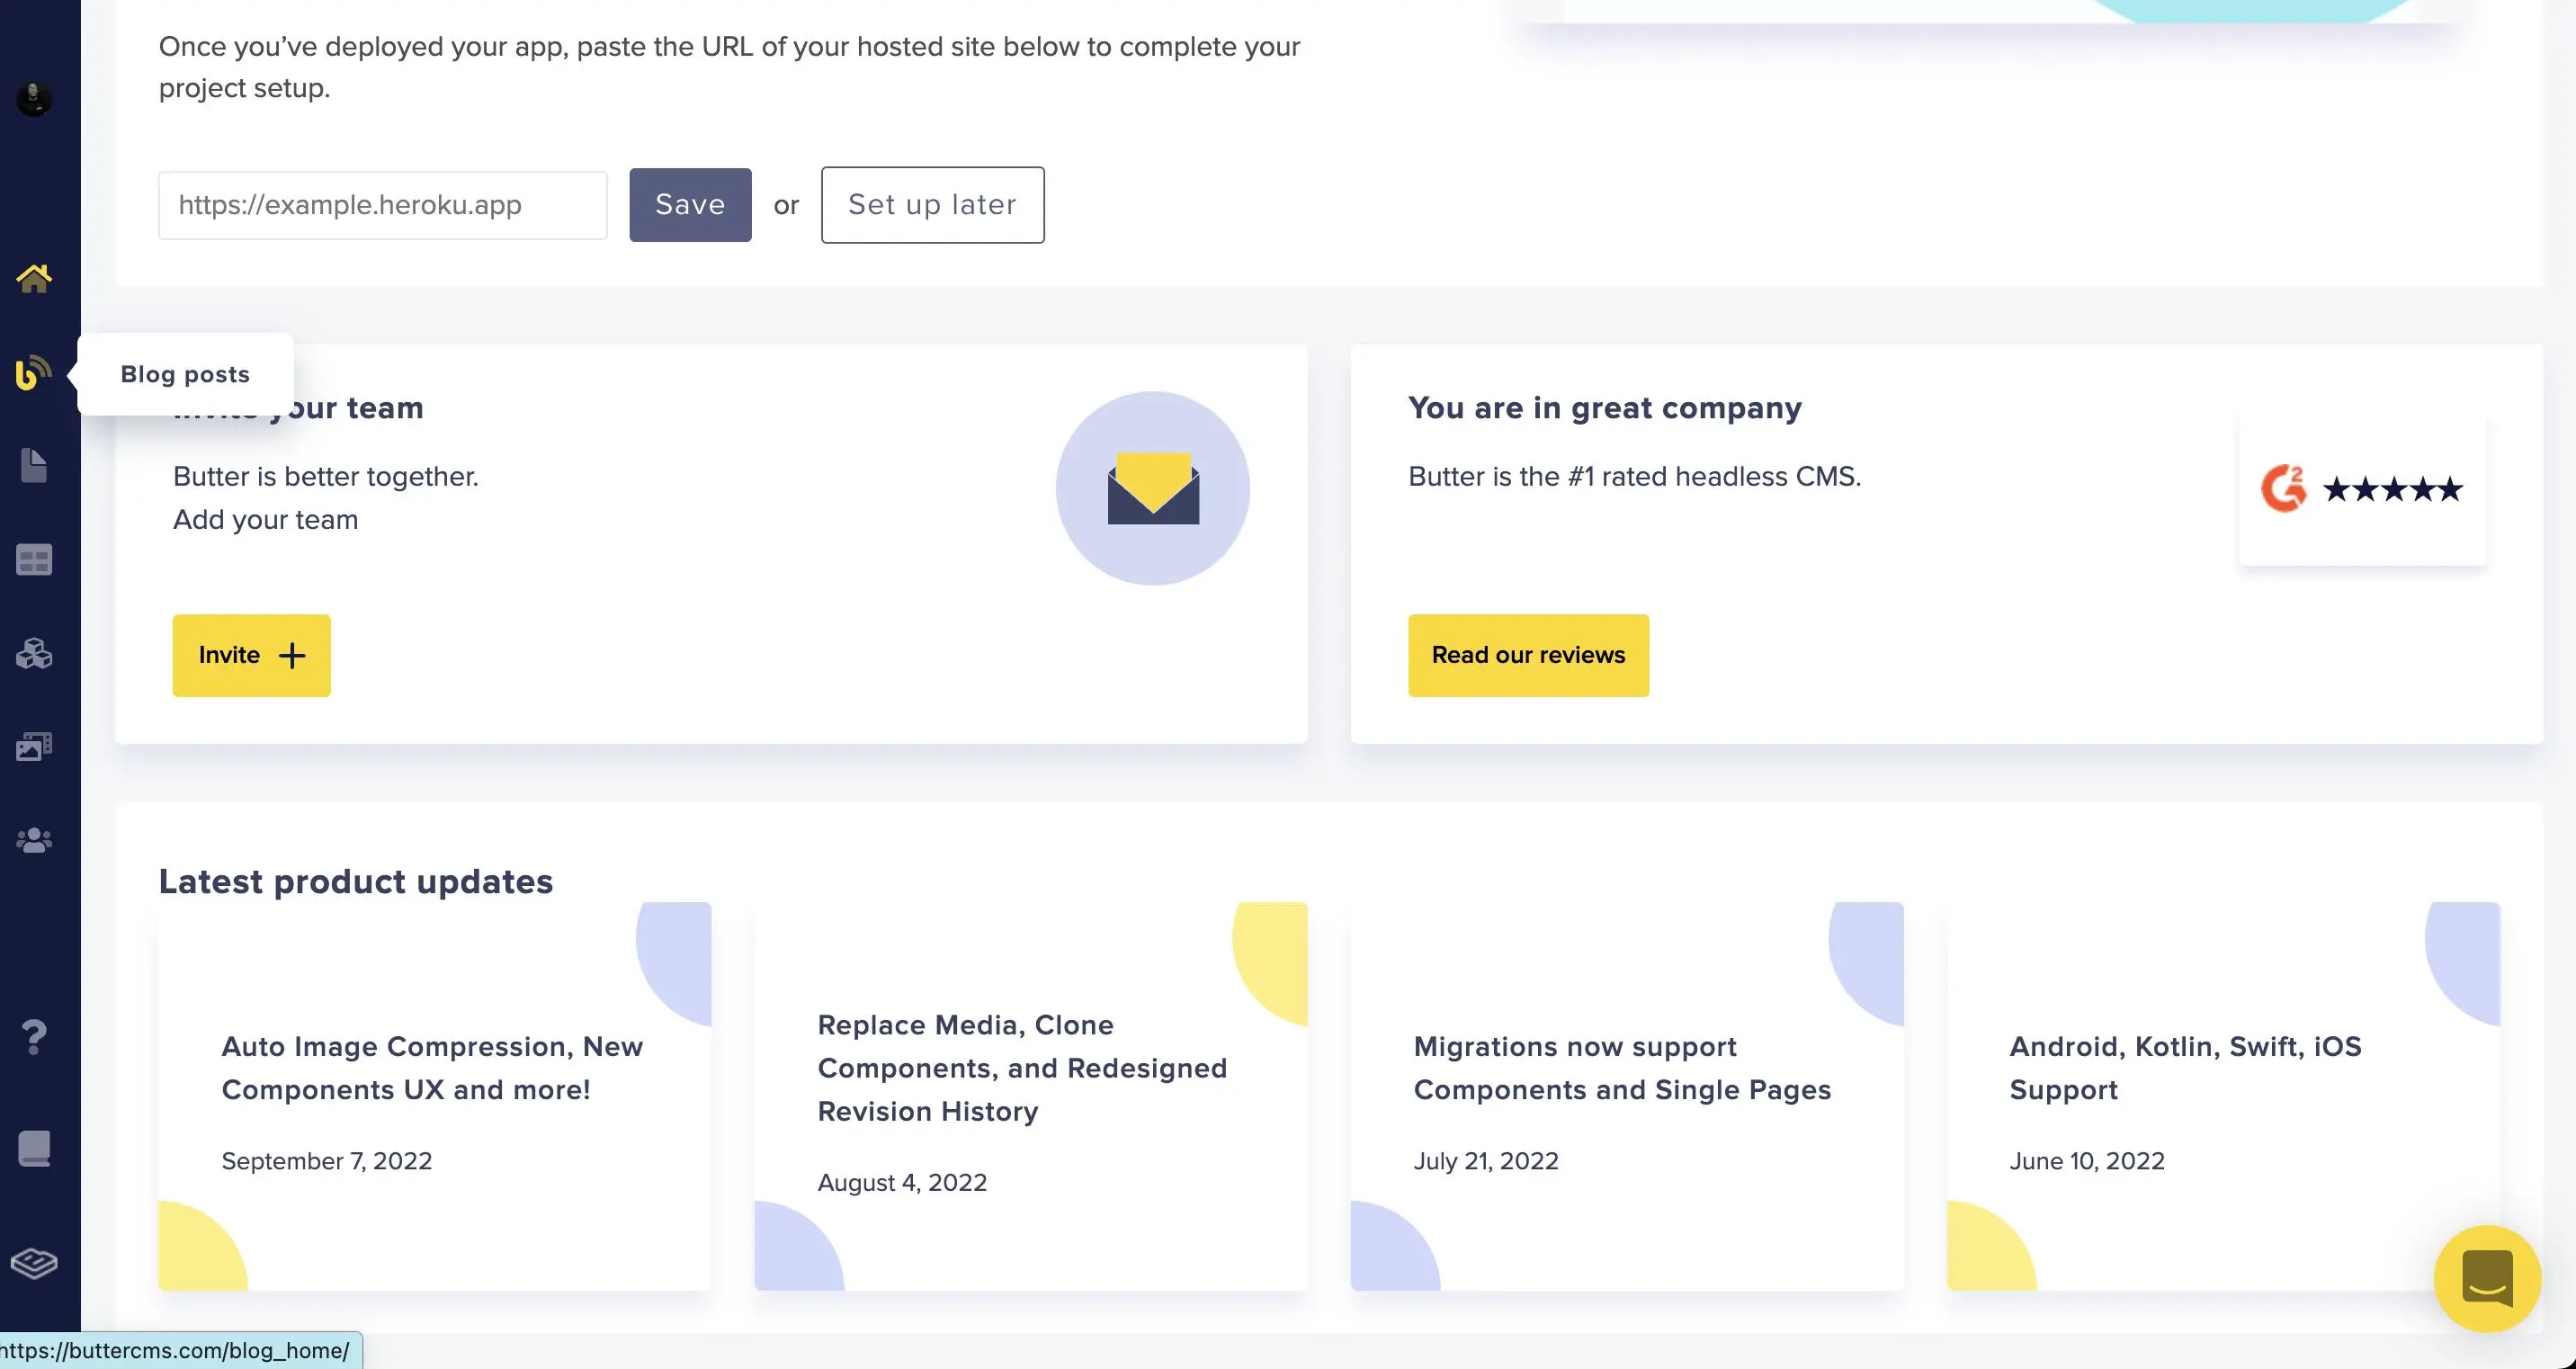
To get started building a blog with ButterCMS, you need to sign-up and create a user account. After that, log in to your dashboard on the ButterCMS website. ButterCMS comes with an impressive blog engine that integrates with your websites using a straightforward API. It has an intuitive content setup designed for creating blog posts, so there isn’t any need to create your own setup. To utilize the blog posts, go into your dashboard and select Blog posts from the left sidebar:
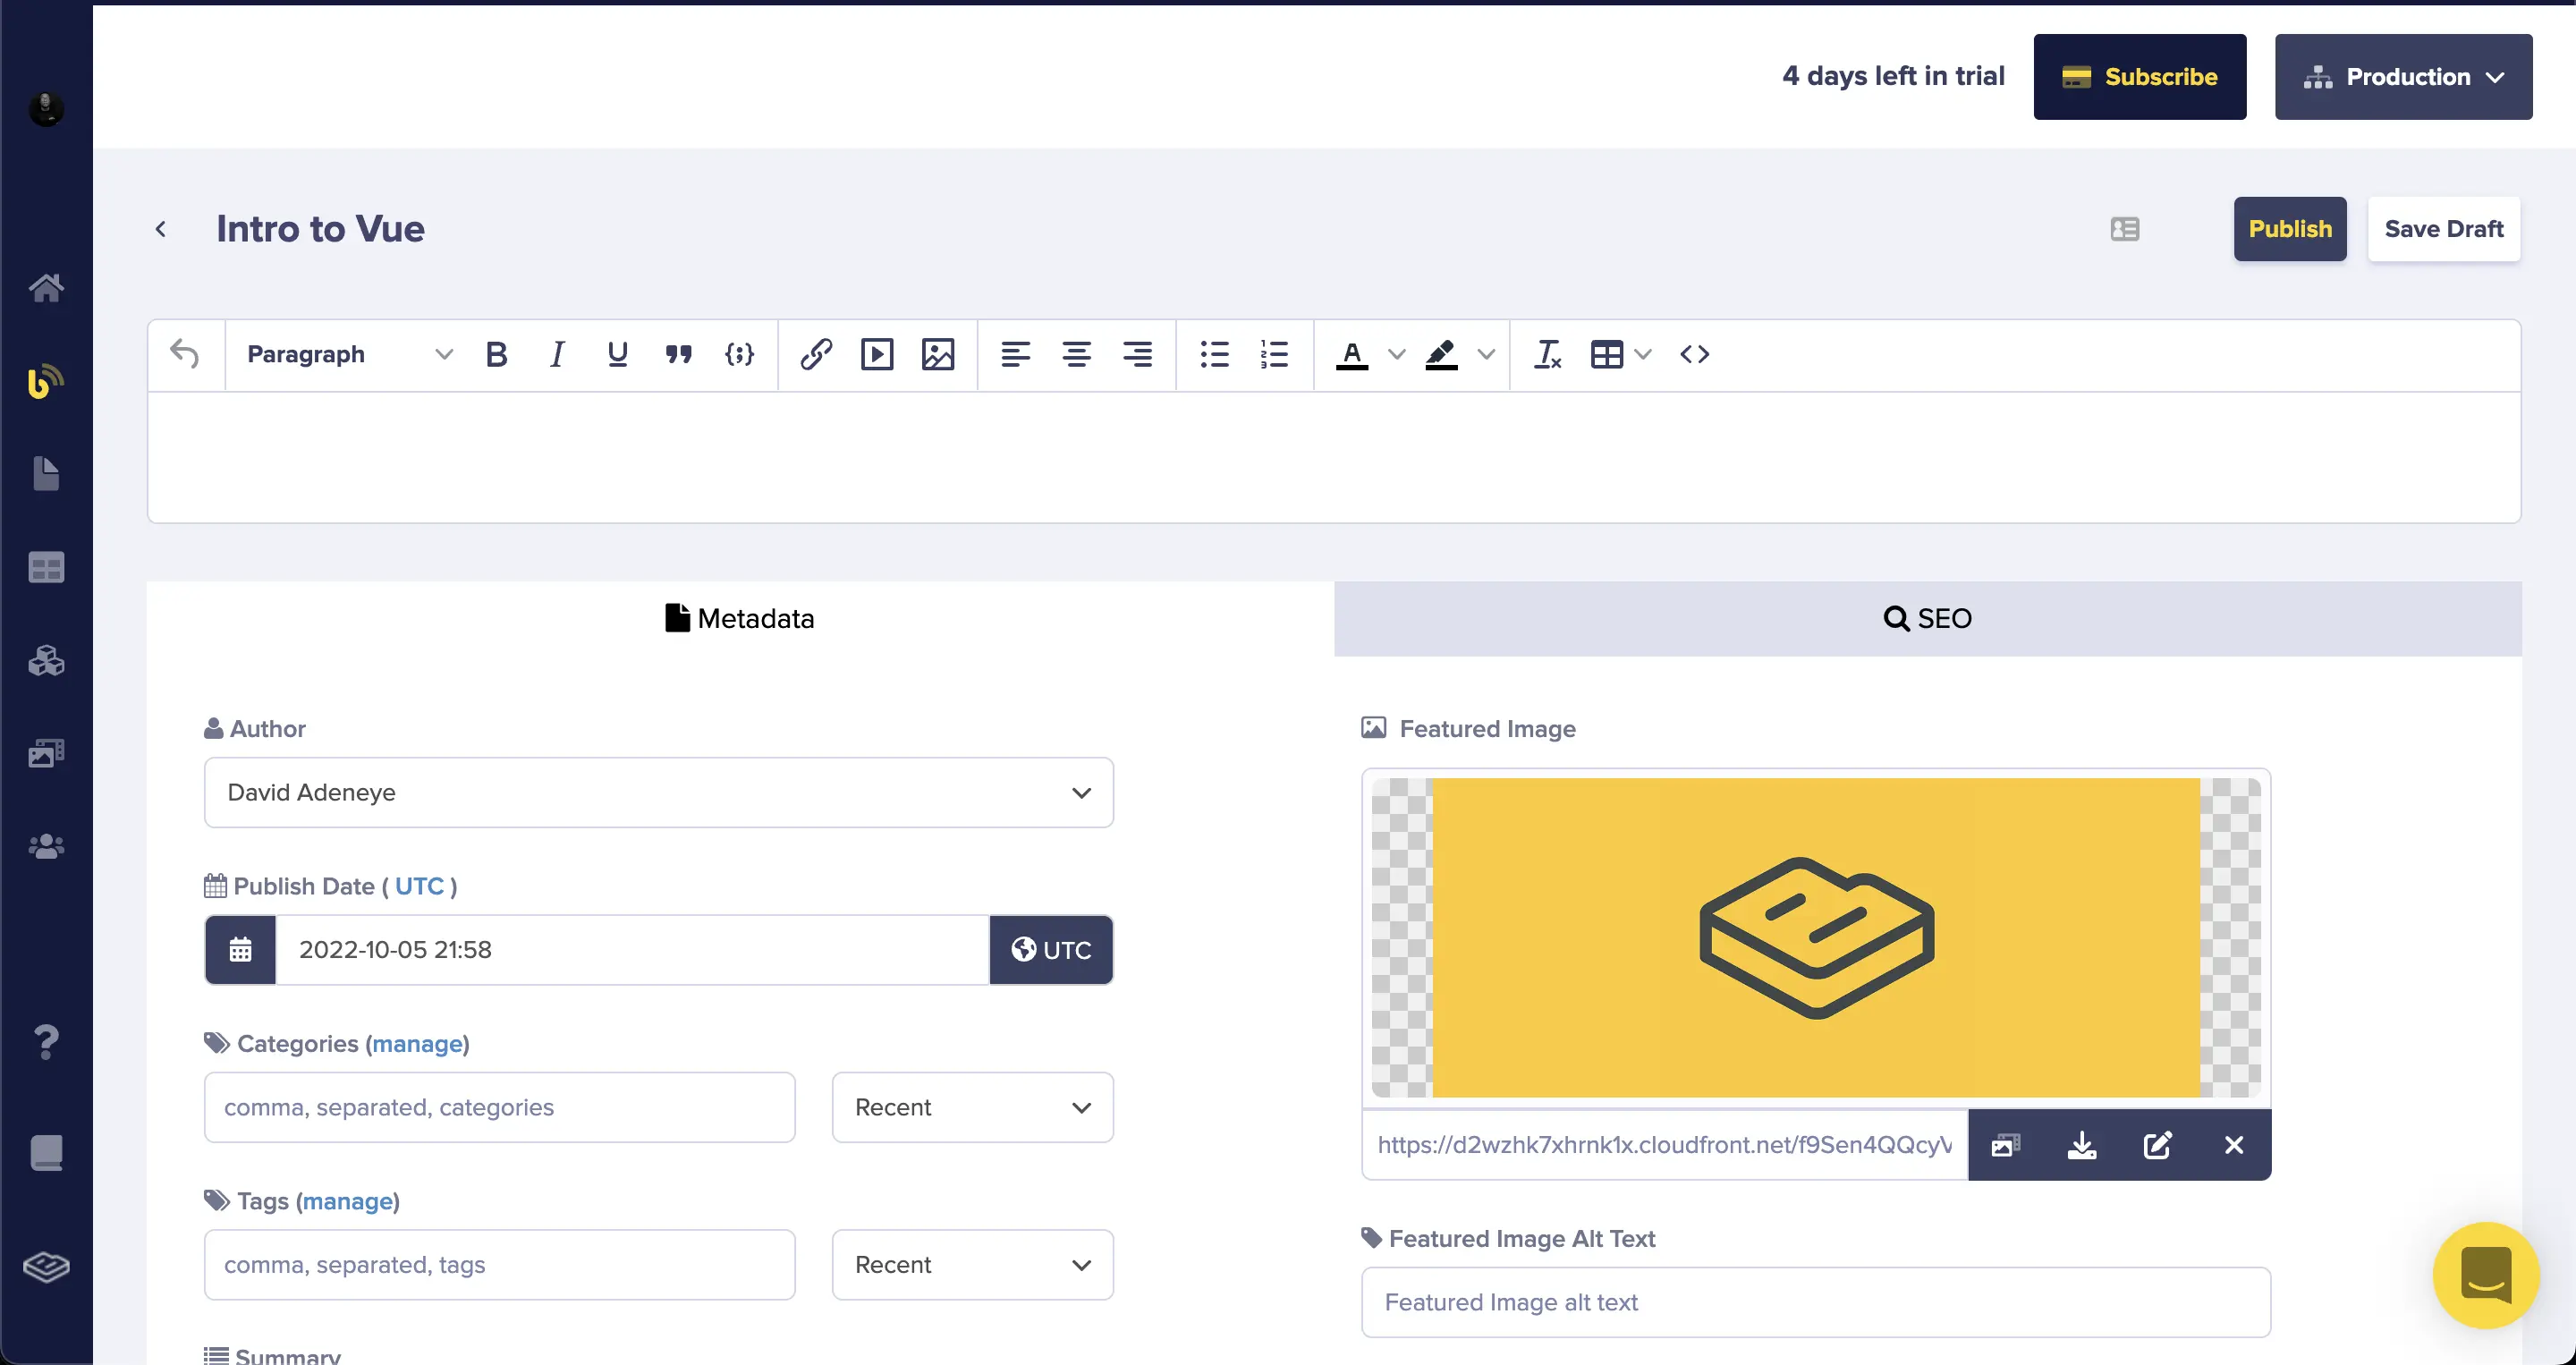
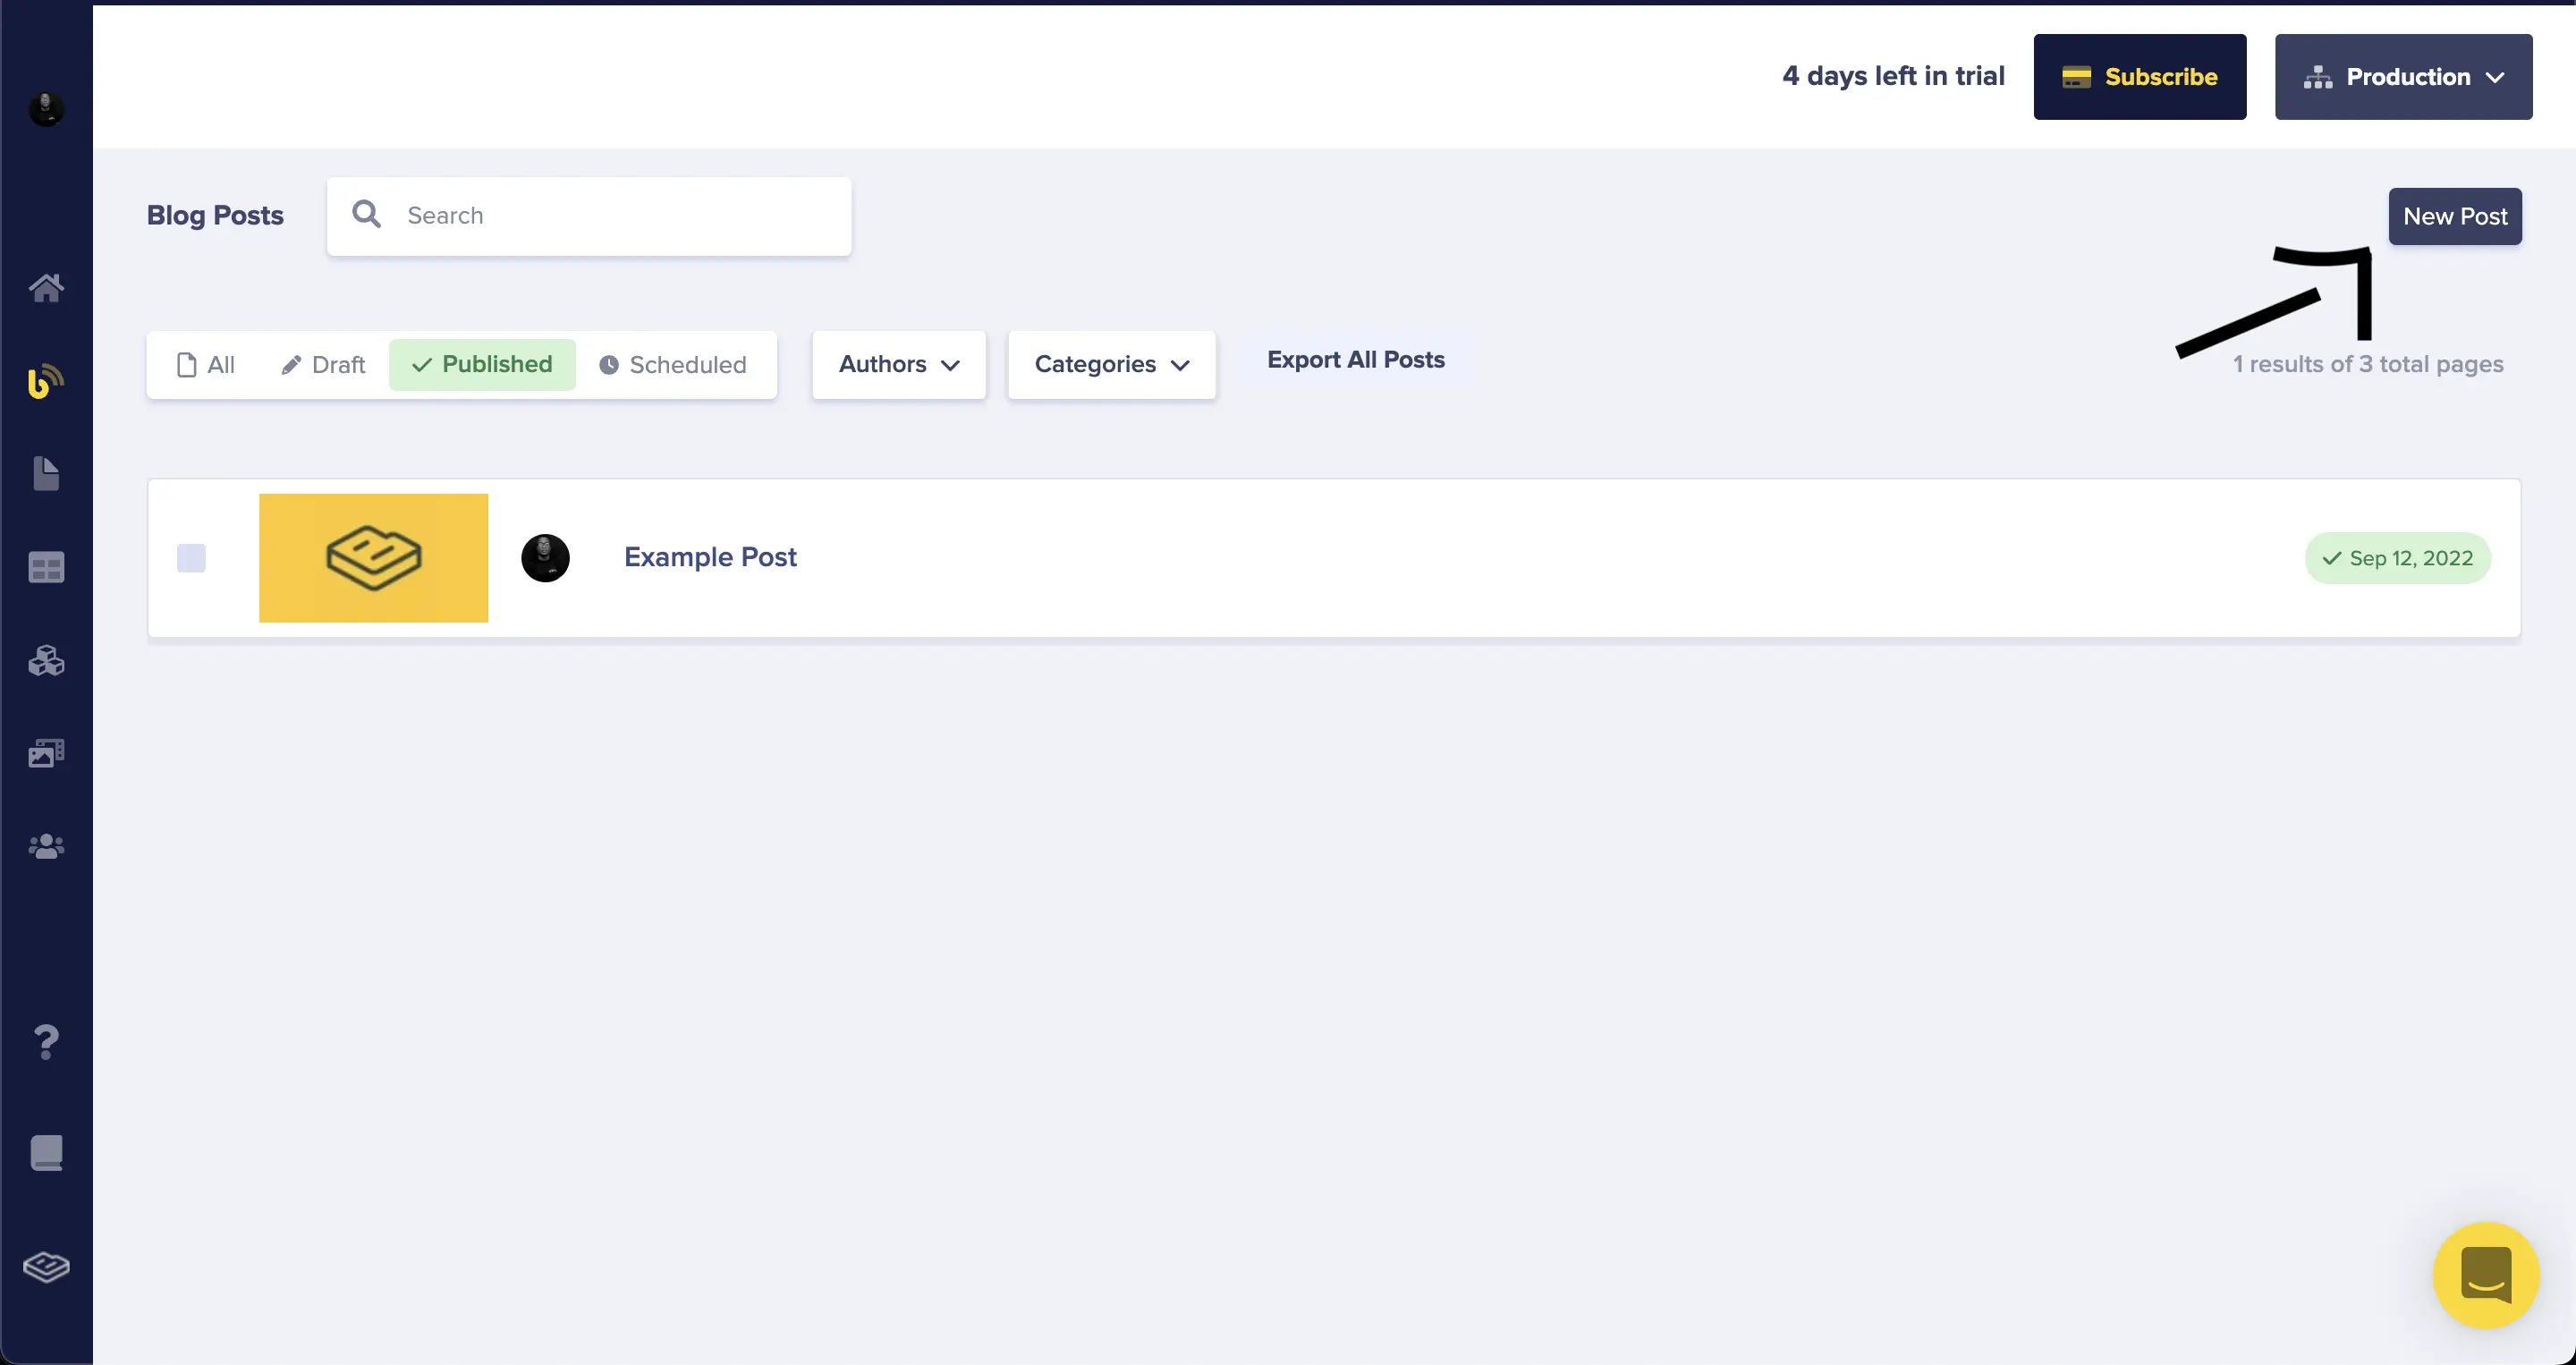
When the new page opens up, you will notice there is an example blog post already created for us. To create a new blog post, click on the New Post button at the top-right corner of the dashboard and fill out the form on the page that opens up. The blog post also comes with a WYSIWYG editor that enables you to seamlessly create content for a blog site, including inserting other media files like video and images.
Connecting ButterCMS to our JavaScript application
To connect ButterCMS to our application, you will need to save your Read API Token key as an environmental variable and read it to fetch data from the CMS. You can locate and copy it on the Settings page on your dashboard:
Create a .env file at the root of your project directory and paste the token inside it like this:
READ_API_TOKEN = "YOUR_BUTTERCMS_API-TOKEN"
Then, open the src/api.js file where we will set up our fetch operation to get data from the ButterCMS API and add the following code:
import dotenv from "dotenv";
dotenv.config();

const read_token = process.env.READ_API_TOKEN;

export const getAllBlogs = async () => {
  const res = await fetch(
    `https://api.buttercms.com/v2/posts?auth_token=${read_token}`
  );
  return (await res.json()).data;
};
In the code above, we read our token from the dotenv file and use it to interact with the API to get all available published blogs.
After that, open your index.html file and add the following code:
<!DOCTYPE html>
<html lang="en">
<head>
    <meta charset="UTF-8">
    <meta http-equiv="X-UA-Compatible" content="IE=edge">
    <meta name="viewport" content="width=device-width, initial-scale=1.0, maximum-scale=1.0, user-scalable=no">

    <!--stylesheet-->
    <link rel="stylesheet" href="css/main.css">

    <!--fonts-->
    <link rel="preconnect" href="https://fonts.googleapis.com">
    <link rel="preconnect" href="https://fonts.gstatic.com" crossorigin>
    <link href="https://fonts.googleapis.com/css2?family=Poppins:ital,wght@0,100;0,200;0,300;0,400;0,500;0,600;1,100;1,200;1,300;1,400&family=Roboto:ital,wght@0,100;0,300;0,400;0,500;1,300&display=swap" rel="stylesheet">

    <script type="module" src="js/main.js"></script>

    <title>Buttercms Blog</title>
</head>
<body>

    <section class="blog-container">
        <!--blog container-->
        <div class="blogpost-container">

        </div>


    </section>
</body>
</html>
In the header tag, we added the script file with <script type="module" src="js/main.js"></script> and also the css file with <link rel="stylesheet" href="css/main.css">.
Open css/main.css and add the following code to style our demo application:
*,
*::after,
*::before{
    margin: 0px;
    font-family: poppins;
    box-sizing: border-box;
}
a{
    text-decoration: none;
}

ul{
    list-style: none;
}

body{
    margin: 0px;
    padding: 0px;
    font-family: roboto;
}

/* BlogPost */
.container{
    display: flex;
    justify-content: center;
    align-items: center;
    flex-direction: column;
    padding: 40px;
    border-bottom: 1px solid rgba(0,0,0,0,0.05);
}

.blog-heading{
    display: flex;
    justify-content: center;
    align-items: center;
    flex-direction: column;
}

.blog-heading h3 {
    font-size: 2.5rem;
    font-weight: 600;
    color: #2e2e2e;
}

.blog-heading span {
    color: #194aa0;
}
.blogpost-container{
    display: flex;
    justify-content: center;
    align-items: center;
    margin: 20px 0px;
    flex-wrap: wrap;
}

.blogpost-box {
    width: 350px;
    background-color: #ffffff;
    border: 0.1px solid #ececec;
    margin: 20px;
}

.blogpost-img {
    width: 100%;
    height: auto;
}

.blogpost-img img {
    width: 100%;
    height: 100%;
    object-fit: cover;
    object-position: center;
}

.blogpost-text {
    padding: 20px;
    display: flex;
    flex-direction: column;
}
.blogpost-text .blogpost-title{
    font-size: 1.3rem;
    font-weight: 500;
    color: #272727;
}

.blogpost-text p {
    color: #9b9b9b;
    font-size: 0.9rem;
    display: -webkit-box;
    -webkit-line-clamp: 3;
    -webkit-box-orient: vertical;
    overflow: hidden;
    text-overflow: ellipsis;
    margin: 20px 0px;
}

.blogpost-footer {
    display: flex;
    padding: 0 0 0 20px;
    align-items: center;
    justify-content: space-between;
}
.blogpost-footer img {
    width: 30px;
    height: 30px;
    border-radius: 50%;
    object-fit: cover;
    margin-left: 0.1rem;
}

.blogpost-footer p {
    font-weight: 500;
    float: right;
    margin: 7px 0 0 7px;
    font-size: 0.8rem;
    color: #414141;
}

.blogpost-footer a {
  text-decoration: none;
  color: inherit;
}

.blogpost-footer a:hover {
   color: #f33c3c;
   transition: all ease 0.3s;
}

.blogpost-tag {
    font-size: 0.7rem;
    background: linear-gradient(to right, #dc7776, #e7bebe);
    color: #fff;
    padding: 0.3rem 0.5rem;
    border-radius: 5px;
    width: fit-content;
    text-transform: capitalize;
  }
/* Blog */
.blog-wrap {
    max-width: 700px;
    margin: 0 auto;
}

.blog-goBack {
    text-decoration: none;
    font-size: 0.8rem;
    color: #a9a9a9;
    font-weight: 500;
    margin-bottom: 2rem;
    display: block;
}

.blog-wrap header {
    text-align: center;
}

.blog-date {
    font-size: 0.8rem;
    color: #a9a9a9;
    font-weight: 500;
}

.blog-wrap img {
    width: 100%;
}

.blog-subCategory > div {
    margin: 1rem;
}
.blog-content p{
    margin-top: 1.5rem;
}

.blog-content h1, .blog-content h2, .blog-content h3, .blog-content h4, .blog-content h5, .blog-content h6 {
    margin-top: 1.5rem;
}

.blog-content img {
    margin: 10px 0;
}


.blog-tag {
    display: flex;
    justify-content: center;

  }

.blog-tag > div {
    margin: 1rem;
    font-size: 0.7rem;
    background: linear-gradient(to right, #dc7776, #e7bebe);
    color: #fff;
    padding: 0.3rem 0.5rem;
    border-radius: 5px;
    width: fit-content;
    text-transform: capitalize;
    align-items: center;
  }

@media(max-width:1250px) {
    .blogpost-box{
        width: 300px;
    }
}
@media(max-width:1100px){
    .blogpost-box {
        width: 70%;
    }
}
@media(max-width:550px){
    .blogpost-box{
        margin: 20px 10px;
        width: 100%;
    }
    .container {
        padding: 20px;
    }
}Rendering data from the ButterCMS API
Open the js/main.js file and add the following code:
import { getAllBlogs } from "./api";

const blogContainer = document.querySelector(".blogpost-container");

const fetchMainBlogPage = async () => {
  try {
    const headerMarkup = ` <div class="blog-heading">
    <h3>My Blog</h3>
    <span>Here is my space where I write different developer focused article</span>
</div>
`
const headContainer = document.querySelector(".blog-container");
headContainer.insertAdjacentHTML("afterbegin", headerMarkup);


    const blogs = await getAllBlogs();
    blogs.map((blog) => {
      const blogMarkup = `<!--blogpost-container-->
            <div class="blogpost-box" key={${blog.title}}>
                <!--img-->
                <div class="blogpost-img">
                    <img src="${blog.featured_image}" alt="Blog">
                </div>

                <!--blogpost text-->
                <div class="blogpost-text">
                    <span class="blogpost-tag">${blog.tags[0].name}</span>
                    <a href="/blog/${blog.slug}" class="blogpost-title">${blog.title}</a>
                    <p>${blog.summary}</p>
                </div>

                <div class="blogpost-footer">
                    <div>
                        <img src="${blog.author.profile_image}" alt="avatar">
                        <p class="blogpost-name">${
                          blog.author.first_name + " " + blog.author.last_name
                        }</p>
                    </div>
                    <a class="blogpost-link" href="/blog/${blog.slug}">→</a>
                </div>
            </div>`;
      blogContainer.insertAdjacentHTML("afterbegin", blogMarkup);
    });
  } catch (error) {
    alert(error);
  }
};

fetchMainBlogPage();
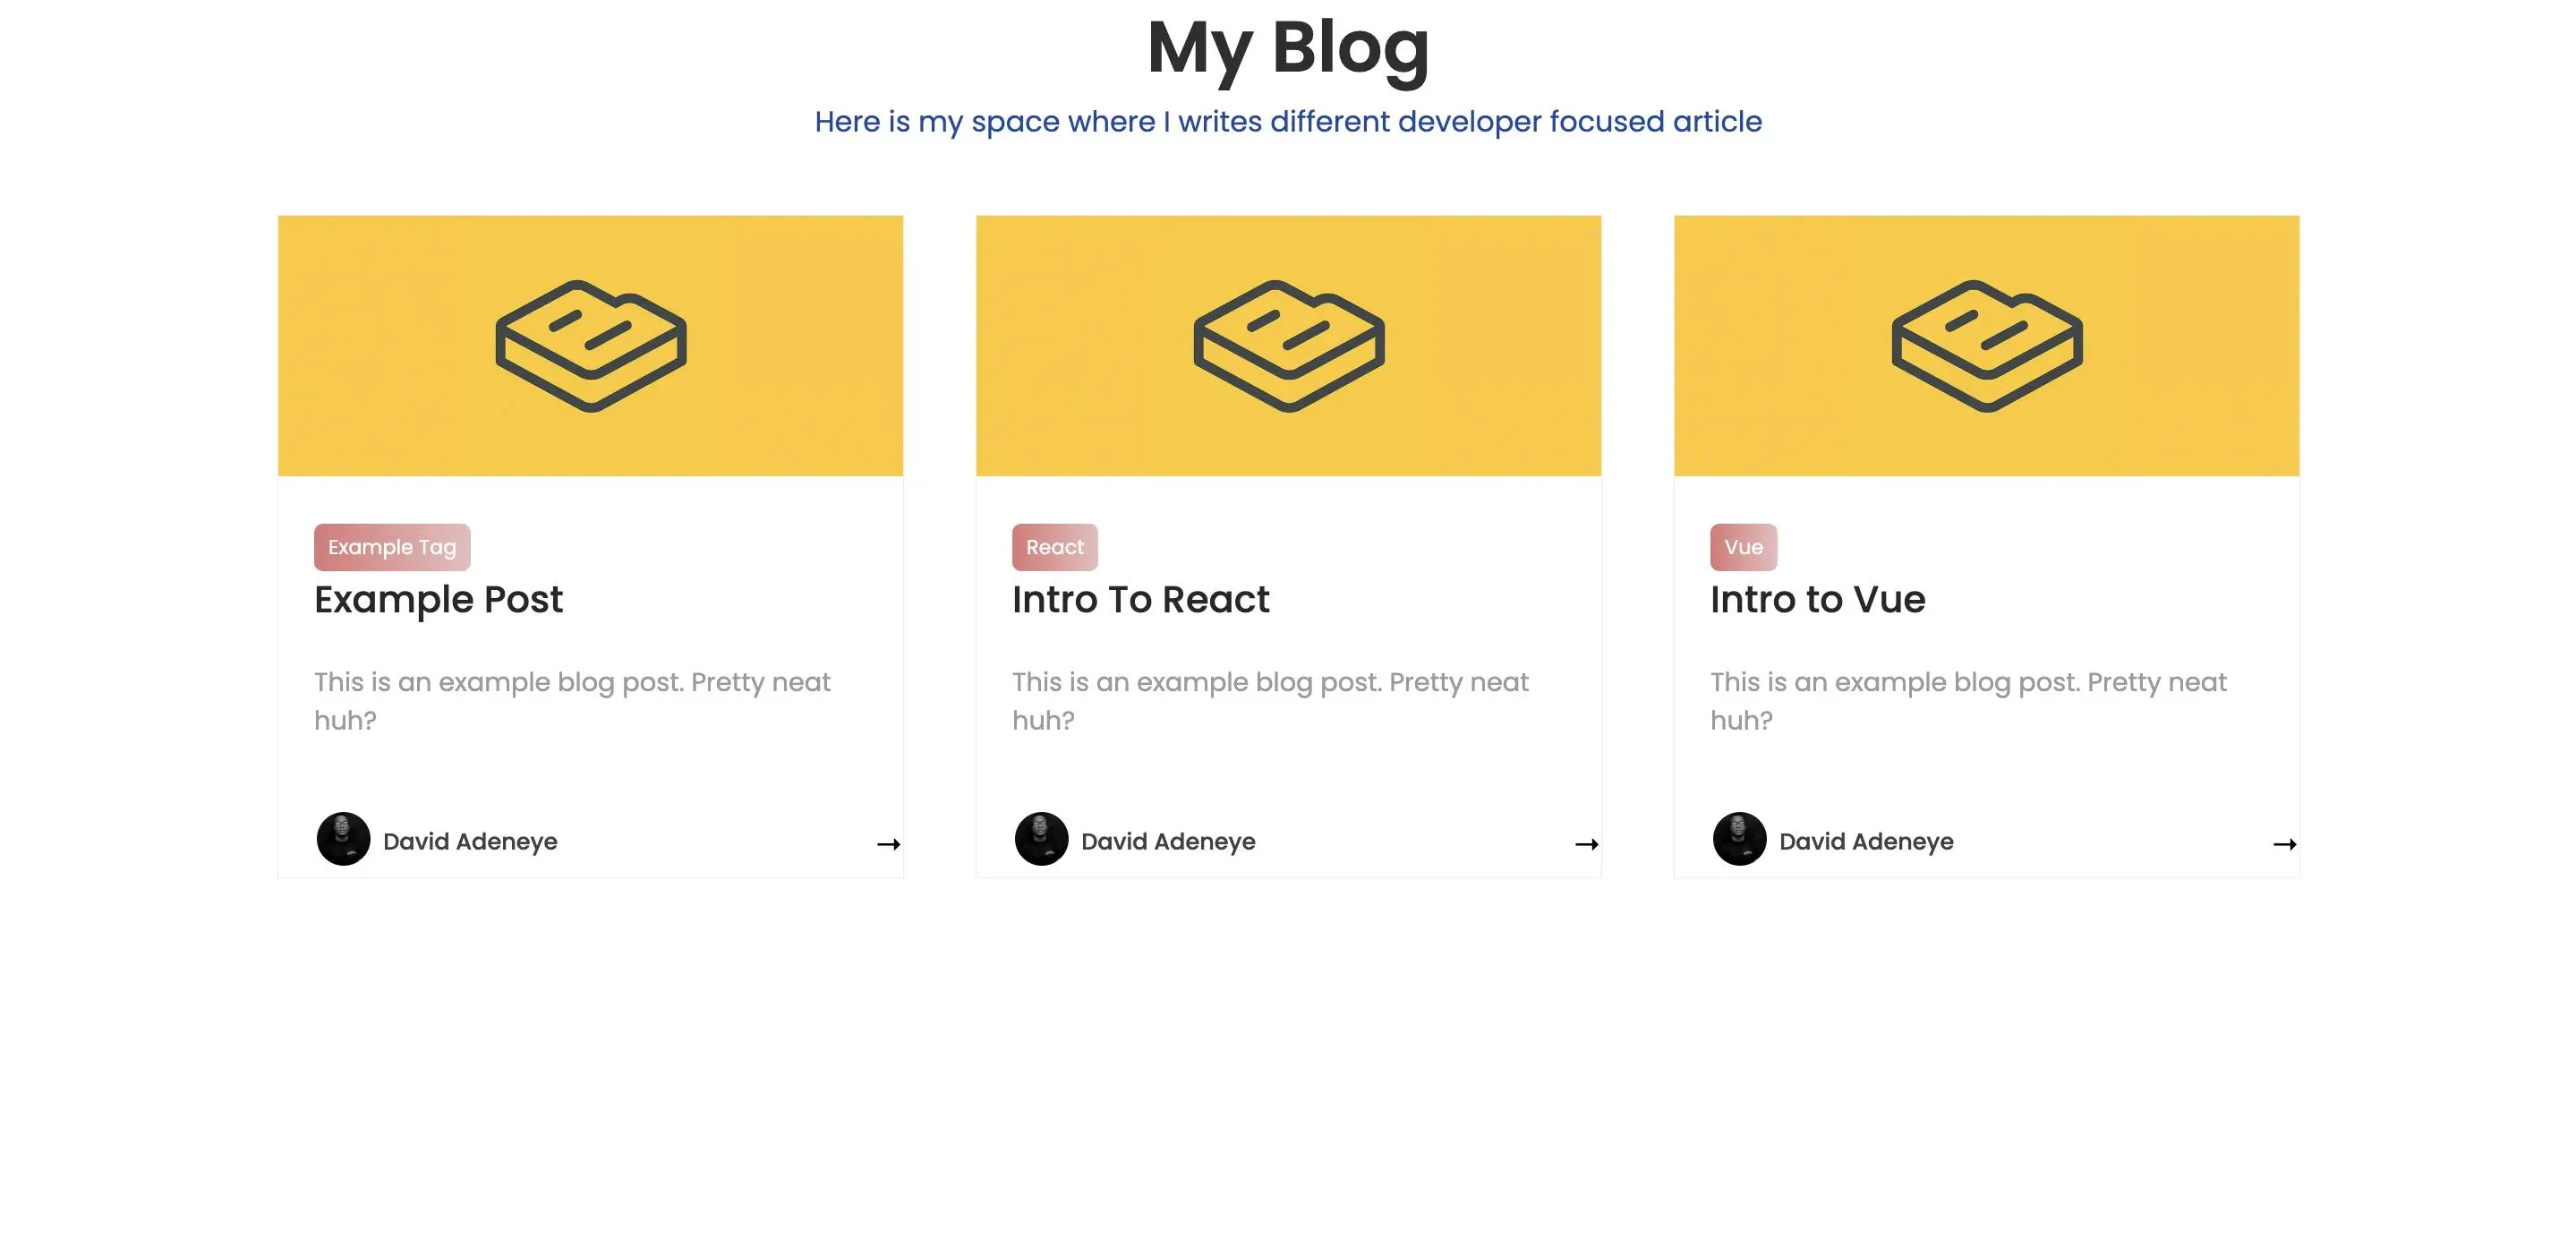
The fetchMainBlogPage() function will fetch all the published blog posts from our ButterCMS blog API and render them on the main page. You can choose the type of blog post content attributes you want to render in the response data from the API.
You can add more blog posts by clicking the New Post button on the dashboard:
After inserting all your blog post details, click on the Publish button at the top-right corner of the dashboard to publish your post.
Now, if you run the command `npm start in the CLI, you will get a result similar to the image below:
To view the blog content through the arrow link at the bottom right of the blog post container or via the blog post title, we will need to create dynamic routing. To do that, open js/main.js and update it with the following code below:
const fetchABlogPage = async () => {
  try {
    const url = window.location.pathname;

    const blogs = await getAllBlogs();

    const blog = blogs.find((blog) => {
      const parts = url.split("/");
      return blog.slug === parts[parts.length - 1];
    });

    const blogMarkup = `<div class="blog-container">
        <span class="blog-goBack"><a href="/">Go back</a></span>
    <div class="blog-wrap">
        <header>
            <p class="blog-date">Published ${blog.created}</p>
            <h1>${blog.title}</h1>
            <div class="blog-tag">
                <div>${blog.tags[0].name}</div>
            </div>
        </header>
        <img src=${blog.featured_image} alt="cover" />
        <div class="blog-content" dangerouslySetInnerHTML={{__html:${blog.body}}}></div>
    </div>
</div>`;

blogContainer.insertAdjacentHTML("afterbegin", blogMarkup);
  } catch (error) {
    alert(error);
  }
};

// This is a custom routing system.
const url = window.location.pathname;
const slugs = url.split("/");
if (slugs.includes("blog")) {
  fetchABlogPage();
} else {
  // localhost:1234
  fetchMainBlogPage();
}
We utilized the window.location.pathname function that returns the path and filename of the current page. So if the slug of the current page includes “blog”, it should fetch the blog page; else, it should fetch the main blog posts page:
// This is a custom routing system.
const url = window.location.pathname;
const slugs = url.split("/");
if (slugs.includes("blog")) {
  fetchABlogPage();
} else {
  // localhost:1234
  fetchMainBlogPage();
}
This is just a basic custom routing system for our demo app. You can also change the blog markup to suit the type of content you want to render on the page.
Now, if you click the arrow link or the blog post's title, it will load the blog content page of the selected blog post:
The WYSIWYG editor provided by ButterCMS returns its content in the form of HTML. You can configure your markup rendering to suit how you want to display your blog and add other related blog content features like on-site search or pagination.
This is the link to the GitHub repository for this tutorial.
Closing thoughts
In this article, we have learned how to build a demo blog with vanilla JavaScript and ButterCMS. We also learned how to set up and configure the JavaScript development environment with ButterCMS. Also, we demonstrated how to fetch data from the CMS and display it in our application.
You can build on the knowledge you gained from this tutorial by adding additional features such as on-site search or pagination. I can’t wait to see what you would like to build with vanilla JavaScript and ButterCMS!

