
For the last two and a half decades, blogging has been a staple for brands and individuals who want to maintain consistent communication with their audiences. And to this day blogging has remained an incredible platform for sharing information and ideas that can improve the lives of readers, thereby becoming an essential part of the web.
For businesses, blogs serve as a crucial tool for keeping customers informed on product offerings, new features, and other important information. By creating compelling content, businesses can build strong relationships with their customers, increase brand awareness, and boost customer loyalty. But blogs are not limited to business purposes alone; they are also effective tools for sharing information on topics such as safety, health, personal growth, etc.
Moreover, the beauty of blogs lies in their ability to provide a platform for anyone to express themselves and share their experiences and opinions with the world. This has given rise to a vast and diverse blogging community covering a wide range of topics, from travel and food to politics and current events. By creating and sharing content on their blog, bloggers can connect with people around the world, influence opinions, and make a positive impact on society.
In this tutorial, you will discover how to seamlessly integrate the ButterCMS Blog Engine into your Java application, enabling you to create and customize your own blog with ease. You will gain insights into Java and ButterCMS and learn how to leverage these tools to build your blog from scratch.
Next, you will learn more about why you should use the Java programming language and ButterCMS to build your blog.
Table of contents
Why use Java?
Java is a versatile, high-level programming language that offers numerous benefits for building applications such as blog sites, mobile apps, and much more. Here are some compelling reasons to consider using Java for your blog development:
-
Security: Java has an exceptional security model that helps protect against all sorts of security threats, such as viruses, malware, and unauthorized access. It's like a fortress, guarding your system against all sorts of attacks, and ensuring that your data remains safe and secure. With Java's robust security features such as garbage collection, cryptography, bytecode verification, and more, users can rest easy knowing that their systems are safeguarded against potential harm.
-
Large developer community and support: The active and sizable Java developer community provides invaluable support and resources to developers. It serves as a rich source of libraries, frameworks, and other essential tools that are critical in creating top-notch applications. Thanks to this community, developers can achieve remarkable feats and take their development skills to new levels. Overall, the Java developer community is an asset that greatly enhances the development process for Java programmers.
-
Versatility: Java is a versatile programming language that can be used to build a wide range of applications, including platforms for payment processing, enterprise-level software, mobile apps, blogs, and web applications. Due to its JVM (Java Virtual Machine), applications built with Java can run on several varieties of devices.
-
Object-oriented programming: Java is an object-oriented programming language, which means that it allows developers to create modular and reusable code. It simplifies development, reduces bugs, improves maintenance, encourages code reuse, and promotes best practices, which streamlines the development process and improves the quality of the final application.
-
Scalability: Java's scalability features can help developers build blog applications that can handle high traffic demands and scale with the growth of the application. By leveraging Java's platform independence, automatic memory management, multi-threading, and extensive libraries and frameworks, developers can build robust, scalable, and efficient blog applications.

Why use ButterCMS?
ButterCMS is a headless content management system (CMS) that offers an array of advanced features and benefits for businesses and developers seeking to transform their content management processes. With ButterCMS, you can enjoy a variety of benefits, including ease of use, flexibility, security, and enhanced content availability.
Furthermore, ButterCMS boasts an impressive Blog Engine, making it a particularly intriguing choice for those seeking to establish a robust and dynamic blog presence.
The ButterCMS blog engine
The Blog Engine allows businesses to create and manage their website's blog posts. It provides a user-friendly interface that lets users write and publish blog posts, manage SEO settings, and create page content without requiring any technical knowledge.
It offers features such as:
-
A robust WYSIWYG editor: ButterCMS offers a robust WYSIWYG (What You See Is What You Get) editor that facilitates the creation and editing of blog content. The editor has a plethora of modern features that are tailored to meet the diverse content needs of bloggers. Regardless of whether one is a novice or an experienced blogger, ButterCMS's WYSIWYG editor provides an intuitive, user-friendly interface that streamlines content creation, editing, and refinement.
-
Tag and category fields: Blogs can be categorized using the blog engine's tags and category fields. This is crucial for bloggers and blog readers when looking for information or conducting research.
-
Content review: This feature allows blog post authors to draft their content in the blog engine and submit it for approval before publication. This feature is essential for individual bloggers and blogging companies because it allows a third party to review content before it goes live, allowing them to deliver high-quality work.
-
Built-in SEO optimization: ButterCMS provides built-in SEO optimization tools to help you optimize your blog posts for search engines.
Tutorial prerequisites
To build a blog application with Java, you would typically need to have a good understanding of the Java programming language and web development concepts. Some prerequisites for building a web Java application include:
-
Knowledge of the Java programming language and its core concepts.
-
An understanding of web development technologies such as HTML, CSS, and a little bit of JavaScript.
-
Knowledge of Java web frameworks such as Spring Boot and Thymeleaf.
-
Having IntelliJ IDEA, Java JDK version 17, and Gradle installed.
-
An account with ButterCMS.
-
Experience with integrated development environments (IDEs) such as IntelliJ IDEA, which can enhance and streamline the development process.
-
A CLI terminal.
All the source code for this tutorial can be found in this GitHub repository.
Setting up your project
For this project, you’ll be using the Spring Boot framework, Gradle as the build tool to manage our dependencies, and Thymeleaf to serve as the template engine. To get started, we'll use Spring Initializr to create and download our project.
To continue, visit the Spring Initializr website.
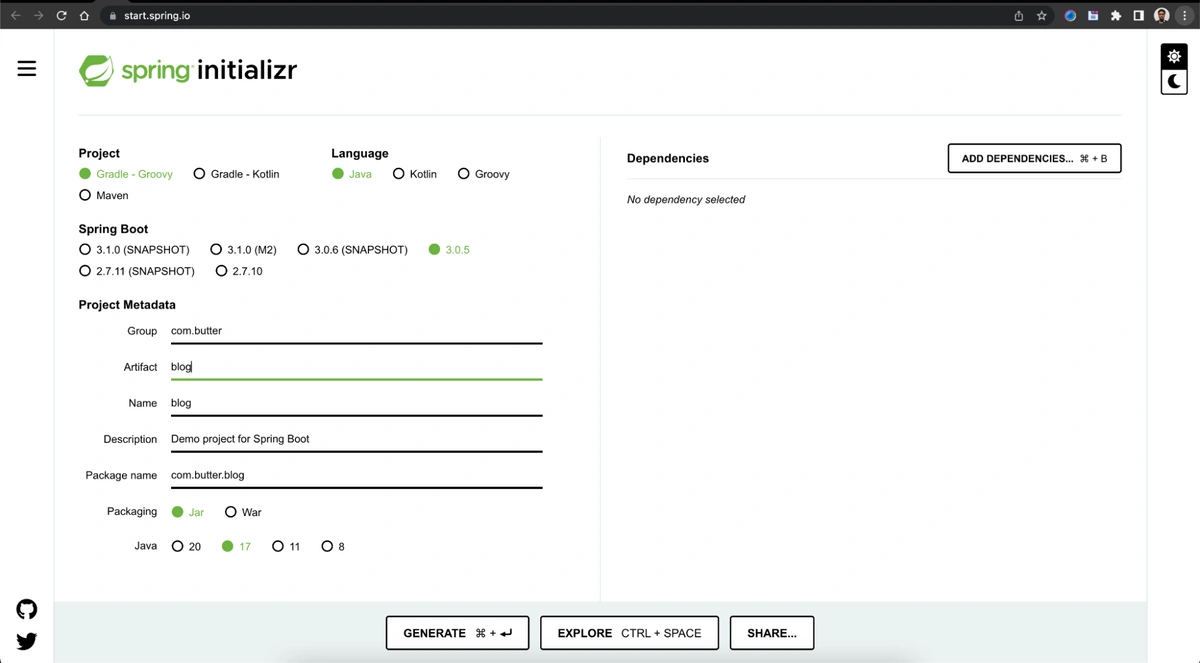
A screenshot showing the Spring Initializr’s interface
Before proceeding, ensure that you have selected the following configurations:
-
In the Project section, select Gradle - Groovy.
-
Under Languages, choose Java.
-
For Spring Boot, select version 3.0.2.
-
For Project Metadata, enter the following information:
-
Group: com.butter
-
Artifact: blog
-
Packaging: Jar
-
Java: 17
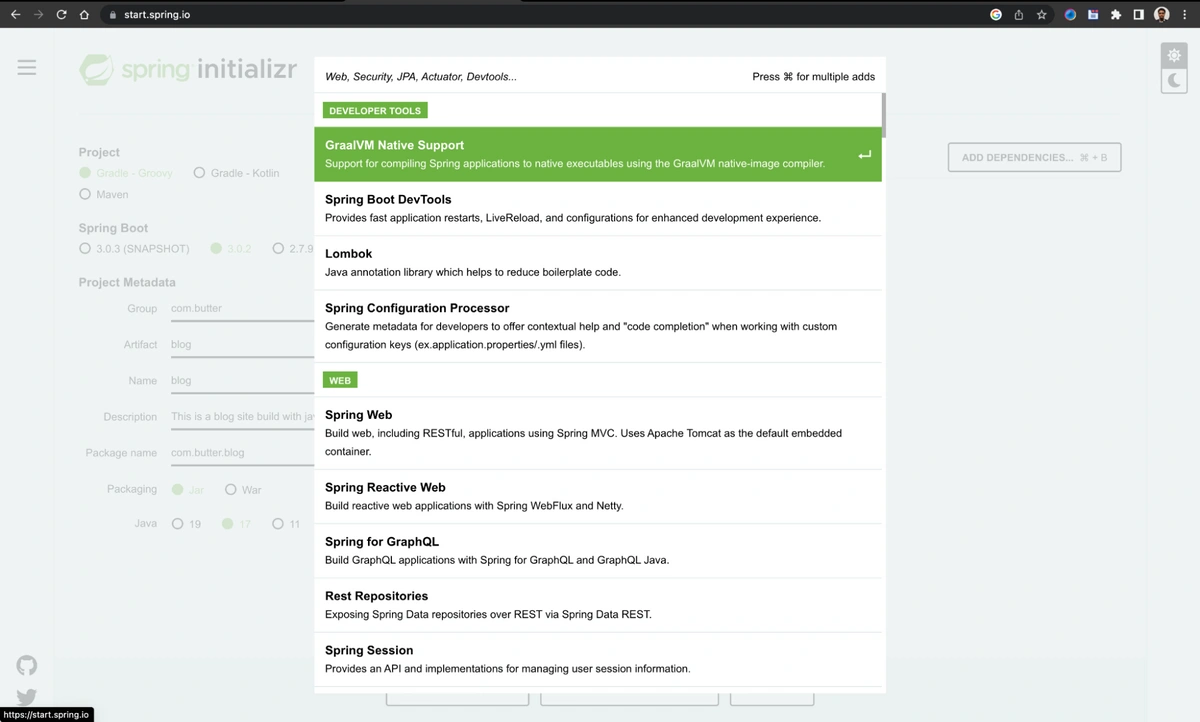
Next, in the Dependencies section, click on the Add Dependencies button to add any necessary dependencies for your project.
A screenshot showing the list of dependencies that can be added to our project
After accessing the dependencies section and clicking on the Add Dependencies button, you will need to select the following dependencies for your project:
-
Spring Boot DevTools: This can be found by searching for "Spring Boot DevTools" and selecting it from the results.
-
Spring Web: Similarly, search for "Spring Web" and add it to your project.
-
Thymeleaf: Search for "Thymeleaf" and add it as a dependency to your project.
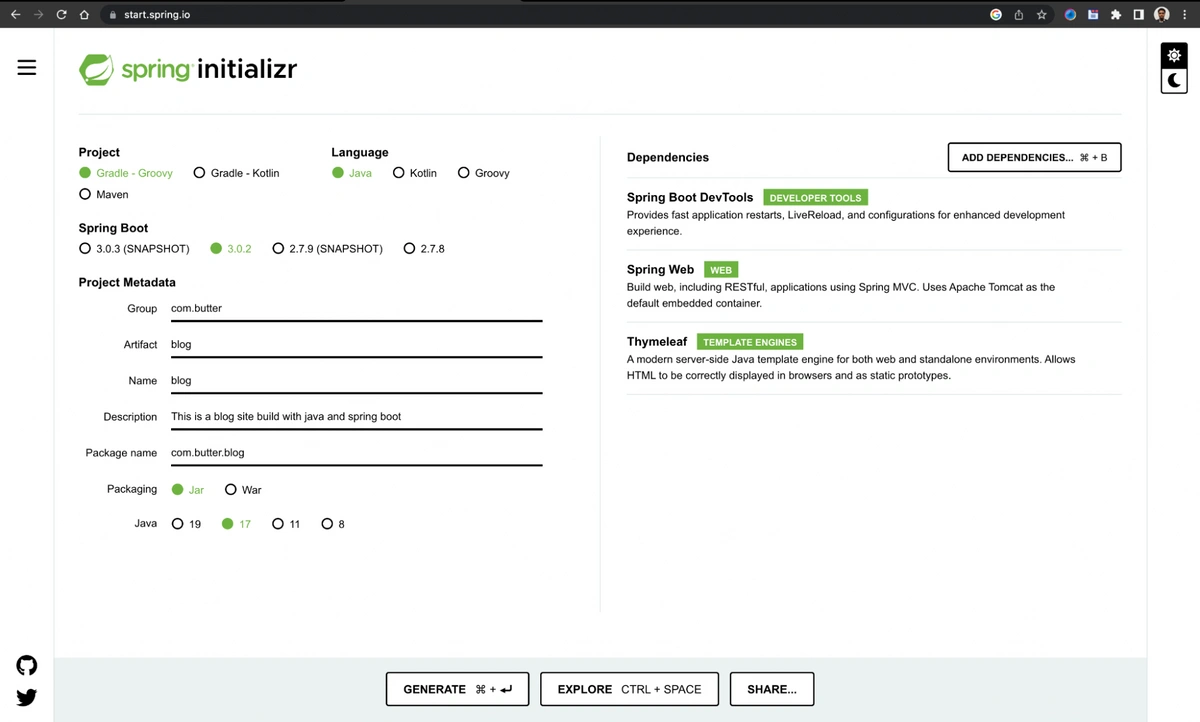
A screenshot showing the list of dependencies that were selected
After clicking on the Generate button, a zipped project folder will be downloaded to your computer. To access the project, you will need to extract the folder and save it to the directory where you store your projects.
Installing the ButterCMS Java SDK
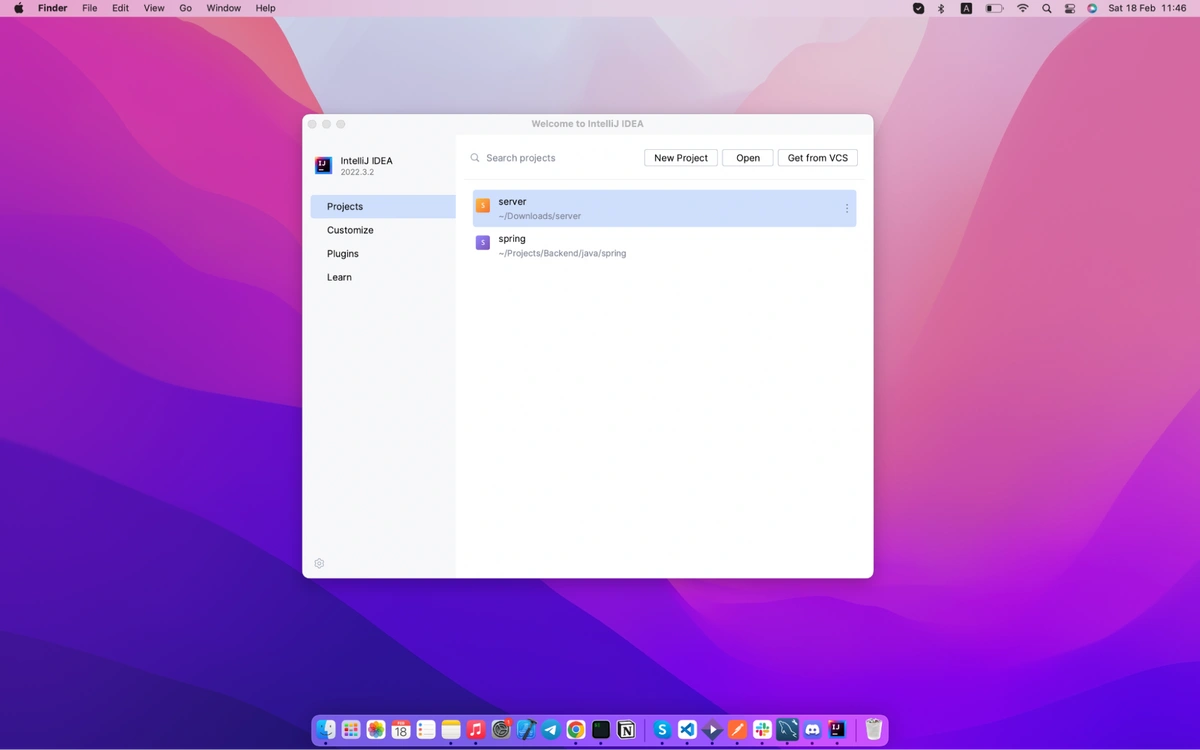
To launch the IntelliJ IDE and open the project, first open the IDE and select Open from the welcome screen or from the File menu. Then, navigate to the extracted project folder and select it. Finally, click the Open button to open the project in the IDE.
A screenshot of the IntelliJ IDE's interface for opening a project
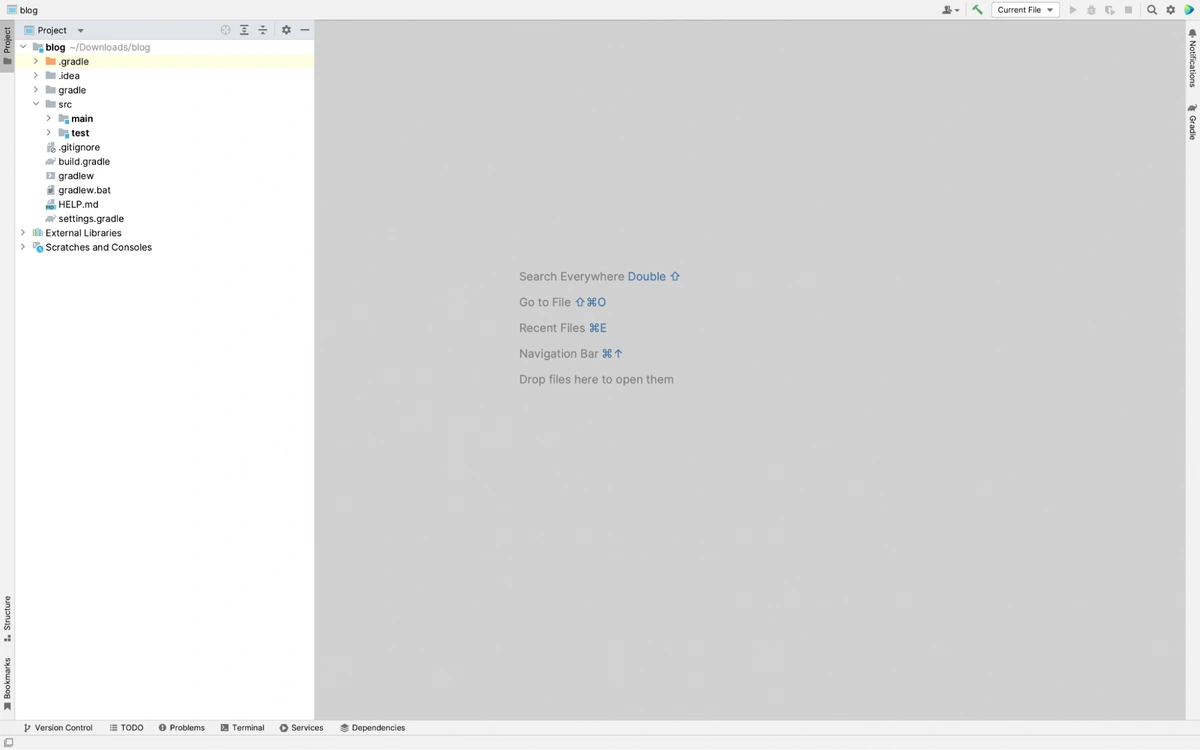
A screenshot showing the project opened on the IntelliJ IDEA IDE
Then, double-click on the build.gradle file in the Project tab to open it and add the following:
implementation 'com.buttercms:buttercmsclient:1.11'
A screenshot showing the opened build.gradle file and the added ButterCMS dependency
Then, you can use the following command in your terminal in the project directory to install the dependencies:
./gradlew buildOpen the IDE's terminal by clicking on the Terminal button at the bottom of the IDE’s window. The command line interface (CLI) will open in the project directory.
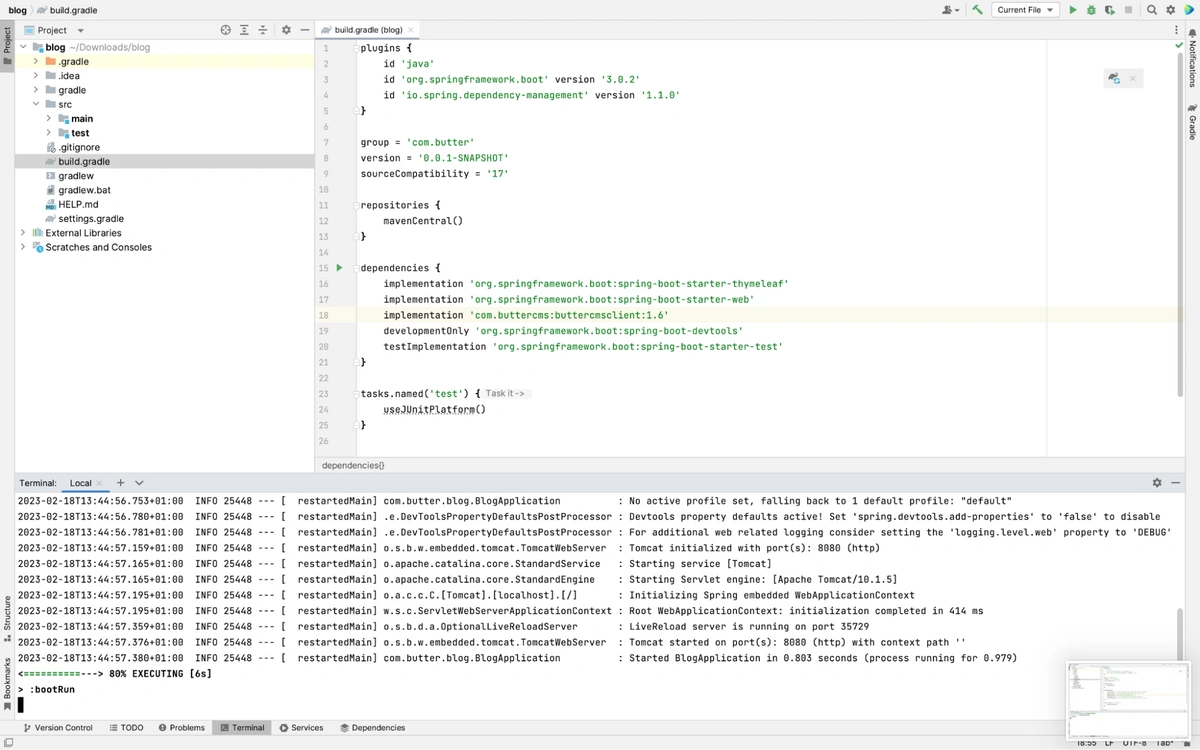
A screenshot showing the terminal with the command being executed
Once it successfully executes the command, you can proceed.
If you encounter an error, navigate to src/test/java/com.butter.blog, open the BlogApplicationTests.java class file, and then delete the following:
@Test
void contextLoads() {
}
After that is done, re-run the previous command. This will ensure there are no errors during the testing phase triggered by the build command.
Getting the ButterCMS key
ButterCMS offers two types of tokens: read tokens and write tokens. For this tutorial, you'll be using the read token to perform your operations.
To retrieve your read token, you'll need to log in to your ButterCMS account and follow these steps:
-
Log in to your ButterCMS account.
-
Click on the user icon, which can be found at the top-left corner of the screen.
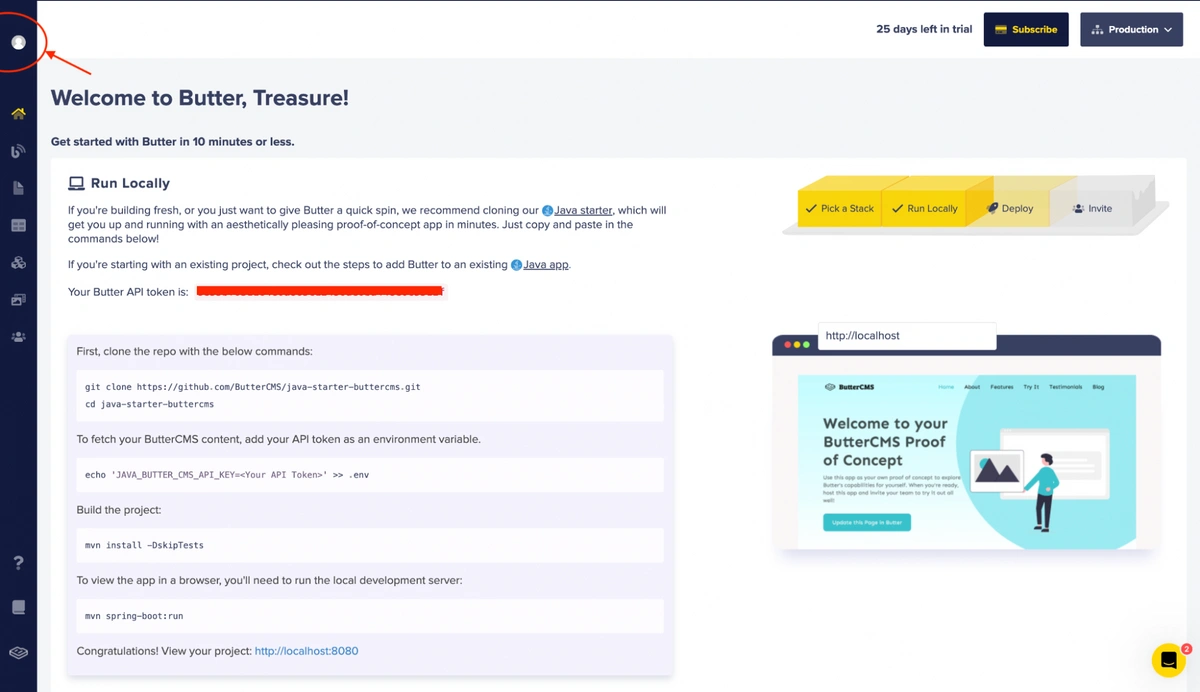
A screenshot showing the user icon
-
You’ll see a list of your API keys, including your read token. If you haven't already created a read token, you can do so by clicking on the Create Read Key button.
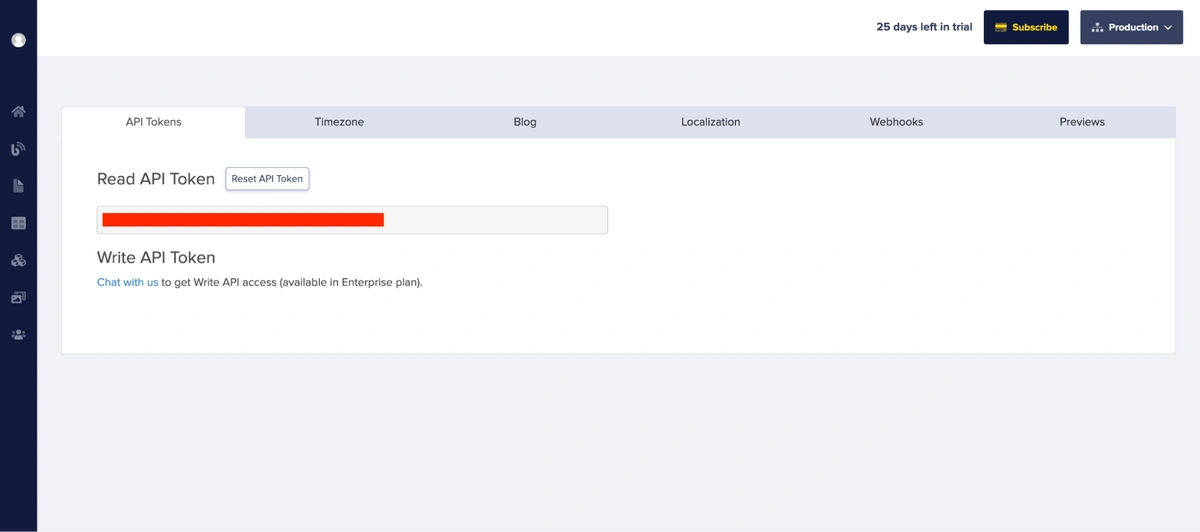
A screenshot showing the read token
Adding your environment variables
To secure the environmental variables for your application, you need to take a few steps. First, it's important to add the io.github.cdimascio:dotenv-java:2.2.0 dependency. You can do this by following these steps:
-
Open your project's build file, i.e., build.gradle.
-
Add the following line to the dependencies section:
implementation 'io.github.cdimascio:dotenv-java:2.2.0'-
Save the file.
-
Run the ./gradlew build command to install
By including this dependency, you will be able to load environment variables from a .env file using the dotenv library. This is a safer way to store sensitive data like API keys, passwords, and other credentials, as it allows you to keep these values separate from your code and version control.
Then, in your project's root directory, create a .env file and add the ButterCMS key. Add the read token from ButterCMS:
BUTTERKEY=xxxxxxxxxxxxxxxxxxxx
Now that you are done setting up the environment variables, you can move on to building the project.
Building your Java application
To proceed, it's important to ensure that your folder structure matches the one shown below. This will help ensure that you can follow the steps in the tutorial without running into any issues. Here's the recommended folder structure:
└── blog/
    ├── HELP.md
    ├── build
    ├── build.gradle
    ├── gradle/
    │   └── wrapper
    ├── gradlew
    ├── gradlew.bat
    ├── settings.gradle
    └── src/
        ├── main/
        │   ├── java/
        │   │   └── com/
        │   │       └── butter/
        │   │           └── blog/
        │   │               └── BlogApplication.java
        │   └── resources/
        │       ├── application.properties
        │       ├── static
        │       └── templates
        └── test/
            └── java/
                └── com/
                    └── butter/
                        └── blog/
                            └── BlogApplicationTests.java
Then, you create a folder (package) called services in src/main/java/com/butter/blog which will contain the service class that will handle the interaction with ButterCMS.
Create a file (class) named BlogService in the services folder and add the following code:
package com.butter.blog.services;

import java.util.HashMap;
import java.util.List;
import java.util.Map;

import com.buttercms.ButterCMSClient;
import com.buttercms.IButterCMSClient;
import com.buttercms.model.PostResponse;
import com.buttercms.model.PostsResponse;
import org.springframework.stereotype.Service;
import io.github.cdimascio.dotenv.Dotenv;

@Service
public class BlogService {
    private String buttterAPIKey;
    private IButterCMSClient butterCMSClient;

    BlogService() {
        this.setupButter();
    }

    private void setupButter() {
        Dotenv dotenv = Dotenv.load();
        this.buttterAPIKey = dotenv.get("BUTTERKEY");
        this.butterCMSClient = new ButterCMSClient(this.buttterAPIKey, true);
    }

    public PostsResponse search(String search) {
        Map<String, String> params = new HashMap<String, String>();
        params.put("query", search);

        return this.butterCMSClient.getSearchPosts(params);
    }


    public PostsResponse getBlogs(String pageSize, String page) {
        Map<String, String> params = new HashMap<String, String>();
        params.put("page", page);
        params.put("page_size", pageSize);
        params.put("exclude_body", "true");

        return this.butterCMSClient.getPosts(params);
    }

    public PostResponse getBlog(String slug) {
        return this.butterCMSClient.getPost(slug);
    }
}
This includes a class that loads the environment variable from the .env file and sets up the ButterCMS client for interaction.
After that, you’ll need to add a controller to manage requests and interact with the services. To do this, create a new package (or folder), controllers in src/main/java/com/butter/blog, then add the following code:
package com.butter.blog.controllers;

import com.butter.blog.services.BlogService;
import com.buttercms.model.PostsResponse;

import org.springframework.http.ResponseEntity;
import org.springframework.stereotype.Controller;
import org.springframework.ui.Model;
import org.springframework.web.bind.annotation.GetMapping;
import org.springframework.web.bind.annotation.PathVariable;
import org.springframework.web.bind.annotation.RequestParam;

import java.util.Map;

@Controller
public class BlogController {
   private BlogService blogService;
   BlogController(BlogService blogService) {
       this.blogService = blogService;
   }

   @GetMapping("/")
   public String index(Model model) {
       try {
           var posts = this.blogService.getBlogs("2", "1");
           model.addAttribute("posts", posts.getData());
           return "index";
       } catch (Exception e) {
           model.addAttribute("error", e);
           return "error";
       }
   }

   @GetMapping("/search")
   public String search(Model model, @RequestParam("q") String query) {
       try {
           var results = this.blogService.search(query).getData();
           model.addAttribute("posts", results);

           return "search-result";
       } catch (Exception e) {
           model.addAttribute("error", e);
           return "error";
       }
   }


   @GetMapping("/posts")
   public String getPosts(Model model, @RequestParam Map<String, String>
req) {
       try {
           String page = req.get("page") == null ? "1": req.get("page");
           String pageSize = req.get("page_size") == null ? "10": req.get("page_size");

           var posts = this.blogService.getBlogs(pageSize, page).getData();
           model.addAttribute("posts", posts);

           return "posts";
       } catch (Exception e) {
           model.addAttribute("error", e);
           return "error";
       }
   }

   @GetMapping("/posts/{slug}")
   public String getPost(Model model, @PathVariable String slug) {
       try {
           var post = this.blogService.getBlog(slug).getData();
           model.addAttribute("post", post);

           return "post";
       } catch (Exception e) {
           model.addAttribute("error", e);
           return "error";
       }
   }

   @GetMapping("/about")
   public String about(Model model) {
       return "about";
   }
}
The code snippet above defines the class BlogController with five (5) methods:
-
index: This method renders the home route when the user navigates to http://localhost:8080 in their browser. It makes a request to ButterCMS to retrieve the list of blogs associated with the API KEY.
-
getPost: This method extracts the blog slug from the URL and uses it to fetch a single blog post from ButterCMS.
-
getPosts: The getPosts method retrieves all posts in ButterCMS that belong to the owner of the API key.
-
search: This method leverages the ButterCMS Java SDK to query blog posts from ButterCMS.
-
about: This method renders the about page on the browser client.
When attempting to retrieve data from ButterCMS, the try-catch block is used to handle any potential errors that may occur. In addition, the templates used to render the retrieved data are matched based on their corresponding method return values, ensuring that the correct template is utilized.
After that, you’ll need to update the BlogApplication class to register both the controllers and the services. To do this, replace the content of the BlogApplication class file with the following:
package com.butter.blog;

import org.springframework.boot.SpringApplication;
import org.springframework.boot.autoconfigure.SpringBootApplication;
import org.springframework.context.annotation.ComponentScan;

@SpringBootApplication
@ComponentScan(basePackages = {"com.butter.blog.controllers", "com.butter.blog.services"})
public class BlogApplication {
	public static void main(String[] args) {
		SpringApplication.run(BlogApplication.class, args);
	}

}
The Spring Framework annotation @ComponentScan is used to configure component scanning. Spring will search the specified package and its sub-packages for Spring components such as @Component, @Service, @Repository, and @Controller and create instances of those components.
Adding the templates
To add the template, first navigate to the resource folder from src/main, open the application.properties file, and add the following:
spring.thymeleaf.cache=false
spring.thymeleaf.prefix=classpath:/templates/
spring.thymeleaf.suffix=.html
This configuration is to enable the Thymeleaf package to locate the templates and the template file type to render. Thymeleaf maps the file name to the controller’s returned string.
Navigate to the template folder in src/main/resource/templates, create the files, and add the respective code.
Let's begin with _fragments.html.
Thymeleaf supports added fragments of HTML that can be reused. So with that, you can organize your code.
Add the following to your _fragments.html file:
<!-- SEO Fragment -->
<head th:fragment="head(title, author, keywords, desc)">
<meta charset="UTF-8" />
<meta name="og:description" th:if="${desc == null}" content="This is a niconico blog website">
<meta name="og:description" th:if="${desc}" th:content="${desc}">
<meta name="og:keywords" th:if="${keywords}" th:content="${keywords}">
<meta name="og:keywords" th:if="${keywords == null}" content="blog niconico">
<meta name="og:author" th:if="${author}" th:content="${author}">
<meta name="og:author" th:if="${author == null}" content="Butter">
<meta name="viewport" content="width=device-width, initial-scale=1.0">
<meta http-equiv="X-UA-Compatible" content="IE=edge" />
<meta name="viewport" content="width=device-width, initial-scale=1.0" />
<title th:if="${title}" th:text="${title}"></title>
<title th:if="${title == null}" >😹 Otrex Blog 🎩</title>
<link rel="preconnect" href="https://fonts.googleapis.com" />
<link
rel="stylesheet"
href="https://fonts.googleapis.com/css2?family=Material+Symbols+Outlined:opsz,wght,FILL,GRAD@48,400,0,0"
/>
<link rel="preconnect" href="https://fonts.gstatic.com" crossorigin />
<link
href="https://fonts.googleapis.com/css2?family=Anton&family=Abel&family=Caveat:wght@700&family=Fredoka+One&family=Poppins:ital,wght@0,500;0,600;0,700;1,100&family=Shadows+Into+Light&display=swap"
rel="stylesheet"
/>
<link href="/css/output.css" rel="stylesheet" />
</head>
<!-- Navbar Fragment -->
<nav th:fragment="navbar" class="navbar">
<div class="container $flex row">
<div class="$flex row">
<div class="logo pr-1.5rem">Otrex Blog</div>
<div class="navigation">
<ul class="$flex row">
<li><a href="/">Home</a></li>
<li><a href="/posts">More Blogs</a></li>
<li><a href="/about">About Us</a></li>
</ul>
</div>
</div>
<div class="$flex row-p">
<div class="search">
<form method="get" action="/search" class="$flex row-p">
<input type="text" class="search" name="q" placeholder="Search..." />
<div>
<button type="submit" class="btn">
<span class="white-text material-symbols-outlined"> search </span>
</button>
</div>
</form>
</div>
<div class="action">
<button type="button" class="action-btn">Subscribe</button>
</div>
</div>
</div>
</nav>
<!-- Blog Card Fragment -->
<div th:fragment="blog_card(post)" class="grey blog-card">
<span class="tagline" th:if="${#arrays.length(post.tags)}" th:text="${post.tags[0].name}">Trending</span>
<span class="tagline" th:if="${#arrays.length(post.tags) == 0}">Trending</span>
<div>
<div class="blog-image">
<img th:src="${post.featuredImage}" alt="first blog image" />
</div>
</div>
<div class="px-1rem pb-1rem">
<h1 th:text="${post.title}"></h1>
<p text="${post.summary}"></p>
<a th:href="'/posts/' + ${post.url}"> Read More </a>
</div>
</div>
<!-- Footer Fragment -->
<footer th:fragment="footer_script" class="container footer">
Obisike Treasure © <span id="year"></span>
<script type="text/javascript">
const year = new Date().getFullYear();
document.getElementById("year").innerHTML = year;
</script>
</footer>
As indicated, the fragment contains the following:
-
Head/SEO fragment: This fragment sets up the `meta` tags for SEO, as well as links the `css`, and `font` files. When used, it requires the parameters `title`, `author`, `keywords`, and `desc` to be provided.
-
Footer fragment: The footer fragment consists of the content that will be displayed on all the pages.
-
Blog post fragment: The blog post fragment serves as reusable code that will be used to render a summary form of the blog post data. It requires the parameter post, which is a map consisting of the ButterCMS’s post.
Then, you can add index.html:
<!DOCTYPE html>
<html>
  <head th:replace="~{_fragments::head(title=~{null}, author=~{null}, keywords=~{null}, desc=~{null})}"></head>
  <body>
    <div class="cover">
      <!-- NAV -->
      <nav th:replace="~{_fragments::navbar}"></nav>


      <span th:text="${other_post}"></span>
        <!-- ARTICLES -->
      <div class="container">
        <header class="pb-1rem">
          <h1 class="large">Insights and Inspiration: Exploring the World Through Words</h1>
          <h3>We Believe that Words have the Power to Transform Lives, and we're Committed to Bringing you the Very Best of what the Written Word has to Offer.
            So, Join us Today, and Let's Embark on a Journey of Discovery and Inspiration Together!"</h3>
        </header>

        <section class="latest">
          <div class="grid-2">
            <div th:each="post: ${posts}" th:insert="~{_fragments::blog_card(post=~{post})}"></div>
          </div>
          <h1></h1>
        </section>
        <section class="blogs"></section>
      </div>
    </div>

    <div th:insert="~{_fragments::footer_script}"></div>
  </body>
</html>
The code snippet above makes use of Thymeleaf syntax to indicate which fragments should be replaced in the HTML document. Specifically, the th:replace attribute is used to specify the fragments to be replaced with their corresponding templates.
In this case, the head fragment is replaced with the template specified by the head fragment method:
<head th:replace="~{_fragments::head(title=~{null}, author=~{null}, keywords=~{null}, desc=~{null})}"></head> Similarly, the nav fragment is replaced with the template specified by the navbar fragment method:
<nav th:replace="~{_fragments::navbar}"></nav>
The div element containing the blog post content is generated using the blog_card fragment method and inserted with the th:insert attribute:
<div th:each="post: ${posts}" th:insert="~{_fragments::blog_card(post=~{post})}"></div>
Finally, the footer fragment is inserted with the th:insert attribute:
<div th:insert="~{_fragments::footer_script}"></div>
post.html:
<!DOCTYPE html>
<html>
  <head th:replace="~{_fragments::head(title=~{post.title}, author=~{post.author.firstName}, keywords=~{null}, desc=~{post.summary})}"></head>
  <body>
    <div class="cover">
      <!-- NAV -->
      <nav th:replace="~{_fragments::navbar}"></nav>

      <div class="container white p-1rem">
        <header class="pb-1rem">
          <h1 class="large" th:text="${post.title}">The Art of Letting Go: How to Release Attachments and Embrace Change</h1>
          <h3>By <span th:text="${post.author.firstName} + ' ' + ${post.author.lastName}" ></span></h3>
        </header>
        <section class="latest">
          <div class="white blog-card">
            <span class="tagline">Trending</span>
            <div>
              <div class="blog-image">
                <img th:src="${post.featuredImage}" alt="cover image" />
              </div>
            </div>
            <div class="blog-text pb-1rem" th:utext="${post.body}"></div>
          </div>
        </section>
      </div>

    </div>
    <div th:insert="~{_fragments::footer_script}"></div>
  </body>
</html>
The post.html file consists of the injected head, footer, and navbar fragments. The blog post data coming from the controller method is being rendered within the div with the class container.
At <div class="blog-text pb-1rem" th:utext="${post.body}"></div>, the th:utext part causes the HTML from the blog post's data to be rendered as HTML.
posts.html:
<!DOCTYPE html>
<html>
  <head th:replace="~{_fragments::head(title=~{null}, author=~{null}, keywords=~{null}, desc=~{null})}"></head>
  <body>
    <div class="cover">
      <nav th:replace="~{_fragments::navbar}"></nav>
      <div class="container">
        <header class="pb-1rem">
          <h1 class="large">Latest Posts</h1>
        </header>
        <section class="latest">
          <div class="grid-3">
            <div th:each="post: ${posts}" th:insert="~{_fragments::blog_card(post=~{post})}"></div>
          </div>
        </section>
      </div>
    </div>
    <div th:insert="~{_fragments::footer_script}"></div>
  </body>
</html>
This file, like post.html, contains all of the fragments. The parameter null is passed to the head fragment to ensure that the meta tags' values are set to default. Because the data coming from the controller's method is an array, you loop through it, generating several blog post fragments and passing each post as a parameter to each blog post fragment.
about.html:
<!DOCTYPE html>
<html>
  <head th:replace="~{_fragments::head(title=~{null}, author=~{null}, keywords=~{null}, desc=~{null})}"></head>
  <body>
    <div class="cover container">
      <!-- NAV -->
      <nav th:replace="~{_fragments::navbar}"></nav>

      <!-- HEADER -->
      <header>
        <div class="header-wrapper">
          <h6>About Us</h6>
          <h1>Get to Know About Me!!</h1>
        </div>
      </header>
      <article class="about-wrapper">
        <p>
          Pellentesque sit amet mauris purus. Mauris egestas molestie ex vel
          gravida. Nam sem erat, tempor quis porttitor vitae, porttitor nec
          metus. Class aptent taciti sociosqu ad litora torquent per conubia
          nostra, per inceptos himenaeos. Mauris ultricies nisi bibendum nulla
          euismod, nec pharetra lacus lobortis. Integer vitae lacus in leo
          sagittis rutrum sit amet nec quam. Nullam sed diam et lectus
          molestie tempor hendrerit in risus. Duis risus urna, imperdiet
          condimentum neque vitae, elementum viverra odio. Nulla euismod
          ornare luctus.
        </p>
      </article>
    </div>
    <div th:insert="~{_fragments::footer_script}"></div>
  </body>
</html>
The about page contains only the head, footer, and navbar fragments. It’s just a page containing information about the blog.
Moving on to error.html.
This page is the fallback page when an error occurs on your blog site.
Add the following code to the file:
<!DOCTYPE html>
<html>
  <head th:replace="~{_fragments::head(title=~{null}, author=~{null}, keywords=~{null}, desc=~{null})}"></head>
  <body>
    <div class="cover container">
      <!-- NAV -->
      <nav th:replace="~{_fragments::navbar}"></nav>

      <!-- HEADER -->
      <header>
        <div class="header-wrapper">
          <h1>Error</h1>
          <h2 th:text="${error}"></h2>
        </div>
      </header>
    </div>
    <div th:insert="~{_fragments::footer_script}"></div>
  </body>
</html>
Then, you’ll add the static files like images and the CSS script to the static folder located at src/main/resources/static. Create the folder CSS and add the file output.css.
Once that is complete, you can proceed to add the blog post and run the application.
Adding blog posts using the ButterCMS Blog Engine
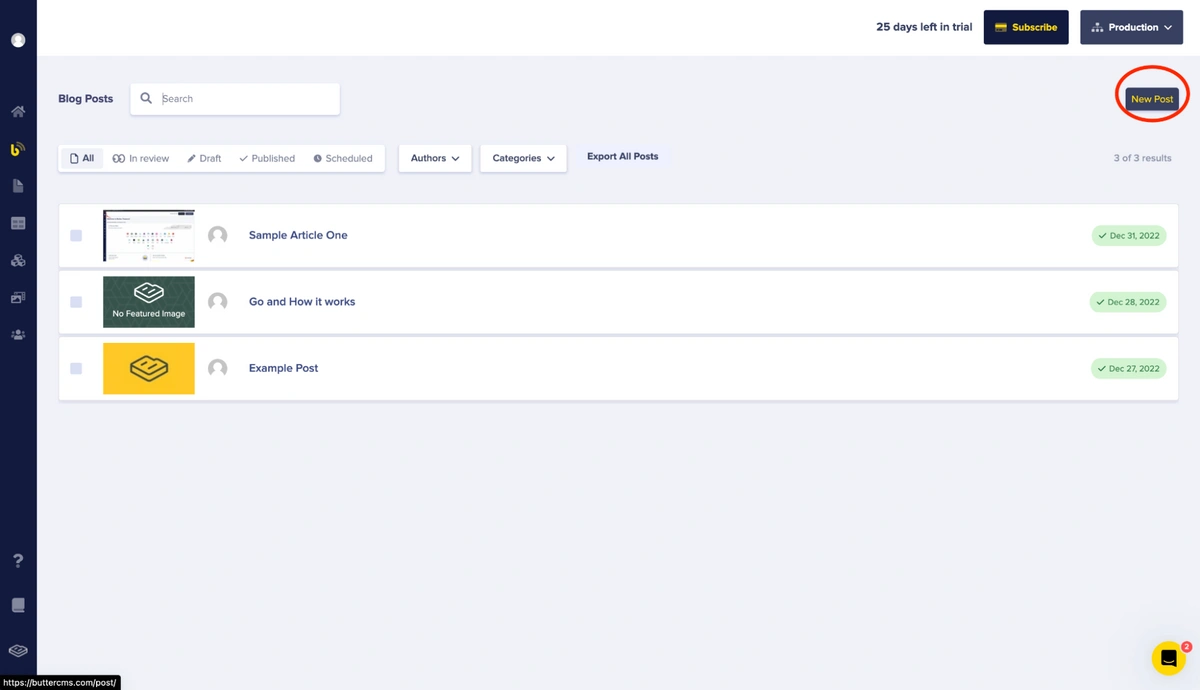
To run the application, you’ll need to add the blog post to the ButterCMS client. To add a blog post, visit the ButterCMS platform in your browser, log in, then click on the blog post icon indicated in the figure below:
A screenshot indicating the blog posts navigation button
Click the New Post button and enter your blog post details.
A screenshot indicating the New Post button
The Blog Engine provides a WYSIWYG editor coupled with several other fields and forms that require the necessary information for a blog post.
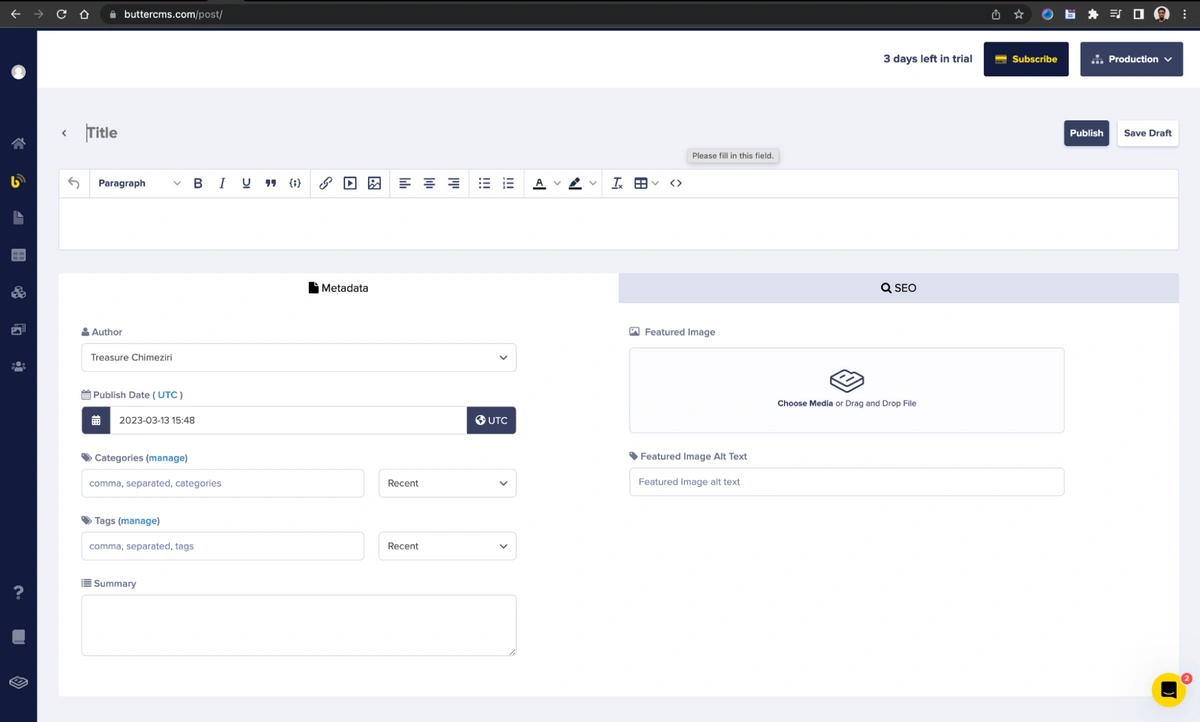
This screenshot showcases the form that gathers information for your new blog post.
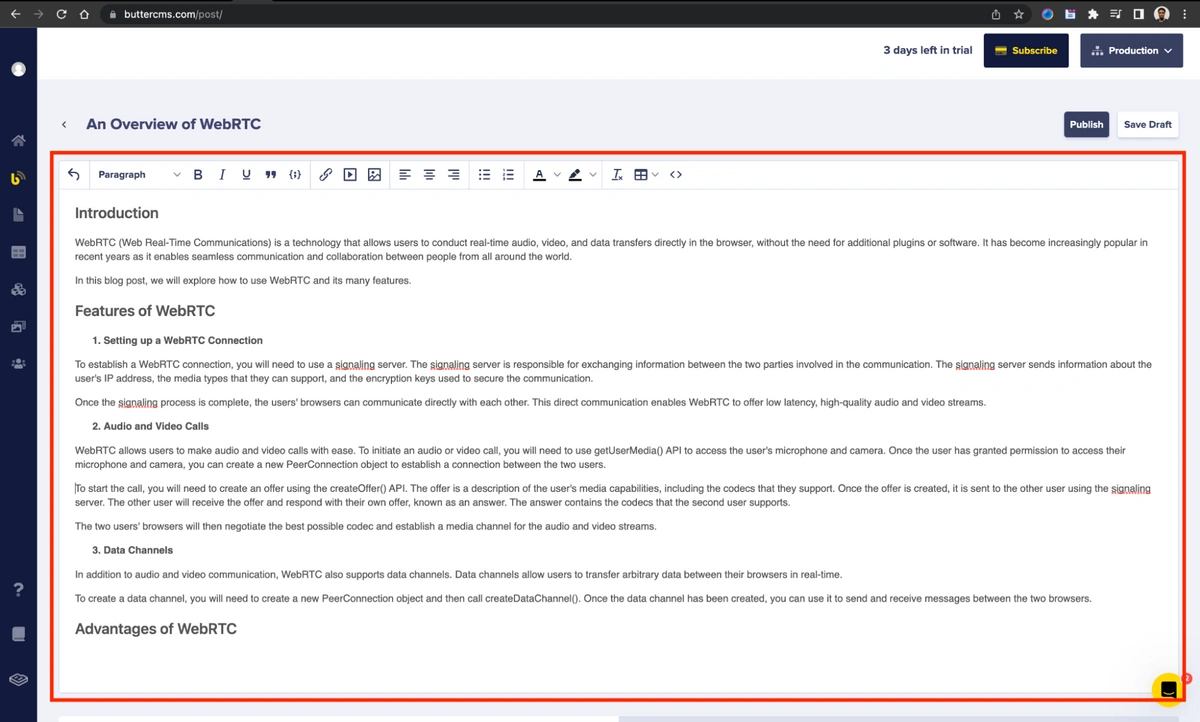
The field where you can enter the content for your blog post is the WYSIWYG editor, denoted by the red box in the figure below. It offers features like adding code blocks, images, and bold/italic/underlined text, as well as functionality for aligning, highlighting, creating paragraphs, and creating tables.
A screenshot indicating the WYSIWYG editor
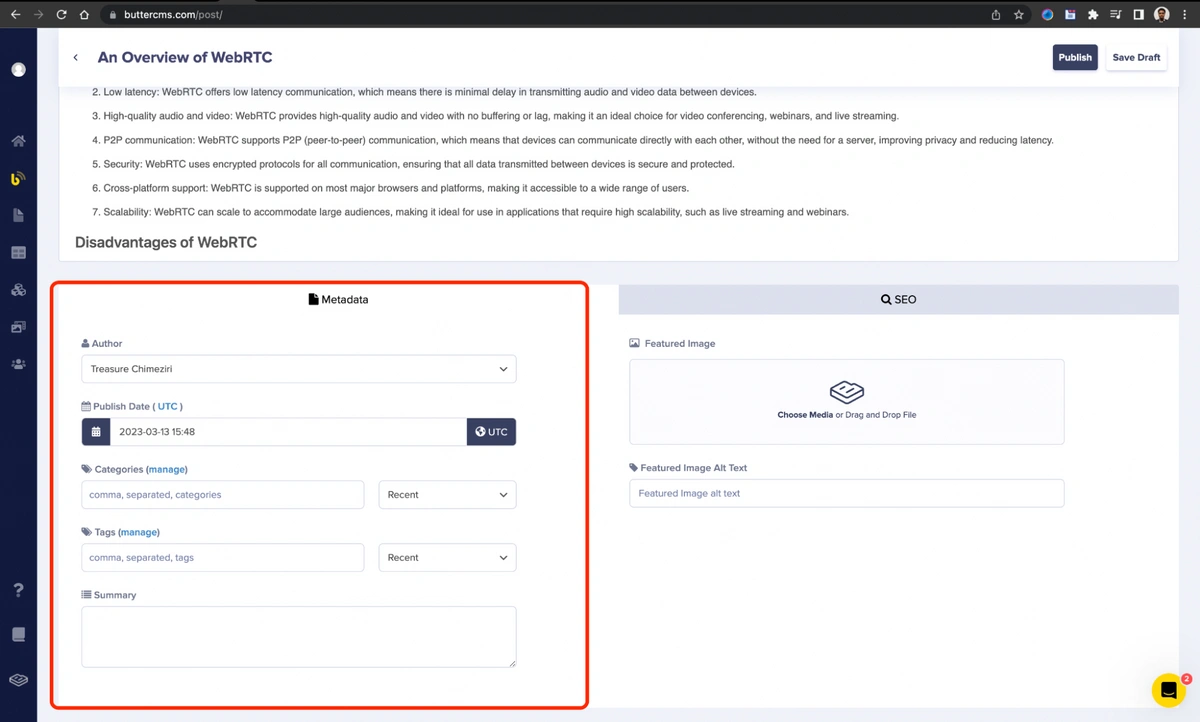
After you have entered the content of your post, you proceed to add the author's information. The section in the screenshot below contains fields that collect the author’s data.
A screenshot showing the section to enter the author’s information
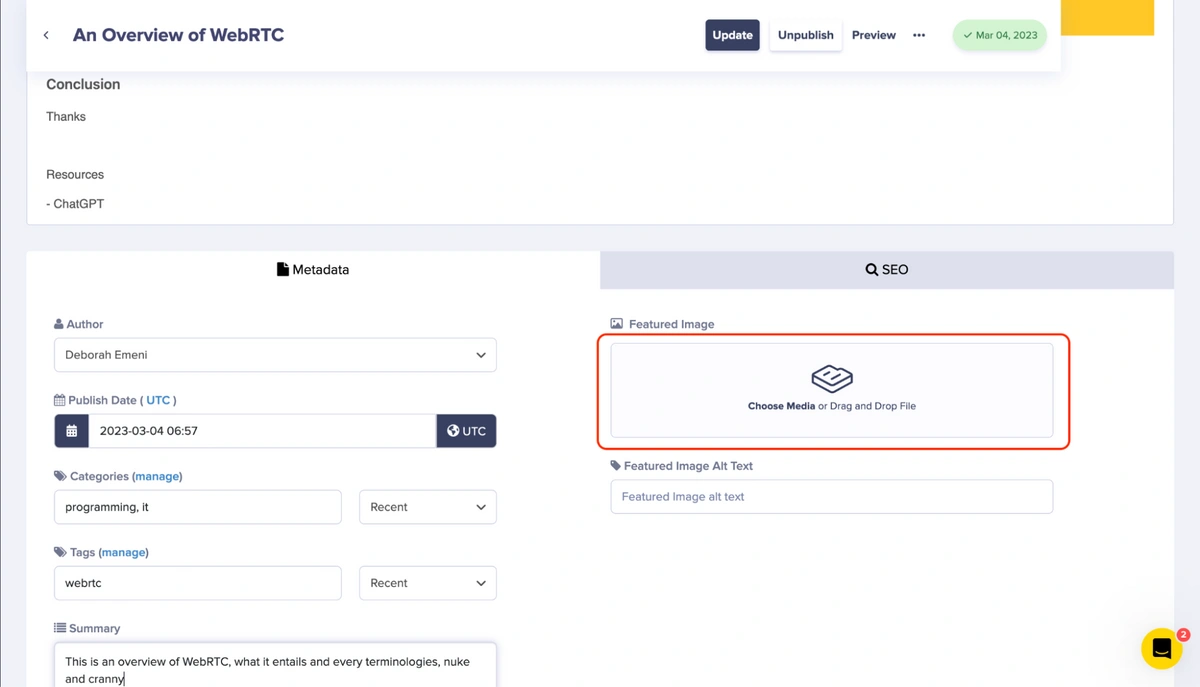
Next, it's time to add the featured image. To do this, select the featured image field and click the Choose Media button, as indicated below. Then, choose the image you want to upload and edit as necessary. This will help make your content more visually appealing and engaging for readers.
A screenshot showing the Choose Media field
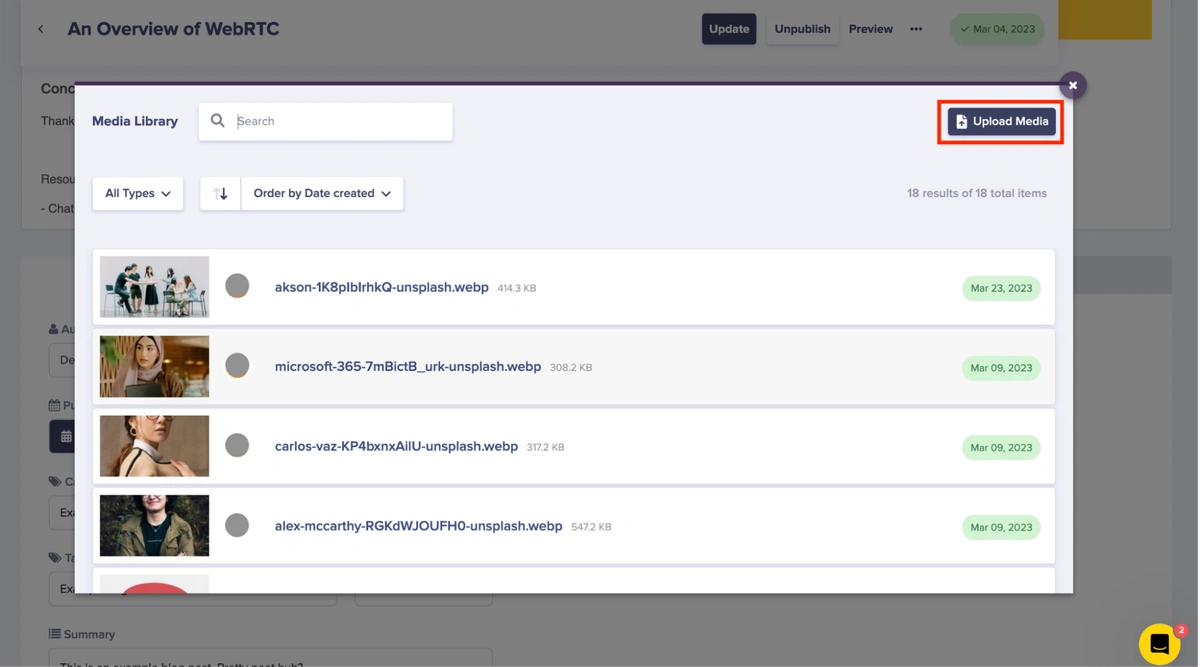
Then, proceed to select from already existing images or upload your own image by clicking on the Upload Media button at the top right corner of the modal box.
A screenshot showing the Upload Media button
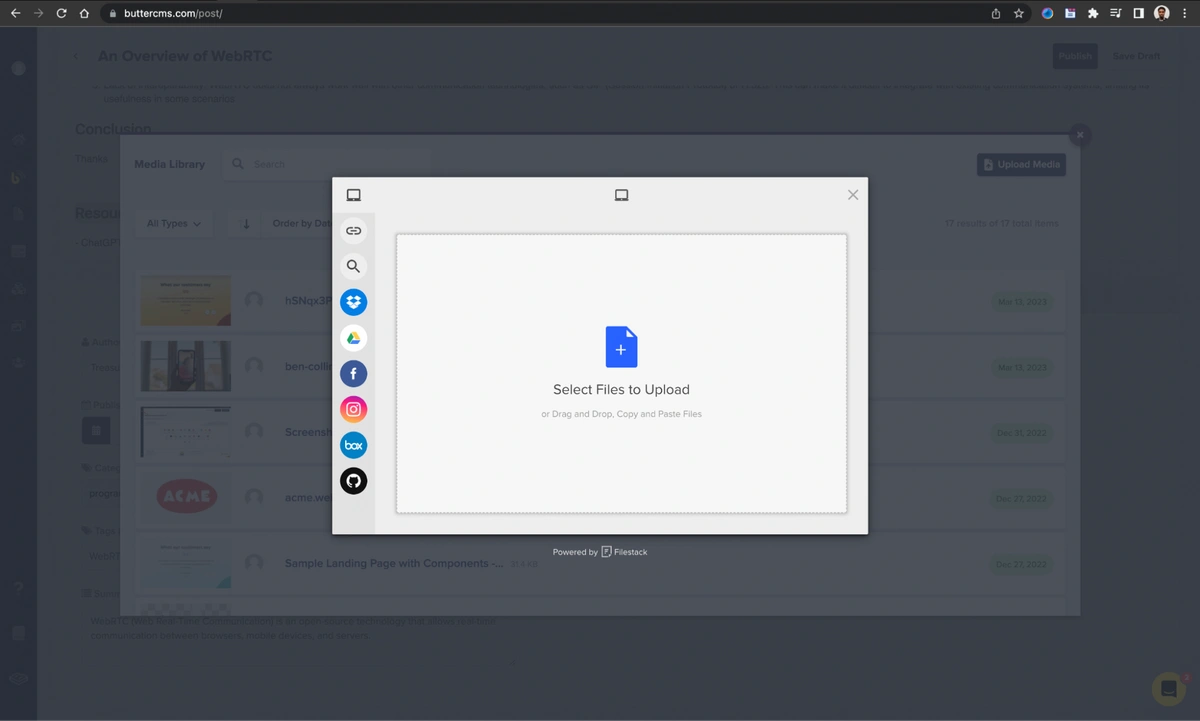
This screenshot shows the upload modal, indicating how to add the image. It also shows the image manager.
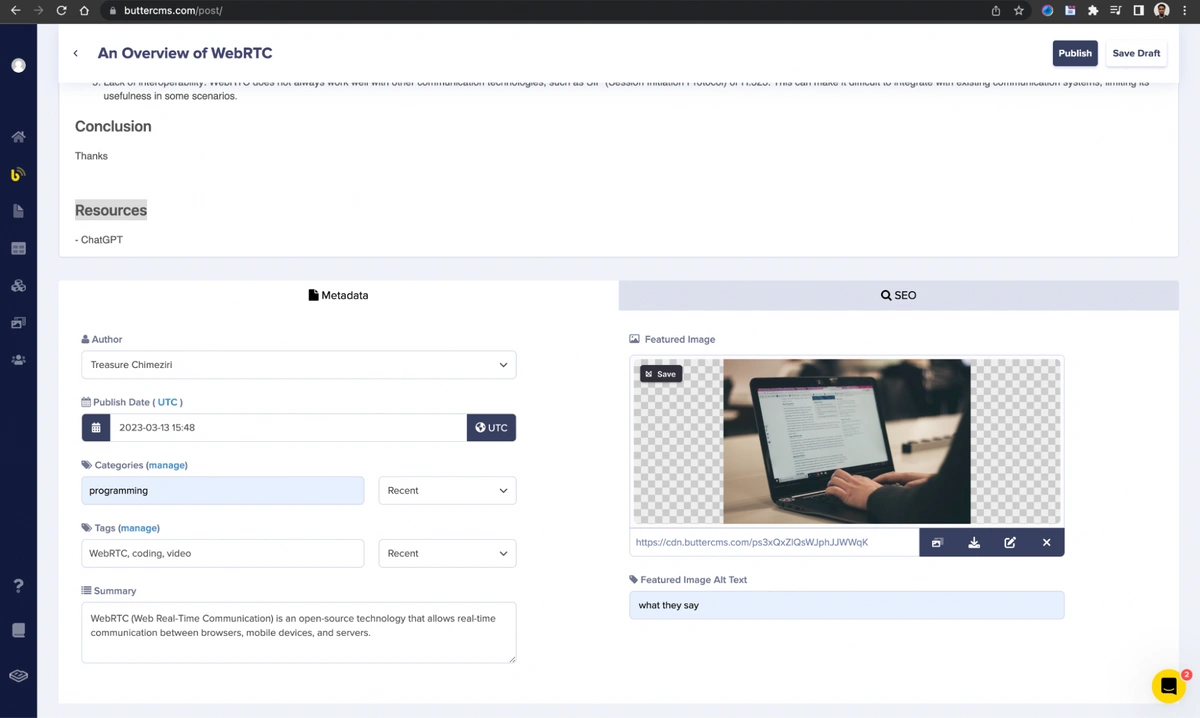
A screenshot showing the added image
You can click on the edit button icon to launch the image editor.
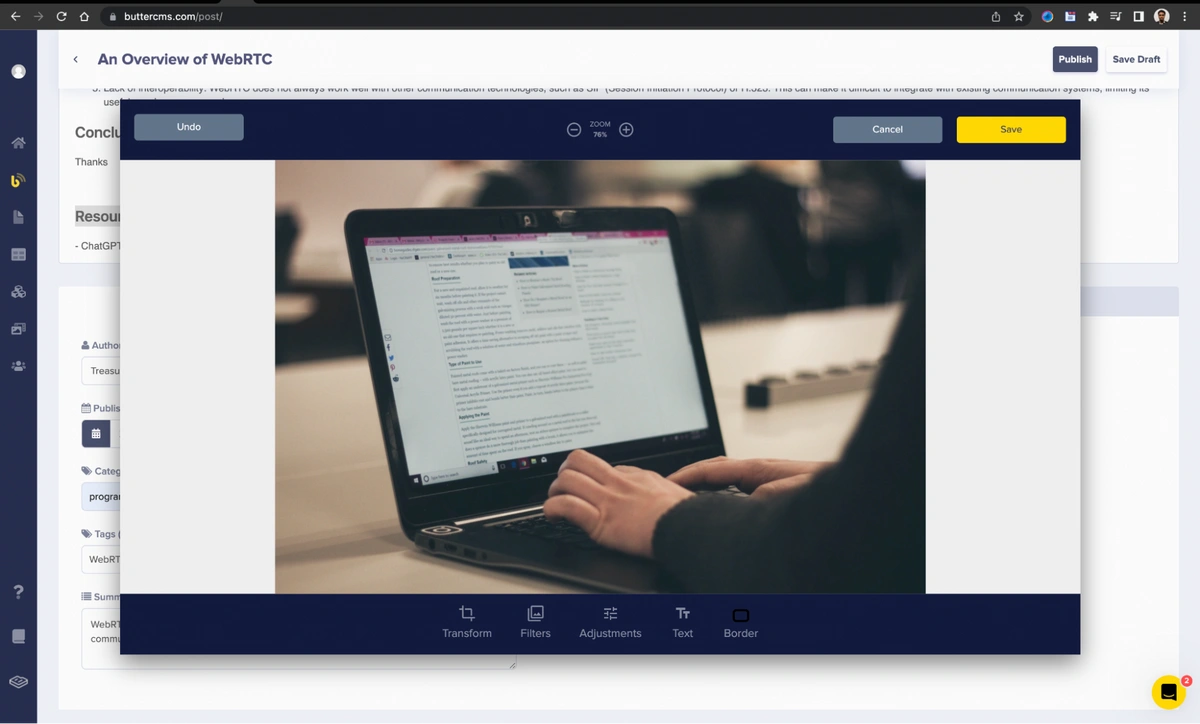
A screenshot showing the ButterCMS image editor.
Then, you'll add your SEO information. This will help you optimize your content for search engines. Simply click on the SEO tab and enter the required information, as shown in the screenshot below.
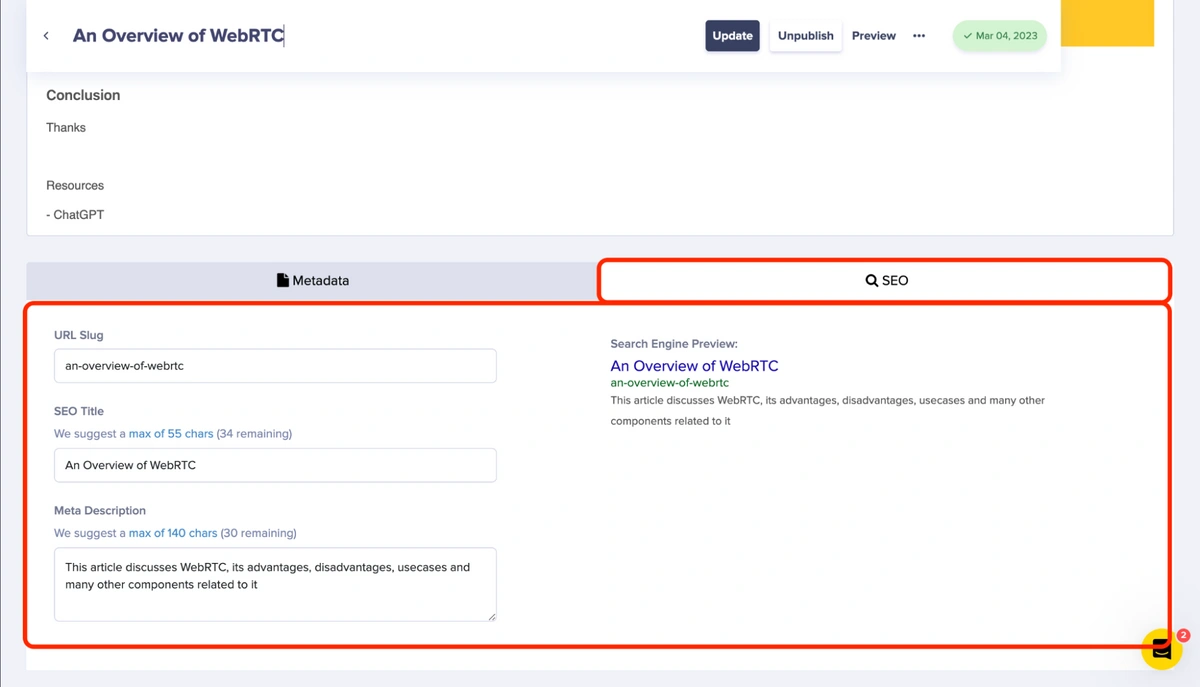
A screenshot indicating the SEO section and its required fields
After that, you can choose to publish the post or save it as a draft. In this case, you’ll publish the post. To publish the post, press the Publish button, as shown below.
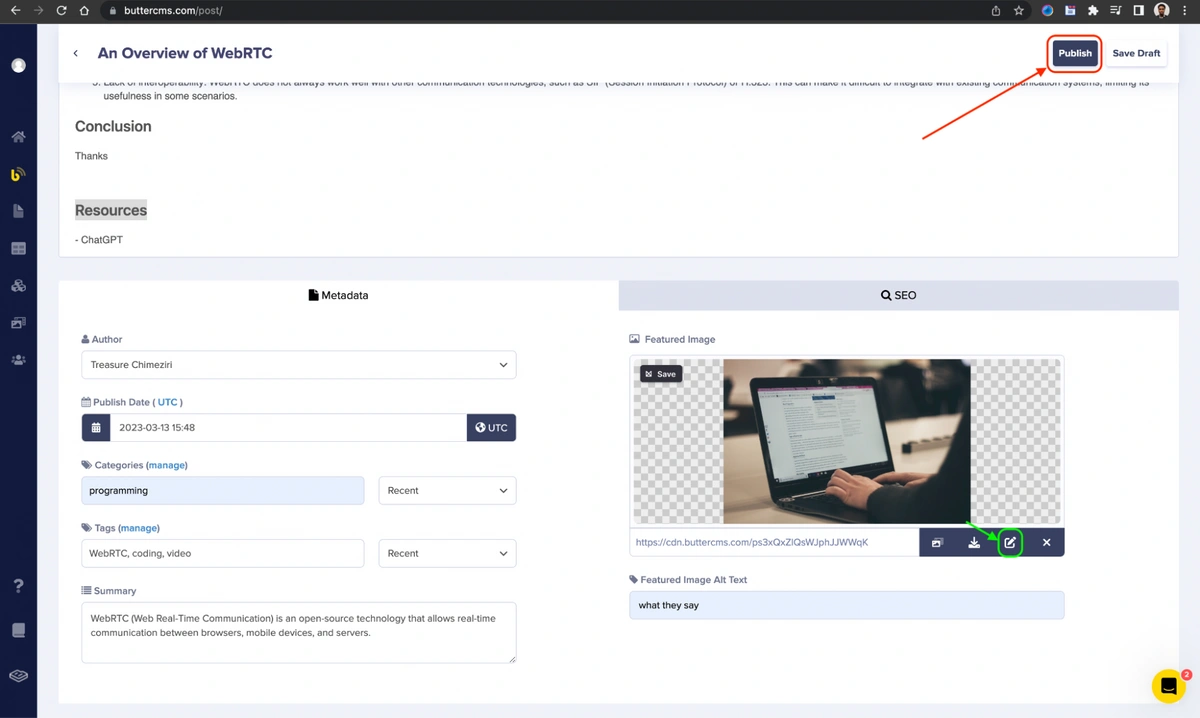
A screenshot showing the Publish button in red and the Image Edit button in green
Testing the application
After adding the blog posts, you can simply use the following command to start the blog server:
./gradlew bootRun
This will set up a server using Tomcat at port 8080.
Navigate to your browser and visit the URL http://localhost:8080.
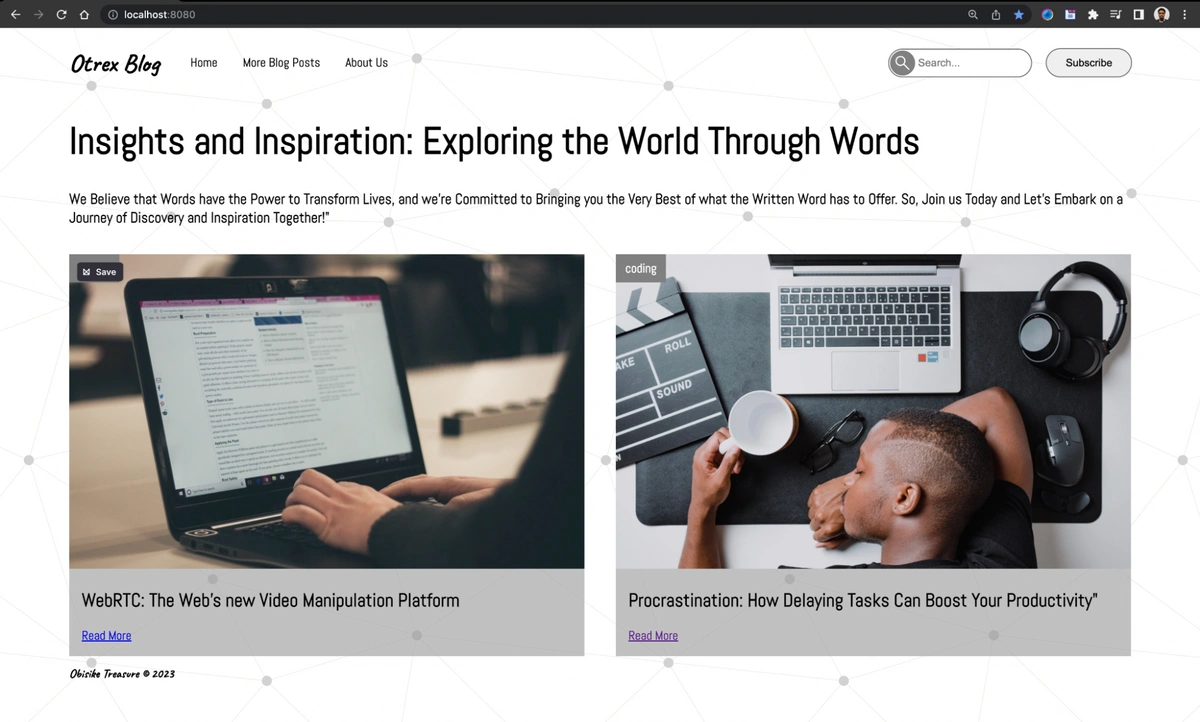
A screenshot showing the landing page of our blog site
You can visit the More Blog Posts page to see more blog posts or click on a particular blog post’s Read More link to read the blog post.

A screenshot showing the More Blog Posts page
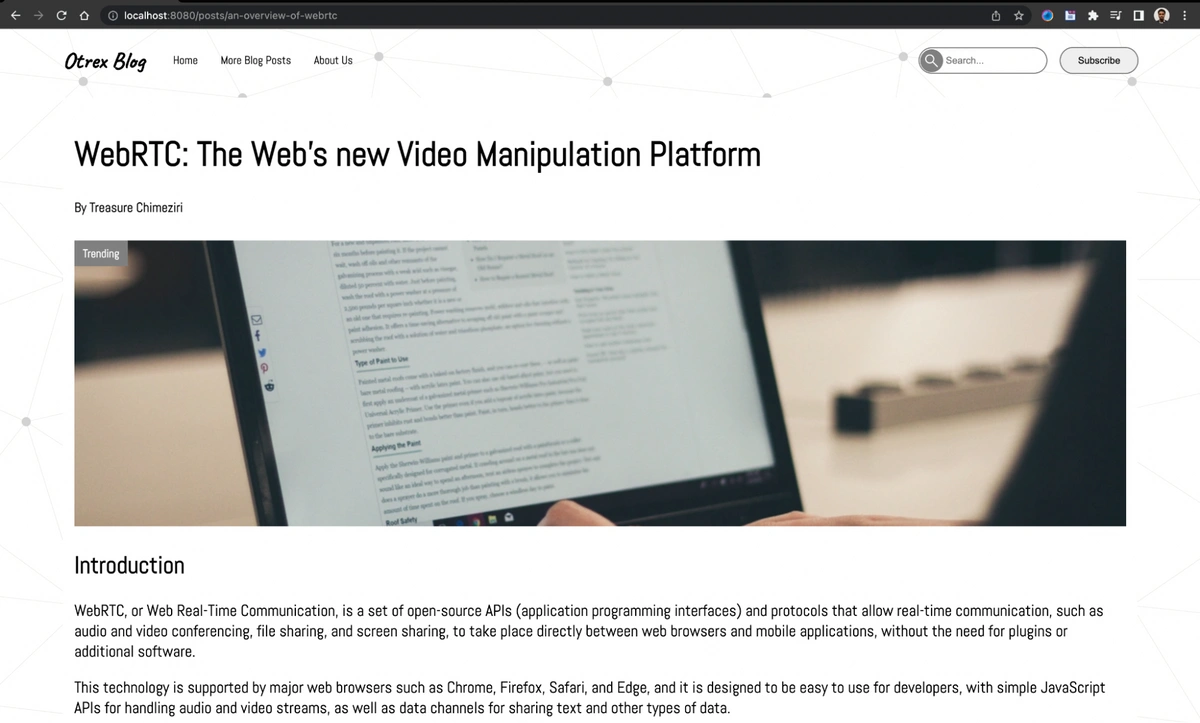
A screenshot showing the View Blog page
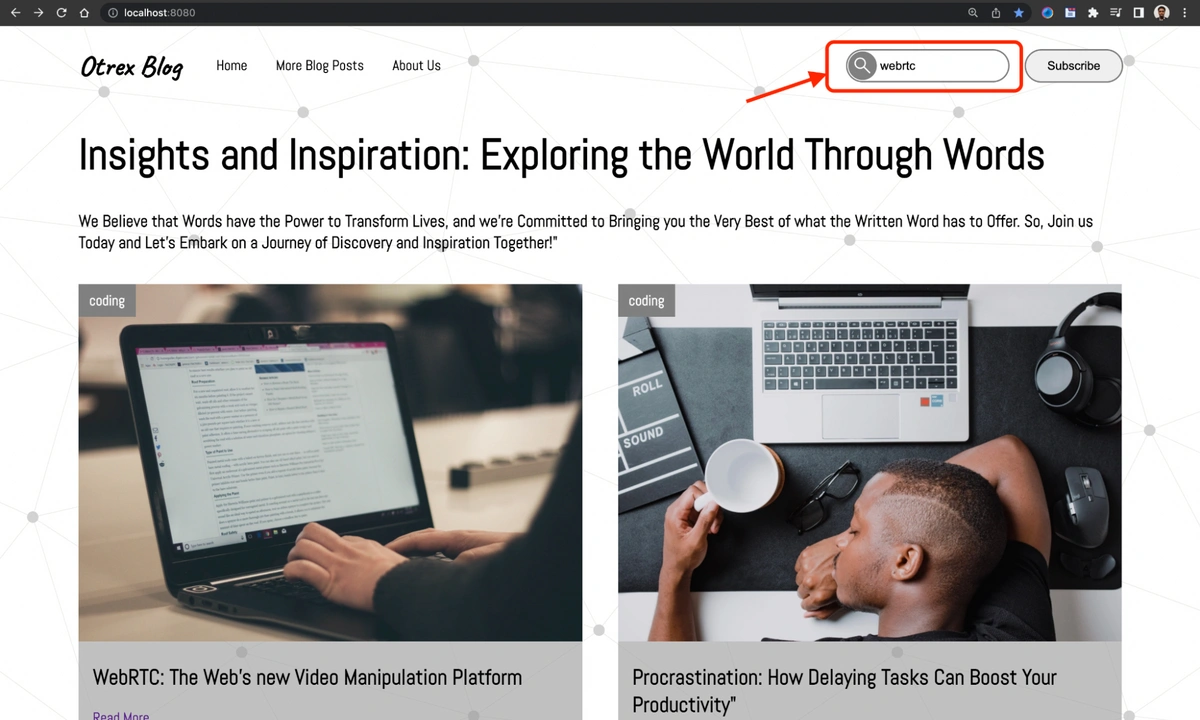
To test the search functionality, simply enter the title of the desired blog post in the search bar located at the top right corner of the blog site. Then click on the search icon to fetch the blog post.
Type “webrtc” into the search bar, and click on the search icon to proceed.
A screenshot of the search bar and the search icon placed next to it
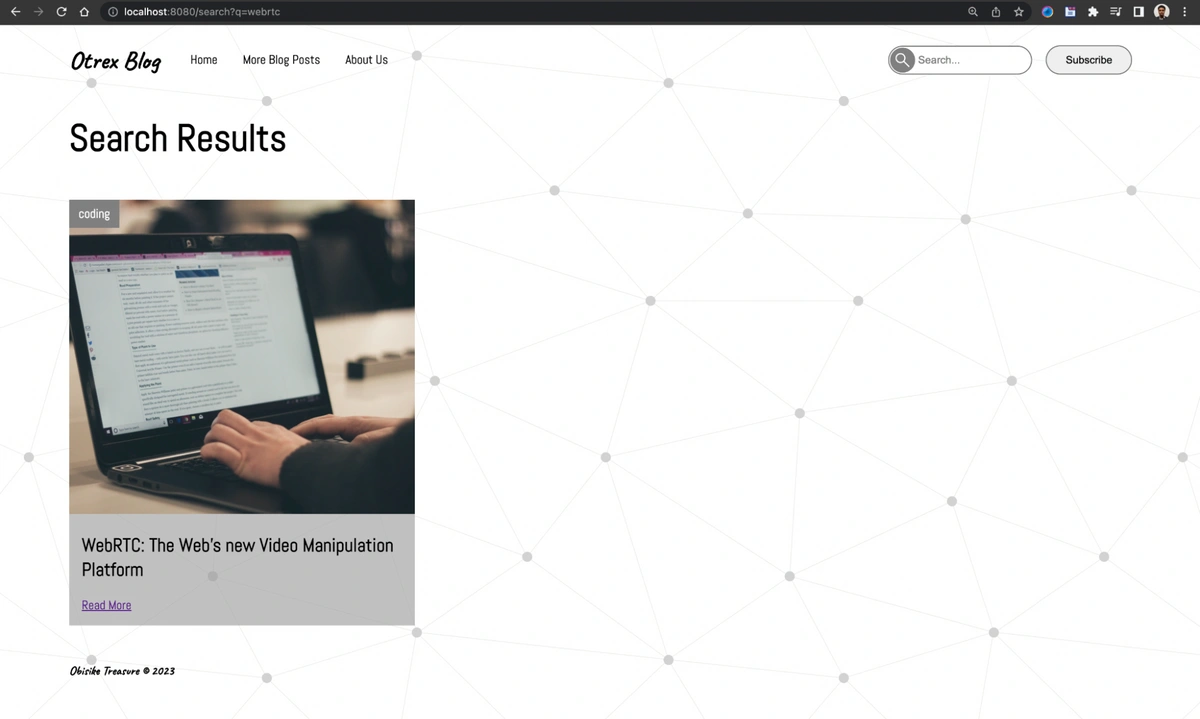
A screenshot showing the search results
Final thoughts
Congratulations on successfully completing the tutorial! The knowledge and skills you've acquired have equipped you to develop user interfaces that are both dynamic and engaging. With ButterCMS's flexibility and compatibility with various programming languages and frameworks, such as Java and SpringBoot, the opportunities to build content-rich applications are endless.
ButterCMS removes the hassle of creating time-consuming and overwhelming blog sites. Its instant backend and SEO capabilities allow you to concentrate on providing rich content and an exceptional user experience. The API connectivity with your preferred programming language lets you build data-driven user interfaces with ease, making the process of developing blog sites and other web applications effortless.
In addition to creating blog sites, you can use ButterCMS components, pages, and collections to create powerful landing pages.
Ultimately when using Java with ButterCMS the possibilities for creating dynamic and engaging content are endless.

