According to Forbes, the average human attention span is around 47 seconds. If you have a product or service you are offering, you must ensure that you grab the user’s attention as soon as possible and provide them with a direct path to make a purchase or query by clearly stating important information.
The main purpose of a landing page is to drive conversions using CTAs, such as with free trials, contact information, or promotions. For example, Google focuses on providing search functionality as its primary service, reflecting this emphasis by featuring a single key element on its landing page—the search bar. This design approach ensures an effective and streamlined user experience, directing users directly to the service they are seeking.
To create a landing page, you will utilize Laravel, a PHP web application framework, along with ButterCMS as a content management tool. You will be creating a hotel landing page to drive a campaign showing your popular bookings and the promotions you're currently running as well as reviews from your customers.
Table of contents
Understanding Laravel
Laravel is a free and open-source PHP framework for web applications. It makes use of controllers, routes, and views—also known as MVC architecture—to create dynamic web applications with separate logic for the backend and front-end. The controller initiates the application by making requests to the backend (servers) or acquiring local data and then passes the results to a view. The view file will have Blade as an extension.
Blade is Laravel's powerful templating engine that provides features like template inheritance, conditional statements, loops, and more. The following are reasons you should consider using Laravel to create your landing page application:
-
Front-end design: The views are mainly created with HTML; Blade makes it easy to incorporate your PHP code into your HTML code. So as a developer, you do not need to learn another language to create a great front-end.
-
Routing: Laravel makes it easy to route your application by isolating the routing logic plus uses simple syntax to tie a controller and its functions to routes on your application.
-
MVC architecture: Laravel follows the Model-View-Controller (MVC) architectural pattern, which promotes the separation of concerns and enhances code organization.
-
Security: Laravel prioritizes security and incorporates features like protection against cross-site scripting (XSS), cross-site request forgery (CSRF), and SQL injection attacks. It also provides a secure way to handle user authentication and authorization.
-
ORM and database migration: Laravel's ORM simplifies database interactions by providing an intuitive and expressive syntax. It supports relationships, eager loading, query building, and more. Additionally, Laravel's database migration feature allows for seamless database schema changes and version control.

Powering your landing page with ButterCMS
ButterCMS is an API-driven content management system—it powers your application’s backend in the cloud. This means you can run a range of applications without having to worry about server hardware, software updates, backups, and uptime. ButterCMS can help you quickly add blog and market site capability to any tech stack and since it is SaaS, it is only responsible for hosting and maintaining the CMS API (data) and a dashboard.
It is simple to configure and control your content using ButterCMS’ dashboard. The dashboard has features like blog posts, pages, collections, and content types. Content types include components, page types, and collections. You can configure your pages and collections using content fields. These content fields help you compose dynamic page layouts and easily reorder them without coding.
If you are a marketer, you will have the freedom and flexibility you need to create compelling, unique content experiences with pages built using components. You and your team can define a library of reusable, custom components that you can use to create limitless kinds of experiences.
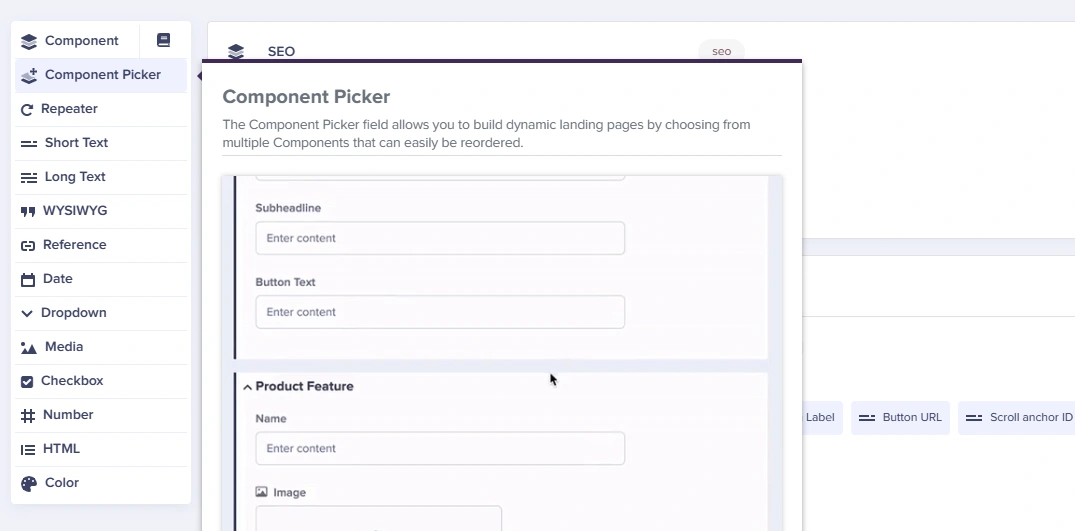
In this tutorial, you will be using components to build dynamic pages on your ButterCMS account. Content fields used include short and long text fields for text content, a repeater field for any combination of one or more content fields that can be repeated multiple times within a page, and a media field for images. The component picker field allows you to build dynamic landing pages by choosing from multiple components that can easily be reordered.
Tutorial: Creating a Laravel landing page with ButterCMS
In this tutorial, you will use ButterCMS to create a structure for your application’s content backend. You will utilize ButterCMS’ components feature to create separate components for your landing page. After creating the ButterCMS page, you will create a Laravel application and use ButterCMS’ API to integrate the two applications.
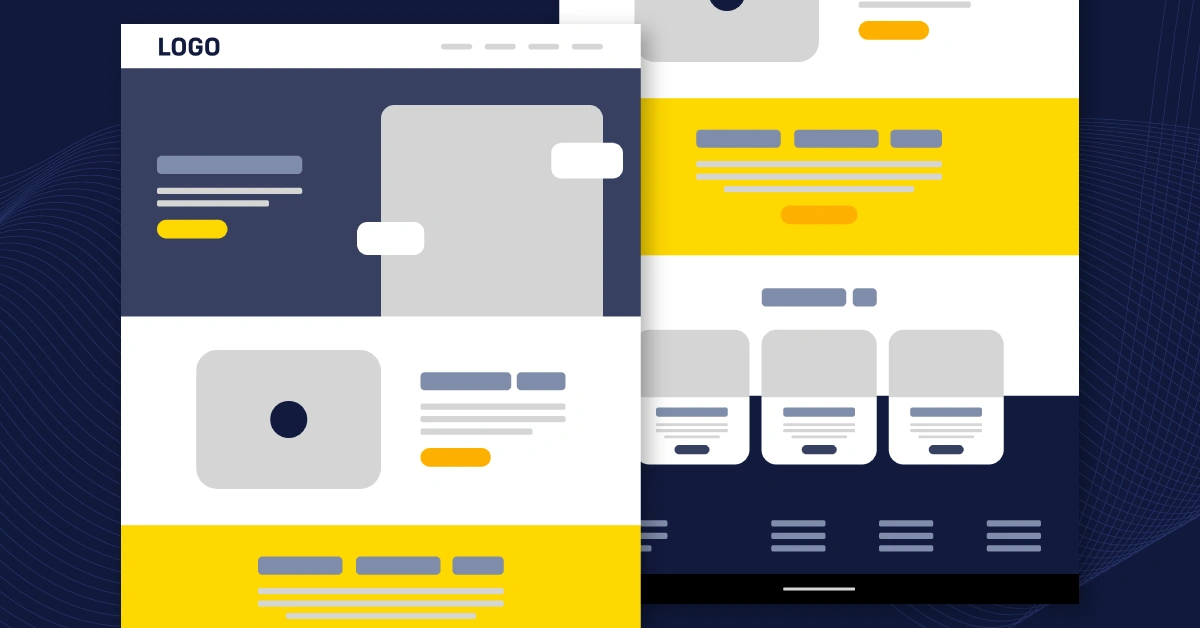
Creating your landing page
To build your landing page, you will start by creating the content structure in your ButterCMS portal.
Creating components for our landing page sections
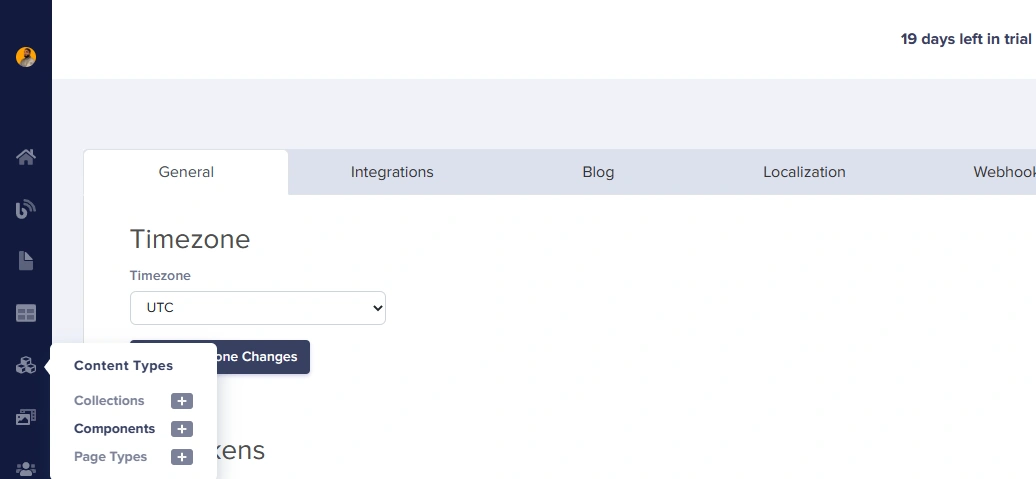
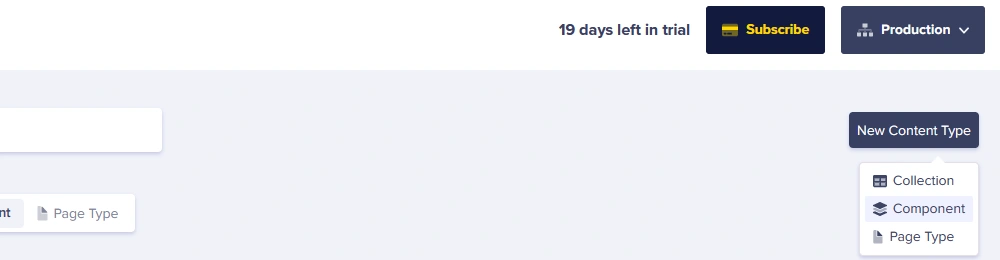
Log in to ButterCMS and start by creating your components. To do this, hover over Content Types and click on Components, as shown below.
Once redirected, hover over the New Content Type button and select Component
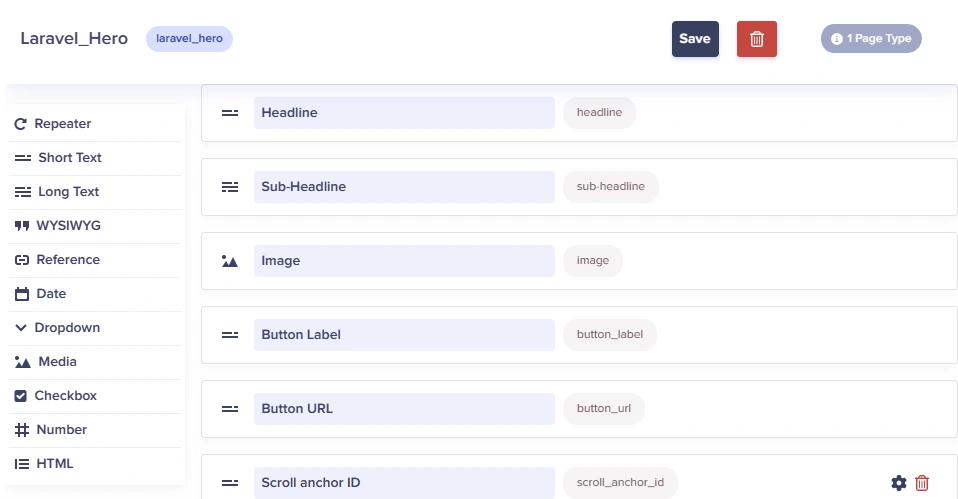
First, you will be creating a component for the Hero section. Add the following content fields with their field names:
-
Short text: Headline
-
Long text: Sub-Headline
-
Media: Image
-
Short text: Button Label
-
Short text: Button URL
-
Short text: Scroll anchor ID
This is how the complete schema looks like in the ButterCMS portal:
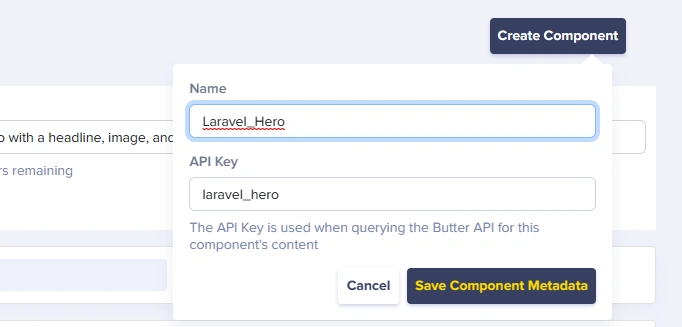
After creating your fields, click on the Create Components button and save the component as Laravel_Hero, as shown below.
After creating the Laravel Hero component, you need to create another component for the Accommodation section and the Promos and Offers section. Add the following content fields to the schema:
-
Short text: Title
-
Repeater: Features
-
Short text: Name
-
Long text: Description
-
Media: Icon
-
Short text: Additional
-
The Laravel_features component will have a repeater named Features with content fields which every feature should have:
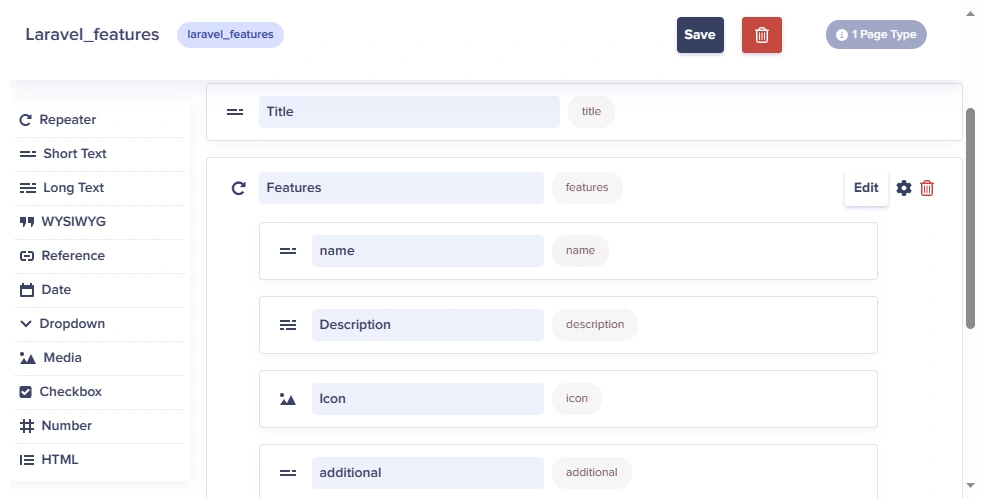
Save the new component as Laravel_Features. This component demonstrates how you can use one component for different sections of your page if the sections have the same structure.
After you save this component, create another component for a section to display an image next to columns reflecting your services section and add the following fields:
-
Short text: Heading
-
WYSIWYG: Sub-heading
-
Media: Image
-
Drop-down: Image position
-
Short text: Button label
-
Short text: Button URL
-
Short text: Scroll anchor ID
Save the component as Laravel Two Columns with Images.
After you save this component, create another component to contain client testimonials and add the following fields:
-
Short text: Headline
-
Repeater: Testimonials
-
Long text: Quote
-
Short text: Name
-
Short text: Title
-
Save the component as Laravel Testimonials.
Creating our landing page using the components we’ve built
Now you must create a page in your ButterCMS portal. You can create a page by hovering over the Page icon and clicking Page on the pop-up, as shown below:
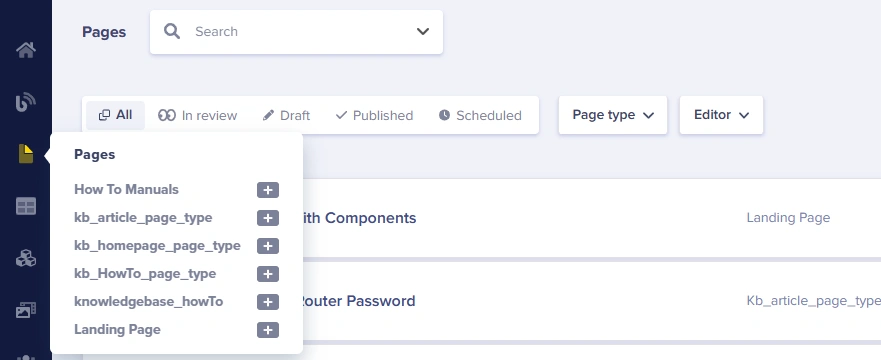
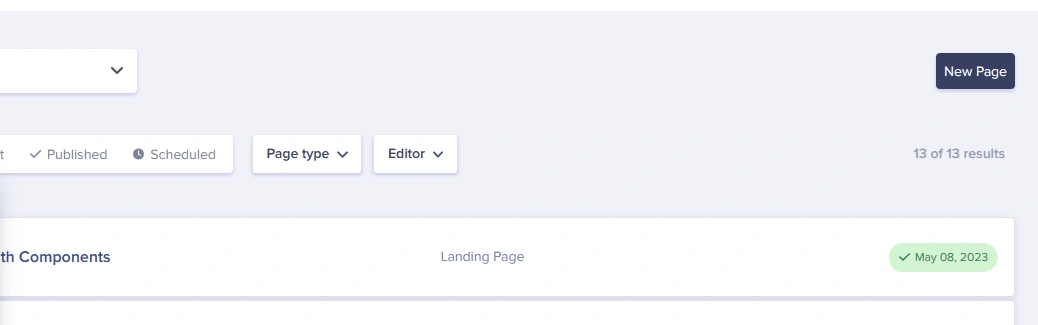
Once on the Pages page, click on the New Page button.
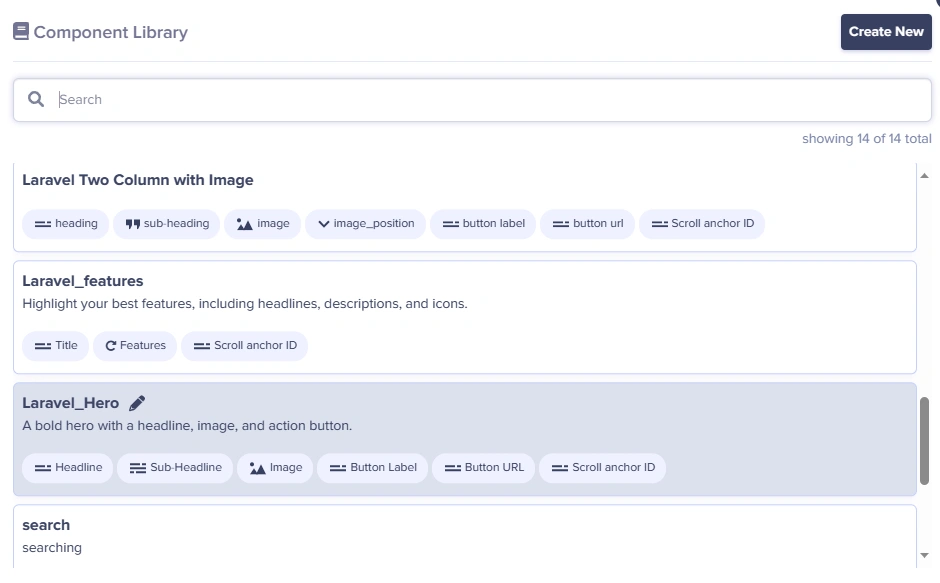
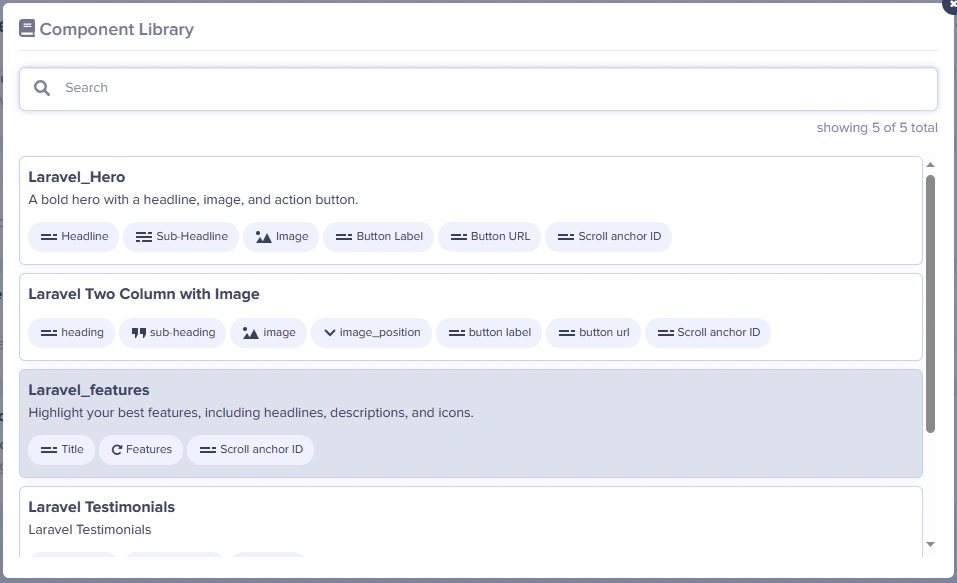
Once on the New Page page, add the components you created by clicking on the Book icon next to Component, as shown below:
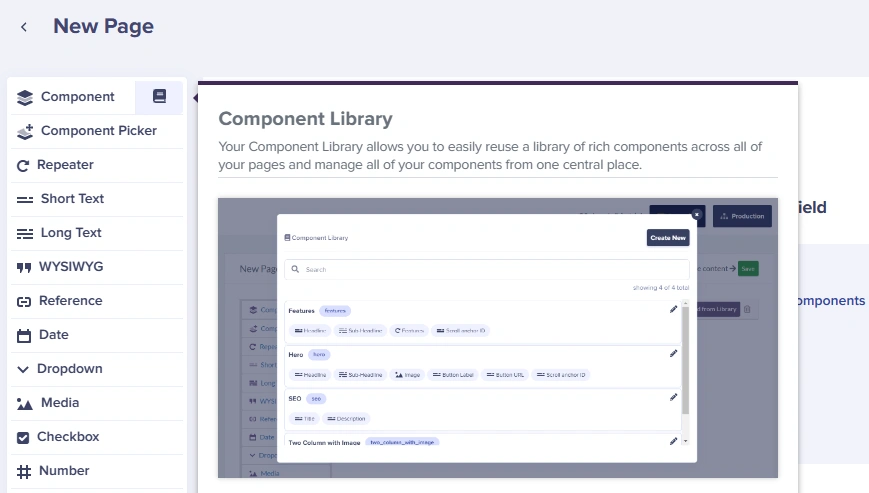
After clicking on the book button, you will see a modal where you can select a component from your Component Library. The first component added to the page is the SEO component.
After adding the first component, you will then use the Component Picker element to group components together.
Here is the list of components to be added to the Component Picker:
-
Laravel_Hero
-
Laravel Two Column with Image
-
Laravel Testimonials
-
Laravel_features
-
Laravel_features
-
Contact us
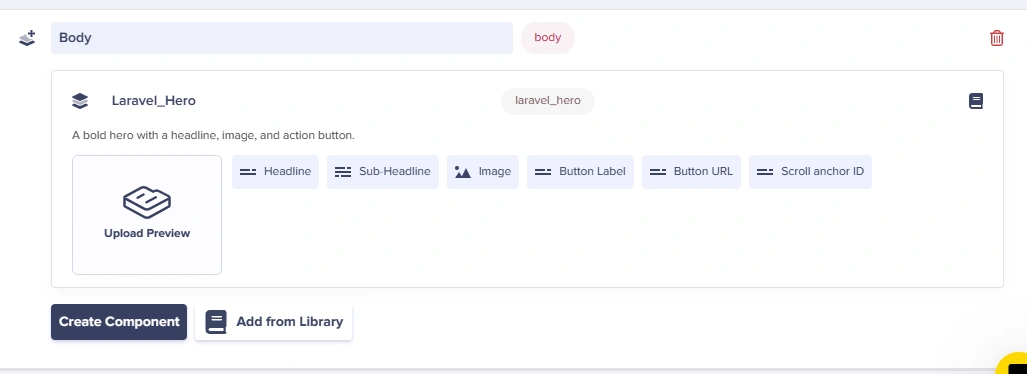
After clicking on the Component Picker, thereby adding it to the schema, name it “Body”:

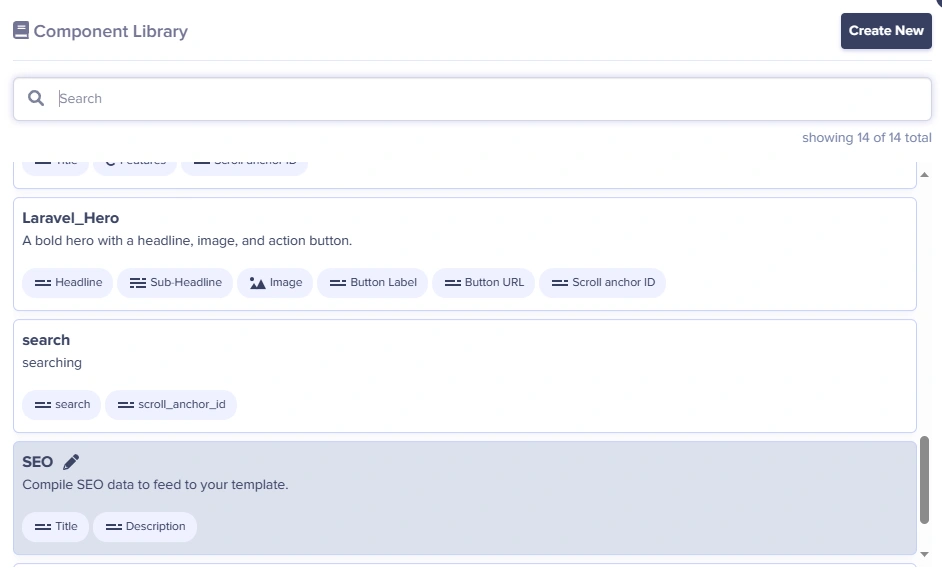
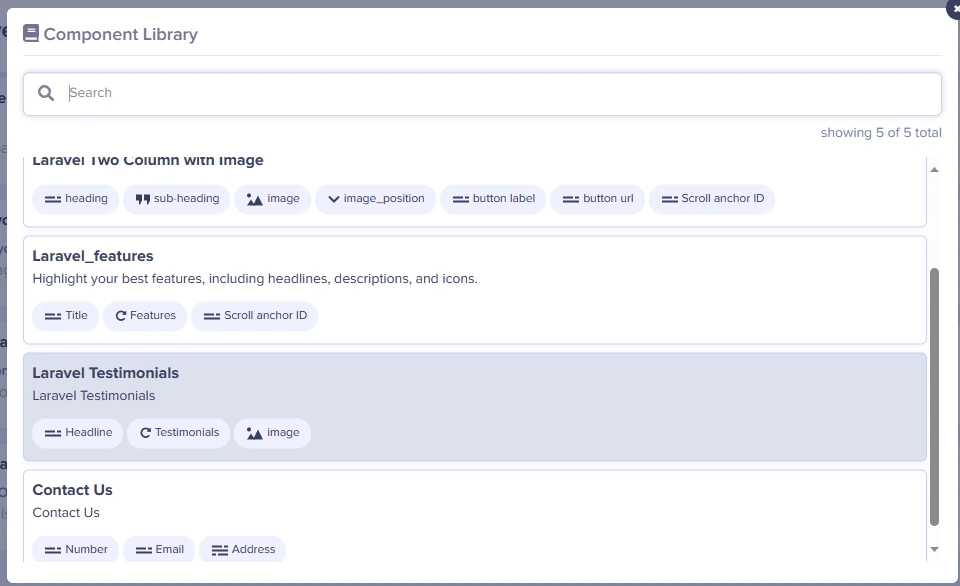
Since we’ve already created the components, click on the Add from Library button to add the components from the Component Library modal:
The first component in the Component Picker is Laravel_Hero:
Click on the Add from Library button again to add the Laravel Two Column with Image Component and then add the rest of the components in the list above.
Note that the Laravel_features component is used twice but for different content—the components will be separated by their titles on the front-end. This is how the repeater schema looks like in ButterCMS:
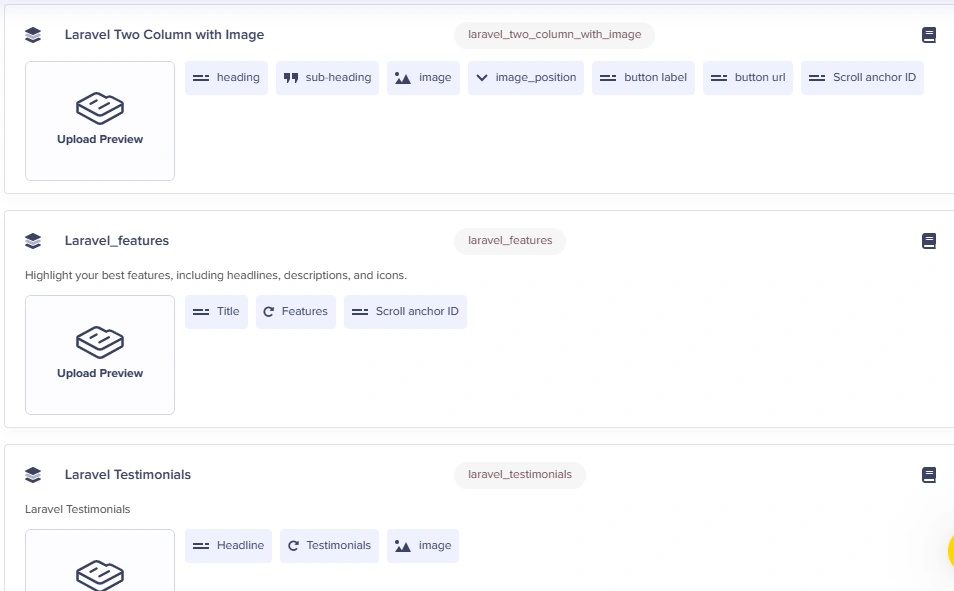
Note that the Laravel_features and Laravel Testimonials components make use of the repeater content field. This will help you group content which will be repeated.
After adding your components, go to the top of the page and save the page with the name laravel landing page.
Great! You are done with the schema of your page. Next, you will be adding content to the page you have created.
Populating the page with content
After creating the page, to populate your page with content, hover over the Pages icon on the sidebar and click on the (+) icon next to the newly created laravel landing page:

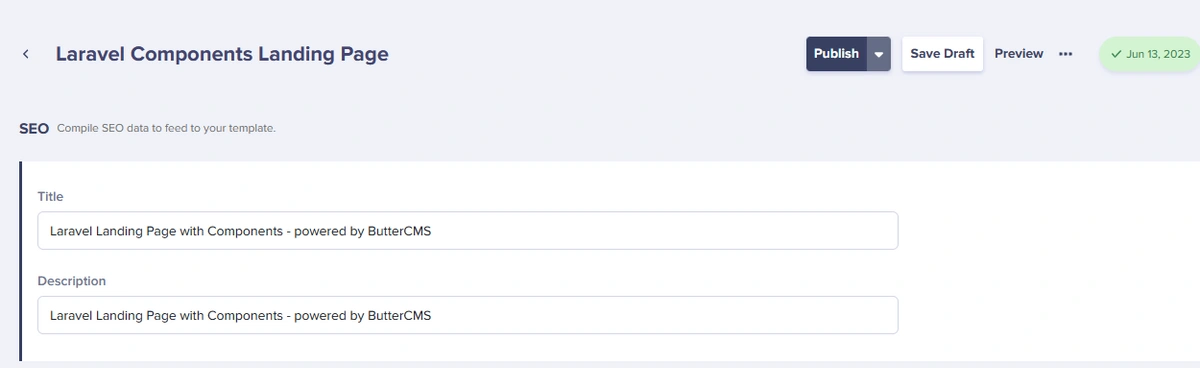
First, add content to the SEO component:
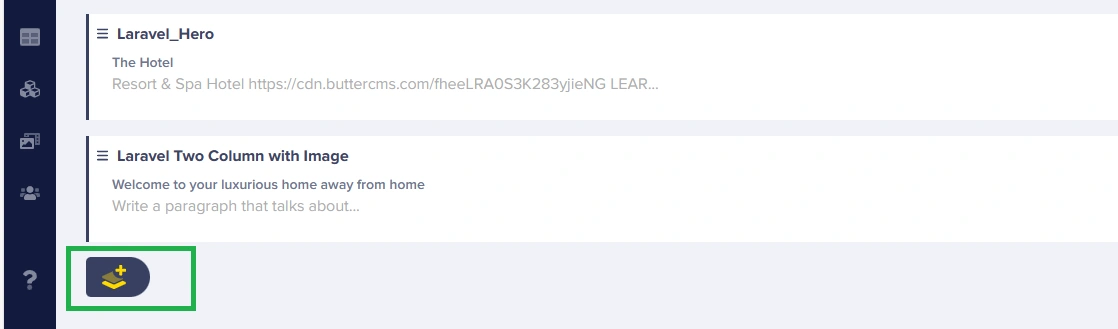
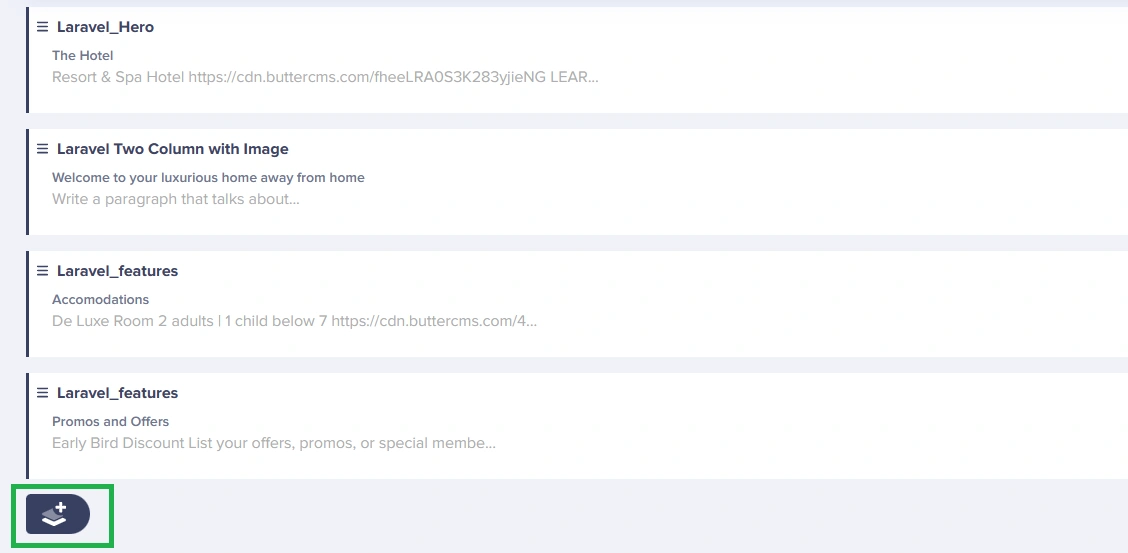
After adding the content to the SEO component, let’s add content to the Component Picker named “Body”. For our page’s body, the first section to build is the Hero section. You will build this section using the Laravel_Hero component. To add the component, click on the Component Picker button:

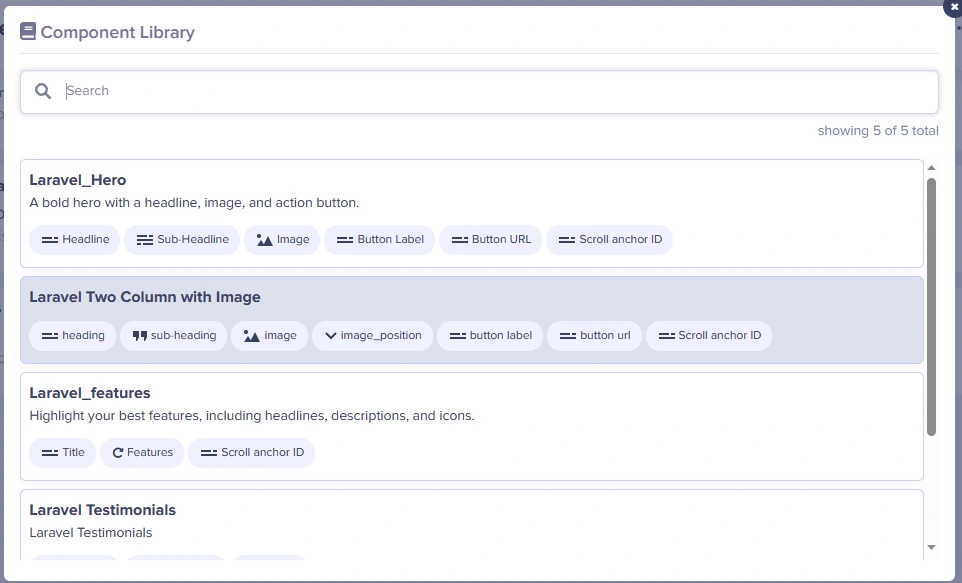
Clicking this button will pop up a modal with the components created in the last section. Select Laravel_Hero:
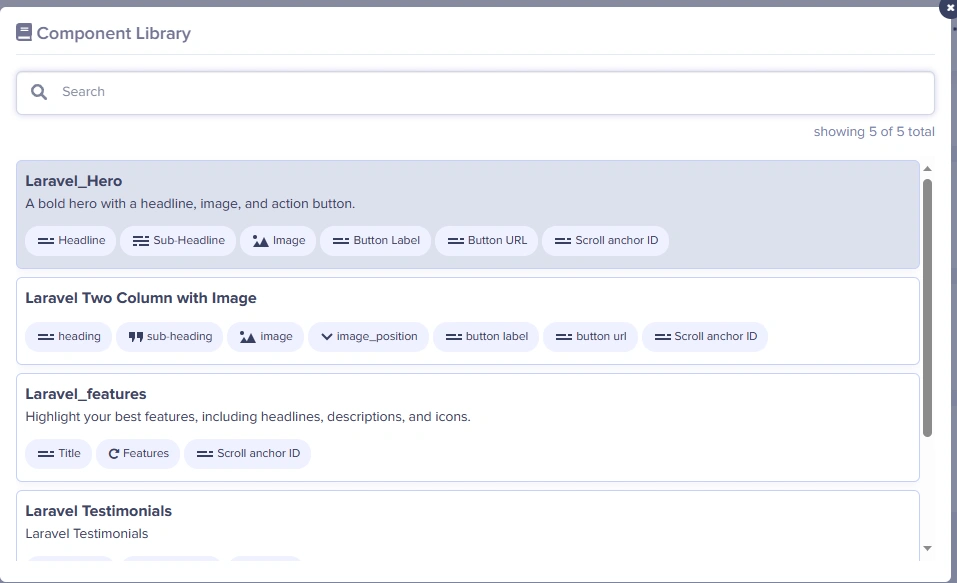
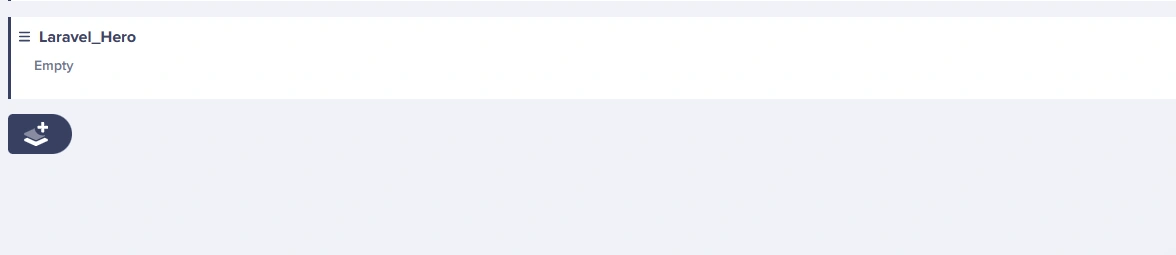
This will add the component to the Component Picker. Since we have not yet added content to the component, it will have the description “Empty”:
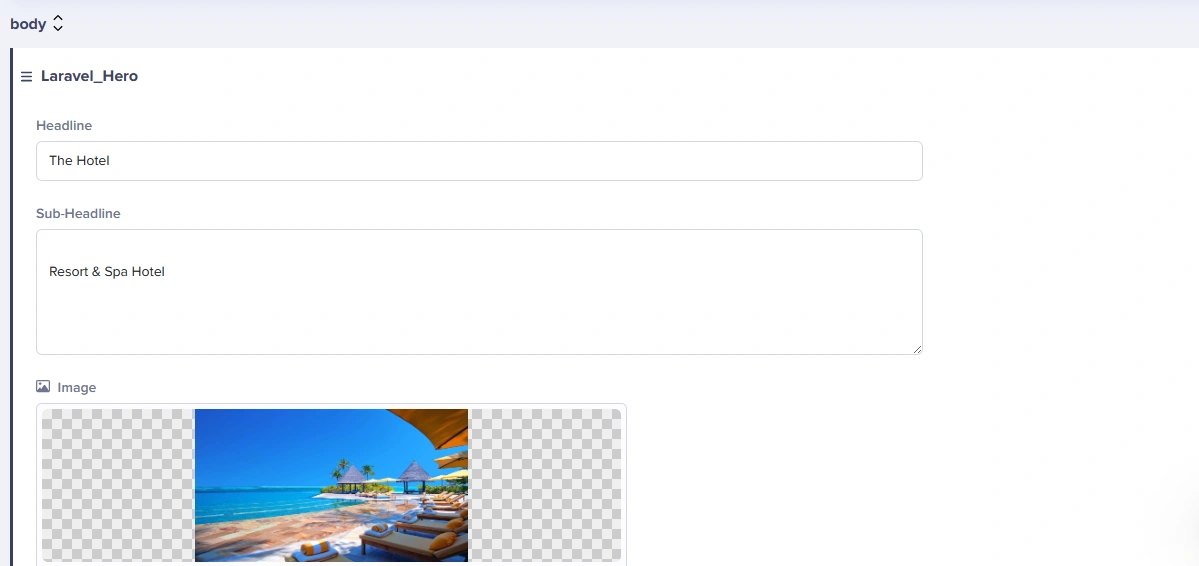
Click the Laravel_Hero component, this will expand to enable you to add content:
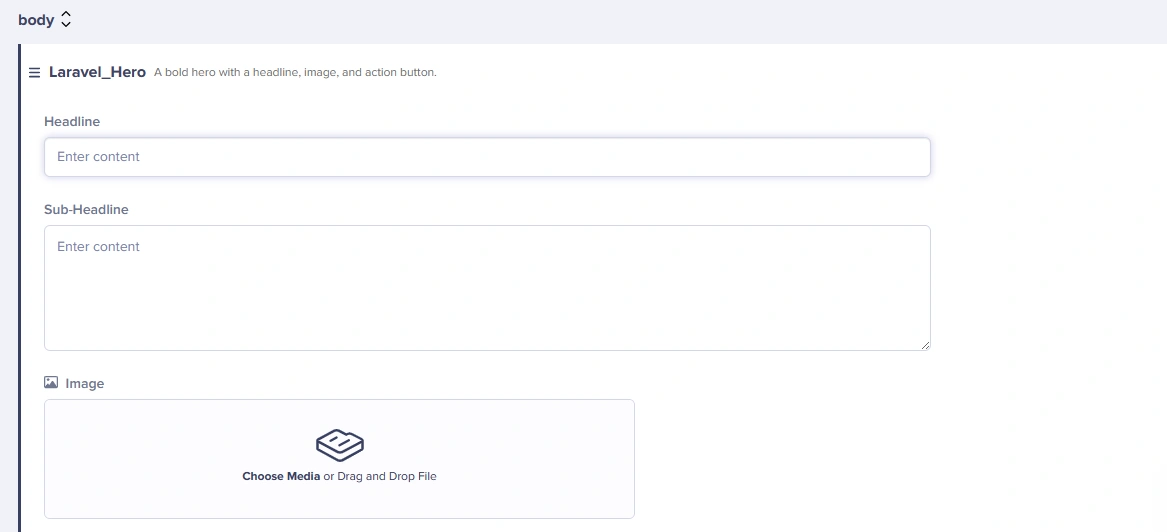
To add content for the Headline and Sub-Headline, you simply need to click on the text input fields below them. To add the image, simply drag the image from your PC and drop it on the media input. After adding your content, this is how Laravel_Hero should look like:
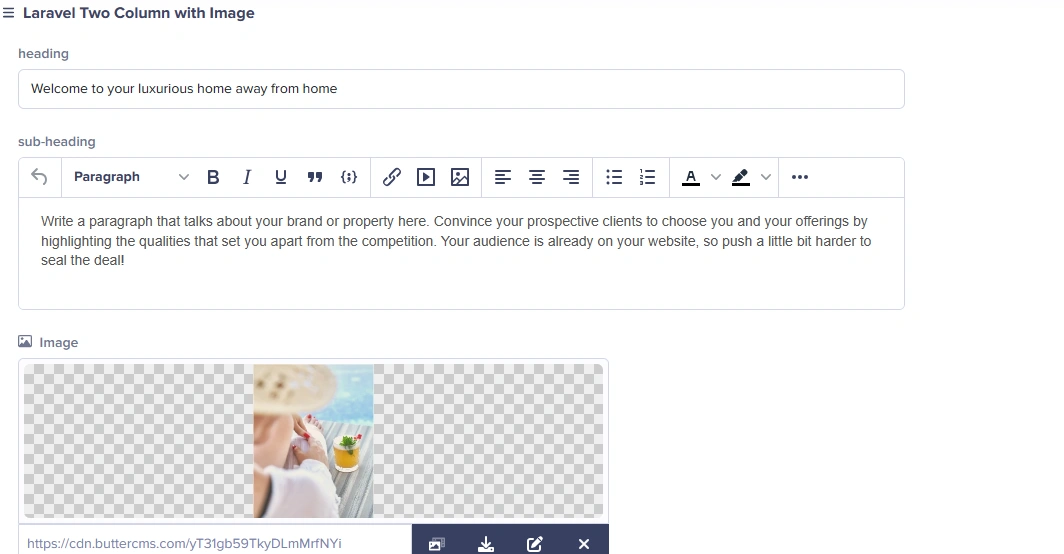
The next component on the list is Laravel Two Column with Image. Click on the Component Picker button and select Laravel Two Column with Image:
After adding the component, click on the component and add content:
After adding content to the Laravel Two Columns with Image component, the next component to add content to is the Laravel Features component. The Laravel Features component will be used to create two sections: the Accommodations section and the Promos and Offers section. First, let's create the Accommodations section.
Click on the Component Picker button:
In the pop-up modal, select Laravel_features:
After adding the component, click on it to expand it:
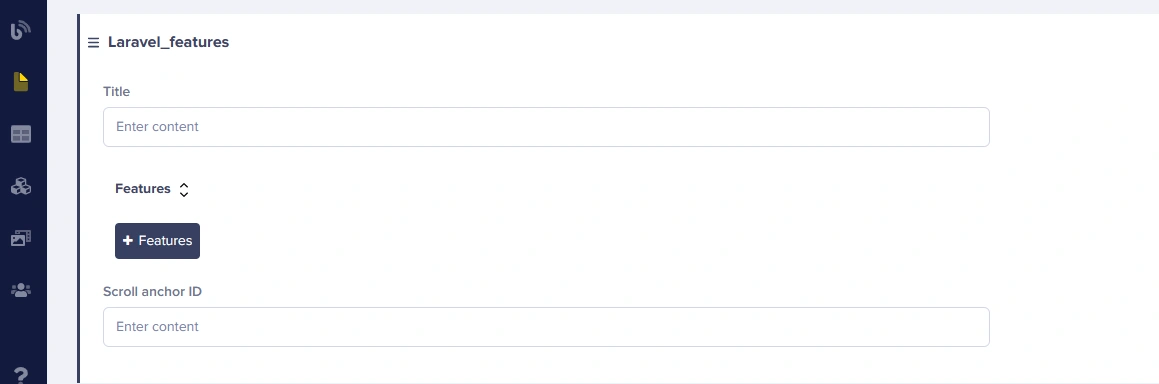
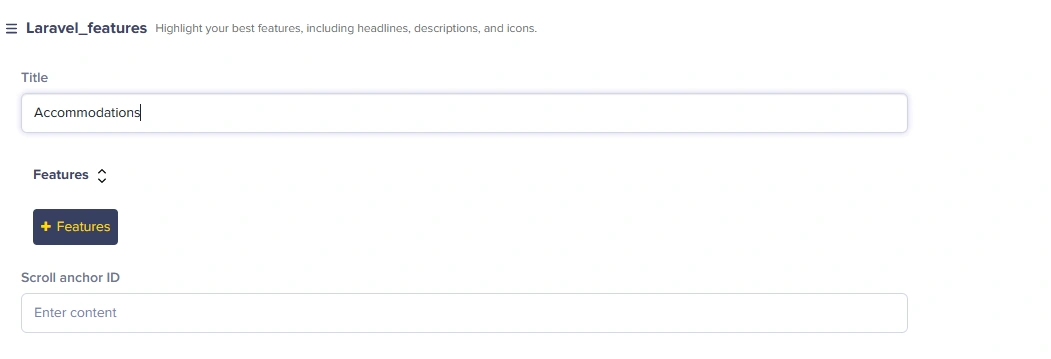
Since you are using this component for the Accommodations section, the Title will be “Accommodations”. This will be helpful when distinguishing between sections using the same component.
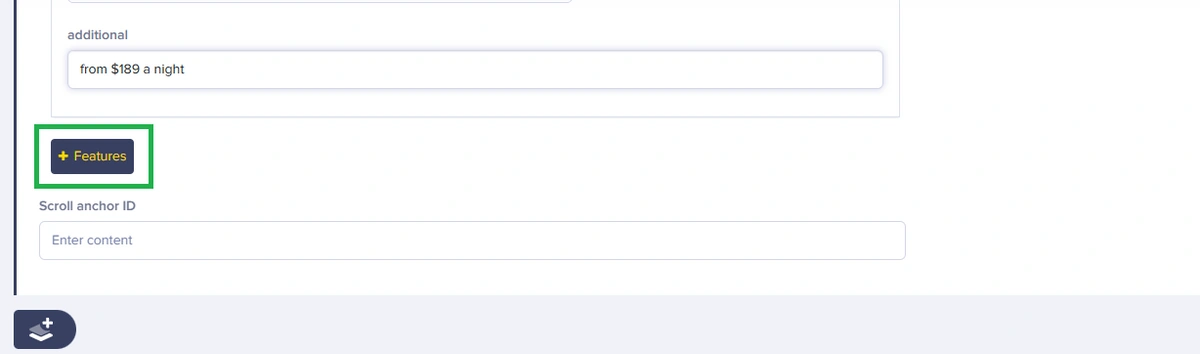
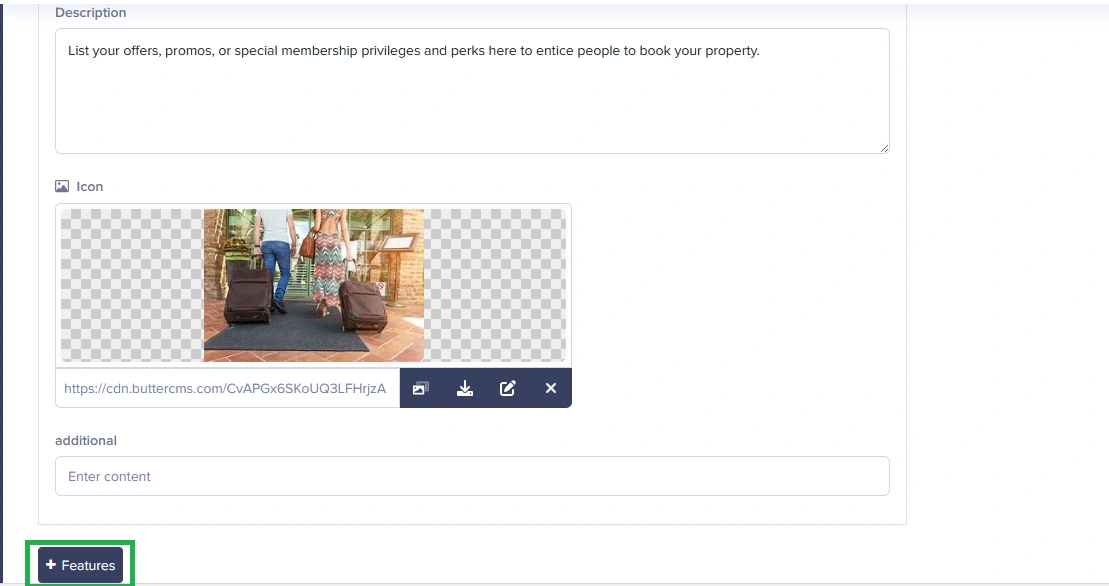
Now to add content to the repeater, click on the + Features button. This is the repeater named “Features” we defined in the last section:
After clicking on the button, a new item will be shown under the Features repeater, as shown below:
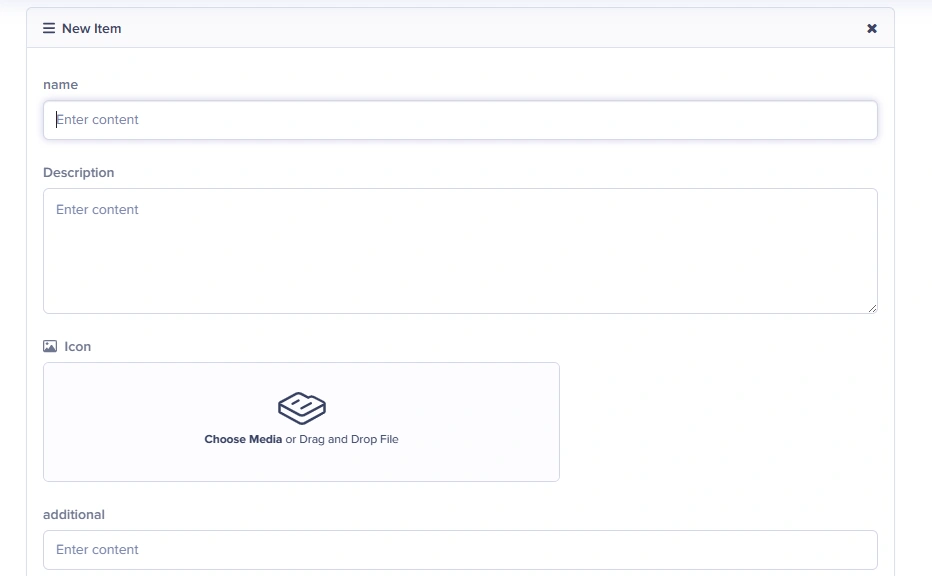
After adding your content, the populated item should look like this:
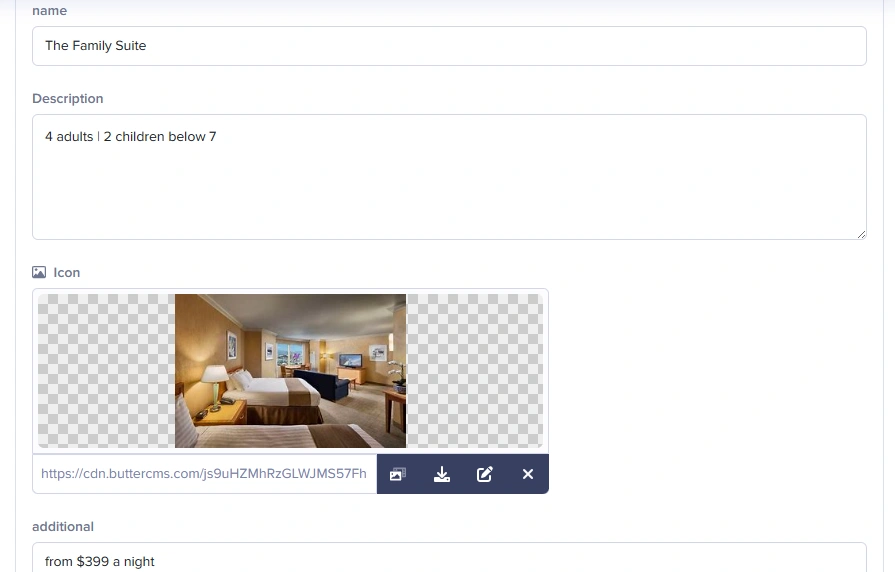
To add more items to the repeater, simply click on the + Features button again:
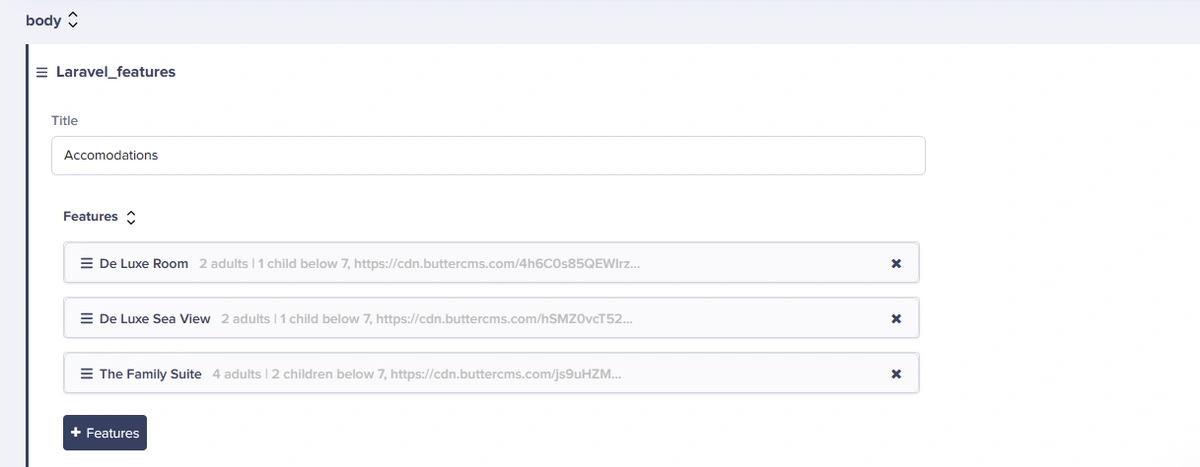
This will add another empty item to the repeater for you to populate. Repeat the steps to add more items to the Features repeater. Here is all the content added to the Accommodations section:
Next, let’s create the Promos and Offers section using the Laravel_Features component. The Laravel_features component was also used for the Accommodations section, but the Title content field will be used to distinguish between the two sections.
Click on the Component Picker button and, from the modal, select Laravel_Features again:
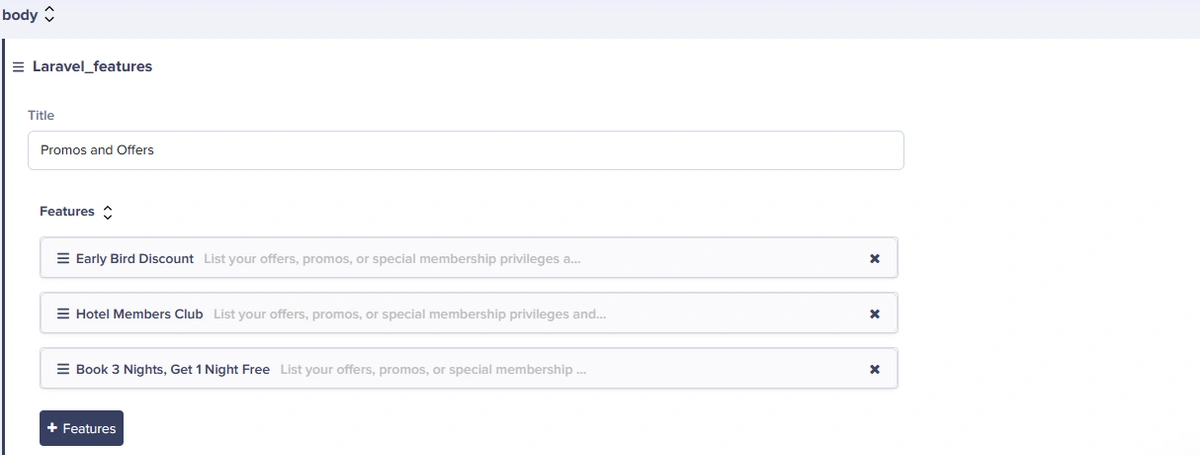
Once the component is added, click on it to expand it to start adding content to it. Since this component will be used for the Promos and Offers section, the Title will be “Promos and Offers”:
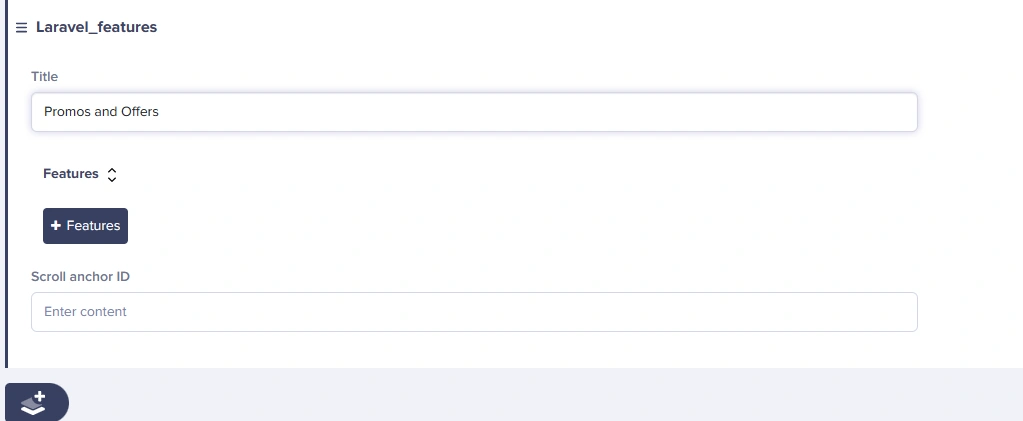
To start adding content to the Features repeater, click on the + Features button, and after adding content to the first repeater item, click on the + Features button to add more items:
After adding all the items, the Laravel_features component for the Promos and Offers section should look like this:
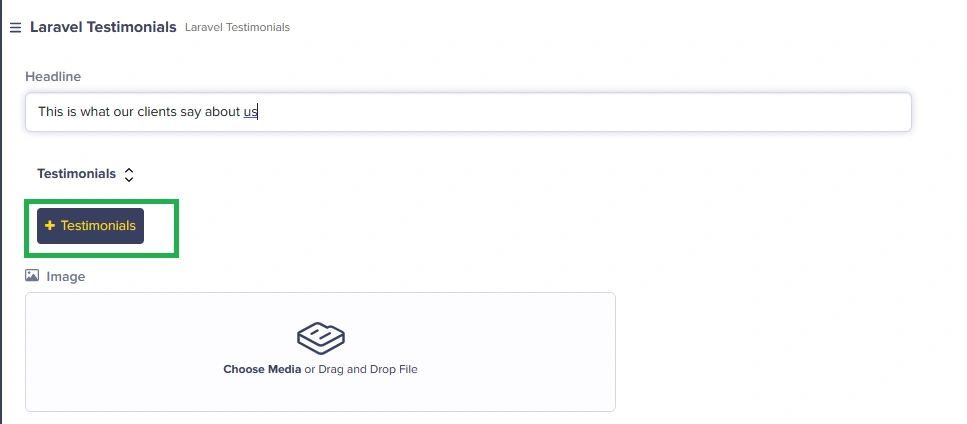
Now, let’s use the Laravel Testimonials component to create the Testimonial section of the page. Click on the Add Component button:
From the modal, select Laravel Testimonials:
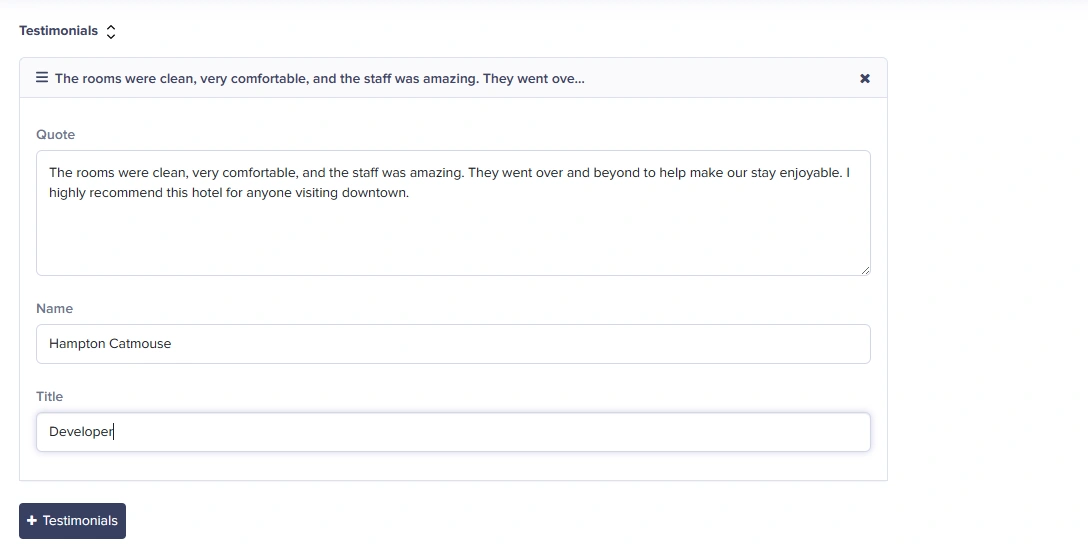
After selecting the component, click on it to start adding content to it. You first had to add the headline and then click on the + Testimonials button to add a repeater item:
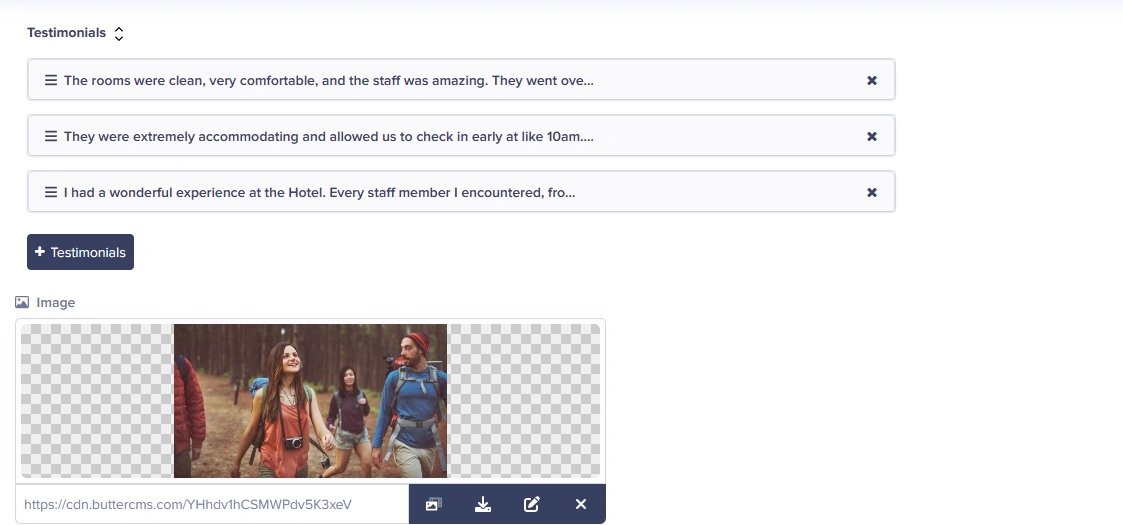
This is to create a new item for the repeater for us to populate. Add content to the first item, and click the + Testimonials button again to add more items to the repeater:
After adding your items, scroll down and add the image. This image will be used as the background image for the testimonials:
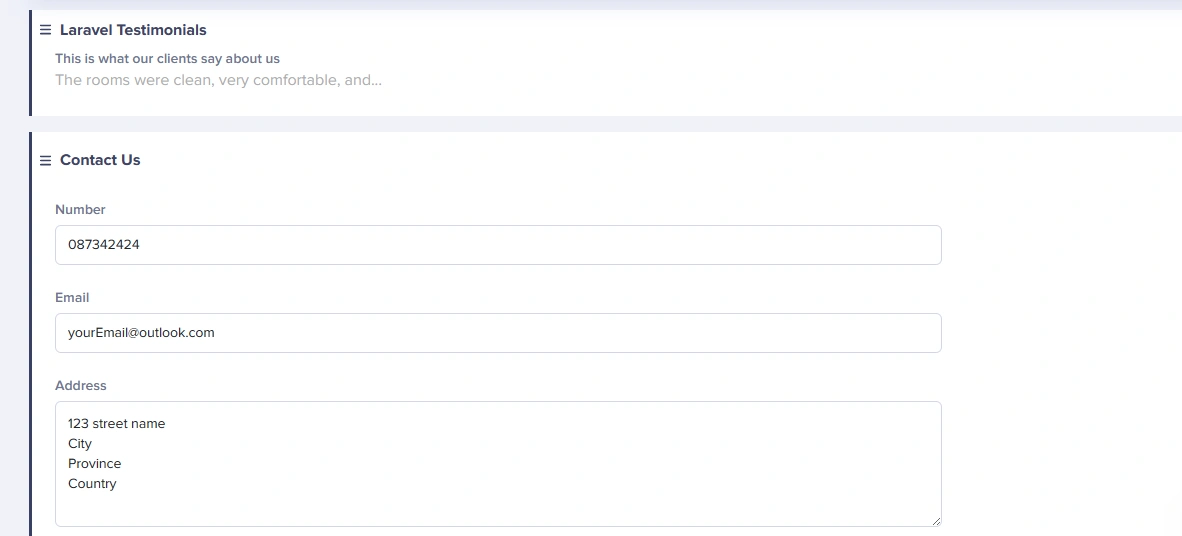
Lastly, for the Contact Us section, make use of the Contact Us component. Click on the Add Component button as shown previously and select the Contact Us component from the modal. After adding the component, click on the component and add content to it.
After populating your page with content, publish the page by going to the top of the page and clicking the Publish button. It is now time to start creating the Laravel application.
Creating the Laravel application
This tutorial creates the application using a simple and straightforward method. For a more detailed and complex template (i.e., for advanced Laravel developers), you should follow this GitHub repo.
This tutorial uses Visual Studio Code as the code editor. To work with Laravel, we will use PHP and Composer. Create a new Laravel project using the following command on your command line:
composer create-project laravel/laravel ButterApp
To add ButterCMS to your project, go to your project directory, open the composer.json file and under the "require" field, add "buttercms/buttercms-php": "~2.4.0". Once done, run the following commands on your terminal:
Composer update
Composer Install
After the Laravel application is set up, navigate to ButterApp\app\Http\Controllers and create a new controller. Name the file PageController.php and add the following code to the file:
<?php


namespace App\Http\Controllers;


use ButterCMS\ButterCMS;
use Illuminate\Http\Request;
use Illuminate\Support\Facades\Config;
use Illuminate\View\View;


class PageController extends Controller
{
    private static $apiToken = 'c3c37caed6eaa3141e464fc82cab8f83cae7925f';
    private $client;
    public function __construct() {
        $this -> client = new ButterCMS(PageController::$apiToken);
      }


    public function showPage(string $type, string $pageSlug): View
    {
        $page = $this->client->fetchPage($type, $pageSlug);


        return view('page', [
            'pageSeo' => $page->getFields()['seo'],
            'pageBody' => $page->getFields()['body'],
        ]);
    }


    public function showLandingPage(): View
    {
        return $this->showPage('laravel_landing_page', 'laravel-components-landing-page');
    }


    public function showLandingPageSlug(string $pageSlug): View
    {
        return $this->showPage('laravel_landing_page', $pageSlug);
    }
}
After adding your code, navigate to ButterApp\resources\views and create a PHP file called page.blade.php and add the following code:
<!doctype html>
<html lang="en">
  <head>
    <script src="https://kit.fontawesome.com/48764efa36.js" crossorigin="anonymous"></script>
        <link rel="preconnect" href="https://fonts.gstatic.com">
        <link href="https://fonts.googleapis.com/css2?family=Source+Sans+Pro:wght@300;400;600&display=swap" rel="stylesheet">
    <!-- Required meta tags -->
    <meta charset="utf-8">
    <meta name="viewport" content="width=device-width, initial-scale=1">
    <link rel="stylesheet" href="{{ asset('css/style.css') }}">
    <!-- Bootstrap CSS -->
    <link href="https://cdn.jsdelivr.net/npm/bootstrap@5.1.3/dist/css/bootstrap.min.css" rel="stylesheet" integrity="sha384-1BmE4kWBq78iYhFldvKuhfTAU6auU8tT94WrHftjDbrCEXSU1oBoqyl2QvZ6jIW3" crossorigin="anonymous">
    <title>{{ $pageSeo['title'] }}</title>
    <meta name="description" content="{{ $pageSeo['description'] }}">
    <link rel="stylesheet" href="{{ asset('css/owl.carousel.min.css') }}">
    <link rel="stylesheet" href="{{ asset('css/owl.theme.default.min.css') }}">
    <script src="https://cdnjs.cloudflare.com/ajax/libs/jquery/3.6.0/jquery.min.js"></script>


  </head>
  <body style="width: 100%;padding: 0%; background-color: #f4f1ed;">


        @foreach ($pageBody as $section)

        @if ($section['type'] === 'laravel_hero')
        <div id="banner" style="background-image: url('{{ $section['fields']['image'] }}');  background-repeat: no-repeat; background-size: cover;background-position: center;">
                    <div id="signup" style="background-color: rgba(0, 0, 0, 0.4);">
                        <div id="S_top">
                            <h1 id="welcomeText1">{{ $section['fields']['headline'] }}</h1>
                             <p id="welcomeText">{{ $section['fields']['sub-headline'] }}</p>
                        </div>
                        <div id="S_bot">
                            <div class="custom-bg-6">
                               <a href="{{ $section['fields']['button_url'] }}" style="text-decoration: none;color:inherit;"> <h4 >{{ $section['fields']['button_label'] }}</h4> </a>
                            </div>
                        </div>
                    </div>
        </div>
        <div id="slide">
        @elseif ($section['type'] === 'laravel_two_column_with_image')
            <div id="TwoColumns">
                <div id="Tleft">
                    <h2>{{ $section['fields']['heading'] }}</h2>
                    <h6>{!! $section['fields']['sub-heading'] !!}</h6>
                </div>
                <div id="Tright">
                    <img src="{{ $section['fields']['image'] }}" alt="Two Column Image" style="width:250px;height:380px;">
                </div>
            </div>
        </div>
        @elseif ($section['type'] === 'laravel_features')
          @if ($section['fields']['title'] === 'Accomodations')
          <h1 class="featureHeading">{{$section['fields']['title']}}</h1>
        <div class="features">

            @foreach ($section['fields']['features'] as $feature)
                <div class="featuresInner">
                    <div id="fTop">
                        <img src="{{ $feature['icon'] }}" alt="Component Icon" style="width:260px;height:160px">
                    </div>
                    <div class="fBottom">
                        <p>{{ $feature['description'] }}</p>
                        <h4>{{ $feature['name'] }}</h4>
                        <p>{{ $feature['additional'] }}</p>
                    </div>
                </div>
            @endforeach
        </div>
         @endif

         @if ($section['fields']['title'] === 'Promos and Offers')
         <h1 class="featureHeading">{{$section['fields']['title']}}</h1>
        <div class="features">

            @foreach ($section['fields']['features'] as $feature)
                <div class="featuresInner">
                    <div id="fTop">
                        <img src="{{ $feature['icon'] }}" alt="Component Icon" style="width:260px;height:160px">
                    </div>
                    <div class="fBottom">
                        <h4>{{ $feature['name'] }}</h4>
                        <p>{{ $feature['description'] }}</p>
                        <p>{{ $feature['additional'] }}</p>
                    </div>
                </div>
            @endforeach
        </div>

         @endif
            @elseif ($section['type'] == 'laravel_testimonials')


            <div id="testimonials" style="background-image: url('{{ $section['fields']['image'] }}');  background-repeat: no-repeat; background-size: cover;background-position: center;">

            <div id="Theads">
                    <h2>{{ $section['fields']['headline'] }}</h2>
                </div>
                <div id="testimonials-carousel">
                @foreach ($section['fields']['testimonials'] as $testimony)
                    <div class="testimonial-item">
                    <h5>{{ $testimony['quote'] }}</h5>
                    <p style="margin-top:5px">{{ $testimony['name'] }}</p>
                    <p>{{ $testimony['title'] }}</p>
                    </div>
                @endforeach
                </div>


            </div>

            @elseif ($section['type'] == 'contact_us')
            <div id="contactUs">
                <h2 style="text-align:center">Contact Us</h2>
                <div id="firstBlock">

                    <h6>{{ $section['fields']['number'] }}</h6>
                    <h6>{{ $section['fields']['email'] }}</h6>
                    <h6>{{ $section['fields']['address'] }}</h6>


                </div>
                <div  id="secBlock">


                </div>


            </div>


            @endif


    <!-- Optional JavaScript; choose one of the two! -->

    <!-- Option 1: Bootstrap Bundle with Popper -->
    <script src="https://cdn.jsdelivr.net/npm/bootstrap@5.1.3/dist/js/bootstrap.bundle.min.js" integrity="sha384-ka7Sk0Gln4gmtz2MlQnikT1wXgYsOg+OMhuP+IlRH9sENBO0LRn5q+8nbTov4+1p" crossorigin="anonymous"></script>

    @endforeach


  </body>
</html>
Then navigate to ButterApp\routes and open the web.php file and add the following code:
<?php


use App\Http\Controllers\BlogController;
use App\Http\Controllers\PageController;
use Illuminate\Support\Facades\Route;


/*
|--------------------------------------------------------------------------
| Web Routes
|--------------------------------------------------------------------------
|
| Here is where you can register web routes for your application. These
| routes are loaded by the RouteServiceProvider within a group which
| contains the "web" middleware group. Now create something great!
|
*/


Route::get('/', [PageController::class, 'showLandingPage'])->where('slug', '.*');
To add your assets, navigate to the public folder and create a CSS folder. Under the folder, create a CSS file called style.css and add the following code to it:
#right{

    width: 25%;
    align-items: center;
    align-self:flex-start;
  }
  #center{
    background-color: rgb(173, 216, 230, 0.0009);
    width: 50%;
    display: flex;
    flex-direction: row;
    align-items: baseline;
    align-self:flex-start;
    padding: 3px;
    justify-content: center;
    margin-top: 20px;
  }
  #left{

    width: 25%;
    align-self:flex-start;
    justify-content: center;
    align-items: center;
    text-align: center;
    margin-top: 20px;

  }
  .navigation{
    position: fixed;
    padding-top: 50%;
    display: flex;
    flex-direction: row;
    width: 100%;
    height:100px;
    padding: 5px;
    background-size:contain; /* Adjust background image size */
    background-position: center; /* Adjust background image position */
    background-color: #0e1a29;

  }


  #testimonials-carousel{
    width: 100%;
    height:fit-content;
   display: flex;
   flex-direction: row;
    color: #0e1a29;


  }
  #Theads{
   text-align: center;
   color:#f4f1ed;
    width: 100%;
    font-size: 90px;
   font-weight: bold;
    margin: 1%;
    margin-top: -55px;

  }
#testimonials{
  width: 100%;
  height: 670px;
  display: flex;
  flex-direction: column;
  justify-content: center;
  color:#0e1a29;
  padding: 2%;
}

.testimonial-item{
  background-color: rgb(14, 26, 41, 0.3);
  justify-content: center;
  display: flex;
  flex-direction: column;
  border-radius:3%;
  padding: 2%;
  color: #ADD8E6;
  margin: 10px;
}
#contactUs{
  width: 100%;
  height: 260px;
  background-color:#623e2a;
  color: #ADD8E6;
  padding: 3%;
}
#firstBlock{
  border: #f4f1ed 1px solid;
  width: 20%;
  padding: 10px;
  font-size: medium;

}
  .col{
    padding: 10px;
    text-decoration: none;
    color: #ADD8E6;
  }
  #navContainer{
    width: 100%;
    background-color: #0e1a29;
  }
  .container{
    width: 100%;

  }
  .body{
    width: 100%;
    background-color: rgb(173, 216, 230, 0.3);
  }
  #image{
    float: right;
    width: 600px;
    height: 432px;
    margin-right: 30px;
  }
  #banner{
    width: 100%;

    height: 670px;


  }


#signup{
    color: #ADD8E6;
    width: 100%;
    height: 100%;
    display: flex;
    flex-direction: column;
    justify-content: center;
    background-color: #1d8b1d;
}
#S_top{

  justify-content: center;
  text-align: center;
  margin-top: -90px;
}
a {

  text-decoration: none; /* no underline */
  }
#welcomeText{
  font-size: 60px;
  font-family:Gabriola
}
#welcomeText1{
  font-size: 80px;
  font-family:Gabriola
}
#S_bot{
  width: 100%;


  display: flex;
  flex-direction: column;
  align-items: center;
  margin-top: 50px;
}
.custom-bg-6 {
  background-color: #0e1a29; /* Light green */
  margin: 5px;
  width: 20%;
  border: #ADD8E6 2px solid;
  padding: 10px;
  text-decoration: none;
  color: #ADD8E6;
  text-align: center;
}
#slide{
  background-color: #f4f1ed;
  width:100%;
  color: #623e2a;
  margin: 0px;
}
#TwoColumns{
  display: flex;
  flex-direction: row;
  padding: 2%;
  background-color:#f4f1ed;
  margin-left: 8%;
}
#Tleft{
  justify-content: center;
  display: flex;
  flex-direction: column;
  text-align: center;
  align-items: center;
  width: 50%;
  margin-left: 20px;

}
#Tright{
  width: 40%;


  justify-items: center;
  text-align: center;
}
.features{
  display: flex;
  flex-direction: row;
  align-content: space-between;
  align-items: normal;
  background-color: #f4f1ed;
  width: 100%;
  justify-content: center;
  margin-top: 0px;
}
.featuresInner{
  display: flex;
  flex-direction: column;
  width: 20%;
  margin-top: 10px;
  margin-bottom: 10px;
  margin-right: 20px;
  margin-left: 20px;
  color: #623e2a;

}
.featureHeading{


  text-align: center;
  margin-top: 25px;
  background-color: #f4f1ed;
  padding: 10px;
  font-weight: bolder;
  color: #623e2a;
  margin-bottom: 0px;
}
.fBottom{
  border: #623e2a 1px solid;
  margin: 10px;
  padding: 5px;


}
.title {
    font-weight: 900;
    display: inline-block;
    width: 100%;
}
.subtitle {
    font-weight: 100;
    line-height: 1.25rem;
}
.subtext {
    font-size: 1.1167rem;
    position: absolute;
    bottom: 0;
    left: 0;
    padding: 1.25rem 1rem;
    width: 100%;
    white-space: initial;
    letter-spacing: 0;
    box-sizing: border-box;
    font-weight: 400;
}
.icon {
    font-size: 1rem;
    line-height: 1rem;
    display: block;
    padding: 0 0 0.5rem 0;
}
canvas {
    position: absolute;
    top: 0;
    left: 0;
}
h1 {
    font-size: 2.5rem;
    color:#ADD8E6;
    margin: 0;
    font-weight: 600;
    text-shadow: 0 2px 10px rgba(0,0,0,0.2);
}
Running your application locally
To run your Laravel application on your localhost, navigate to your terminal and ensure that the terminal is on your application’s directory by running the following commands:
Cd app_name
php artisan serve
By default, PHP will host the application at 127.0.0.1:1800. Hold control and click on the link to get directed to the web application on your default browser.
The results
The resulting web application is as shown below:

Creating a landing page is a great way to convert users on the internet into your customers. You want to ensure that the landing page has a specific agenda guiding the user to the same endpoint. The landing page above simply shows the user different accommodations available as well as the pricing. After that, the user is offered promotions and membership.
Rearranging your components to create an altered experience
You can rearrange the structure or layout of your web application’s front-end by rearranging your ButterCMS page’s structure. You may find the need to rearrange your layout depending on your use case. For example, if the user is searching for reviews on hotels, it would be advantageous to elevate the testimonials section higher on the front-end. To do this, navigate to the pages and rearrange the components by clicking and holding a component and moving it over to the position you desire, as shown below:
After rearranging the components, click on the Publish button to publish your new structure. Then, run your Laravel site again by going to your terminal, ensuring you are at the root directory of your application, and running the following command:
php artisan serve
Follow the link to your localhost on your browser and view the front-end again.

As you can see, the layout of the front-end has changed to reflect the changes made on the ButterCMS page. This means you can change how your web application looks by simply dragging and dropping the components in your ButterCMS portal.
Final thoughts
Congratulations on making it to the end of the tutorial! Using Laravel to create a web application ensures that the application is secure and easy to manage without having to learn any other programming language except PHP. The PHP code is further simplified with the Blade engine. You should also take time to learn Laravel best practices for developers.
Laravel and ButterCMS work well together since you can mirror ButterCMS’ backend structure with your Laravel front-end structure. Using ButterCMS’ page types to divide different sections in your Laravel application, plus Laravel’s routing system, compliments ButterCMS’ API approach and makes it easier to route your application in relation to your APIs.
To learn more about how you can use ButterCMS with Laravel, check out the following tutorial: