Laravel is one of the most popular frameworks to create a variety of websites. You can create portfolio websites, admin dashboards, e-commerce websites, and more. Most importantly, you can create blogs, a process central to this Laravel blog tutorial. Typically this, however, would require setting up a database and an admin dashboard to be able to enter the posts and their content and then display them.
An easier way to do this is to use a headless CMS solution like ButterCMS. With ButterCMS, you don’t need to go through the hassles of creating and configuring your database or a dashboard to create posts. ButterCMS provides all that for you and more. You can create pages, blog posts, or your own entity types with fields that you choose based on your use cases. Then, all you need to do is retrieve that content with ButterCMS’s APIs, or SDKs, and display them in Laravel.
In this tutorial, you will learn how to create a blog with Laravel and ButterCMS. Then, you’ll add integration into ButterCMS’ webhooks that will send notifications directly to your Slack channel of choice whenever a new post is published.
You can find the code used in this tutorial at this GitHub repository.
Table of contents

Why use Laravel?
Laravel is a full-stack PHP framework that can be integrated with powerful front-end frameworks such as React or Vue.js. With Laravel, you’ll be creating websites and apps that are scalable and capable of growth.
In particular, Laravel is a good choice when you need to create a blog. Not only can you easily integrate it with third-party tools such as a headless CMS, but you can also add a ton of other functionalities like authentication, commenting, and more. You can also integrate with popular platforms like Slack, as you’ll see in this tutorial. While following along with this tutorial, we recommend that you refer to our list of Laravel best practices to make sure your application runs smoothly.
Laravel Blog Tutorial Prerequisites
Before you start, make sure you have at least version 7.3 of PHP installed. Also, you need to have Composer installed.
Step One: Create a ButterCMS account
Start by creating a ButterCMS account if you don’t have one already. You can create one with a social media account or your email. You’ll also get the first 30 days free!
After you create an account, you can start creating posts. In the sidebar, click on Blog Posts.
After that, click on New Post at the top right. You’ll be able to enter the post’s title, content, image, and more.
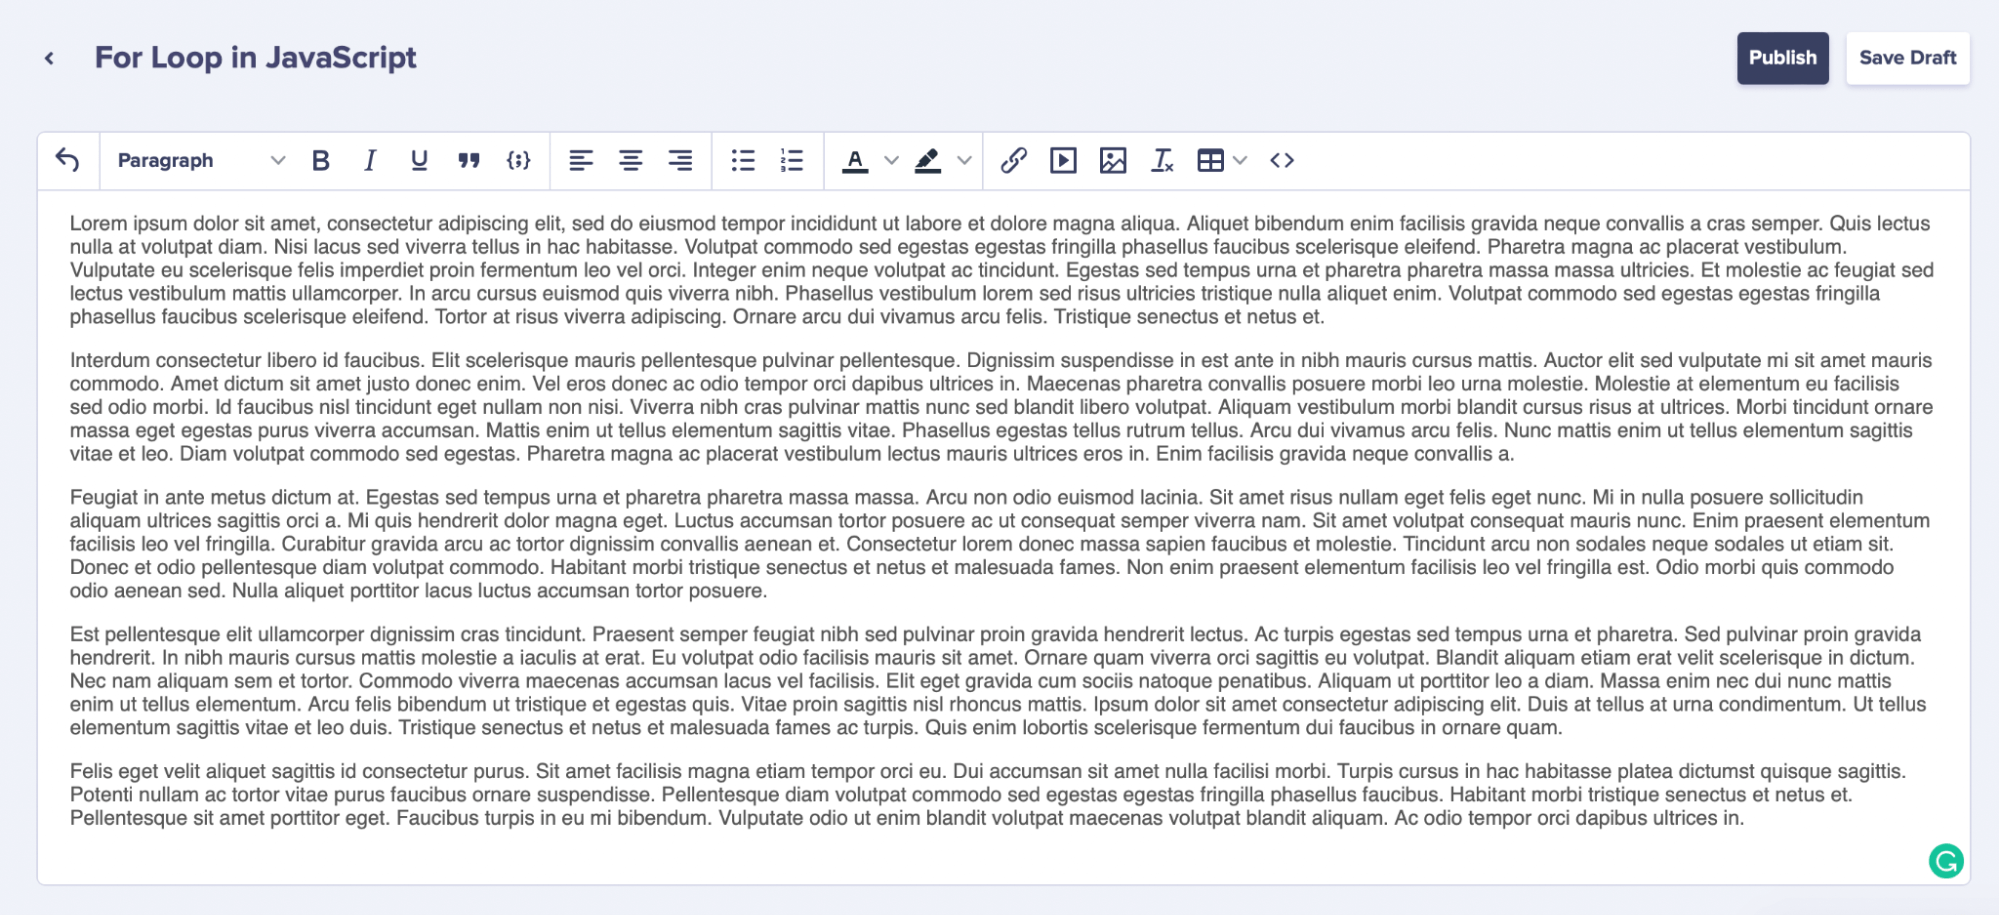
Once you’re done, click on Publish at the top right.
Try to add a couple of posts to see them later in your Laravel blog app.
Step Two: Create a Laravel project
In this section, you’ll create a Laravel project and add the dependencies needed for this tutorial.
Open a terminal and run the following command:
composer create-project laravel/laravel butter-blog
This will create a new Laravel project in a new directory called butter-blog.
Change to the newly created directory:
cd butter-blog
Next, you’ll install ButterCMS’s PHP API client:
composer require buttercms/buttercms-php
In order to connect Laravel with ButterCMS using their APIs, you need to grab your account’s API token. You can find it on your dashboard by scrolling down to the “Integrate Butter into your app” section.
After copying your API token, open .env and add the following new key:
BUTTER_API_KEY=Make sure to set the value to your API token.
You’re now all set to start showing your posts in Laravel!
Step Three: Make a posts page
You’ll now create a controller that will grab all posts from ButterCMS and display them in cards on the home page.
To create a controller, run the following command:
php artisan make:controller BlogController
This will create the file app/Http/Controllers/BlogController.php. Open the file, and add the following new method:
public function home() {
        $butterClient = new ButterCMS(env('BUTTER_API_KEY'));
        $postsResponse = $butterClient->fetchPosts();

        return view('home', ['posts' => $postsResponse->getPosts()]);
}
First, you create a new client for ButterCMS using the SDK you installed earlier. Notice that you pass to the constructor the API token. You retrieve the API token from .env using the env helper function.
Then, you can retrieve posts with fetchPosts on the client. This method returns a PostsResponse instance. You can then use that instance to retrieve the posts with the method getPosts. You pass the posts to the view home which you’ll create next.
Create the view home in resources/views/home.blade.php with the following content:
<!DOCTYPE html>
<html lang="en">
<head>
  <meta charset="UTF-8">
  <meta name="viewport" content="width=device-width, initial-scale=1.0">
  <meta http-equiv="X-UA-Compatible" content="ie=edge">
  <title>Butter Blog</title>
  <link href="https://cdn.jsdelivr.net/npm/bootstrap@5.1.3/dist/css/bootstrap.min.css" rel="stylesheet" integrity="sha384-1BmE4kWBq78iYhFldvKuhfTAU6auU8tT94WrHftjDbrCEXSU1oBoqyl2QvZ6jIW3" crossorigin="anonymous">
</head>
<body>
  <nav class="navbar navbar-light bg-light">
    <div class="container-fluid">
      <a class="navbar-brand" href="/">Butter Blog</a>
    </div>
  </nav>
  <div class="container my-4">
    <div class="row">
      @forelse ($posts as $post)
        <div class="card col-2 col-md-4 me-2 p-0">
          <img src="{{ $post->getFeaturedImage() }}" class="card-img-top" alt="{{ $post->getFeaturedImageAlt() }}">
          <div class="card-body">
            <h5 class="card-title">{{ $post->getTitle() }}</h5>
            <p class="card-text">{{ $post->getSummary() }}</p>
            <a href="#" class="btn btn-primary">Read More</a>
          </div>
        </div>
      @empty
        <div class="card">
          <div class="card-body">
            <p class="card-text">There are no posts!</p>
          </div>
        </div>
      @endforelse
    </div>
  </div>
  <script src="https://cdn.jsdelivr.net/npm/bootstrap@5.1.3/dist/js/bootstrap.bundle.min.js" integrity="sha384-ka7Sk0Gln4gmtz2MlQnikT1wXgYsOg+OMhuP+IlRH9sENBO0LRn5q+8nbTov4+1p" crossorigin="anonymous"></script>
</body>
</html>
This will show the posts passed from the controller in a row of cards. Please notice that you are linking to Bootstrap’s CDN for easy styling. If there are no posts, a message on a card saying that there are no posts will be shown.
Finally, you need to link the home route to the new method in the controller we just created. In routes/web.php replace the current / route with the following:
Route::get('/', [App\Http\Controllers\BlogController::class, 'home']);
Your home page is now ready. In your terminal, run the server:
php artisan serve
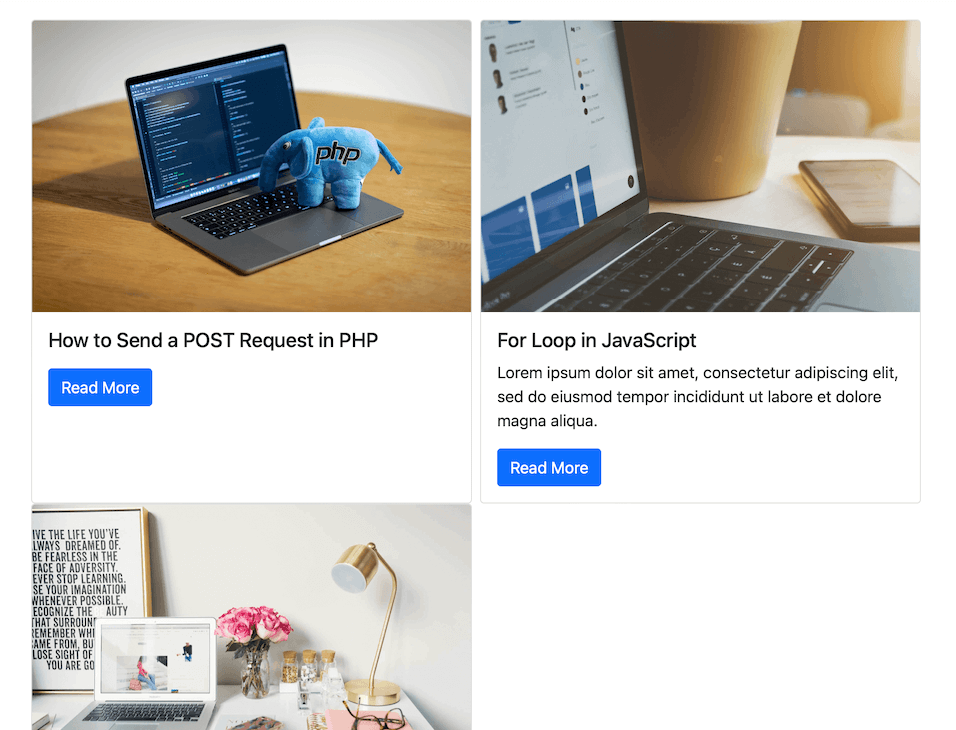
This will run your blog at localhost:8000. Open it, and you’ll see your posts displayed in a row.
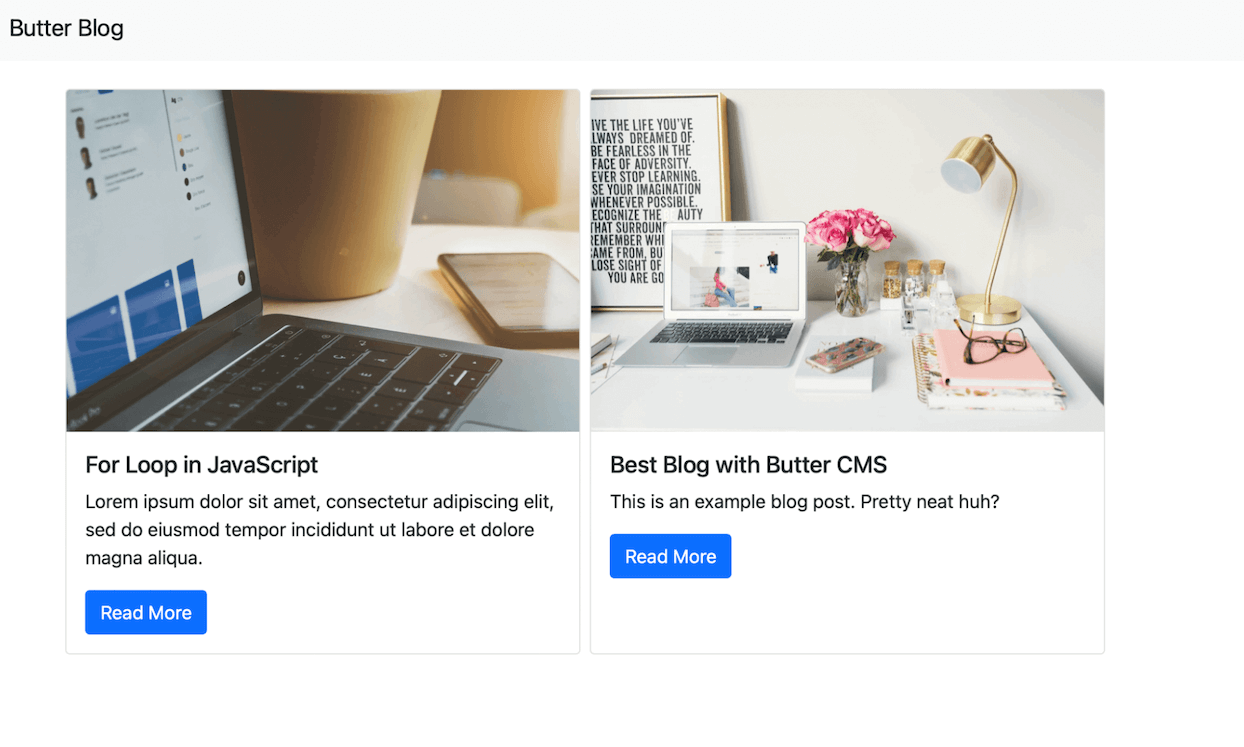
This shows the blog posts you have added. Notice that the “Best Blog with Butter CMS” is a default blog post that you’ll find once you create an account at ButterCMS. I have only changed the image.
Notice that the “Read More” buttons currently don’t work. You’ll add a page to view a post next.
Step Four: Make a single post page
In app/Http/Controllers/BlogController.php add a new method to show a single post:
public function showPost (Request $request, $slug) {
        $butterClient = new ButterCMS(env('BUTTER_API_KEY'));
        try {
            $postResponse = $butterClient->fetchPost($slug);
        } catch (RequestException $error) {
            //in case the post is not found
            return redirect('/');
        }

        return view('post', ['post' => $postResponse->getPost()]);
    }
Similar to the previous method we added, you first create a new ButterCMS client using the SDK. Then, to fetch a single post you can use the fetchPost method on the client. This method accepts a parameter, which is the post’s slug. This slug will be passed as a parameter to the page’s URL.
If a post with the slug passed does not exist, the API will return a 404 response and a RequestException will be thrown. So, you wrap the method call in a try-catch block. For simplicity, in the code block above you just redirect to the home page if the post does not exist.
If the post exists, the method will return a PostResponse instance. You can use the getPost method on this instance to retrieve the post. You pass it to the post view which you’ll create next.
Create the file resources/views/posts.blade.php with the following content:
<!DOCTYPE html>
<html lang="en">
<head>
  <meta charset="UTF-8">
  <meta name="viewport" content="width=device-width, initial-scale=1.0">
  <meta http-equiv="X-UA-Compatible" content="ie=edge">
  <title>Butter Blog</title>
  <link href="https://cdn.jsdelivr.net/npm/bootstrap@5.1.3/dist/css/bootstrap.min.css" rel="stylesheet" integrity="sha384-1BmE4kWBq78iYhFldvKuhfTAU6auU8tT94WrHftjDbrCEXSU1oBoqyl2QvZ6jIW3" crossorigin="anonymous">
  <meta name="description" content="{{ $post->getMetaDescription() }}" />
</head>
<body>
  <nav class="navbar navbar-light bg-light">
    <div class="container-fluid">
      <a class="navbar-brand" href="/">Butter Blog</a>
    </div>
  </nav>
  <div class="container my-4">
    <h1 class="mb-3">{{ $post->getTitle() }}</h1>
    <p class="text-muted">{{ $post->getSummary() }}</p>
    <div class="w-50 my-3">
      <img src="{{ $post->getFeaturedImage() }}" alt="{{ $post->getFeaturedImageAlt() }}" class="img-fluid" />
    </div>
    <div class="overflow-hidden">
      {!! $post->getBody() !!}
    </div>
  </div>
  <script src="https://cdn.jsdelivr.net/npm/bootstrap@5.1.3/dist/js/bootstrap.bundle.min.js" integrity="sha384-ka7Sk0Gln4gmtz2MlQnikT1wXgYsOg+OMhuP+IlRH9sENBO0LRn5q+8nbTov4+1p" crossorigin="anonymous"></script>
</body>
</html>
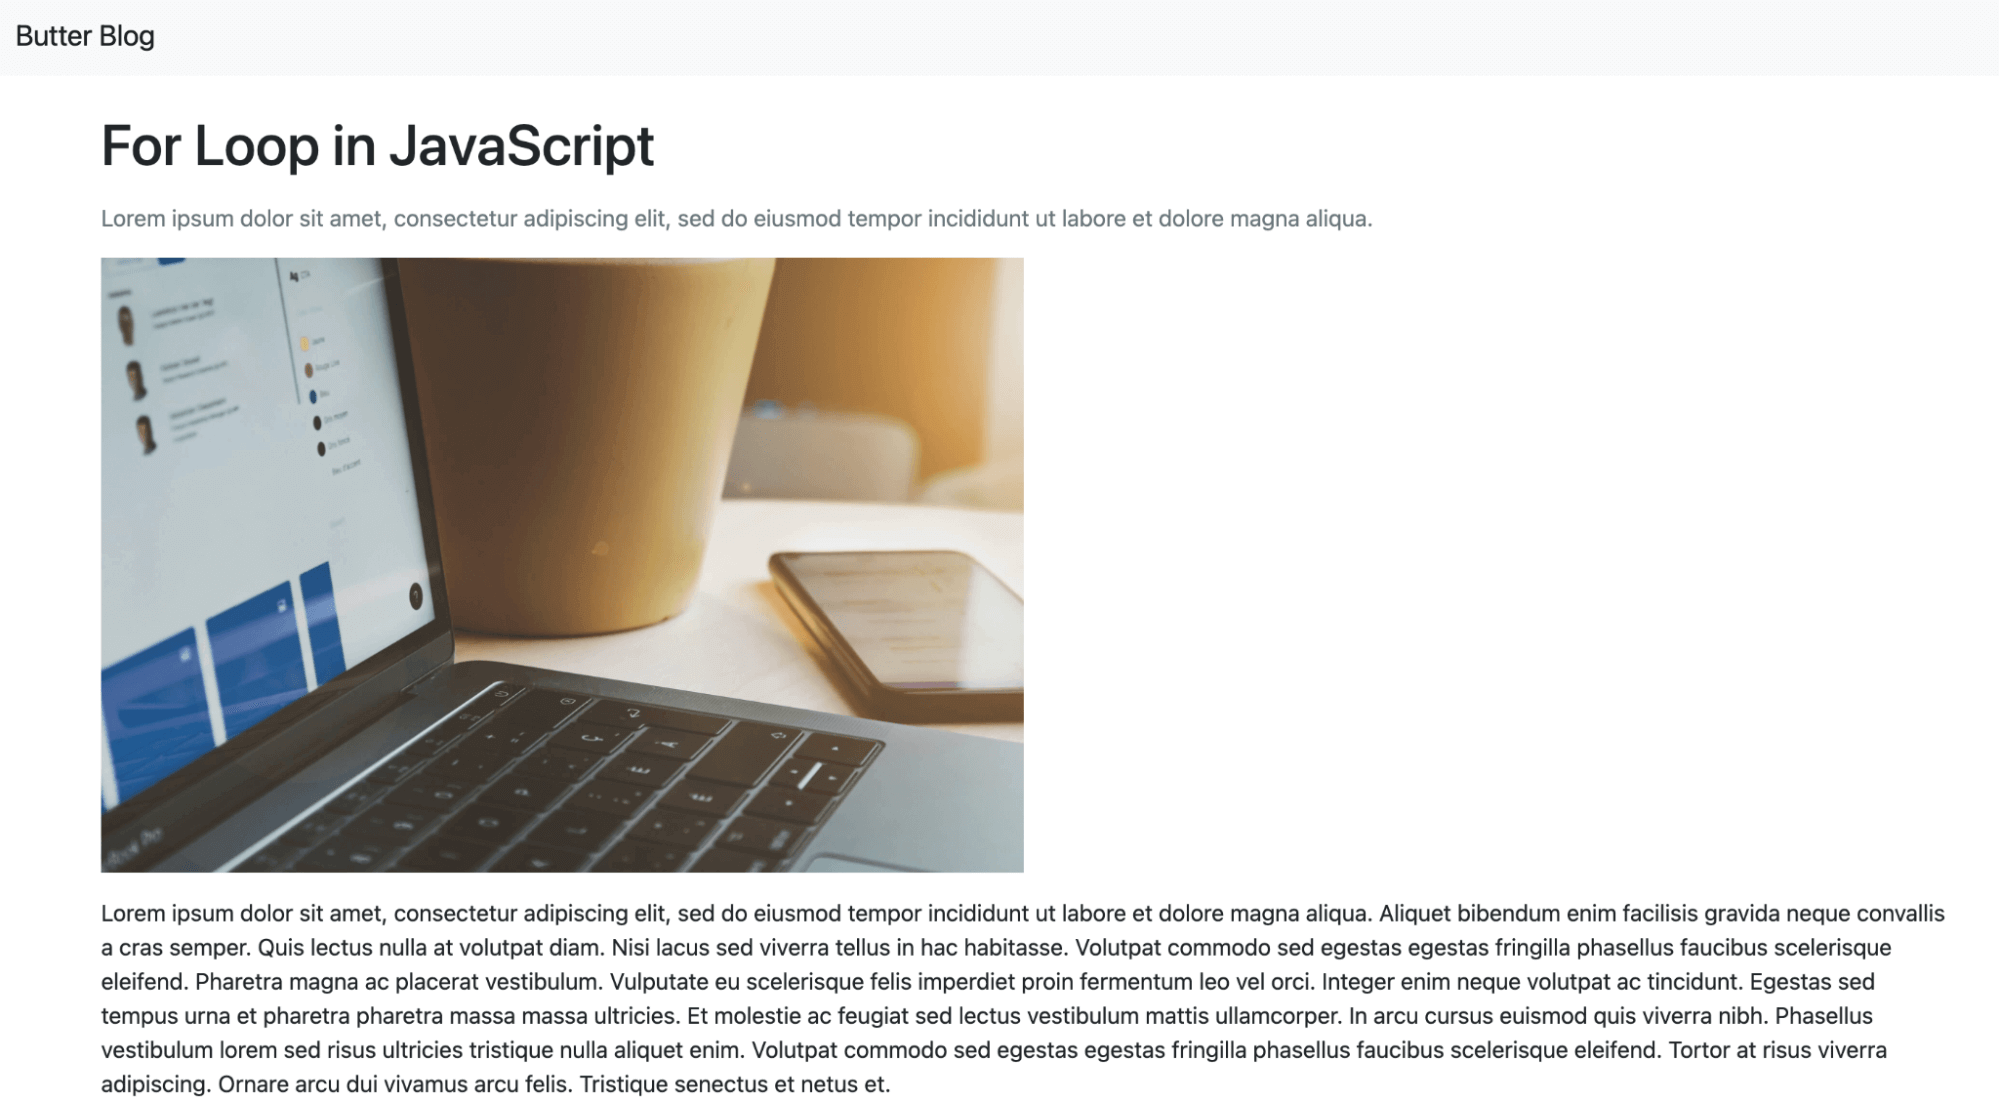
On this page, you’re showing the post’s title, summary, image, and content. Notice that since the content entered in ButterCMS can contain HTML elements like links or videos, you display it using Blade’s unescaped directive {!! !!}.
Now, add the new route in routes/web.php:
Route::get('/post/{slug}', [App\Http\Controllers\BlogController::class, 'showPost'])->name('post');
Finally, change the link of the buttons in home.blade.php to link to this new route:
<a href="{{ route('post', ['slug' => $post->getSlug()]) }}" class="btn btn-primary">Read More</a>
Run the server again if it isn’t still running and open the website again. If you click on the “Read More” button now, you should be taken to the post’s page where you can view its content.
Step Five: Integrate Slack
In this section of our laravel blog example, you’ll learn how to integrate Slack and send notifications to a Slack channel whenever a new post is published from ButterCMS.
To do that, you will need to register a webhook receiver on your ButterCMS account so that whenever a new post is published, a POST request is sent to a certain URL. This URL will be a route in your Laravel blog. When the blog instance receives the POST request, it will send a notification to the Slack channel that a new post has been published.
Create Your Slack App
To integrate Slack, you need a Slack channel. If you don’t have one, please go ahead and create one.
After that, you need to create an app. To do that, after you sign in to Slack, go to your app directory. Then, click on “Create New App” at the top right.

In the pop-up that shows up, click on “From scratch”. You then need to enter App Name and a workspace that this app will be connected to.
Once you’re done, you’ll be redirected to the app’s page. After that, you need to enable Socket Mode for your app. This will allow you to receive payloads using web sockets. When you open the page, just enable the switch.
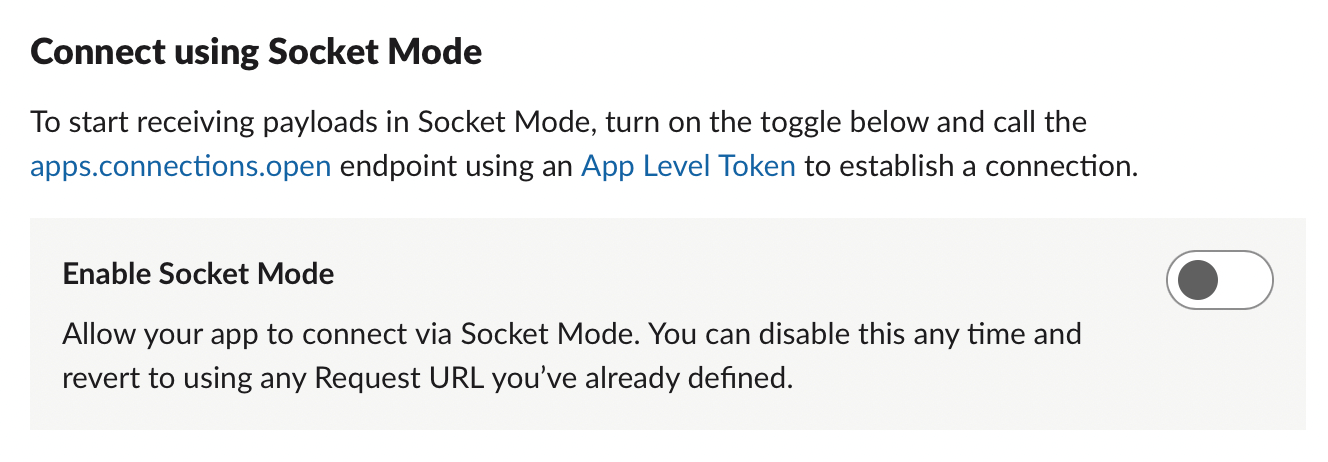
When you click on the switch, a pop-up will open and you’ll need to enter a name for the token to be generated. Enter “butter blog” then click Generate.
Next, you need to activate incoming webhooks. Go to Incoming Webhooks in the sidebar and enable the switch.
The last thing you need to do is install the app into your workspace. On your app’s dashboard, click on the “Install your app” accordion, then click on “Install to Workspace”. You can then choose a channel to post the messages to from the drop-down. Once you’re done, click on “Allow”.
In order to integrate Laravel with your Slack app, you need to retrieve your app’s webhook URL. Go to the Incoming Webhooks page again from the sidebar. If you scroll down, you’ll see a Webhook URL to a channel in your workspace.
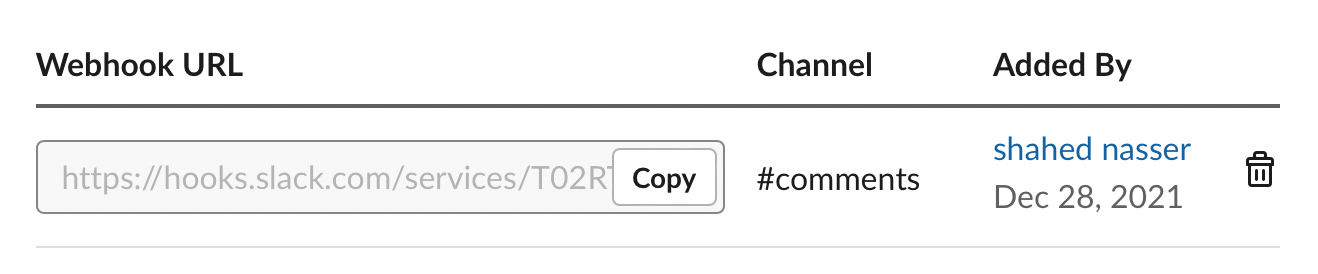
Copy this URL, as you’ll need to use it later.
Now, back in our project, you need to install slack-notification-channel:
composer require laravel/slack-notification-channel
After that, in .env add the webhook URL you copied earlier:
SLACK_WEBHOOK=
To submit notifications from Laravel to Slack, you need to submit notifications to notifiable entities. This tutorial does not have users, but you’ll simulate that in a simple manner.
You’ll use Laravel’s user factory to create a user in your database. In database/seeders/DatabaseSeeder.php you’ll see a commented line inside the run method. Replace it with the following:
\App\Models\User::factory(1)->create();
Next, you need to prepare the user entity to receive notifications on Slack by adding the following method in app/Models/User.php:
public function routeNotificationForSlack($notification)
{
        return env('SLACK_WEBHOOK');
}
This retrieves the webhook URL you added in .env.
After that, you need to create a Notification class to send the slack notifications to. In your terminal, run the following command:
php artisan make:notification NewPost
This will create a new notification class in app/Notifications/NewPost.php with the base methods needed. First, change the __constructor method to the following:
public function __construct($postTitle, $postUrl)
    {
        $this->postTitle = $postTitle;
        $this->postUrl = $postUrl;
    }
This will add 2 class fields: postTitle for the title of the post and postUrl for the URL of the post.
Then, change the via method to the following:
public function via($notifiable)
    {
        return ['slack'];
    }
This indicates which notification methods are allowed for this notification.
Finally, add the following method to send messages to Slack:
public function toSlack($notifiable)
    {
        return (new SlackMessage)
                    ->content('New post ' . $this->postTitle . ' at ' . $this->postUrl);
    }
This will create a new SlackMessage instance and will pass content using the postTitle and postUrl fields.
Add Webhook Receiver
The integration is now ready. Next, we need to create the route that will receive the webhook POST request from ButterCMS whenever a post is published.
In app/Http/Controllers/BlogController.php add the following new method:
public function sendNotification (Request $request) {
        $butterClient = new ButterCMS(env('BUTTER_API_KEY'));
        //get slug from request
        $slug = $request->get('data')['id'];
        //get post
        $postResponse = $butterClient->fetchPost($slug);
        //get all users
        $users = User::all();
        if ($users->count()) {
            //send notification to slack
            Notification::sendNow($users, new NewPost($postResponse->getPost()->getTitle(), route('post', ['slug' => $postResponse->getPost()->getSlug()])));
        }
    }
The webhook POST request sends data of the following format:
{
  "data": {
      "url": "http://www.example.com/blog/this-is-a-blog-post",
      "created": "2015-06-12T13:59:32.441289Z",
      "published": "2015-06-12T00:00:00Z",
      "author": {
        "first_name": "API",
        "last_name": "Test",
        "email": "apitest@buttercms.com",
        "slug": "api-test",
        "bio": "This is my bio.",
        "title": "API",
        "linkedin_url": "https://www.linkedin.com/in/API",
        "facebook_url": "https://www.facebook.com/API",
        "twitter_handle": "buttercmsapi",
        "profile_image": "https://buttercms.com/api.png"
      },
      "categories": [
        {
          "name": "test category",
          "slug": "test-category"
        }
      ],
      "tags": [
        {
          "name": "test tag",
          "slug": "test-tag"
        }
      ],
      "featured_image": null,
      "featured_image_alt": "",
      "slug": "this-is-a-blog-post",
      "title": "This is a blog post",
      "body": "<p class=\"\">This is a blog post to test the API.</p>",
      "summary": "This is a blog post to test the API.",
      "seo_title": "This is a blog post",
      "meta_description": "This is a blog post to test the API.",
      "status": "published",
      "rank": 0.5
    },
  "webhook": {
    "event": "post.all",
    "target": "http://yoururl.com/process_webbook"
  }
}
So, in the new method you just added, you get the slug from id in data, then retrieve the post details using $butterClient->fetchPost passing it the slug. Finally, you send the Slack notification to all the users using the NewPost class you created earlier.
Next, add the new route in routes/web.php:
Route::post('/new-post', [App\Http\Controllers\BlogController::class, 'sendNotification']);
The last thing we’ll do is add an exception for this route for CSRF token validation. Usually, you should create a key that the sender of the POST request should add in the header. However, for the tutorial’s simplicity, we’ll just add an exception for this route.
In app/Http/Middleware/VerifyCsrfToken.php add the route to the $except array:
protected $except = [
        //
        '/new-post'
    ];
Add Webhook in ButterCMS
The last step is to add the webhook receiver URL in ButterCMS’ settings. However, before you can do that, you need to deploy your app publicly to be accessed by ButterCMS.
Deploy Blog
In this section, you’ll be deploying the blog on Heroku’s free tier hosting. This will be a simple walkthrough. If you already have your blog deployed, then you can skip this section.
First, you need to download and install Heroku’s CLI. You also need to create an account at Heroku.
Then, in your terminal, you need to first log in with Heroku:
heroku login
This will open your default browser and ask you to log in.
After you log in, you can start creating your Heroku website to deploy the blog to.
By default, Heroku will launch your website from the root directory. However, in Laravel, the website should be launched from the public directory. Heroku can be configured to do that using a Procfile.
In your terminal, run the following to create a Procfile:
echo "web: vendor/bin/heroku-php-apache2 public/" > Procfile
Now, create a new Heroku app:
heroku apps:create <APP_NAME>
Make sure to replace <APP_NAME> with the name of the app you want to create. For example, butter-blog. Heroku will create an app and show you a URL and a Git URL. Copy the Git URL as you’ll be using it next.
Now, link your code to the Git repository that Heroku created:
git remote add origin <GIT_URL>
git add .
git commit -m “initial commit”
git push origin master
Make sure to replace <GIT_URL> with the Git URL you copied earlier. This will deploy the website with the code to the app that Heroku created.
Next, you need to set some configurations. Start by opening your .env file and copying the value for APP_KEY.
Then, in your terminal run the following:
heroku config:set APP_KEY=<APP_KEY>
Make sure to replace <APP_KEY> with the value you copied from .env.
Next, copy the value of BUTTER_API_KEY from .env and set it with Heroku:
heroku config:set BUTTER_API_KEY=<BUTTER_API_KEY>
After that, copy the value of SLACK_WEBHOOK from .env and set it with Heroku:
heroku config:set SLACK_WEBHOOK=<SLACK_WEBHOOK>
Next, you need to create a database that will store the tables and fake users. You’ll use the JawsDB MySQL AddOn, which is free.
To add the AddOn to your Heroku app, run the following command:
heroku addons:create jawsdb
Then, you need to retrieve the database URL. You can do it with the following command:
<span style="font-weight: 400;">heroku config:get JAWSDB_URL</span>This will output the URL of the MySQL database. It will be in the following format:
mysql://<USERNAME>:<PASSWORD>@<HOST>:<PORT>/<DATABASE>
You need to copy each of these elements and set the values in Heroku’s configurations with the following commands:
heroku config:set DB_CONNECTION=mysql
heroku config:set DB_DATABASE=<DATABASE>
heroku config:set DB_HOST=<HOST>
heroku config:set DB_USERNAME=<USERNAME>
heroku config:set DB_PASSWORD=<PASSWORD>
heroku config:set DB_PORT=<PORT>
The last thing you need to do is migrate and seed the database. To do that, open a bash connection into the Heroku server with the following command:
heroku run bash
When the bash connection to the server is open, first run the following:
composer install --dev
This will install the development dependencies required for seeding.
Then, migrate the database:
php artisan migrate --force
Then, seed the database:
php artisan db:seed --force
The Heroku server is now done and ready to receive webhook requests.
Setup Webhook in ButterCMS
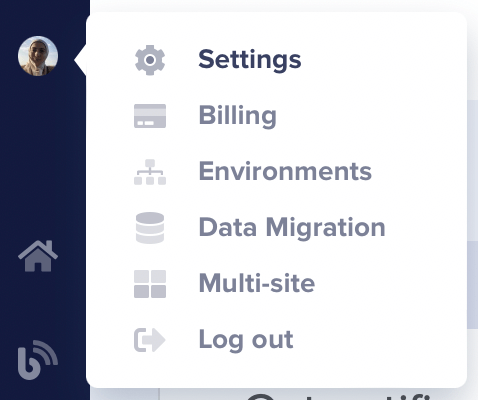
In your ButterCMS account, put your mouse over the avatar at the top right then click Settings in the dropdown that shows up.
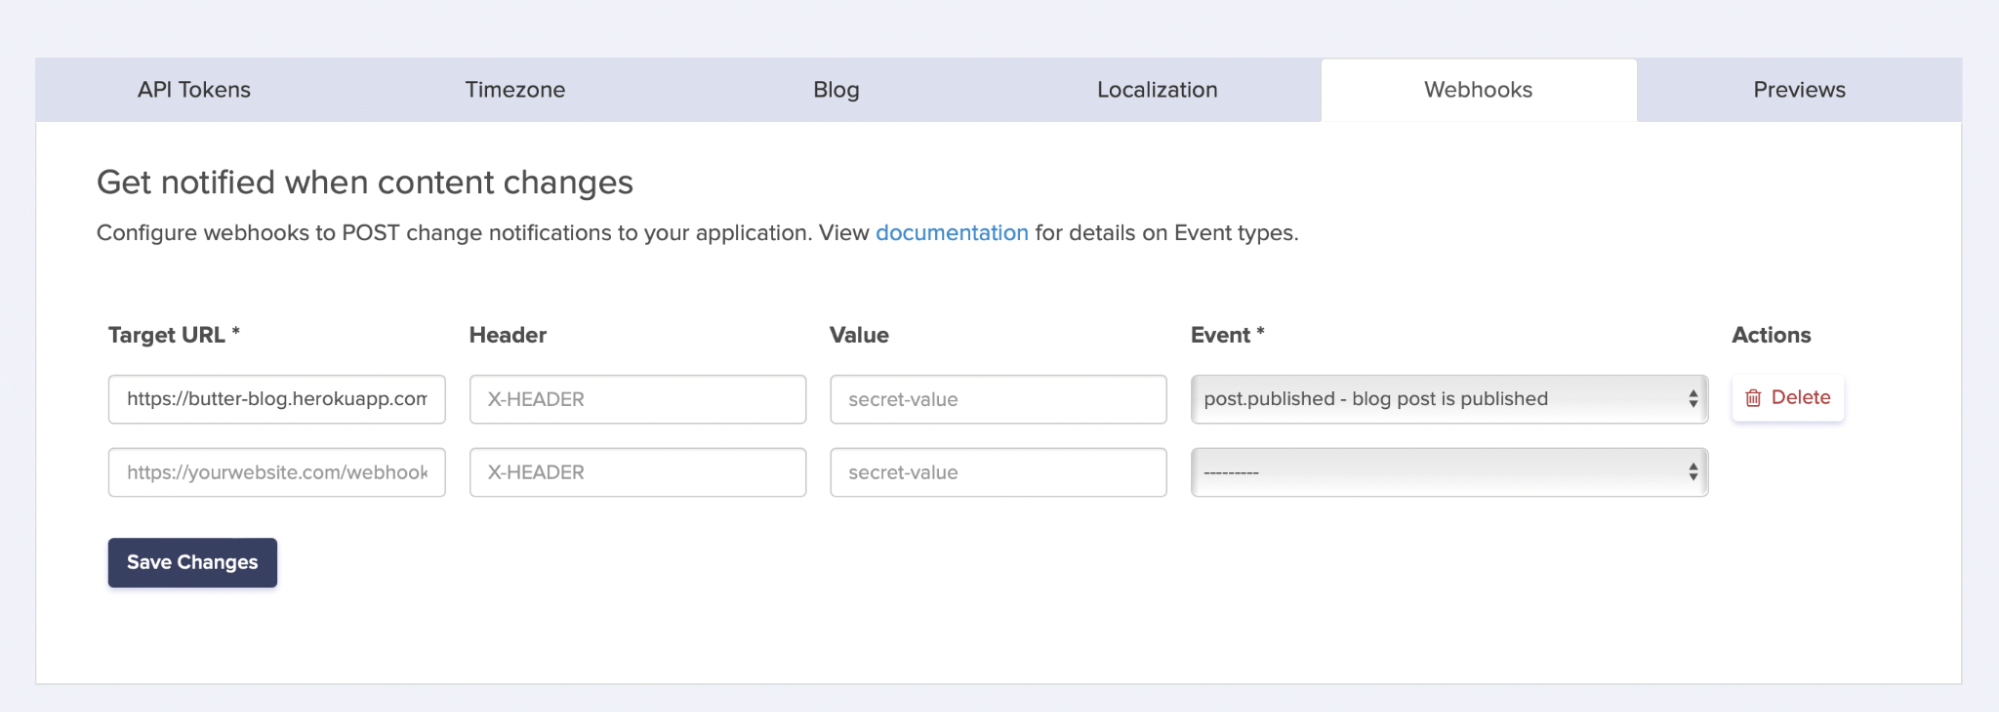
Then, from the tabs, choose “Webhooks”. You’ll need to fill in the row that shows the target URL as your Heroku URL followed by /new-post. In the Event dropdown, choose post.published. Once you’re done click Save Changes.
The integration is now ready! Go create a new blog post for this laravel blog project in ButterCMS and publish it. You should see a new notification for the new post in the channel you chose for integration in Slack! I myself created a new post entitled "How to Send a POST Request in PHP."

And the post is now available on the laravel blog website as well.
Conclusion
In this tutorial, you learned how to build a blog with Laravel and ButterCMS. You learned how you can use the SDK to show all posts or a single post. You also learned how to integrate webhooks between ButterCMS and Laravel, and use them to send Slack notifications whenever you publish a new Laravel blog post.
As you can see from this tutorial, ButterCMS saves you the time you’d spend building the CMS functionalities into Laravel as it provides a clean and easy-to-use interface that can get you started with your blog in seconds. ButterCMS’s APIs and SDKs then allow you to integrate it into any platform of your choice.