
Blogs are a great medium for transmitting ideas, messages, and other forms of information. As a developer and also a business owner, having one is a great score for product advertising, sharing ideas, and displaying technical skills.
In this tutorial, we’ll be building a blog application with Flutter and ButterCMS. While we'll be using the ButterCMS blog engine for this tutorial, a feature that covers the vast majority of normal use cases for blogs, you can still configure your own custom blog pages using ButterCMS Page Types if you need additional fields or functionalities.
Table of contents
Why use Flutter?
Flutter is a cross-platform UI toolkit that enables applications to communicate directly with platform services and promotes code reuse across platforms like iOS, Android, the web, and desktop.
With its rising popularity in the market, Flutter is known for its simplicity, code reusability, and swift design, making it the best choice for mobile, web, and desktop development.
Why use ButterCMS?
Building a blog from scratch as a front-end developer can be a pain, especially when you have to set up and handle the back-end development process. This can take many months to achieve and is very stressful to accomplish for a single developer. Here, ButterCMS shines.
ButterCMS is a headless CMS, meaning you can use any technology for your site without being restricted in terms of implementation. ButterCMS offers a simple-to-use yet robust dashboard for creating pages, blog posts, and such. Furthermore, all of your data is delivered through API endpoints.

Tutorial prerequisites
To follow along with this tutorial, you should have the following installed:
- Flutter SDK: The Flutter SDK is a command-line toolkit used to create and manage Flutter projects. To install the Flutter SDK, go to https://flutter.dev/docs/get-started/install.
- Code Editor or IDE: This is a text editor for writing in programming languages that are used for building software.
- ButterCMS trial account: You can sign up here.
Setting up ButterCMS
Before we proceed with building our application, let’s start with setting up our CMS. Head over to ButterCMS and click Get Started to sign up. After signing up, fill out the questionnaire in the modal and choose Flutter on the Dashboard.
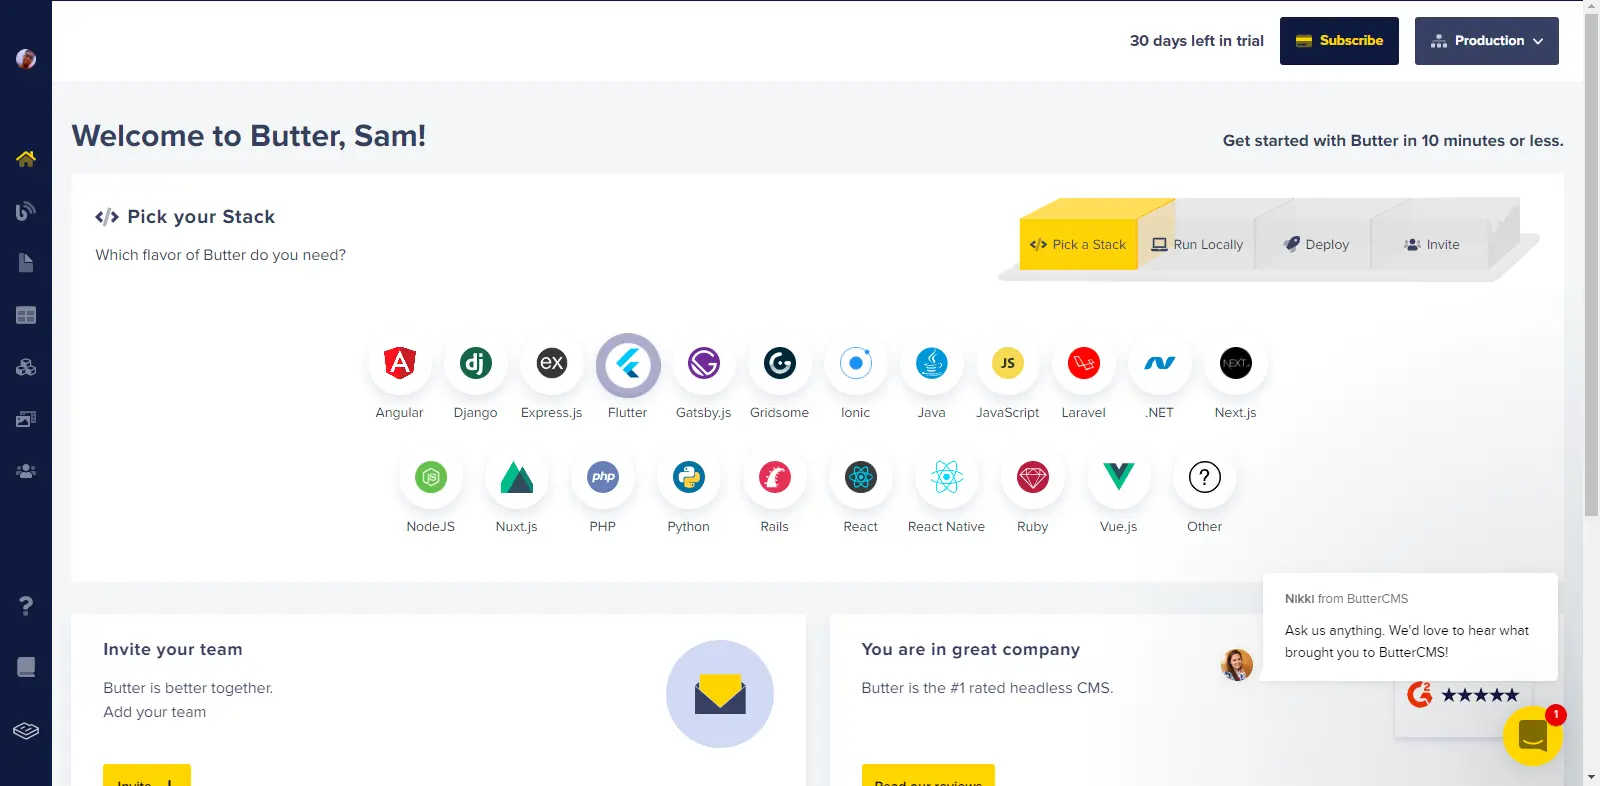
After selecting the Flutter stack, you’ll be redirected to the Run Locally page where an API will be generated for you, as seen in the image below:
Copy and save your API key.
Setting up our workspace
Let’s scaffold our Flutter application and start making some API calls. Run the command below in the terminal to create a Flutter project:
flutter create blog_app Once the command above is done running, run the command below to change the directory of the terminal and run the project in an emulator:
cd blog_app && flutter run
Installing dependencies
For this tutorial, we’ll be using some of Flutter’s packages to ace our development. Replace your entire pubspec.yaml file with the block below:
name: blog_app
description: A new Flutter project.

publish_to: "none" # Remove this line if you wish to publish to pub.dev

version: 1.0.0+1

environment:
  sdk: ">=2.18.0 <3.0.0"

dependencies:
  cupertino_icons: ^1.0.2
  flutter:
    sdk: flutter
  http: ^0.13.5
  animated_splash_screen: ^1.3.0
  get: ^4.6.5
  flutter_html: ^2.2.1
  url_launcher: ^6.1.5
  intl: ^0.17.0

dev_dependencies:
  flutter_lints: ^2.0.0
  flutter_test:
    sdk: flutter

flutter:
  uses-material-design: true
Based on the code above, we’re installing some dependencies. Let’s get to know their uses.
- http: The http package is a network library for making HTTP requests via API calls.
- animated_splash_screen: The animated_splash_screen is a fully lightweight plugin for building fully customized splash screens with animations very quickly.
- get: The get package, famously known as GetX, is a super-efficient and lightweight Flutter solution that efficiently and practically integrates high-performance state management, intelligent dependency injection, and route management. We’ll be using the package’s route management for this tutorial.
- flutter_html: The flutter_html package is a Flutter widget that renders HTML and CSS content in the widget tree as Flutter widgets.
- url_launcher: The url_launcher is used to launch links and URLs from a Flutter application to a browser.
- intl: The intl package is used for properly formatting message translations and dates/numbers.
File architecture
Before heading on to development, let’s create Dart files below in our project’s lib/ folder:
📦lib
 ┣ 📜blog_card.dart
 ┣ 📜blog_screen.dart
 ┣ 📜home.dart
 ┣ 📜main.dart
 ┣ 📜secret_key.dart
 ┗ 📜splash_screen.dart
Our lib/ folder contains 6 Dart files, including:
- blog_card.dart: This contains a reusable card component that will be used throughout the application.
- blog_screen.dart: This contains the blog details screen with the full article.
- home.dart: This is the home of our application. It contains all published blog posts.
- main.dart: This is the entry point for all Flutter applications. It executes the first screen.
- secret_key: As the name implies, this contains our ButterCMS secret key. This file will be hidden from source control (GitHub).
- splash_screen.dart: This contains the app logo and a brief intro animation.
Adding assets image
Create an assets folder in the project’s root directory and download and add this logo to it.
Next, add the code below to the pubspec.yaml file:
...

flutter:
  uses-material-design: true

  assets:
    - assets/
Building the splash screen
Giving our users a nice intro when they open our application gives the users a nice experience and confidence. Let’s achieve this by heading over to splash_screen.dart and pasting the code below into it.
import 'package:animated_splash_screen/animated_splash_screen.dart';
import 'package:blog_app/home.dart';
import 'package:flutter/material.dart';
import 'package:get/get.dart';
import 'package:page_transition/page_transition.dart';

class SplashScreen extends StatelessWidget {
  const SplashScreen({Key? key}) : super(key: key);
  @override
  Widget build(BuildContext context) {
    return AnimatedSplashScreen(
      splashIconSize: Get.height * 0.5,
      duration: 3000,
      backgroundColor: Colors.black,
      splash: Image.asset('assets/logo.png'),
      nextScreen: const HomeScreen(),
      splashTransition: SplashTransition.slideTransition,
      pageTransitionType: PageTransitionType.fade,
    );
  }
}
In the code block above, we created a stateless widget and added our AnimatedSplashScreen widget while giving it a splash image, duration, size, and type of animation. We’re also specifying the next screen after the splash screen animation is completed.
Updating main.dart
To see all our current changes, let’s update our main.dart file. Copy and replace the main.dart file with the code block below:
import 'package:flutter/material.dart';
import 'package:get/get.dart';
import 'splash_screen.dart';

void main() {
  runApp(const MyApp());
}

class MyApp extends StatelessWidget {
  const MyApp({super.key});
  // This widget is the root of your application.
  @override
  Widget build(BuildContext context) {
    return GetMaterialApp(
        title: 'ButterCMS Blog',
        debugShowCheckedModeBanner: false,
        theme: ThemeData(
          primarySwatch: Colors.teal,
          useMaterial3: true,
        ),
        home: const SplashScreen());
  }
}
In the code block above, we’re wrapping our material app with GetX. We're also setting our home route to the animated splash screen we created earlier.
Building the blog card component
Before heading over to the Home screen, let’s build our blog card component. This will be used to populate the Home screen later on. Head over to the blog_card.dart file and add the code block below to it:
import 'package:flutter/material.dart';

class BlogCard extends StatelessWidget {
  const BlogCard(
      {super.key,
      required this.image,
      required this.title,
      required this.desc,
      required this.author,
      required this.authorImg,
      required this.slug,
      required this.press});

  final String image, title, desc, author, authorImg, slug;
  final Function() press;

  @override
  Widget build(BuildContext context) {
    return GestureDetector(
        onTap: press,
        child: Card(
          elevation: 5,
          clipBehavior: Clip.hardEdge,
          margin: const EdgeInsets.only(bottom: 20),
          surfaceTintColor: Colors.white,
          child: Column(
            crossAxisAlignment: CrossAxisAlignment.start,
            mainAxisSize: MainAxisSize.min,
            children: [
              Hero(
                tag: slug,
                child: Image.network(image, fit: BoxFit.cover),
              ),
              Padding(
                padding: const EdgeInsets.symmetric(horizontal: 15.0),
                child: Column(
                  crossAxisAlignment: CrossAxisAlignment.start,
                  children: [
                    const SizedBox(height: 15),
                    Text(title,
                        style: const TextStyle(
                            fontSize: 20, fontWeight: FontWeight.bold)),
                    const SizedBox(height: 5),
                    Text(desc,
                        style: const TextStyle(
                            fontSize: 16, color: Colors.blueGrey)),
                    const SizedBox(height: 10),
                    ListTile(
                        contentPadding: EdgeInsets.zero,
                        leading: CircleAvatar(
                            radius: 20,
                            backgroundImage: NetworkImage(authorImg)),
                        title: Text(author,
                            style: const TextStyle(
                              fontSize: 14,
                              fontWeight: FontWeight.w600,
                            ))),
                  ],
                ),
              )
            ],
          ),
        ));
  }
}
In the code block above, we created a card using a column, image, title, description, and author’s details in a ListView. We’ve also added some final variables that would serve as props when calling the cards in other components. We also made the cards clickable by wrapping them in GestureDetector.
Hiding the secret key
To prevent malicious attacks, it’s not ideal to expose our secret key to our source control. Head over to the secret_key.dart file and add your API key as seen in the code block below:
const String apiKey = 'YOUR_BUTTERCMS_API_KEY';
Next, add the file path to the .gitignore file to hide the file from Git.
/lib/secret_key.dart
Building the Homescreen
As revealed earlier in the file architecture section, our Home screen will contain our list of blog posts. Head over to the home.dart file:
import 'dart:convert';
import 'package:blog_app/base.dart';
import 'package:flutter/material.dart';
import 'package:get/get.dart';
import 'package:http/http.dart' as http;
import 'blog_card.dart';
import 'blog_screen.dart';
import 'secret_key.dart';

class HomeScreen extends StatefulWidget {
  const HomeScreen({super.key});
  @override
  State<HomeScreen> createState() => _HomeScreenState();
}

class _HomeScreenState extends State<HomeScreen> {
  List data = [];
  bool isLoading = true;

  Future retrieveBlogPost() async {
    try {
      final url = Uri.parse("${Base.baseUrl}/v2/posts?auth_token=$apiKey");
      final response = await http.get(url);
      if (response.statusCode == 200) {
        var result = jsonDecode(response.body);
        setState(() {
          data = result['data'] as List;
          isLoading = false;
        });
        return result;
      }
    } catch (e) {
      print(e);
    }
  }

  @override
  void initState() {
    super.initState();
    retrieveBlogPost();
  }

  @override
  Widget build(BuildContext context) {
    return isLoading
        ? const Center(child: CircularProgressIndicator())
        : Scaffold(
            appBar: AppBar(title: const Center(child: Text('Home'))),
            body: SingleChildScrollView(
                child: Padding(
              padding: const EdgeInsets.symmetric(horizontal: 15.0),
              child: Column(children: [
                const SizedBox(height: 15),
                ...List.generate(
                    data.length,
                    (index) => BlogCard(
                          image: data[index]['featured_image'],
                          title: data[index]['title'],
                          slug: data[index]['slug'],
                          desc: data[index]['summary'],
                          author:
                              "${data[index]['author']['first_name']} ${data[index]['author']['last_name']}",
                          authorImg: data[index]['author']['profile_image'],
                          press: (){}
                        ))
              ]),
            )),
          );
  }
}
In the code block above, we’re making an API call to the ButterCMS API with our apiKey to get all the available blog posts when the screen begins. We’re then pushing the results into our data list.
Next, we’re populating our Home screen using the List.generate function with the results from the data list. This multiplies our blog component according to the specified length given. In this case, we’re using the length of our array. We’re then passing all the properties from our data list to our BlogCard widget using the index as it loops.
Finally, we’re displaying a loading indicator when the data is still fetching from the API and displaying the widgets when it’s completed.
With our progress so far, let’s restart our application to see what we’ve achieved so far.
Building the BlogScreen
Let us give our users the ability to read any blog post they click on in our application. To achieve this, head over to the BlogScreen.dart file and paste the code below into it:
import 'package:flutter/material.dart';
import 'package:flutter_html/flutter_html.dart';
import 'package:get/get.dart';
import 'package:url_launcher/url_launcher_string.dart';
import 'package:html/dom.dart' as dom;
import 'package:intl/intl.dart';

class BlogScreen extends StatelessWidget {
  const BlogScreen({super.key, required this.data});
  final Map<String, dynamic> data;

  @override
  Widget build(BuildContext context) {
    DateTime parseDate =
        DateFormat("yyyy-MM-dd'T'HH:mm:ss.SSS'Z'").parse(data['updated']);
    var inputDate = DateTime.parse(parseDate.toString());
    var outputDate = DateFormat('MM/dd/yyyy hh:mm a').format(inputDate);

    return Scaffold(
        appBar: AppBar(
          title: const Text('Blog'),
        ),
        body: SingleChildScrollView(
            child: Column(
          children: [
            Hero(
                tag: data['slug'],
                child: Image(
                    image: NetworkImage(data['featured_image']),
                    fit: BoxFit.cover,
                    width: Get.width)),
            const SizedBox(height: 10),
            Padding(
                padding: const EdgeInsets.symmetric(horizontal: 20.0),
                child: Column(
                  crossAxisAlignment: CrossAxisAlignment.start,
                  children: <Widget>[
                    ListTile(
                        contentPadding: EdgeInsets.zero,
                        leading: CircleAvatar(
                          backgroundImage:
                              NetworkImage(data['author']['profile_image']),
                        ),
                        title: Text(
                            "${data['author']['first_name']} ${data['author']['last_name']}",
                            style: const TextStyle(
                                // color: Colors.black,
                                fontSize: 18,
                                fontWeight: FontWeight.bold)),
                        subtitle: Text(outputDate,
                            style: TextStyle(
                              color: Colors.grey[800],
                              fontSize: 16,
                            ))),
                    const SizedBox(height: 10),
                    Text(data['title'],
                        style: const TextStyle(
                            fontSize: 35, fontWeight: FontWeight.w900)),
                    const SizedBox(height: 10),
                    Html(
                        data: """
                ${data['body']}
                """,
                        onLinkTap: (String? url,
                            RenderContext context,
                            Map<String, String> attributes,
                            dom.Element? element) async {
                          await _launchURL(url);
                        }),
                  ],
                ))
          ],
        )));
  }

  _launchURL(url) async {
    if (await canLaunchUrlString(url)) {
      await launchUrlString(url, mode: LaunchMode.externalApplication);
    } else {
      throw 'Could not launch $url';
    }
  }
}
In the code block above, we’re populating the Blog screen with the data we’ll be getting from the Home screen. We’re also formatting our updated time using the intl library.
The data['body'] string returns an HTML string that doesn't work, so here is where Flutter_html shines. The Flutter_html package converts the HTML strings to Flutter widgets which are compatible with the widget tree.
The raw data['body'] string also contains some hyperlinks that might come in handy for users. To make this clickable, we’re using url_launcher to launch the hyperlinks in an external browser application.
Note: ButterCMS shortens hyperlinks, and this confuses the url_launcher. To fix this, head over to the Blog Post section in ButterCMS.
To fix this URL issue, head over to the Blog Post section and click on any of the hyperlinks in the WYSIWYG editor, and hit the chain link icon in the editor's toolbar.
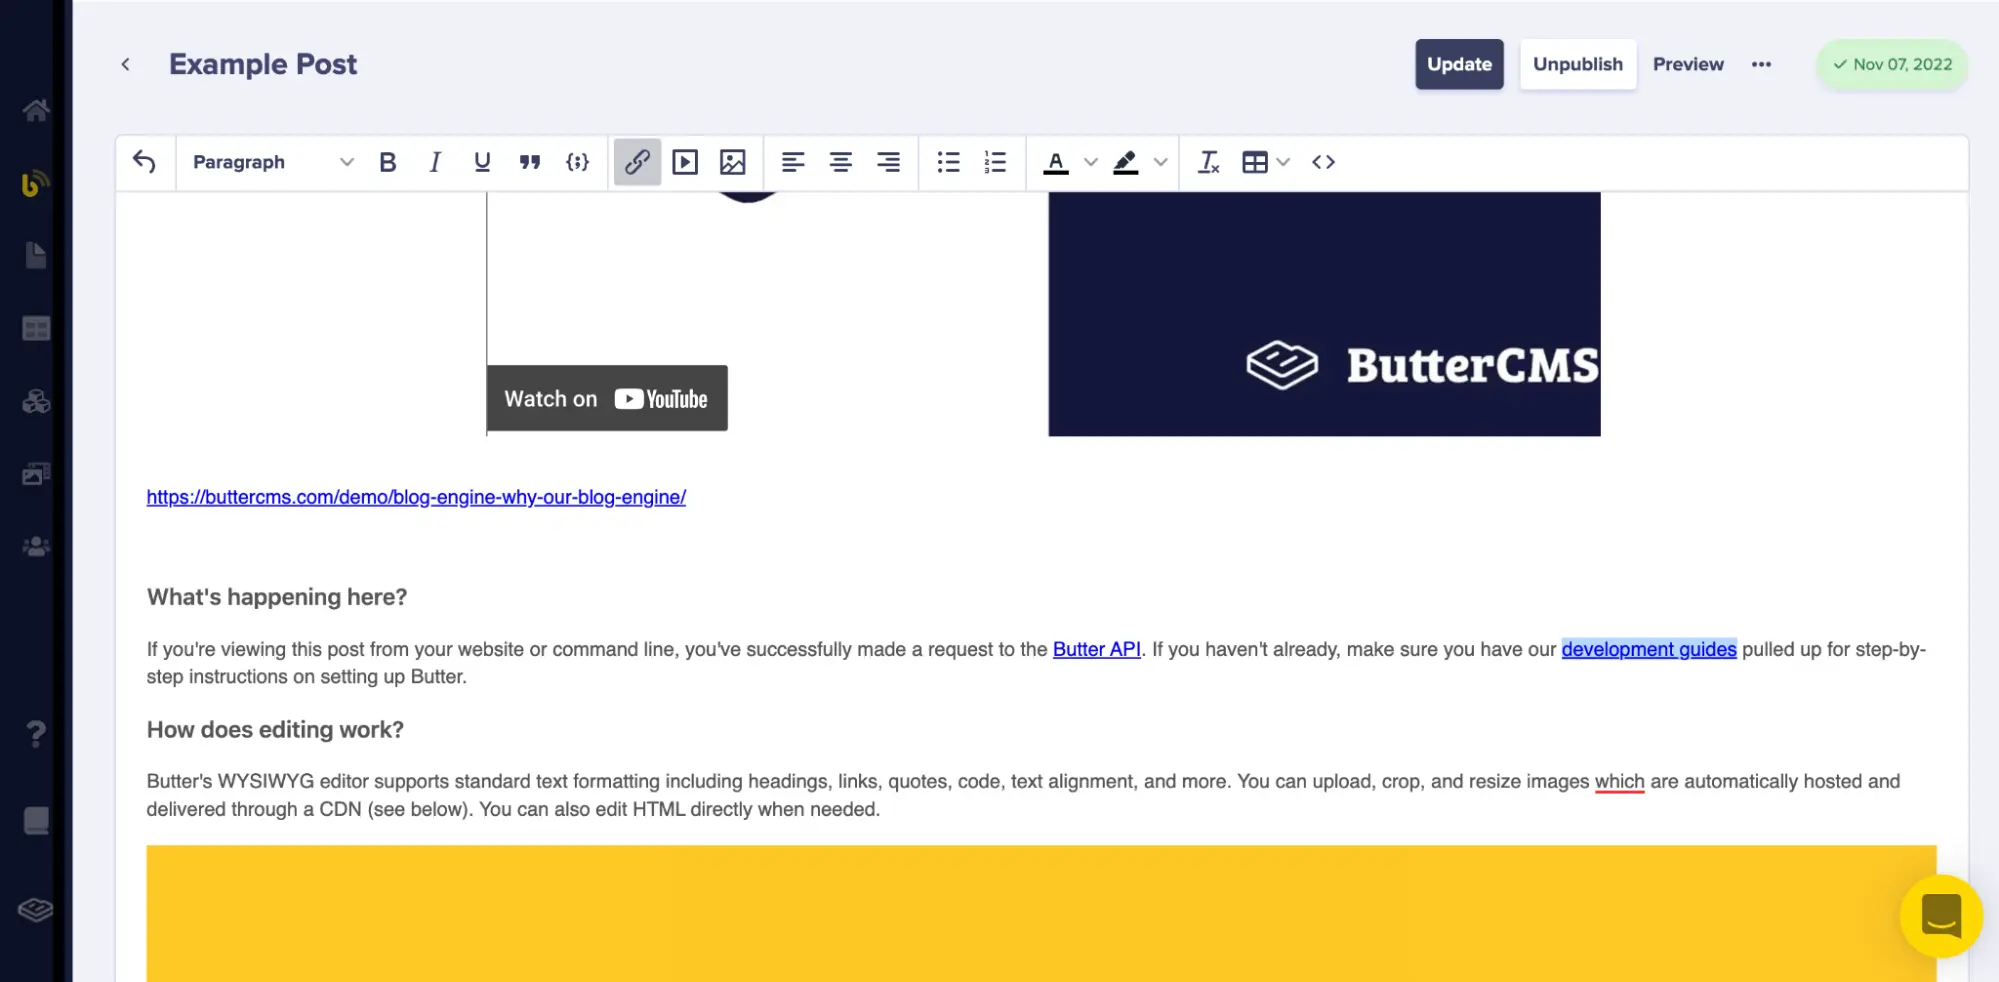
This should bring up this link modal as seen in the image below:
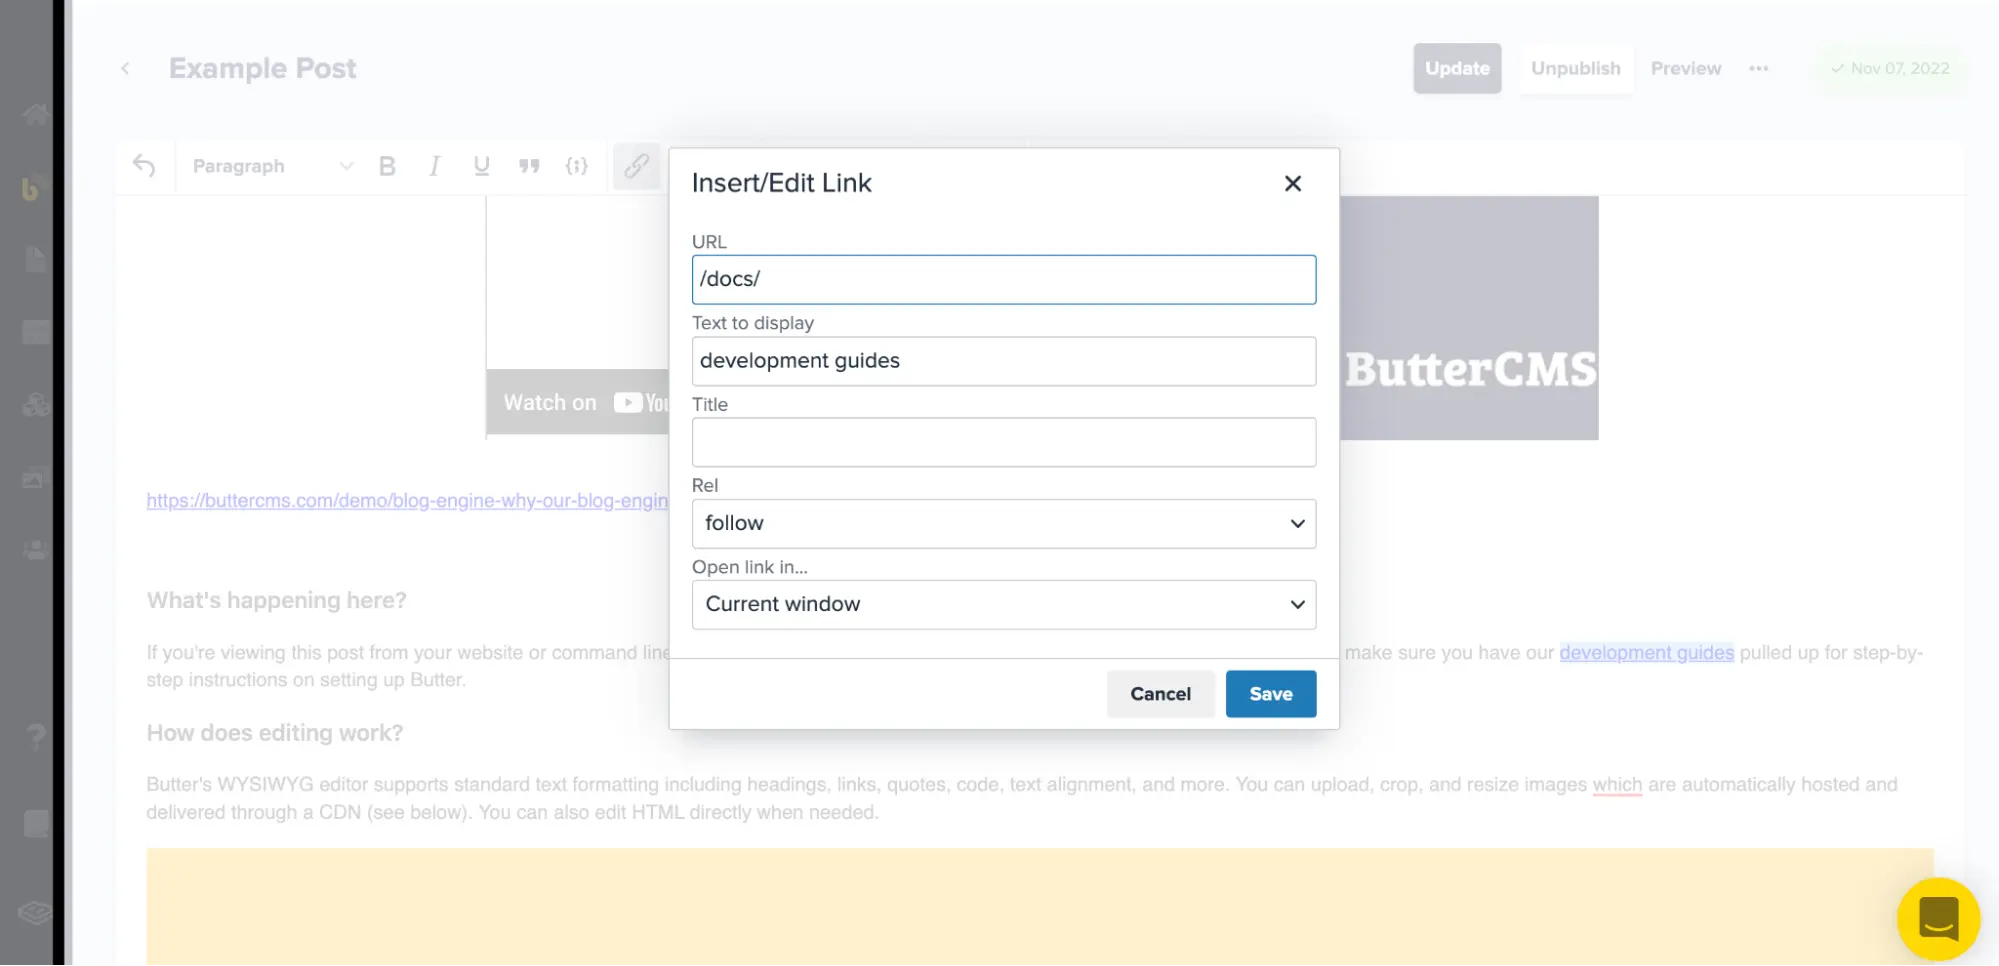
Finally, click on the Save button and accept the changes to correct the link.
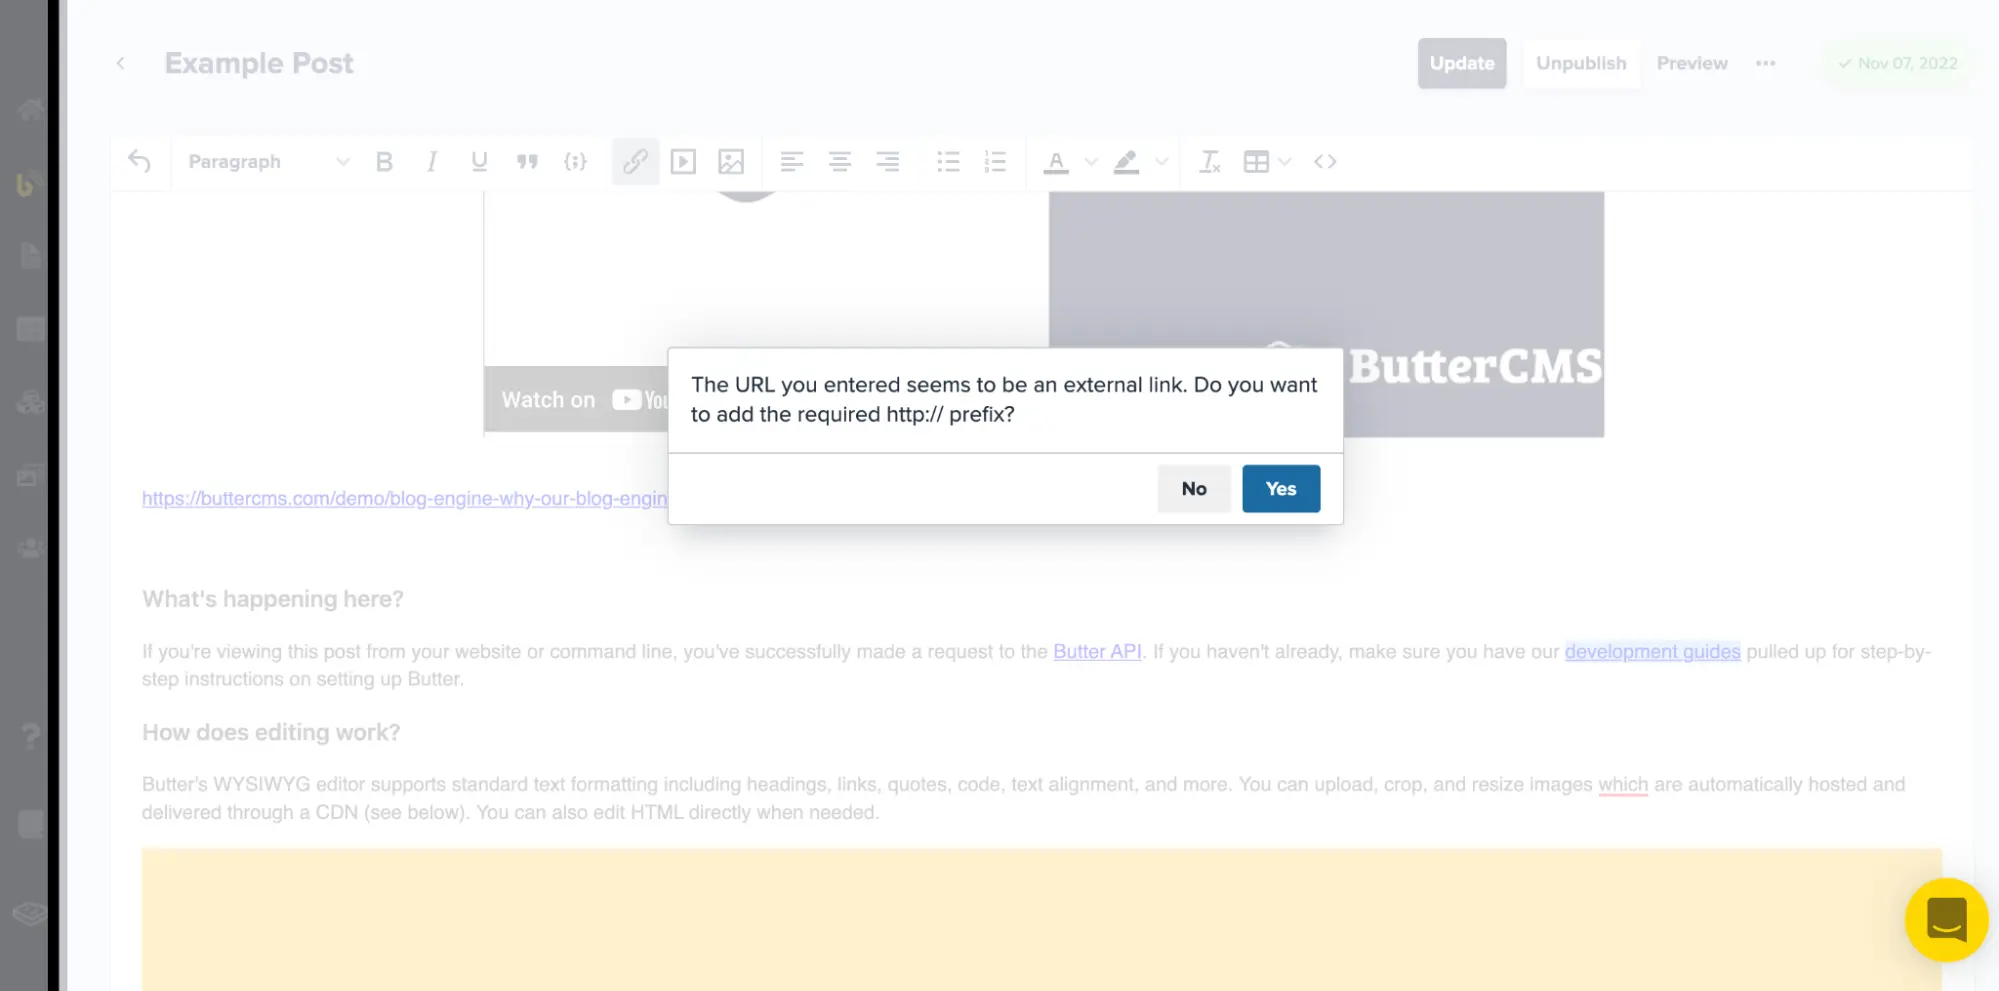
Once this is done, and once you review the link again, the complete URL should be displayed.
Finally, let’s route our blog post to the Blog screen whenever a user clicks on a post. To achieve this, head over to home.dart and update the press function in the BlogCard component.
...List.generate(
                    data.length,
                    (index) => BlogCard(
                          image: data[index]['featured_image'],
                          title: data[index]['title'],
                          slug: data[index]['slug'],
                          desc: data[index]['summary'],
                          author:
                              "${data[index]['author']['first_name']} ${data[index]['author']['last_name']}",
                          authorImg: data[index]['author']['profile_image'],
                          press: () =>
                              Get.to(() => BlogScreen(data: data[index])), //add this
                        ))
In the code block above, we’re routing our app to BlogScreen whenever a user clicks on a blog card. We’re also passing the clicked data across to the BlogScreen.
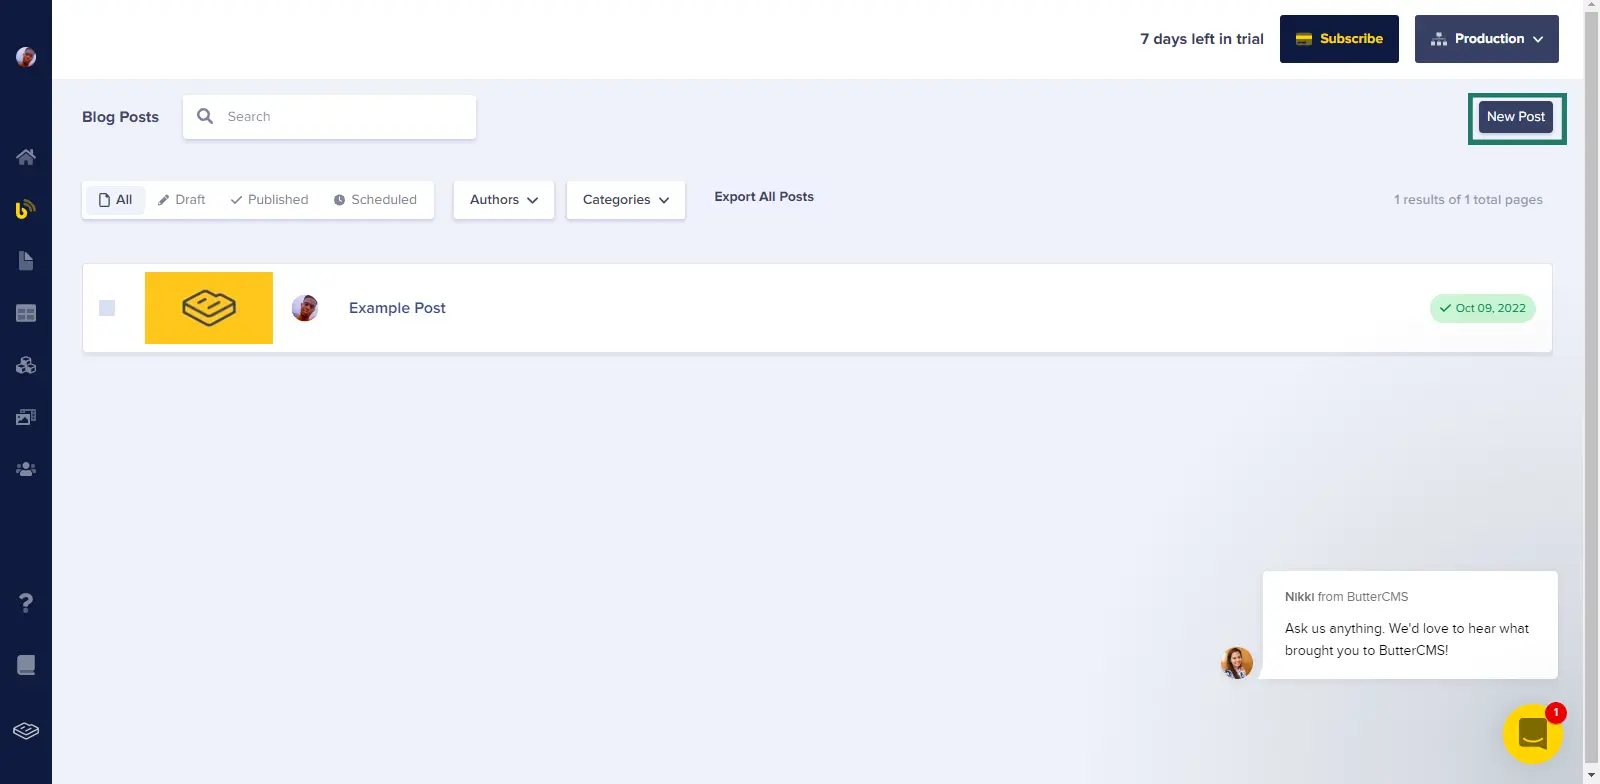
Creating our blog posts
With our application complete, let’s create our own custom blog post using the ButterCMS blog engine. Click on the Blog Post section from the sidebar of your dashboard and click on New Post located at the top right of the page.
In the WYSIWYG editor, add your blog contents, metadata, and SEO data.
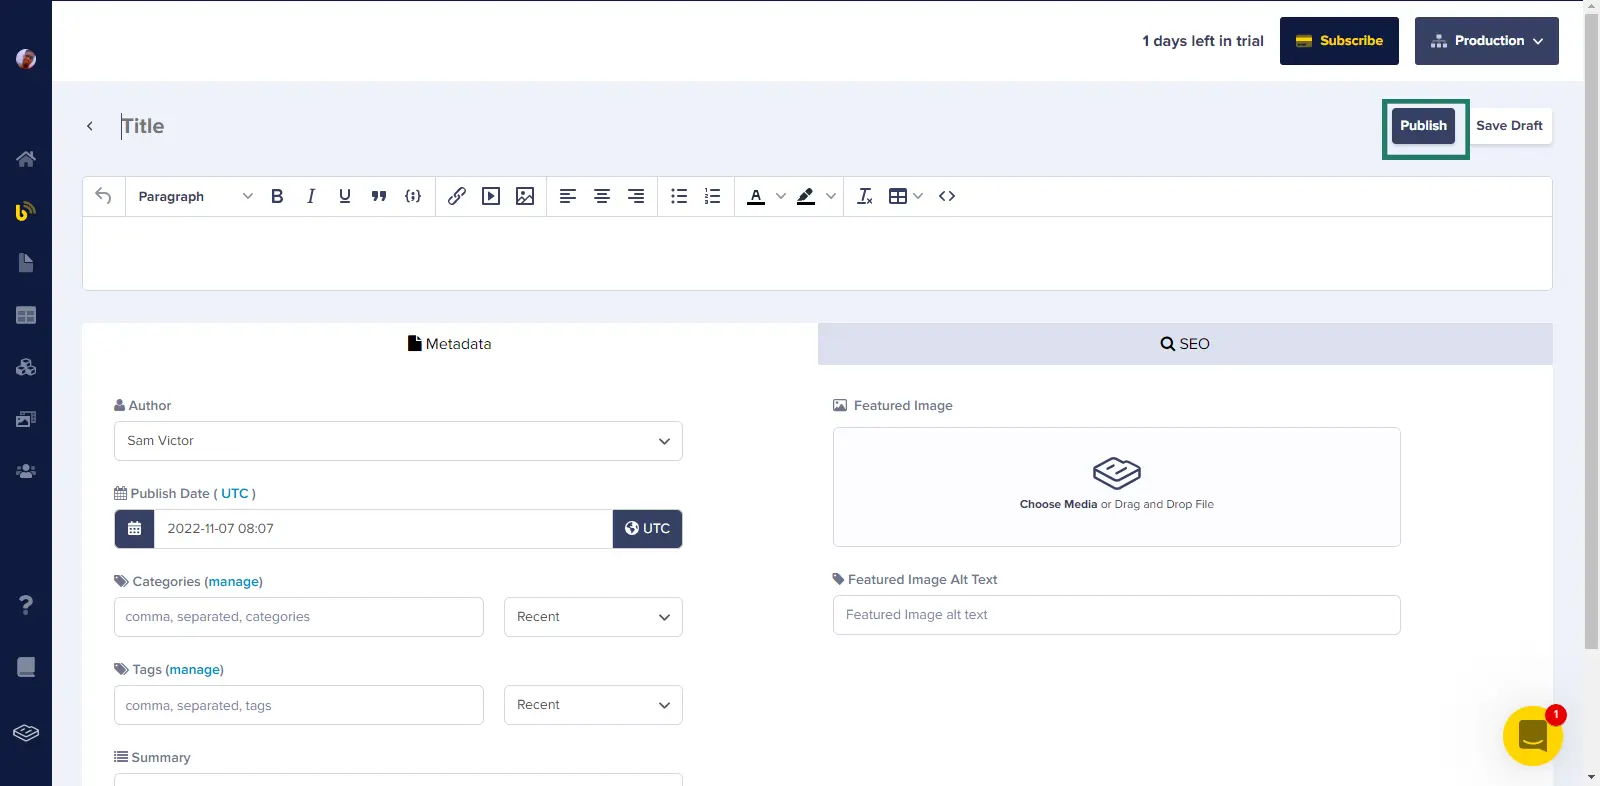
When you're ready to publish your post, click Publish, or Save Draft if you want to save your progress and continue editing later.
With these actions done, let’s restart our application to see what we’ve achieved so far with a new blog post added:
Closing thoughts
We’ve successfully built our blog app from start to finish in a couple of minutes without the stress of setting up a back-end server and managing our blog posts because ButterCMS has handled the necessary setup for us.
As we all know, blogs are a fantastic medium for transferring thoughts, messages, and other types of information, and with the simplicity and flexibility of Flutter, which allows us to build cross-platform apps using a single code base, developing and deploying a blog app is simple and quick.
Here is the link to the complete source code on GitHub.

