
- Why use JavaScript?
- Why use ButterCMS?
- JavaScript landing page tutorial prerequisites
- Setting up the development environment
- Setting up our landing page in ButterCMS
- Creating components to add to the landing page
- Adding components to the landing page
- Integrating the components in JavaScript
- Adding a navigation menu and testimonials section with collections
- Final thoughts
Landing pages are standalone web pages that potential users or customers first land on when visiting a website. In the marketing space, the landing page is distinctive from any other page on a website. It serves as the first impression of your business or service and is designed to convert visitors into paying customers or active users.
Building a modern, optimized landing page from scratch requires considerable effort due to the large amounts of data that need to be organized and managed. Hence why a headless CMS is an ideal solution. In simple terms, a headless CMS serves as a content repository designed solely to manage and serve application content. It provides a streamlined way to access content via an application programming interface (API) and modify content via the headless CMS platform's visual dashboard.
In this tutorial, we will demonstrate how to set up and quickly build a landing page that helps companies and startups generate more leads using a vanilla JavaScript landing page powered by ButterCMS. We will cover:
- How to set up the development environment for vanilla JavaScript and ButterCMS.
- How to manage your content, fetch data from ButterCMS, and render it in your application.
Table of contents
Why use JavaScript?
JavaScript is the building block of the web, and it's the programming language primarily used by web browsers to create dynamic and interactive web experiences for users. The majority of libraries and applications that make the internet indispensable are developed in JavaScript. Even though JavaScript is not the only client-side scripting language, it is one of the most popular and widely used. Also, according to W3tech, over 90% of all websites use JavaScript, so it's quite a vital tool in web development.
Because JavaScript is the core technology of the modern internet, it's the best language for building simple websites like landing pages. Rather than using its complex frameworks, you can quickly build a simple landing page from scratch using JavaScript, CSS, HTML, and a headless CMS like ButterCMS.
Why use ButterCMS?
ButterCMS is an API-first headless CMS that allows you to build CMS-powered applications and websites using any programming language that you choose. Whether you are building a new application or integrating it into an existing one, it's one of the most powerful headless CMSs to work with. The following features make ButterCMS an excellent choice for building landing pages:
- Flexible content modeling: By using custom components, you can easily customize the contents of your landing page according to your requirements.
- Page types: Page types are powerful tools that can be used to create pages with the same structure but different content. You can create SEO landing pages, knowledge bases, and articles for your applications or websites with ButterCMS page types.
- Collections: Another great feature of ButterCMS is collections. Basically, collections are tables of data that pages can reference. Among the many use cases for collections is their use as facets (filterable properties for your pages).
- Components: Components provide a way to compose dynamic landing pages. With components, it's easy to compose flexible and customizable layouts.
- Developer-friendly: ButterCMS was developed from the ground up with developers in mind. With the headless CMS, you can use your favorite tech stack and launch your landing page faster with less code, all thanks to its developer-friendly ecosystem.

JavaScript landing page tutorial prerequisites
Below are the main requirements you need to follow along with this tutorial:
- A ButterCMS trial account
- A code editor such as Visual Studio Code or Sublime
- Basic knowledge of JavaScript
- Node.js installed on your system
Setting up the development environment
To get started, create a new folder and initialize a Node.js project by running the command below:
mkdir buttercms-javascript_landingPage
cd buttercms-javascript_landingPage
npm init
Next, we need to install Parcel as our build tool. The Parcel build tool combines brilliant out-of-the-box development with a scalable architecture that can handle projects from the earliest stages of development to the largest production projects.
Run the following command to install Parcel as a dev dependency:
npm install --save-dev parcelOpen your package.json file and update it to have a source file to have your entries in a single place, like this src/index.html:
{
  "name": "buttercms-javascript_landingpage",
  "version": "1.0.0",
  "description": "A demo on how to build a landing page in ButterCMS and JavaScript",
  "source": "src/index.html",
  "scripts": {
    "start": "parcel",
    "build": "parcel build"
  },
  "author": "David Adeneye",
  "license": "ISC",
  "devDependencies": {
    "parcel": "^2.8.0",
  },
}
Then, create this folder structure and add these files in your buttercms-javascript_landingPage project directory:
📦buttercms-javascript_landingPage
     ⊢ 📁src
            ⊢  📁css
	   📜 main.css
          ⊢📁 js
	   📜api.js
               📜main.js
  ⊢📜index.html
Installing dependencies
Next, install the ButterCMS SDK and dotenv as dependencies by running the command below:
`npm install buttercms dotenv --save`After that, install @babel/core as dev-dependency with the command below:
`npm install --save-dev @babel/core`Setting up our landing page in ButterCMS
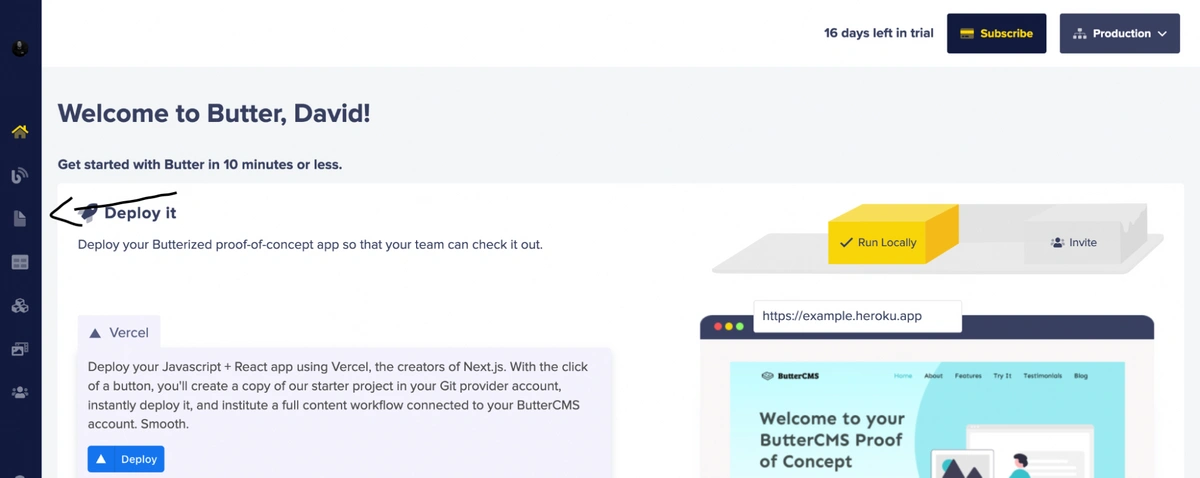
To get started building a landing page with ButterCMS, you need to sign up and create a user account. Then, log in to your ButterCMS account. Once signed up, you will be redirected to your ButterCMS dashboard, where you can manage your application's content. To create a landing page for your websites, on the sidebar of your dashboard navigate to the Pages tab, and click on the plus icon next to Landing Page to create a new page.
Then, enter the page title and description. To do this, we'll create the Home page.
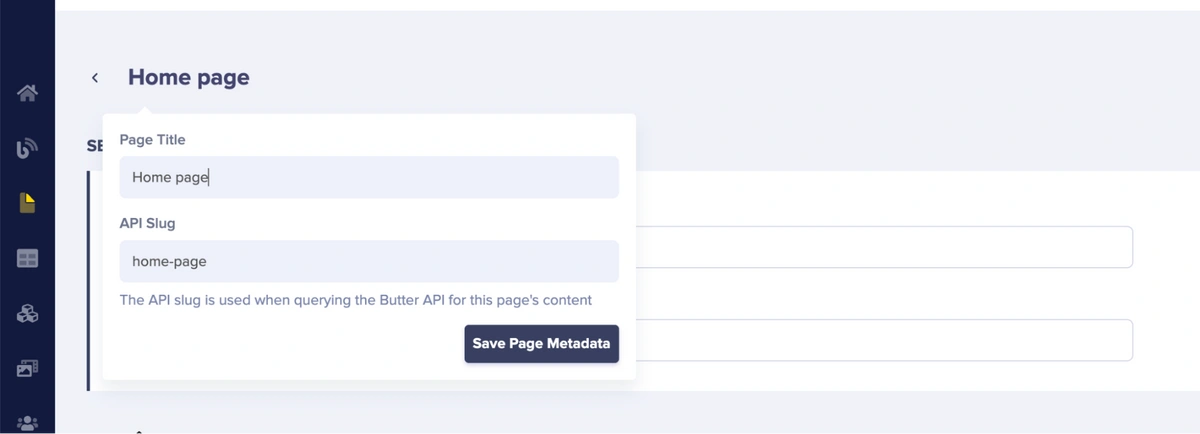
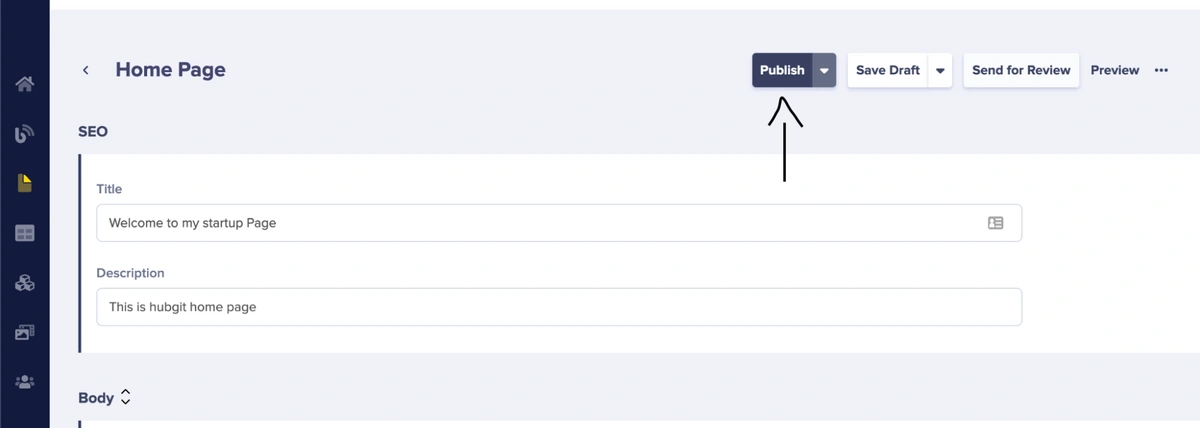
Once you enter the page title, it will automatically generate an API slug for you, where you can access your page. Then click on the Save Page Metadata button to save the page. After that, enter the SEO Title and SEO Description for the page and click on the Publish button.
Creating components to add to the landing page
We will create different types of components such as the Hero, Features, and Testimonials for the page we just created. Let's start by creating the Hero components by following the steps below:
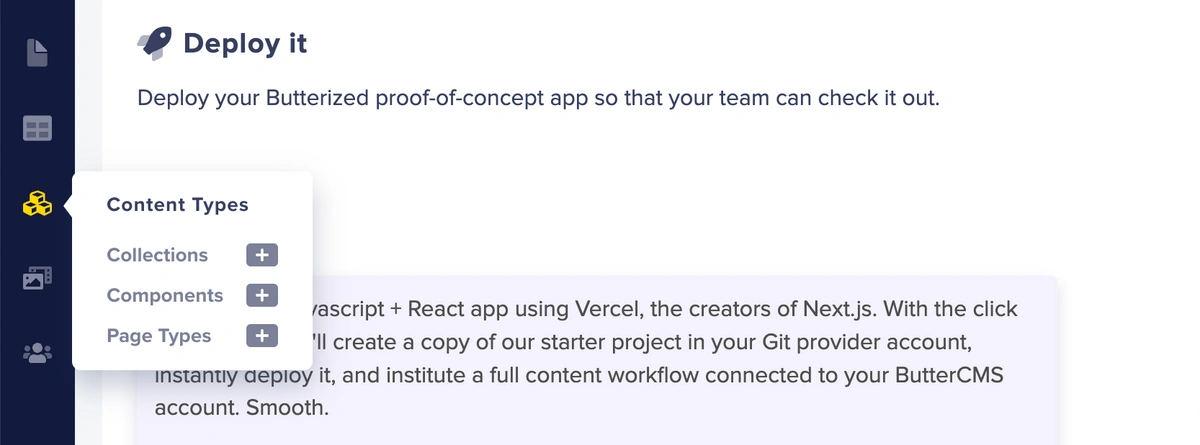
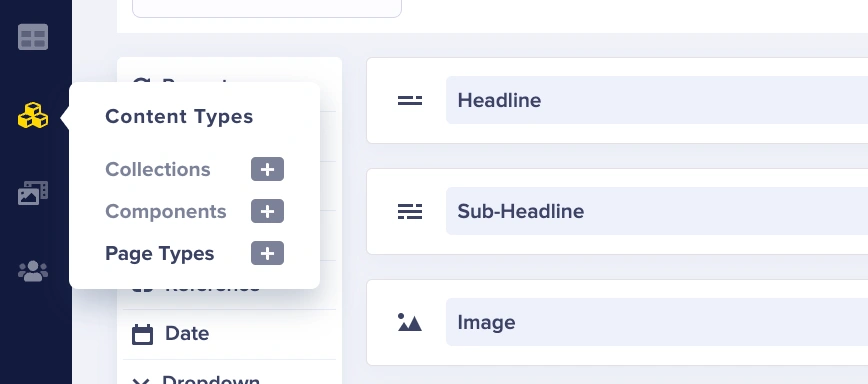
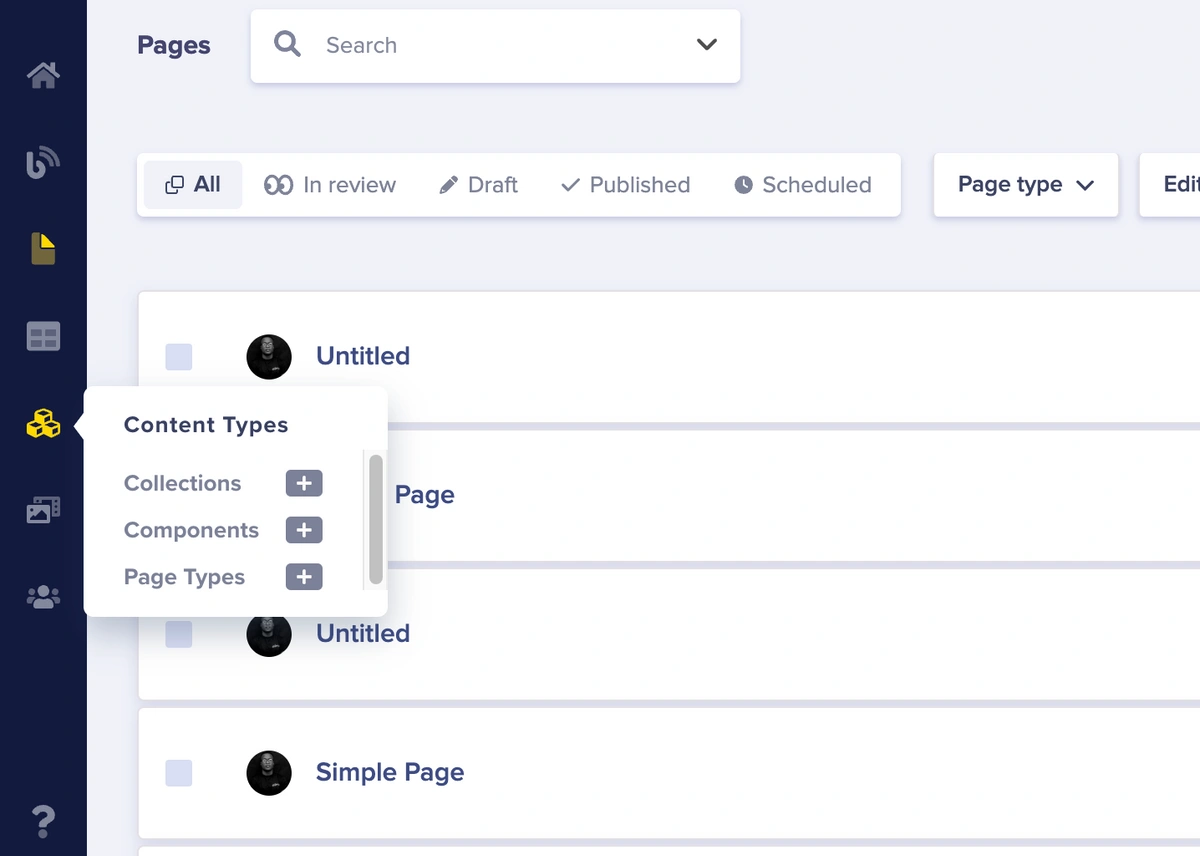
Click on the Content Types icon tab in the sidebar of your dashboard, then click on the + icon next to begin configuring your components.
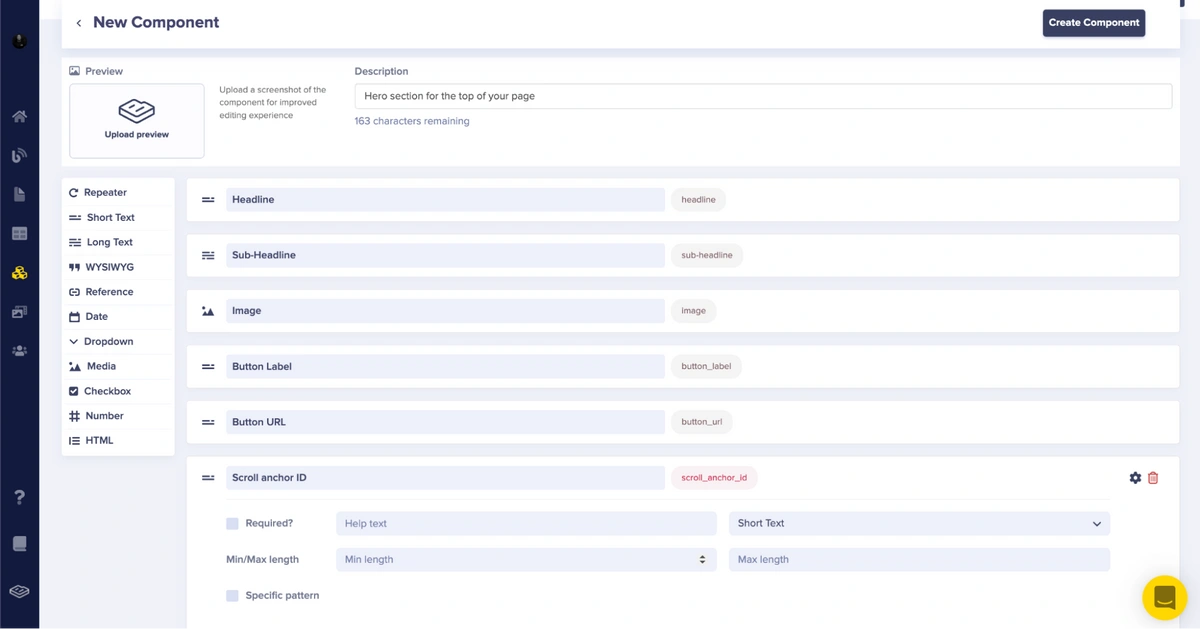
On our configuration page, you will define our components with several fields:
- Select short text field and name it Headline
- Long text field for Sub-Headline
- Media field for the image
- Short text field for Button Label
- Short text field for Button URL
- Short text field for Scroll anchor ID
Click the Create Component button. Then, enter the component name. Here we’ve named the component “Hero”.
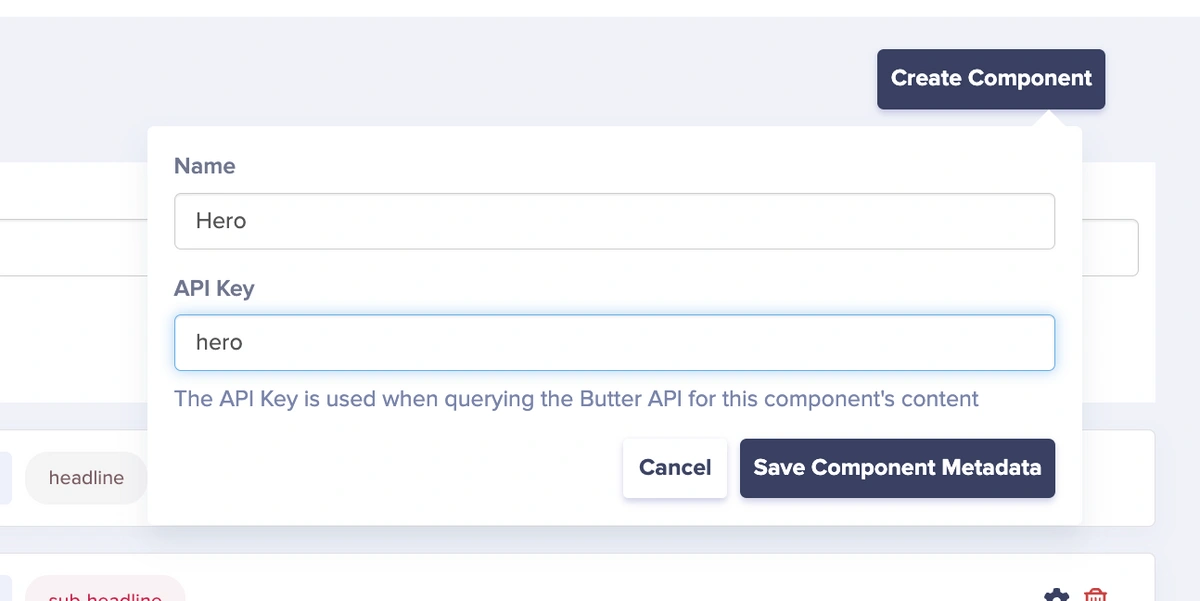
Click the Save Component Metadata button.
Next, create the Features component by following the steps below:
Click on the + icon next to Components on the Content Types tab in the sidebar of your dashboard.
Then choose the fields for the components. We'll select:
- Short text for the Headline field
- Long text for the Sub-Headline field
- Repeater for the Features field
- Short text for the Scroll anchor ID field
- For the Repeater, we'll choose short text for Headline, long text for Description, and Media for the icon

Next, click the Create Component button. Then, enter the component name. Here, we’ve named the component “Features”.
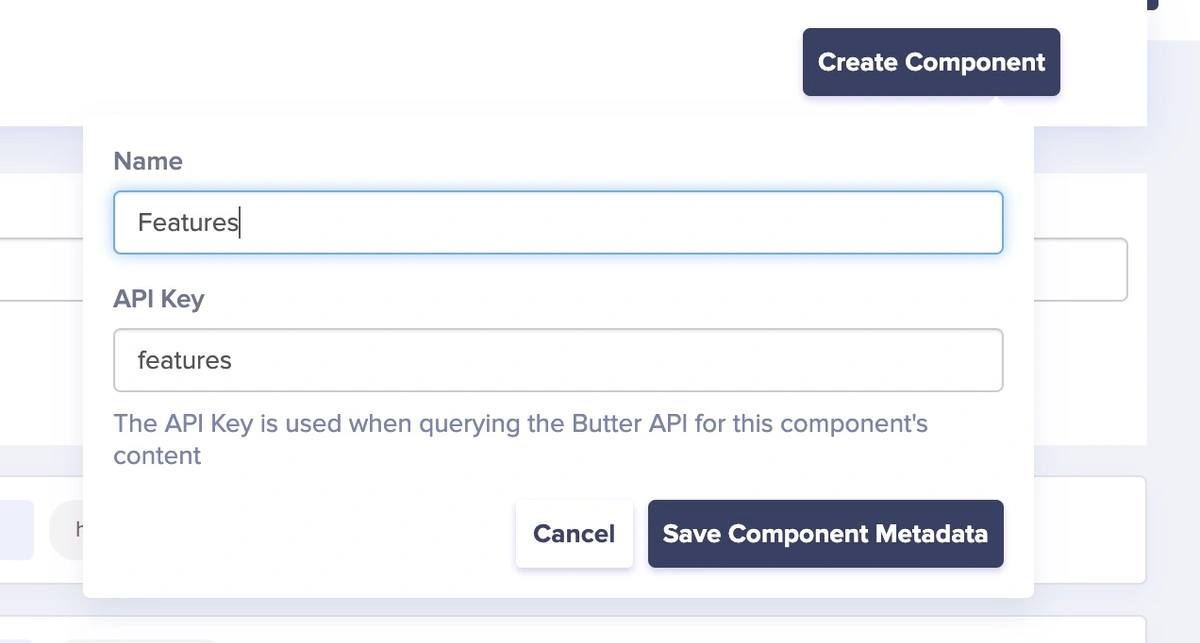
Click the Save Component Metadata button.
Adding components to the landing page
After that, click on Page Types in the Content Types tab.
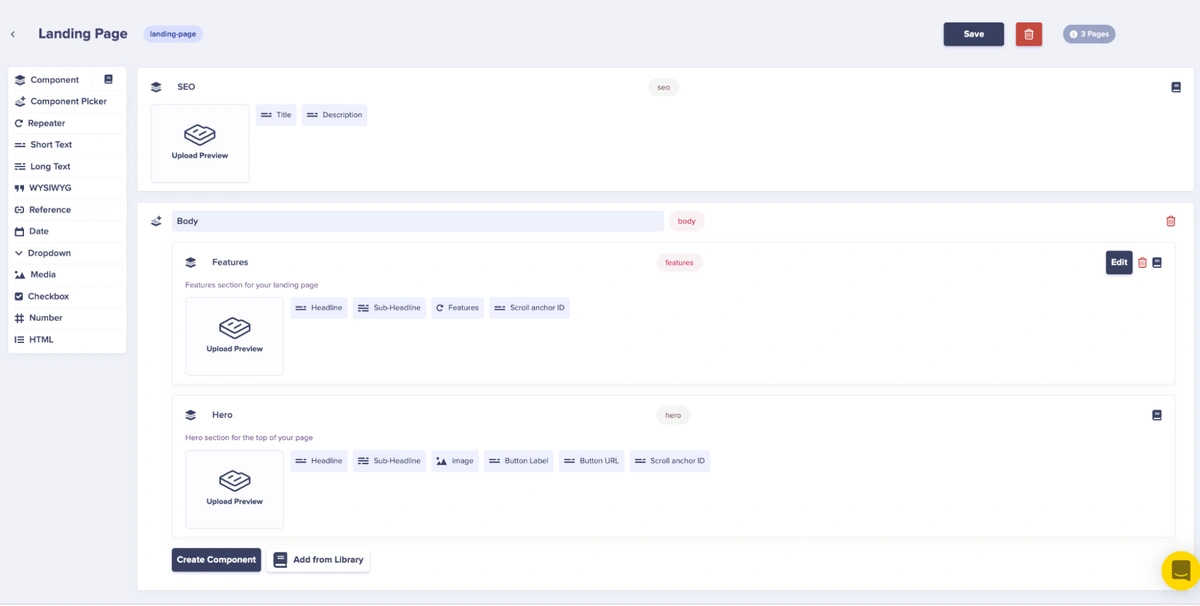
Then select the Landing Page page type from the list of page types on the page to modify the schema and add the components you created to the Landing Page body. So, click the Add from Library button, select the Features and Hero components we just created, and click Save.
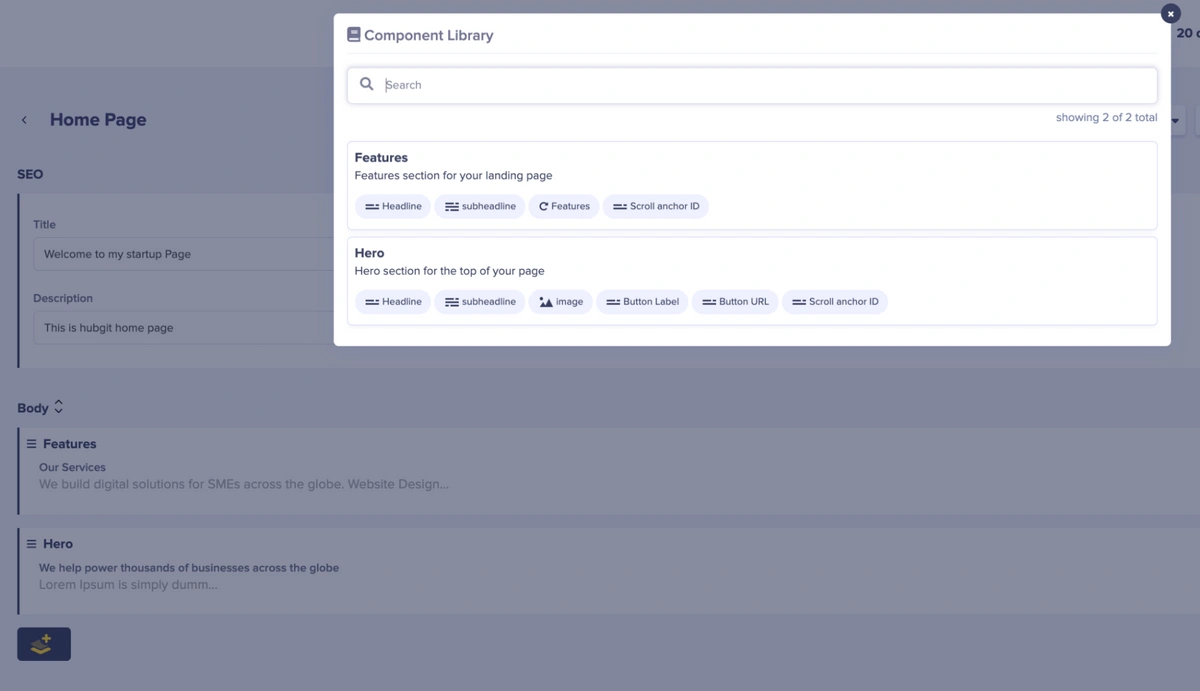
Now, back at the Home page we created earlier (which was built using the Landing Page page type), you can see additional components we created for the page by clicking on the Component Picker button under the Body tab and accessing the Component Library.
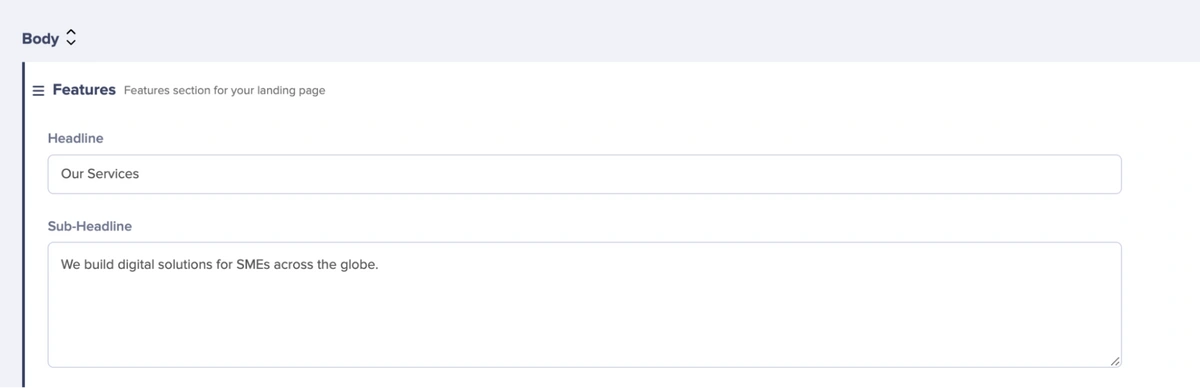
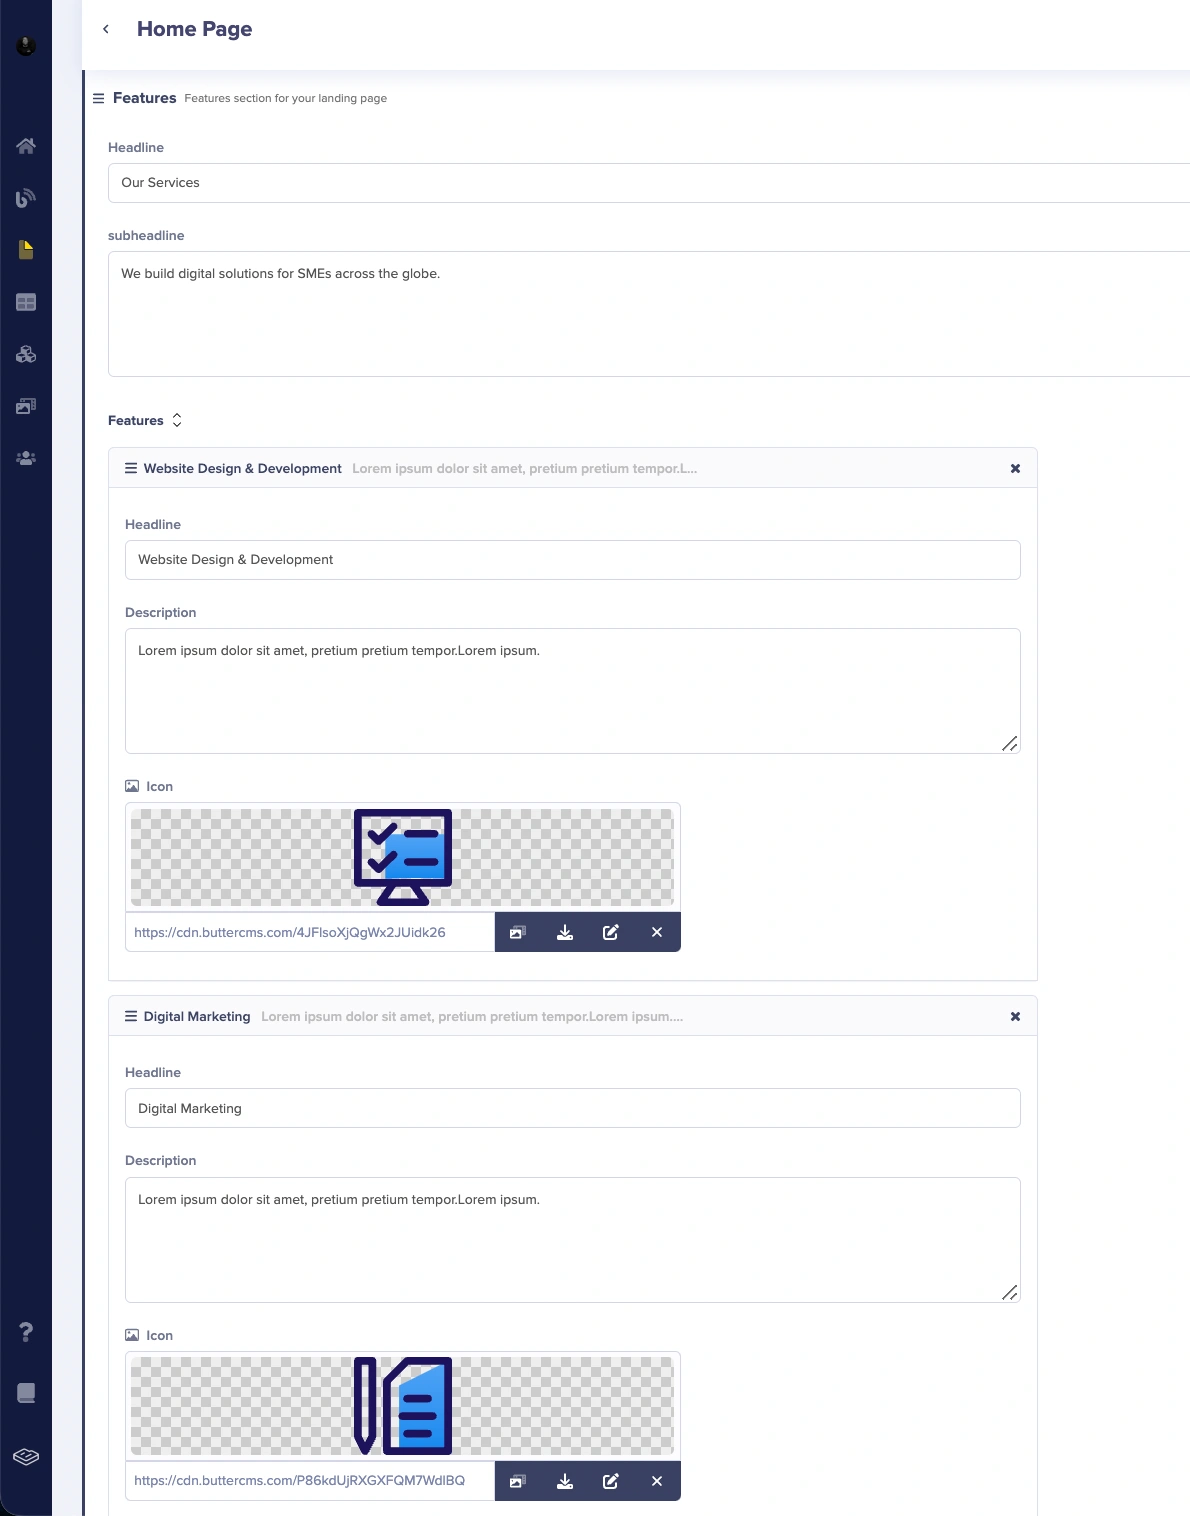
Now, click on the Features column to add the Features component with details. The headline is for the headline text of the Features component and the sub-headline is for the sub-headline text of the Hero component. Once a feature component is added to the page, click on it to add the details of the component. Enter the details in the screenshot below for the Features component.
Then, click the Features button and add a list of features you want in your application.

We'll add a few features as shown in the screenshot below:
Next, click the Component Picker again below the Feature components you just created to add other components from the Component Library. Then, click on the Hero column to add the components of the hero to the page. Afterward, click on the Hero component to add the Hero component with the details in the screenshot below. We have the headline for the headline text of the Hero component, the subheadline for the sub-headline text of the Hero component, the Image field for the Hero image, the button label for the label of the Hero button, and the button URL for the URL you may want to redirect your page to when clicked.
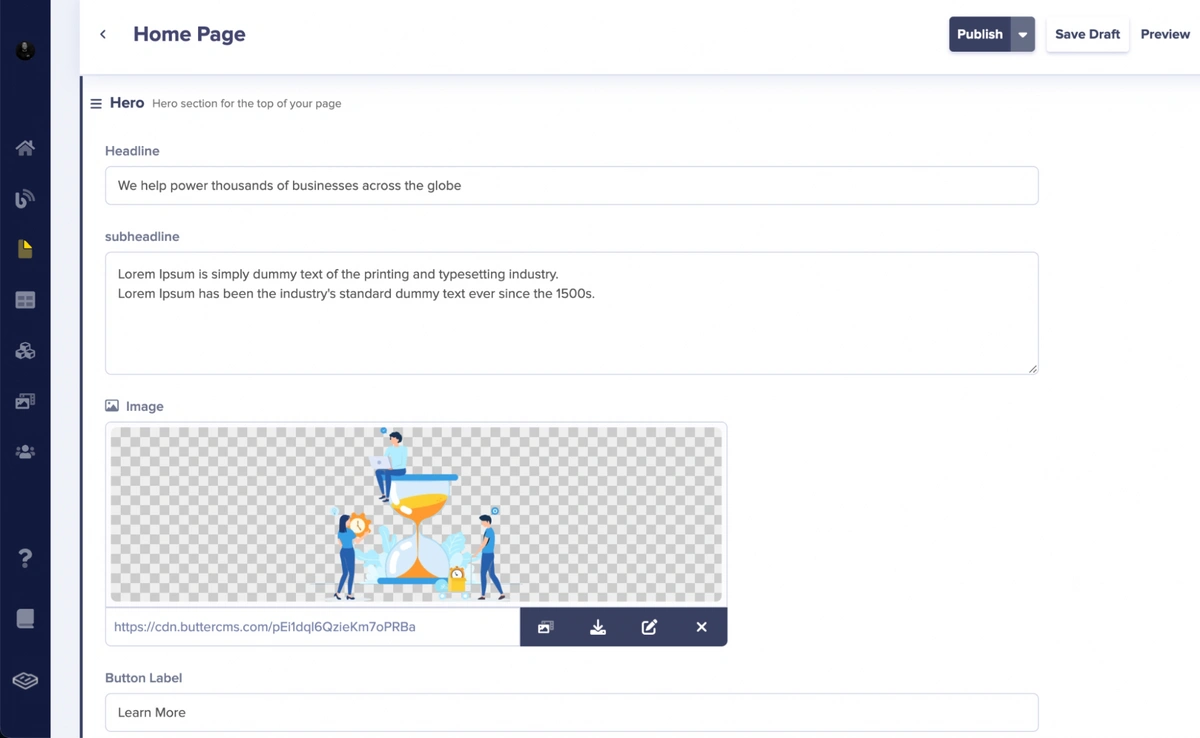
Input the details of the headline and subheadline fields, then add the hero image (you can choose from the available images provided by ButterCMS or you can upload and use your own custom images to their CDN). Add details for the button label and the button URL. You can use the pound sign (#) since we are not redirecting the button click anywhere.
Lastly, click the Publish button at the top of the page to save and make the page's API available.
Integrating the components in JavaScript
Since we have two components created—Features and Hero'—let's proceed to fetch the components into our landing page. Before doing that, open your index.html file to add the following code:
<!DOCTYPE html>
<html lang="en">
<head>
   <meta charset="UTF-8">
   <meta http-equiv="X-UA-Compatible" content="IE=edge">
   <meta name="viewport" content="width=device-width, initial-scale=1.0">
   <title></title>
   <!-- CSS only -->
   <link href="https://cdn.jsdelivr.net/npm/bootstrap@5.2.3/dist/css/bootstrap.min.css" rel="stylesheet" integrity="sha384-rbsA2VBKQhggwzxH7pPCaAqO46MgnOM80zW1RWuH61DGLwZJEdK2Kadq2F9CUG65" crossorigin="anonymous">
   <script type="module" src="js/main.js"></script>
</head>
<body>
   <nav class="container navbar  navbar-expand-lg">
     <!-- // insert navbrand here -->
     <div class="collapse navbar-collapse float-end" id="navbarScroll">
       <ul class="navbar-nav list me-auto my-2 my-lg-0 navbar-nav-scroll" style="--bs-scroll-height: 100px;">
           <!-- // insert menu-list here -->
       </ul>
     </div>
   </nav>

 <section class="hero">
 </section>

 <section>
   <div id="" class="feature-section">
     <div class="container">
         <div class="row feature">
             <div class="col-lg-7">
                 <div class="row features">
                 </div>
             </div>
         </div>
     </div>
 </div>
 </section>

<section class="featured-section">
   <div class="t-header">
   </div>
     <div class="container">
           <div class="row testimonials">

           </div>
     </div>
</section>

</body>
</html>


<style>
.navbar-brand {
 font-size: 1.7rem;
 font-weight: 400;
}

.feature-section {
 margin-top: 3rem;
}

.feature-icon {
 margin-top: 1.5rem;
}

.feature-content {
 margin-top: 1rem;
}

.features {
 margin-top: 2rem;
}
 .btn-main {
   color: #fff;
   background-color: #1998ff;
   border-color: #1998ff;
   padding: 11px 30px;
   font-size: 0.875rem;
   line-height: 1.5;
   border-radius: 50px;
}
.featured-section {
  background: linear-gradient(180deg,#1998ff 0%, rgba(255, 255, 255, 0) 93.47%);
  margin-top: 3rem;
  padding:20px;
  text-align: center;
 }
 .featured-section .card {
    background-color: white;
    padding:20px;
 }
 .featured-section .card img{
   width: 100px;
   height: 100px;
   border-radius: 50%;
   margin-top: 20px;
   margin-bottom: 20px;
   border: 3px solid #1998ff;
 }
</style>
In the code snippet above, we added Bootstrap as our styling framework and the landing page HTML semantics with additional styling.
Now, let's display the components on the home page in our template. However, let's first look at the format of the data returned from the home page API by clicking on the API Explorer tab.
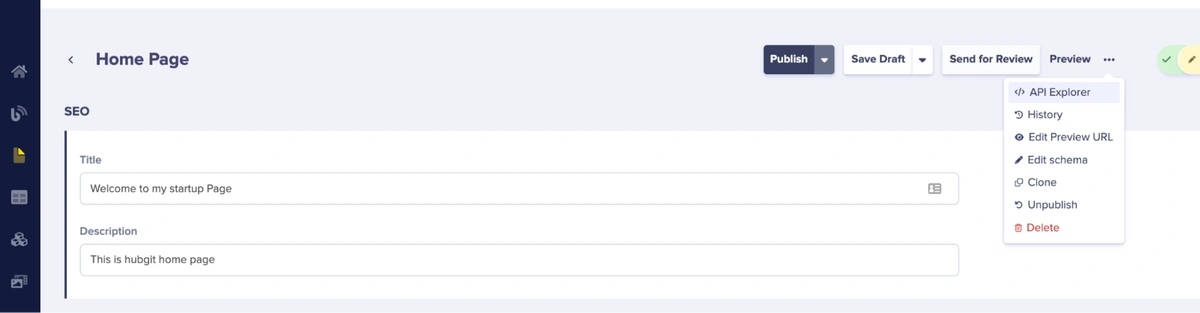
You will see a response like in the screenshot below:
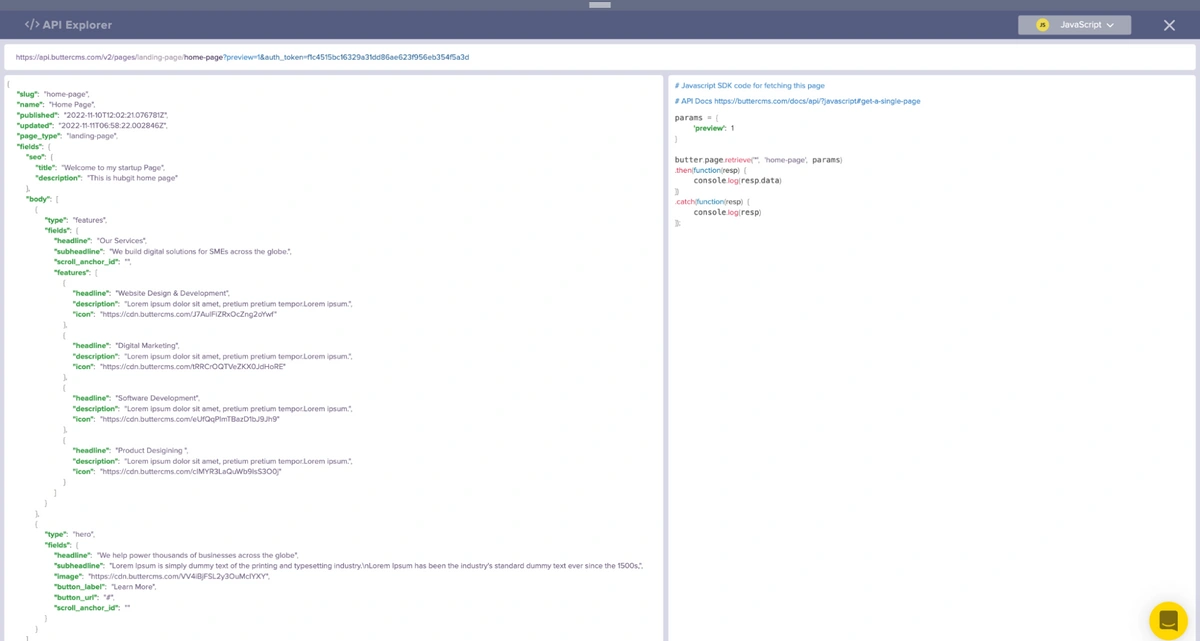
Since we have the basic structural representation of how the data to be fetched from the API looks, we will loop through the content in the body field of the data and check the content type before rendering it. Open the main.js file and add the following code snippet:
const butter = require('buttercms')('ADD YOUR API KEY HERE');

async function fetchPage(){
   const page = await butter.page.retrieve('*', "home-page").then(res => res.data.data);

   let title = document.querySelector('title');
   title.innerText = page.fields.seo.title;


   (function Homapage() {

       let featureList = document.querySelector('.features');

       page.fields.body.forEach(data => {
           if(data.type == "hero") {
             let heroMarkUp = `<div id="${data.fields.scroll_anchor_id}" class="hero-section mt-5">
             <div class="container">
                 <div class="row align-items-center">
                     <div class="col-xl-6 col-lg-6 col-md-10">
                         <div class="hero-content">
                             <h1>${data.fields.headline}</h1>
                             <p>${data.fields.subheadline}</p>
                             <a
                               href="${data.fields.button_url}"
                               target="_blank"
                               class="btn btn-primary btn-hover btn-main"

                             >
                               ${data.fields.button_label}
                             </a>
                     </div>
                 </div>
                 <div class="col-xxl-6 col-xl-6 col-lg-6">
                     <div class="hero-image text-center text-lg-end">
                         <img src="${data.fields.image}" alt="" />
                     </div>
                 </div>
             </div>
         </div>`

         let hero = document.querySelector('.hero');
         hero.innerHTML = heroMarkUp;

           }

                //Lopp features

           if (data.type == "features"){
               data.fields.features.forEach(feature => {
               let FList =  `<div class="col-lg-6 col-md-6">
               <div class="single-feature">
                   <div class="feature-icon">
                      <img src="${feature.icon}" alt=""/>
                   </div>
                   <div class="feature-content">
                       <h5>

                         ${feature.headline}
                       </h5>
                       <p>
                           ${feature.description}
                       </p>
                   </div>
               </div>
           </div>`

                 featureList.insertAdjacentHTML('afterbegin', FList)
              })

               let featureMarkUp = `<div class="col-lg-5 col-md-10">
                           <div class="section-title mb-60">
                               <h3 class="mb-20">
                                   ${data.fields.headline}
                               </h3>
                               <p>
                                   ${data.fields.subheadline}
                               </p>
                           </div>
                       </div>`
           document.querySelector('.feature').insertAdjacentHTML('afterbegin',featureMarkUp);
           }
       });
   })();

}

fetchPage();
The code above renders the content in the Hero and Features components. To run the application, use the following command:
npm startThen, navigate to http://localhost:3000 to view the application:
Adding a navigation menu and testimonials section with collections
Implementing a navigation menu
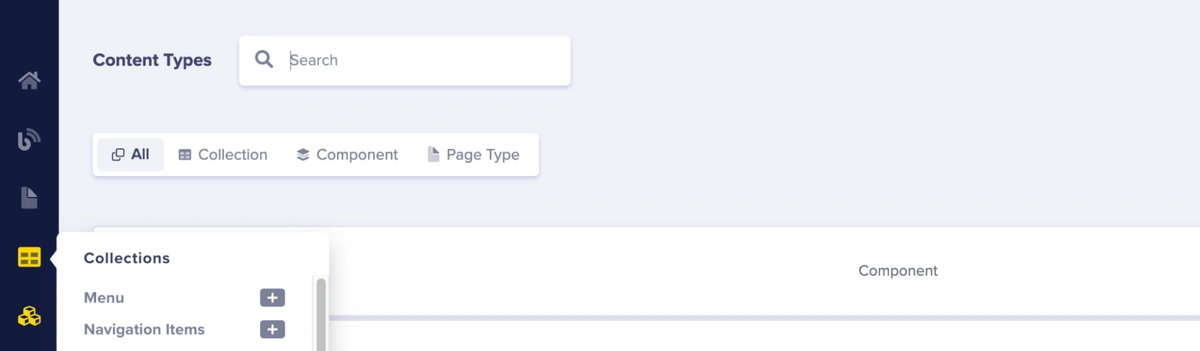
Let's add a navigation menu to the landing page. To do that, we need to add a Main Menu collection to handle the page navigation. We will create Menu and Navigation Items collections. We will create the Navigation Items collection first. To do that, follow the steps below:
Click on the Content Types icon in the sidebar of your dashboard, and then click the + icon next to Collections:
Select Short Text for the label and another Short Text for the URL of the Home page. Click on the Create Collection button. Enter the collection name. Click the Save as a Collection button.

Enter details for the label and URL of the collection.
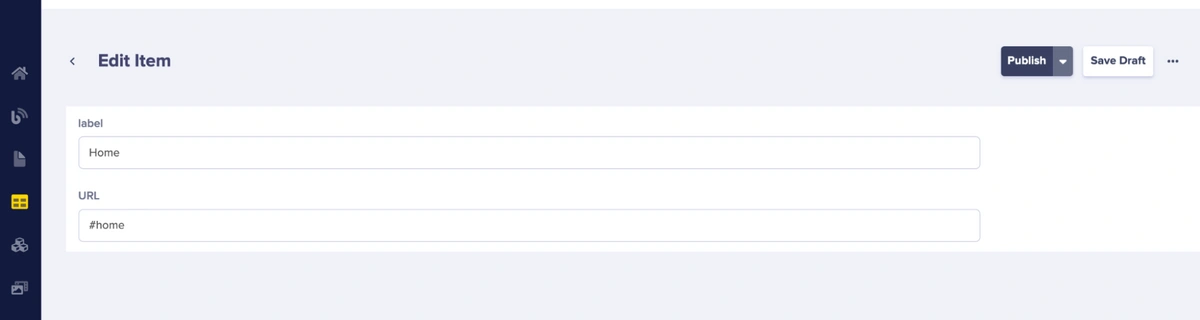
Click the Publish button.
Then, hover on the collections tab and click the + icon to add more items to the collection. Do this to create About, Services, Projects, Testimonials, and Blog items.
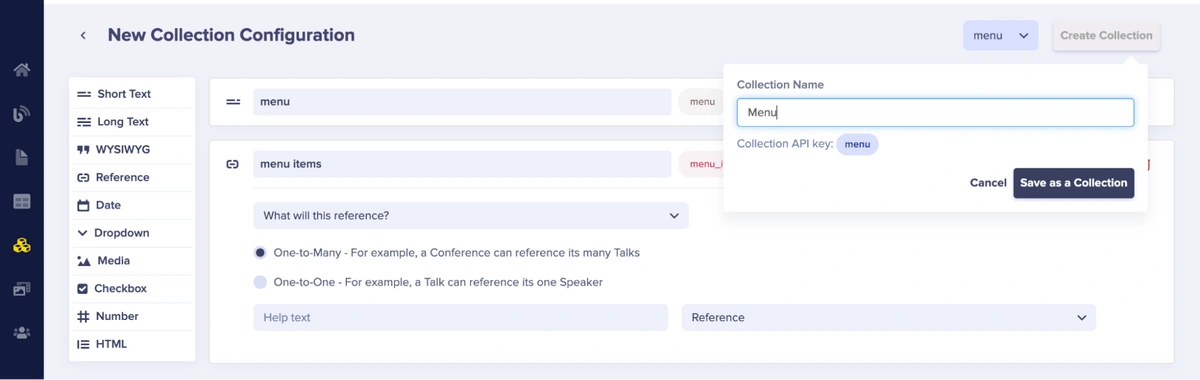
Next, create another collection to group the navigation items. We'll name this collection “Menu”. To do that, continue with the following steps:
Click on the + icon next to the Collections tab in the sidebar of your dashboard.
Select Short Text for the label and Reference field to reference the Navigation items collection. Click on the Create Collection button. Enter the collection name. Click the Save as a Collection button.
Add the Main Menu item to the Menu collection, click the Add Reference button, and select all the Navigation 1items.
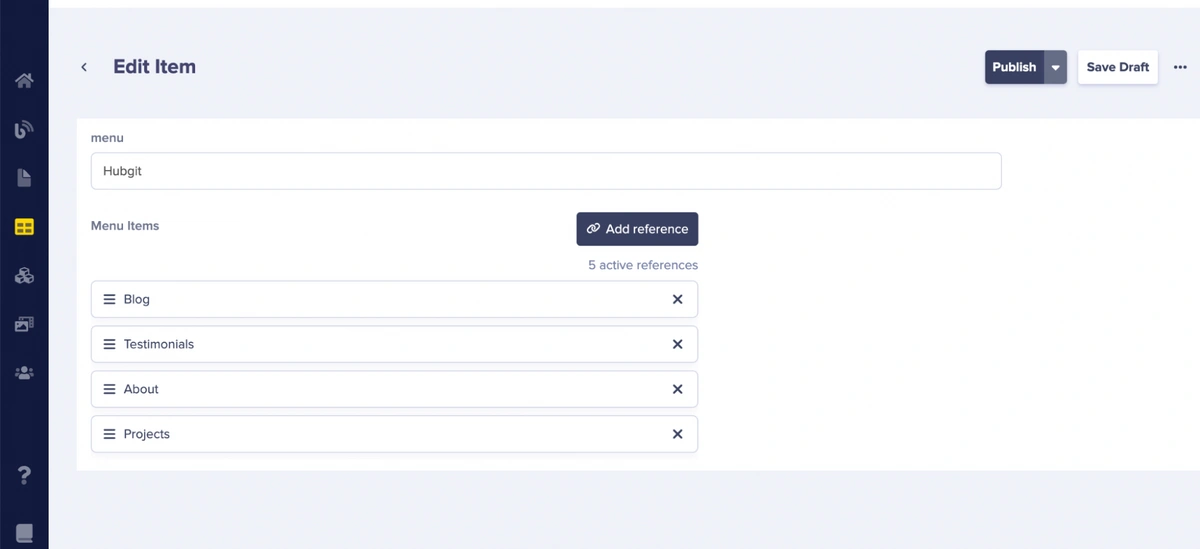
Click the Publish button.
Next, open your main.js file and update it with the following code:
…
async function fetchPage(){
   …
   const menuItems = await butter.content.retrieve(['menu']).then(res=>res.data.data);
   …
   (function Homapage() {

       let menu = menuItems.menu[0];
     …
       const menuList = document.querySelector('.list');
             menu.menu_items.forEach(item => {
           let List =    `<li class="nav-item">
           <a class="nav-link" href="${item.url}">${item.label}</a>
         </li>`
         menuList.insertAdjacentHTML('afterbegin', List)
       })

      let navMarkup = `<div class="container-fluid">
      <a class="navbar-brand" href="">${menu.menu}</a>
      <button class="navbar-toggler" type="button" data-bs-toggle="collapse" data-bs-target="#navbarScroll" aria-controls="navbarScroll" aria-expanded="false" aria-label="Toggle navigation">
        <span class="navbar-toggle-icon"></span>
      </button>
       </div>`

       document.querySelector('.navbar').insertAdjacentHTML('afterbegin',navMarkup);
         })();

    …
}

fetchPage();
Implementing the Testimonial section
Next, let's create another collection to display testimonials on your landing page. To do that, click on the Collection tab:
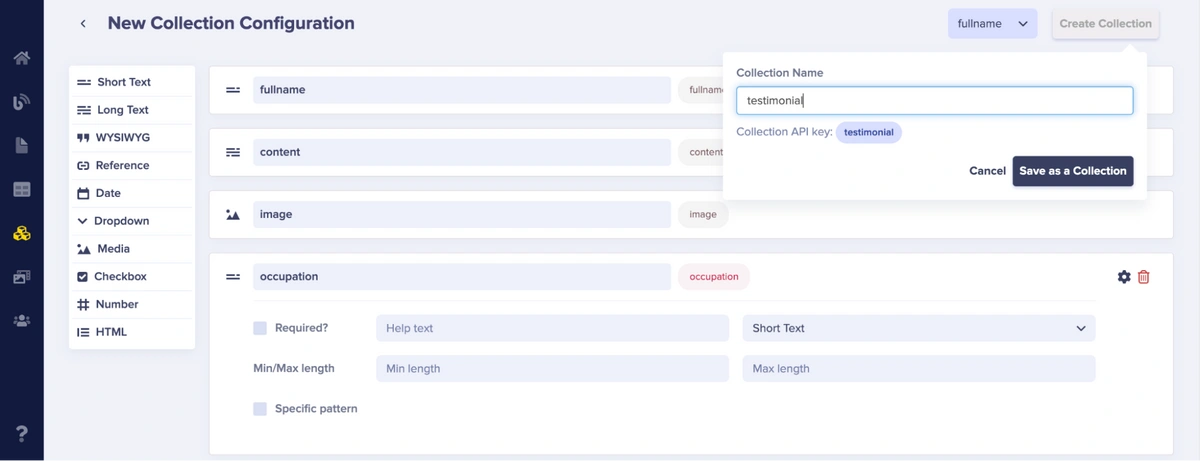
Then, click on the New Content Type > Collection button.

Then, enter your blog configuration. Choose Short Text for full name and occupation, Long Text for the content field, and Media for the image field. Then, enter the collection name and press the Save as a Collection button.
Next, add details to your first testimonial collection item.
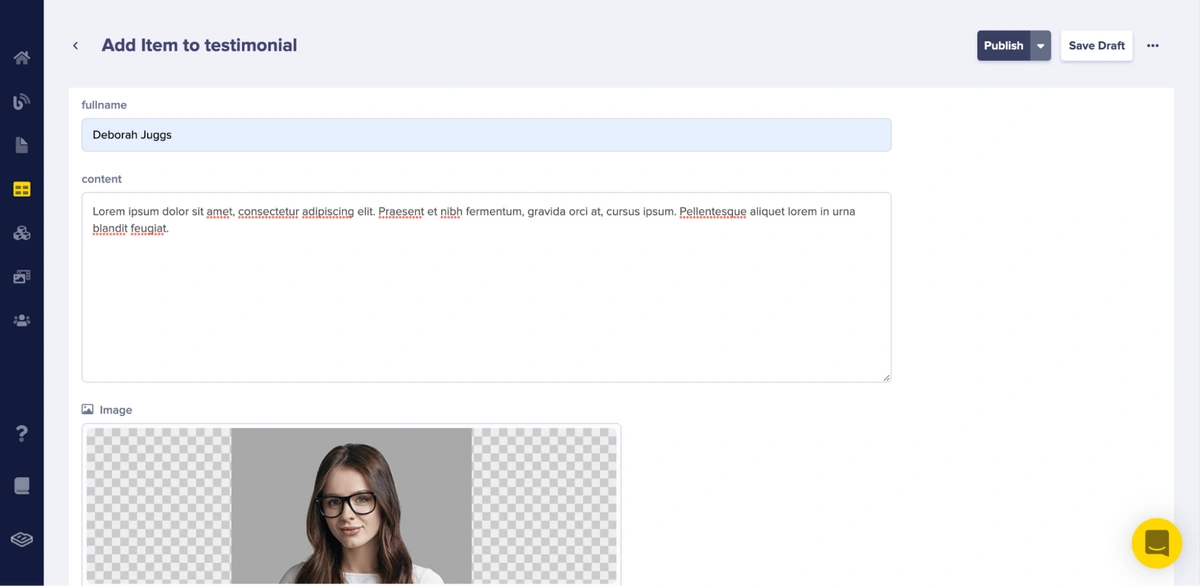
The screenshot above is showcasing how to add the testimonial data. You will also need to add three more testimonials. Then, click the Publish button. Now, let's update our codebase to fetch the content of our landing page. To do that, open your main.js file and update it with the code snippet below:
const butter = require('buttercms')('ADD YOUR API KEY HERE');

async function fetchPage(){
   const page = await butter.page.retrieve('*', "home-page").then(res => res.data.data);
   const menuItems = await butter.content.retrieve(['menu']).then(res=>res.data.data);
   const { testimonial } = await butter.content.retrieve(['testimonial']).then(res=>res.data.data);

   let title = document.querySelector('title');
   title.innerText = page.fields.seo.title;
   (function Homapage() {

       let menu = menuItems.menu[0];

       const featureList = document.querySelector('.features');
       const menuList = document.querySelector('.list');
       const testimonials = document.querySelector('.testimonials');

       menu.menu_items.forEach(item => {
           let List =    `<li class="nav-item">
           <a class="nav-link" href="${item.url}">${item.label}</a>
         </li>`
         menuList.insertAdjacentHTML('afterbegin', List)
       })

      let navMarkup = `<div class="container-fluid">
      <a class="navbar-brand" href="">${menu.menu}</a>
      <button class="navbar-toggler" type="button" data-bs-toggle="collapse" data-bs-target="#navbarScroll" aria-controls="navbarScroll" aria-expanded="false" aria-label="Toggle navigation">
        <span class="navbar-toggle-icon"></span>
      </button>
       </div>`


       document.querySelector('.navbar').insertAdjacentHTML('afterbegin',navMarkup);


       page.fields.body.forEach(data => {
           if(data.type == "hero") {
             let heroMarkUp = `<div id="${data.fields.scroll_anchor_id}" class="hero-section mt-5">
             <div class="container">
                 <div class="row align-items-center">
                     <div class="col-xl-6 col-lg-6 col-md-10">
                         <div class="hero-content">
                             <h1>${data.fields.headline}</h1>
                             <p>${data.fields.subheadline}</p>
                             <a
                               href="${data.fields.button_url}"
                               target="_blank"
                               class="btn btn-primary btn-hover btn-main"

                             >
                               ${data.fields.button_label}
                             </a>
                     </div>
                 </div>
                 <div class="col-xxl-6 col-xl-6 col-lg-6">
                     <div class="hero-image text-center text-lg-end">
                         <img src="${data.fields.image}" alt="" />
                     </div>
                 </div>
             </div>
         </div>`

         let hero = document.querySelector('.hero');
         hero.innerHTML = heroMarkUp;

           }


           //Lopp features

           if (data.type == "features"){
               console.log(data, 'datarid');

               data.fields.features.forEach(feature => {
               let FList =  `<div class="col-lg-6 col-md-6">
               <div class="single-feature">
                   <div class="feature-icon">
                      <img src="${feature.icon}" alt=""/>
                   </div>
                   <div class="feature-content">
                       <h5>

                         ${feature.headline}
                       </h5>
                       <p>
                           ${feature.description}
                       </p>
                   </div>
               </div>
           </div>`

                 featureList.insertAdjacentHTML('afterbegin', FList)
              })

               let featureMarkUp = `<div class="col-lg-5 col-md-10">
                           <div class="section-title mb-60">
                               <h3 class="mb-20">
                                   ${data.fields.headline}
                               </h3>
                               <p>
                                   ${data.fields.subheadline}
                               </p>
                           </div>
                       </div>`
           document.querySelector('.feature').insertAdjacentHTML('afterbegin',featureMarkUp);
           }
       });

       // for testimonial
       testimonial.forEach(info => {

           let TList = `<div class="col-4">
               <div class="card" style="width: 20rem">
               <p class="card-text">${info.content}</p>
               <div class="card-body">
                 <img src="${info.image}" class="card-img-top" alt="...">
                 <h5 class="card-title style="font-size: 2.5rem;"">${info.fullname}</h5>
                 <h4 class="card-title" style="color:lightgray; font-size: 0.9rem;">${info.occupation}</h4>
               </div>
             </div>
           </div>`
            testimonials.insertAdjacentHTML('afterbegin', TList)
       })

       let testimonialMarkup = `<h4 style="margin: 9px">Testimonials</h4>
       <hr>`
       document.querySelector('.t-header').insertAdjacentHTML('afterbegin', testimonialMarkup);
   })();

}

fetchPage();
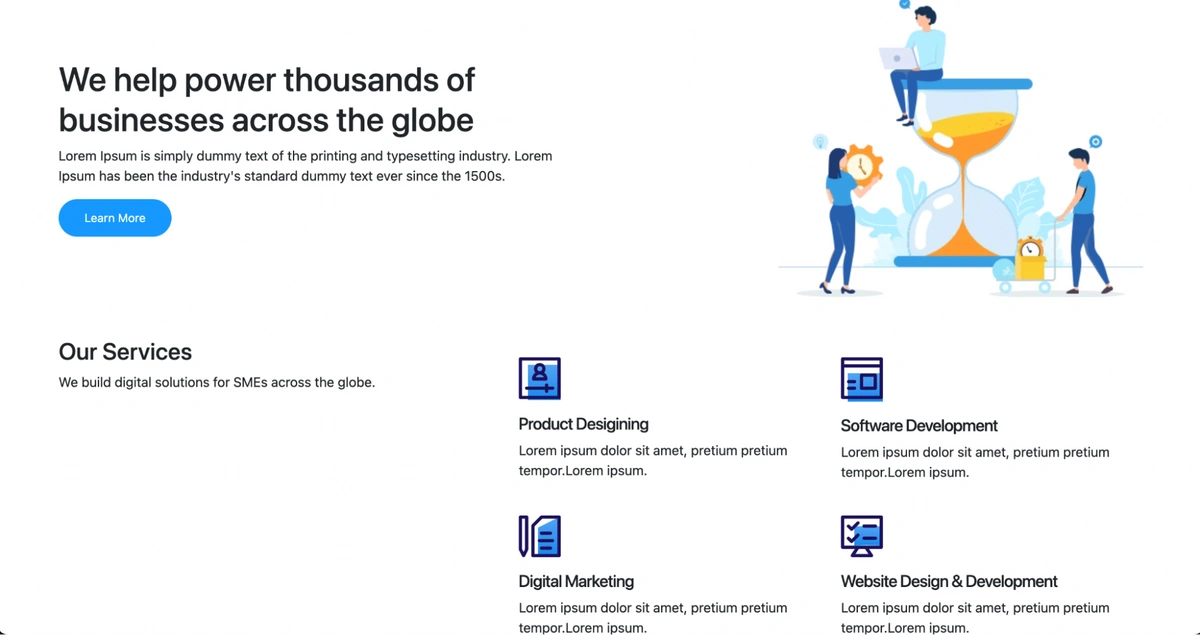
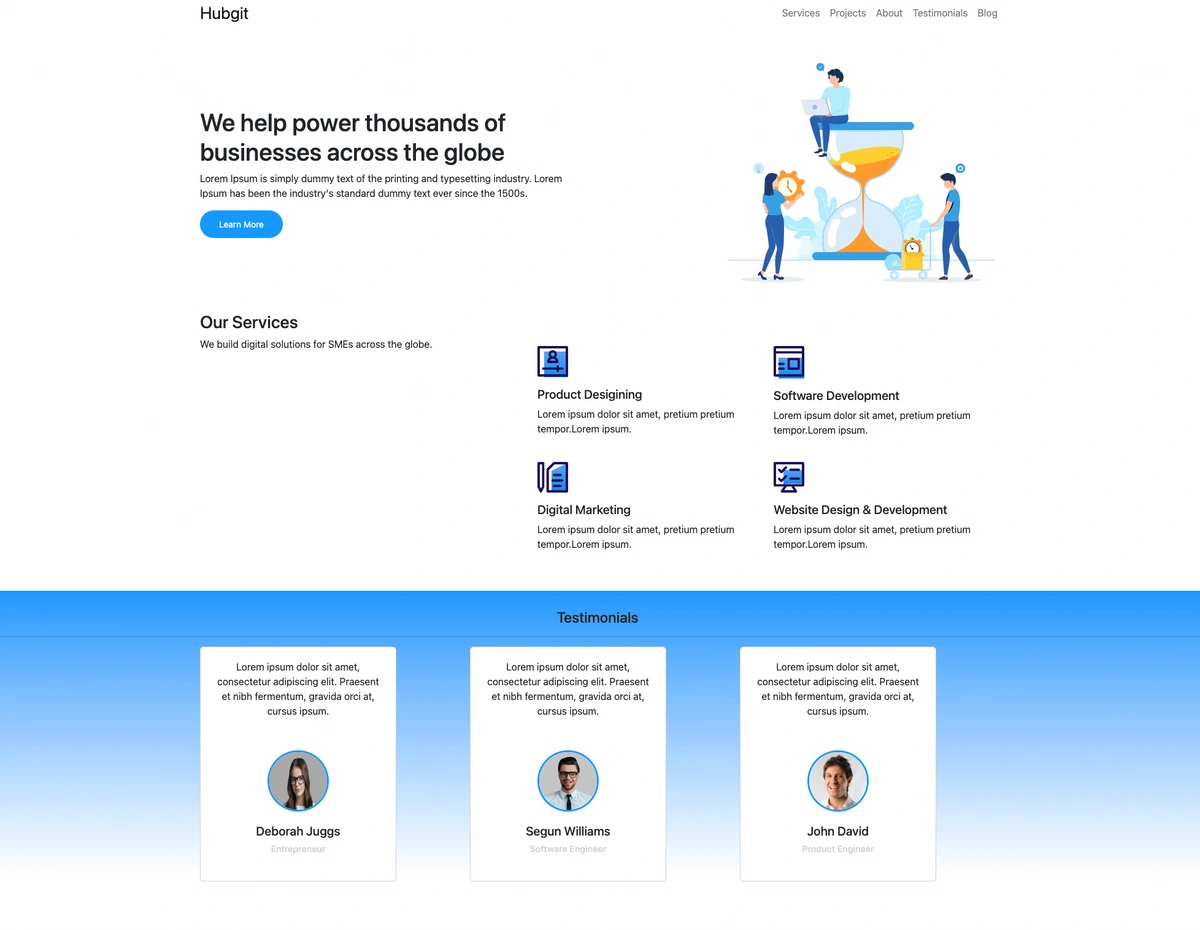
Run the application again to see the final view of the landing page:
Final thoughts
In this article, we have demonstrated the fundamentals of how to rapidly scaffold a functional JavaScript landing page. We showcased the power of ButterCMS and how to use its collections, components, and page-type features to create a highly customizable landing page. JavaScript is the programming language that powers the web so rather than using its other complex frameworks, we stuck with the basics (along with HTML, CSS, and ButterCMS APIs) to create something wonderful.
To further customize this landing page or your landing page, you can utilize the component feature to add more components to your page layout. In addition, you can also use the collections feature to create filterable properties of your pages such as facets. I can’t wait to see the amazing projects you build with ButterCMS. If you'd like to learn how you can use the ButterCMS blog engine to add a blog to your JavaScript site check out the tutorial here.

