If you are thinking of launching your website to customers around the world, then there is a good chance that you will have to serve content in multiple languages. There are many languages used all over the world and some people might feel more comfortable reading content in their native language. If you are not serving your content in those languages, you may lose potential customers.
In this article, you will learn about how to use ButterCMS along with your Next.js application to serve content in multiple languages and turn those potential users into paying clients. We will start by discussing the benefits of a multilingual site, then look into how to create one using Next.js and ButterCMS.
According to W3Techs, over 60% of websites across the world serve content in English. Even though that sounds like a lot, there's a good chance that it’s still better to serve your content in multiple languages if you intend on engaging with an international audience.
Some of the benefits of localizing content by creating a multilingual website are as follows:
Expand your customer base, and thereby increasing revenue. For a little bit of perspective, when looking at Internet World Stats' 2020 Internet World Users by Language statistics, you can see that only 25.9% of internet users are native English speakers, which means the remaining 3.4 billion internet (74.1%) users browse in languages other than English. This is a massive opportunity for growth.
SEO (Search Engine Optimization) for all regions will increase the traffic to your website and reduce bounce rates. According to Hubspot, “If your content doesn’t match the visitors you’re attracting, they’ll quickly leave”. So, it is essential that you perform optimizations based on the regions where you provide your services.
Create awareness, recognition, and trust for your international users. For reference, as reported by Slator.com according to the CSA's 2020 Can't Read, Won't Buy report, it was found that 76% of consumers would rather read product information in their native tongue and about 40% of internet users won’t buy from websites that aren’t in their native language.
You will need the following for the application that we are going to build:
Node.js 12.0 or later
The code for the application that you will be building as a part of this article is hosted on GitHub. The demo for the application is hosted on Vercel.
In this section, you will learn how to bootstrap a basic Next.js application.
Next.js is a very popular framework built on top of the React.js library and it provides the best Development Experience for building applications. It offers a bunch of features like:
The recommended way to bootstrap a Next.js application is by using its official CLI tool. To create a new Next.js application, run the following command in your terminal:
yarn create next-app
You will be asked the name of the application that you are creating:
~/Development/bin ❯ yarn create next-app

success Installed "create-next-app@11.1.2" with binaries:
      - create-next-app

✔ What is your project named? nextjs-buttercms-i18n
In this case, I entered the name “nextjs-buttercms-i18n”. However, you can choose whatever name you want to use for your application.
The Next.js CLI will generate the following files and directories for us:
.
├── README.md
├── next.config.js
├── node_modules
├── package.json
├── pages
├── public
├── styles
└── yarn.lock

4 directories, 4 files
You can start the development server of the application using the following command:
yarn dev
Our new Next.js application will be up and running on http://localhost:3000.
In this section, you will modify the landing page and add content in English.
You can modify the content of the pages/index.js file by entering some text in English like the following:
export default function Home() {
 return (
   <div>
     <h1>This is the heading</h1>
     <p>
       This is the dummy content of the page. This is just a placeholder
       content for this page and is written in English. We will be using the
       translations API of both ButterCMS and Next.js to build a multilingual
       website.
     </p>
   </div>
 );
}
Now, if you visit http://localhost:3000, you will see the following screen:
Note that I have added some basic styles to make this page look better. But, let’s not worry about them for the sake of this article.
In this section, you will learn how to use the Internationalized Routing feature of Next.js to add translations to your application.
To start using the feature, you will have to add the `i18n` config to your next.config.js file:
// next.config.js

module.exports = {
 reactStrictMode: true,
 i18n: {
   locales: ["en", "fr"],
   defaultLocale: "en",
   domains: [
     {
       domain: "website.com",
       defaultLocale: "en",
     },
     {
       domain: "website.fr",
       defaultLocale: "fr",
     },
   ],
 },
};
Let’s look at the keys that the `i18n` config uses.
Note that in this post, we won’t work with domains. We will only work with locales.
Next.js has two locale strategies:
We will be discussing the sub-path routing strategy in this article.
In this section, you will add the Navbar component, which will have links to different pages of the application. It will also have a LocalSwitcher component, which will be responsible for switching the current locale of the application.
Let’s start by adding a new file components/navbar.js with the basic blocks of a typical navbar:
// components/navbar.js

import React from "react";
import Link from "next/link";
import LocaleSwitcher from "./locale-switcher";

export default function Navbar() {
 return (
   <nav>
     <Link href="/">
       <a>Home</a>
     </Link>
     <Link href="/ssg">
       <a>SSG</a>
     </Link>
     <Link href="/ssr">
       <a>SSR</a>
     </Link>
     <LocaleSwitcher />
   </nav>
 );
}
Let’s add the LocaleSwitcher component in the components/locale-switcher.js file:
// components/locale-switcher.js
import Link from "next/link";
import { useRouter } from "next/router";
export default function LocaleSwitcher() {
const { locales, locale, pathname, query, asPath } = useRouter();
const otherLocales = locales.filter((l) => l !== locale); // Find all the locales apart from the current locale.
return (
<>
{otherLocales.map((locale) => {
return (
<Link
key={locale}
href={{ pathname, query }}
as={asPath}
locale={locale}
>
<a>Switch to &quot;{locale}&quot;</a>
</Link>
);
})}
</>
);
}Both of these components are very basic and add minimal functionality to the application.
You will also need to import the Navbar component into the pages/_app.js file:
// pages/_app.js

import Navbar from "../components/navbar";
import "../styles/globals.css";

function MyApp({ Component, pageProps }) {
 return (
   <>
     <Navbar />
     <Component {...pageProps} />
   </>
 );
}

export default MyApp;
You can also add two more files for SSG and SSR (static site generation and server-side rendering) :
// pages/ssg.js

export default function Page() {
return (
  <div>
    <h1>Article title</h1>
    <p>This is the body of the article.</p>
  </div>
);
}

export const getStaticProps = ({ locale, locales }) => {
return {
  props: {
    locale,
    locales,
  },
};
};
// pages/ssr.js
export default function Page() {
return (
<div>
<h1>Article title</h1>
<p>This is the body of the article.</p>
</div>
);
}
export const getServerSideProps = ({ locale, locales }) => {
return {
props: {
locale,
locales,
},
};
};
Now, if you visit http://localhost:3000, you will see the following:

Note that some styles have been added to make the navbar look better.
You can play with the application and notice how the URL changes when you click on the LocaleSwitcher.
Until now, you have implemented internationalized routing for the application. But, you haven’t added any translations for the texts. In this section, you will install and integrate the next-intl translation package with the Next.js application to support multiple locales.
You can start by installing the next-intl package by running the following command from the root of the project inside a terminal:
yarn add next-intl
Next, you can add translations to the pages/_app.js file:
// pages/_app.js

import { NextIntlProvider } from "next-intl";
import Navbar from "../components/navbar";
import "../styles/globals.css";

function MyApp({ Component, pageProps }) {
 return (
   <NextIntlProvider messages={pageProps.messages}>
     <Navbar />
     <Component {...pageProps} />
   </NextIntlProvider>
 );
}

export default MyApp;
Next, you can add translations to the pages/index.js file:
// pages/index.js

import { useTranslations } from "next-intl";

export default function Home() {
 const t = useTranslations("index");

 return (
   <div>
     <h2>From next-intl</h2>
     <h1>{t("heading")}</h1>
     <p>{t("content")}</p>
   </div>
 );
}

export function getStaticProps({ locale }) {
 return {
   props: {
     messages: {
       ...require(`../messages/index/${locale}.json`),
       ...require(`../messages/navbar/${locale}.json`),
     },
   },
 };
}
You can also modify the pages/ssg.js and pages/ssr.js files:
// pages/ssg.js

import { useTranslations } from "next-intl";

export default function Page() {
 const t = useTranslations("ssg");

 return (
   <div>
     <h2>From next-intl</h2>
     <h1>{t("heading")}</h1>
     <p>{t("content")}</p>
   </div>
 );
}

export const getStaticProps = ({ locale, locales }) => {
 return {
   props: {
     messages: {
       ...require(`../messages/ssg/${locale}.json`),
       ...require(`../messages/navbar/${locale}.json`),
     },
   },
 };
};
// pages/ssr.js
import { useTranslations } from "next-intl";
export default function Page() {
const t = useTranslations("ssr");
return (
<div>
<h2>From next-intl</h2>
<h1>{t("heading")}</h1>
<p>{t("content")}</p>
</div>
);
}
export const getServerSideProps = ({ locale, locales }) => {
return {
props: {
messages: {
...require(`../messages/ssr/${locale}.json`),
...require(`../messages/navbar/${locale}.json`),
},
},
};
};Let’s also add translations to our Navbar and LocaleSwitcher components.
// components/navbar.js

import React from "react";
import Link from "next/link";
import LocaleSwitcher from "./locale-switcher";
import { useTranslations } from "next-intl";

export default function Navbar() {
 const t = useTranslations("navbar");

 return (
   <nav>
     <Link href="/">
       <a>{t("home")}</a>
     </Link>
     <Link href="/ssg">
       <a>{t("ssg")}</a>
     </Link>
     <Link href="/ssr">
       <a>{t("ssr")}</a>
     </Link>
     <LocaleSwitcher />
   </nav>
 );
}
// components/locale-switcher.js
import { useTranslations } from "next-intl";
import Link from "next/link";
import { useRouter } from "next/router";
export default function LocaleSwitcher() {
const { locales, locale, pathname, query, asPath } = useRouter();
const otherLocales = locales.filter((l) => l !== locale); // Find all the locales apart from the current locale.
const t = useTranslations("navbar");
return (
<>
{otherLocales.map((locale) => {
return (
<Link
key={locale}
href={{ pathname, query }}
as={asPath}
locale={locale}
>
<a>{t("switchLocale", { locale })}</a>
</Link>
);
})}
</>
);
}You will also need to add the translation strings:
// messages/index/en.json

{
 "index": {
   "heading": "This is the heading",
   "content": "This is the dummy content of the page. This is just placeholder content for this page and is written in English. We will be using the translations API of both ButterCMS and Next.js to build a multilingual website."
 }
}
// messages/index/fr.json
{
"index": {
"heading": "C'est le titre",
"content": "Il s'agit du contenu factice de la page. Ceci est juste un contenu d'espace réservé pour cette page et est écrit en anglais. Nous utiliserons l'API de traduction de ButterCMS et Next.js pour créer un site Web multilingue."
}
}You can add the rest of the translations similarly. Feel free to check out this commit for more details.
Now, if you visit http://localhost:3000, you should be able to see the translated application.
In this section, you will learn about how to create a new page in ButterCMS and modify the schema of a page.
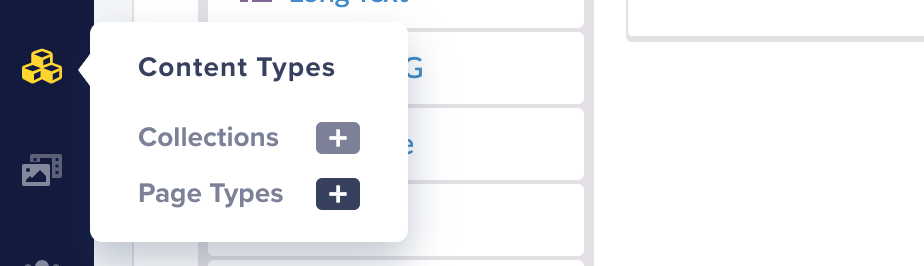
You can create a new page by visiting this link or by clicking on the New Content Type button on the Content Types page. You can also click on the + icon next to the Page Types menu under Content Types in the sidebar menu:
The schema of the page that we are going to create looks like this:
Start by selecting the Short Text field type from the left:
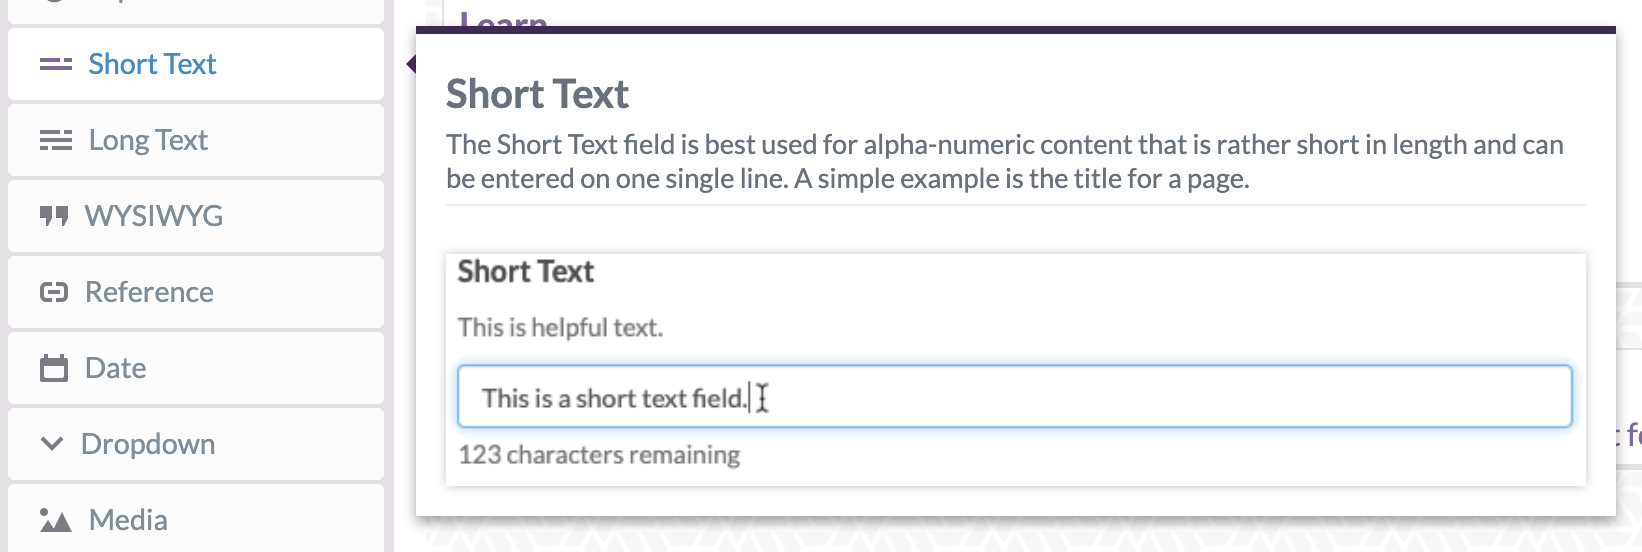
Next, you need to enter the details of the fields:
Next, select the Long Text field type from the left:
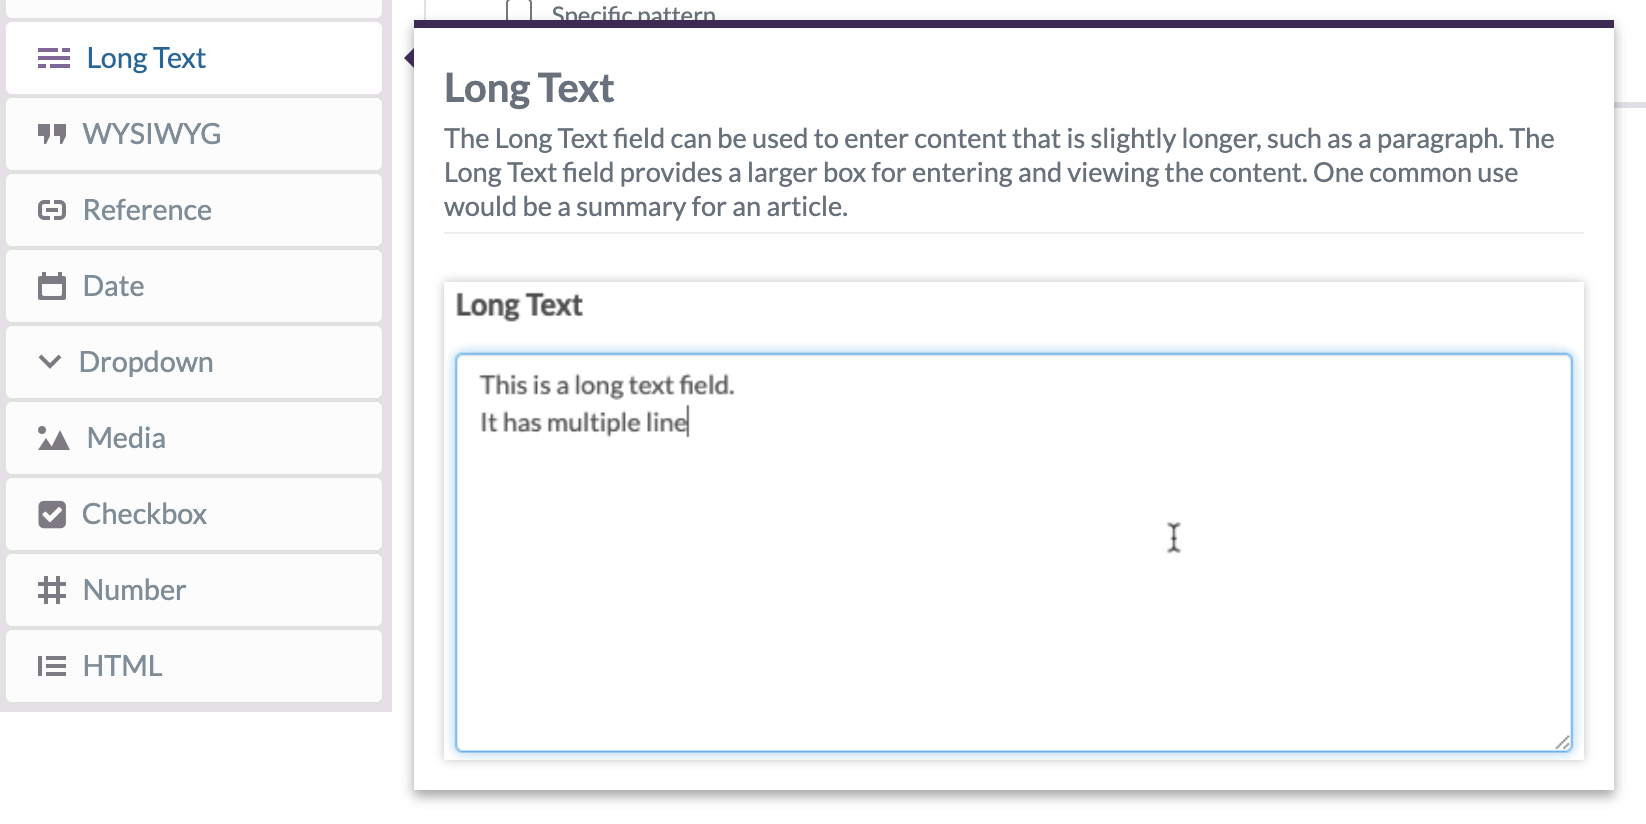
Enter the appropriate details for the fields:

Next, click on the Create Page Type button on the top right and enter the name of the Page Type:
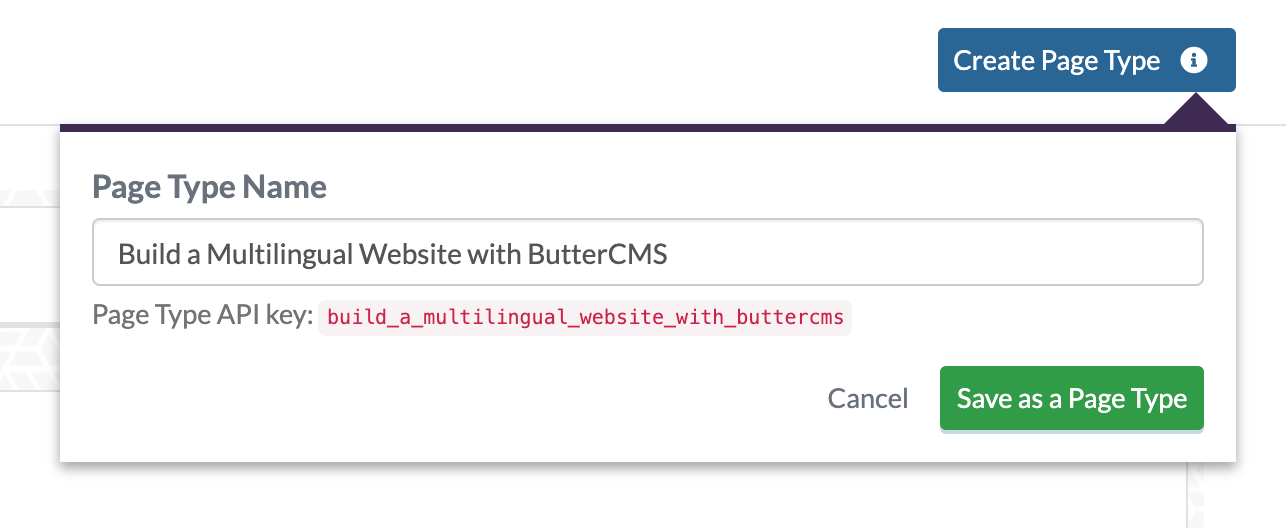
Note the Page Type API key is build_a_multilingual_website_with_buttercms, which has been generated by ButterCMS for us. We will fetch pages of this type for our application later.
You can now use the new page type to create a new page. Select the new page type that you created from the sidebar menu:
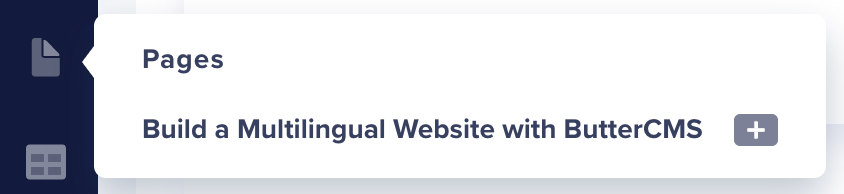
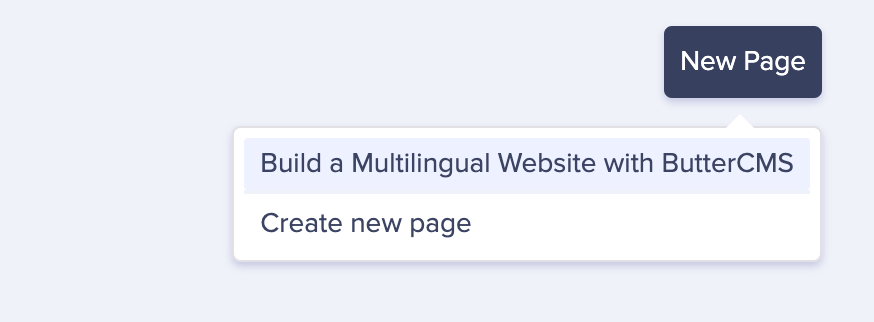
Next, click on the New Page button on the top right to create a new page:
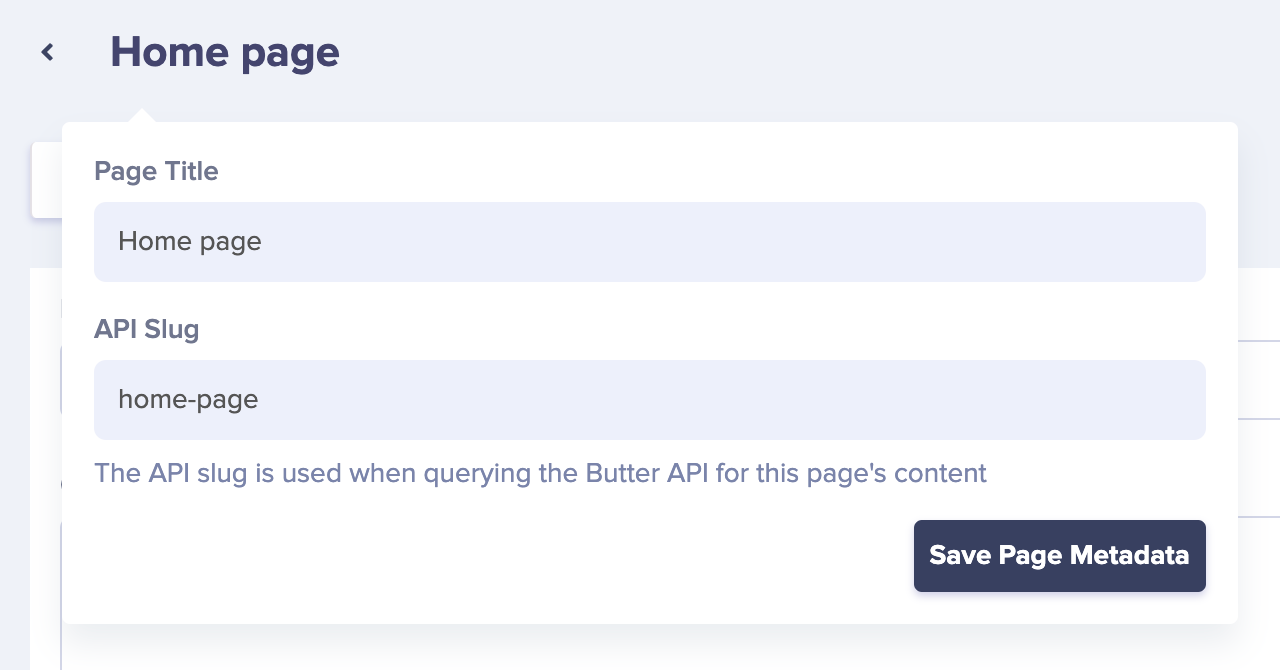
Next, add the Page Title and API Slug for your new page and click on the Save Page Metadata button:
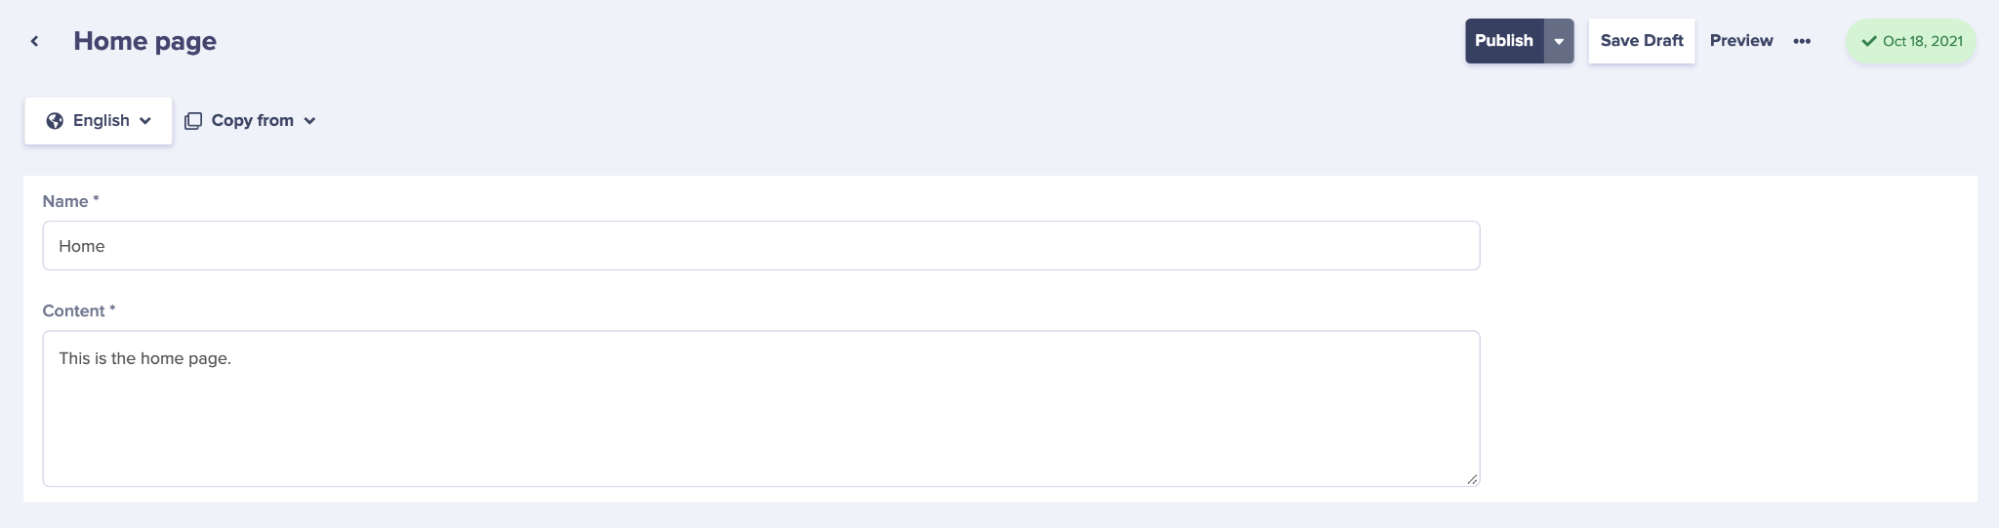
Enter the Name and Content for the new page and click on the Publish button on the top right:
In this section, you will learn about how to integrate ButterCMS with your Next.js application. You will also use the ButterCMS package to fetch data.
Let’s start by installing the ButterCMS package into our application. From the root of your project, run the following command:
yarn add buttercms
You can create a new file at libs/buttercms.js for storing the ButterCMS client:
// libs/buttercms.js

import ButterCMS from "buttercms";

// ButterCMS Read API Token from https://buttercms.com/settings/
const butterCMSClient = ButterCMS("BUTTERCMS_READ_API_TOKEN");

export default butterCMSClient;
You can now use the ButterCMSClient to fetch data in your application. Let’s fetch some data in the pages/index.js file.
// pages/index.js
import { useTranslations } from "next-intl";
import butterCMSClient from "../libs/buttercms";
export default function Home({ fields }) {
const t = useTranslations("index");
return (
<div>
<h2>From next-intl</h2>
<h3>{t("heading")}</h3>
<p>{t("content")}</p>
<h2>From ButterCMS</h2>
<h3>{fields.name}</h3>
<p>{fields.content}</p>
</div>
);
}
export const getStaticProps = async ({ locale }) => {
const { data } = await butterCMSClient.page.retrieve(
"build_a_multilingual_website_with_buttercms",
"home-page",
{
locale,
}
);
const { fields } = data.data;
return {
props: {
messages: {
...require(`../messages/index/${locale}.json`),
...require(`../messages/navbar/${locale}.json`),
},
fields,
},
};
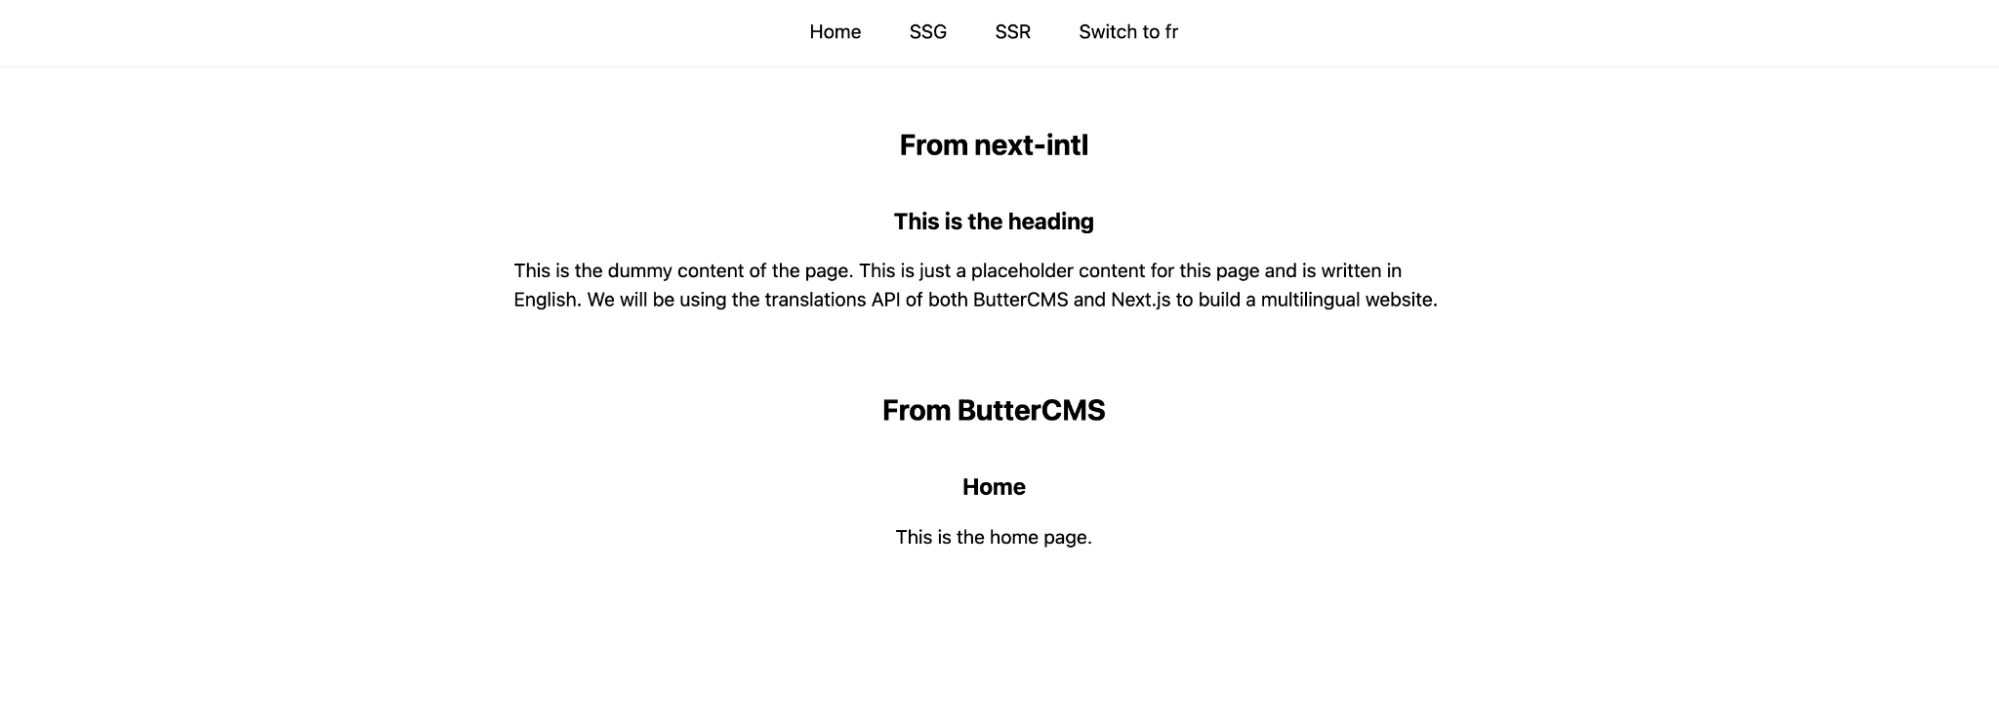
};Now, if you visit http://localhost:3000, you should be able to view the post from ButterCMS:
For using ButterCMS’s Localization API, you will need to subscribe to one of the plans:

Once you have subscribed to a plan, you will need to visit the locales page and add the necessary locales:
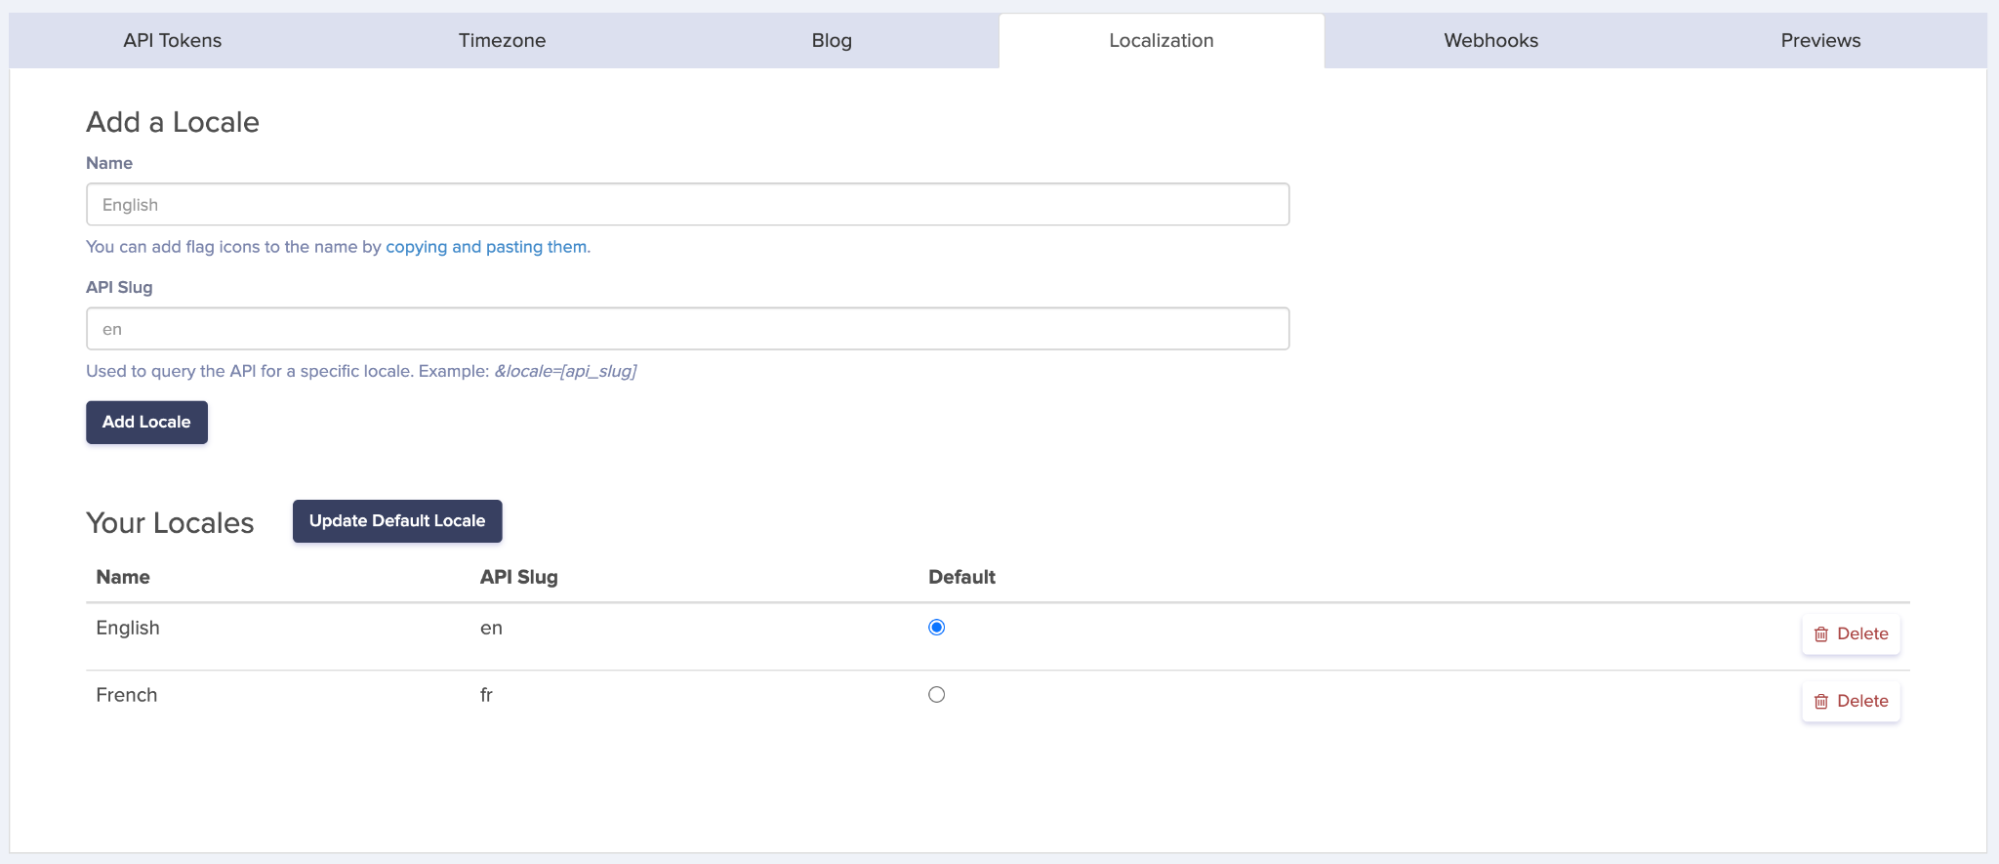
In my case, I have added the English (en) and French (fr) locales. You can add as many as you need for your application.
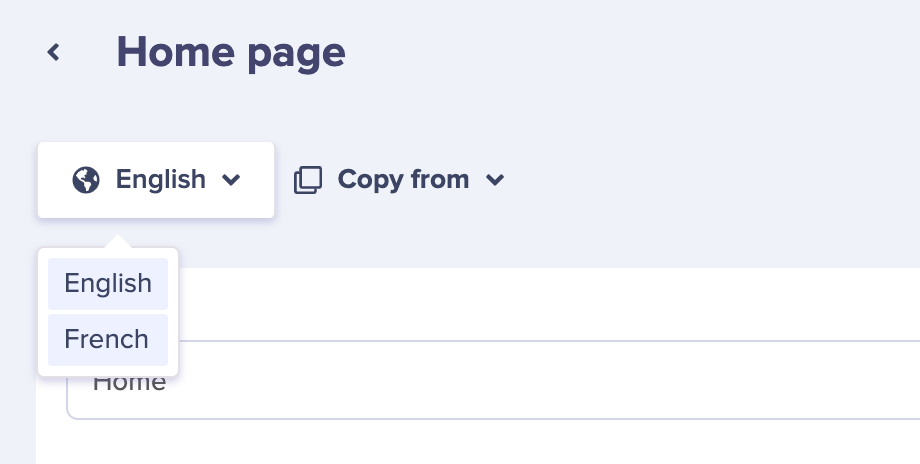
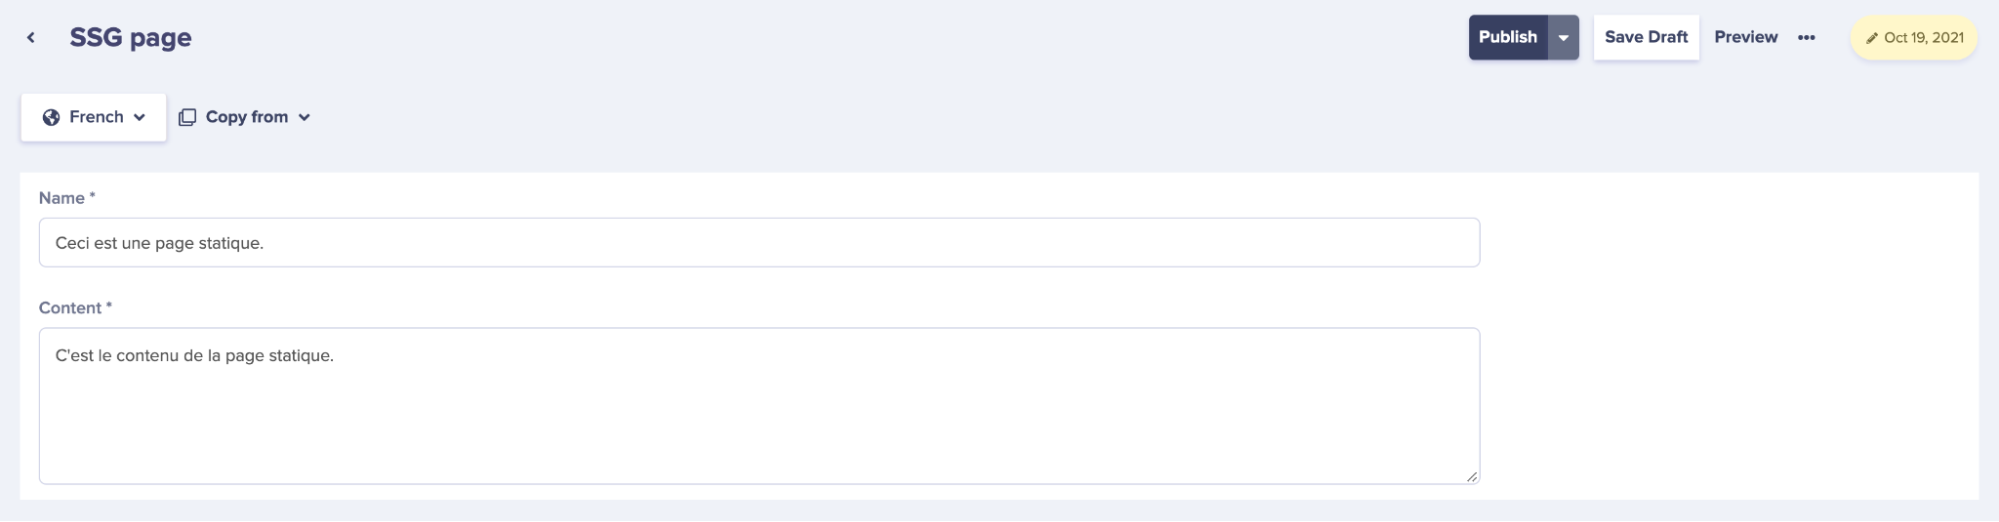
Once you are done with that, go back to the page that you had created initially and select the French locale from the dropdown, and add the necessary content for both the fields:
I used Google Translate to translate my English content to French:
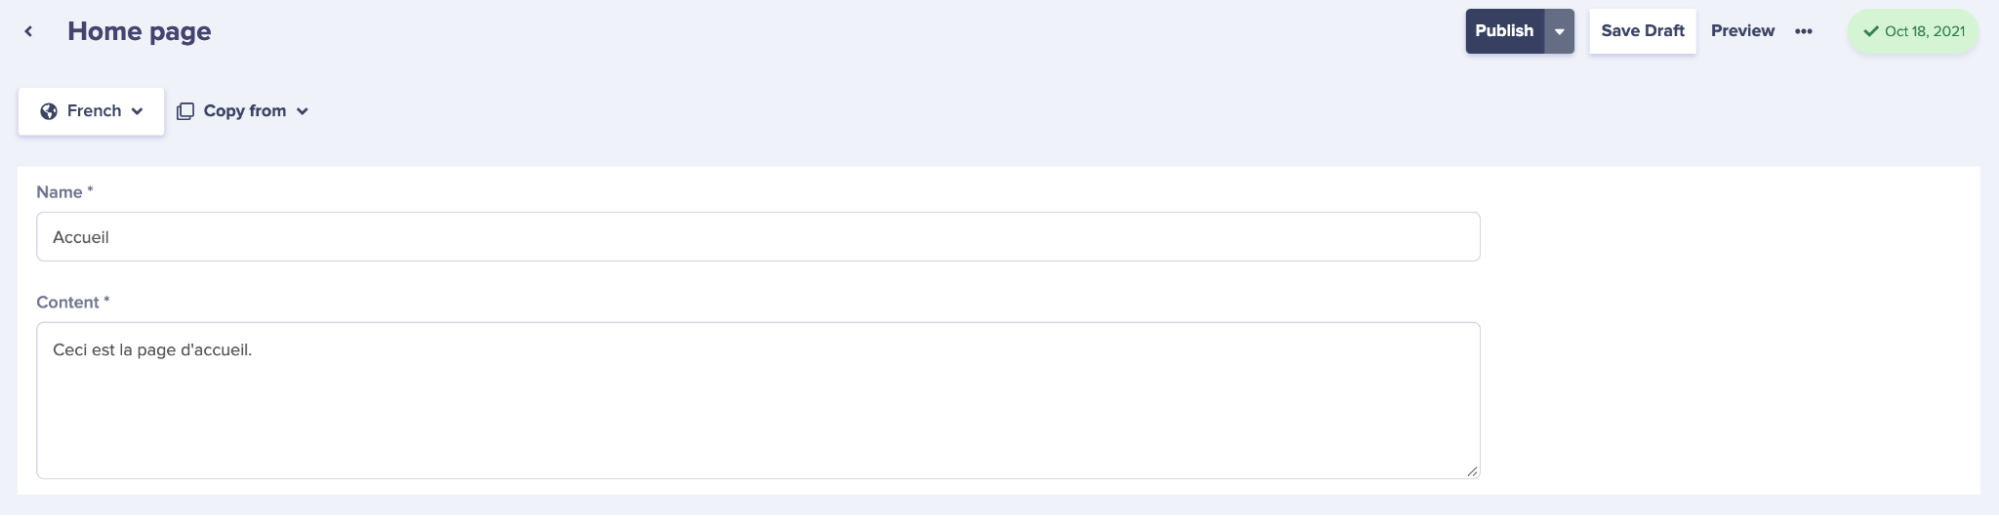
Now, if we visit http://localhost:3000, we should be able to view the translated content:
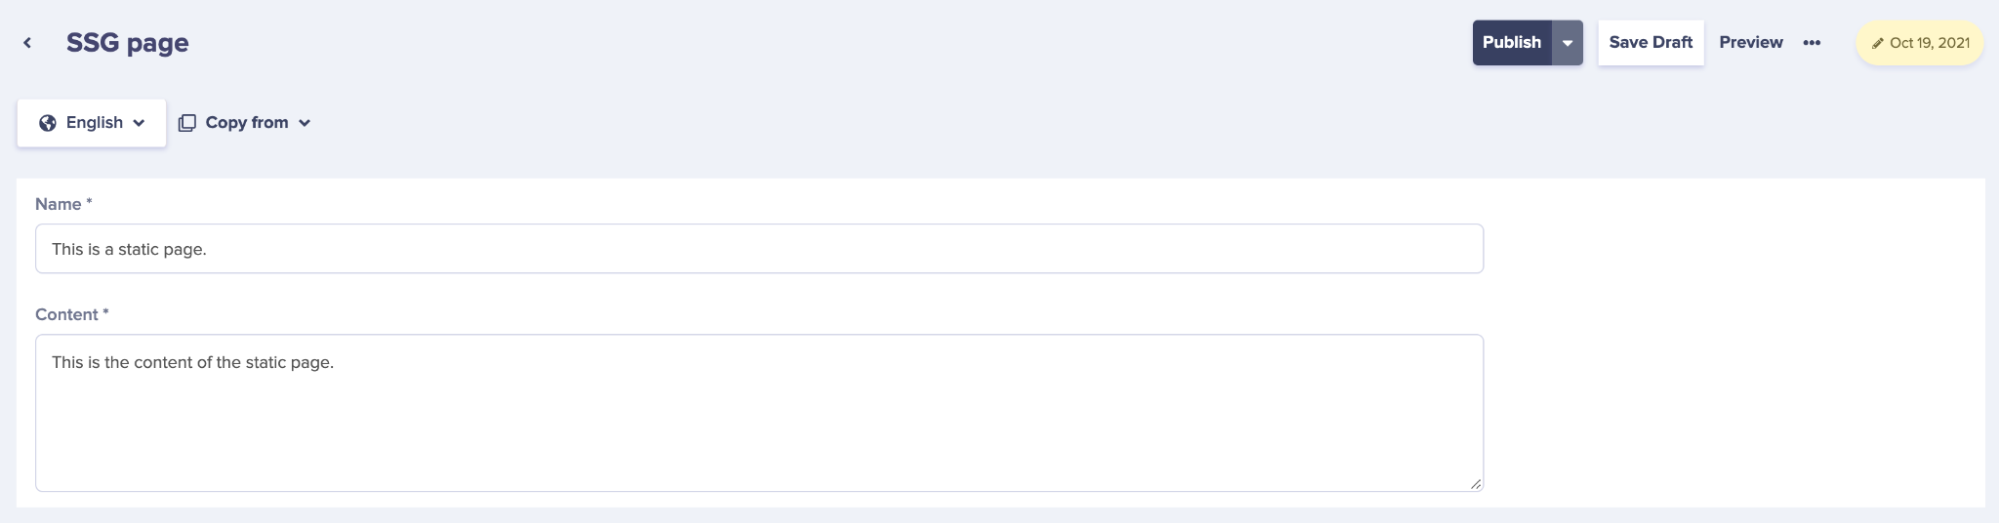
Let’s create a new page in ButterCMS to store the translations for the SSG Page. First, you can enter the English content:
Next, you can enter the French content:
Note that I have used Google Translate to translate the content from English to French. If you would like to set up an auto-translation workflow, check out our Write API for Translating Content tutorial.
Next, go to the pages/ssg.js file and add the translations in the getStaticProps function. The file will look like this:
// pages/ssg.js

import { useTranslations } from "next-intl";
import butterCMSClient from "../libs/buttercms";

export default function Page({ fields }) {
 const t = useTranslations("ssg");

 return (
   <div>
     // Other stuffs

     <h2>From ButterCMS</h2>
     <h3>{fields.name}</h3>
     <p>{fields.content}</p>
   </div>
 );
}

export const getStaticProps = async ({ locale }) => {
  const { data } = await butterCMSClient.page.retrieve(
   "build_a_multilingual_website_with_buttercms",
   "ssg-page",
   {
     locale,
   }
 );
 const { fields } = data.data;

 return {
   props: {
     // Other stuffs

     fields,
   },
 };
};
Now, if you visit http://localhost:3000/ssg, you should be able to view the translated content:
You can extend this functionality to the other pages as well.
In an application, there are certain texts that you want to be translated and fetched from a CMS. These include page headings, descriptions, etc. There is also certain content that doesn’t need to depend on the CMS. This includes text used on buttons, navbars, and footers.
In this article, you learned how you can use both the Localization API of ButterCMS as well as the Next.js translations API and next-intl package to build a translated application.
Now, you can build your multilingual website and turn those potential clients into active, paying customers.