
A knowledge base is an essential tool for any product or service. For a product to be user-friendly, it must have adequate documentation and instructions for navigating and resolving issues without assistance from customer support. Even if you build a remarkable product or service, if it's difficult to use or navigate, people won't like it.
In this article, you will learn how to create a knowledge base using PHP and ButterCMS.
Table of contents
Why PHP & ButterCMS?
In simple terms, PHP stands for Hypertext Preprocessor. It is an open-source general-purpose scripting language extensively used for web backend services and architecture. Over 78% of websites are built with PHP, making it the backbone of virtually all the internet.
In my opinion, PHP's biggest advantage is its simplicity and ease of use. Besides giving web developers more control, it's cross-platform compatible with Windows and MacOS, as well as most web servers (Apache, Microsoft, IIS, Netscape). When it comes to building a knowledge base that loads fast, PHP is the best option.
ButterCMS is an API-first headless content management system (CMS) for building CMS-powered websites and applications with any programming language or framework stack of your choice. It's one of the most reliable headless CMSs available today, whether you're building a new application or integrating it with an existing one.
ButterCMS provides many amazing features that make it easy to build a knowledge base. It has a user-friendly dashboard that makes it easy for a non-technical team to create content for the knowledge base via text editors.
Key features of ButterCMS such as its Content API, flexible content types, and media library make it an ideal choice for building a knowledge base. With page types, you can easily define the structure and layout of each page on your site. They provide a flexible way to manage the content of the pages on your sites. The Content API enables developers to fetch data within ButterCMS and display it using any programming language or framework stack of their choice. In this PHP knowledge base tutorial, we will learn how to utilize these features to build a knowledge base.

Tutorial: How to create a knowledge base using PHP and ButterCMS
What we’ll be building
As we progress through this article, we'll discuss the key steps involved in building a PHP knowledge base with content powered by ButterCMS. These steps include setting up a development environment, designing the user interface, and integrating ButterCMS for content management.
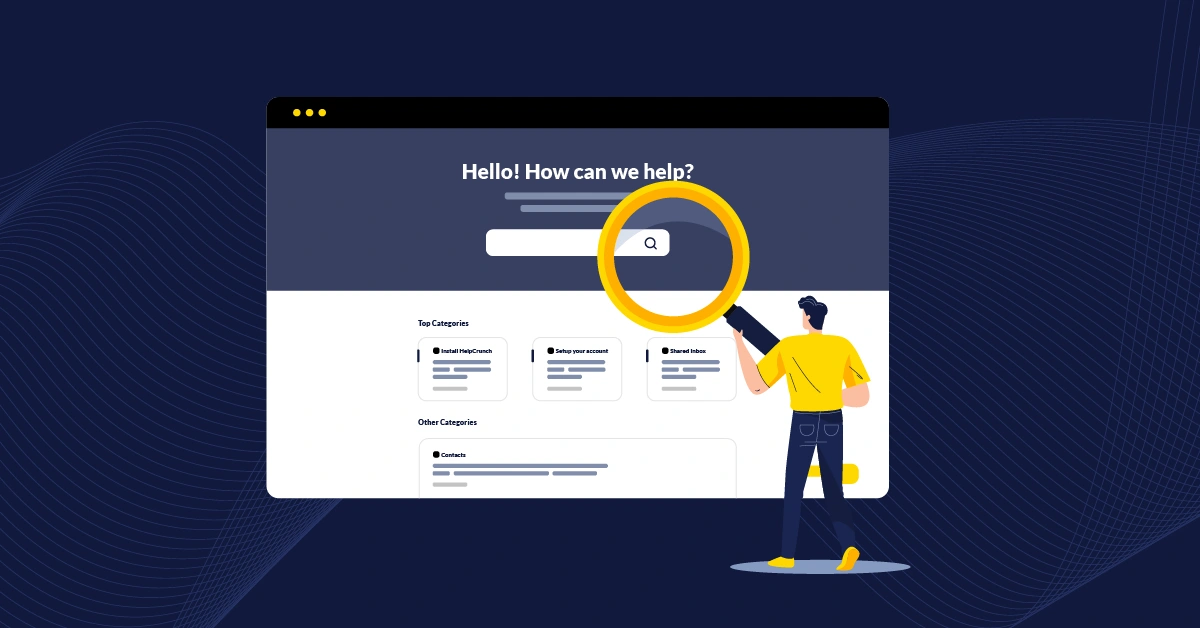
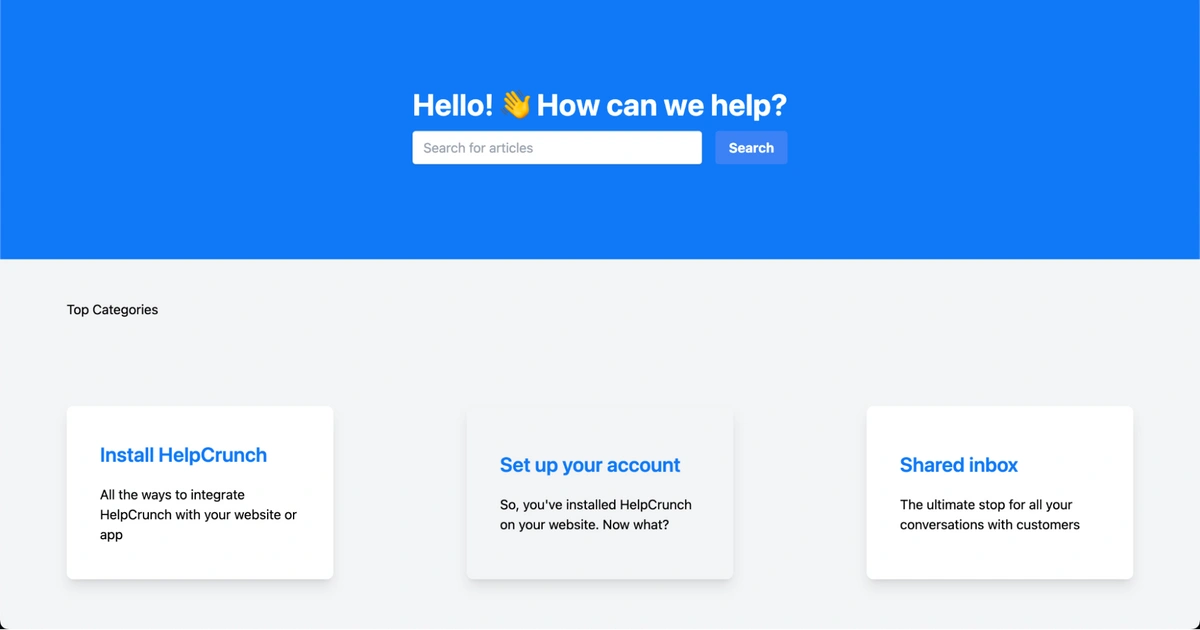
We will build a simplified clone of the HelpCrunch knowledge base, and the clone will serve as an external knowledge base repository for HelpCrunch users to find information about how to use HelpCrunch.
The demo application will look like this below:
The codebase for this tutorial can be found in this GitHub repo.
Tutorial prerequisites
Below are the main requirements to follow along with this tutorial:
-
Node.js v16 or greater installed on your system
-
A ButterCMS trial account
-
A code editor such as Visual Studio Code or Sublime
-
Basic knowledge of PHP
Modeling the knowledge base content in ButterCMS
To get started, you need to sign up and create a user account if you’re a new user. Then, log in to your dashboard on the ButterCMS website.
In this section, we will create the page types for the section, article, and default pages of the knowledge base. To create the pages, we will be using page types.
Configure the Article page
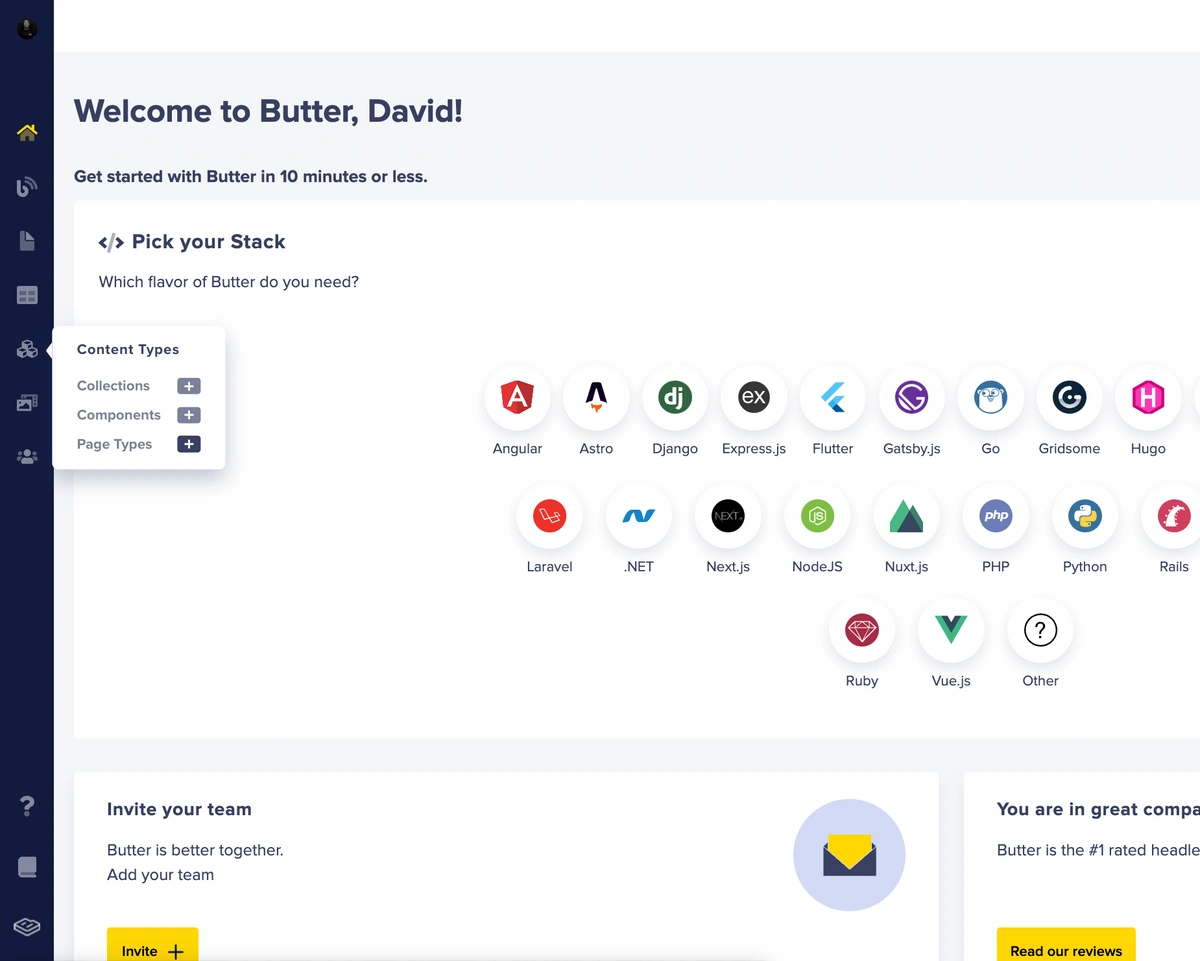
As highlighted in the image below, click the Content Types icon in the sidebar of your dashboard, then click the plus (+) icon next to Page Types and you will be redirected to the ButterCMS page editor.
Then, we need to create the necessary fields to create the structure of the new page. Add the following content fields to the page:
-
A short text named “kb_article_title”
-
A long text named “kb_article_description”
-
A WYSIWYG named “kb_article_body”
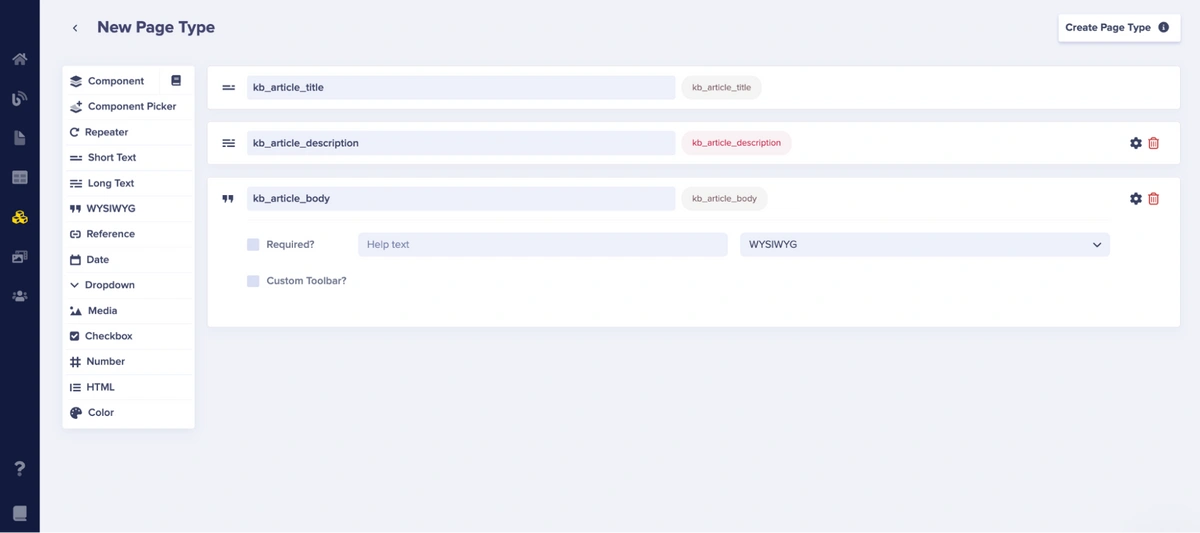
Next, click the Create Page Type button at the top right corner of your page, name the page type, and save the page.

Save the page type as “KB_article” and then click on the Save as Page Type button.
Configure the Section page
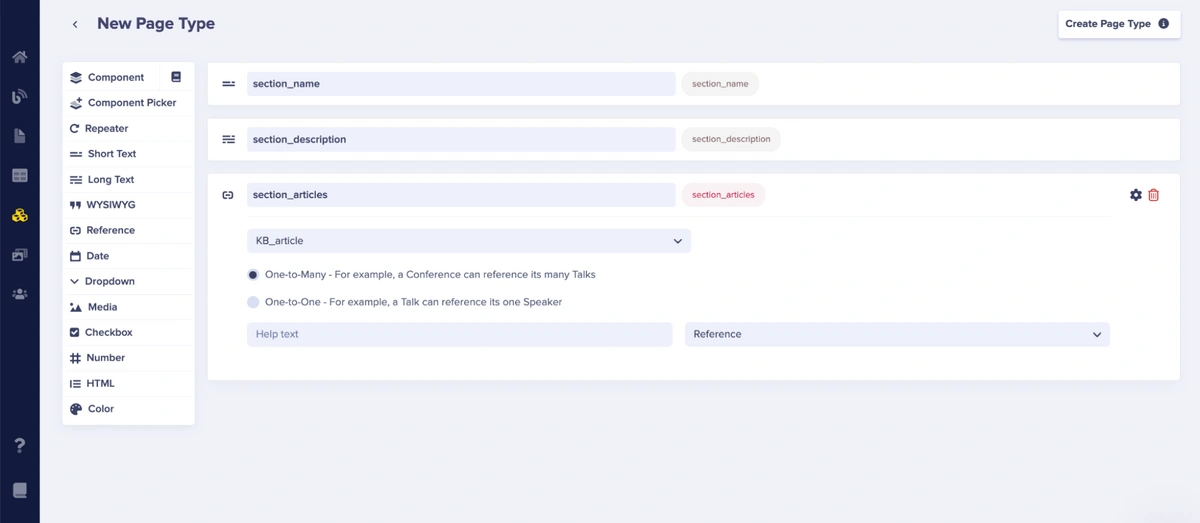
Next, navigate to the New Page Type section again, just as we did with the Article page to define the content model of sections within the knowledge base. Then, add the following field below:
-
A short text named “section_name”
-
A short text named “section_description”
-
A reference named “section_articles”
Then, select the page you would like to reference by clicking on the What will this reference dropdown field and set it to One-to-Many so it can reference as many items as you want. For the reference, add KB_article so that you can reference the various articles present on the KB_article page.
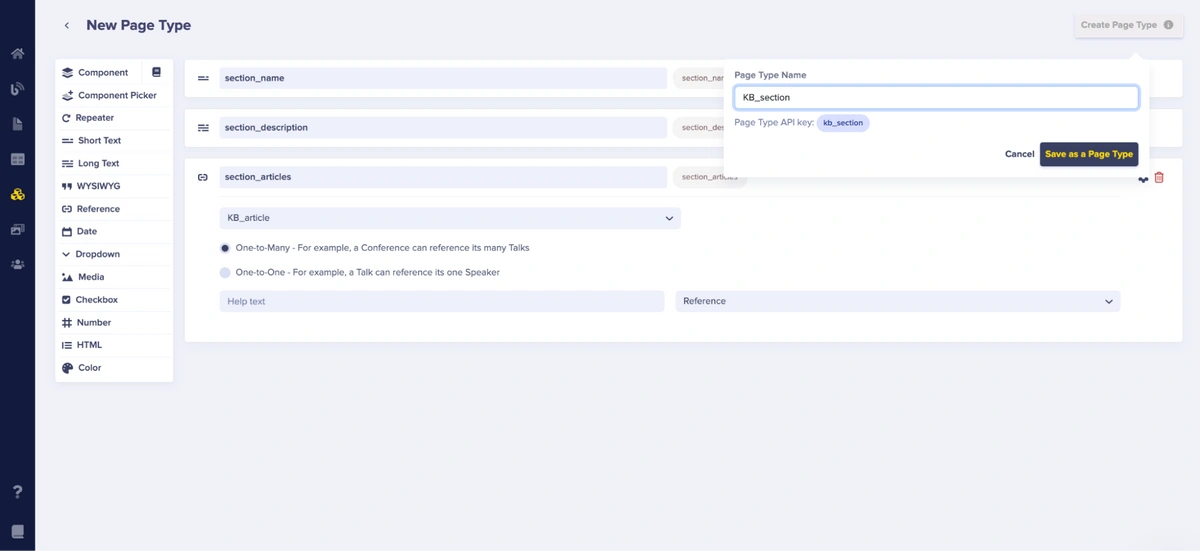
Next, click on the Create Page Type button and save it as “KB_section”.
Configure the knowledge base home page
After that, navigate to the New Page Type page to define the content model of the default page of the knowledge base.
Then, add the following content fields to the page type:
-
A short text field named “kb_home_hero_title”
-
A short text field named “kb_home_hero_text”
-
A reference field named “kb_home_sections”
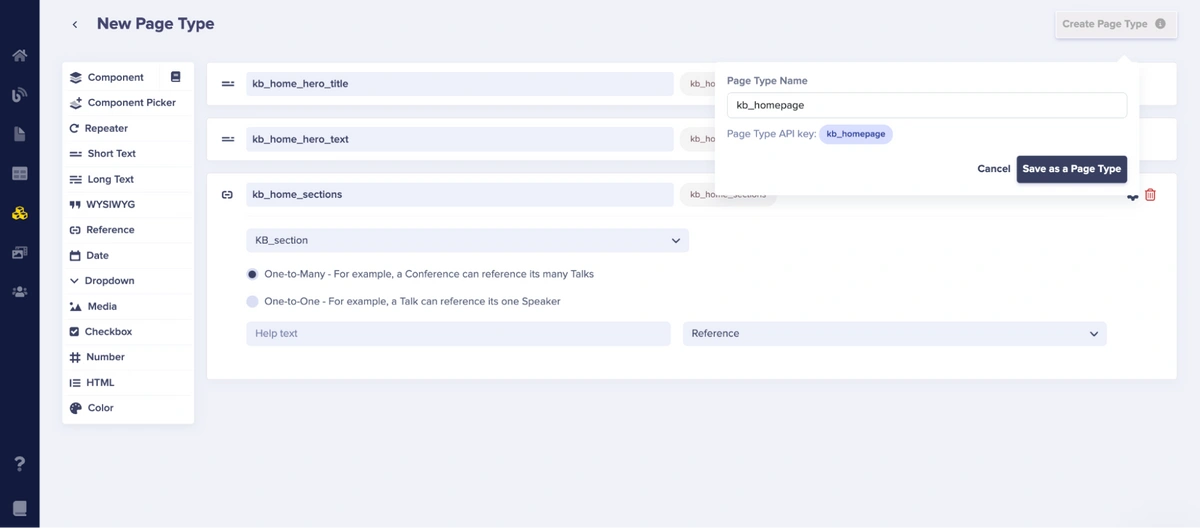
In the reference section, add KB_section in order to reference the sections to be added to the knowledge base homepage, and set it to One-to-Many. Then, save the page as “Kb_homepage”.
At this point, we have modeled the article page, section page, and the basic structure of the homepage.
Creating knowledge base pages in ButterCMS
After creating the content model of the knowledge base in the previous section, we will now focus on creating pages using the page types we created in the section above. We will start by creating an article.
Creating a knowledge base article
Navigate to the Pages section on your dashboard side menu, click the New Page button, and select KB_article from the dropdown. It will then take you to the page where you will add metadata.

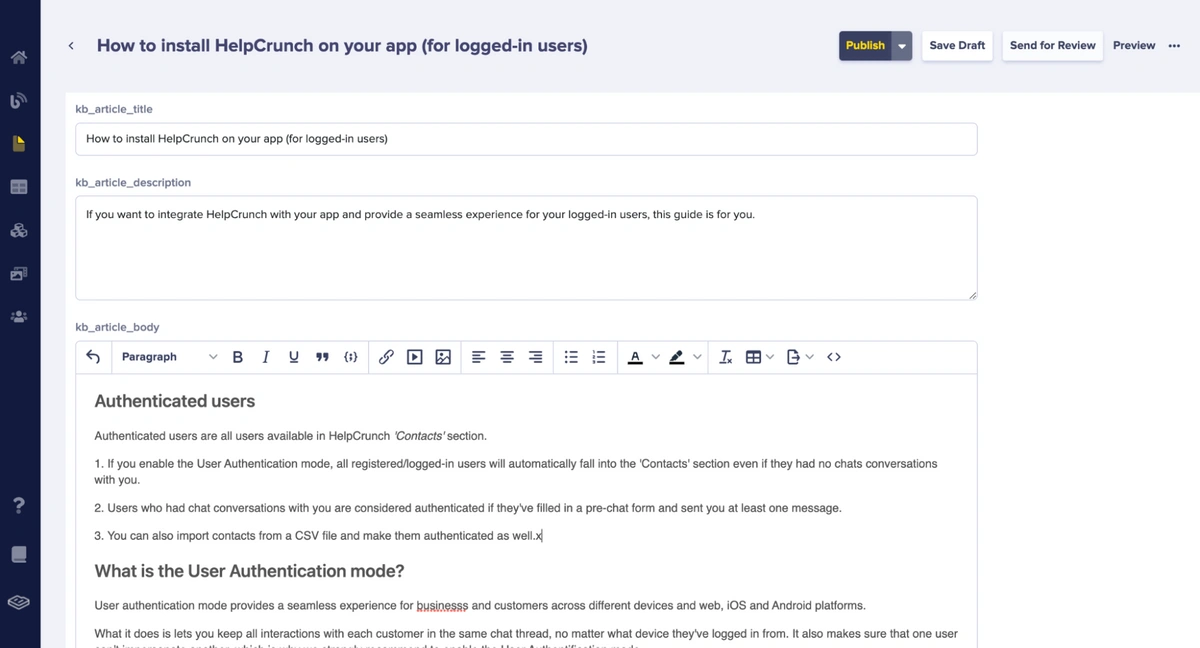
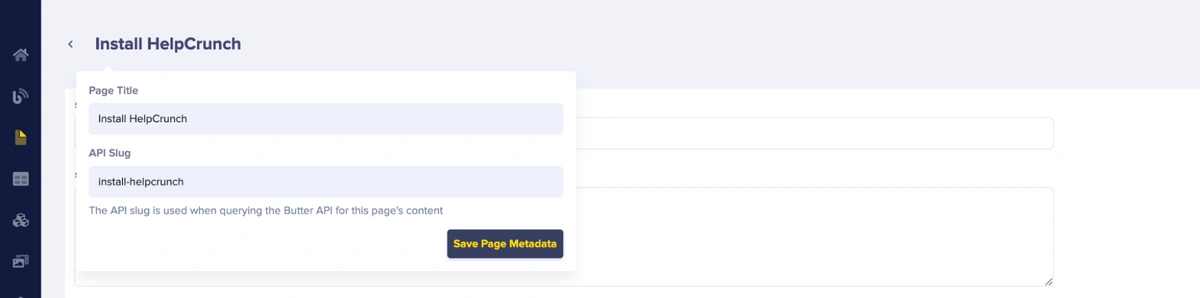
Then specify How to install HelpCrunch on your app (for logged-in users) in the Page Title and the API slug will be created automatically. Then, click the Save Page Metadata button to create a draft for the new article we are creating.

Next, fill in the title and description of the article for the kb_article_title and kb_article_description fields and paste the content of the article into the kb_article_body rich text editor. Then, click on Publish to save and publish the article.
In order to create more article pages, click on the New Page button as seen in the image below and repeat the steps above.

Next, we need to create section pages for the knowledge base.
Creating the Section pages
Go back to the Pages section on the ButterCMS dashboard, then click on the New Page button at the top right corner of the page and select KB_section from the dropdown.

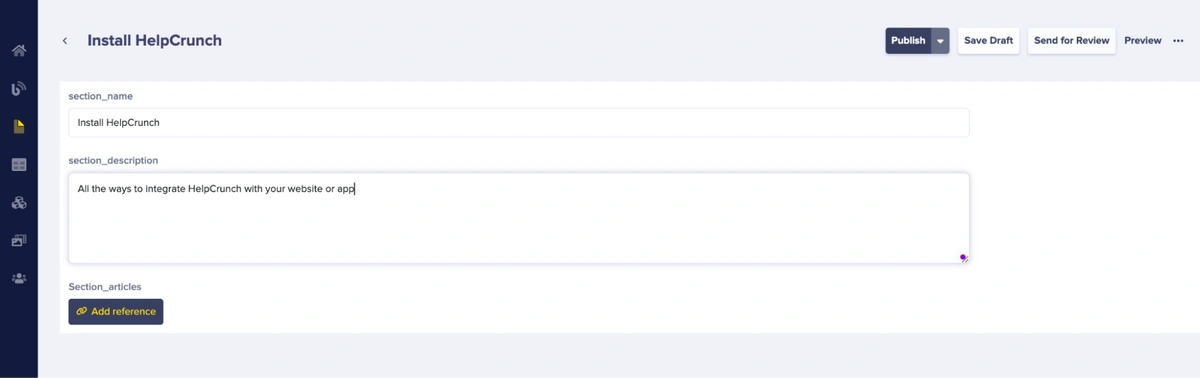
Next, specify “Install HelpCrunch” in the Page Title field and it will create the API slug automatically. Click the Save Page Metadata button to create a draft for the new section we are creating.
Then, fill in the section_name and section_description fields. Click the Add Reference button to prompt a modal where you will select the pages you want to link.
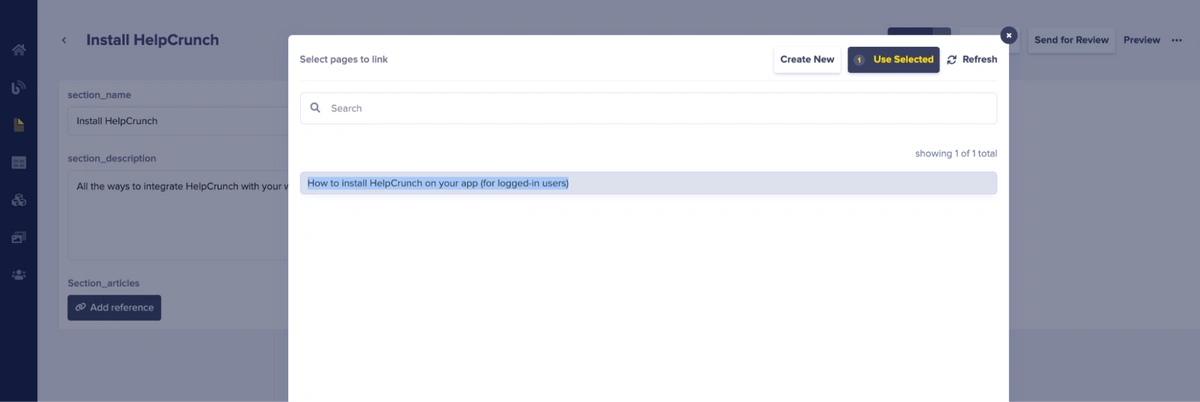
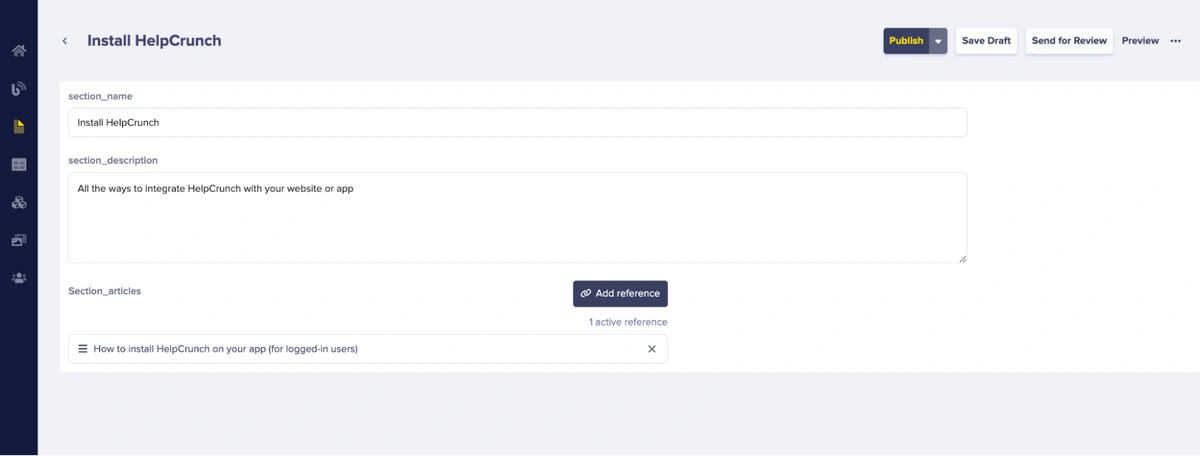
In the modal, select the article you want to reference. In this case, we will reference the article “How to install HelpCrunch on your app (for logged-in users)” and any other article you created. Then click the Use Selected button to save the reference(s) and exit the modal.
Click the Publish button to save and publish.
To create more sections for the knowledge base, navigate again to the Pages dashboard, click the New Page button, and repeat the steps above.
Creating the home page
Navigate back to the Pages section of the ButterCMS dashboard, then click the New Page button and select kb_homepage from the dropdown.
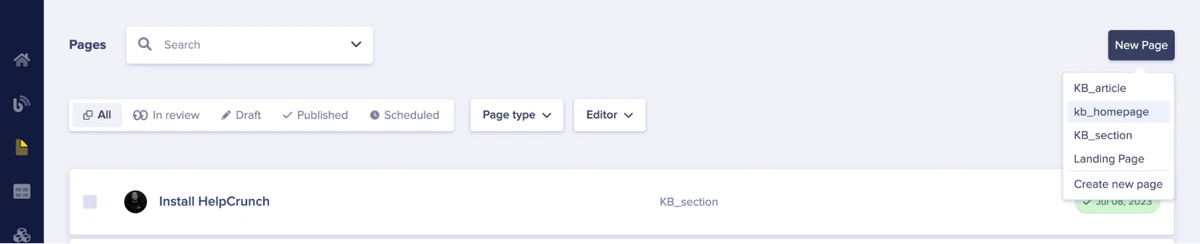
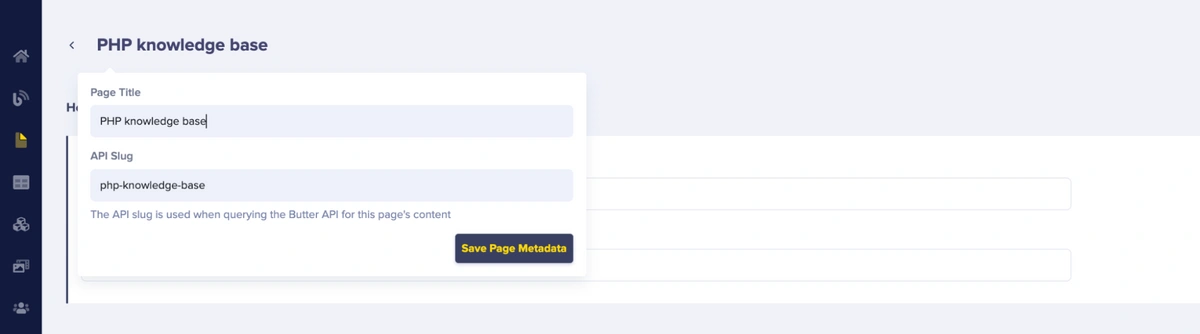
Then, specify “PHP knowledge base” in the Page Title field and click the Save Page Metadata button.
Then, specify the content for both the kb_home_hero_title and kb_home_hero_text fields.
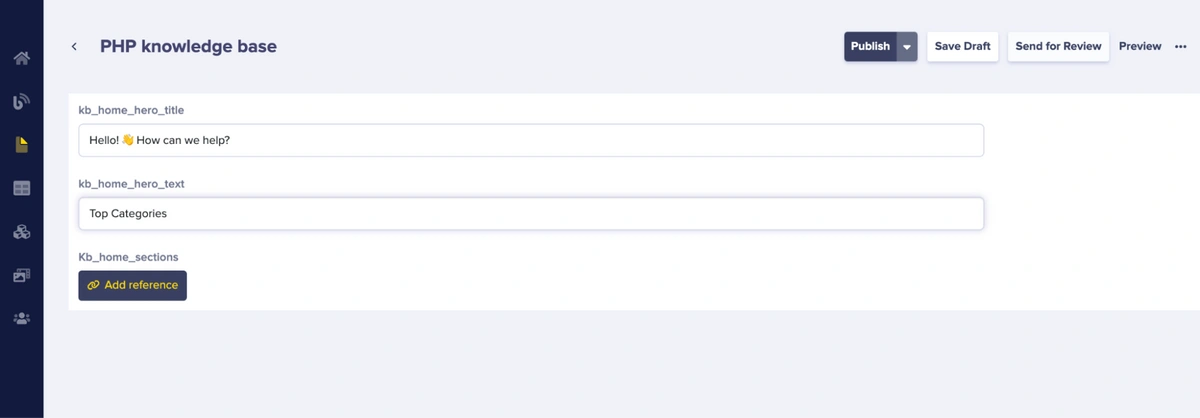
For the Kb_home_section segment, click the Add Reference button to open the reference modal and select all the pages you created using the KB_section.
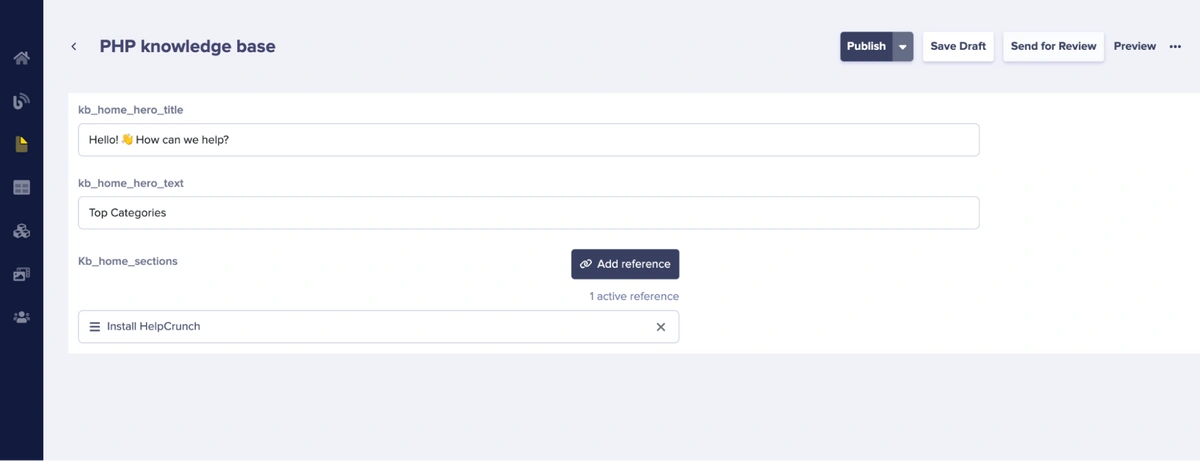
Then, click the Publish button to validate and publish.
Building the knowledge base’s front-end
In this section, we will build the knowledge base with PHP and consume the data that we created earlier in the ButterCMS platform. To get started, clone the repository for this tutorial on GitHub here. Then, navigate into the tutorial folder and install the dependencies:
cd php-buttercms-knowledge_base
composer install
Then, you need to authenticate your application with ButterCMS using your API keys, the keys enable your application to communicate with ButterCMS and access data.
To get your API keys, log into your ButterCMS account and navigate to the Avatar icon and click Settings.
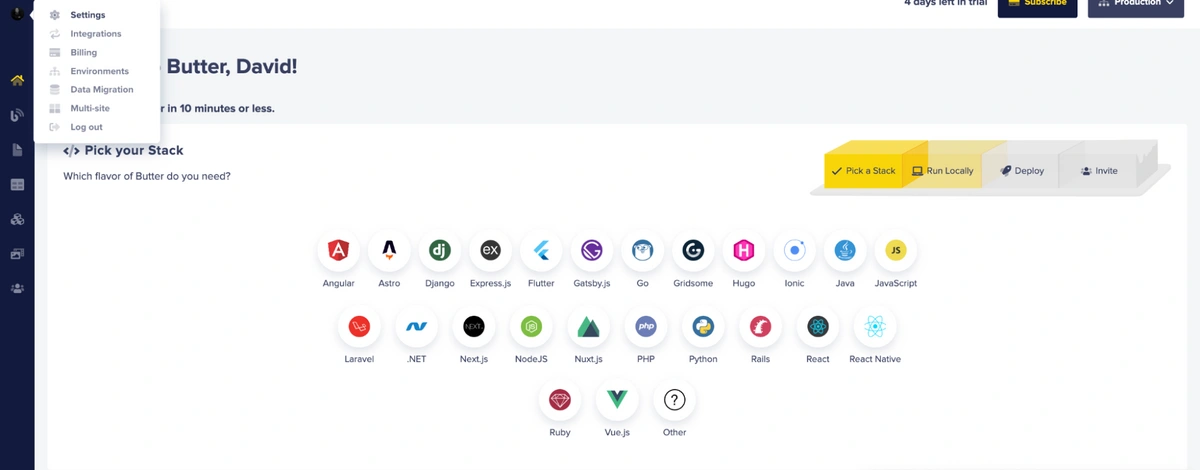
It will send you to a new page where you can find your API token (Read and Write tokens). Copy the Read API Token as we will be using it to fetch content from ButterCMS.

After that, create a .env file in the root of your project and add your API token as an environment variable:
BUTTER_CMS_API_KEY="<Your API Token>"Creating the knowledge base home page
The knowledge base home page is the first page that is displayed to the user. It will display a quick overview of the knowledge base, along with search functionality and sections to navigate around the knowledge base.
To do that, open app/Http/Controllers/PageController.php and add the following code:
<?php

namespace App\Http\Controllers;

use ButterCMS\ButterCMS;
use Illuminate\Http\Request;
use Illuminate\Support\Facades\Config;
use Illuminate\View\View;

class PageController extends Controller
{
   public function __construct(
       private ButterCMS $butterCMS
   ) {
   }

   public function showPage(string $type, string $pageSlug): View
   {
       $page = $this->butterCMS->fetchPage($type, $pageSlug, [
           'preview' => app('isPreview')
       ]);

       return view('HomePage', [
            'pageFields' => $page->getFields()['kb_home_sections'],
       ]);
   }

   public function showHomePage(): View
   {
       return $this->showPage('kb_homepage', 'php-knowledge-base');
   }

   public function showHomePageSlug(string $pageSlug): View
   {
       return $this->showPage('kb_homepage', $pageSlug);
   }
}
In the code above, we created a function that displays the homepage. After that, open resources/views/HomePage.blade.php and add the following code:
<div class="kb-home">
    <div class="kb-header">
       <h1 className="mb-3 text-4xl font-bold" > {{$pageFields['kb_home_hero_title']}} </h1>
      <p class="kb-description" id="hero-description"></p>
      <form action="" class="search-bar">
        <input type="search" name="search" placeholder="Search for articles" value="{{$searchTerm ?? null}}"
 required>
        <button class="search-btn" type="submit">
          <span>Search</span>
        </button>
	<button   className="ml-4 bg-gray-500 hover:bg-gray-700 text-white font-bold py-2 px-4 rounded focus:outline-none focus:shadow-outline type="button">
                   Cancel
           </button>
      </form>
    </div>
  </div>
The code above will create the hero section of the home page which contains the header and search fields.
Then, open resources/views/Section.blade.php and add the following code:
<section  class="section">
 <h2 class="mb-20">{{$pageFields['kb_home_hero_text']}}</h2>
   <div class="container">
       <div class="row">
           <div class="col-lg-6">
               <div class="section-content-wrapper">
                   <div class="section-title">
                       <h4 class="mb-20">{{$pageFields['section_name]}}</h4>
                       <p>{{$pageFields['section_description]}}</p>
                     </div>
               </div>
           </div>
       </div>
   </div>
</section>
The code above creates the Section component of the home page.
To view that home page on a web browser, you need to run the local development server with the command below:
$ php artisan serveThen, navigate to http://localhost:8080 to view the application:
Implementing the search functionality
By adding a search feature, you can improve the user experience, make your site more accessible and scalable, and find desired information with more precision and flexibility. The user can search through the entire knowledge base for specific resources that contain their search keywords by typing a keyword into the search field, without having to manually navigate through the entire knowledge base.
Now, let’s implement a search functionality that allows users to filter knowledge base resources.
To do so, open or create app/View/Components/Widget/Search.php and add the following code:
<?php

namespace App\View\Components\Widget;

use Illuminate\View\Component;

class Search extends Component
{
    /**
     * Create a new component instance.
     *
     * @return void
     */
    public function __construct()
    {
        //
    }

    /**
     * Get the view / contents that represent the component.
     *
     * @return \Illuminate\Contracts\View\View|\Closure|string
     */
    public function render()
    {
        return view('components.widget.search', [
            'searchTerm' => request()->query->get('q'),
        ]);
    }
}
After that, open or create app/Http/Controllers/ArticleController.php and add the following code:
<?php
namespace App\Http\Controllers;
use ButterCMS\ButterCMS;
use Illuminate\Http\Request;
use Illuminate\View\View;
class ArticleController extends Controller
{
    public function __construct(
        private ButterCMS $butterCMS
    ) {
    }
    public function showDefault(): View
    {
        $posts = $this->butterCMS->fetchPosts([
            'preview' => app('isPreview')
        ]);
        return view('article-default', [
            'posts' => $posts,
        ]);
    }
    public function showPost(string $postSlug): View
    {
        $post = $this->butterCMS->fetchPost($postSlug);
        return view('article-post', [
            'post' => $post->getPost(),
        ]);
    }
    public function showPostsByTag(string $tagSlug): View
    {
        $tag = $this->butterCMS->fetchTag($tagSlug);
        $posts = $this->butterCMS->fetchPosts([
            'tag_slug' => $tag->getSlug(),
            'preview' => app('isPreview')
        ]);
        return view('article-default', [
            'posts' => $posts,
            'tag' => $tag,
        ]);
    }
    public function showPostsByCategory(string $categorySlug): View
    {
        $category = $this->butterCMS->fetchCategory($categorySlug);
        $posts = $this->butterCMS->fetchPosts([
            'category_slug' => $category->getSlug(),
            'preview' => app('isPreview'),
        ]);
        return view('article-default', [
            'category' => $category,
            'posts' => $posts,
        ]);
    }
    public function showPostsBySearchQuery(Request $request): View
    {
        $searchTerm = $request->query->get('q');
        $posts = $this->butterCMS->searchPosts($searchTerm, [
            'preview' => app('isPreview')
        ]);
        return view('article-default', [
            'posts' => $posts,
            'searchTerm' => $searchTerm,
        ]);
    }
}
Then, open or create resources/views/article-post.blade.php and add the following code:
@endphp
@extends('layout')
@section('metaTitle', 'HelpCrunch knowledge base - '.$post->getSeoTitle())
@section('metaDescription', $post->getMetaDescription())
@if($post->getFeaturedImage())
    @section('metaImage', $post->getFeaturedImage())
@endif

<section class="article-post">
    <div class="container">
        <div class="row justify-content-center">
            <div class="col-lg-8 col-md-12 col-12">
                <div class="single-post">
                    <div class="single-post-meta">
                        <h2 class="single-post-header">{{$post->getTitle()}}</h2>
                        <ul class="single-post-meta-info">
                            <x-common-parts.blog-meta-info :post="$post" />
                        </ul>
                    </div>
                    <div class="single-post-body">
                        {!! $post->getBody() !!}
                    </div>
                </div>
            </div>
        </div>
    </div>
    </div>
</section>
@endsection
The code above will list every page section of each article when the link is clicked.
At this point, we have completed the necessary steps and processes for building a simple knowledge base in PHP with ButterCMS.
Final results
Now, let’s run the app again with the command below to interact with our simple application:
$ php artisan serveThen, navigate to http://localhost:8080 to view the application.
Your knowledge base should look and work like below:
Final thoughts
Congrats on completing this PHP knowledge base tutorial! We have demonstrated how to easily scaffold a knowledge base application with PHP and ButterCMS. We explored some powerful ButterCMS features such as page types to build a highly functional knowledge base system. We walked through the process of creating the content on ButterCMS to build the interface with PHP. We also added a search functionality feature that makes it easy for users to find their desired information with more precision and flexibility.
You can further customize this PHP knowledge base or your own knowledge base by adding more categories and articles. You can also add features to fit your specific requirements.
Happy building! I can’t wait to see what you build next with ButterCMS.
Learn more about what you can achieve with Butter and PHP by checking out the following tutorials:

