
- How we’re going to be using ButterCMS
- Why use Rails to build a knowledge base?
- Rails tutorial: Building a knowledge base with Rails and ButterCMS
- Tutorial prerequisites
- Getting started with ButterCMS
- Modeling the knowledge base page types
- Creating knowledge base pages using our page types
- Setting up the Rails project
- Integrating the components into Rails
- Implementing the search feature
- Our rendered knowledge base
- Closing thoughts
- Resources
In this Rails tutorial, we will build a knowledge base using Rails and ButterCMS. A knowledge base is like a centralized repository of information businesses use to make it easy for their workers and customers to find important information.
It is pertinent for a business to have a user-friendly knowledge base. For example, if a consumer wants to access more information about a product of a business, like a cloud service, it will be more user-friendly to access that information from the cloud service’s knowledge base rather than contacting its customer support, which may not have a fast response time.
Table of contents
How we’re going to be using ButterCMS
In this article, we will be using ButterCMS to store knowledge base content as well as render that content as a page. This content will be fetched through an API and rendered by the knowledge base application. We are able to do this because ButterCMS is a headless CMS.
In order to create a knowledge base, we will use certain features provided by ButterCMS, which are:
-
Content fields: Fields are the basic building blocks for adding content in ButterCMS. Fields are content blocks that hold certain content types. We are using fields in this tutorial because fields are required for adding content to the knowledge base. Fields can exist in formats such as short text, long text, reference, WYSIWYG, and media fields.
To learn more about fields in ButterCMS, check out this article in the ButterCMS knowledge base.
-
Page types: Page types act as templates when building pages on ButterCMS. They contain various content fields that can hold certain content types. We will be using page types to generate templates for the pages in the knowledge base.
-
Pages: Pages are the resultants of page types. A page is made up of various content fields and their inputted contents. Pages will contain the contents of the knowledge base.

Why use Rails to build a knowledge base?
Ruby on Rails is a full-stack MVC framework developed by David Heinemeier Hansson. It is a framework built on top of Ruby to make Ruby sufficient for building software.
Ruby on Rails is an excellent framework for setting up a knowledge base for a business. It possesses qualities and benefits such as:
-
Community: Rails, as a framework, has a highly buoyant community. This is very important in building a knowledge base, as there is a high supply of Rails engineers who can build and manage the knowledge base.
-
Speed: As a full-stack framework, Ruby on Rails provides an array of built-in features like the ability to connect to a database directly, the use of a templating engine, and app routing mechanisms. It enables developers to build full-stack software projects quickly as well as deploy full-stack web projects faster than with other web frameworks. Ruby on Rails is very useful in creating a knowledge base as it is a full-stack framework. This ensures that businesses can set up their knowledge base quickly without concern for technical architecture, as Ruby on Rails supports good technical architecture by default.
-
Metaprogramming techniques: Rails employs metaprogramming techniques, allowing you to write programs with less code and greater flexibility. This enables businesses to set up a knowledge base with little code. You can learn more about metaprogramming from this resource.
-
Easy maintenance: Rails follows the model-view-controller (MVC) architectural paradigm, which makes it easy to maintain. Maintenance is vital for a knowledge base, as it needs to be up and running at all times in order to be available to consumers and employees. With Ruby on Rails, it is easy to achieve this.
Rails tutorial: Building a knowledge base with Rails and ButterCMS
In this tutorial, we will build a minimal clone of the Help Scout knowledge base. The knowledge base will have all its data stored within ButterCMS.
Tutorial prerequisites
To follow through with this article, you need the following:
-
A basic understanding of Ruby and Rails
-
Rails installed
-
Ruby installed
-
An active ButterCMS account
-
A code editor (VS Code is preferred)
Getting started with ButterCMS
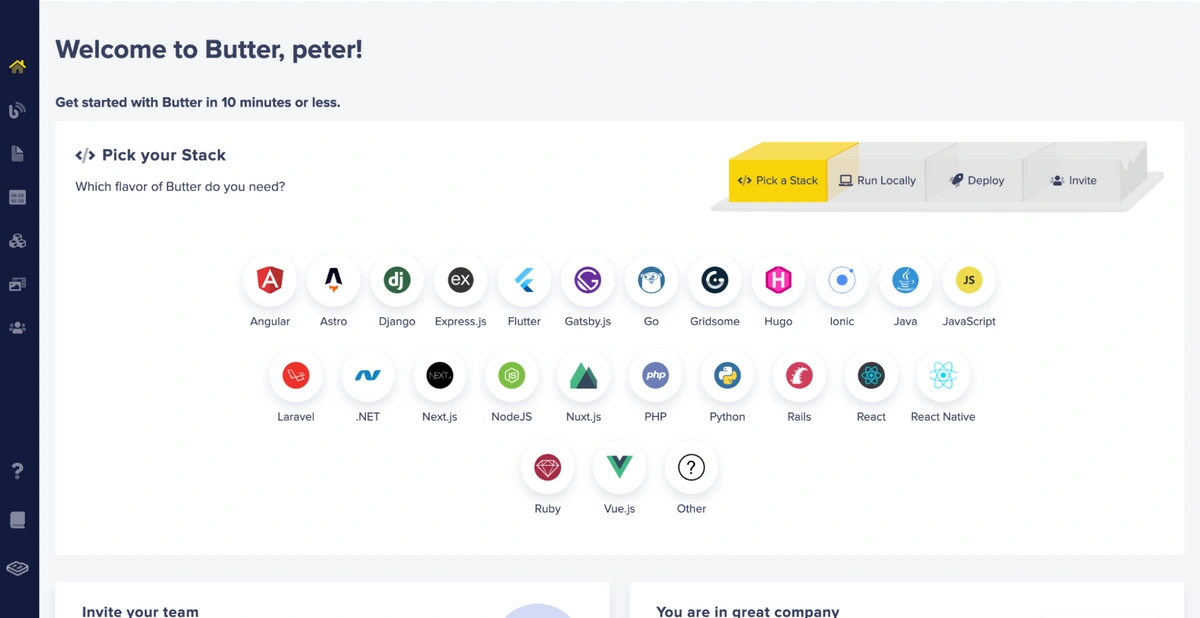
First and foremost, sign up for ButterCMS. Go to the ButterCMS website and select the Get Started button. If you have an account, you can simply log in with your credentials.
You can sign up via email, Google sign-in, or GitHub sign-in. Upon signup or login, you will be redirected to the ButterCMS dashboard.
Modeling the knowledge base page types
The knowledge base will be modeled into three page types:
-
The Article page type: This page type displays the article's content.
-
The Section page type: This page type shows sections of the knowledge base. It displays quick links to articles or information pertaining to that section.
-
The Home page type: This page type displays the home page content of the knowledge base. It also displays quick links to a section of the knowledge base.
Article page type
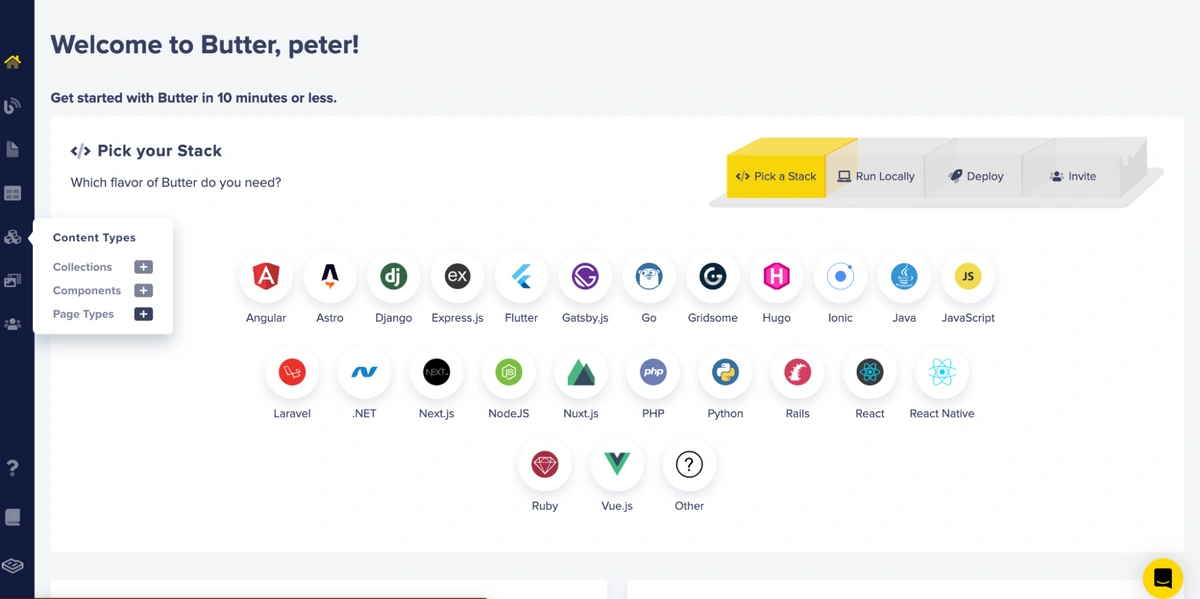
We create the Article page type by clicking the + icon next to the Page Types option on the Content Types tab on the sidebar menu, as shown below:
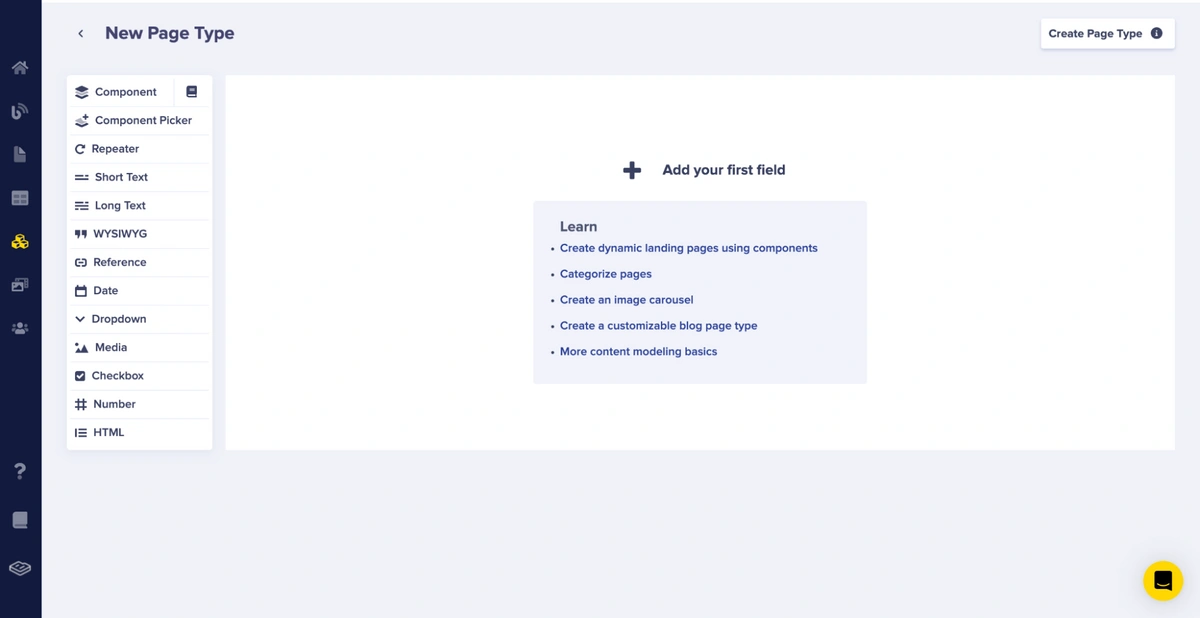
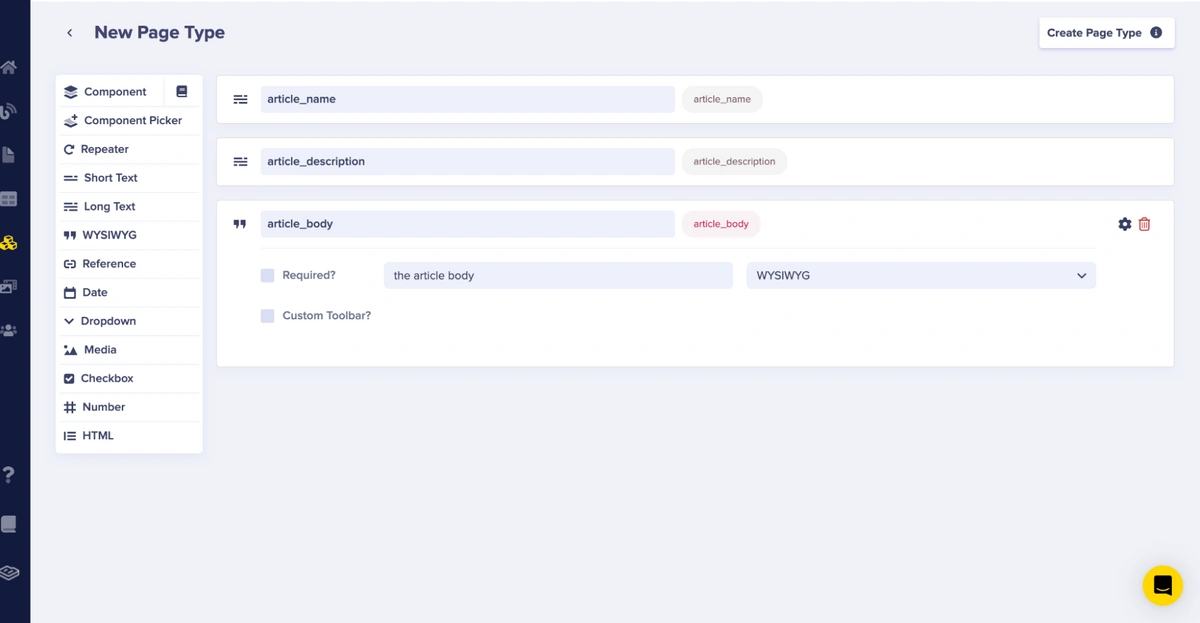
Upon clicking the icon, we will be directed to a new, empty New Page Type page, as shown below:
For the Article page type, we will add the following fields:
-
article_name: This is a long text field that will bear the article name.
-
article_description: This is a long text field that will bear the article description.
-
article_body: This is a WYSIWYG editor field that will bear the article's content.
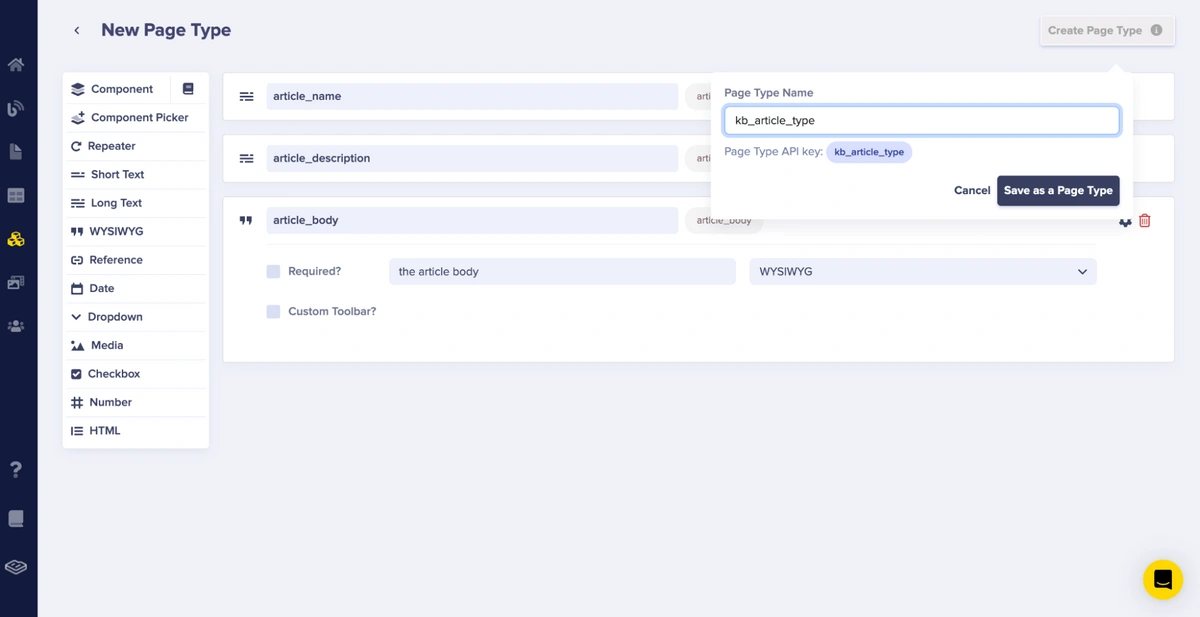
Next, we’re going to save this page type as kb_article_type.
The Section page type
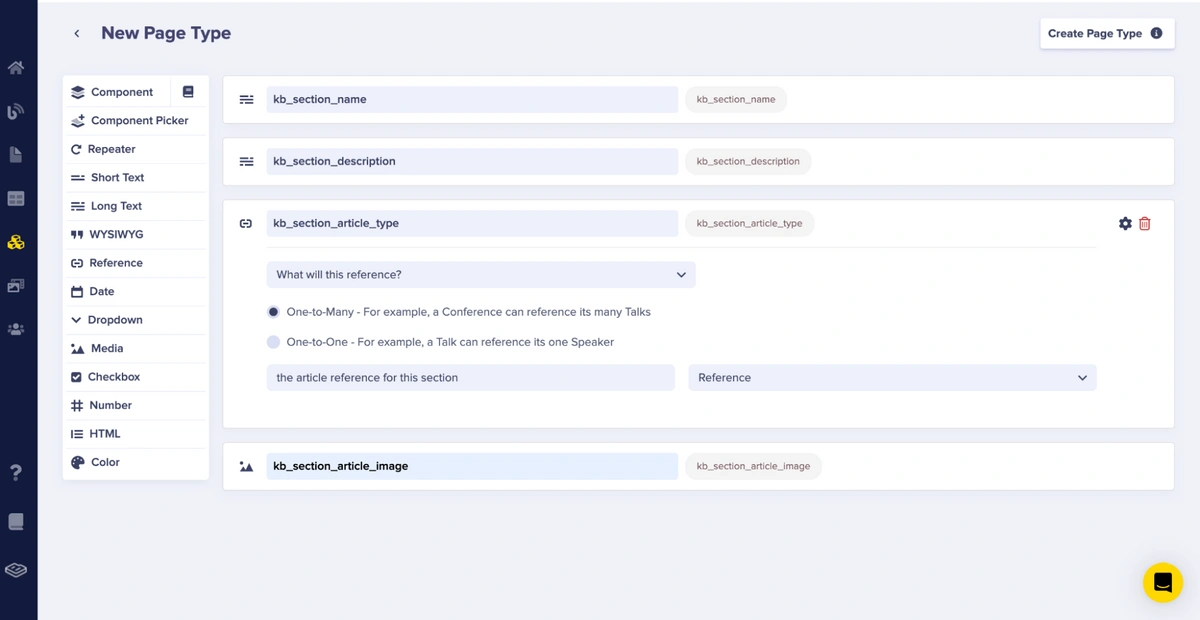
For the Section page type, we will add the following fields:
-
kb_section_name: This is a long text field that will hold the section name.
-
kb_section_description: This is a long text field that will hold the article description.
-
kb_section_article_type: This is a reference field to an article page type (a one-to-many reference—that is, this field can reference many Article page types).
-
kb_section_image: This is a media field.
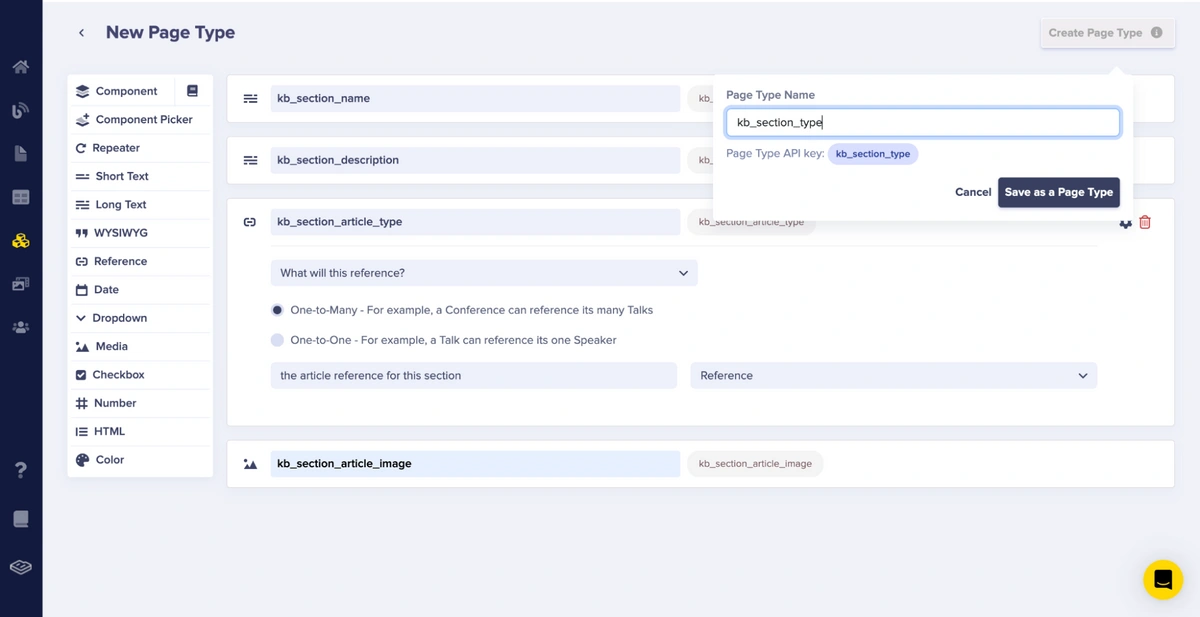
Next, we’re going to save this page type as kb_section_type.
The Home page type
For the Home page type, we will add the following fields:
-
kb_home_image: This is a media field that will hold the home page image.
-
kb_home_title: This is a short text field that will hold the title text of the home page.
-
kb_home_sections: This is a repeater field that holds two fields, namely:
-
kb_section_title: A short text that holds the title text for a section.
-
kb_home_section: A reference field to a section page type (a one-to-many reference—that is, this field can reference many section page types).
-
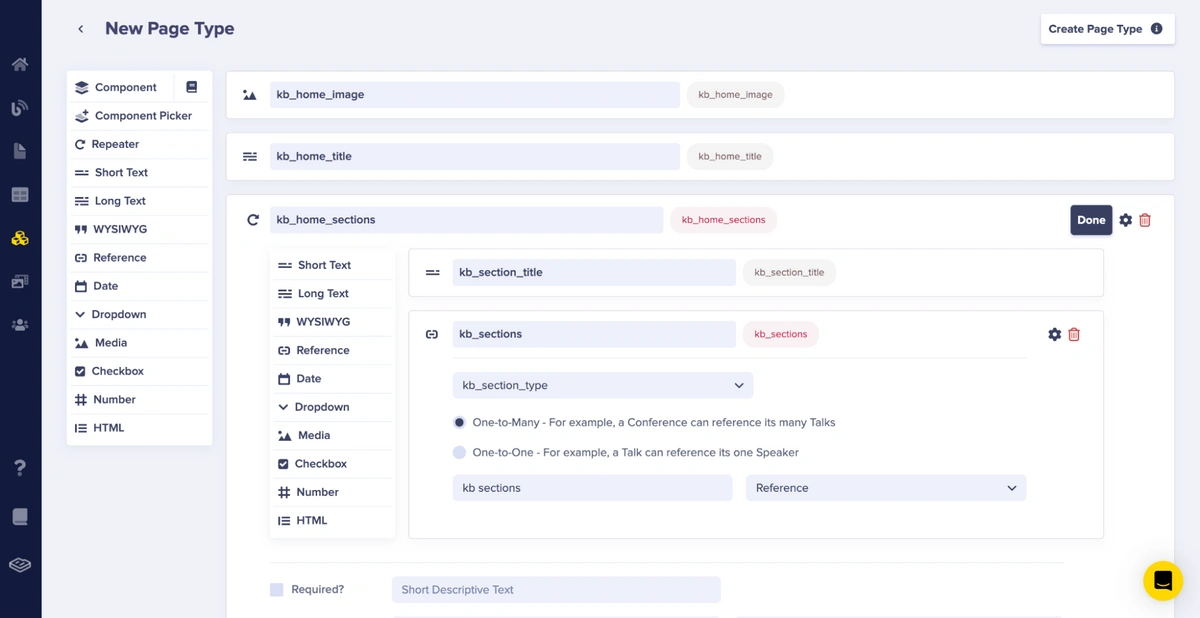
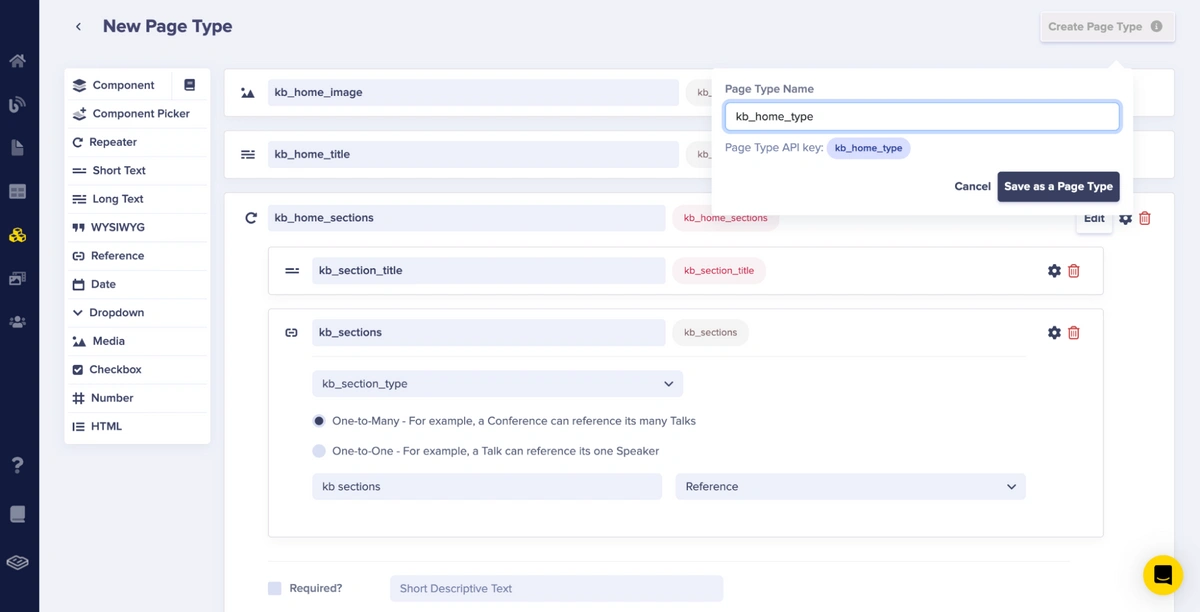
Next, we’re going to save this page type as kb_home_type.
Creating knowledge base pages using our page types
After modeling the page types in the previous section, we will now create pages using them. Let's begin by creating an article using the kb_article_type.
Creating the knowledge base article
We create the article page by clicking the + icon next to the kb_article_type option on the Pages tab on the sidebar menu, as shown below:
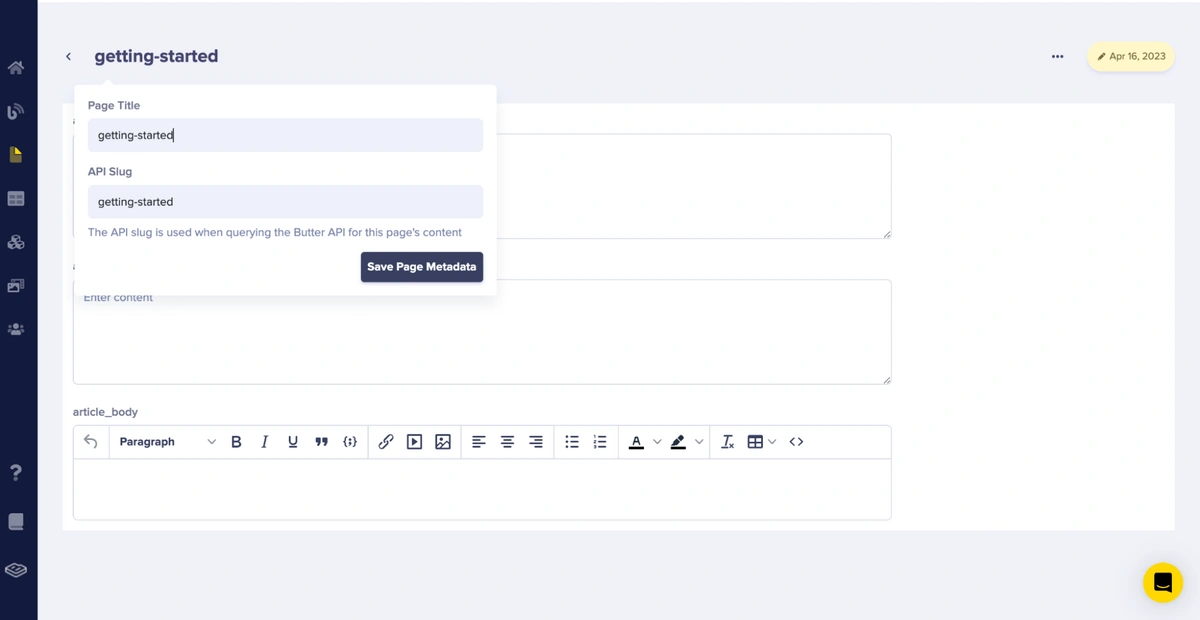
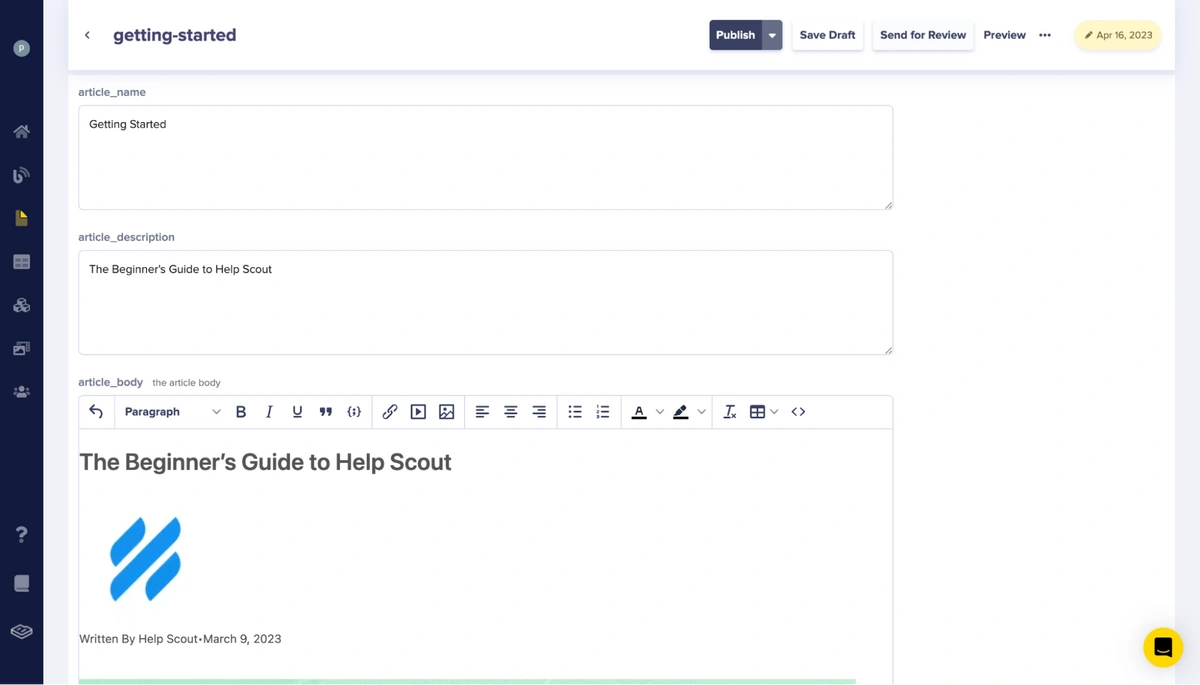
After selecting, we will be directed to a page that is based on the kb_article_type page type. On the page, add the page title and API slug as page metadata information. In our case, we will add getting-started as both the page title and slug. Click the Save Page Metadata button to create a draft and proceed to the text editor.
Next, we will add content to the article.
After adding the content, click the Publish button to save and publish all the changes. To create more articles, as seen in the Help Scout knowledge base, repeat the article_page creation steps several times to achieve that.
Creating the knowledge base’s Section page
We create the section page by clicking the + icon next to the kb_section_type option on the Pages tab on the sidebar menu, as shown below:

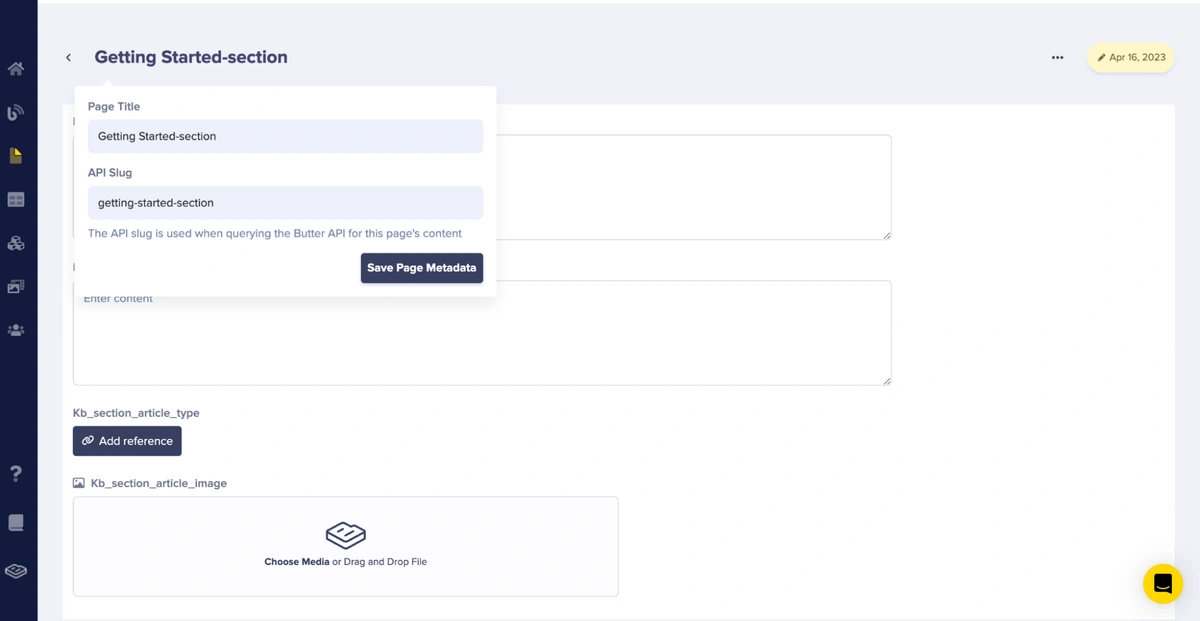
After selecting, we will be directed to a page that is based on the kb_section_type page type. On the page, add the page title and API slug as page metadata information. In our case, we will add getting-started-section as both the page title and slug. Click the Save Page Metadata button to create a draft and proceed to the text editor.
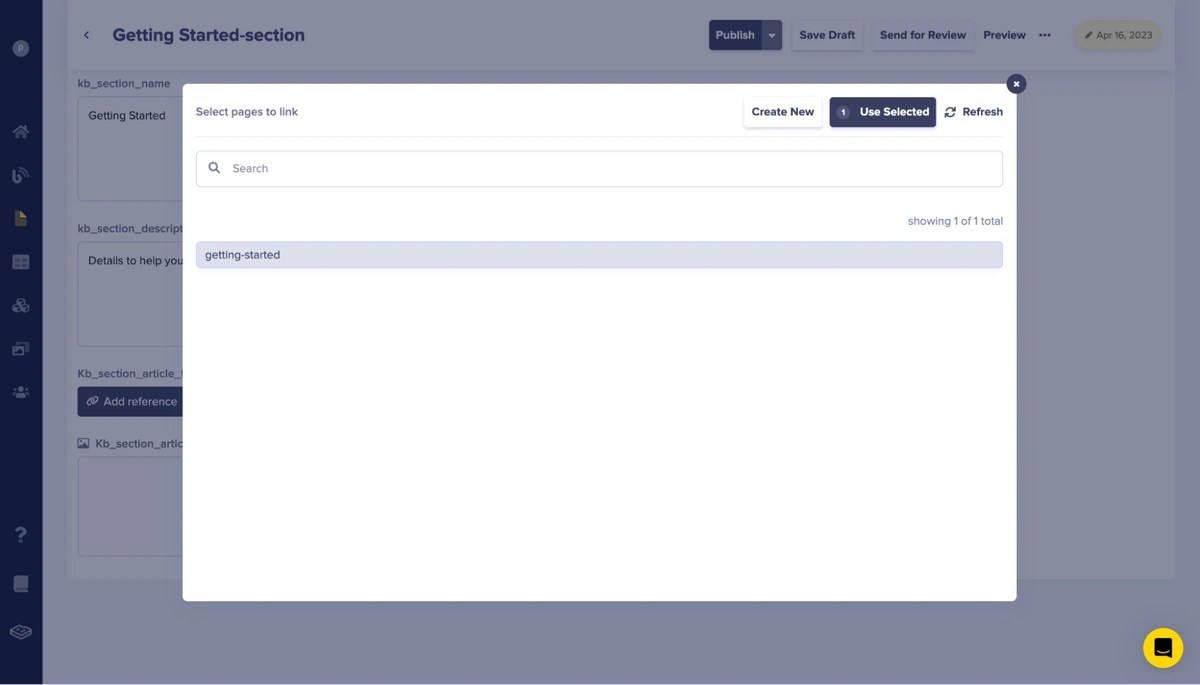
Once we add the page metadata information, we will add the text to the kb_section_name and kb_section_description fields. Upon clicking the Add Reference button on the kb_section_article_type field, it brings up a popup that shows us the reference article page(s) we can link to in our kb_section_type page type.
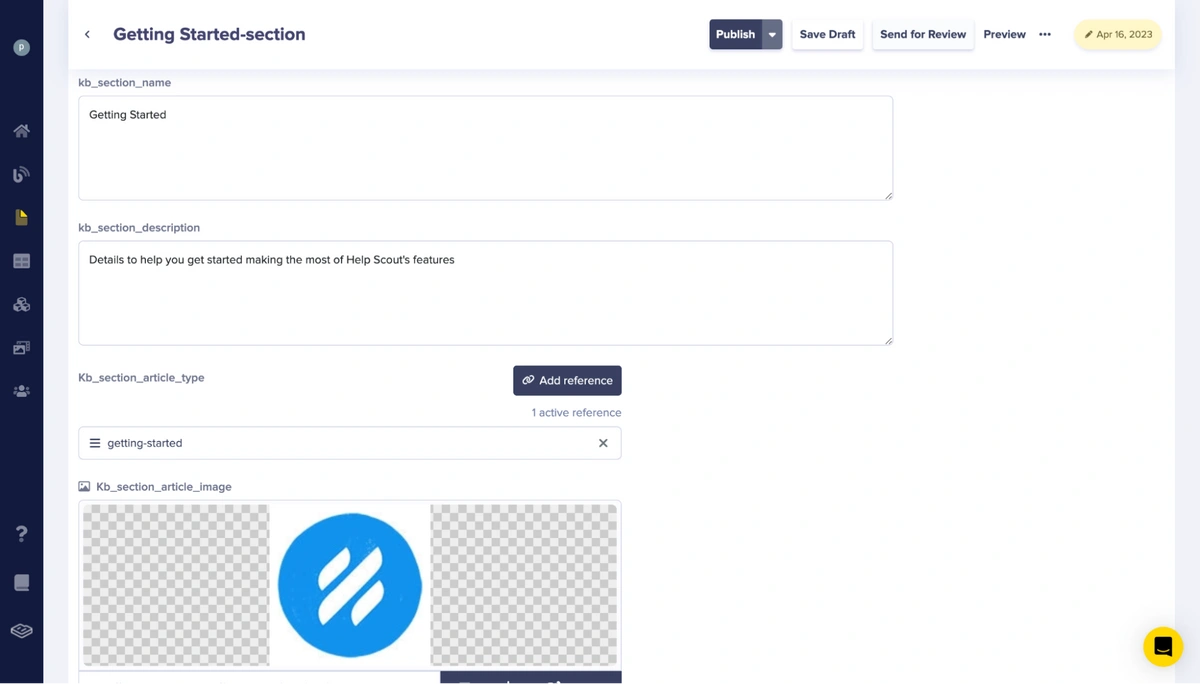
Next, we add an image to the kb_section_article_image field, as shown below:
After adding the content, click the Publish button to save and publish all the changes. To create more sections, as seen in the Help Scout knowledge base, repeat the section_page creation steps several times.
Creating the knowledge base’s Home page
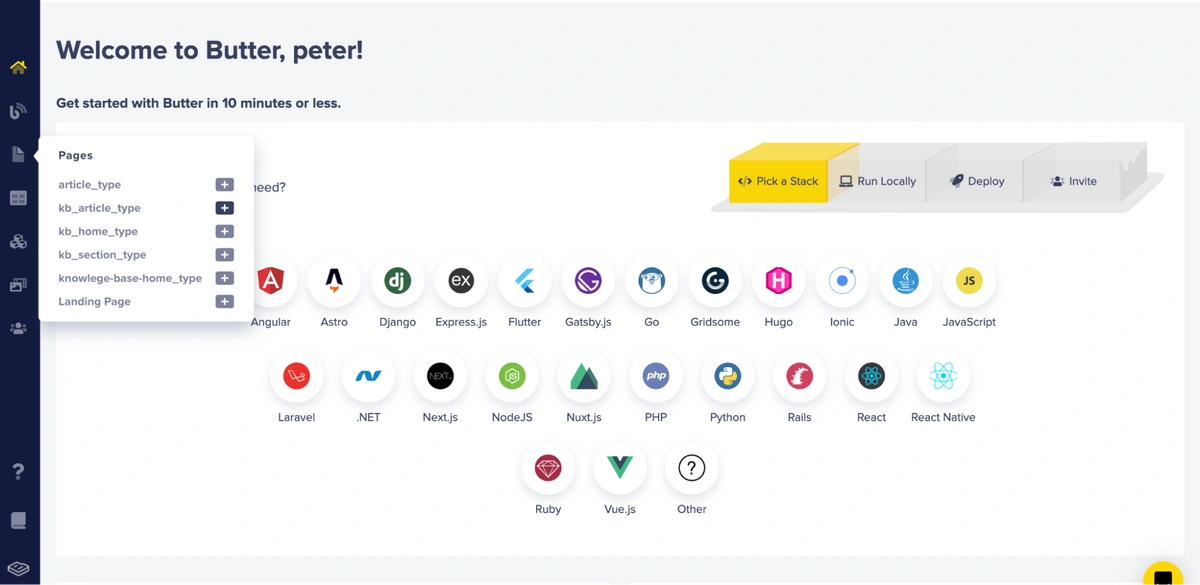
We create the home page by clicking the + icon next to the kb_home_type option on the Pages tab on the sidebar menu, as shown below:
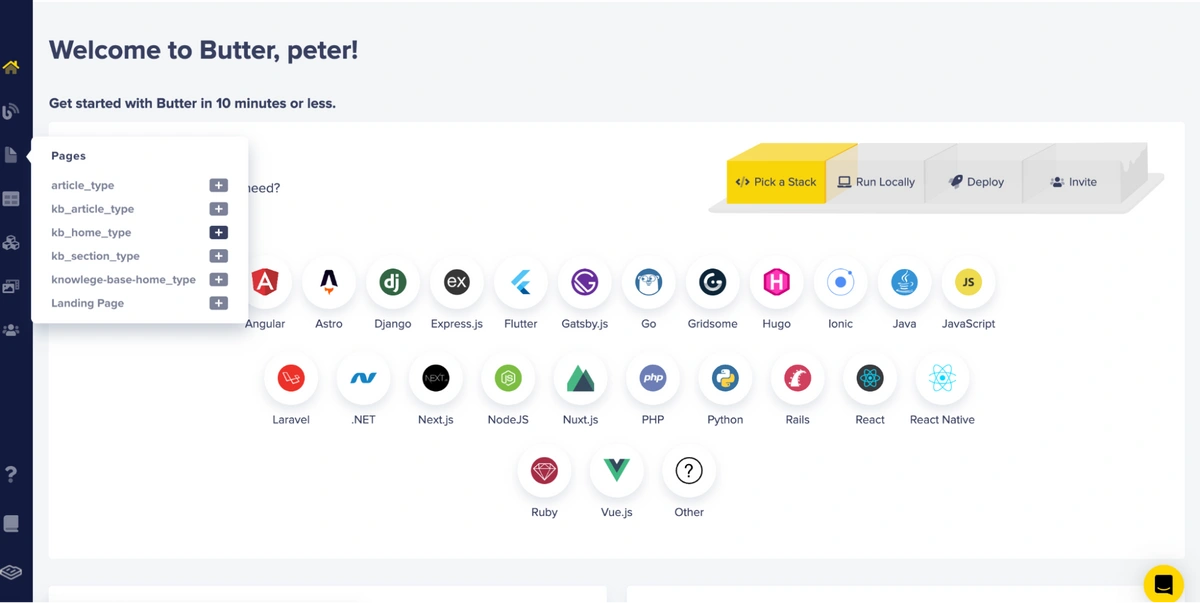
After selecting, we will be directed to a new page that is based on the kb_home_type page type. On the page, add the page title and API slug as page metadata information. In our case, we will add kb-homepage” as both the page title and slug. Click the Save Page Metadata button to create a draft and proceed to the text editor.
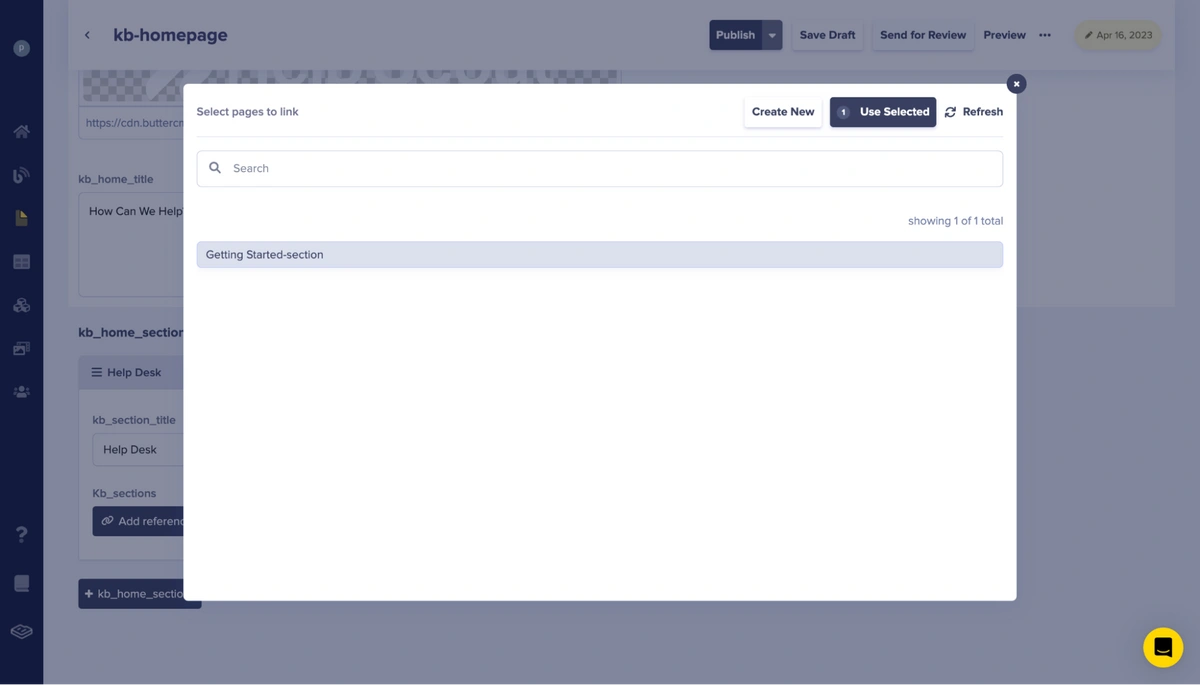
Once we add the page metadata information, we will add the text to the kb_home_title fields. After doing so, we click the +kb_home_sections button. The +kb_home_sections button is a repeater field that displays a repeater item that displays a kb_section_title field (a short text field) and a kb_sections field (a reference field) upon clicking.
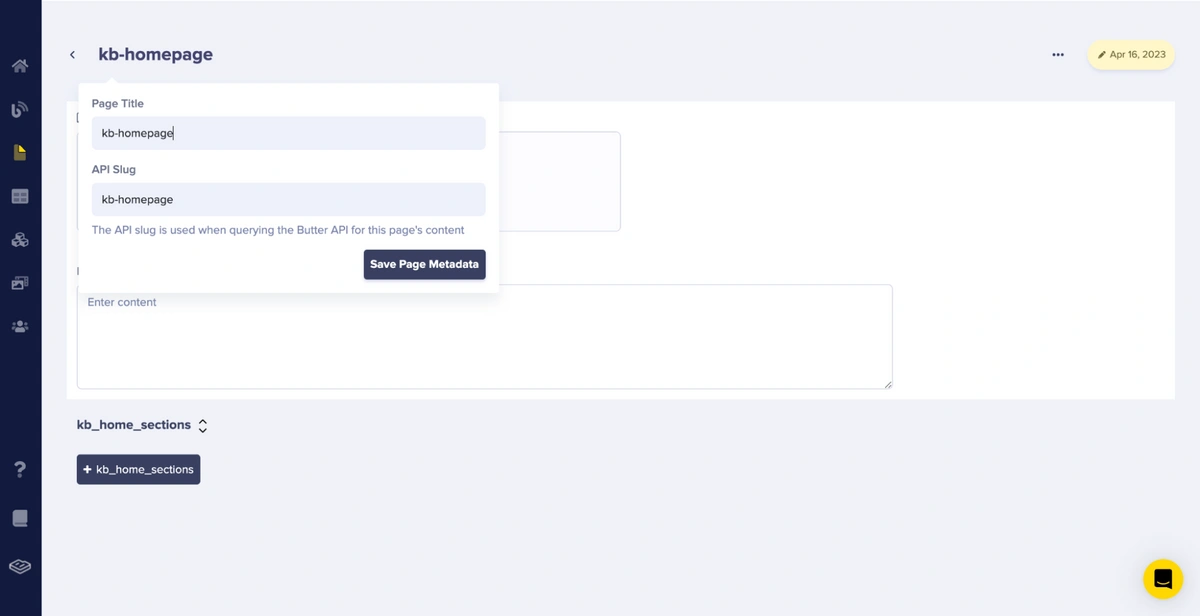
We add text to the kb_section_title field. For the kb_sections field, we click the Add Reference button on the kb_sections in the repeater item, and it brings up a popup that shows us the reference article page(s) we can link to in our kb_home_type page type.
Next, we add an image to the kb_section_article_image field, as shown below:
After adding the contents, click the Publish button to save and publish all the changes.
You can add more home sections to the homepage, as seen in the Help Scout knowledge base, by clicking the + kb_home_sections button. This is possible because the kb_home_sections field is a repeater field, and we can add as many home sections as we want.
After adding the content, we will access the API Explorer to look at a sample of the response data from our kb_home_type page in the ButterCMS content API. To access the API Explorer, select the API Explorer option on the menu beside the preview link.
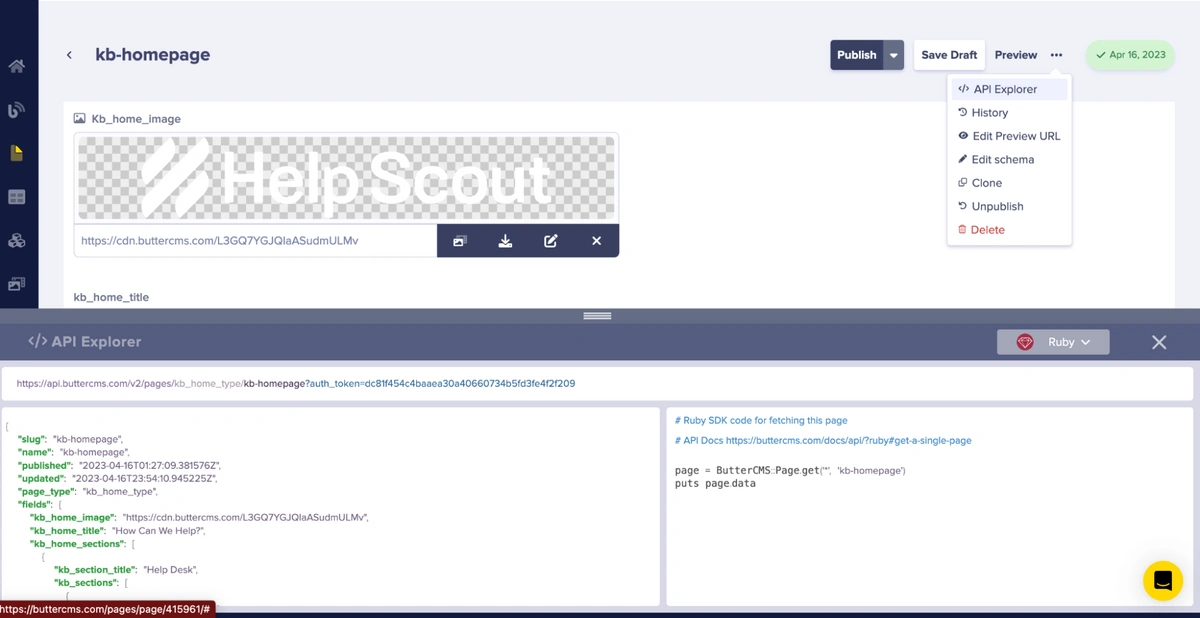
As shown, the explorer displays a sample of the response data from the kb_home_type page in the ButterCMS content API.
So, we are done modeling the knowledge base page types as well as creating pages from the page types. We will now create a Rails application that will retrieve and display the knowledge base content via the ButterCMS content API.
Setting up the Rails project
Before we proceed, ensure that Rails is installed on your machine. You can type the following command on your terminal to confirm the installation:
rails -v
The command should output the version of Rails you have installed:

Next, we’ll create a Rails project for the application. You can do this by typing the following command on your terminal
rails new <name of application>
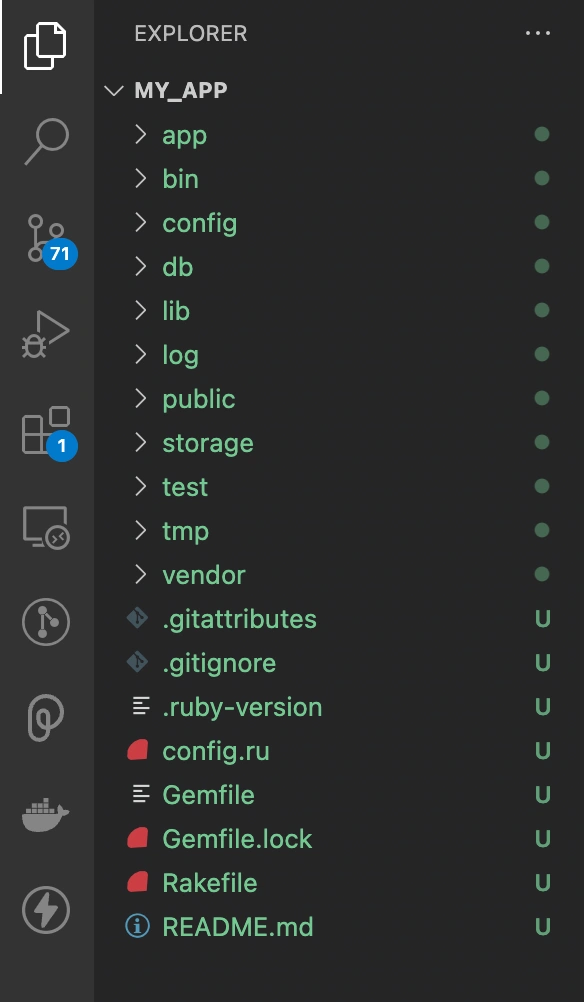
Upon typing the command, a Rails project with a Git repository is created. Open the project with your code editor to see the Rails application:
Installing dependencies
We will add the ButterCMS SDK and dotenv dependencies. The ButterCMS SDK enables the application to connect to the ButterCMS content API, while the dotenv dependency handles the management of environment variables. To install these dependencies, we will include them in the project's Gemfile, as shown below:
# Add Dotenv Files with ease [https://github.com/bkeepers/dotenv]
gem 'dotenv-rails', groups: [:development, :test]


# ButterCMS Rails SDK [https://github.com/buttercms/buttercms-ruby]
gem 'buttercms-ruby', '~> 2.3'
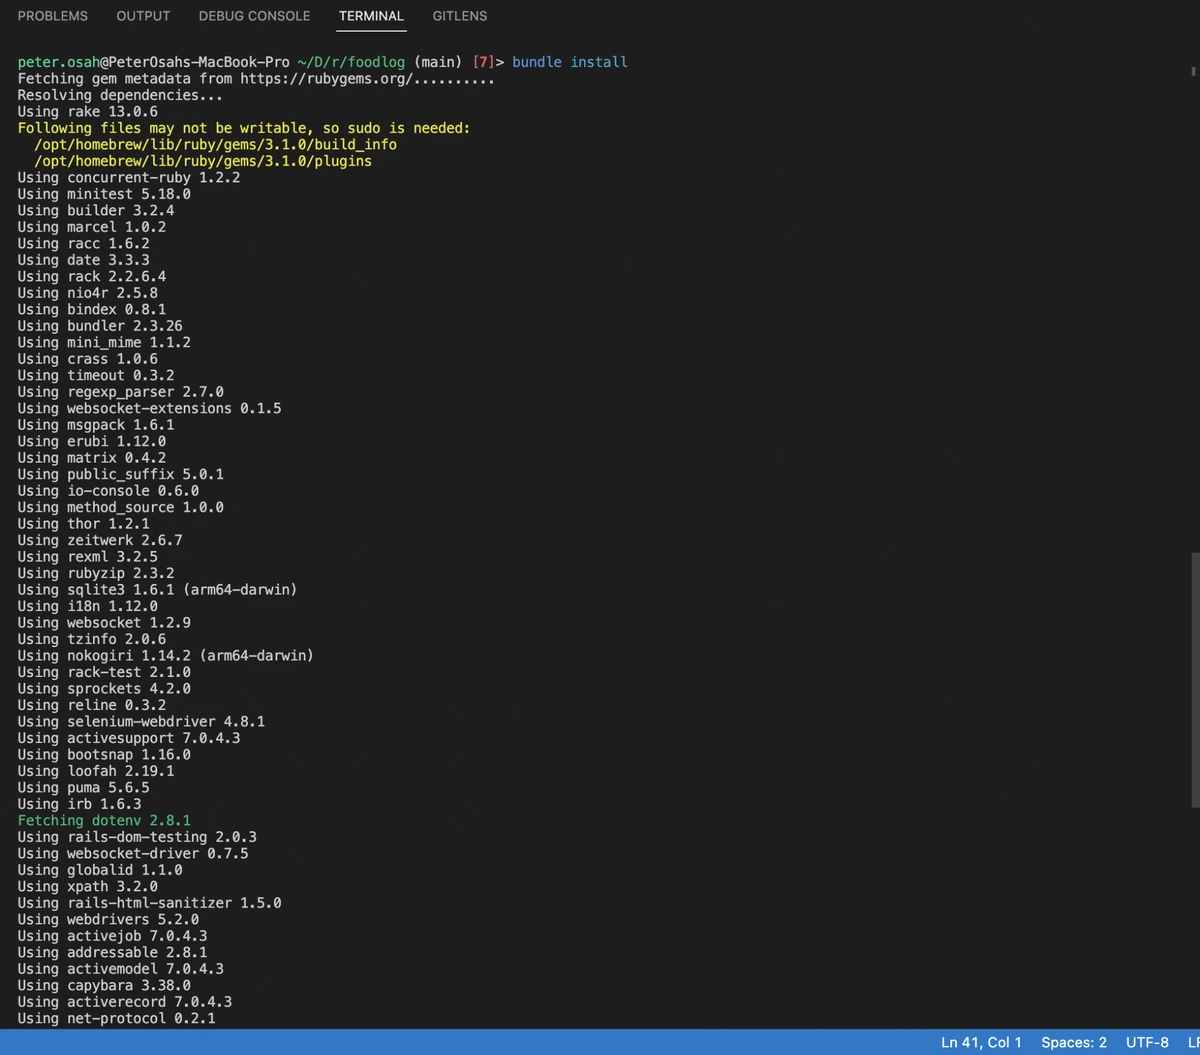
After adding them, run the following command within your project directory to install the dependencies:
bundle install
Integrating the components into Rails
Next, we will add the components to our Rails application. To do so, we need to create controllers for the views. A Rails controller is the application's logical heart. It orchestrates the interaction between the application's views and model sections.
Our application will have three controllers:
-
home_controller: This controller handles the logic for the application's home page. It will also include the integration of the content of the home page from ButterCMS.
-
section_controller: This controller handles the logic for the application’s article section. It will also include the integration of the content of the article section from ButterCMS.
-
article_controller: This controller handles the logic for the application’s article. It will also include the integration of the content of the article from ButterCMS.
Home controller
To generate the home controller, view, and route for our application, use this command:
./bin/rails generate controller home index
After typing the command, the following files will be generated:

Next, we’ll set the route for the home page by navigating to the routes.rb file and insert this line below:
root "home#index"
Next, we will fetch the home page content from ButterCMS. Go to the app's controllers/home_controller.rb file and add the following code:
require 'buttercms-ruby'
ButterCMS::api_token = ENV["BUTTER_API_TOKEN"]


class HomeController < ApplicationController
   def index
   homeData = ButterCMS::Page.get('*', "kb-homepage")
   @homeData = homeData.data


   rescue ActionView::Template::Error => e
     raise ButterCmsError::MissingComponentPartial, e
 end


 def not_found
   render '404', layout: false
 end
end
In the code above, we simply integrate the ButterCMS SDK into the controller and use it to fetch the knowledge base homepage content from ButterCMS.
Next, we will replace the following code in the app/views/layouts/application.html.erb file with:
<!DOCTYPE html>
<html>
 <head>
   <title>Foodlog</title>
   <meta name="viewport" content="width=device-width,initial-scale=1">
   <link rel="preconnect" href="https://fonts.googleapis.com">
   <link rel="preconnect" href="https://fonts.gstatic.com" crossorigin>
   <link href="https://fonts.googleapis.com/css2?family=Inter:wght@100;200;300;400;500;600;700;800;900&display=swap" rel="stylesheet">
   <%= csrf_meta_tags %>
   <%= csp_meta_tag %>
   <%= stylesheet_link_tag "tailwind", "inter-font", "data-turbo-track": "reload" %>

 <%= stylesheet_link_tag "application", "data-turbo-track": "reload" %>
   <script src="https://cdn.tailwindcss.com"></script>
 </head>


 <body>
   <main class="">
     <div class="bg-[#404996] p-5 relative">
       <div class="max-w-[1250px] py-2 mx-auto flex items-center justify-between w-full">
         <div class="">
           <a class="brand block" href="/">
             <span>Help Scout Support</span>
           </a>
         </div>


         <div class="">
           <div class="block md:hidden">
             <span class="sr-only">Toggle Navigation</span>
             <span class="icon-bar"></span>
             <span class="icon-bar"></span>

             <span class="icon-bar"></span>
           </div>


           <div class="hidden md:flex navbar-links items-center -mx-6">
             <div id="home" class="px-6">
                 <a href="/">Home <b class="caret"></b></a>
             </div>
             <div id="help-desk" class="px-6">
                 <a href="/collection/1-help-desk">Help Desk  <b class="caret"></b></a>
             </div>
             <div id="beacon" class="px-6">
                 <a href="/collection/1202-beacon">Beacon  <b class="caret"></b></a>
             </div>
             <div id="docs" class="px-6">
                 <a href="/collection/3-docs">Docs  <b class="caret"></b></a>
             </div>
             <div id="status" class="px-6">
                 <a href="/collection/1454-status">Status  <b class="caret"></b></a>
             </div>
           </div>
         </div>
       </div>
     </div>
     <%= yield %>
   </main>
 </body>
 </html>
In the code above, we simply added a navbar to the application’s layout. We also added CDNs for the font we will be using in the application and the styling library that we will be using (TailwindCSS).
Next, navigate to app/views/home/index.html.erb and insert the following code:
<div>
<div id="docsSearch">
<h1>
<%= @homeData.fields.kb_home_title %>
</h1>
<form action="/" method="GET" id="searchBar" autocomplete="off" class="md:w-[635px] mx-auto">
<div class="w-full md:flex md:items-center md:justify-center -mx-2">
<div class="md:w-[460px] px-2">
<input type="text"
name="query"
title="search-query"
class="search-query block"
placeholder="Search Beacon, Docs, Reports, etc"
aria-label="Search Beacon, Docs, Reports, etc" value=""
>
</div>
<div class="md:w-4/12 px-2">
<button
type="submit"
aria-label="Search"
class="block"
>
<i class="icon-search lp"></i>
<span>Search</span>
</button>
</div>
</div>
<% if @listData %>
<div id="serp-dd" class="mt-4">
<ul class="result">
<% @listData.each do |article| %>
<li>
<%= link_to article_path(article.slug, article.slug) do%>
<%= article.name %>
<% end %>
</li>
<% end %>
</ul>
</div>
<% end %>
</form>
</div>
<section id="contentArea" class="cont-fluid container mx-auto">
<div id="noResults" style="display:none;">No results found</div>
<section class="collection-category" id="collection-category-1">
<h2 id="collection-1">
<a>
<%= @homeData.fields.kb_home_sections[0].kb_section_title %>
</a>
</h2>
<section class="flex flex-wrap category-list">
<% @homeData.fields.kb_home_sections[0].kb_sections.each do |section| %>
<div class="p-3 w-full md:w-6/12 lg:w-4/12">
<%= link_to section_path(section.slug) do%>
<div class="category" id="<%= section.slug %>" style="background-image: url(<%= section.fields.kb_section_article_image %>)">
<h3>
<%= section.fields.kb_section_name %>
</h3>
<p>
<%=
section.fields.kb_section_description %>
</p>
<p class="article-count">
<span class="notranslate">
<%= section.fields.kb_section_article_type.length() %>
</span>
articles
</p>
</div>
<% end %>
</div>
<% end %>
</section>
</section>
<section class="collection-category" id="collection-category-1202">
<h2 id="collection-1202">
<a>
<%= @homeData.fields.kb_home_sections[1].kb_section_title %>
</a>
</h2>
<section class="flex flex-wrap category-list ">
<% @homeData.fields.kb_home_sections[1].kb_sections.each do |section| %>
<div class="p-3 w-full md:w-6/12 lg:w-4/12">
<%= link_to section_path(section.slug) do%>
<div class="category" id="<%= section.slug %>" style="background-image: url(<%= section.fields.kb_section_article_image %>)">
<h3>
<%= section.fields.kb_section_name %>
</h3>
<p>
<%= section.fields.kb_section_description %>
</p>
<p class="article-count">
<span class="notranslate">
<%= section.fields.kb_section_article_type.length() %>
</span>
articles
</p>
</div>
<% end %>
</div>
<% end %>
</section>
</section>
<section class="collection-category" id="collection-category-3">
<h2 id="collection-3">
<a>
<%= @homeData.fields.kb_home_sections[2].kb_section_title %>
</a>
</h2>
<section class="category-list flex flex-wrap">
<% @homeData.fields.kb_home_sections[2].kb_sections.each do |section| %>
<div class="p-3 w-full md:w-6/12 lg:w-4/12">
<%= link_to section_path(section.slug) do%>
<div class="category" id="<%= section.slug %>" style="background-image: url(<%= section.fields.kb_section_article_image %>)">
<h3>
<%= section.fields.kb_section_name %>
</h3>
<p>
<%= section.fields.kb_section_description %>
</p>
<p class="article-count">
<span class="notranslate">
<%= section.fields.kb_section_article_type.length() %>
</span>
articles
</p>
</div>
<% end %>
</div>
<% end %>
</section>
</section>
<footer class="center">
<p>
©<a href="https://www.helpscout.com/">Help Scout</a>
2023.
<span>
Powered by
<a rel="nofollow noopener noreferrer" href="https://www.helpscout.com/knowledge-base/?utm_source=docs&utm_medium=footerlink&utm_campaign=Docs+Branding" target="_blank">
Help Scout
</a>
</span>
</p>
</footer>
</section>
</div>In the code above, we rendered the content from ButterCMS with the app/views/home/index.html.erb template.
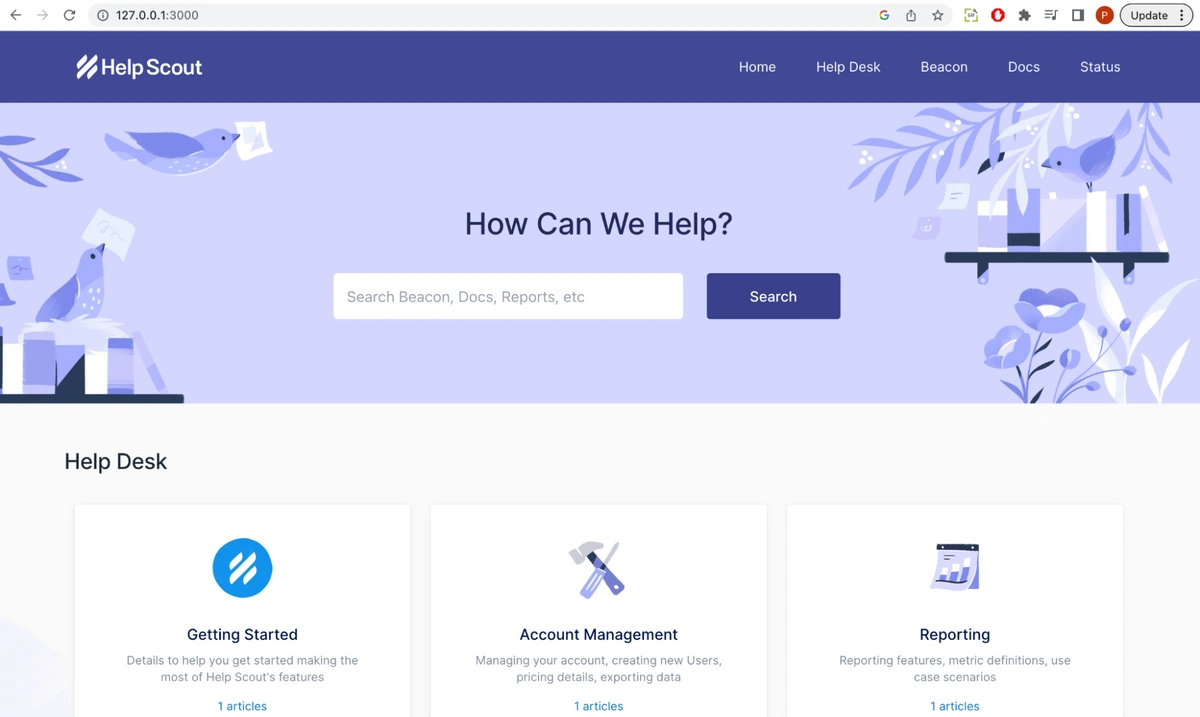
An image of the first section of the knowledge base
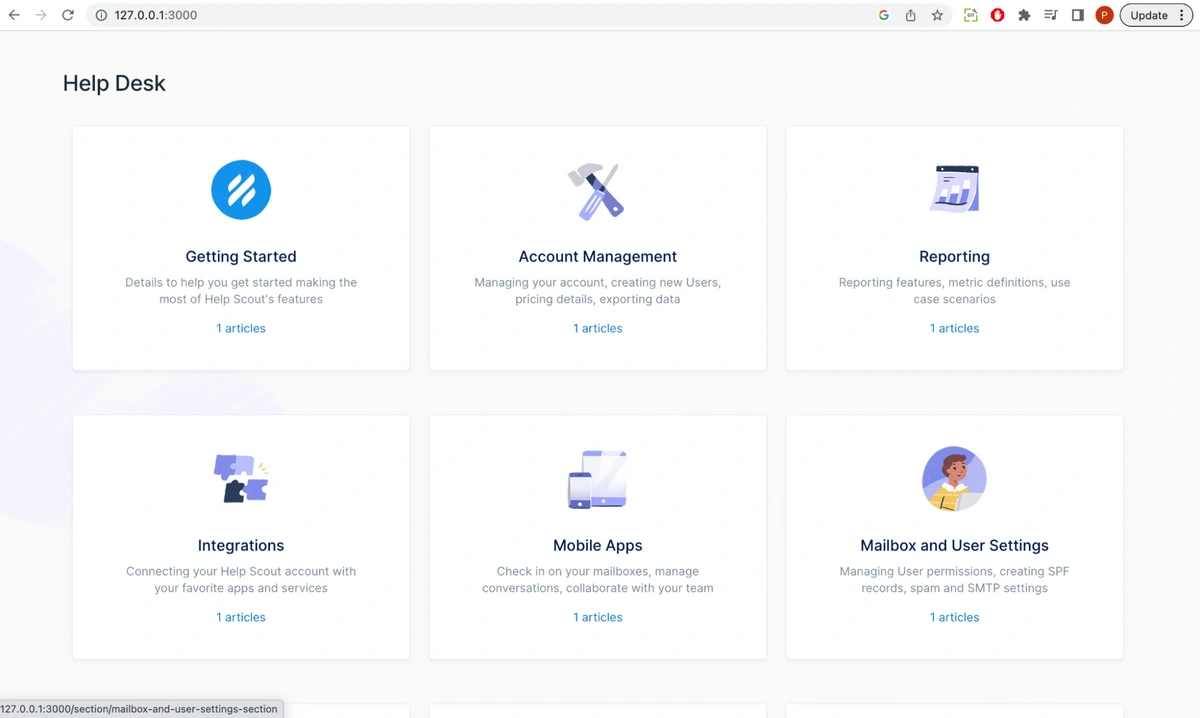
An image of the second and third sections of the knowledge base
Section controller
To generate the section controller, view, and route for our application, use this command:
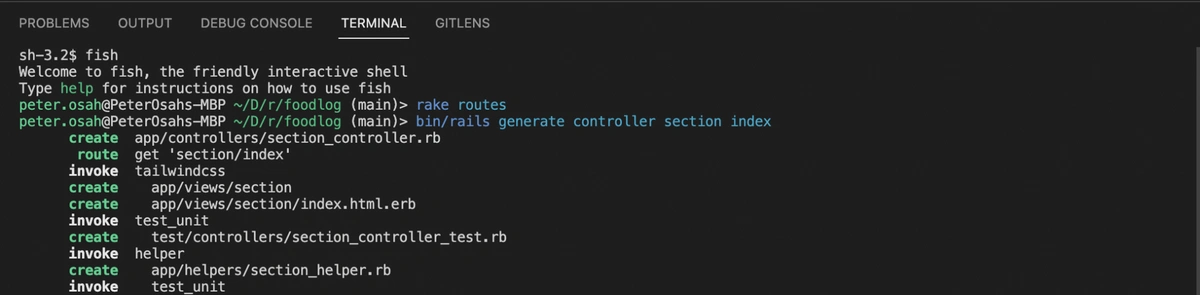
./bin/rails generate controller section index
After typing the command, the following files will be generated:
Next, we’ll set the route for the section page by navigating to the routes.rb file and inserting this line below:
# Defines the section path route
 get '/section/:sectionId', to: 'section#index', as: 'section'
Next, we will fetch the section content from ButterCMS. Go to the app's controllers/section_controller.rb file and add the following code:
require 'buttercms-ruby'
ButterCMS::api_token = ENV["BUTTER_API_TOKEN"]


class SectionController < ApplicationController
 def index
   ## get section
   sectionParamsValue = params[:sectionId]
   query = params[:params]
   if sectionParamsValue != 'not-found'
     sectionData = ButterCMS::Page.get('*', sectionParamsValue)
     @sectionData = sectionData.data
     @sectionParamsValue = sectionParamsValue
   else
     @query = session[:queryValue]
     @sectionData = nil
   end
 rescue ActionView::Template::Error => e
   raise ButterCmsError::MissingComponentPartial, e
 end


 def not_found
   render '404', layout: false
 end
end
In the code above, we simply integrate the ButterCMS SDK into the controller and use it to fetch the knowledge base section content from ButterCMS.
Next, navigate to app/views/home/index.html.erb and insert the following code:
<div>
   <section id="contentArea" class="container-fluid max-w-[1250px] mx-auto">
       <div class="row-fluid">
           <section id="main-content" class="span9">
               <div class="contentWrapper">
                   <hgroup id="categoryHead">
                       <% if @sectionData %>
                           <h1>
                               <%= @sectionData.fields.kb_section_name %>
                           </h1>
                           <p class="descrip">
                               <%= @sectionData.fields.kb_section_description %>
                           </p>
                       <% else %>
                           <h1>
                               Here's what we found for <%= @query %>
                          </h1>
                       <% end %>


                       <div class="sort">
                           <form action="/category/832-getting-started" method="GET">
                               <select name="sort" id="sortBy" title="sort-by" onchange="this.form.submit();" aria-label="Page reloads on selection">
                                   <option value="">Sort by Default</option>
                                   <option value="name">Sort A-Z</option>
                                   <option value="popularity">Sort by Popularity</option>
                                   <option value="updatedAt">Sort by Last Updated</option>
                               </select>
                           </form>
                       </div>
                   </hgroup><!--/categoryHead-->


                   <% if @sectionData %>
                       <% @sectionData.fields.kb_section_article_type.each do |article| %>
                           <ul class="articleList">
                               <li>
                                   <%= link_to article_path(@sectionParamsValue, article.name) do%>
                                       <i class="icon-article-doc"></i>
                                       <span>
                                           <%= article.fields.article_description %>
                                       </span>
                                   <% end %>
                               </li>
                           </ul>
                       <% end %>
                   <% else %>
                       <ul class="articleList">
                           <li>
                               No articles were found. Feel free to try again or contact us.
                           </li>
                       </ul>
                   <% end %>


               </div><!--/contentWrapper-->
           </section><!--/content-->


           <aside id="sidebar" class="span3">
               <form action="/" method="GET" id="searchBar" class="sm" autocomplete="off">
                   <input type="hidden" name="collectionId">
                   <input type="text" name="query" title="search-query" class="search-query" placeholder="Search" value="" aria-label="Search">
                   <button type="submit">
                       <span class="sr-only">Toggle Search</span>
                       <i class="icon-search"></i>
                   </button>
                   <div id="serp-dd" style="display: none;" class="sb">
                       <ul class="result">
                       </ul>
                   </div>
               </form>
            </aside><!--/span-->
       </div><!--/row-->

       <div id="noResults" style="display:none;">No results found</div>
       </section>
</div>
In the code above, we rendered the content from ButterCMS using the app/views/section/index.html.erb template.
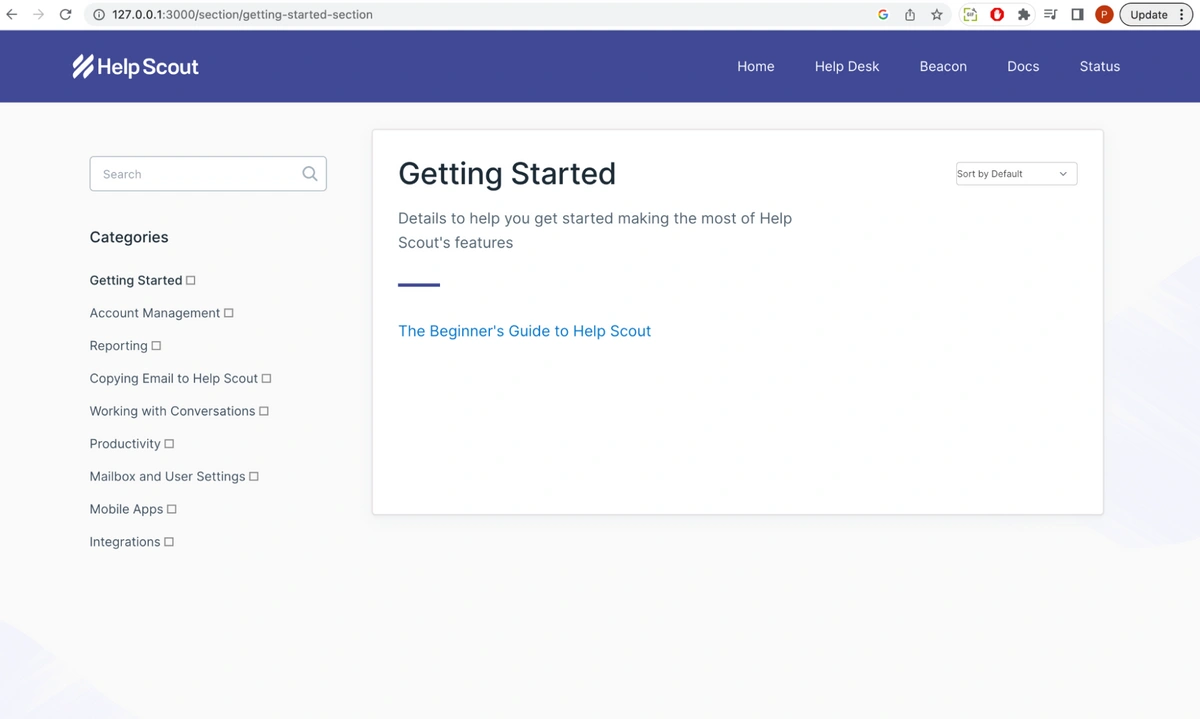
In the image above, ButterCMS is responsible for delivering the content in the section, including the categories section (on the left) and the getting-started section (on the right).
Article controller
To generate the article controller, view, and route for our application, use this command:
./bin/rails generate controller article index
After typing the command, the following files will be generated:

Next, we’ll set the route for the section page by navigating to the routes.rb file and inserting this line below:
# Defines the article path route
 get '/section/:sectionId/article/:articleId', to: 'article#index', as: 'article'
Next, we will fetch the section content from ButterCMS. Go to the app's controllers/article_controller.rb file and add the following code:
require 'buttercms-ruby'
ButterCMS::api_token = ENV["BUTTER_API_TOKEN"]


class ArticleController < ApplicationController
 def index
   sectionParamsValue = params[:sectionId]
   articleParamsValue = params[:articleId]
   articleData = ButterCMS::Page.get('*', articleParamsValue)
   @articleData = articleData.data
 rescue ActionView::Template::Error => e
   raise ButterCmsError::MissingComponentPartial, e
 end


 def not_found
   render '404', layout: false
 end
end
In the code above, we simply integrate the ButterCMS SDK into the controller and use it to fetch the knowledge base article from ButterCMS.
Next, navigate to app/views/home/index.html.erb and insert the following code:
<div class="max-w-[1250px] py-2 mx-auto">
<%= @articleData.fields.article_body.html_safe %>
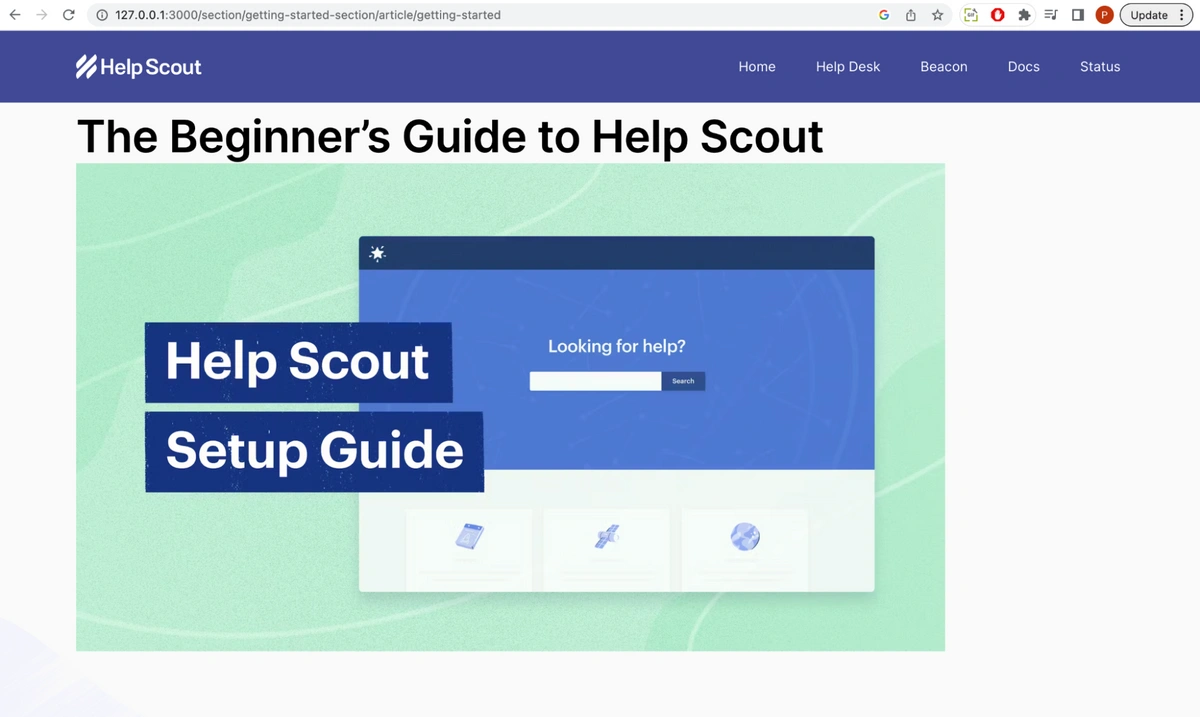
</div>In the code above, we rendered the article content from ButterCMS in the app/views/article/index.html.erb template.
Implementing the search feature
Next, we will implement an article search on the home page. Go to the app's controllers/home_controller.rb file and update the file with the code below:
require 'buttercms-ruby'
ButterCMS::api_token = ENV["BUTTER_API_TOKEN"]


class HomeController < ApplicationController
 def search()
   search = params[:query]
   p search
   if search
     listData = ButterCMS::Page.search(search, {
       page_type: 'kb_article_type'
     });


     if listData.items.empty?
       # Do something if my_array is empty
       listData = ButterCMS::Page.search(search, {
         page_type: 'kb_section_type'
       });
       if listData.items.empty?
         redirect_to '/section/' + 'not-found'
         session[:queryValue] = search
       else
         redirect_to '/section/' + listData.items[0].data.slug
       end
     else
       # Do something if my_array is not empty
       @listData = listData.items
     end


     p listData


    else
     @listData = []
   end
 end
  def index
   homeData = ButterCMS::Page.get('*', "kb-homepage")
   @homeData = homeData.data
   search()


   rescue ActionView::Template::Error => e
     raise ButterCmsError::MissingComponentPartial, e
 end


 def not_found
   render '404', layout: false
 end
end
In the code above, we created a search method that integrates with ButterCMS and fetches article contents based on the value of a query parameter inserted from the homepage view through the search input on the homepage.
One thing to note is that the search functionality pulls up results for article content. The content does not pertain to a section. Thus, if there are two or more results for the “get-started” article, and if they are in different sections, the search will display those as well.
Our rendered knowledge base
When we combine all of the components we've created, we get a knowledge base, as shown below.
Closing thoughts
In this Rails tutorial, we learned how to build a knowledge base Rails application using ButterCMS, as well as how to create pages from page types, reference pages in other pages, and more. We have also shown that having a knowledge base is vital to a business and has benefits, including customer retention and satisfaction.
We have highlighted the benefits of using ButterCMS in building a knowledge base, as it is an efficient content management tool that enables easy content management in a knowledge base. We also used the Rails framework to build the knowledge base and highlighted its technical advantages like speed and community, among others.
There is so much you can build with ButterCMS, and I advise readers to look into the features of ButterCMS to get more insight into its capabilities. Also, to further explore how to integrate ButterCMS as well as add more features to a Rails application, you can visit ButterCMS's official Rails documentation.
Resources
The code for this tutorial can be found in this GitHub repo.
To learn more about how you can use Rails with ButterCMS, I strongly recommend you check out the following tutorials:

