
This Django blog tutorial will show business owners how to quickly add a blog to their website using ButterCMS. As a business owner, a blog is crucial for creating fresh, relevant content that engages your website and visitors. However, building a blog application can be time-consuming and complex. There is a lot of work needed to set up the database, configure API routes, manage file storage, and more.
ButterCMS, a headless CMS, offers a solution by handling all of these backend tasks. That allows you to focus on creating and publishing great content. In addition, with ButterCMS you can easily create and manage your blog content through its visual dashboard or API, allowing you to make updates and changes on the fly. This tutorial will guide you through adding a blog to your Django app using ButterCMS.
Table of contents
Why use Django?
Django is a popular and powerful web framework for building web applications. It is built in Python and follows the model-view-controller (MVC) architectural pattern. Some of the key features and advantages of using Django include the following:
- It comes with a built-in administration panel, making it easy to manage a web application's data.
- It includes an Object-relational mapper (ORM) which allows developers to interact with databases using Python code rather than writing raw SQL.
- It has a built-in template engine, which allows developers to separate the presentation logic from the business logic in their code.
- It has a large and supportive community, which means many resources are available for learning and troubleshooting.
- It follows the Don't Repeat Yourself (DRY) principle, which helps developers write less code and easily maintain it.
- It has built-in authentication and security support, which helps protect the web application from common attacks.
Django is a good choice for building web applications that require a database, a user interface, and a way to handle requests and deliver responses.

Why use ButterCMS?
ButterCMS is a headless content management system (CMS) that allows developers and marketers alike to quickly configure, create, and manage content for their digital experiences. Some of the core features and advantages of using ButterCMS include:
- It's a headless CMS, meaning it doesn't have its front end and can be integrated into any web application, regardless of the programming language or framework used.
- It has a simple and intuitive interface for content editors and marketers, allowing them to easily manage and update a website's content without requiring technical knowledge.
- It has a robust API that allows developers to retrieve and update content from their web applications. This can be particularly useful for building web applications that display frequently updated content such as blog posts, case studies, or product information.
- It has built-in support for SEO, which allows developers to create optimized content that can improve the search engine rankings of a website.
- It provides built-in analytics and tracking of the pages and will help to identify which pages are more popular, which are not, and much more.
- It offers webhooks and trigger-based webhooks and allows your application to take action based on the events in ButterCMS, such as a new post being published.
ButterCMS is a good choice for building web applications that require managing and delivering content, especially when frequent updates, SEO optimization, and flexible page configuration are required.
Django blog tutorial prerequisites
To follow the tutorial, ensure you’ve met the following requirements:
- An understanding of Python3 and Django
- Python3 installed
- A ButterCMS account
Also, the code for this tutorial is available in this GitHub repository.
Set up the virtual environment
We need to set up a virtual environment for your project to get started. First, confirm you have virtualenv installed by running the command below:
pip install virtualenvThen create a new folder for the project and create an isolated Python environment by running the command below:
mkdir python-cms && cd python-cms
python3 -m venv env
To activate the virtual environment we just created, run the command below:
source env/bin/activate
Activating a virtual environment allows you to install and use only the dependencies installed for a project. This way, even if the dependencies are updated in the future, the updates will not affect your old projects.
Install dependencies
With the virtual environment set up and activated, install Django and the ButterCMS Python SDK by running the command below:
pip install django buttercms-python
Wait for the installation to complete and proceed to create a Django application with the command below:
django-admin startproject blog .
The above command will create a blog folder with the project structure below:
📦python-cms
┣ 📂blog
┃ ┣ 📜__init__.py
┃ ┣ 📜asgi.py
┃ ┣ 📜settings.py
┃ ┣ 📜urls.py
┃ ┗ 📜wsgi.py
┣ 📂env
📜manage.py
Setting up the blog engine
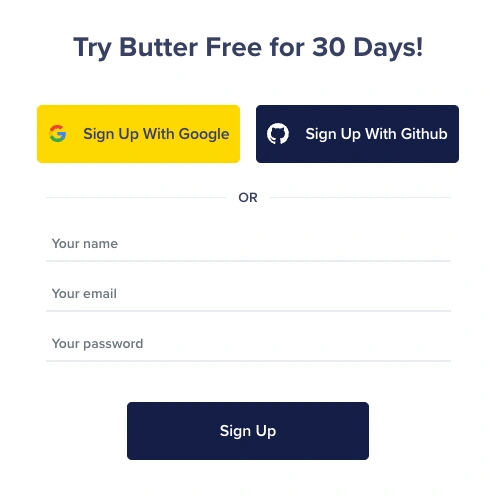
To start building with ButterCMS, you must sign up with your Gmail or GitHub account to log in to your project dashboard.
ButterCMS provides an out-of-the-box blog engine that allows developers to build great SEO blogs applications quickly. When you log in to your ButterCMS dashboard, you’ll see the blog engine as shown below:
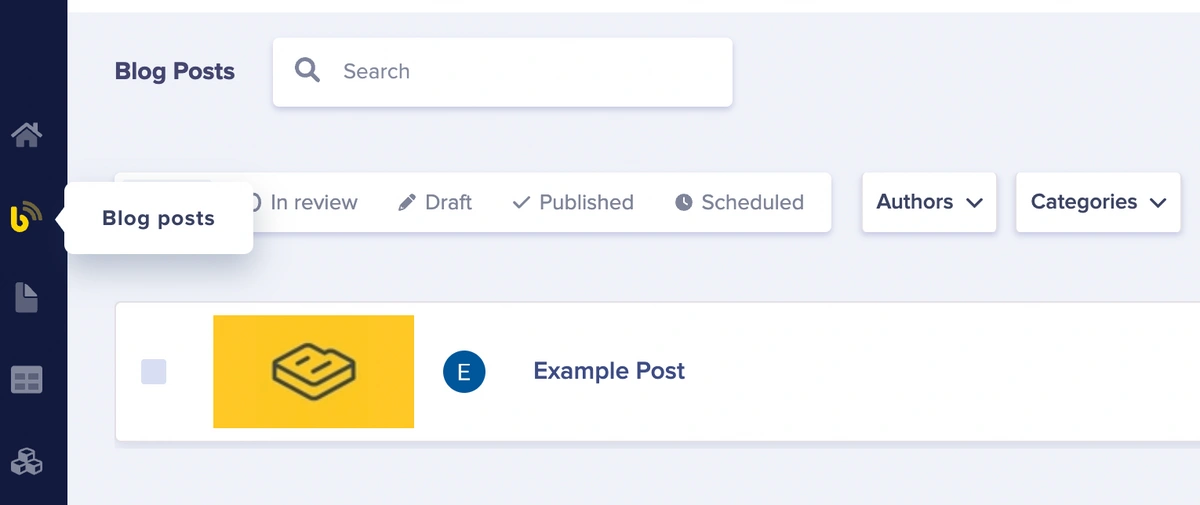
The blog engine is usually titled Blog Posts, and you can add, update, and delete blog posts using this engine. So, click on the New Post button at the top right corner to begin creating a blog post, as shown below:
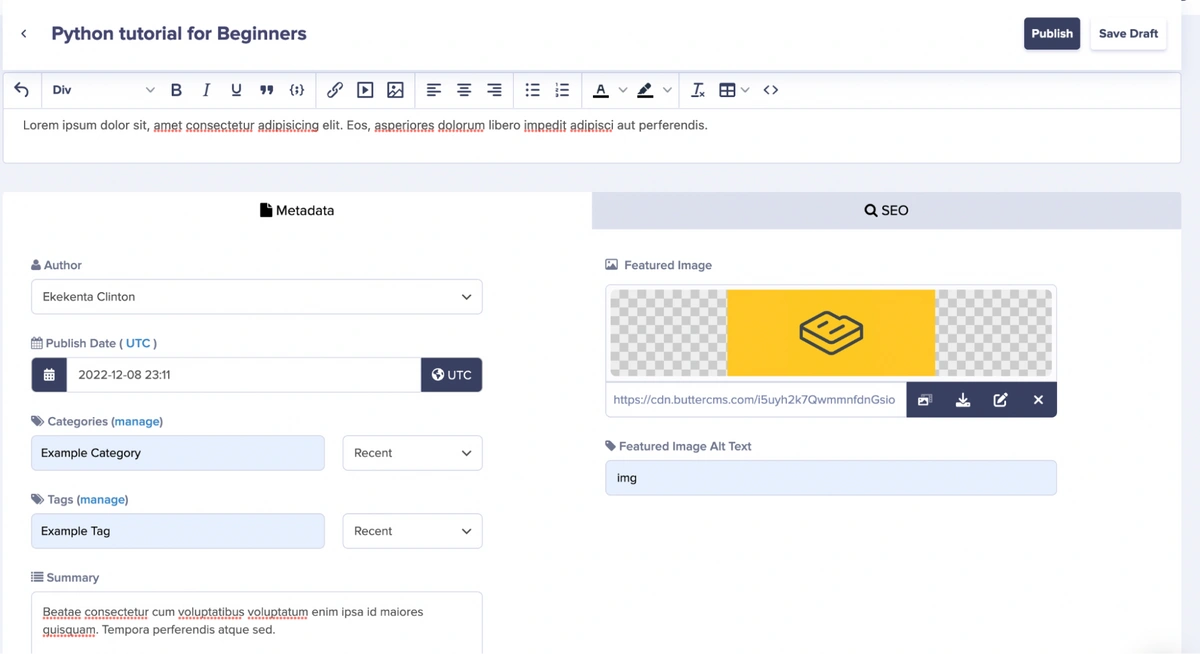
Here, we supplied the values for the fields provided by the blog engine. We supplied the metadata and the SEO values for each blog we are creating and added the blog body using the WYSIWYG editor.
Getting the API secret
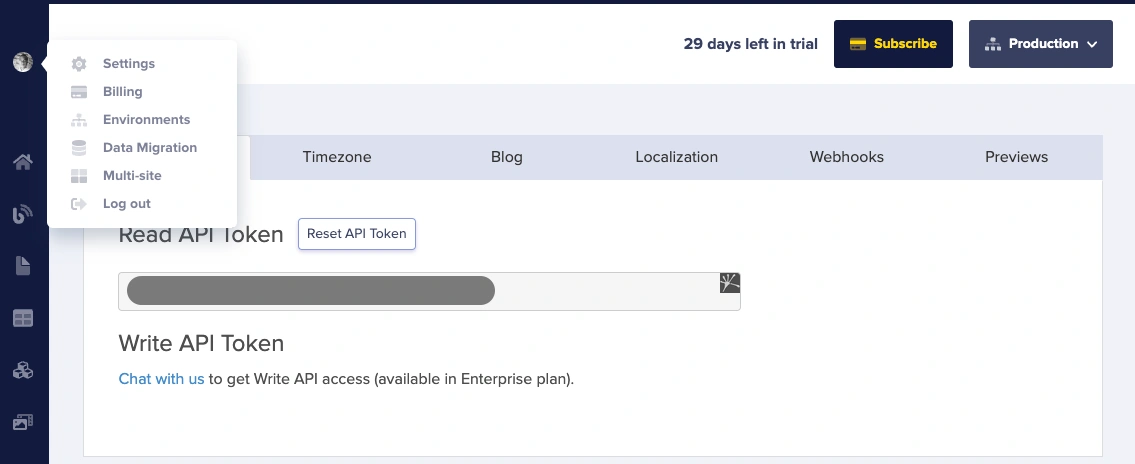
To allow your Python application to interact with headless ButterCMS content, ButterCMS provides you with two API tokens that authenticate and grant your application access to read or modify content. They are Read API Token and Write API Token. The Read API Token is generated by default when you sign up, while you can contact ButterCMS to get the Write API Token. To get the tokens, click on Settings -> API Tokens on the dashboard and copy the Read API Token.
Creating views
Now, back in our Python application, let’s create a view.py file to handle our application logic. First, we need to initialize the ButterCMS SDK and get our API TOKEN from the environment variable:
from butter_cms import ButterCMS
from django.shortcuts import render
import os
client = ButterCMS(os.environ["API_TOKEN"])
Now add the API key as an environment variable to the project with the command below:
export API_TOKEN=6699b1efadd0ab96c248d116c5f24b5adaf3635a
Next, create a function to get all the posts you’ve created in your CMS with the code snippet below:
...
def Index(request, page = 1):
   response = client.posts.all({'page_size': 10, 'page': page})


   try:
       recent_posts = response['data']
       print(recent_posts)
   except:
       raise Http404('Page not found')
   next_page = response['meta']['next_page']
   previous_page = response['meta']['previous_page']


   return render(request, 'index.html', {
       'recent_posts': recent_posts,
       'next_page': next_page,
       'previous_page': previous_page
   })
In the above code snippet, we get the contents in the posts collection using the ButterCMS client. Then, we render the data in the collection with an index.html template.
Next, create another function to get the individual blog data using the blog’s slug data with the cope snippet below:
...
def Blog(request, slug):
   try:
       response = client.posts.get(slug)
   except:
       raise Http404('Post not found')


   post = response['data']
   return render(request, 'blog.html', {
       'post': post
   })
Now, let’s create the templates we rendered in the above functions.
Creating routes and templates
Now that we’ve created and configured the templates, let’s define the routes to access the blog contents. Django defines its application routes in the urls.py file. So, update the code in the urls.py file with the code snippets below:
from django.contrib import admin
from django.urls import path
from . import views


urlpatterns = [
   path('', views.Index),
   path('<slug>', views.Blog),
   path('admin/', admin.site.urls),
]
Now let's create our templates.
Create a templates folder in the project's root directory and create the files index.html and blog.html. In the index.html file, add the code snippets below:
{% load static %}
<!doctype html>
<html>
 <head>
   <meta charset="utf-8">
   <meta content="IE=edge,chrome=1" http-equiv="X-UA-Compatible">


   <title>Blog Template</title>


   <meta name="viewport" content="width=device-width, initial-scale=1.0">
   <meta name="description" content="">


   <meta property="og:type" content="" />
   <meta property="og:url" content="" />
   <meta property="og:title" content="" />
   <meta property="og:image" content="" />
   <meta property="og:description" content="" />
   <meta name="twitter:site" content="">
   <meta name="twitter:creator" content="">
   <meta name="twitter:title" content="">
   <meta name="twitter:description" content="">


   <link href="https://maxcdn.bootstrapcdn.com/bootstrap/3.3.7/css/bootstrap.min.css" rel="stylesheet">
   <link href="https://fonts.googleapis.com/css?family=Lato" rel="stylesheet" type="text/css">
   <link href="{% static 'stylec.css' %}" rel="stylesheet">
 </head>
 <body>
   <div class="section-blog-header">
     <div class="container">
       <div class="row">
         <div class="col-md-10 col-md-offset-1 col-sm-12">
           <h3>Join thousands of subscribers and get our monthly newsletter!</h3>
           <form action="" method="post">
             <input type="email" value="" name="EMAIL" class="required email" placeholder="Email Address">
             <input type="submit" value="Subscribe" name="subscribe" id="mc-embedded-subscribe" class="button">
           </form>
         </div>
       </div>
     </div>
   </div>
   <div class="section-blog">
     <div class="container">
       <div class="row">

         <div class="col-md-10 col-md-offset-1 col-sm-12">
           <div class="articles">
           {% for post in recent_posts %}
             <div class="article">
               <a href="/{{post.meta.id}}">
                 <img src="{{post.featured_image}}" width="100%">
               </a>
               <div class="inner">
                 <p class="mb-3">{{post.summary}}</p>
                 <h3><a href="/{{post.slug}}">{{post.title}}</a></h3>
               </div>
             </div>
           {% endfor %}
           </div>
           <div class="pagination-links">
             {% if previous_page %}
             <a class="pagination-link" href="{% url "archive" previous_page %}">Prev</a>
             {% endif %}

             {% if next_page %}
             <a class="pagination-link" href="{% url "archive" next_page %}">Next</a>
             {% endif %}
           </div>
         </div>
       </div>
     </div>
   </div>
 </body>
</html>
We created the markup for our index page templates in the code snippet. We used the load static jinja template page to load the static files like our CSS and images files. Then, we iterate over the data sent from our template and display the details.
Next, add the code snippets below to the blog.html file.
{% load static %}
<!DOCTYPE html>
<html>
<head>
<meta charset="utf-8" />
<meta content="IE=edge,chrome=1" http-equiv="X-UA-Compatible" />
<title>Blog Template</title>
<meta name="viewport" content="width=device-width, initial-scale=1.0" />
<meta name="description" content="" />
<meta property="og:type" content="" />
<meta property="og:url" content="" />
<meta property="og:title" content="" />
<meta property="og:image" content="" />
<meta property="og:description" content="" />
<meta name="twitter:site" content="" />
<meta name="twitter:creator" content="" />
<meta name="twitter:title" content="" />
<meta name="twitter:description" content="" />
<link
href="https://maxcdn.bootstrapcdn.com/bootstrap/3.3.7/css/bootstrap.min.css"
rel="stylesheet"
/>
<link
href="https://fonts.googleapis.com/css?family=Lato"
rel="stylesheet"
type="text/css"
/>
<link href="{% static 'stylec.css' %}" rel="stylesheet" />
</head>
<body>
<!-- BEGIN BLOG HEADER -->
<div class="section-blog-header">
<div class="container">
<div class="row">
<div class="col-md-10 col-md-offset-1 col-sm-12">
<h3>
Join thousands of subscribers and get our monthly newsletter!
</h3>
<form action="" method="post">
<input
type="email"
value=""
name="EMAIL"
class="required email"
placeholder="Email Address"
/>
<input
type="submit"
value="Subscribe"
name="subscribe"
id="mc-embedded-subscribe"
class="button"
/>
</form>
</div>
</div>
</div>
</div>
<!-- END BLOG HEADER -->
<!-- BEGIN BLOG POST -->
<div class="section-blog-post">
<div class="container">
<div class="row">
<div class="col-sm-12">
<div class="post-container">
<a class="back" href="/">Back to all posts</a>
<h1>{{post.title}}</h1>
<span class="by"
>Posted by <strong>{{post.author.last_name}} {{post.author.first_name}}</strong> on
<strong>{{ post.published }}</strong></span
>
<div class="featured-image">
<img
src="{{ post.featured_image }}"
width="100%"
/>
</div>
<div class="post-body">
<p>
{{ post.body|safe }}
</p>
</div>
</div>
</div>
</div>
</div>
</div>
</body>
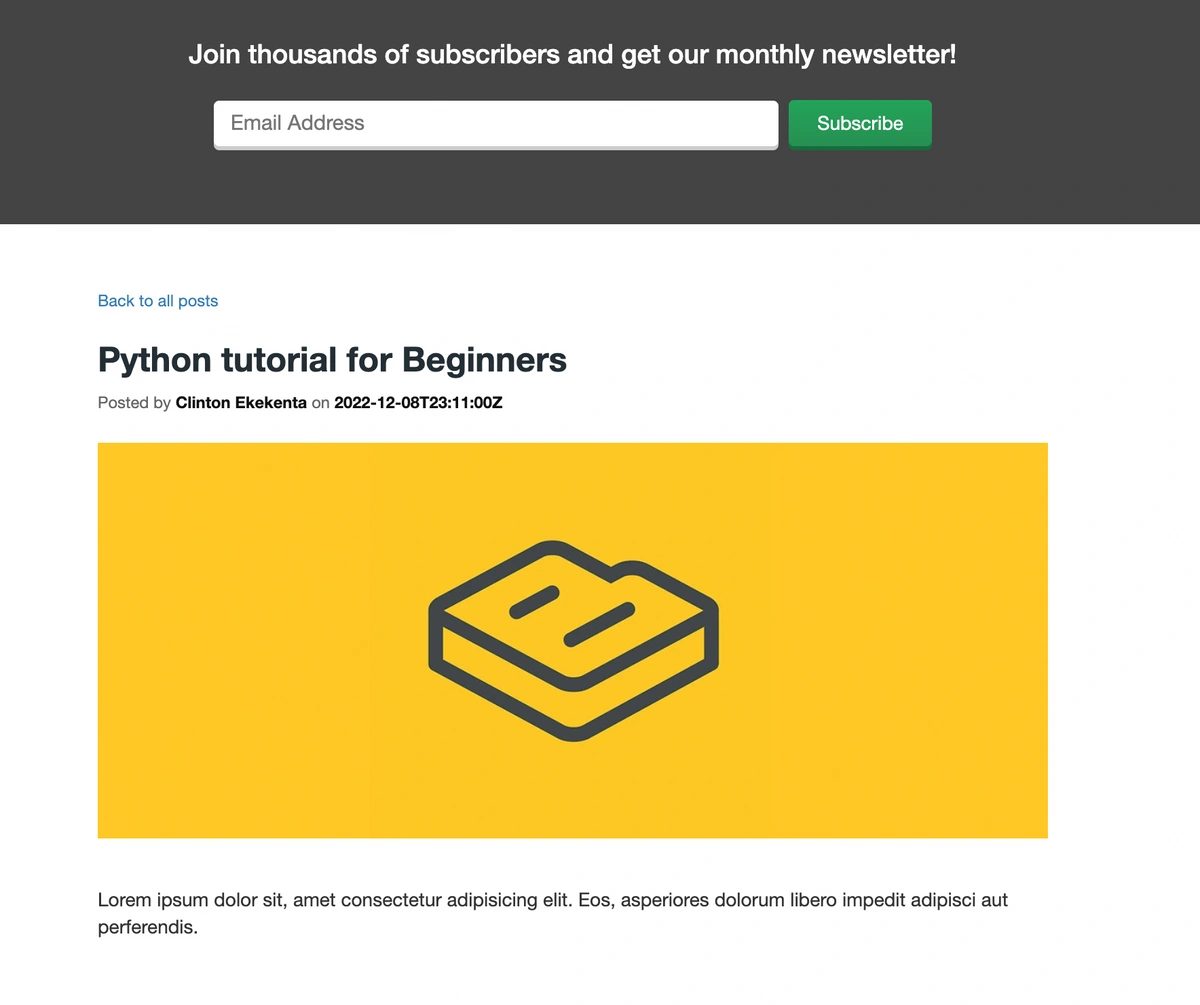
</html>In the above code snippet, we are getting the post data of the individual blog post and displaying the details through their slug field.
To access the template and static file in Django, you’ll need to configure them in settings.py and specify their location in the file system. Add the code snippet below to the settings.py file.
TEMPLATES = [
   {
       ...
       'DIRS': [
           BASE_DIR / 'templates'
       ],
       ...
  ]
...


STATICFILES_DIRS = [
   BASE_DIR / 'static'
]
Next, create a static folder in the root directory of the project. In the static directory, create a styles.css file and copy and add the styling here to style the application.
Preview our blog pages
You can now preview the blog pages in your browser. First, you need to start the make migrations to create the database tables. By default, Django is configured to use an SQLite database and has a pre-built admin page. Running initial migrations will get everything set up for you.
python manage.py migrate
Then, start the server with the command below:
python manage.py runserver
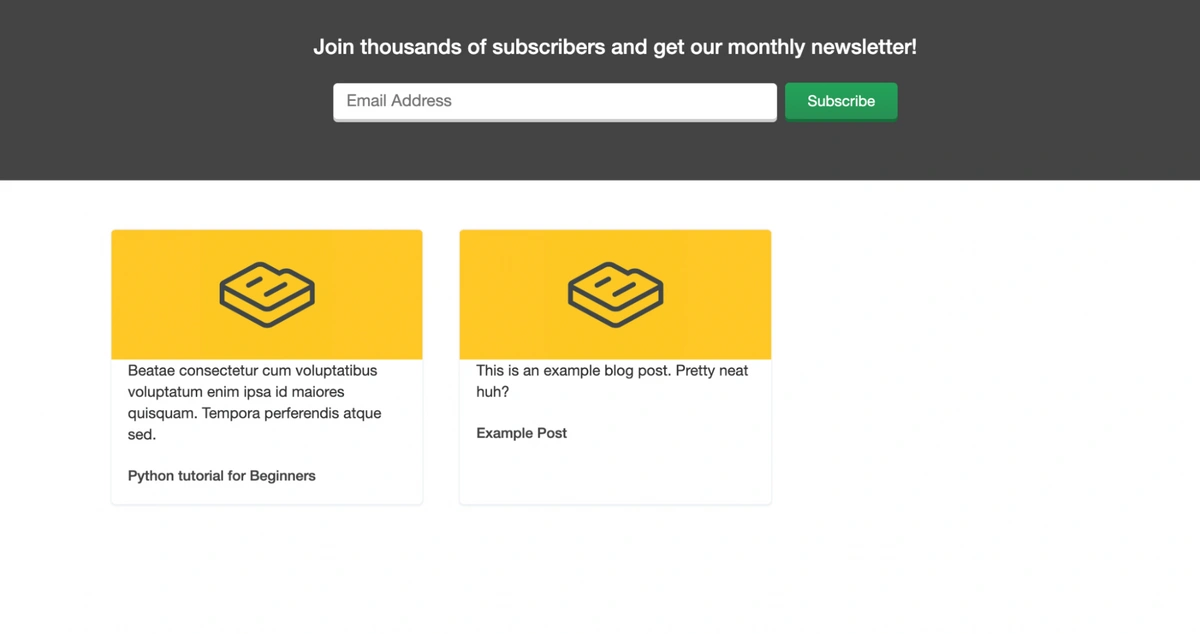
At this point, the server should start running on port 8000. So, navigate to http://127.0.0.1:8000/ to preview the home page.
Closing thoughts
Over the course of this Django blog tutorial, we've learned how to build a blog with Django and ButterCMS. We started by learning why you should use ButterCMS. Then we used the ButterCMS blog engine to quickly create blog posts and add a functional blog to our application. ButterCMS is a great tool for building web applications with little or no boilerplates. To learn more about ButterCMS, check out the documentation.
If you'd like to get your hands dirty with even more tutorials highlighting the power of Django and ButterCMS, check out the following:

