Modern websites are dynamic, meaning they have logic for getting and posting data to a server and using the response from the server to manipulate and change the user interface. There are a lot of development stack options to use for hosting a dynamic web app. Choosing the right stack is really important as this will determine the continuous costs and time spent on your project.
As a developer, if you want to create good-looking user interfaces for blog posts with minimal time, using a headless CMS gives you a great edge at this. You can achieve this by using Python and ButterCMS. In this tutorial, you will learn how to build a blog with Python and ButterCMS.
Table of contents
Why use Python?
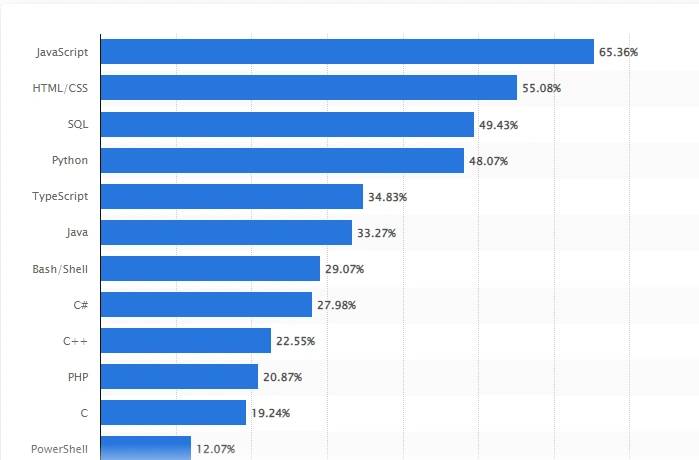
Python is a general-purpose computer programming language created in the Netherlands by Guido van Rossum in the late 1980s. It can be used to build websites, write software, automate tasks, and analyze data. Python is extremely versatile and has an easy-to-use nature, so it’s no wonder that Python is ranked the 4th most-used programming language globally
Python has grown in popularity due to how easy and versatile it has proven to be for developers. Its popularity has given Python a huge boost in community engagement and the creation of Python-based modules and libraries.
Python libraries are very versatile and cover a lot of ground in the programming field, ranging from libraries like Numpy, which helps with complex mathematical calculations, to website frameworks like Flask.
Python’s syntax is also easy to understand compared to other programming languages and doesn’t have a steep learning curve.
Python web framework.
Flask is a web application framework written in Python. It was developed by Armin Ronacher using the Werkzeg WSGI toolkit and the Jinja2 template engine as its base.
Flask is often referred to as a micro-framework. It is designed to keep the core of the application simple and scalable.
Why use ButterCMS?
ButterCMS is a headless CMS solution that decouples the backend code from the front-end code. ButterCMS integrates any tech stack and utilizes an instant backend, meaning you do not have to set up or maintain a server. It also has built-in SEO.
Many companies rely on rigid traditional CMSs like WordPress to post content on the web. The rigidity is also enhanced by a coupled front and back end, which could lead to many companies using a similar template. Using a traditional CMS does not give you the option to change your front-end code as you wish. If you want to change your user interface, you would need to start a new project every time.
To create your own template or customize your website in WordPress, you are required to know how to program using PHP, a language that has arguably lost favor amongst developers over the years. It is hard to think that upcoming developers will be using PHP, so if you create a PHP template, you are most probably building a program that not many people will want to enhance or work with in the future.
A headless CMS such as ButterCMS primarily provides a platform to create, read, update, and delete content and gives a way to manage your content with a user-friendly dashboard. ButterCMS essentially functions as your content backend and makes it available for developers via an API. Once the API is available, a headless CMS can deliver that raw content anywhere, such as a website, mobile app, wearable—essentially anything connected to the internet.
When you choose to use ButterCMS, you can use any programming language or framework for your frontend as well as your backend.
The ButterCMS blog engine
The ButterCMS Blog Engine can be easily integrated with an existing website or application. You can also use it to create a new website or app.
Amongst many features, the ButterCMS blog engine offers:
- Friendly admin interface: Users can upload content in a friendly admin interface. Users can upload different media types such as images and videos.
-
Built-in SEO tags: ButterCMS has tags and metadata that help increase the site’s SEO potential.
-
Default blog engine template: ButterCMS’s blog engine is built to cover a majority of blog use cases.
-
Custom blog pages: In case you want to add functionality or additional fields, ButterCMS also provides you with the ability to create custom blog pages using the Page Type feature.
Tutorial: Building a blog with Python and ButterCMS
In this tutorial, you will learn how to create a blog with Python and ButterCMS by utilizing ButterCMS’s blog engine and Python’s URL module. You will also use the web application framework Flask with a user interface created with HTML.
Prerequisites
The code for this tutorial can be found in the following GitHub repo.
Publishing a blog with ButterCMS
Publishing your blog with ButterCMS is straightforward and intuitive. First, you have to log into your ButterCMS account.
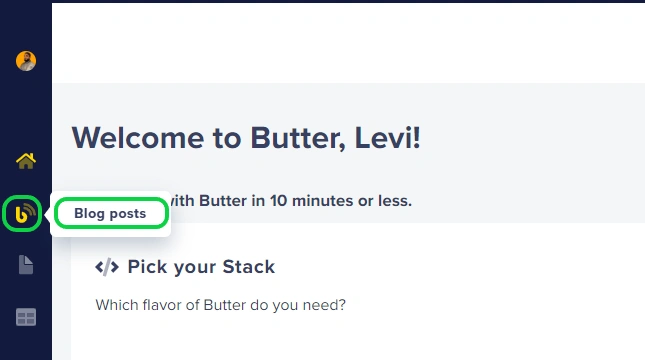
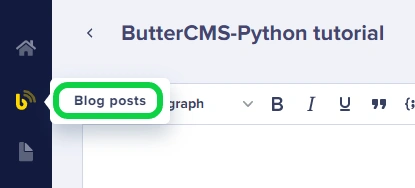
On the dashboard, hover over the Blog icon and click on Blog Posts.
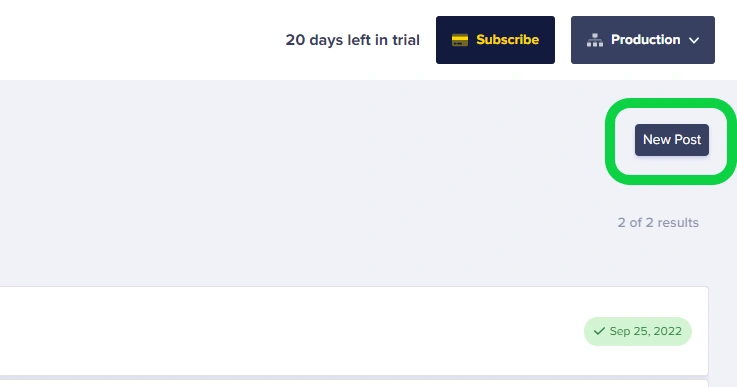
To create a new post, click on the New Post button.
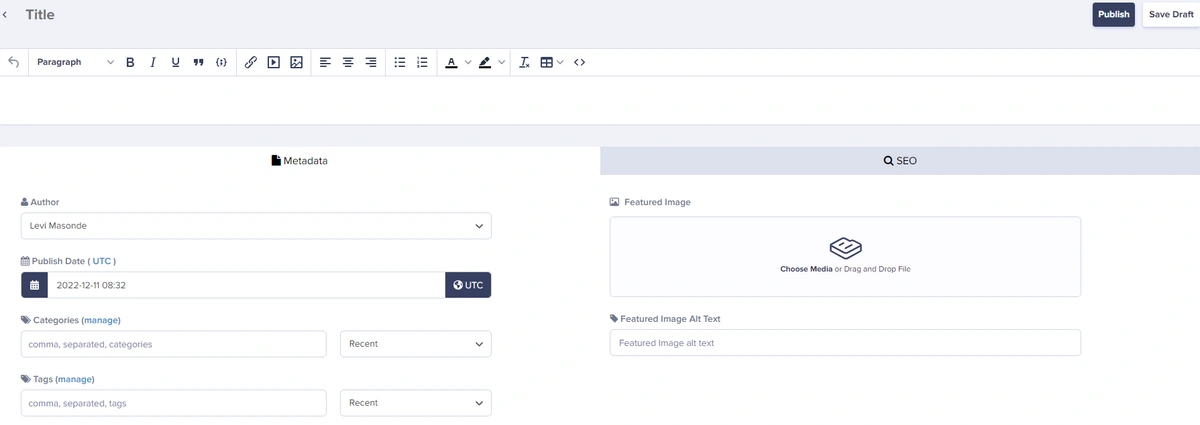
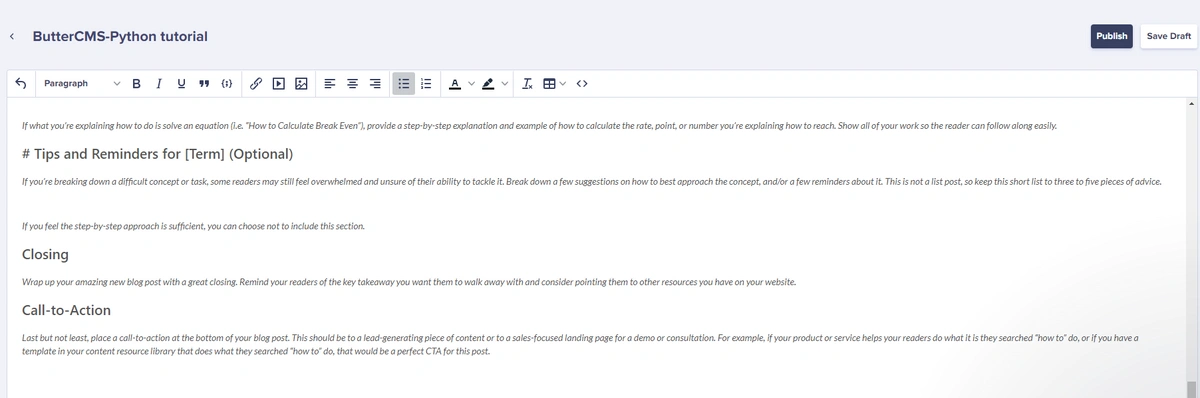
On the screen that appears, populate the WYSIWYG editor with your body content (it supports a variety of content such as images, code snippets, markdown, etc.) and input your SEO data into the built-in SEO and metadata fields at the bottom of the page.

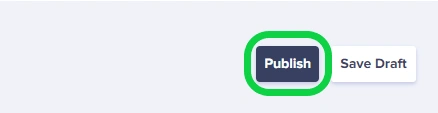
Once you populate the inputs, click on the Publish button to publish your blog.
Then, click on the Blog Posts menu item to view your blogs.
Now that you have published your blog. You can view your newly added blog amongst your blog list.
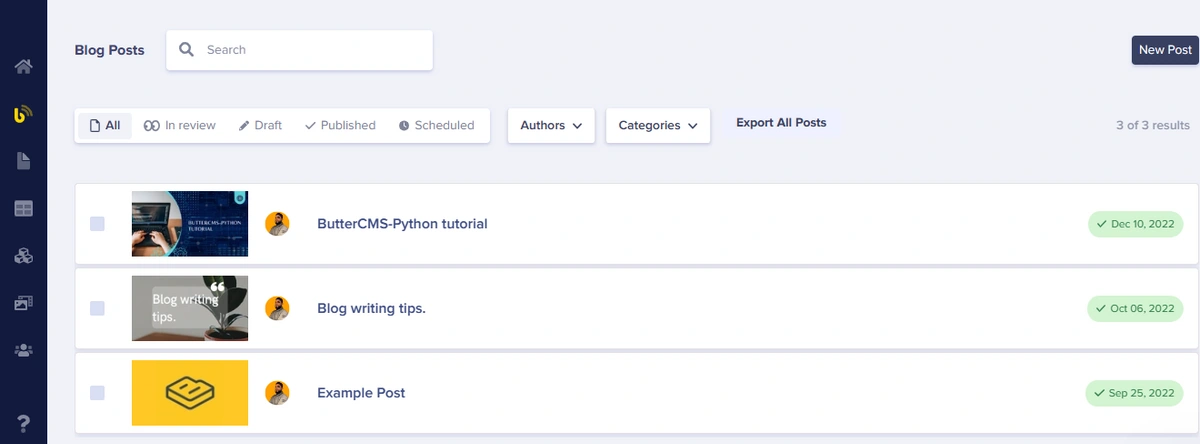
Great! Now you have published a blog post and you will present these posts to the user interface next.
Although you only have to use the blog engine in this tutorial, ButterCMS offers much more than this. You can create your own page types, page components, and media libraries for your website or applications. Use this article about how to Create, Edit, and Delete Pages/Page Types to learn more about this topic.
Creating our main page
The main page will show a list of blog posts published via the ButterCMS engine. This page will make use of ButterCMS content, an HTML template, Python, and Flask.
First, log into ButterCMS and click on your profile image to access user settings.
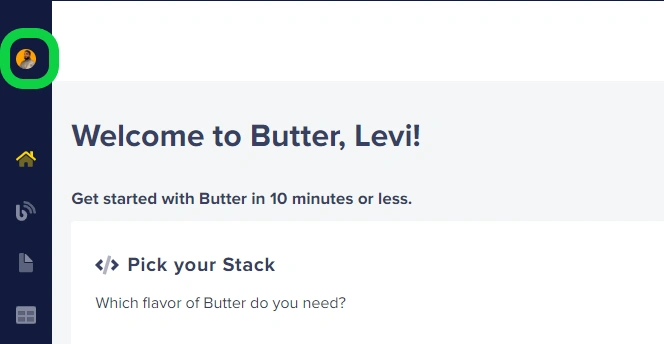
After clicking on the profile, you will see the API key for your profile.
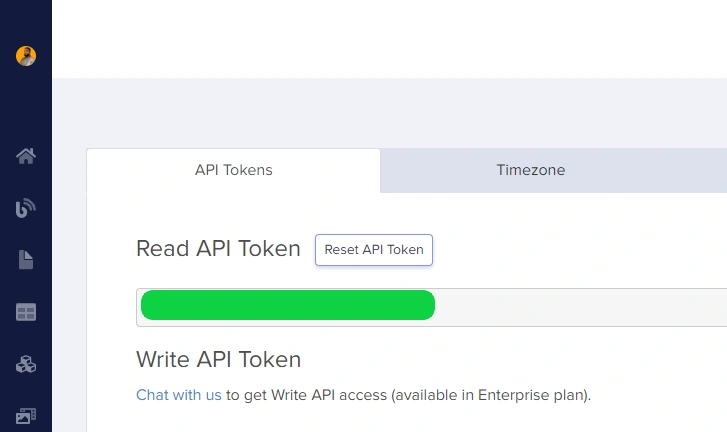
After getting your API key, it's time to code!
Open your Visual Studio Code and create a folder called BUTTERCMS_PYTHON.
While in the folder’s directory, initialize your terminal by pressing CTRL + SHIFT + ` and
use the pip command pip install buttercms-python to add the ButterCMS SDK module to your project.
Create a Python file called BlogApp.py and add the code as shown below.
from butter_cms import ButterCMS

client = ButterCMS('<yourApiKey>')
blog = client.posts.all()

data = blog['data']
print(data)
The output on your terminal will show the content of your blogs in JSON format as shown below.
To pass parameters from HTML to Python without using an HTML form, you can use the GET method. The GET method is the default method to pass information from a browser to a web server and it produces a long string that appears in your browser's location box.

The output verifies that you can receive content through your API and also informs you about the naming of your JSON structure. Knowing your JSON structure will help you extract the correct information in the correct manner, so it is good practice to have a look at your content in JSON format.
Once you have gone through your data, add this code to your BlogApp.py file:
//BlogApp.py
from flask import Flask, render_template, redirect, request
from butter_cms import ButterCMS

blogs = Flask(__name__)

client = ButterCMS('<yourApiKey>')

@blogs.route("/") #For default route
def main():

    blog = client.posts.all()
    data = blog['data']

    return render_template("BlogList.html",  homepage = data)

if(__name__ == "__main__"):
    blogs.run()
The code above refers to an HTML file BlogList.html. This file will be used to render the data you fetch from ButterCMS. Due to Flask’s structure, this file has to be stored in a folder named Templates.
Create a folder named Templates in your project and add the following code to the BlogList.html file as shown below: (Please note that all the navigation links are there as static links and so are all buttons. Page redirection is not included in this tutorial.)
<html>
  <head>
    <title>{{homepage.title}}</title>
    <link rel="stylesheet" href="https://cdnjs.cloudflare.com/ajax/libs/font-awesome/4.7.0/css/font-awesome.min.css">
    <link rel="stylesheet" type="text/css" href="{{ url_for('static', filename='styles.css') }}" />
  </head>

  <body id="body">
    <nav id="nav">
        <div id="top">
          <div id="logo">

          </div>
          <div id="menu">
            <ul>
                <li><a href="#">Home</a></li>
                <li><a href="#">About Us</a></li>
                <li><a href="#">Our Products</a></li>
                <li class="active"><a href="#">Blogs</a></li>
                <li><a href="#">Careers</a></li>
                <li><a href="#">Contact Us</a></li>
            </ul>
          </div>
          <div id="middle">


          </div>
          <div id="button">
            <span>Get Started</span>
          </div>

        </div>
    </nav>
    <div id="SearchHero">
        <span id="bannerText">Take A Deep Dive Through Our Blogs</span>
    </div>
    <div id="ListContainer">
    {% for t in homepage %}
    <div id="mainPaper">
        <div id="mainImage">
              <img src="{{t. featured_image}}" id="image" />
        </div>
        <div id="mainSide">
            <div id="card">
              <h1 id="title">{{ t.title }}</h1>
              <div>
              <span id="summary">{{t.summary}}</span>
              </div>
              <div id="profile">
                <div id="published">
                  <h3 id="published_text">By {{t.author.first_name}}  {{t.author.last_name}}</h3>
                </div>
                <div id="dp_container">
                  <img src="{{t.author.profile_image}}" id="profile_image" />
                </div>

              </div>

            </div>
        </div>
    </div>
    {% endfor %}
    </div>

  </body>
</html>
Then, create a folder named Static on the main branch. After creating the folder, create a CSS file named styles.css in the static folder and add the following code:
#menu{
float: left;
width: 60%;
height: 100%;
margin: none;
}
#menu ul{
text-align: center;
margin-top: 50px;
margin: none;
margin-left: -15px;
}
#menu li{
display: inline-block;
padding: none;
margin: none;
}
#menu li a, #menu li span{
display: inline-block;
padding: 0em 1.5em;
text-decoration: none;
font-weight: 500;
text-transform: uppercase;
line-height: 40px;
}
#menu li a{
color: #FFF;
}
#menu li:hover a, #menu li span{
background: #121A3E;
color: #FFF;
border-bottom: 1px solid #d9d900;
text-decoration: none;
background-color: #121A3E;
}
#menu2{
float: left;
width: 60%;
height: 100%;
margin: none;
}
#menu2 ul{
text-align: center;
margin-top: 50px;
margin: none;
margin-left: -85px;
}
#menu2 li{
display: inline-block;
padding: none;
margin: none;
}
#menu2 li a, #menu li span{
display: inline-block;
padding: 0em 1.5em;
text-decoration: none;
font-weight: 500;
text-transform: uppercase;
line-height: 40px;
}
#menu2 li a{
color:#121A3E
}
#menu2 li:hover a, #menu li span{
background: #121A3E;
color: #FFF;
border-bottom: 1px solid #d9d900;
text-decoration: none;
background-color: #121A3E;
}
#container {
margin-left: 15px;
width: fit-content;
margin-right: 15px;
}
#title{
padding: 5;
font-family:Arial, Helvetica, sans-serif;
font-size: 20px;
color:#121A3E;
font-weight: bolder;
float: left;
width: 100%;
}
#published{
font-size: small;
word-spacing: 0%;
color: white;
float:left;
width: 80%;
align-items: center;
}
#summary{
padding-left: 5;
font-size:small;
color:#121A3E;
}
#image{
width:100%;
height: 100%
}
#profile_image{
width: 40px;
height: 40px;
border-radius: 50%;
float: right;
margin: 5px;
}
#top{
color: rgb(236, 241, 242);
background-color: #121A3E;
height: 130px;
margin: 0;
position: relative;
text-align: center;
}
#nav{
width: 100%;
text-align: center;
height: 130px;
background-color: #FED700;
}
.active{
background: #121A3E;
color: #FFF;
border-bottom: 1px solid #FED700;
text-decoration: none;
background-color: #121A3E;
}
a {
all: unset;
}
#card{
color: #FFF;
width: 100%;
height:100%;
}
#body{
background-color:white;
padding: 0%;
margin: 0%;
}
#slicer{
display: flex;
flex-direction: row;
margin-top: 10%;
}
#button {
background-color: #FED700;
color: #121A3E;
padding: 15px 32px;
text-align: center;
text-decoration: none;
display: inline-block;
font-size: 16px;
margin-top: 45px;
cursor: pointer;
border-radius: 15px;
}
#button:hover{
background-color: #121a3e;
color: #FED700;
border: 2px solid #FED700;
border-radius: 15px;
}
#SearchHero{
height: fit-content;
min-height: 300px;
display: flex;
flex-direction: column;
align-items: center;
font-size: 60px;
font-weight: bolder;
color:#121A3E;
padding: 10px;
-ms-flex-align: center;
}
#ListContainer{
display: flex;
flex-direction: row;
width: 100%;
margin-top: 25px;
}
#mainPaper{
height: 400px;
display:flex;
flex-direction: column;
width: 35%;
margin: 5px;
text-align: center;
align-items: center;
}
#mainImage{
background-color: rgb(27, 156, 156);
width: 80%;
height: 200px;
float: left;
}
#mainSide{
background-color:rgb(252, 252, 252);
float: left;
width: 80%;
height: 35%;
color:#121A3E;
font-weight: bolder;
}
#Profile{
display: flex;
flex-direction:row;
text-align: center;
width: 100%;
margin: 5px;
}
#dpcontainer{
width: 20%;
}
#Published_text{
float: right;
margin-top: 10px;
font-weight:normal;
font-family:Verdana, Geneva, Tahoma, sans-serif;
color: #121A3E;
font-size: small;
}
#bannerText{
margin-top: 90px;
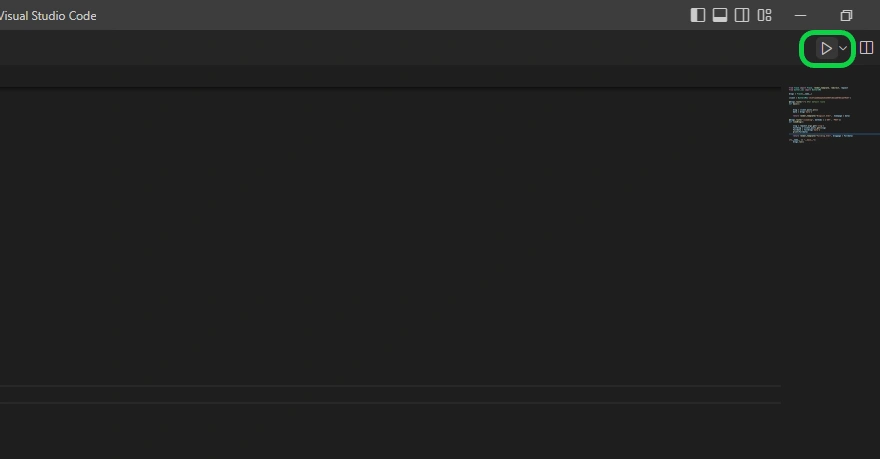
}Once you are done adding your code to the HTML file BlogList.html, go to the main Python BlogApp.py file and press on the Play Icon at the top right section of visual studio to start your Flask server.
You will observe output in your terminal with a link to your running website instance as shown below. Hold CTRL and click the page URL to be redirected to the browser.
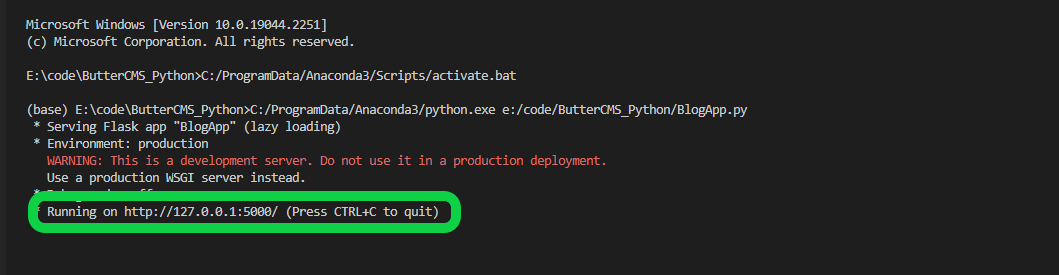
The browser will show the list of blog posts. A GIF will be available in the last section.

As you can see, the blog post you published via the ButterCMS blog engine is listed among the posts.
Creating an individual blog post page
Now that you have created the main page to display a list of the blog posts, you have to create a different page to display the content of a blog post.
You need to obtain the slug value of the selected post from the main HTML page and pass it as a parameter to the HTML content page. To achieve this, you can use Flask’s args property, which is the parsed URL parameters (the part in the URL after the question mark).
First, you have to create an anchor element on top of your blog items to make them clickable and add routing to them. Make changes to your BlogList.html file as shown below (changes have comments):
<html>
  <head>
    <title>{{homepage.title}}</title>
    <link rel="stylesheet" href="https://cdnjs.cloudflare.com/ajax/libs/font-awesome/4.7.0/css/font-awesome.min.css">
    <link rel="stylesheet" type="text/css" href="{{ url_for('static', filename='styles.css') }}" />
  </head>

  <body id="body">
    <nav id="nav">
        <div id="top">
          <div id="logo">

          </div>
          <div id="menu">
            <ul>
                <li><a href="#">Home</a></li>
                <li><a href="#">About Us</a></li>
                <li><a href="#">Our Products</a></li>
                <li class="active"><a href="#">Blogs</a></li>
                <li><a href="#">Careers</a></li>
                <li><a href="#">Contact Us</a></li>
            </ul>
          </div>
          <div id="middle">


          </div>
          <div id="button">
            <span>Get Started</span>
          </div>

        </div>
    </nav>
    <div id="SearchHero">
        <span id="bannerText">Take A Deep Dive Through Our Blogs</span>
    </div>
    <div id="ListContainer">
    {% for t in homepage %}
    <div id="mainPaper">
        <div id="mainImage">
          <a href="/viewblog?slug={{t.slug}}">

              <img src="{{t. featured_image}}" id="image" />

          </a>
        </div>
        <div id="mainSide">
          <a href="/viewblog?slug={{t.slug}}">
            <div id="card">
              <h1 id="title">{{ t.title }}</h1>
              <div>
              <span id="summary">{{t.summary}}</span>
              </div>
              <div id="profile">
                <div id="published">
                  <h3 id="published_text">By {{t.author.first_name}}  {{t.author.last_name}}</h3>
                </div>
                <div id="dp_container">
                  <img src="{{t.author.profile_image}}" id="profile_image" />
                </div>

              </div>

            </div>
          </a>
        </div>
    </div>
    {% endfor %}
    </div>

  </body>
</html>
Now that you have named a route in your HTML file, you have to define the route in the BlogApp.py python file as shown below:
BlogApp.py


from flask import Flask, render_template, redirect, request
from butter_cms import ButterCMS


blogs = Flask(__name__)


client = ButterCMS('c3c37caed6eaa3141e464fc82cab8f83cae7925f')


@blogs.route("/") #For default route
def main():


    blog = client.posts.all()
    data = blog['data']


    return render_template("BlogList.html",  homepage = data)
#defining viewblog route
@blogs.route("/viewblog", methods = ['GET', 'POST'])
def viewBlog():
   #using Flask’s args property to get ‘slug’ parameter from BlogList.html
    slug = request.args.get('slug')
    fullblog = client.posts.get(slug)
    Fulldata = fullblog['data']
    print(Fulldata)


    return render_template("Fullblog.html", blogpage = Fulldata)

if(__name__ == "__main__"):
    blogs.run()
Now that you have defined the route for the content page which will be displayed from the Fullblog.html file, add the code shown below:
<html>
  <head>
    <title>{{blogpage.title}}</title>
    <link rel="stylesheet" href="https://cdnjs.cloudflare.com/ajax/libs/font-awesome/4.7.0/css/font-awesome.min.css">
    <link rel="stylesheet" type="text/css" href="{{ url_for('static', filename='fullStyle.css') }}" />
  </head>

  <body id="body">
    <nav id="nav">
        <div id="top">
          <div id="logo">
          </div>
          <div id="menu">
            <ul>
                <li><a href="#">Home</a></li>
                <li><a href="#">About Us</a></li>
                <li><a href="#">Our Products</a></li>
                <li class="active"><a href="#">Blogs</a></li>
                <li><a href="#">Careers</a></li>
                <li><a href="#">Contact Us</a></li>
            </ul>
          </div>
          <div id="middle">


          </div>
          <div id="button">
            <span>Get Started</span>
          </div>

        </div>
    </nav>
    <div id="ArticleContainer">
      <div id="banner">
        <div id="Art_title">
          {{blogpage.title}}
        </div>
        <div id="Art_author">
            <span>By {{blogpage.author.first_name}} {{blogpage.author.last_name}}</span>
        </div>
        <img src="{{blogpage.author.profile_image}}" id="profile_image" />
      </div>
      <div id="Article">
        {{ blogpage.body | safe}}
      </div>
    </div>


  </body>
</html>
After adding the Fullblog.html file, create the referenced CSS file named fullStyle.css in the static folder and add the following code:
#menu{
    float: left;
     width: 60%;
     height: 100%;
     margin: none;
 }
 #menu ul{
     text-align: center;
     margin-top: 50px;
     margin: none;
     margin-left: -15px;
 }
 #menu li{
     display: inline-block;
     padding: none;
     margin: none;
 }

 #menu li a, #menu li span{
     display: inline-block;
     padding: 0em 1.5em;
     text-decoration: none;
     font-weight: 500;
     text-transform: uppercase;
     line-height: 40px;
 }

 #menu li a{

     color: #FFF;
 }


 #menu li:hover a, #menu li span{
     background: #121A3E;
     color: #FFF;
     border-bottom: 1px solid #d9d900;
     text-decoration: none;
     background-color: #121A3E;

 }

 #menu2{
    float: left;
    width: 60%;
     height: 100%;
     margin: none;
 }
 #menu2 ul{
     text-align: center;
     margin-top: 50px;
     margin: none;
     margin-left: -85px;
 }
 #menu2 li{
     display: inline-block;
     padding: none;
     margin: none;
 }

 #menu2 li a, #menu li span{
     display: inline-block;
     padding: 0em 1.5em;
     text-decoration: none;
     font-weight: 500;
     text-transform: uppercase;
     line-height: 40px;
 }

 #menu2 li a{

     color:#121A3E
 }

 #menu2 li:hover a, #menu li span{
     background: #121A3E;
     color: #FFF;
     border-bottom: 1px solid #d9d900;
     text-decoration: none;
     background-color: #121A3E;

 }

 #container {
     margin-left: 15px;
     width: fit-content;
     margin-right: 15px;

   }
   #title{
     padding: 10;

     font-family:Arial, Helvetica, sans-serif;
     font-size: 30px;
     color:#121A3E;
   }

   #published{
     font-size: small;
     word-spacing: 0%;
     color: #121A3E;
     float:left;
     width: 80%;
     align-items: center;
     padding: 10px;
   }

   #summary{
     padding-left: 10;
     font-size:medium;
     color:#121A3E;
   }
   #image{
     width:100%;
     height: 100%

   }
   #profile_image{
     width: 50px;
     height: 50px;
     padding: 10px;
     border-radius: 50%;
     float: right;
     margin-top: -10px;

   }
   #top{
     color: rgb(236, 241, 242);
     background-color: #121A3E;
     height: 130px;
     margin: 0;
     position: relative;
     text-align: center;

   }
   #nav{
     width: 100%;
     text-align: center;
     height: 130px;
     background-color: #FED700;
   }
   .active{
     background: #121A3E;
     color: #FFF;
     border-bottom: 1px solid #FED700;
     text-decoration: none;
     background-color: #121A3E;

   }
   a {
 all: unset;
   }
   #card{

     width: 100%;
     height:100%;


   }
   #body{
     background-color:white;
     padding: 0%;
     margin: 0%;
   }
   #slicer{
     display: flex;
     flex-direction: row;
     margin-top: 10%;
   }
 #button {
   background-color: #FED700;
   color: #121A3E;
   padding: 15px 32px;
   text-align: center;
   text-decoration: none;
   display: inline-block;
   font-size: 16px;
   margin-top: 45px;
   cursor: pointer;
   border-radius: 15px;
 }
 #button:hover{
   background-color: #121A3E;
   color: #FED700;
   border: 2px solid #FED700;
   border-radius: 15px;
 }
 #SearchHero{
   background-color: rgb(228, 218, 218);
   height: 130px;
 }
 .search-container {
   float: right;
   width: 500px;
   display: flex;
   flex-direction: row;
 }

 .search-container input[type=text] {
   margin-top: 40px;
   font-size: 17px;
   height: 60px;
   width: 60%;

 }

 .search-container button {
   height: 60px;
   margin-top: 40px;
   background:#121A3E;
   font-size: 17px;
   cursor: pointer;
   width: 20%;
   color:#FED700
 }

 .search-container button:hover {
   background: #ccc;
 }
 #mainPaper{
   height: 400px;

   padding: 50px;
   display:inline-block;
   width: 100%;
   text-align: center;
   align-items: center;
 }
 #mainImage{
   background-color: rgb(27, 156, 156);
   width: 40%;
   height: 80%;
   float: left;
   margin-left: 70px;

 }
 #mainSide{

   float: left;
   width: 40%;
   height: 80%;
 }
 #Profile{
   display: flex;
   flex-direction:row;
   text-align: center;
   width: 100%;

 }
 #dpcontainer{
   float: right;
   width: 30%;

 }
 #Published_text{
   float: right;
   margin-top: 10px;
   font-weight: bolder;
 }
 #Article{
   width: 54%;
   background-color:white;
   color: #121A3E;
   padding: 10px;


 }
 #banner{
   width: 54%;
   display: flex;
   flex-direction: column;
   align-items: center;
   height: 300px;
   background-image: url("../static/banner.jpg");
   margin-top: 10px;
 }
 #ArticleContainer{
   width: 100%;
   display: flex;
   flex-direction: column;
   align-items: center;
   text-align: center;
   margin-top: 10px;
 }
 #Art_title{
   font-size: 50px;
   color: #FFF;
   padding: 30px;
   margin-top: 10%;

 }
 #Art_author{
    color: white;
    margin: 10px;
 }
Then, go to the Python file BlogList.py and press the Play icon to run the web application locally.
User interface experience
The expected outcome of the BlogApp.py script is shown in the GIF below.
Great work! You have created a blog website using Python and ButterCMS. As a developer, the heavy lifting done by ButterCMS is apparent. The only aspect you have to focus on is building the frontend. The body section of the blog is already defined as an HTML code block by ButterCMS, making your work even easier.
Closing thoughts
As a developer, developing a user interface template for a CMS can be time-consuming if done traditionally, but since ButterCMS offers an instant backend and SEO, you can basically plug in a programming language via the API and create user interfaces based on this data flow.
The nature of a headless CMS gives you the freedom to choose any front-end programming language or framework you’d like. With Python, you can either use Flask or Django as your web framework. Flask is perfect for a simple project like the blog post project developed in this tutorial.